Distribute First-Party Data to Facebook
See the appropriate sections below for information on distributing first-party data to Facebook.
Note
For information on distributing Data Marketplace data to Facebook, see Distribute Data Marketplace Data to Facebook.
Overall Steps to Distribute First-Party Data to Facebook
Distributing first-party data to Facebook is mostly similar to distributions to other platforms, with a few additional steps in some instances:
Create files, making sure to keep Facebook's data restrictions in mind (listed below). See "Uploading Data" for more information.
Upload your data by using one of the methods listed in "Getting Your Data Into LiveRamp."
If using a Direct Integration, add LiveRamp as a partner in Facebook with "Manage campaigns" access (see "Add LiveRamp as a Partner in Facebook" below for instructions).
Note
This step only needs to be done the first time you distribute first-party data through a Direct Integration to that Facebook Ad Account.
Choose the appropriate integration type (usually a Direct Integration). See "Select the Appropriate Facebook Integration Type" for more information.
Activate the appropriate Facebook destination account integration by following the instructions in "Activate a New Destination Account."
Note
For information on filling out the destination-specific settings fields, see the "Entering Information for Destination-Specific Settings" section below.
Distribute your data to Facebook by following the instructions in "Distribute Data to a Destination."
Caution
Our first-party non-Record Sync Facebook integrations are add-only (i.e., they do not support full refreshes). As a result, even if you are importing your files as full refreshes, this will not trigger an overwrite for the corresponding segments in Facebook - it will only add to them. Instead, you may create new segments in Facebook on a regular cadence to achieve the same effect as a “full refresh”.
Select the Appropriate Facebook Integration Type
When distributing first-party data to Facebook, two primary integration methods are available:
Direct Integration: This type of integration creates an audience directly in your Business Manager account, where the data can be used for targeting, Lookalike Audiences, and audience sharing. For most US customers, this is the recommended first-party integration.
Managed Integration: This type of integration creates an audience first in LiveRamp’s Facebook ad account and then shares that audiences out to your Facebook ad account. The data delivered can only be used for targeting and is not eligible for Lookalike Audiences or further audience sharing.
Within these two primary methods, additional integration options are available in certain circumstances:
Record Sync: For US data only, the “Record Sync” version of a particular integration allows you to keep your data fresh, up to date, and relevant through the ability to propagate user deletions to Facebook. For more information, see "Keep Destination Data Fresh with Record Sync".
Passthrough Activation: For certain countries and regions (such as Latin America, Canada, and Mexico), the “Passthrough Activation” version uses the Direct Integration method to pass through hashed PII in a privacy-safe and compliant manner without performing matching (or any leveraging of our Identity Graph) on our end. If you're in one of these non-US markets, talk to your LiveRamp account team to see if Passthrough Activation is a good fit. For more information, see "Passthrough Activation Destination Integrations”.
For more information on these integration methods and options, see the sections below.
Caution
Our first-party non-Record Sync Facebook integrations are add-only (i.e., they do not support full refreshes). As a result, even if you are importing your files as full refreshes, this will not trigger an overwrite for the corresponding segments in Facebook - it will only add to them. Instead, you may create new segments in Facebook on a regular cadence to achieve the same effect as a “full refresh”.
To keep your US first-party data up-to-date at Facebook, activate a Record Sync-enabled destination (see "Keep Destination Data Fresh with Record Sync" for more information).
Note
Which Facebook Ads properties can be accessed? Both the Managed Integration and the Direct Integration method allow you to distribute data to Facebook's ad system, which you can use to run ads on any Facebook Ads properties (Facebook, Instagram, Audience Manager, etc.).
Direct Integration
The Direct Integration method is the recommended integration method for most customers.
Uses: Targeting, audience sharing, and Facebook Lookalike Audiences.
Note
This integration is required if you want to perform audience sharing and/or use Facebook Lookalike Audiences.
Integration Method: In this type of integration, your first-party distributions are delivered directly to your Facebook account.
Matching Process:
For a regular Direct Integration:
For a Passthrough Activation version of this integration:
Requirements:
This integration type requires that you go through the steps (listed in "Add LiveRamp as a Partner in Facebook" below) to add LiveRamp as a partner in Facebook with permission to manage campaigns before you activate the destination account.
Apart from the Pasthrough Activation version of this integration, this integration is only for US-based data.
Note
Depending on your Facebook agreement, you might have a limit on the total number of segments you can distribute to each Facebook ad account.
Available Options: When distributing your first-party data to Facebook through the Direct integration, three integration options are available (depending on your country or region):
A Record Sync-enabled Direct Onboarding integration
A Direct Onboarding integration that isn't enabled for Record Sync

Caution
The regular Direct Integration is only available for US first-party data. For non-US first-party data, you must use either the Managed Integration or a Passthrough Activation integration.
A Passthrough Activation integration
LiveRamp’s Direct Integration delivers data directly into the customer’s Business Manager account (as opposed to the Managed Integration, which uses Facebook’s shared feature).
The data delivered may be used for targeting, Lookalike Audiences, and audience sharing.
Direct Integration Matching Steps
Apart from the matching process for the Passthrough Activation version of this integration (shown below), the matching process follows the steps outlined below:
When first-party customer data are uploaded, LiveRamp matches that data to RampIDs and delivers any pre-approved-for-marketing encrypted hashed PII that is associated with those RampIDs within our Identity Graph to Facebook.
Facebook looks for a match between the encrypted hashed PII and Facebook IDs, and then adds those Facebook IDs to the selected Ad Account in the customer’s Business Manager account.
Apart from a Passthrough Activation version of this integration, LiveRamp only delivers the encrypted hashed PII that is already contained in our Identity Graph and does not deliver your PII.
Passthrough Activation Matching Steps
For a Passthrough Activation version of this integration, the matching process follows the steps outlined below:
LiveRamp passes through your hashed PII in a privacy-safe and compliant manner without performing matching (or any leveraging of our Identity Graph) on our end.
Facebook looks for a match between the encrypted hashed PII and Facebook IDs, and then adds those Facebook IDs to the selected Ad Account in the customer’s Business Manager account.
Managed Integration
Uses: Targeting only.
Integration Method: In this type of integration, your first-party data distributions are delivered into LiveRamp’s Facebook ad account, and then shared by LiveRamp to your Facebook ad account.
Matching Process:
Available Options: When distributing your first-party data to Facebook through the Managed integration, two integration options are available:
A Record Sync-enabled Managed Onboarding integration
Note
Record Sync is currently only available to US customers.
A Managed Onboarding integration that isn't enabled for Record Sync.
LiveRamp’s Managed Integration delivers data tied to CIDs (custom IDs) first into LiveRamp’s Facebook ad account and then shares the audiences out to the customer’s Facebook ad account. See Facebook’s help page “About Shared Audiences” for more information.
Matching Steps
On a quarterly basis, LiveRamp sends Facebook a mapping file of pre-approved-for-marketing hashed PII tied to our Facebook CIDs (also referred to as “ExternIDs” by Facebook). Facebook then generates a mapping in their backend of ExternID to Facebook ID, which allows us to send only ExternIDs when delivering data.
When first-party customer data are uploaded, LiveRamp matches that data to RampIDs, finds all possible Facebook CIDs that are tied to the same RampID, and delivers those matched CIDs via an API to LiveRamp’s Business Manager within Facebook.
Facebook then uses the mapping file it generated in its backend to look up the CIDs (ExternIDs) it received and matches them to their Facebook IDs.
LiveRamp then shares the Custom Audience from a LiveRamp-owned ad account to the customer’s ad account.
The data delivered may only be used for targeting and is not eligible for Lookalike Audiences or further audience sharing. See Facebook’s help page “About Lookalike Audience” for more information.
Add LiveRamp as a Partner in Facebook
To distribute first-party U.S. data using LiveRamp's Direct Integration with Facebook (including the Direct to Platform version of the integration), you need to add LiveRamp as a partner with the ability to manage campaigns within your Facebook Ad Accounts before you activate the destination account.
Caution
These instructions were accurate at the time of publication but are subject to change depending on future updates to Facebook Business Manager.
To add LiveRamp as a partner in Facebook:
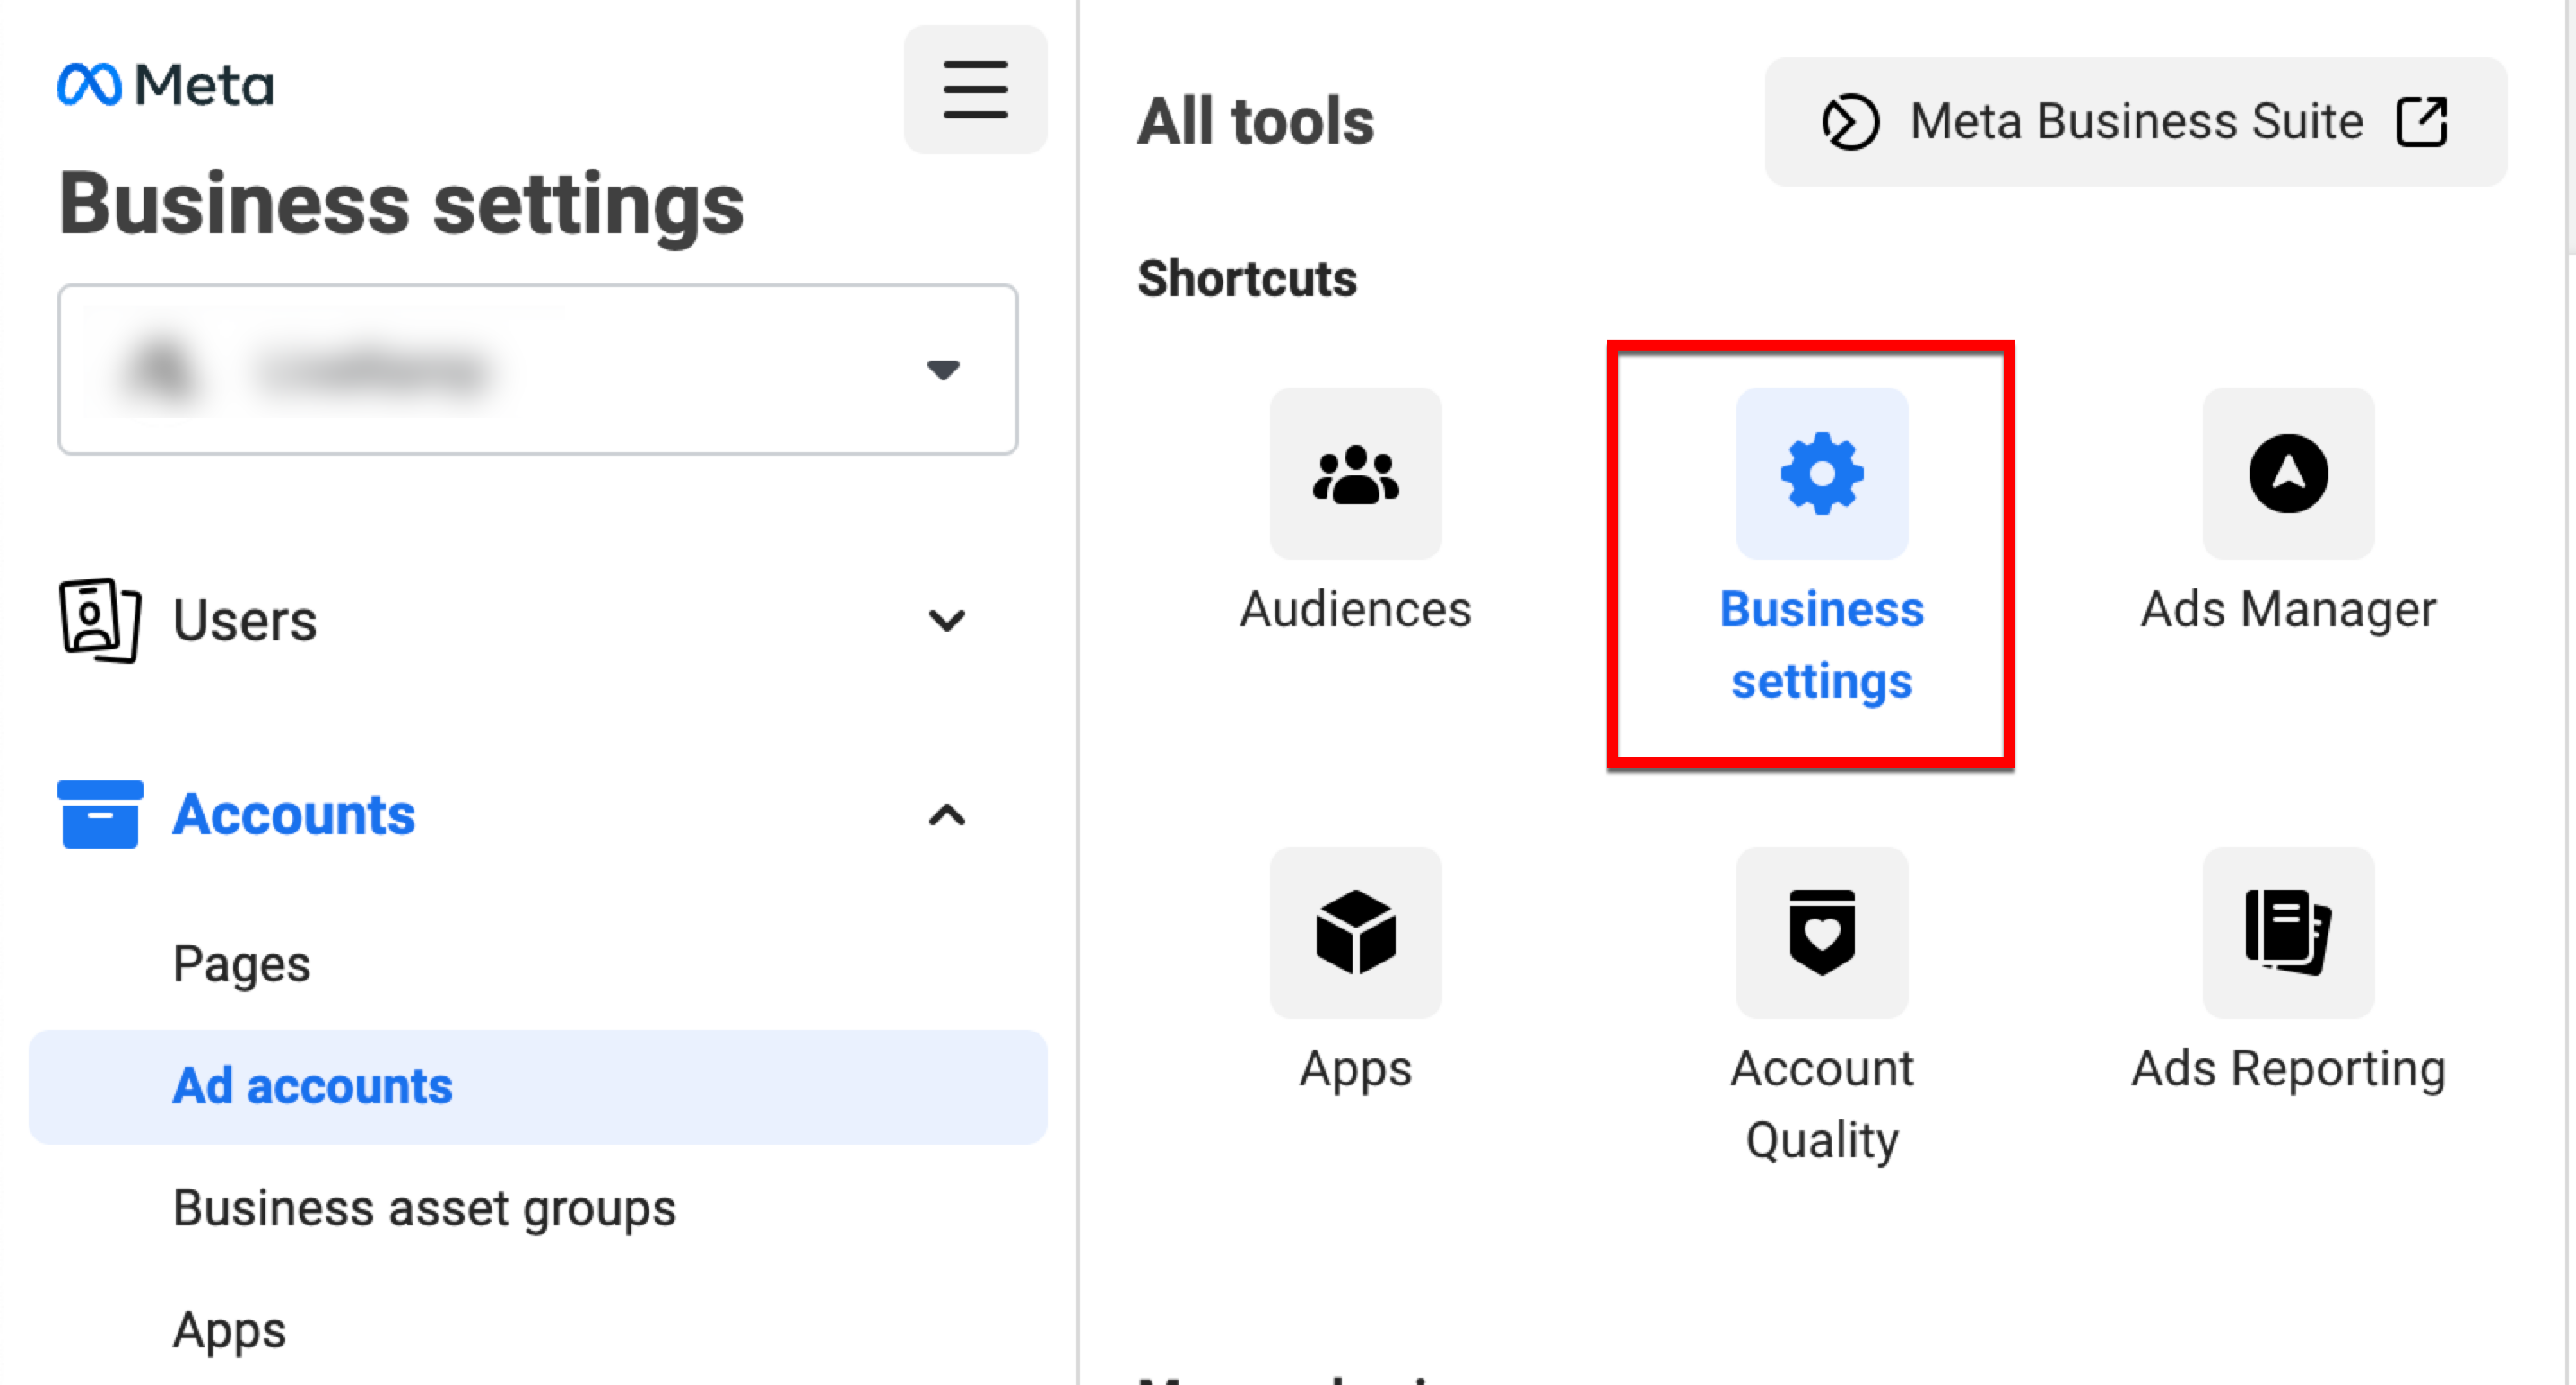
In Meta Business Suite and Manager, click Business Settings.
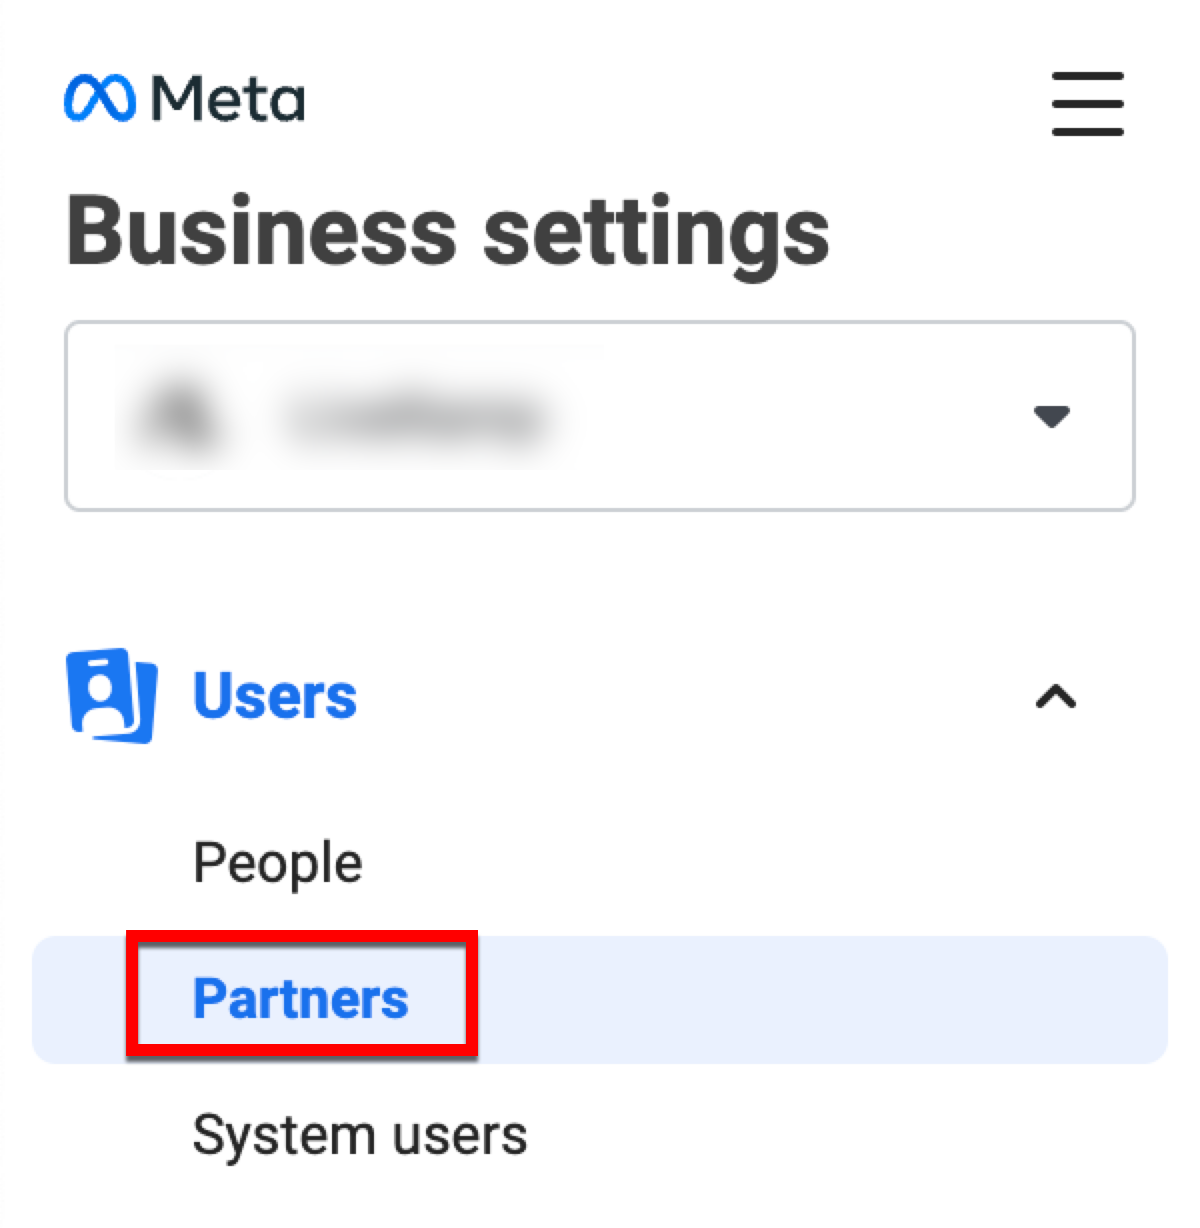
Click Partners.
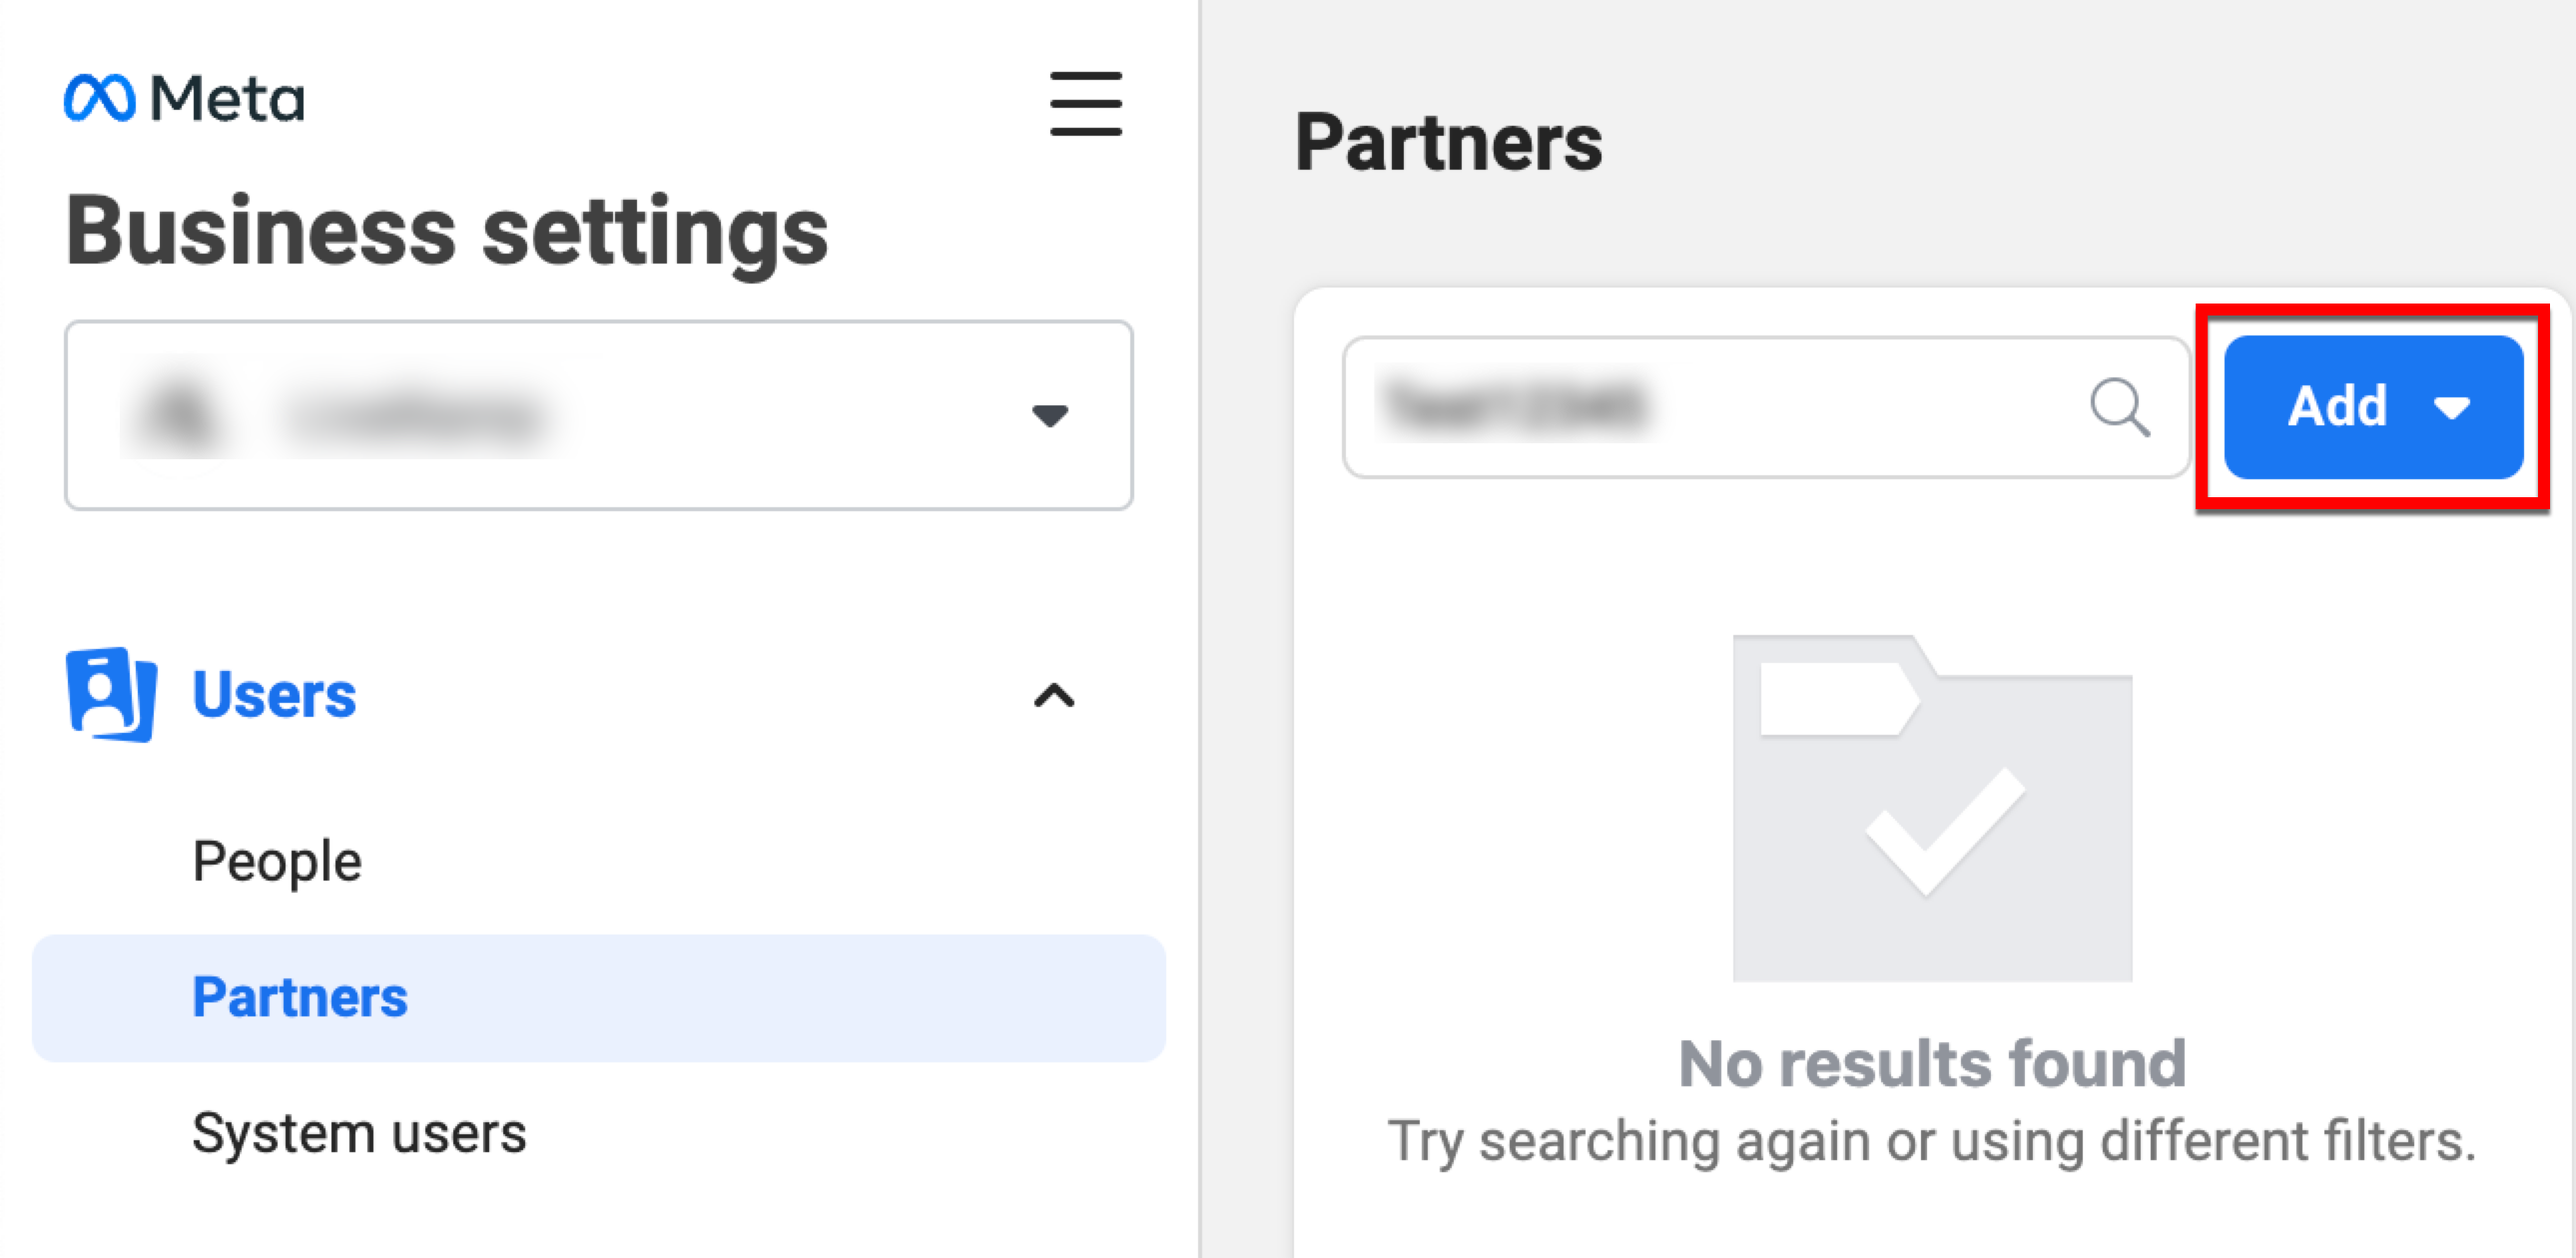
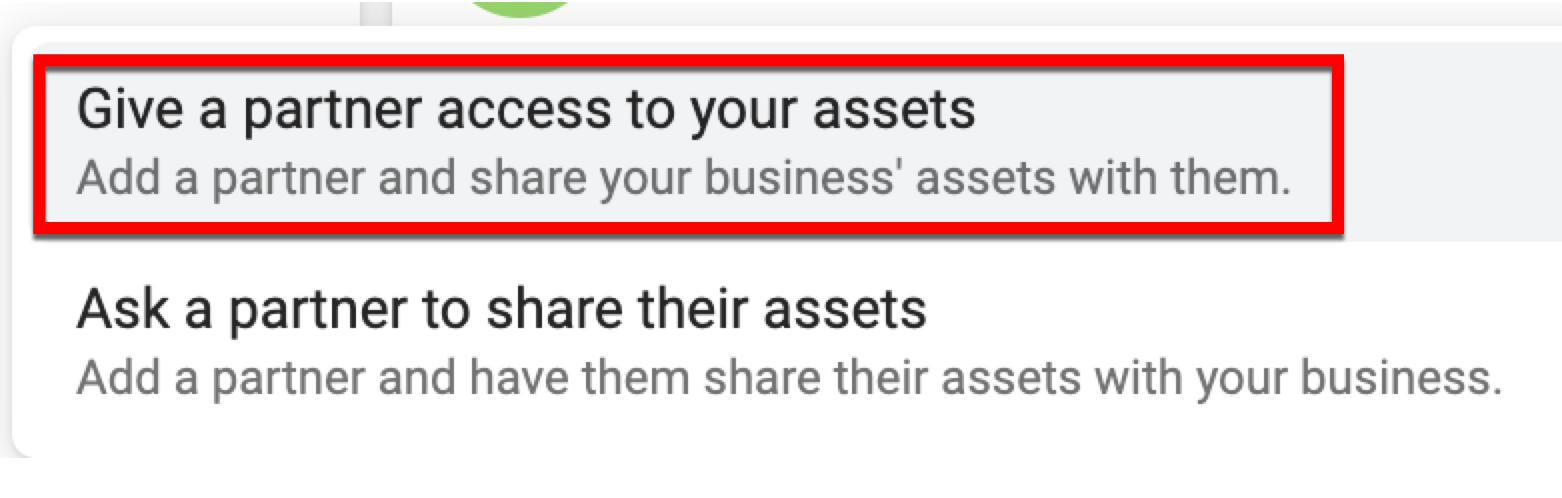
Click the Add drop-down menu and select "Give a partner access to your assets."
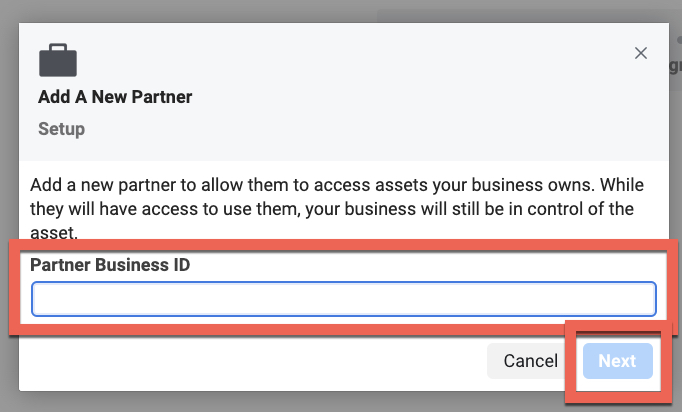
In the Add a New Partner dialog, enter “705664196188477” (LiveRamp’s business ID) in the Partner Business ID field and then click Next.
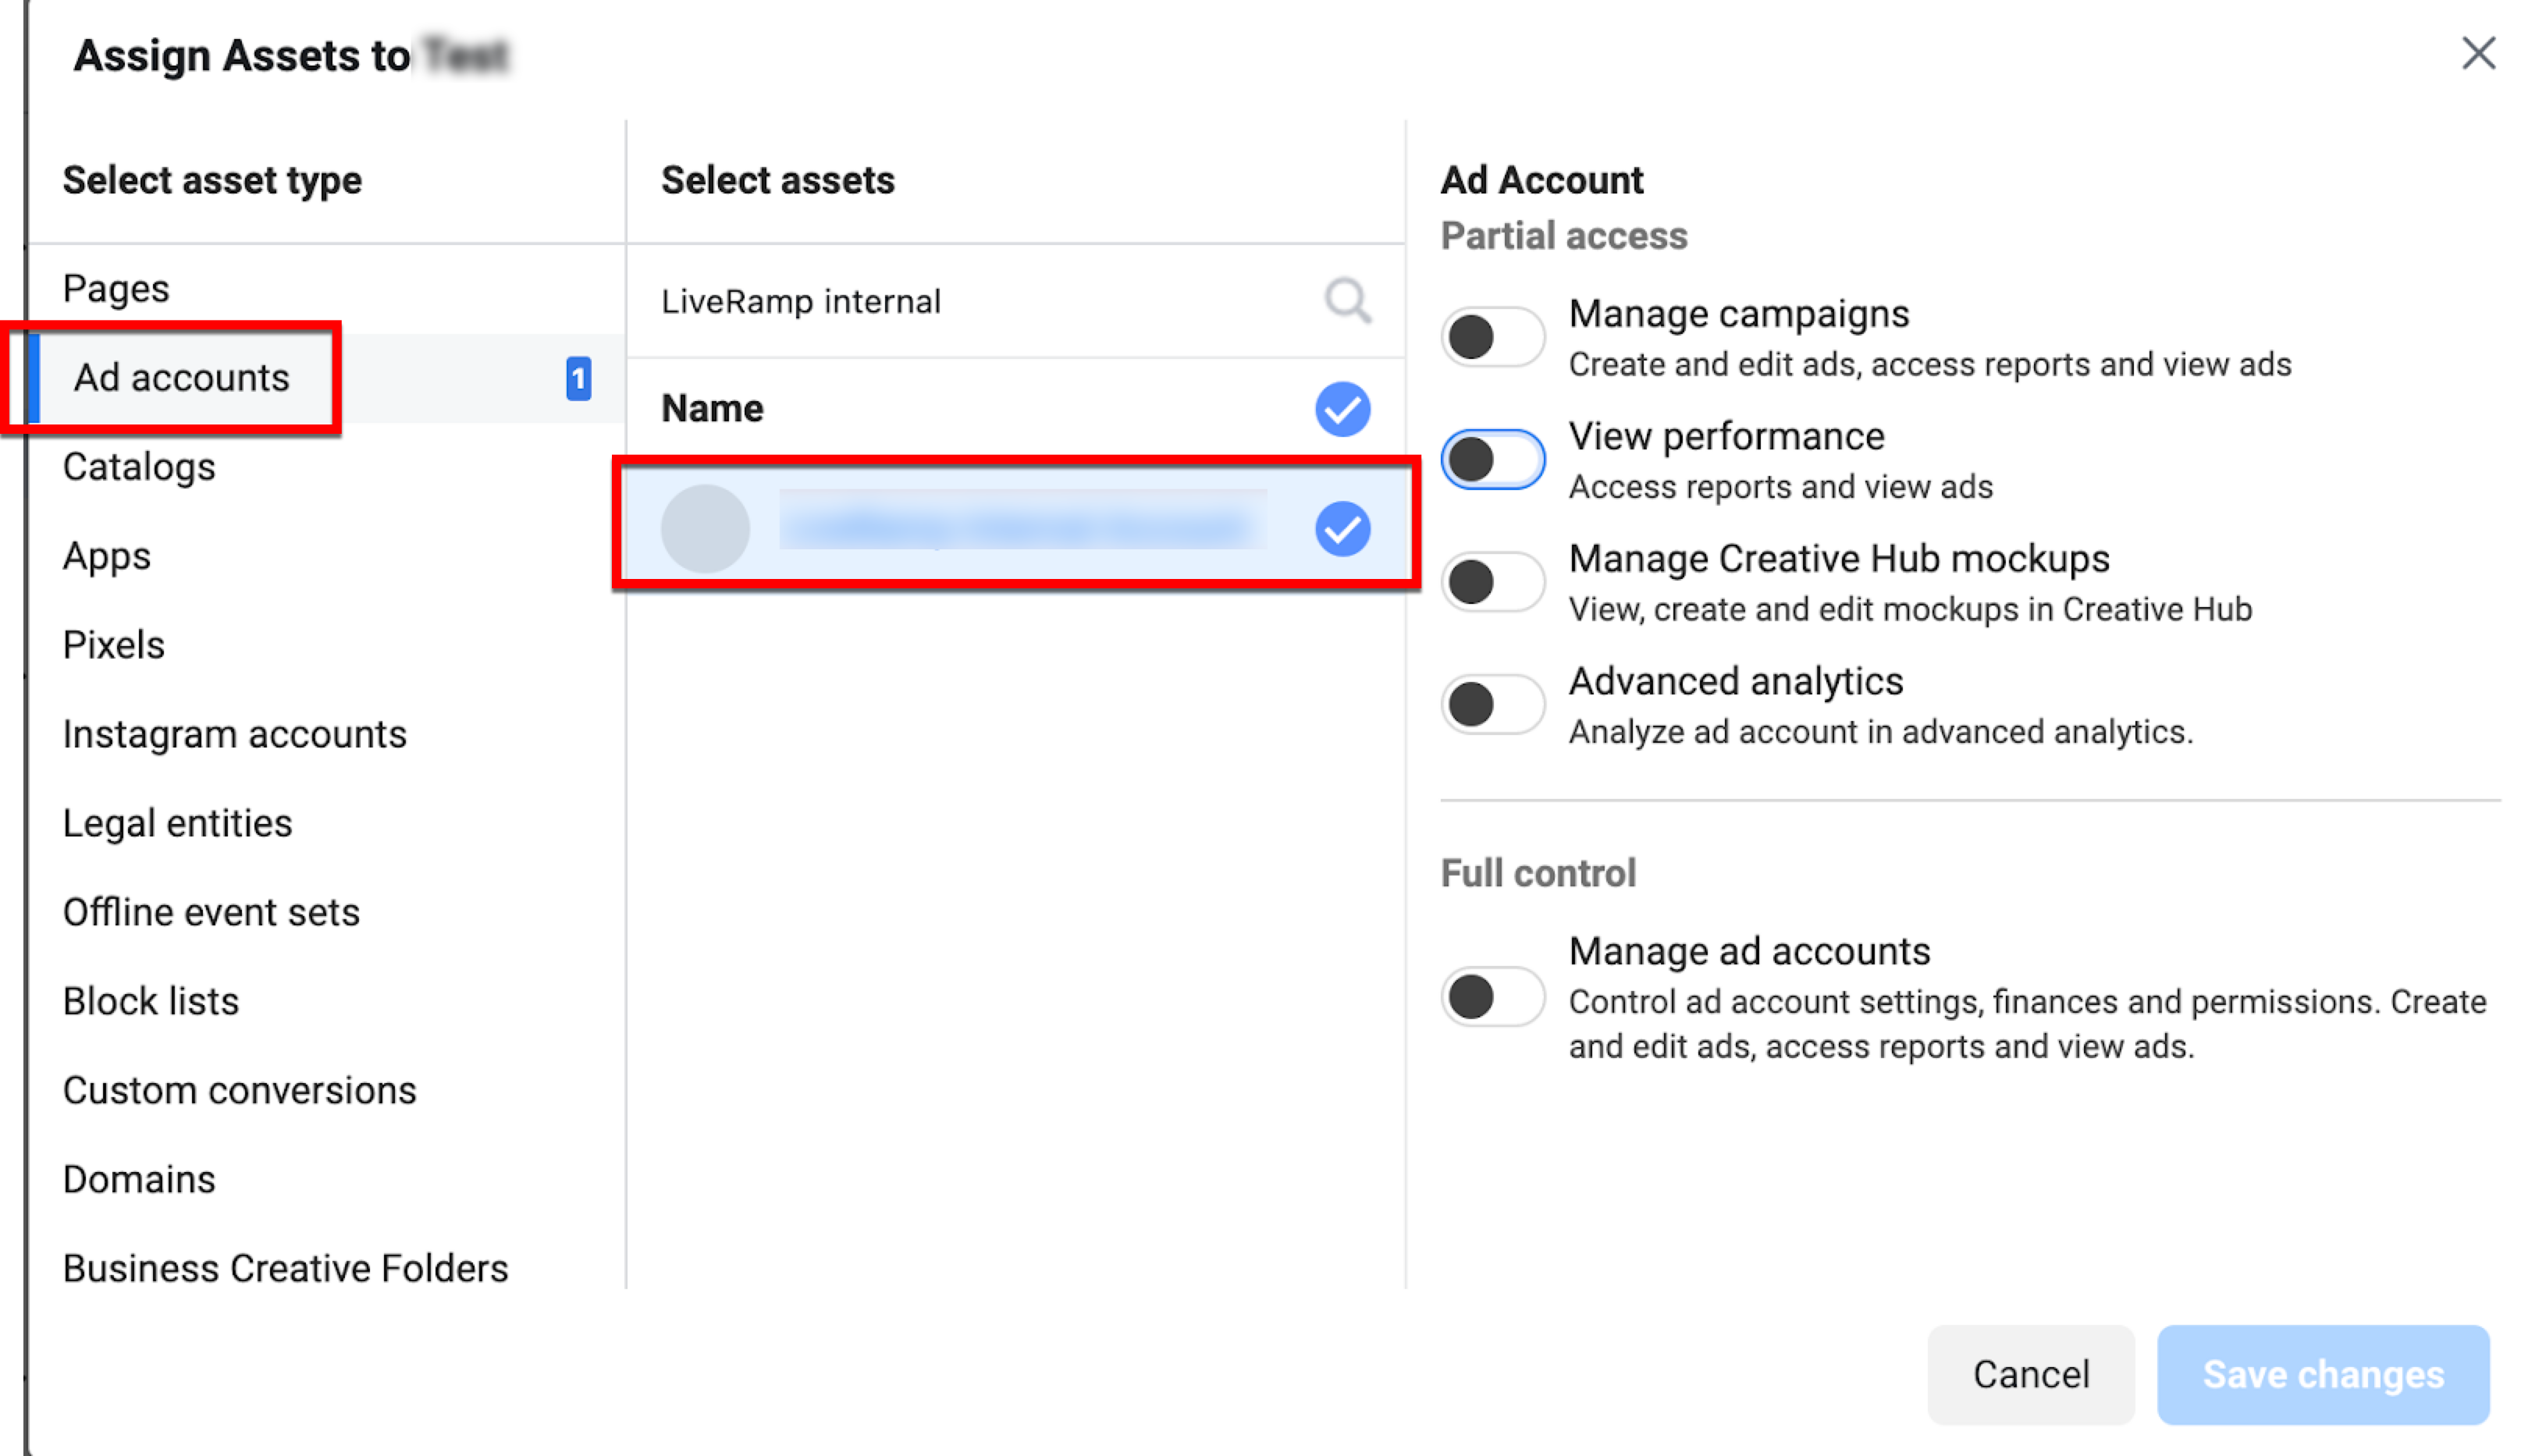
Under Asset Types, select “Ad Accounts” and then check the check box for the ad account(s) to which you want to add LiveRamp as a partner.
Tip
When adding LiveRamp as a partner, we suggest that you include all possible ad accounts that you’d like LiveRamp to deliver segments to, both now and in the future. If you do not include a particular ad account in the initial partner request and you later decide you want to deliver segments to that ad account, you will need to go back into Meta Business Manager and go through the process again to include this new ad account in the partner relationship.
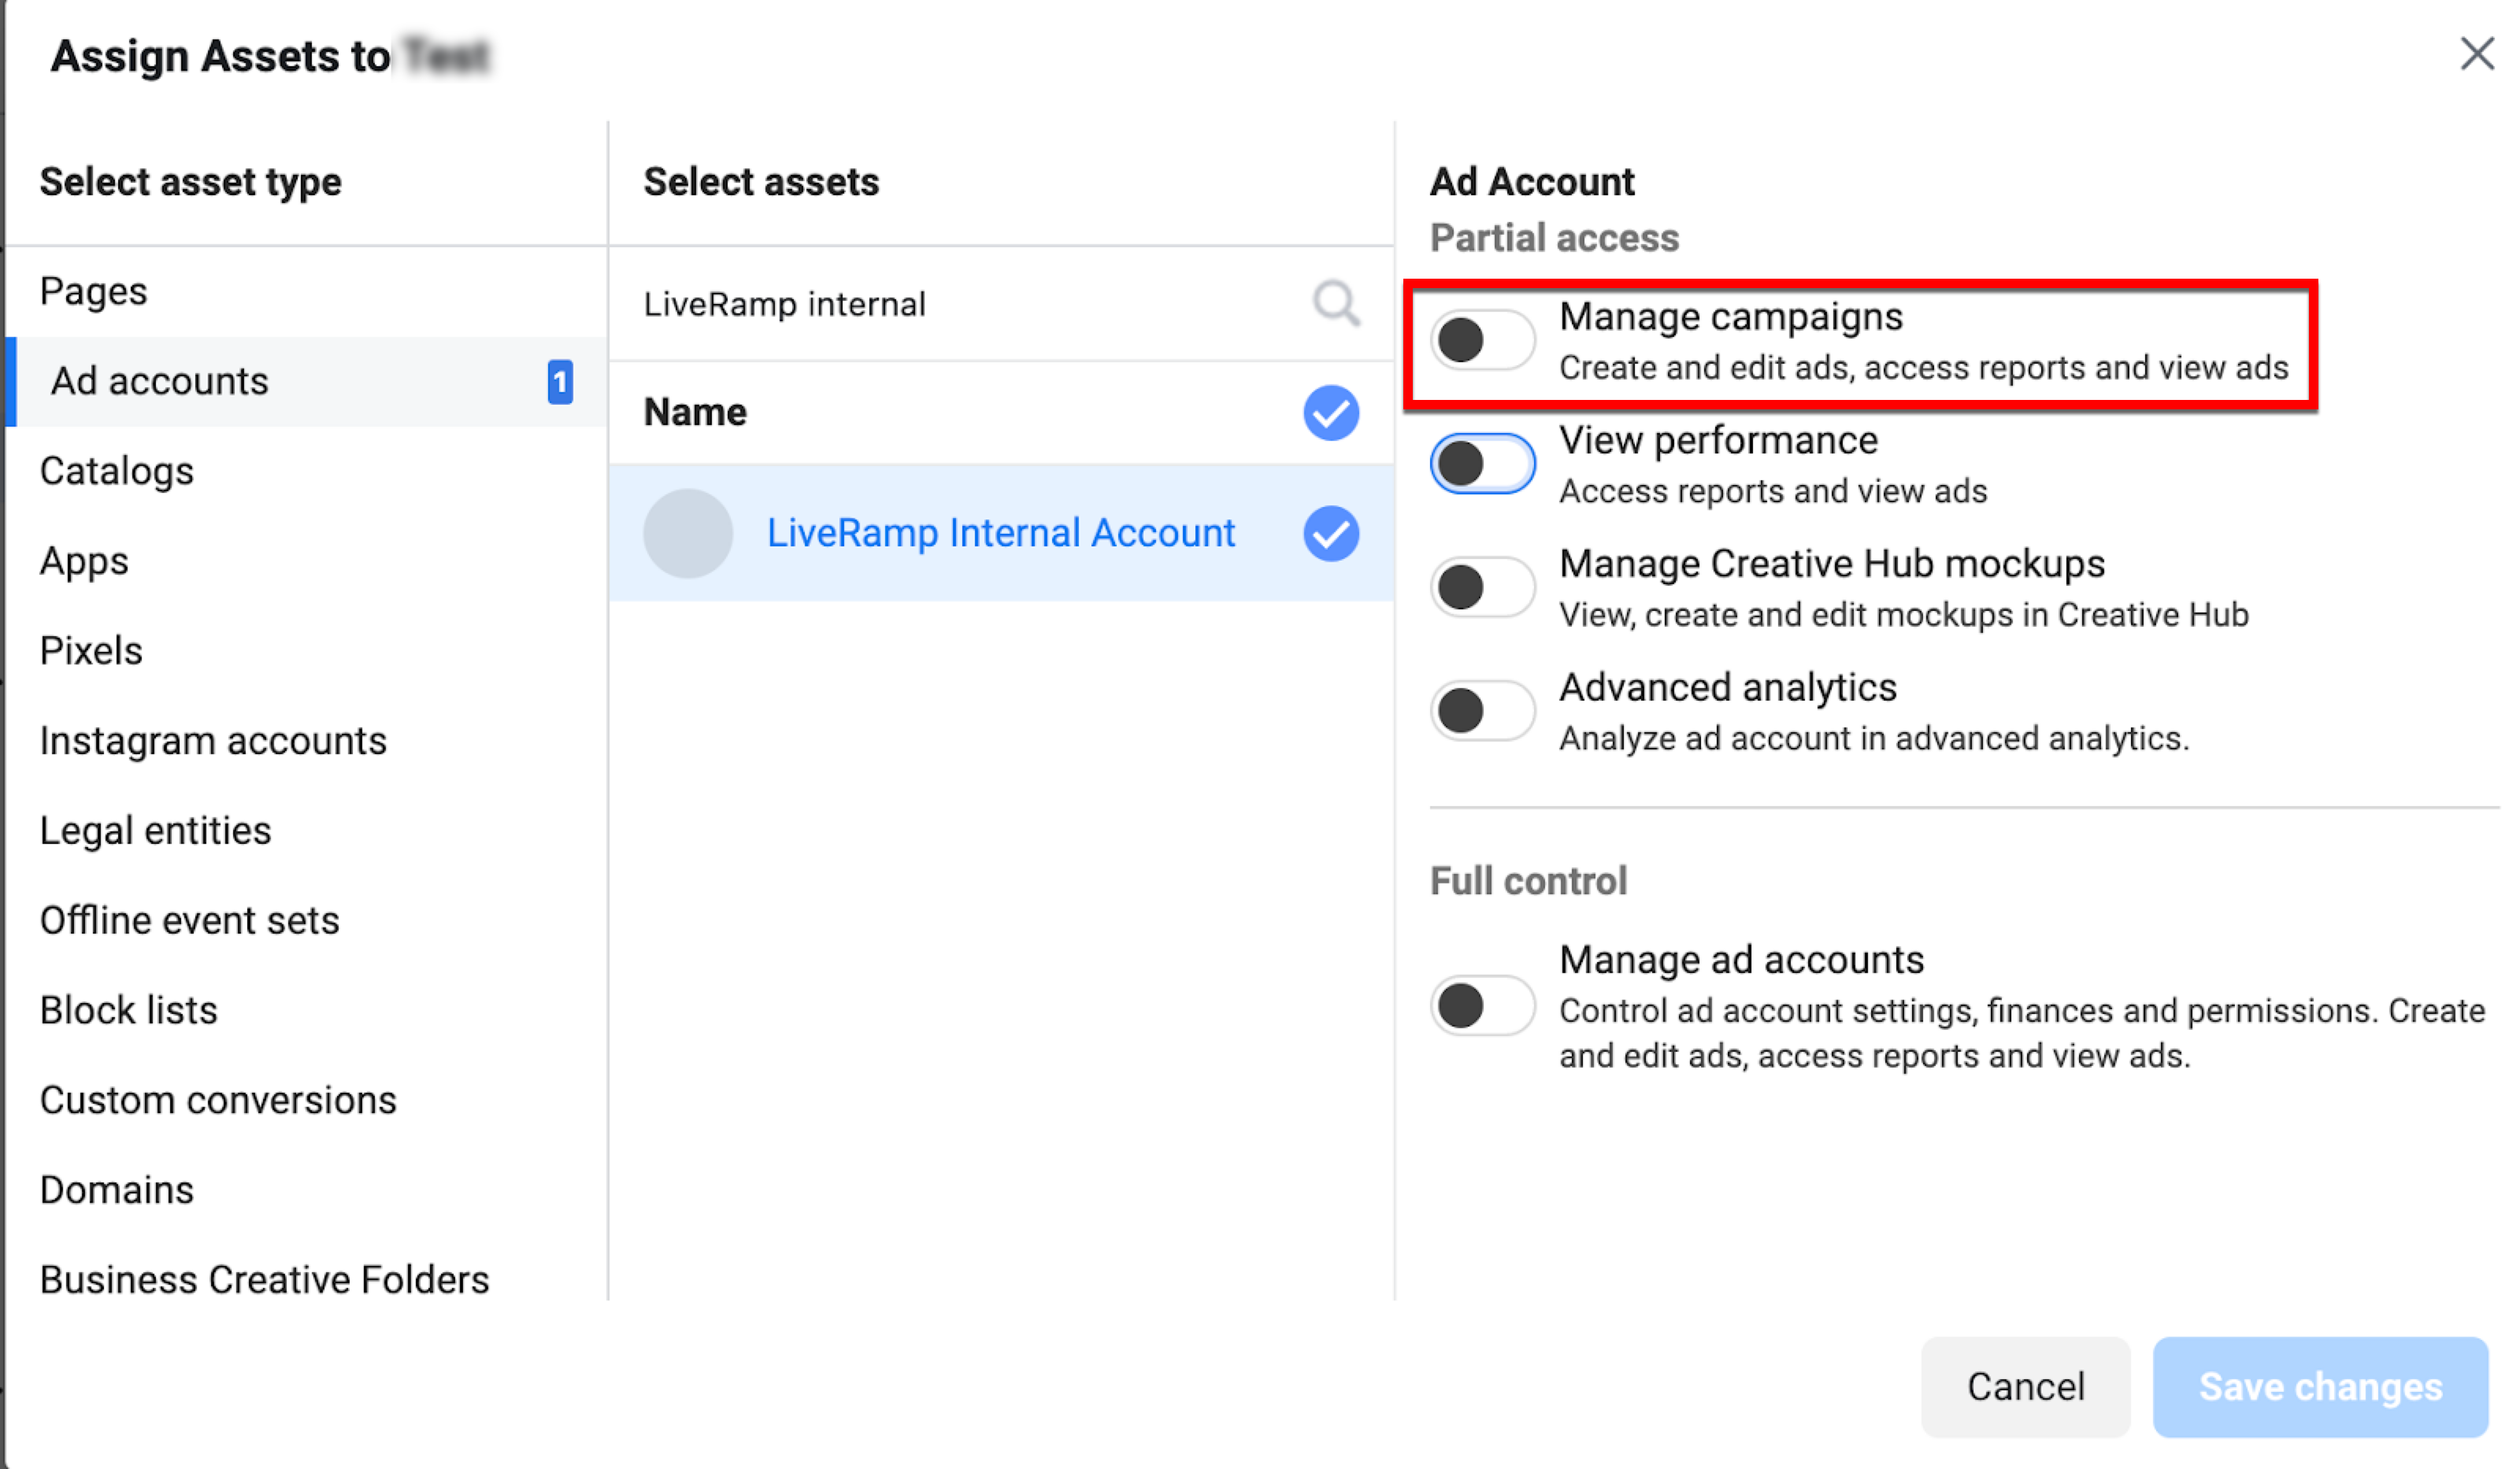
Slide the “Manage campaigns” toggle to the right to enable LiveRamp to create Custom Audiences and then click Save Changes.
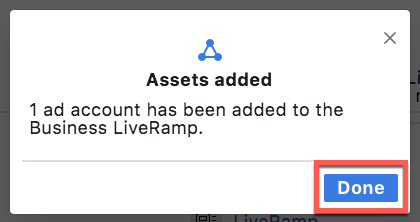
When the confirmation message displays, click Done.
An admin of the Business Manager that owns the Ad Account you are going to deliver into must accept Facebook's terms of service by going to "https://business.facebook.com/ads/manage/customaudiences/tos/?act=[accountID]" (where "[accountID]" is your Ad Account ID). For example, if your Ad Account ID is "123456789", the URL would be "`https://business.facebook.com/ads/manage/customaudiences/tos/?act=123456789".
Once you've performed these steps, you can then follow the steps in “Activate a New Destination Account” to activate a Facebook Direct Onboarding destination account.
Entering Information for Destination-Specific Settings
When you're activating either a Direct or Managed integration destination account, there are several destination-specific settings you'll need to enter information for (Direct integration example shown below).
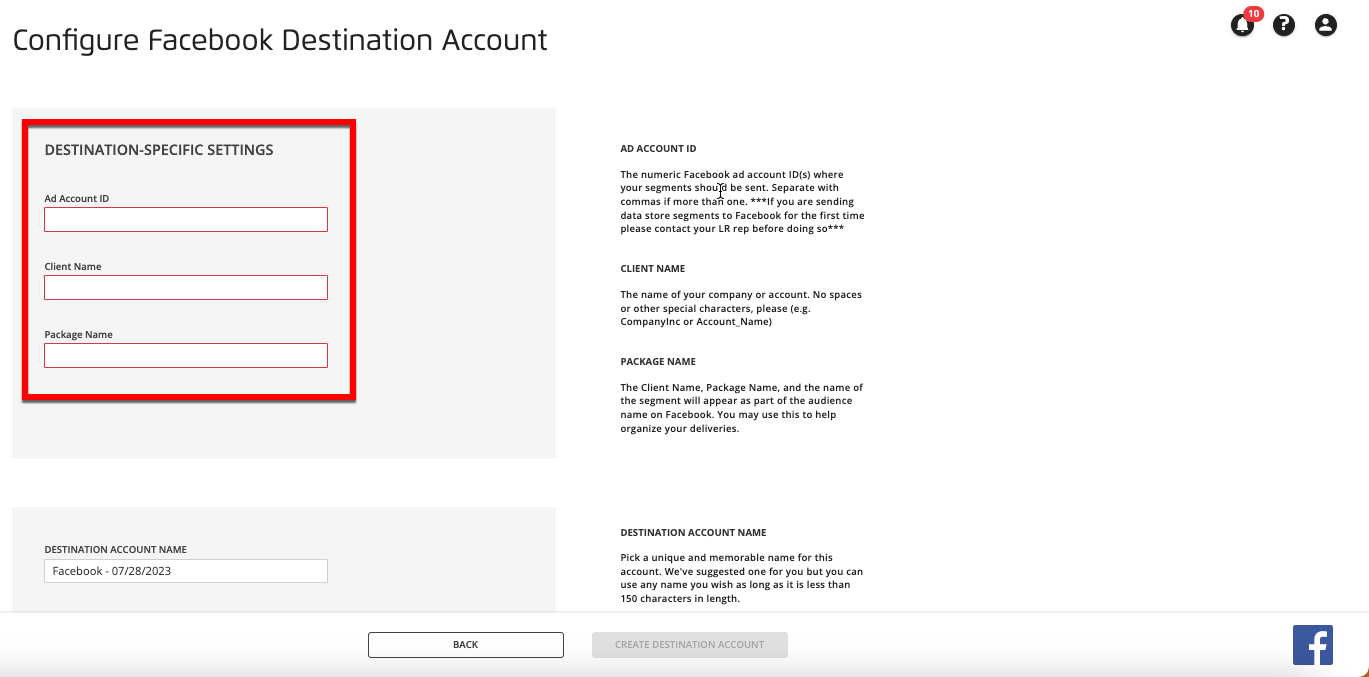
Use the table below to help you fill out these fields.
Field | Description | Notes |
|---|---|---|
Ad Account ID | The numeric Facebook ad account ID where your segments should be sent. | Enter only one ad account ID (you can share to more accounts from within Facebook after delivery). For Direct integrations, if this is the first time you are sending first-party Direct integration segments via this ad account, add LiveRamp as a Partner in Facebook and then create a support case before distributing. |
Client Name | The name of your company or account. | Do not include spaces or other special characters in the Client Name field. For example, enter something like "CompanyInc" or "Account_Name". |
Package Name | The name of the distribution "package" that will be sent to Facebook. | You can use this field in any way you like to help organize your deliveries. The Client Name, Package Name, and the name of the segment will appear as part of the audience name on Facebook. For example, the segment naming convention for the Direct integration is as follows: LR_US_Direct_<Client Name>_<Package Name>_<Segment Name>. For example, it might be that you want to create multiple Facebook destinations for different campaigns or partners. You could then use the Package Name to indicate the campaign or partner in the audience name on Facebook. This field cannot be left blank. |
Why LiveRamp Needs to Have “Manage Campaigns” Access for Direct Integrations
Manage Campaigns access gives us the ability to “Create and edit ads, access reports and view ads” (it also automatically gives us View Performance permission which is a subset of the Manage Campaigns permission). However, in reality we are not using the Manage Campaign permission for any of those actions (we are only sharing custom audiences to the ad account).
From Facebook:
Add Partner to Business Manager: “If you're a business who works with an agency or consultant, you can add them to your Business Manager and share your assets with them. When you add a partner to your Business Manager, you can grant access to different assets and assign specific permission levels. Partners can see assets you share with them in their Business Managers.”
Add Account Permissions by Role: "Advertising accounts have three types of admin permissions available to help you manage your account. When you give someone permission to access your ad account, you choose what they're able to do or see by assigning them a role."