Deploy the ATS Direct Stack
Before you get started with ATS Direct, you must deploy the ATS Direct stack in AWS. ATS Direct uses AWS CloudFormation with a single AMI (Amazon Machine Image), which allows you to deploy a fully configured stack in your AWS environment in a few minutes.
About the ATS Direct Stack
ATS Direct is a stack that runs in your own cloud environment. It is installed using a Cloudformation template using a single AMI from AWS Marketplace. Because the stack uses only server-less infrastructure, there is no upfront cost. Instead the cost scales with usage.
Supported Regions
The stack can be deployed in the following regions:
United States (Virginia)
Europe (Ireland)
Australia (Sydney)
Infrastructure Cost
The cost running ATS is dynamic and depends on the number of requests for segment matches and the number of RampID’s in the database (activated deals). You can estimate the cost using the AWS cost calculator . Check out an example here based on 1 million requests for segments per month with 10 Gb worth of RampID data.
Ensuring the segment data are cached locally and being selective on which deals are activated will have a big impact on the infrastructure cost.
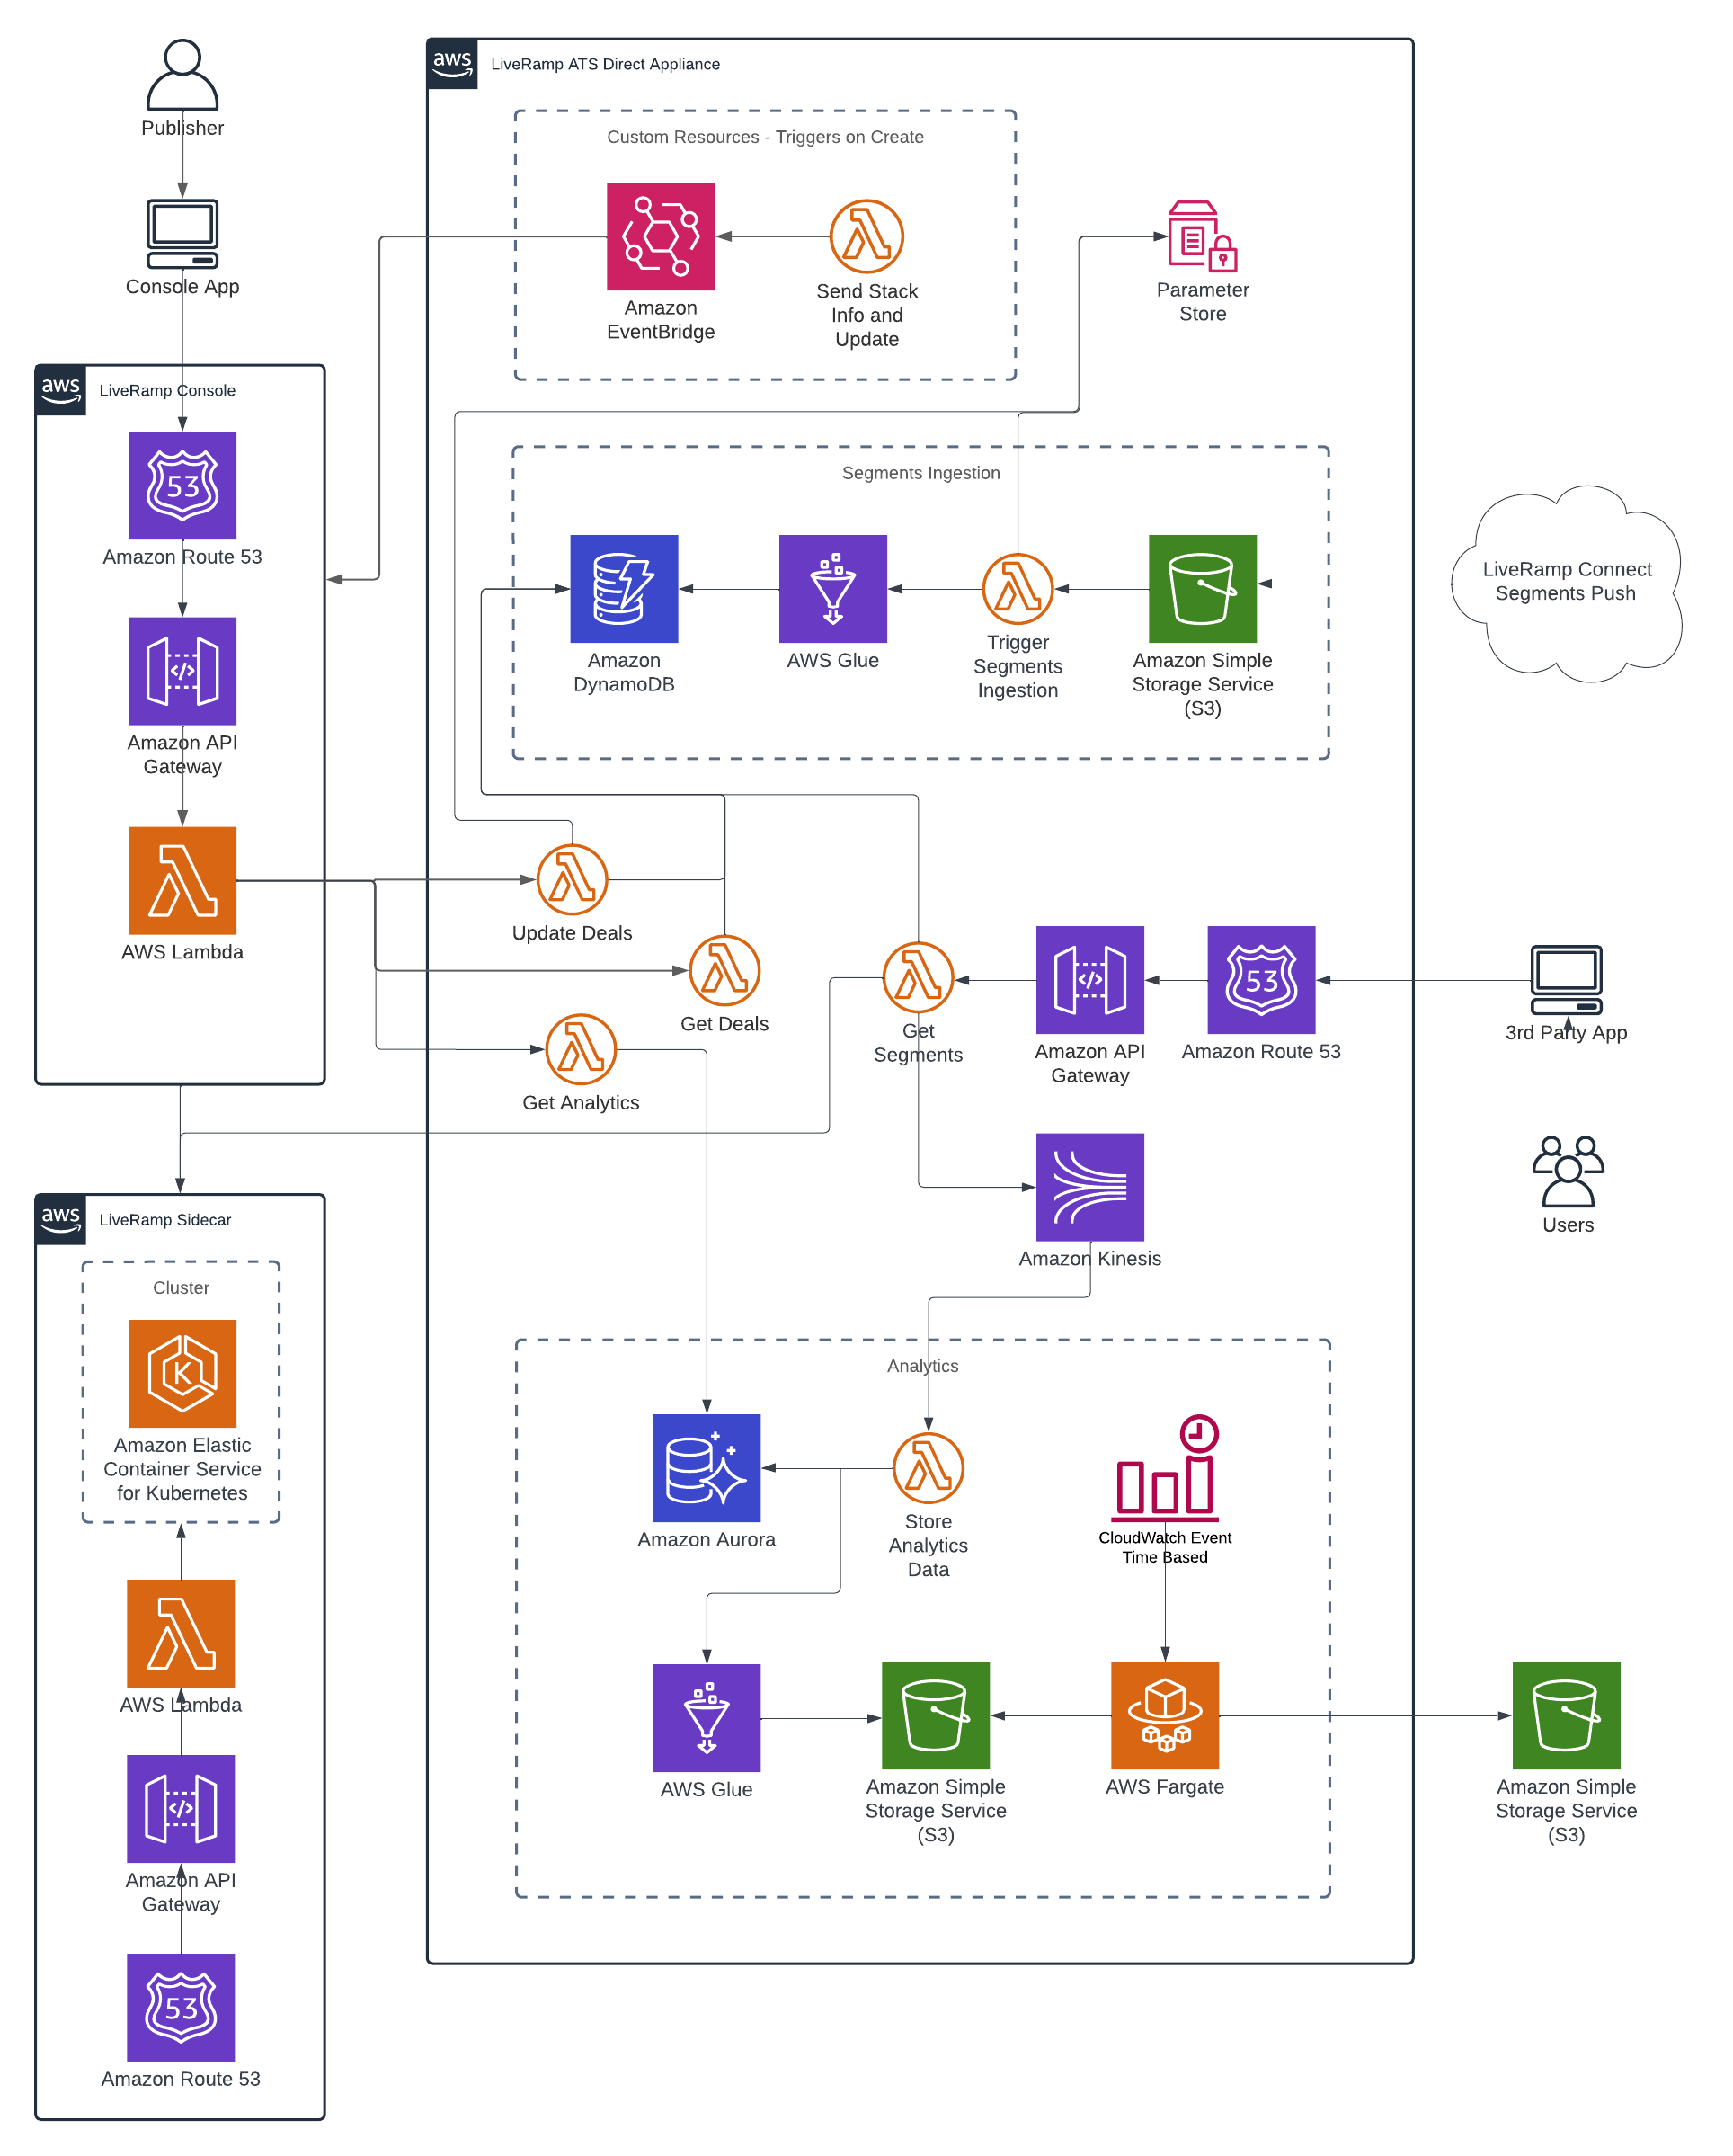
Architecture
Choosing a Region
You can run multiple instances of ATS Direct for a single PID. To ensure you can go through the deployment process smoothly, determine in which region you are looking to run ATS Direct ahead of time. This can either be United States (Virginia), Europe (Ireland), or Australia (Sydney). The region may also impact latency, so choose the region closest to where your users are.
Deploy the ATS Direct Stack
Deploying the ATS Direct stack consists of two parts.
1. Launch the ATS Direct Software From AWS Marketplace
Go to the ATS Direct listing in AWS Marketplace.
Click Continue to subscribe.
Sign in to your AWS account. Make sure you have sufficient permissions in your account to deploy a new stack using CloudFormation.
Note
AWS CDK is used for generating and deploying the necessary resources, so all the roles and policies are handled automatically throughout CDK bootstrap and deploy. During the CDK bootstrap some administrative IAM roles are created; if this goes against your company security policies, then you may want to consider using a new AWS account to deploy the ATS Direct Stack. Having the ATS Direct Stack on a separate account gives the added benefit of easier tracking of roles, resources and costs.
You are now presented with the LiveRamp terms and conditions. These are the same terms and conditions that you have already agreed to when ATS Direct was added from the Marketplace in Console. Click Continue to Configuration. It may take a few minutes to process the request.
Choose the software version (preferably the latest version) and the region in which you want to deploy the stack.
Click Continue to Launch.
You are now ready to launch the software on AWS. Select “Launch CloudFormation” in the Choose Action dropdown and click Launch. This action should launch a new window to create the stack.
2. Create the Stack
In Step 1 (Specify template), you will see that the template has already been pre-selected. Leave all the pre-selected settings as they are and click Next.
In the next step of the stack creation process you will have to provide the following details:
EC2 Instance Type: An EC2 instance is required in order to deploy the ATS Direct stack. This instance is only used during the stack creation and when there are future potential updates to the stack. A t2.micro instance is selected by default. The instance will be shut down automatically after deployment.
AWS Region: Select the region in which you want the stack to be deployed.
Ingress CIDR: Enter the following value "0.0.0.0/0".
Stack name: Enter a name of your choosing.
App ID: Enter the app ID that you’ve obtained from “Create a new Appliance Configuration”.
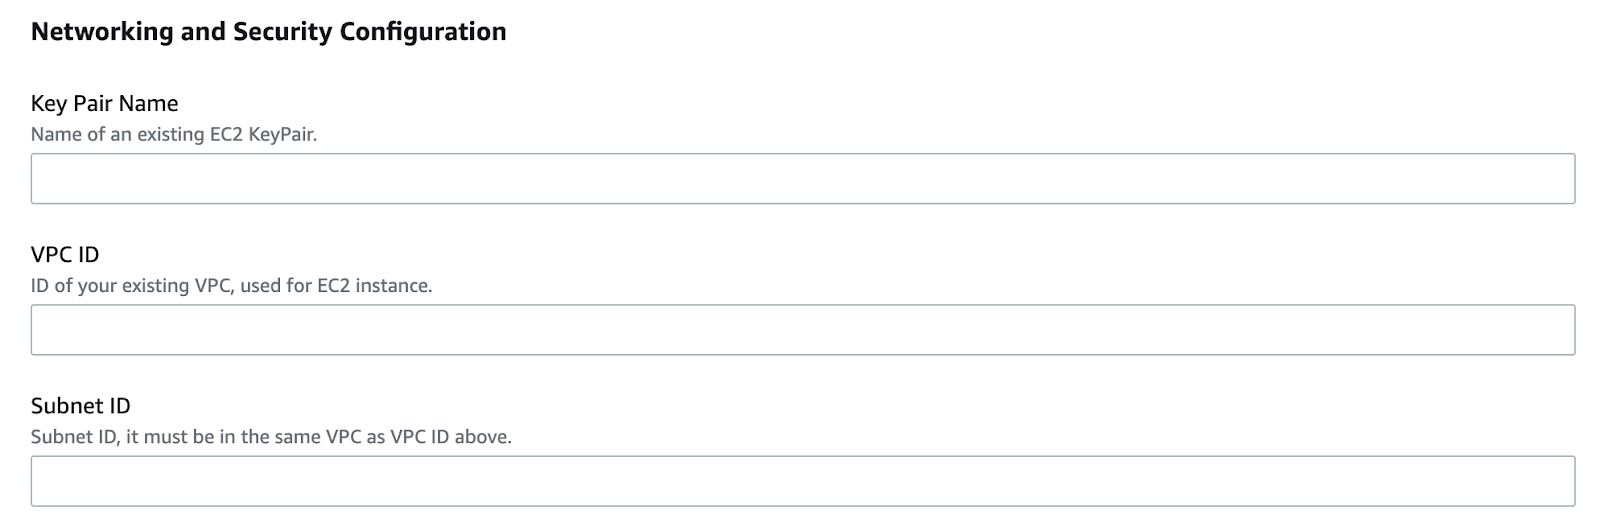
(Optional) If you want to deploy the ATS Direct Stack in an existing VPC (Virtual Private Cloud), you can provide the VPC ID, EC2 Key Pair name and subnet ID. If you don't provide these details, a new VPC will be created.
Click Next.
Review the stack details you’ve provided. Finally, you must acknowledge that CloudFormation may:
create IAM resources,
create IAM resources with custom names,
require “Auto Expand” capability to create the stack.
Click Create Stack.
Two or three stacks will be deployed during this process.
CDKToolkit: (Optional) Generated automatically on cdk bootstrap if it’s the first cdk use in the region.
The stack that is used to run the EC2 instance with the AMI which will handle the deployment. This stack will be stopped after the ATS Direct application stack has been created.
The application stack, with the stack name that was entered previously.
It may take a few minutes for the stack creation to be completed. Once all stacks have been created, ATS Direct is ready for use and you can start with the implementation.