Deploy the Registration Manager Stack
Before you get started with Registration Manager, you must deploy the Registration Manager stack in AWS. Registration Manager uses AWS CloudFormation with a single AMI (Amazon Machine Image), which allows you to deploy a fully configured stack in your AWS environment in a few minutes.
In essence, the deployment process can be divided into three steps:
Create a Registration Manager configuration in Console and obtain the App ID.
Launch the Registration Manager software from AWS Marketplace.
Create a stack using a CloudFormation template.
Preparing the Stack Deployment
To ensure you can go through the deployment process smoothly, make sure to prepare the following ahead of time:
Determine the region you want to deploy in: The region you deploy in may be of relevance out of privacy and performance considerations.
Prepare an S3 bucket: Deploying the stack requires an S3 bucket in the same region you want to deploy. This bucket will only be used to set up the stack and will not contain any user data. Learn more about working with S3 buckets in AWS’ article “Creating, configuring, and working with S3 buckets”.
Prepare an SES Identity: Registration Manager uses AWS SES (Simple Email Service) to handle the emails sent to the end user in the case of passwordless login, forgot password etc.. You must prepare an SES-verified identity email address which will be used as the email sender (‘mail from’ address). More information on SES identity can be found in AWS’ article “Creating and verifying identities in Amazon SES”.
Step 1: Create a Registration Manager Configuration
From the navigation menu of Console, select "Registration Manager".
Click .
Enter a name for the Registration Manager configuration.
Select the "Settings" tab. Obtain the Registration Manager App ID in "Connect AWS Cognito" area. You will need this when deploying the stack at a later stage.
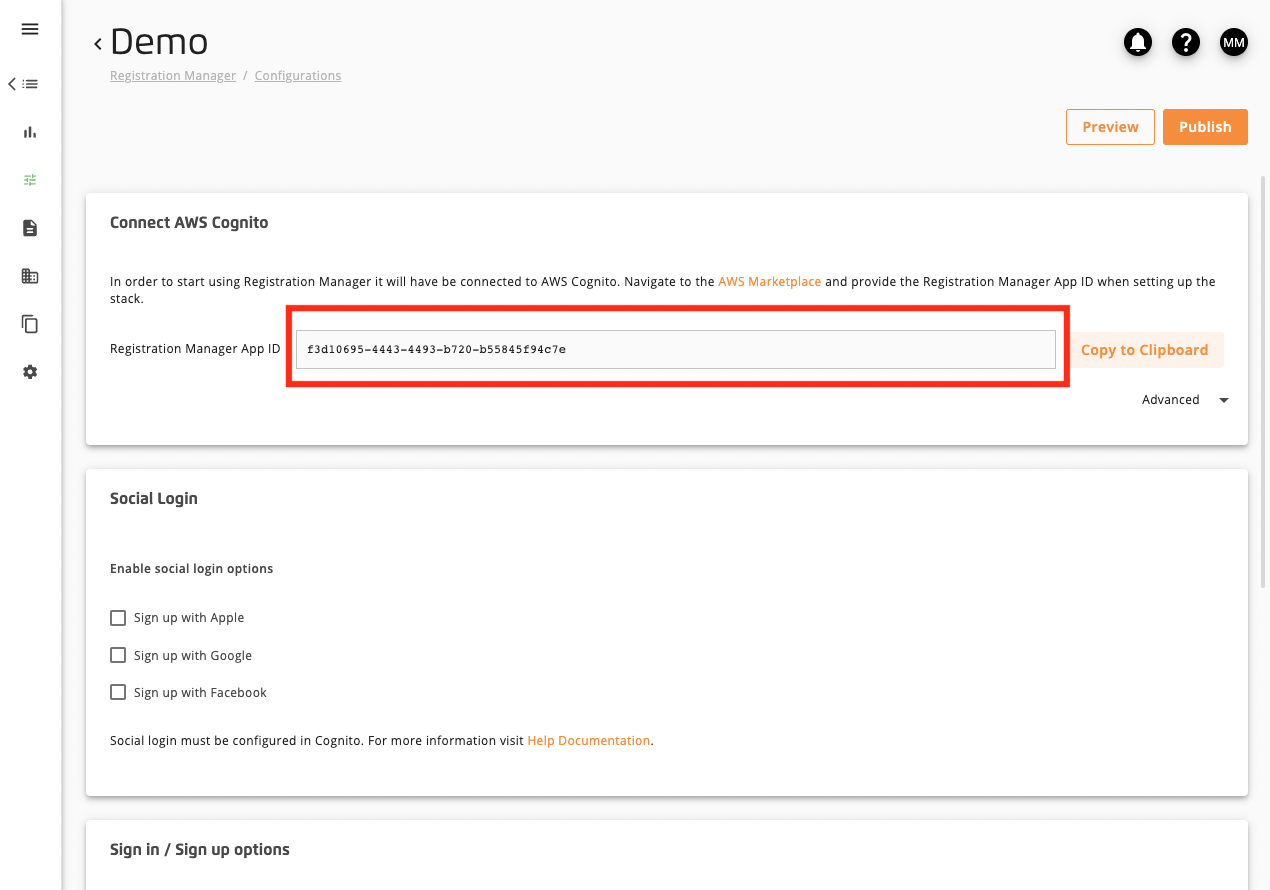 |
Step 2: Launch the Registration Manager Software From AWS Marketplace
Go to the Registration Manager listing in AWS Marketplace.
Click to subscribe.
Sign in to your AWS account. Make sure you have sufficient permissions in your account to deploy a new stack using CloudFormation.
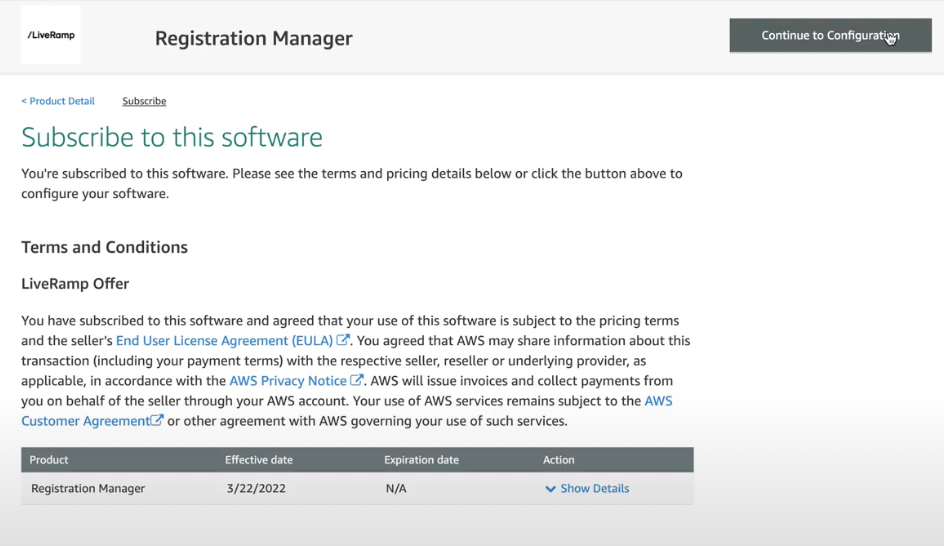
You are now presented with the LiveRamp terms and conditions. These are the same terms and conditions that you have already agreed to when the Registration Manager was added from the Marketplace in Console. Click . It may take a few minutes to process the request.
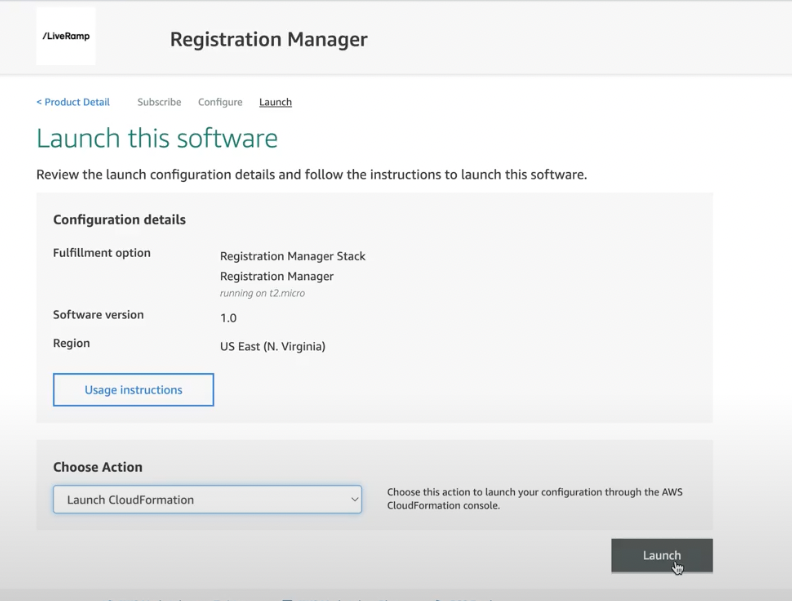
Choose the software version (preferably the latest version) and the region in which you want to deploy the stack. The region you choose here may be relevant for privacy and performance considerations.
Click to Launch.
You are now ready to launch the software on AWS. Select “Launch CloudFormation” in the Choose Action dropdown and click . This action should launch a new window to create the stack.
Step 3: Create the Stack
In Step 1 (Specify template), you will see that the template has already been pre-selected. Leave all the pre-selected settings as they are and click Next.
In the next step of the stack creation process you will have to provide the following details:
Stack name: Enter a name of your choosing.
EC2 Instance Type: An EC2 instance is required in order to deploy the Registration Manager stack. This instance is only used during the stack creation and when there are future potential updates to the stack. A t2.micro instance is selected by default.
S3 Bucket Name: Enter the name of the S3 bucket in the same region the stack will be deployed in.
AWS Region: Select the region in which you want the stack to be deployed.
App Name: Enter a name of your choosing.
Console App ID: Enter the app ID that you’ve obtained from “Step 1: Create a Registration Manager Configuration”.
Magic Link URL: Magic Link allows passwordless logins and logouts by sending a user a link via email which logs them in upon clicking. Enter a URL for where a user should be redirected after clicking the link in the email. This would generally be the website homepage.
SES Region: Select the region for SES. Currently the only supported regions are U.S. east or U.S. west.
SES Identity: Provide an SES verified identity email address you’ve prepared.
Click .
Review the stack details you’ve provided. Finally, you must acknowledge that CloudFormation may:
create IAM resources,
create IAM resources with custom names,
require “Auto Expand” capability to create the stack.
Click .
Two stacks will be deployed during this process. The first stack “[app name]” is required to execute the CloudFormation template for Registration Manager.
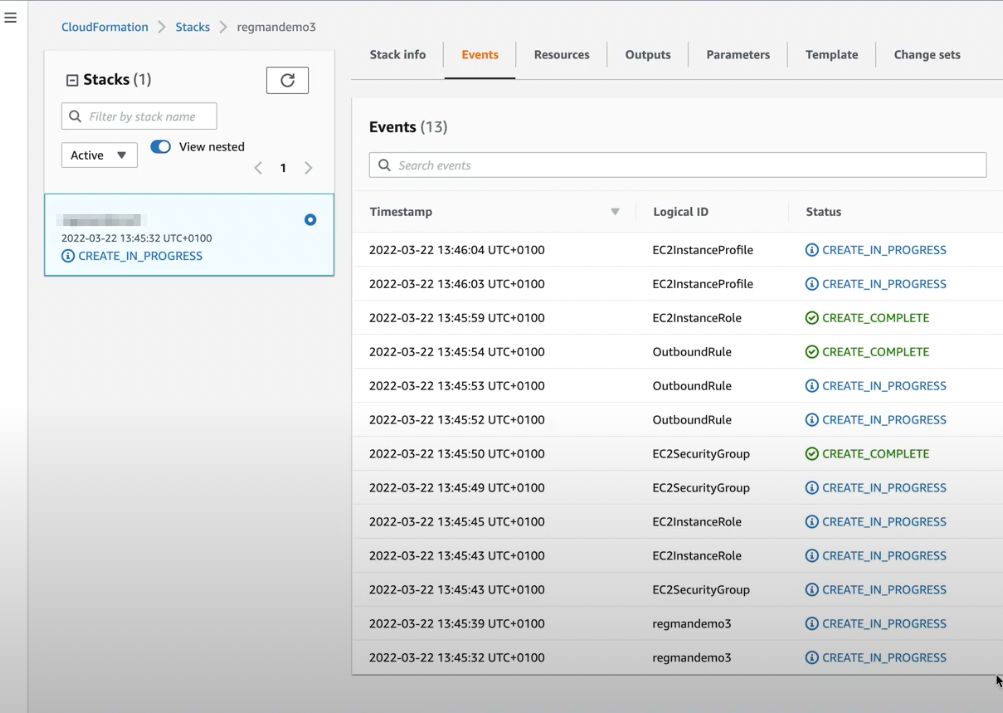
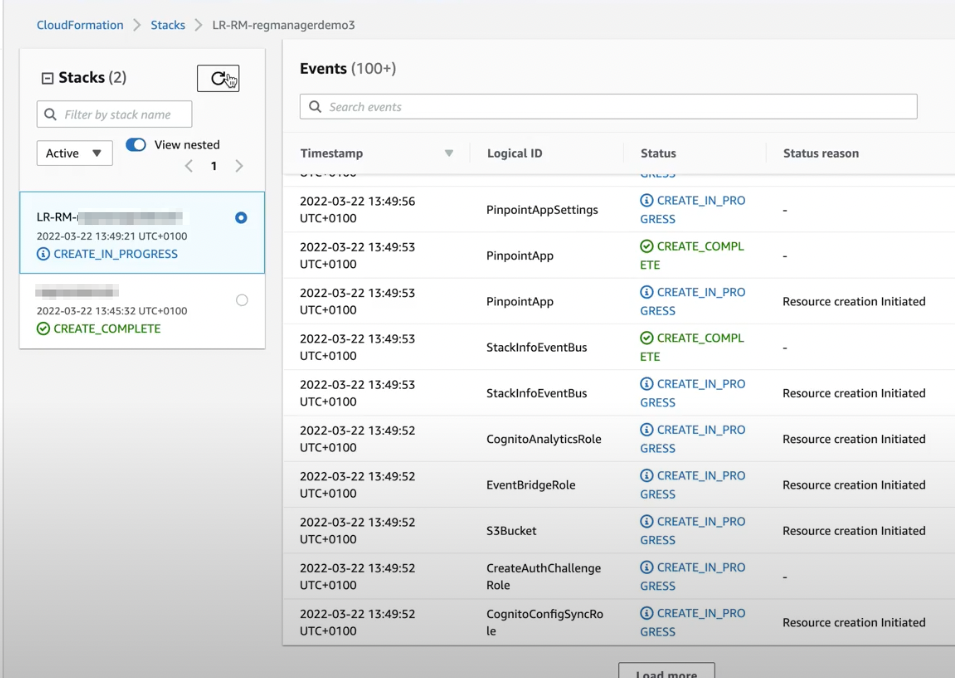
The first stack will be stopped after the Registration Manager stack has been created. Then, the Registration Manager stack “LR-RM-[App name]” will appear and start the creation process. It may take a few minutes for the stack creation to be completed. Once both stacks have been created, the Registration Manager is ready for use and you can start configuring the Registration Manager settings.