Implement Facebook CAPI Adapter via ATS for Web
ATS for Web offers an integration option for Facebook CAPI to easily collect events data and send to Facebook CAPI Adapter. Make sure you have fulfilled the requirements for setting up Facebook CAPI before you get started.
Features Included
This implementation method allows you to:
Obtain identity envelopes
Handle opt-outs from IAB U.S. Privacy API
Collect required parameters from Facebook
Set up customizable events
Set up customizable triggers for each event
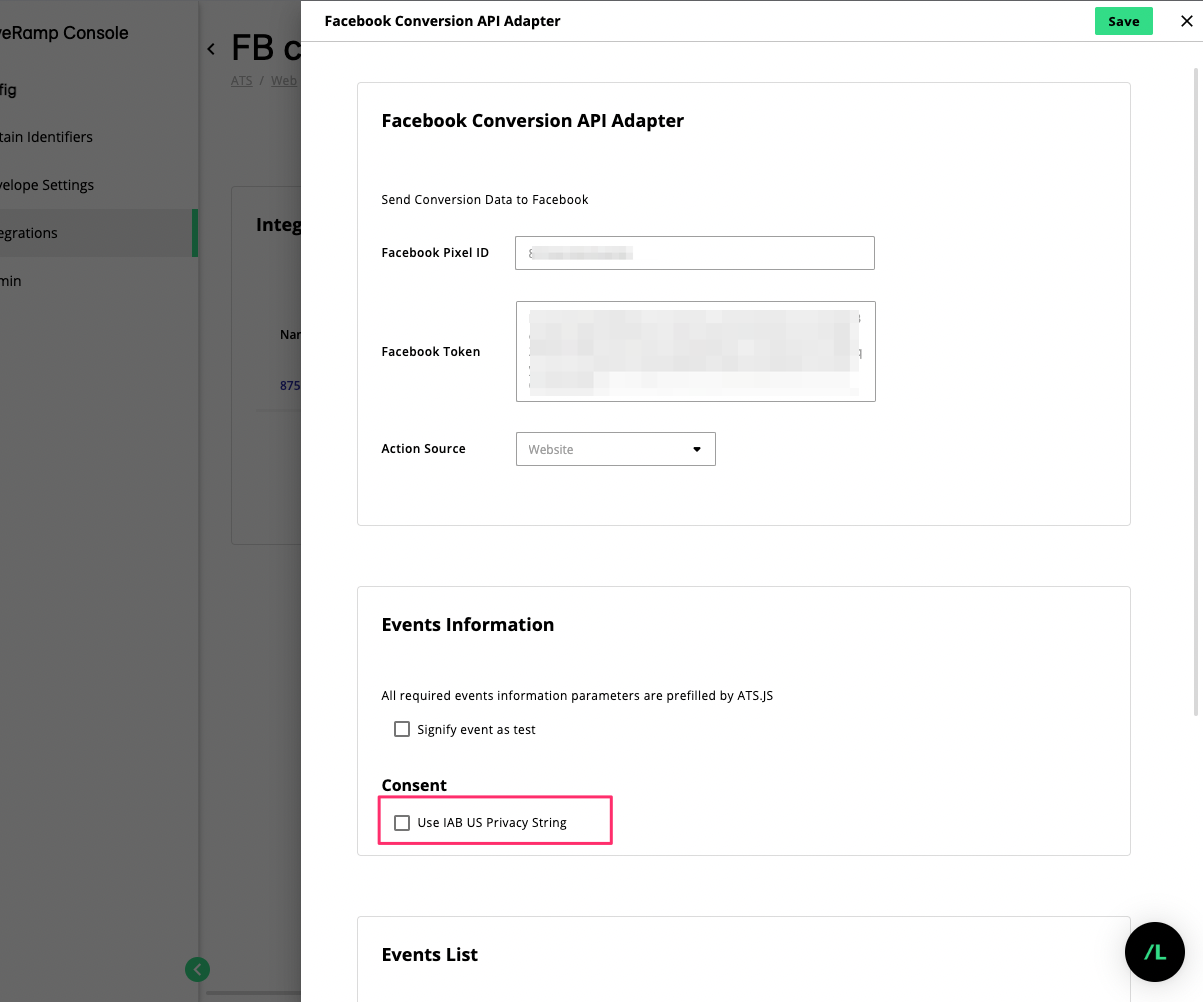
Set Up ATS for Web to Send Event Data to Facebook CAPI Adapter
The procedure below is a direct continuation of the steps from Set Up Facebook CAPI Adapter in Console.
Under “Event information”, select if you want to “Signify the event as a test”. When you enable this option, you can enter a code generated from Facebook’s test event tools that can be used to distinguish the test event from other events. To learn more, see Facebook's article "Test Events Tools".
Select if you want to “Use IAB U.S. Privacy String”. When enabled, ATS.js will send an opt out signal to Facebook and exclude the event for ads delivery optimization.
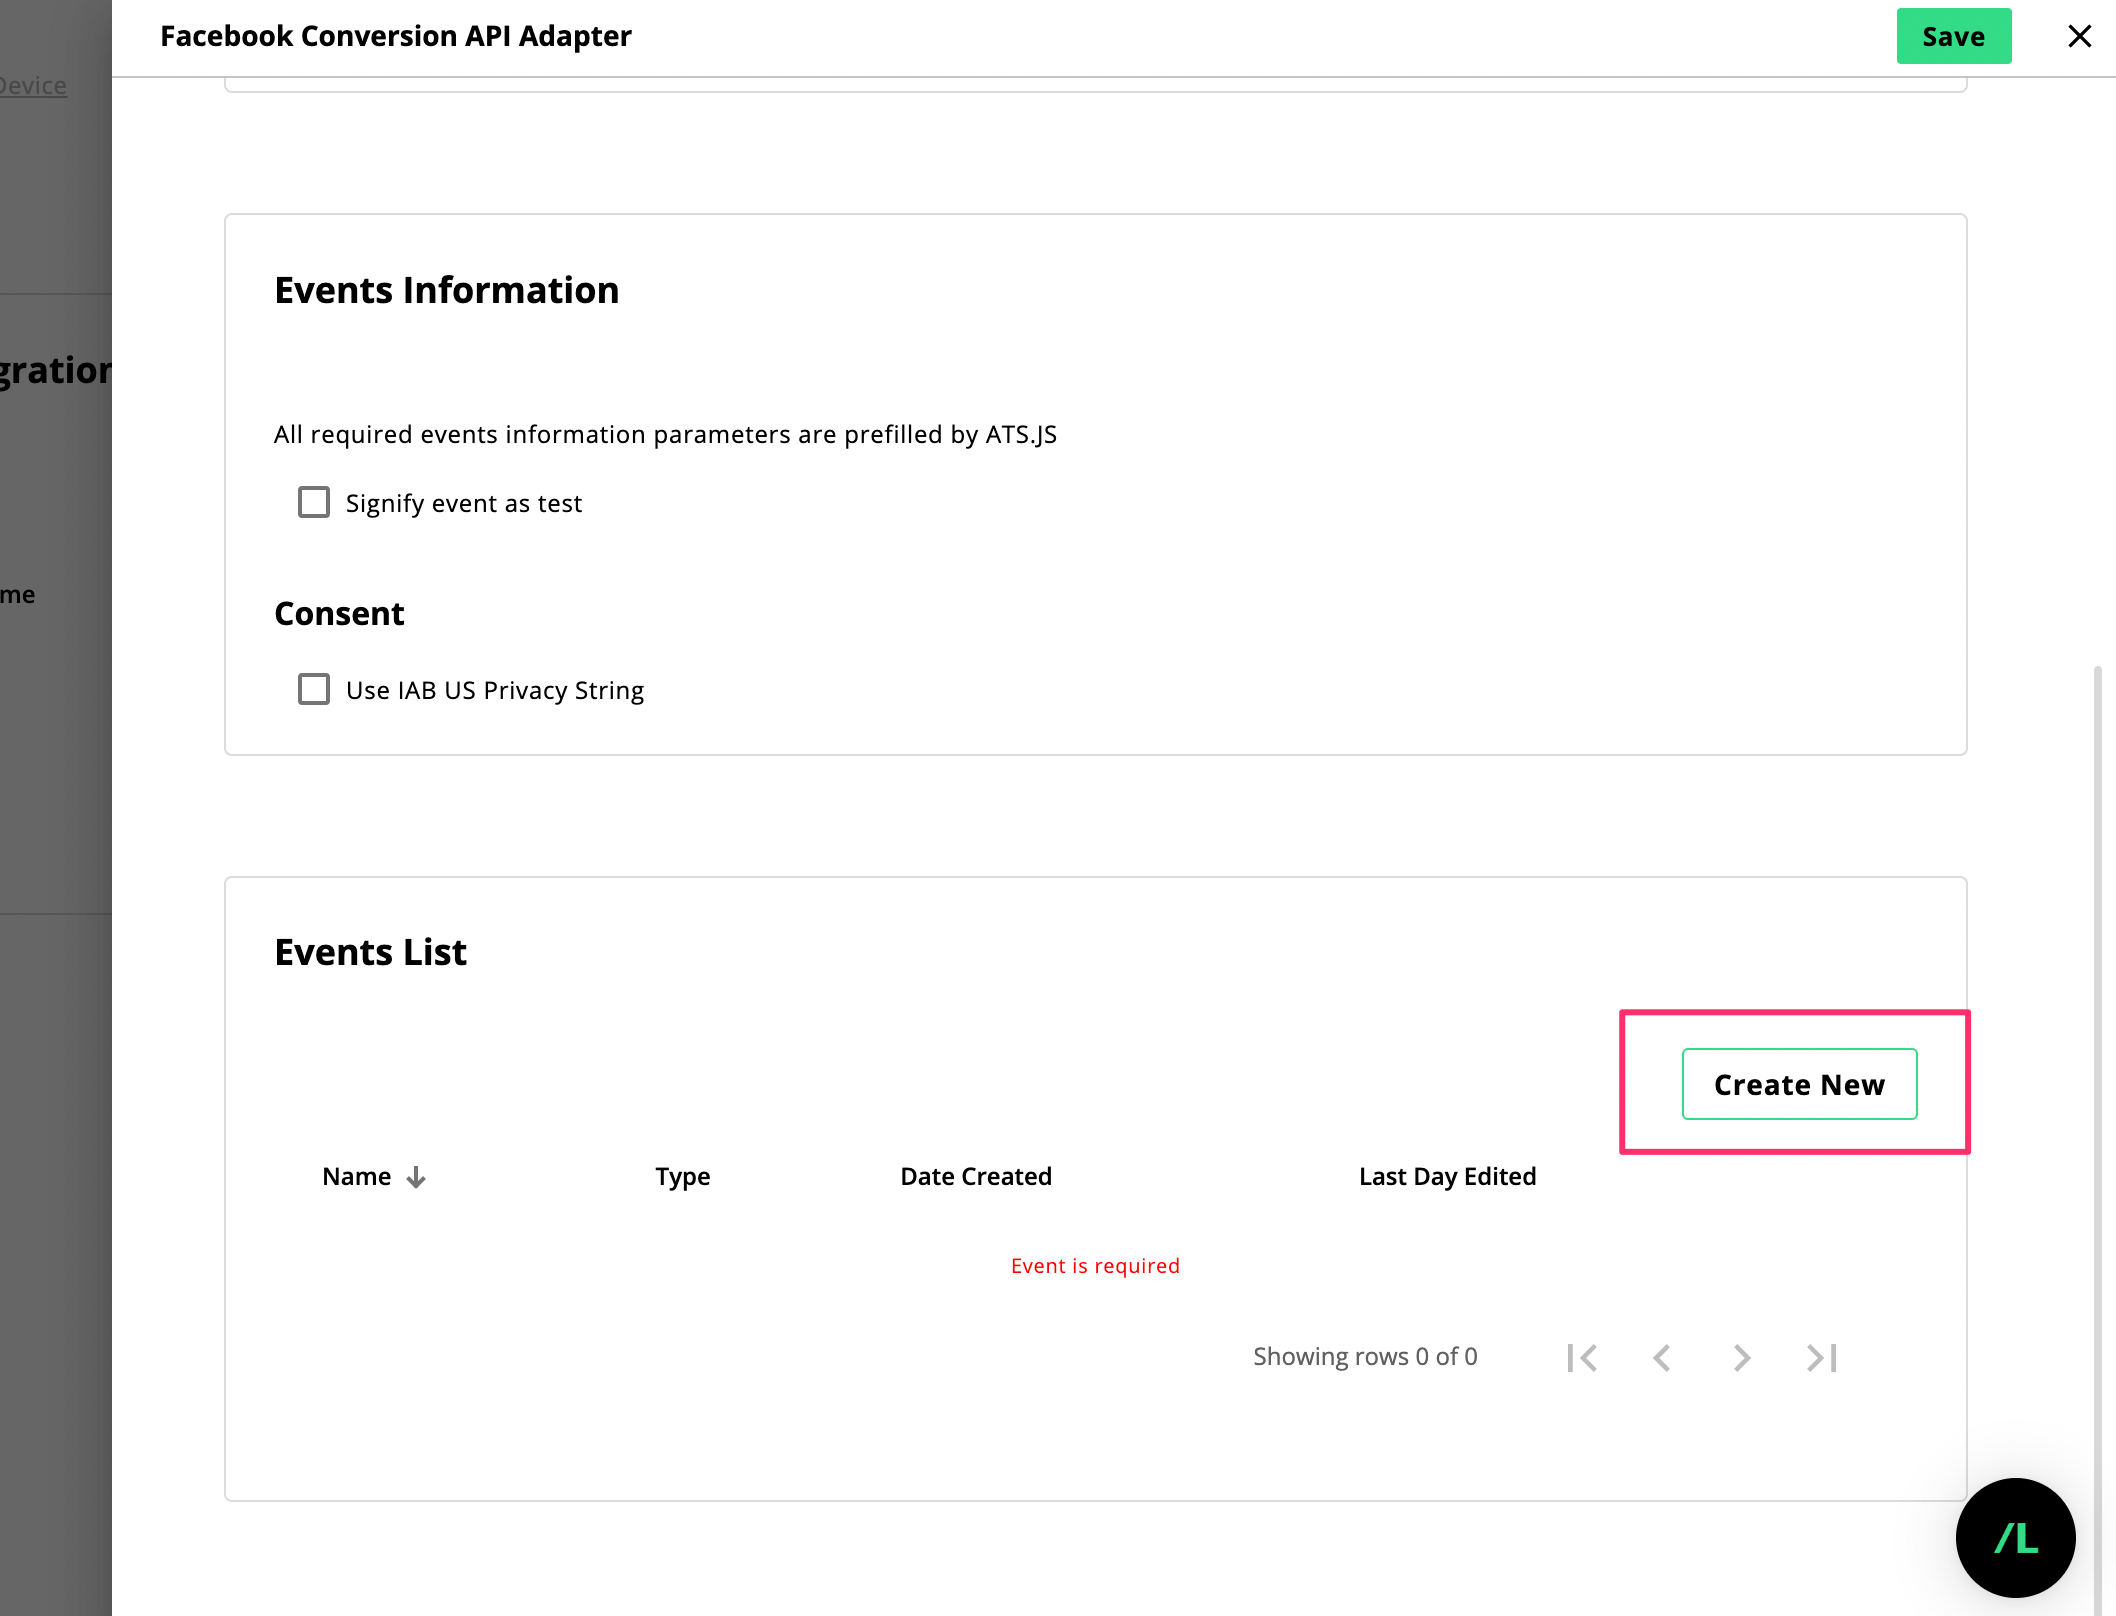
Next, you must specify the events you want to send to Facebook. Under ‘Events List’, click .
Enter an Event Name and select the Event Type.
(Optional) If the predefined standard events aren't suitable for your needs, you can select Custom Event as the event type. When selected, you must enter the name of the custom event in the Custom Event field.
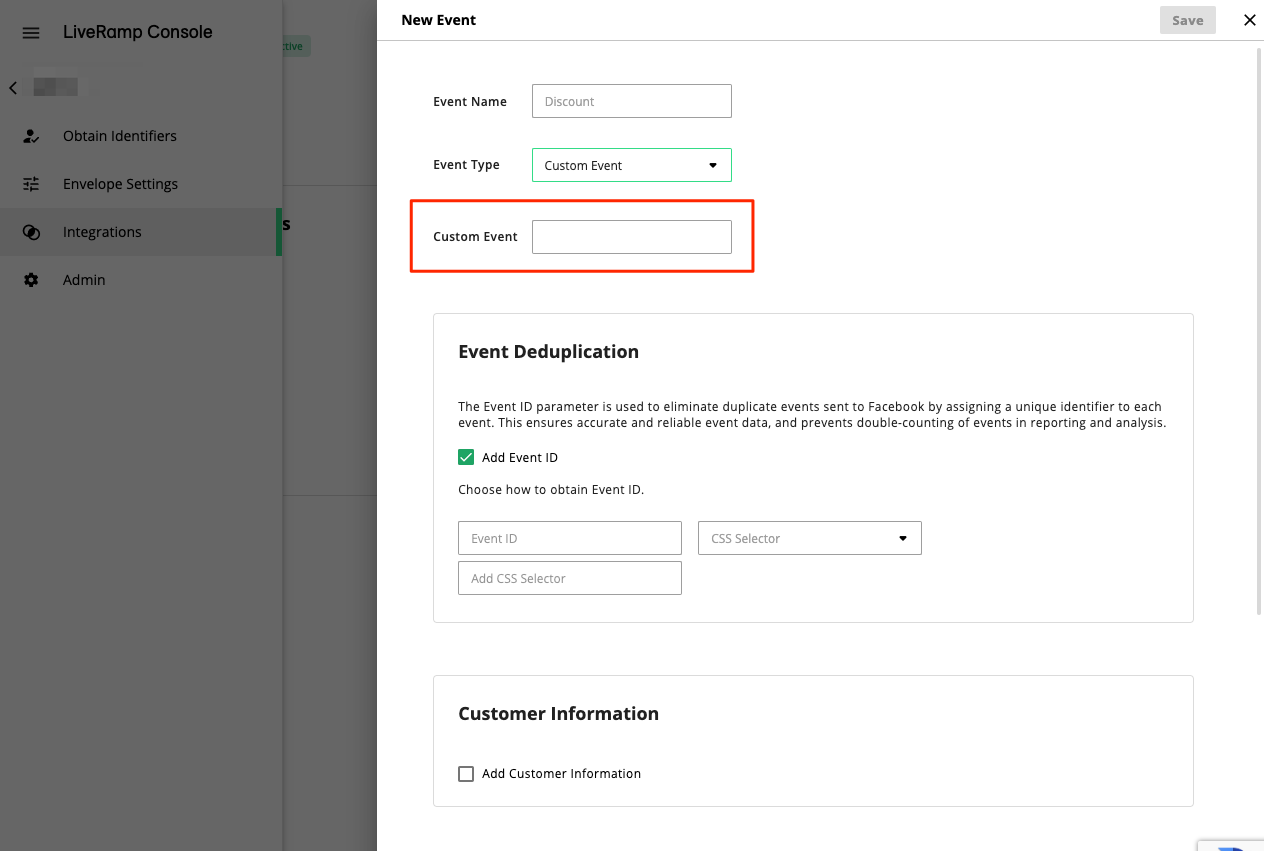
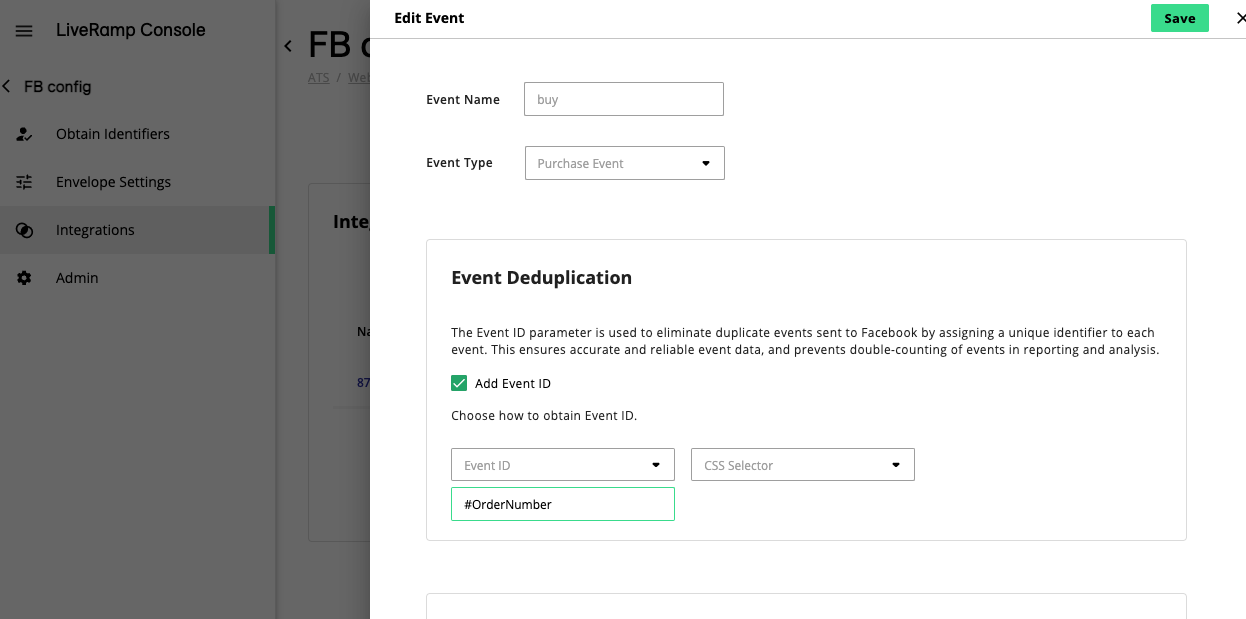
Enable event deduplication to eliminate duplicate events sent to Facebook. Check Add Event ID and select how the Event ID should be obtained, and for which identifier. In the example below, we are using the Order Number as the Event ID.
Note
CSS selector allows you to obtain the parameter by targeting a specific HTML element in your page. We recommend using only ID selector to limit errors. For example; #product-value, #ItemValue
Alternatively, you can provide a URL parameter which is added at the end of a URL after the ‘?’ symbol. For example; currency, product-currency
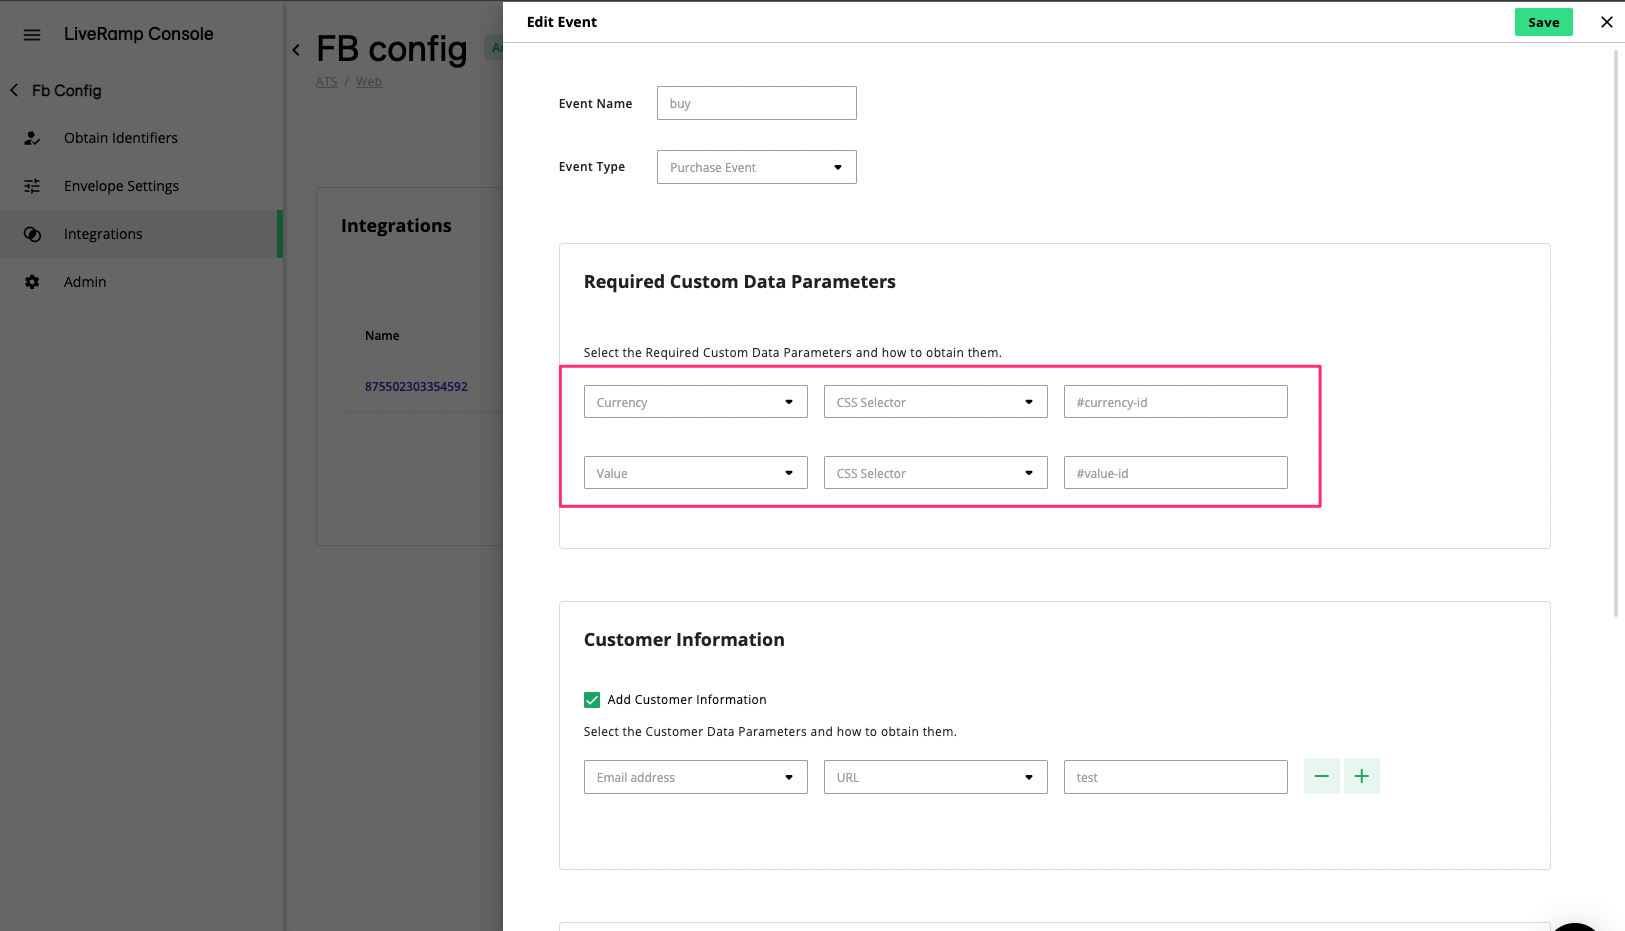
If you selected the Purchase Event type, you must provide additional parameters under Required Custom Data for the ‘Currency’ and ‘Value’ and choose how to obtain them. Select URL or CSS Selector for each parameter and provide the required data.
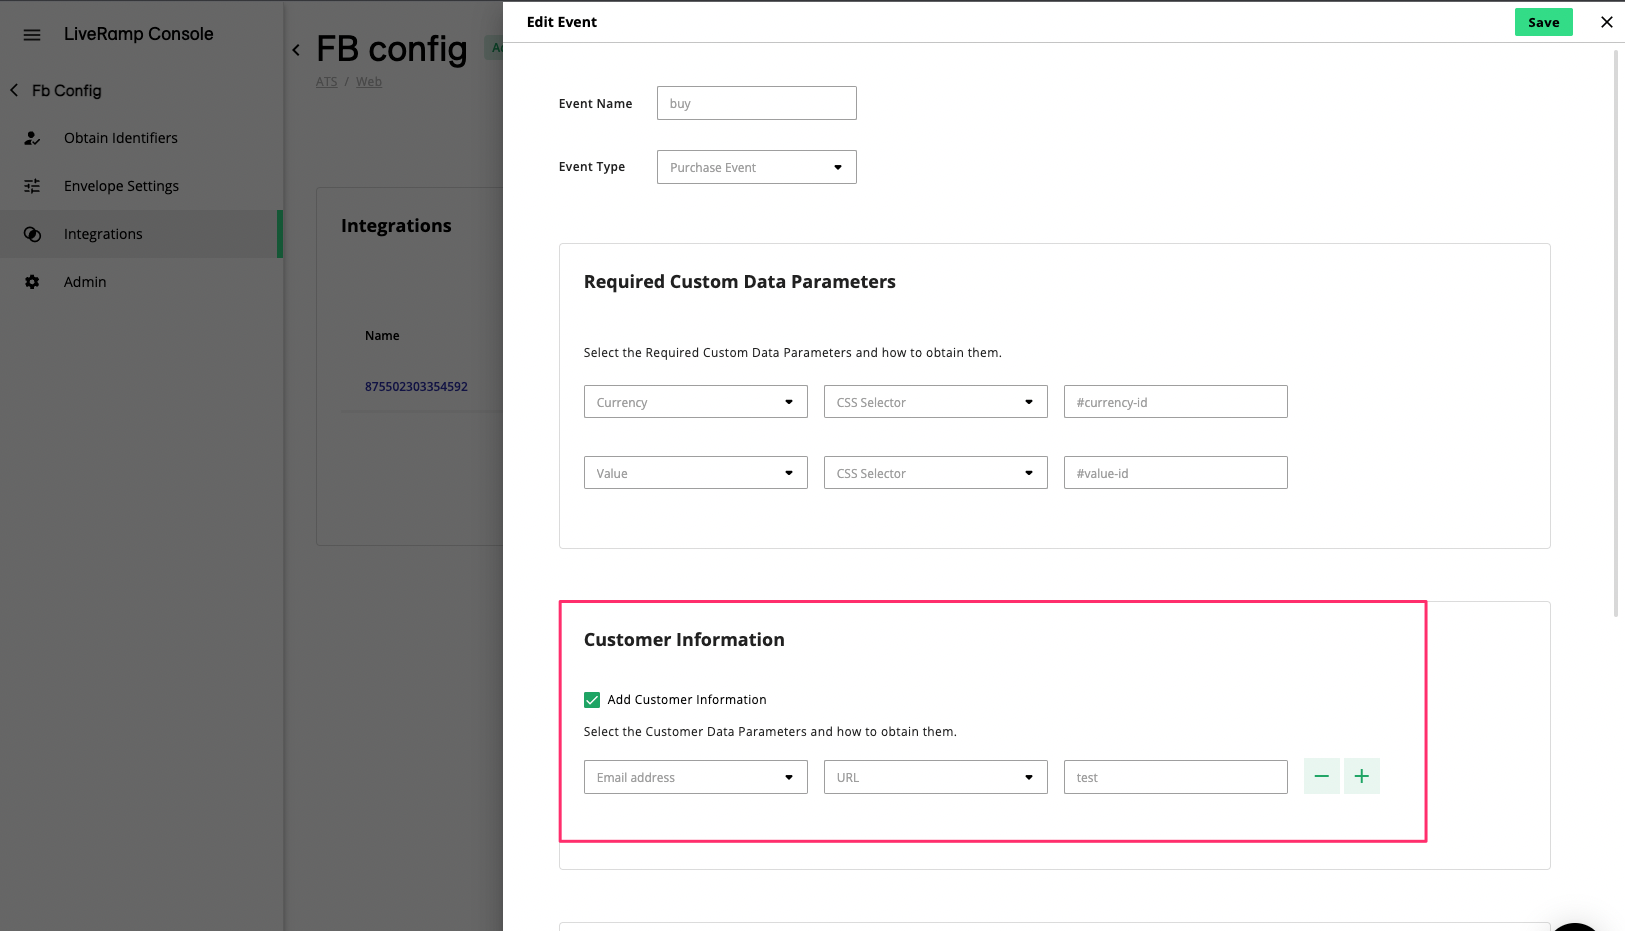
(Optional) Select Add Customer information to include additional parameters based on customer’s information. Click the plus button to add another parameter or select the minus button to remove.
(Optional) You can add custom parameters defined by Facebook in the Custom Data Parameters section which include order ID, content type, content name, and others. For example, you can configure a purchase event that's only fired when a particular product is purchased from your website. The more parameters you add, the more accurate the data Facebook will receive.
You can also add your own Custom Properties, which can be used for both custom events or standard events, to further define custom audiences. When this option is enabled you can define your desired property and, if using the CSS selector method, configure the value of the property.
Set up the Trigger event to decide when the events should be sent. Select Automatically to have it sent every time the event happens, or by an API call.
If you select to set up a trigger event by an API call, this can be done by calling
ats.sendFbEvents(['name_of_event']), where'name_of_event'should be replaced with the event name you provided in step 4.Note
For non-purchase events such as 'Add to Cart', Account 'Creation', and others, we recommend setting up a trigger event only on some pages to make sure they are not fired on every page load.
Specify to have the trigger added to all pages by selecting Always, or in specific pages by selecting On some pages. If you choose the latter, you need to provide the page URL and a domain identifier. Click the plus button to add multiple pages.

Click .
Once you are done with setting up the events, you may want to verify if your setup is working correctly through Facebook’s Events Manager. After you start sending events, you should be able to verify them within 20 minutes.
To see an overview of event data delivered to Facebook, log in to Events Manager and click the Data Sources tab.