Configure an Iceberg Catalog Data Connection
If you have data tables in Apache Iceberg format, you can configure a connection to the data from LiveRamp Clean Room so that you can use that data in either a Hybrid or Confidential Computing clean room.
Note
This connection type currently uses AWS Glue Catalog as the mechanism for connecting to the Iceberg tables. Other catalog types will be available in the future.
For information on how LiveRamp Clean Room interprets the data types from Glue Catalog, see “Glue Catalog”.
To configure an Iceberg Catalog data connection, see the instructions below.
Overall Steps
After making sure all prerequisites are in place, perform the following overall steps to configure an Iceberg Catalog data connection in LiveRamp Clean Room:
For information on performing these steps, see the sections below.
Prerequisites
The Iceberg table must be cataloged in the AWS Glue Catalog.
The following information is needed to configure your Iceberg Catalog data connection in LiveRamp Clean Room:
AWS Access Key ID
AWS Secret Access Key
AWS User ARN
AWS Region
Database Name
Table Name
Catalog Name
Catalog ID
Add the Credentials
To add credentials:
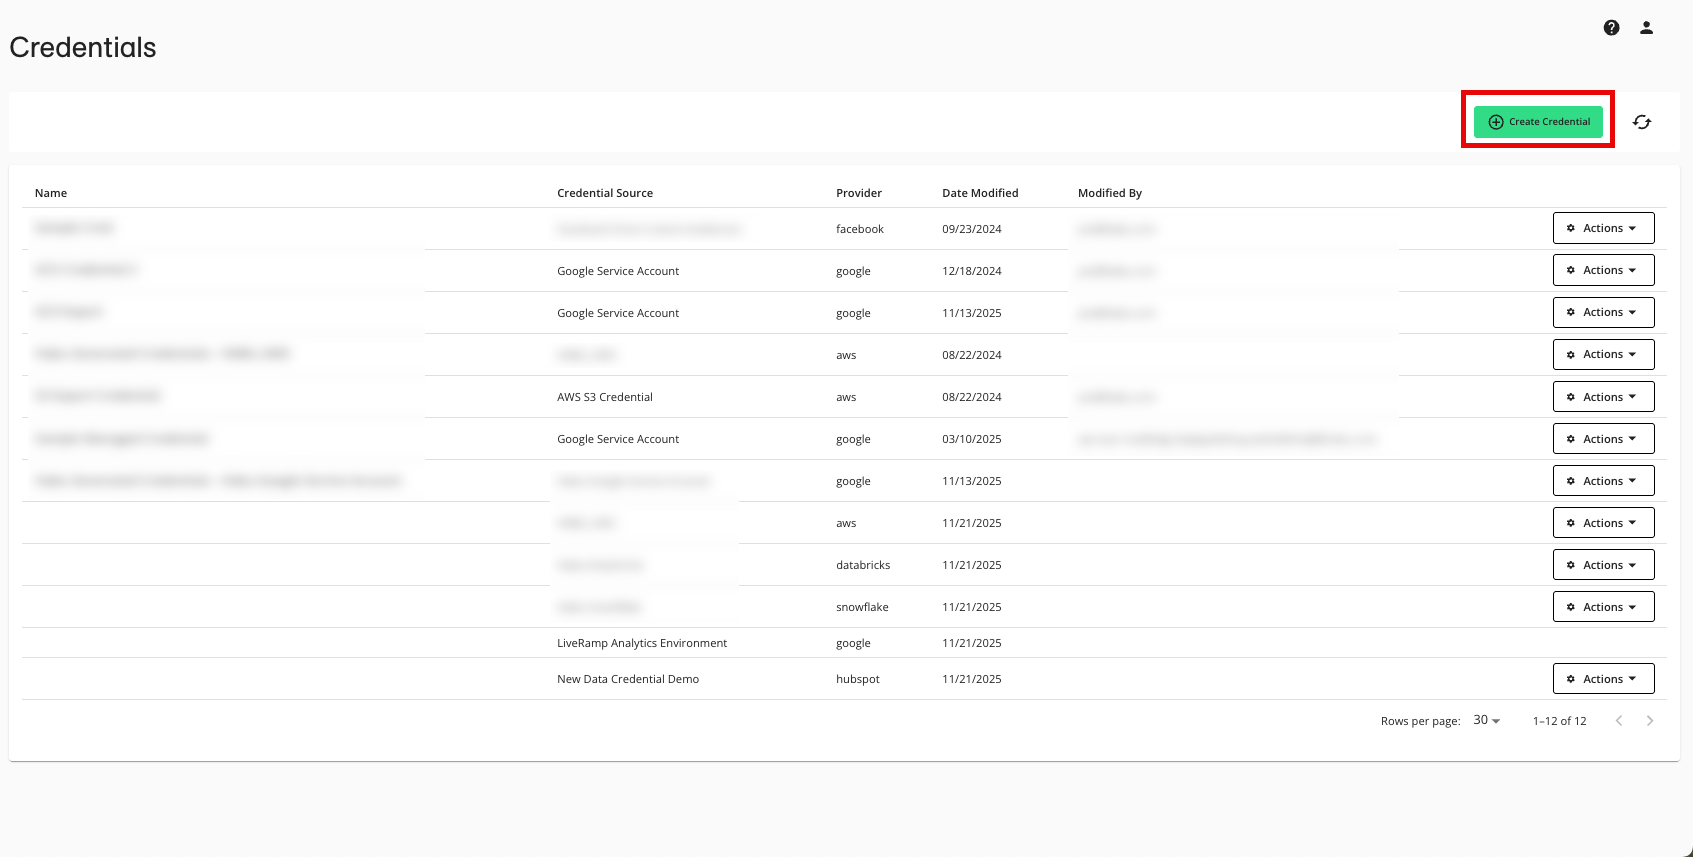
From the LiveRamp Clean Room navigation pane, select Data Management → Credentials.
Click .
Enter a descriptive name for the credential.
For the Credentials Type, select "AWS IAM User Credentials".
Enter the following parameters associated with your AWS configuration:
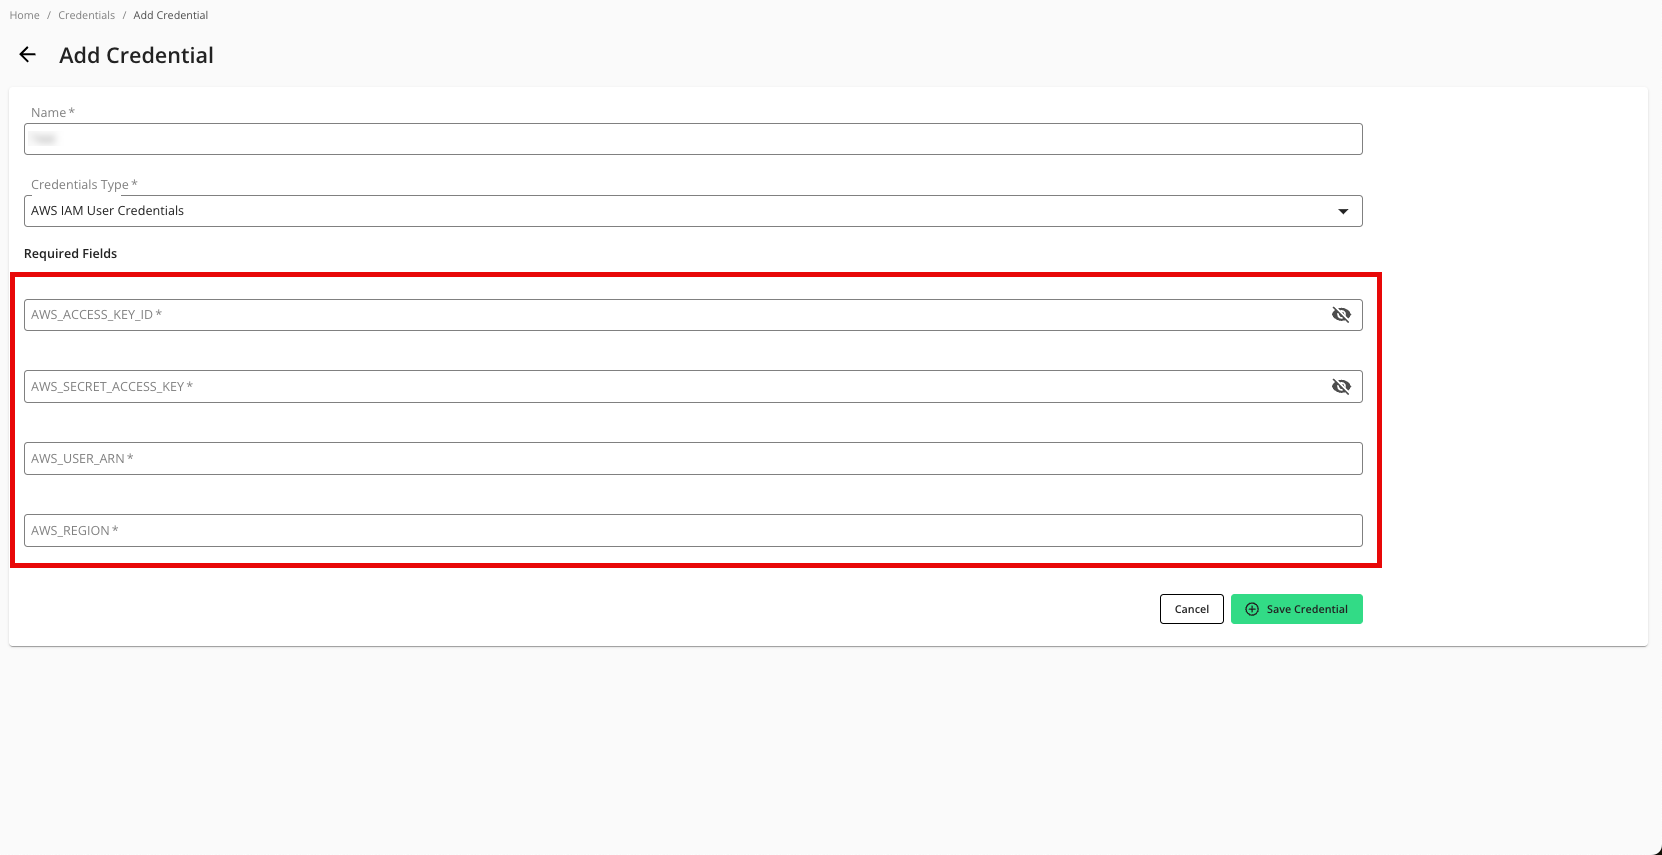
AWS Access Key ID
AWS Secret Access Key
AWS User ARN
AWS Region
Click .
Create the Data Connection
To create the data connection:
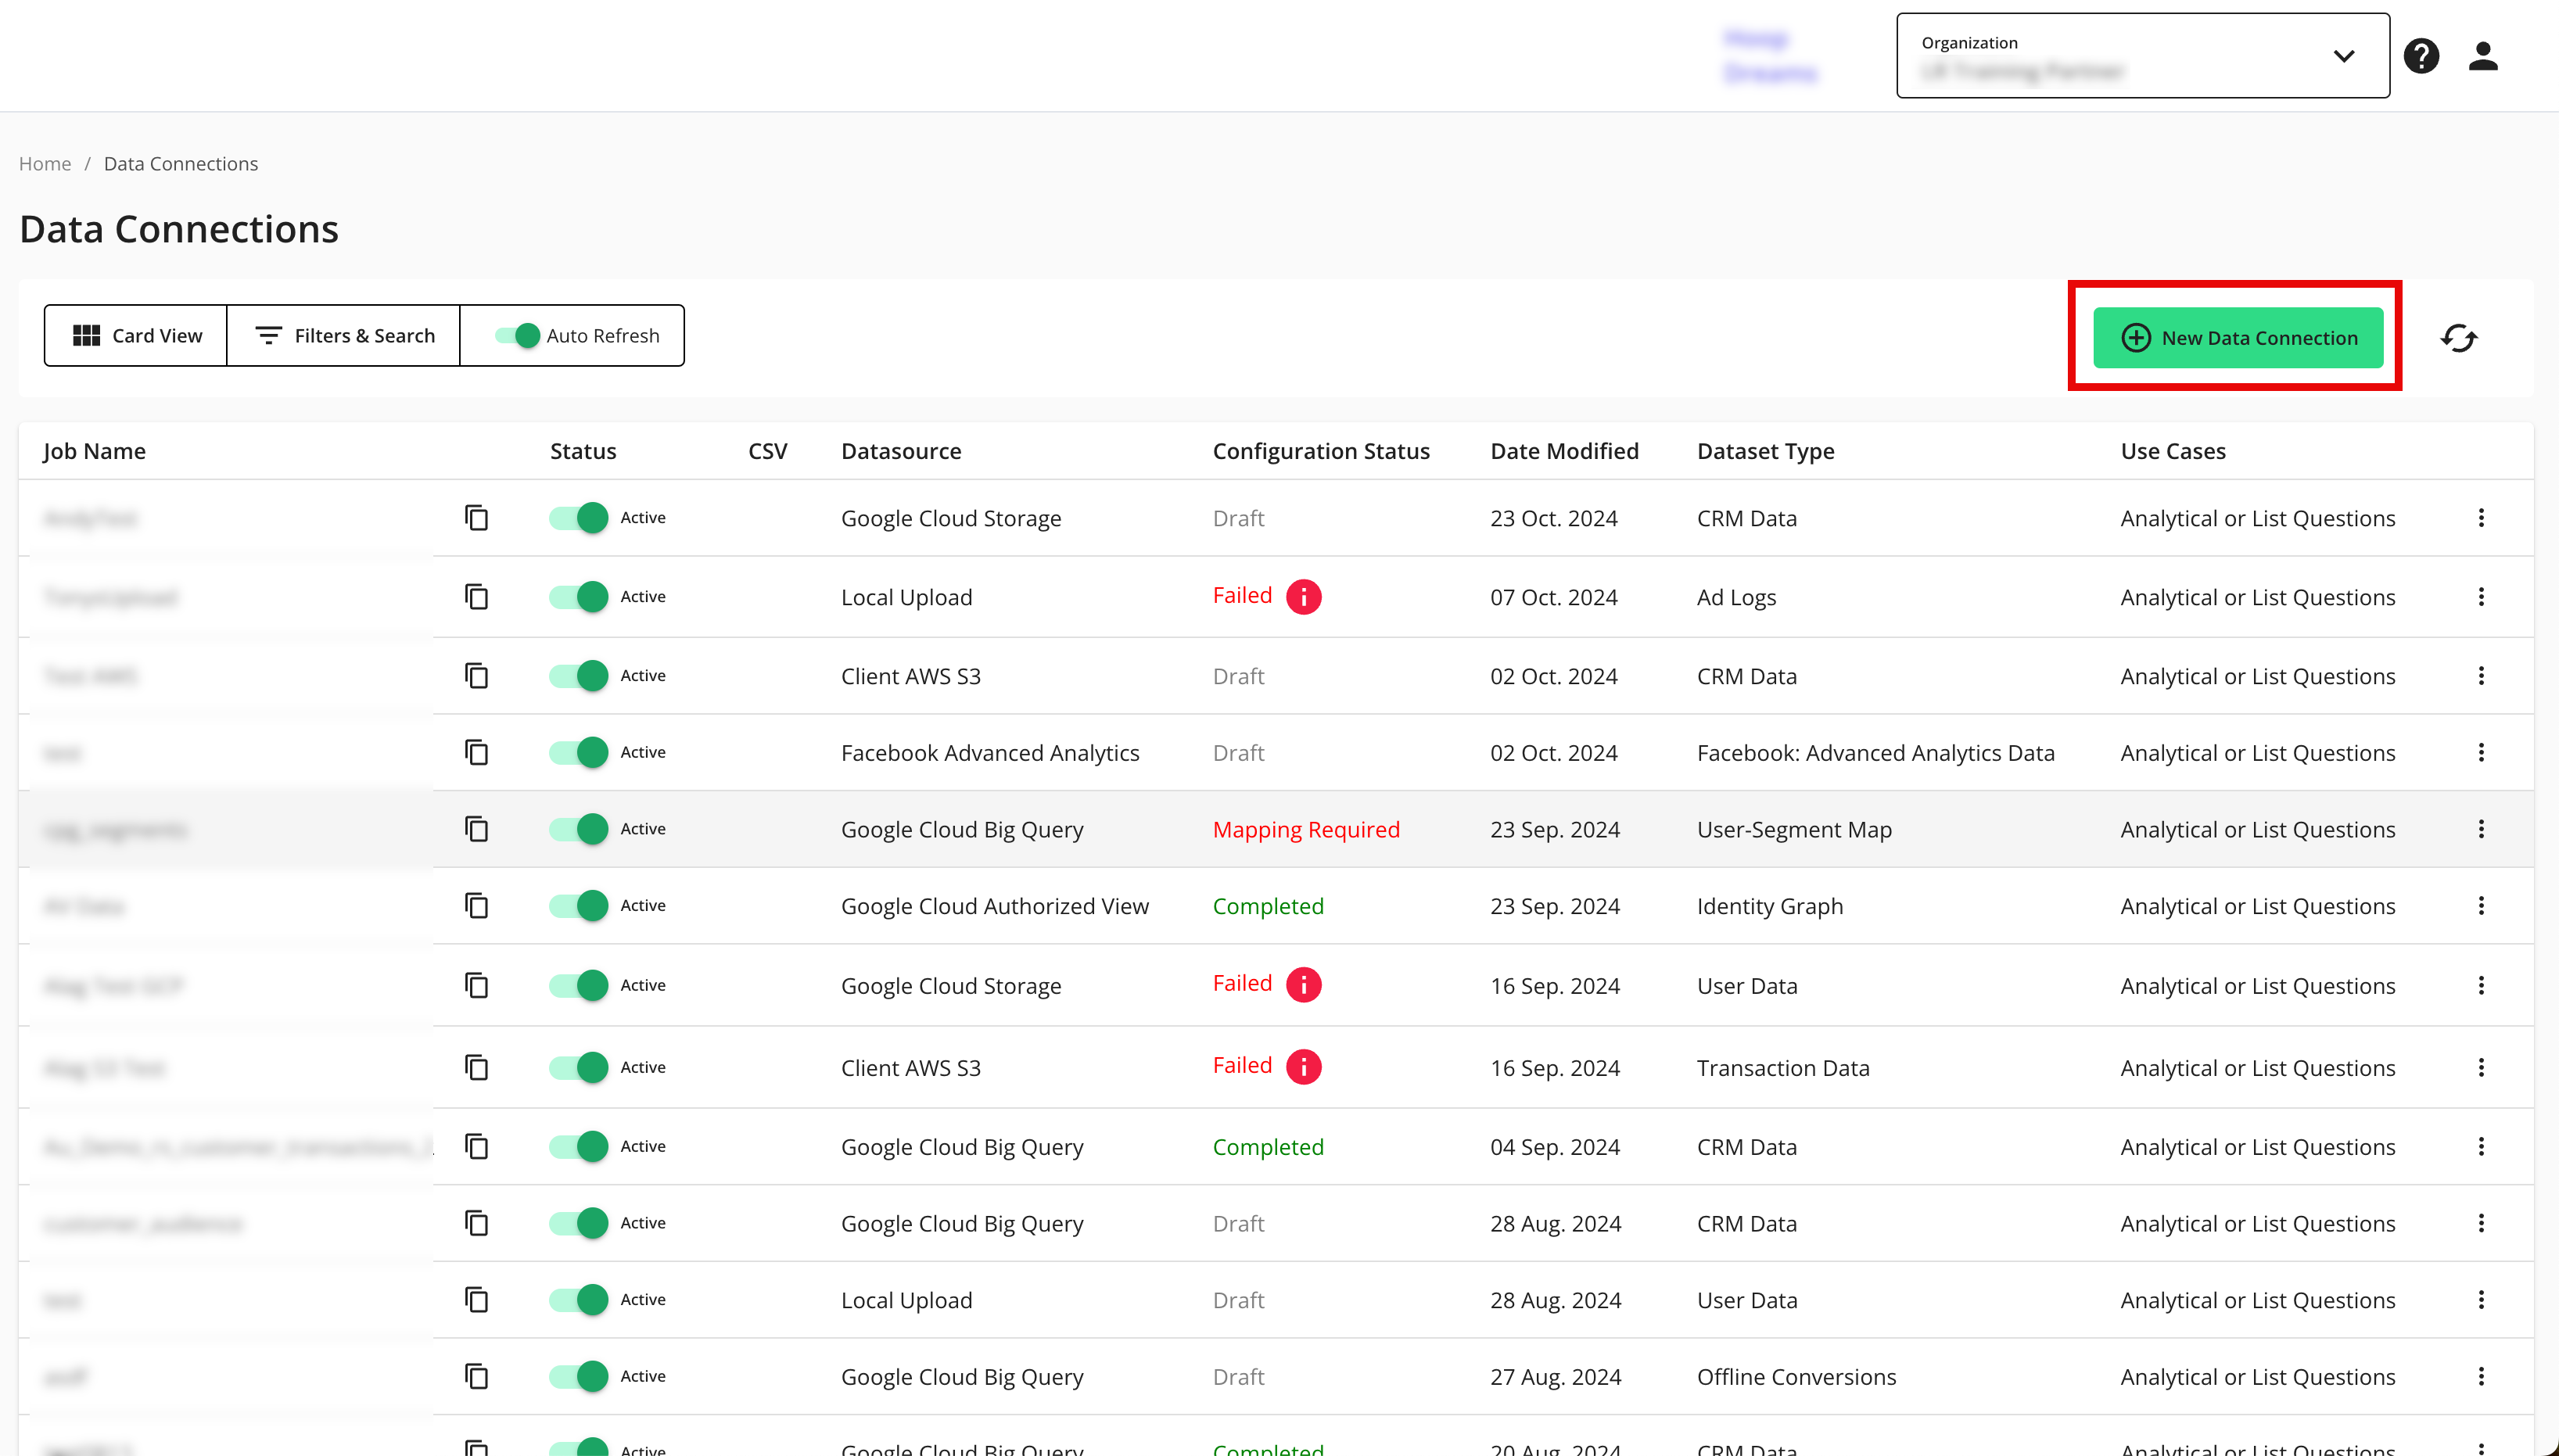
From the LiveRamp Clean Room navigation pane, select Data Management → Data Connections.
From the Data Connections page, click .
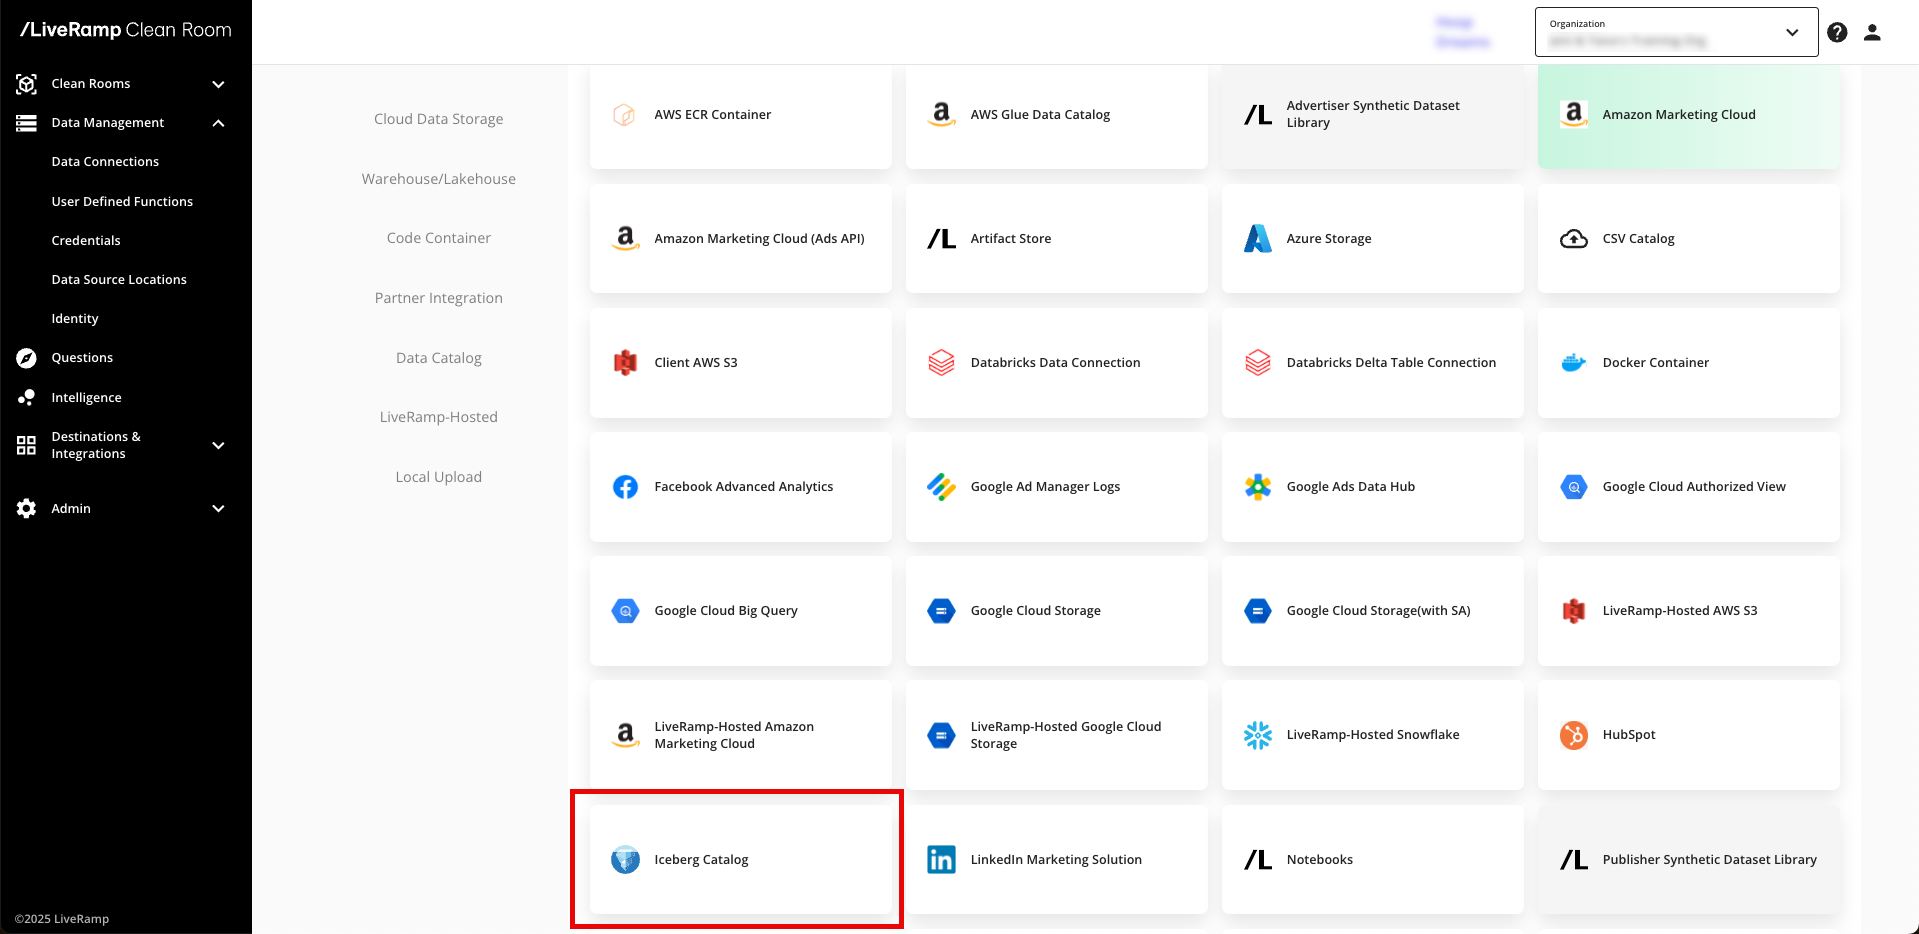
From the New Data Connection screen, select "Iceberg Catalog".
Select the credentials created in the previous procedure from the list.
Note
You can also create credentials here by clicking and following the instructions in the "Add the Credentials" section above.
Configure the data connection:
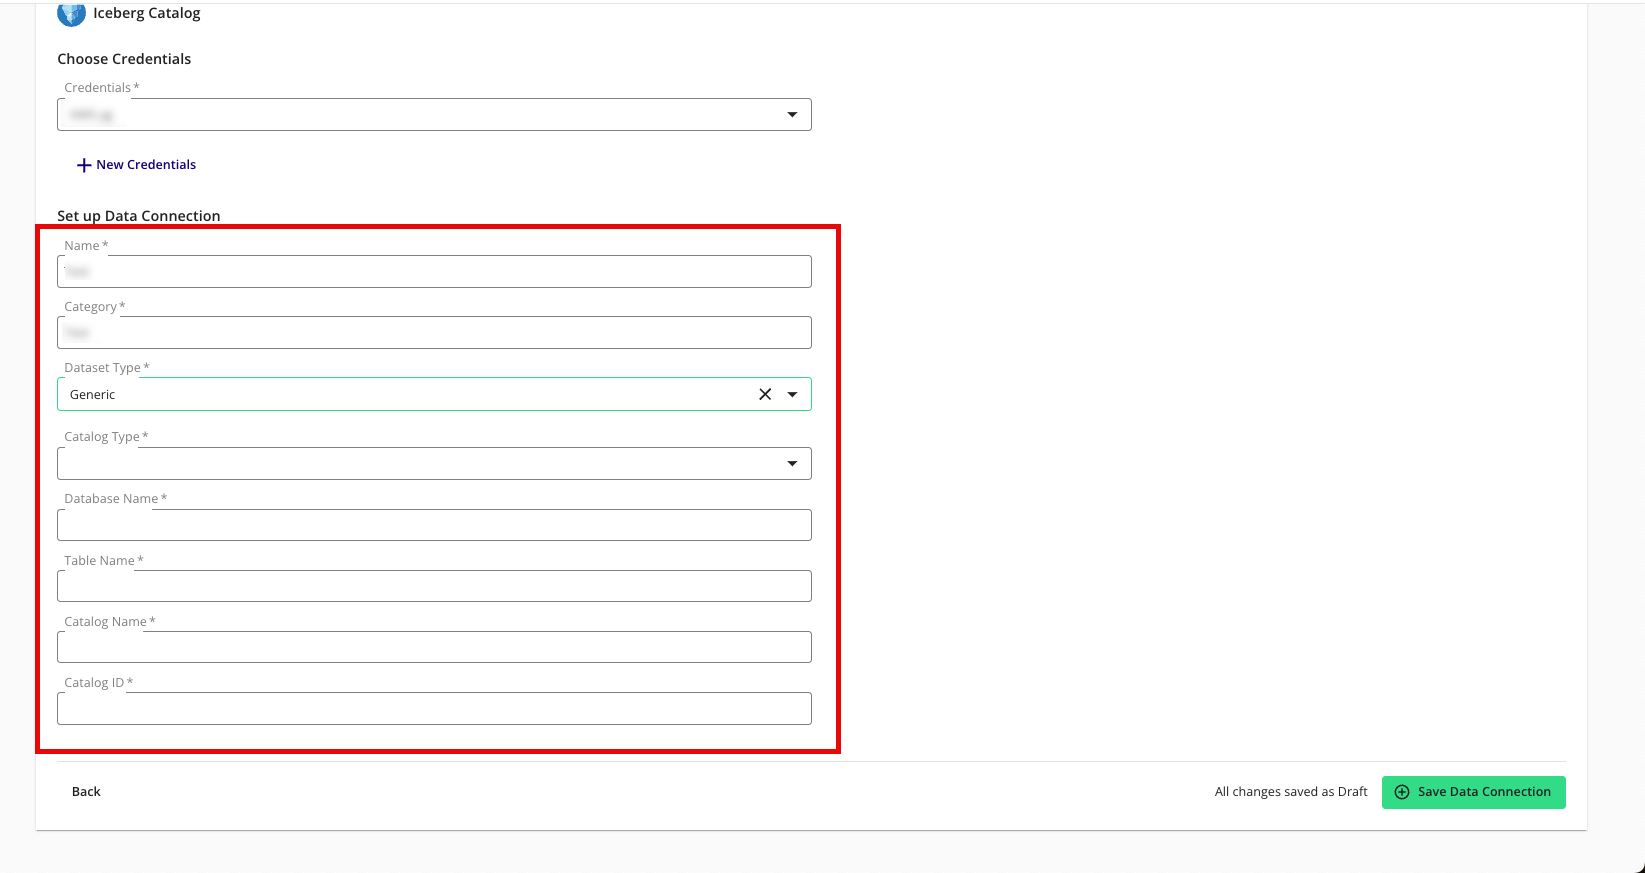
Name: Enter a name of your choice.
Category: Enter a category of your choice.
Dataset Type: Select Generic.
Catalog Type: Select GLUE.
Database Name: Enter the name of the database that contains your data.
Table Name: Enter the name of the Apache Iceberg table.
Catalog Name: Enter the name of the AWS account that contains the Iceberg table.
Catalog ID: Enter the ID of the AWS account that contains the Iceberg table.
Review the data connection details and click .
Note
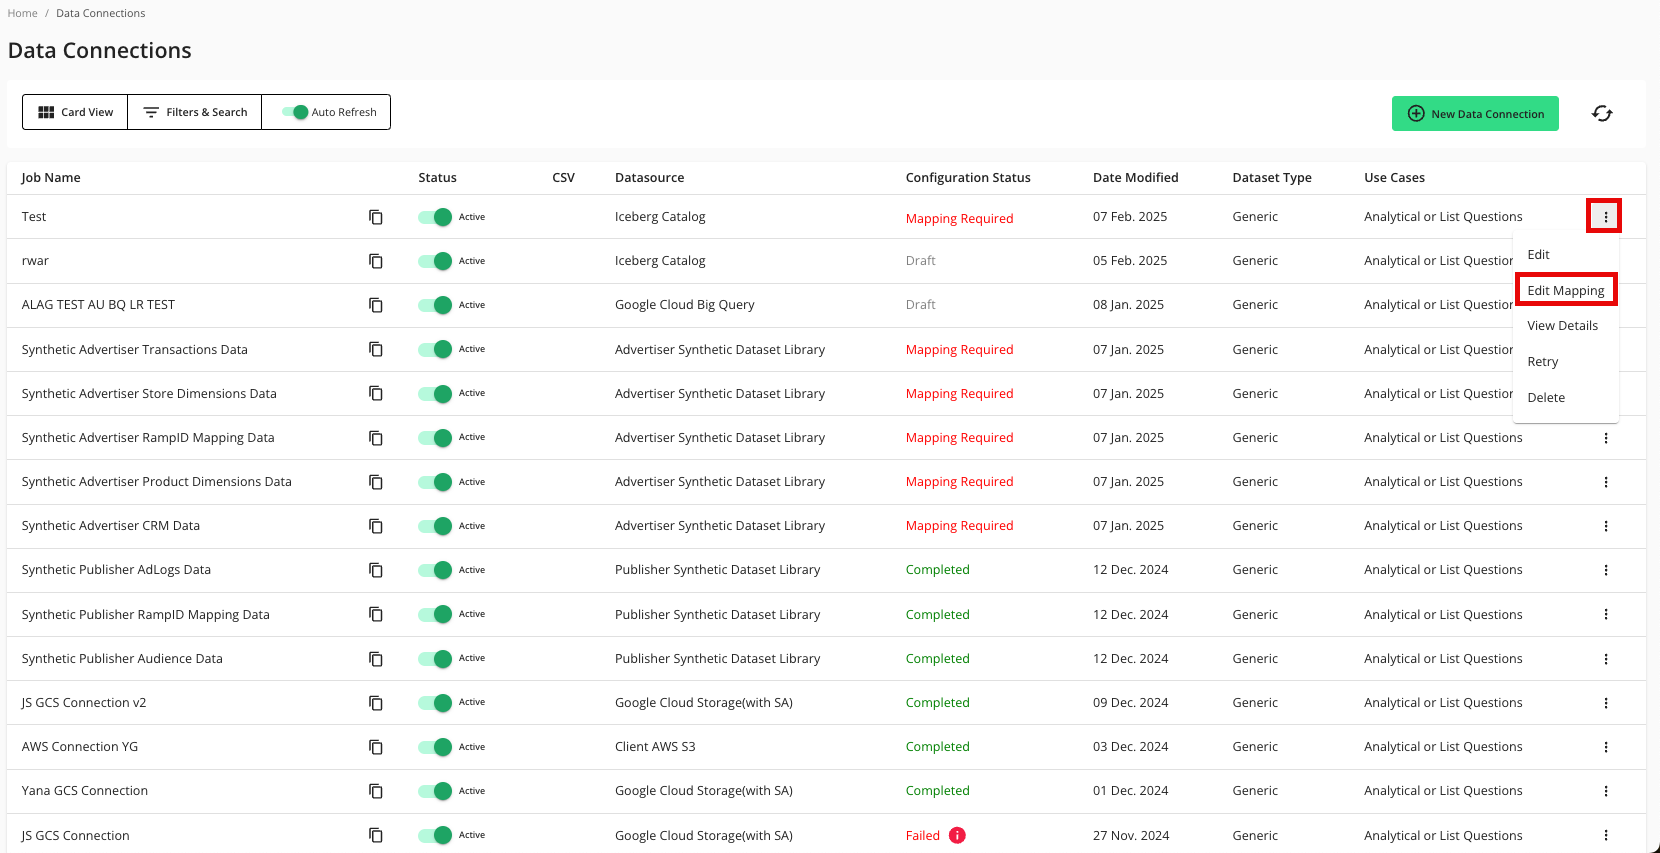
All configured data connections can be seen on the Data Connections page.
When a connection is initially configured, it will show "Verifying Access" as the configuration status. Once the connection is confirmed and the status has changed to "Mapping Required", map the table's fields.

You will receive file processing notifications via email.
Map the Fields
Once the connection is confirmed and the status has changed to "Mapping Required", map the table's fields and add metadata:
From the row for the newly-created data connection, click the More Options menu (the three dots) and then click .
The Map Fields screen opens and the file column names auto-populate.
For any columns that you do not want to be queryable, slide the Include toggle to the left.
Click .
The Add Metadata screen opens.
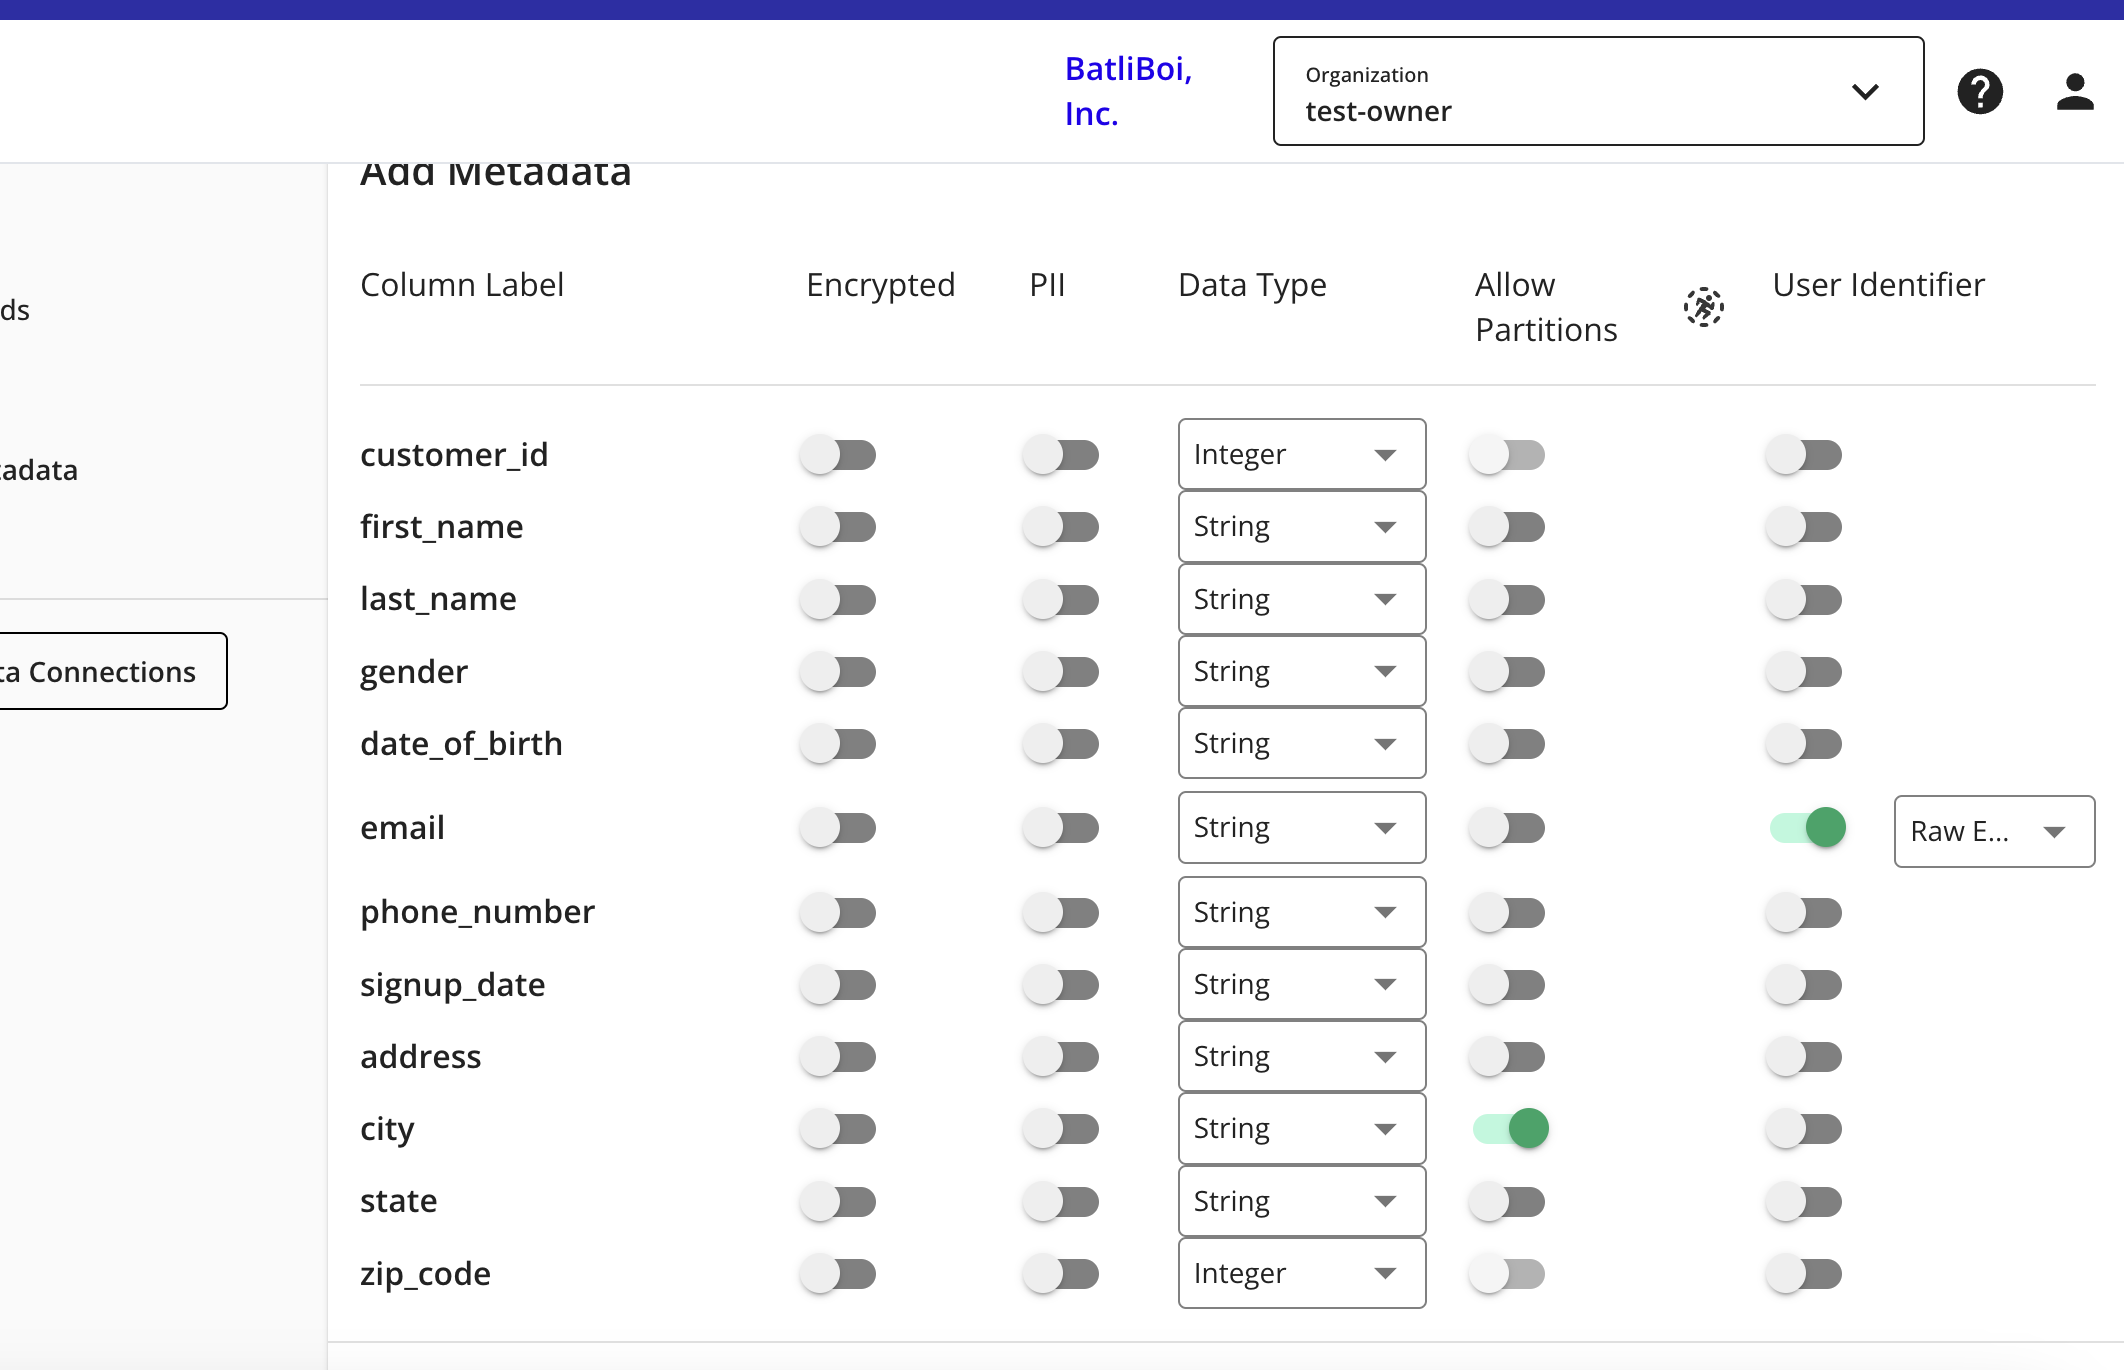
For any column that contains PII data, slide the PII toggle to the right.
Select the data type for each column.
For columns that you want to partition, slide the Allow Partitions toggle to the right.
If a column contains PII, slide the User Identifiers toggle to the right and then select the user identifier that defines the PII data.
Click .
Your data connection configuration is now complete and the status changes to "Completed".