Export Results to a Cloud
You can set up an export of results to an outside cloud location, like an AWS S3 location or GCS. Once you set up an export, all future question run results will be exported. See the articles in this section for specific configuration steps by cloud platform.
Note
For exports of analytical results in Hybrid clean rooms to AWS, GCS, or BigQuery, you can also export previous runs that are less than 90 days old. For more information, see the “Export Older Runs of Analytical Results” section below.
Not all clean room types support exports and whether exports are supported depends on the export location. For those clean room types that support exports, some support both analytical results and list results, while others only support analytical results. For detailed information, see the "Supported Clean Room Types" section below.
Analytical results are exported as CSV files. Once a _SUCCESS file appears, the export job has been completed.
By default, list results are exported as Parquet files, but you can request that list results be exported as CSV files for your account by contacting your LiveRamp representative.
Supported Clean Room Types
For more information on the clean room types supported for each export destination connection, see the table below.
Export Destination Connection Type | Credential Type | Export Timing | Clean Room Type | ||||||
Hybrid | Confidential Computing | Snowflake | Google Cloud BigQuery | Amazon Web Services | Databricks | Industry Clean Rooms (ADH, AMC, and FAA) | |||
S3 IAM Role Export | AWS S3 Credential | Export completed at runtime | Both analytical and list results (including historical analytical results) | Both analytical and list results | Not supported | Not Supported | Not Supported | Not Supported | Not supported |
GCS Export | Google Service Account | Export completed at runtime | Both analytical and list results (including historical analytical results) | Both analytical and list results | Not Supported | Not Supported | Not Supported | Not Supported | Not supported |
Azure Export | Azure AD Service Principal | Export completed at runtime | Both analytical and list results | Both analytical and list results | Not supported | Not supported | Not supported | Not supported | Not supported |
S3 Export | AWS IAM User Credentials | Export completed in batch (AM UTC) | Not supported | Not supported | Both Analytical and List Results | Not Supported | Not Supported | Not Supported | Only analytical results |
BigQuery Export | Google Service Account | Export completed in batch (AM UTC) | Both analytical and list results (including historical analytical results) | Only analytical results | Only analytical results | Not Supported | Not Supported | Not Supported | Only analytical results |
Note
LinkedIn clean rooms have the same export functionality as Confidential Computing clean rooms.
Check with your LiveRamp representative for information on generally available features relevant to your particular collaborations. Export options will vary by pattern, collaboration, permissions, and cloud.
LiveRamp does not have access to the results from Google Cloud BigQuery, Amazon Web Services, and Databricks clean rooms, so results cannot be exported from those clean room types.
LiveRamp does not have access to the results from Snowflake clean rooms, but those results can be exported to AWS S3 or BigQuery by sharing the question results with LiveRamp. For more information, see "Export Results to an AWS S3 Bucket" or "Export Analytical Results to BigQuery".
Once an export has been configured for a particular question, all future question runs will be exported. Previous question runs for analytic questions in a Hybrid clean room that are less than 90 days old can be exported (for more information, see the "Export Older Runs of Analytical Results") section below. However, previous question runs for list questions and for other clean room types cannot be exported.
Export File Names
The file names used for your exports can vary, depending on whether you’ve been enabled to use custom file names for exports or whether you use the default file names.
Default File Names
When you export results without specifying a custom file name, Clean Room uses Spark-style partition file names, depending on the type of question:
Analytical questions (CSV): part-#####-{id}.csv (Example: part-00000-081a5e9f-af71-4960-aeaa-3c0b8524858e-c000.csv)
List questions (Parquet): part-#####-{id}.snappy.parquet
Depending on the size of the results, you might see multiple part- files written into the target folder.
Custom File Names
If your organization has been enabled to use custom file names for exports, you can specify a custom file name to override the default "part-#####-{id}" when creating the new export:
The value you provide is used as a literal prefix.
Clean Room appends a timestamp and file extension to that prefix.
For example, when exporting results with a custom file name, the output file is sent to the path “s3://{base-folder}/{custom-path}/{crq-path}/” and follows these patterns, depending on the export type:
{custom-prefix}_{yyyy-mm-dd_hh-mm-ss}.parquet
{custom-prefix}_{yyyy-mm-dd_hh-mm-ss}.csv
Note
The custom file name field does not support macros or variables. If you enter values such as {date}, {advertiser}, or {segment}, those characters are included literally in the file name.
We recommend using a custom file name that will allow you to trace the export back to its originating question, such as including the clean room question ID in the custom file name.
To enable the ability to use custom file names for your exports, contact your LiveRamp representative.
Files Delivered
In addition to the export files themselves and _SUCCESS file (a standard job-completion marker), the following files are included in the export, depending on the situation:
Analytical exports (Hybrid/TEE clean rooms to S3 or GCS): Clean Room writes a metadata.json file alongside the analytical export files. This file contains column names, data types, and encryption details. If you did not specify a folder when you configured the export, this file might appear in a folder with an effectively empty name in your cloud browser.
Clean Compute on Spark questions (Hybrid and Confidential Computing clean rooms): If an export is configured before the run starts, the export includes all output files generated by the question, not just the report file. Depending on the question output, the export can include the following files:
Note
The ability to export additional files is not available by default. Contact your LiveRamp representative to enable this.
Metadata.json: This file contains column names, data types, and encryption details.
The report CSV file.
Additional output files generated by the question, such as PDF, JSON, or PKL files.
Analytical exports (non-hybrid clean rooms to S3): In addition to the main CSV in "/data", the export includes the following files:
Meta.csv: This file contains high-level question and run metadata.
Headers.csv: This file contains the column headers for the CSV data file.
Metadata.json: This file contains column names, data types, and encryption details.
List exports (Parquet): There are no metadata.json, meta.csv,, or headers.csv files included for list exports, even when you use a custom file name.
Job markers and internal folders: In some export paths (especially when you use a custom file name for Parquet) you will also see internal engine folders (for example, _magic) and the original part- Parquet files in a temporary or intermediate folder.
These files and folders do not contain additional business data and can be safely ignored or deleted in your own environment once you have consumed the consolidated export file.
Using a Custom File Name for Parquet Exports
When you export list results as a Parquet file and set a custom file name, Clean Room writes a single consolidated Parquet file named {custom-prefix}_{yyyy-mm-dd_hh-mm-ss}.parquet at your configured export path.
It also writes the original partitioned Parquet part- files and associated markers (such as _SUCCESS and internal folders) under a temporary or intermediate path.
This means you may see both of the following:
A consolidated Parquet file with your custom name
Multiple part- files representing the same results
After the export is delivered to your cloud location, LiveRamp does not modify or remove any of these files. You can safely delete the partitioned part- files in your own environment if your workflows only rely on the consolidated file.
Advanced Export Options
Advanced export options such as custom path, custom file name, and CSV export for lists were not designed to be used in all combinations. Using them individually or in unexpected combinations may lead to confusing or inconsistent file layouts (for example, many files written into a single folder or overwritten file names).
If you need a highly customized file structure, we recommend using the default export configuration and handling renaming or restructuring as part of your downstream ETL processes.
Overall Steps to Export Results
Perform the following overall steps to set up an export of results to an outside cloud location:
Note
These steps vary depending on the clean room type and export location. See the individual articles in this section for specific instructions.
For information on performing these steps, see the sections below or the individual articles in this section.
Enable the Clean Room for Exports
Before setting up an export, the clean room owner must enable exports for the selected source clean room (if not already done during clean room creation):
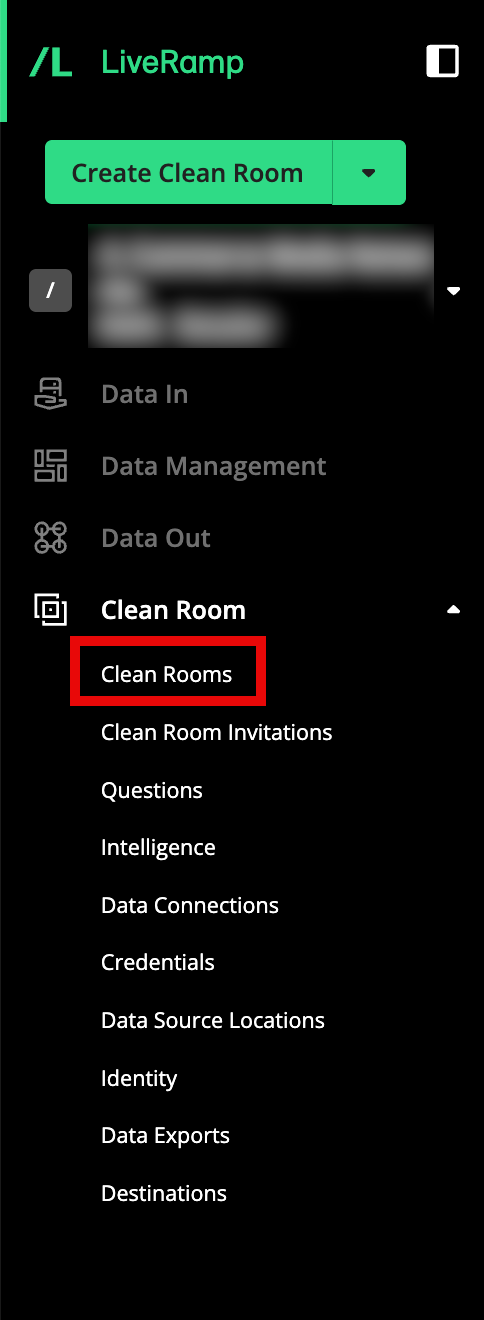
From the navigation menu, select Clean Room → Clean Rooms to open the Clean Rooms page.
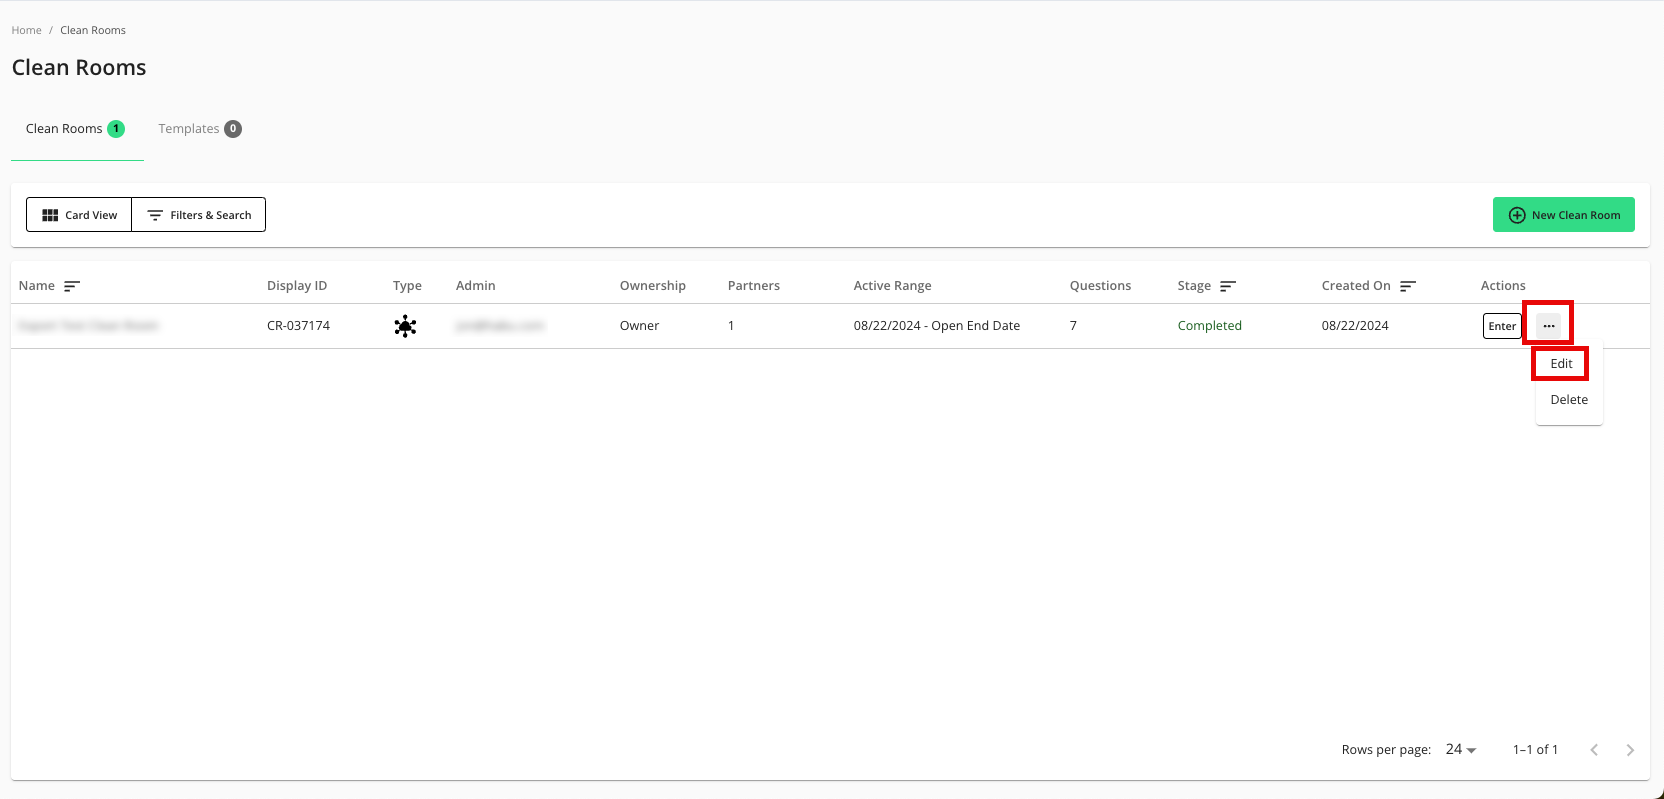
In the row for the clean room you would like to export from, click the More Options menu (the three dots), and then select Edit.
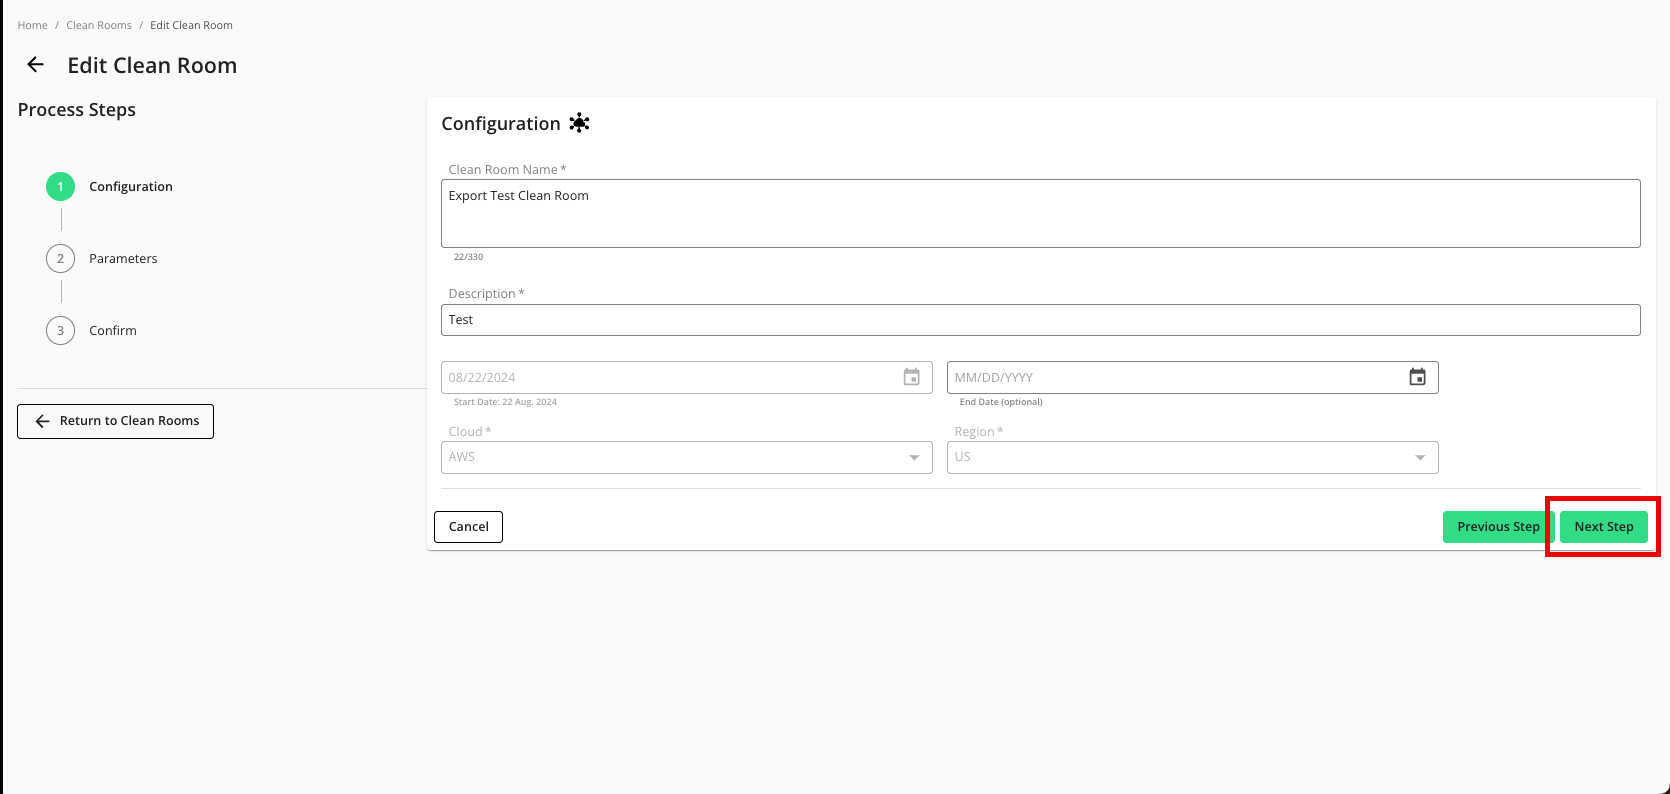
From the Configuration step, click .
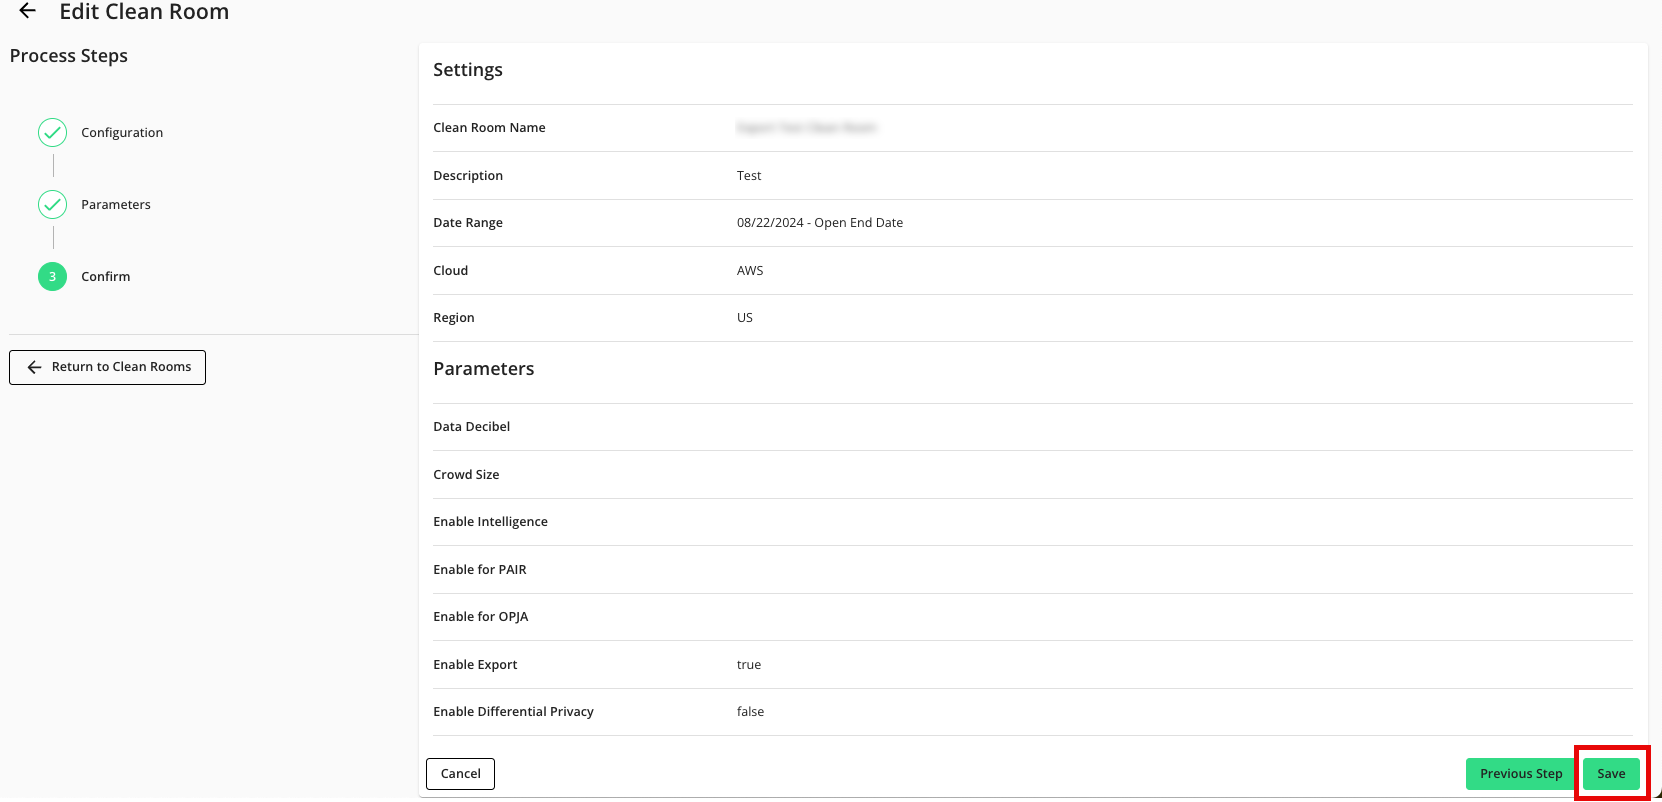
From the Parameters step, adjust any data control parameters as needed and then slide the Enable Export toggle to the right.
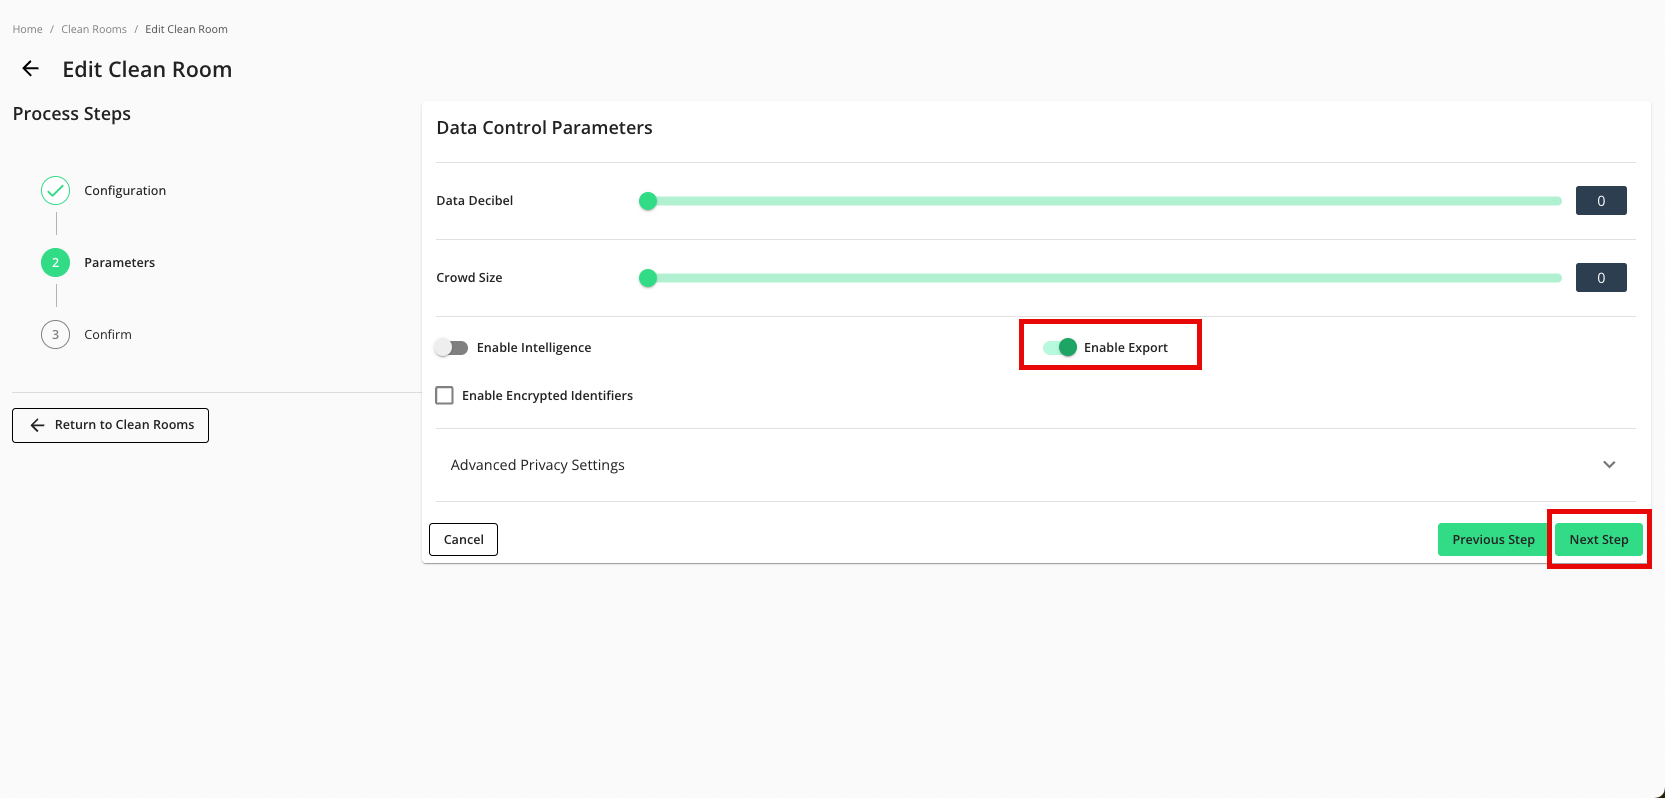
Click .
Verify that your data control parameters are correct and then click .
Add the Credentials
After enabling the clean room for exports, the clean room owner must first add either their own credentials or those of their partner for the destinations they want to export to:
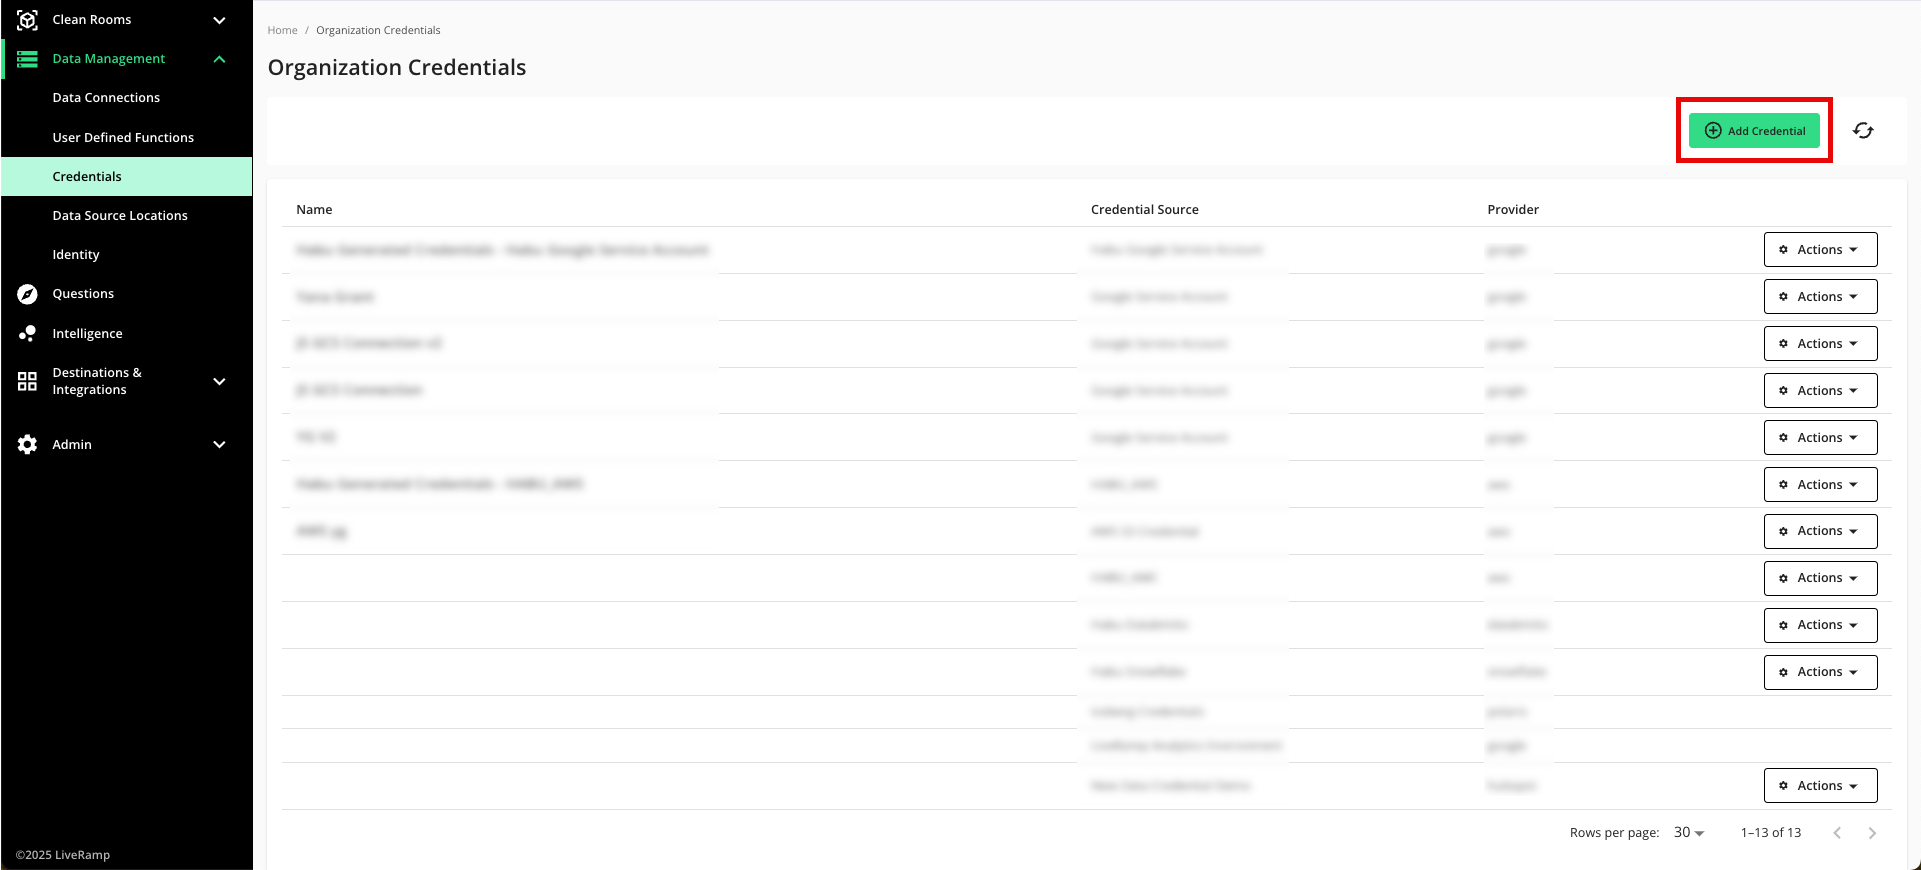
From the navigation menu, select Clean Room → Credentials to open the Credentials page.
Click .
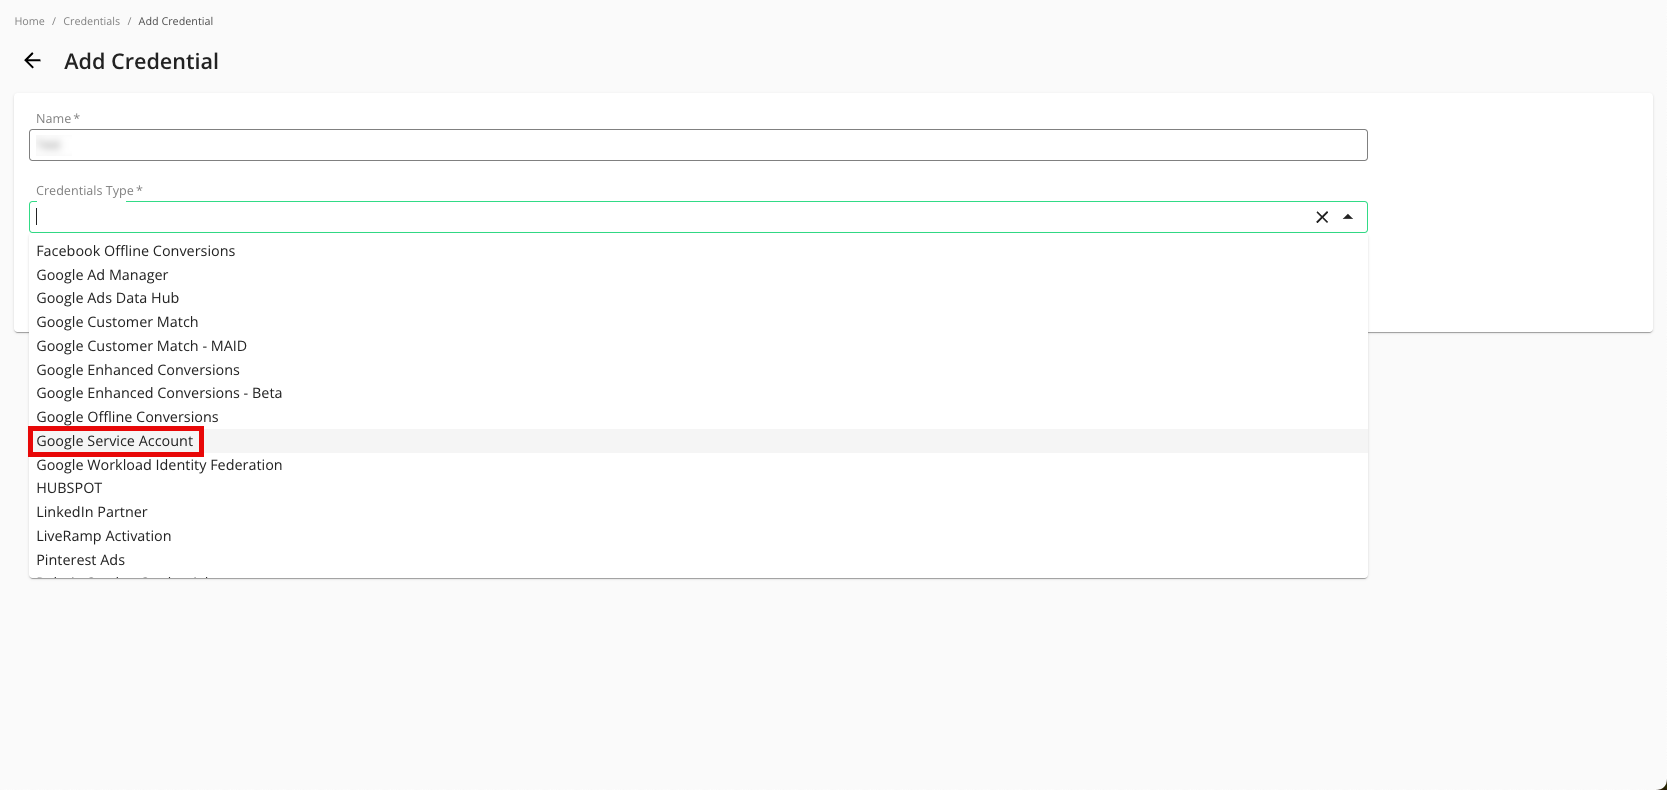
Enter a descriptive name for the credential.
For the Credentials Type, select the appropriate type (Google Service Account example shown - for more information, see the specific articles in this section).
Enter the required information (information varies for each credential type).
Click .
Verify that your credentials have been added to LiveRamp Clean Room (Google Service Account example shown):
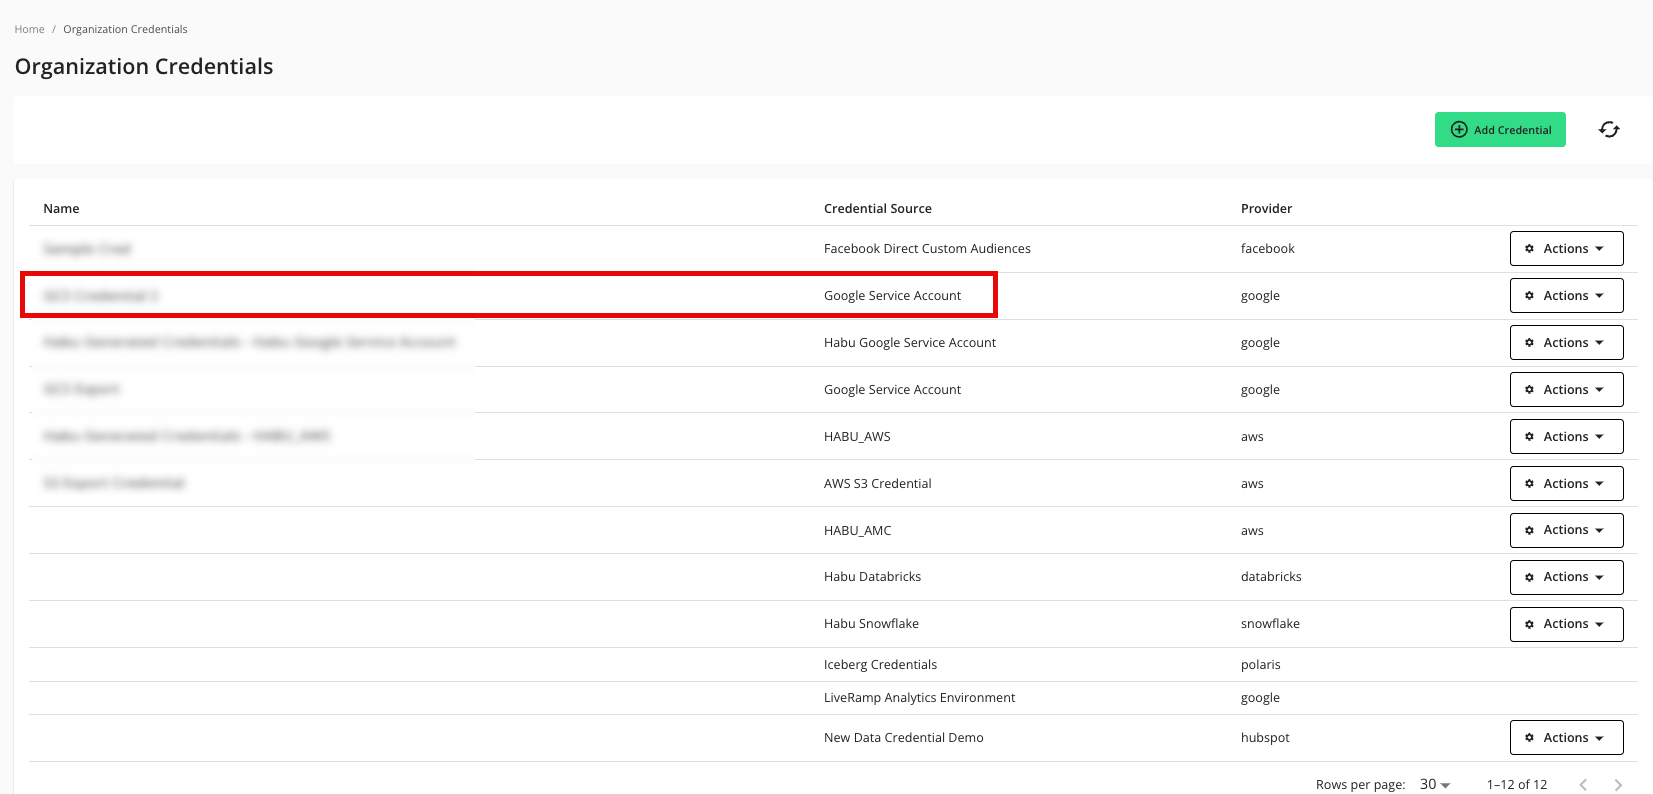
Repeat these steps for any additional credentials you need to create for exports.
Create a Destination Connection
An export destination connection is used to connect your results to your export location. After you've added the appropriate credentials, create an export destination connection for your desired cloud type.
Destination connections are created at the organization level and can be configured for any clean room from there.
Note
Destination connection credentials can be configured on the Organization Credentials page before configuring the destination itself or they can be configured as part of the destination connection creation flow as shown below.
To create a new destination connection:
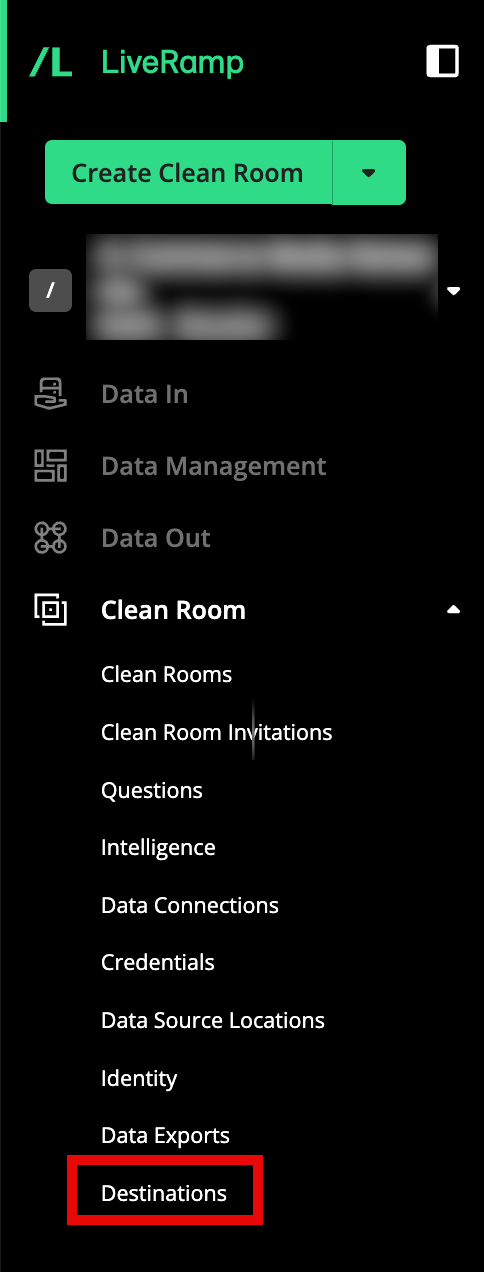
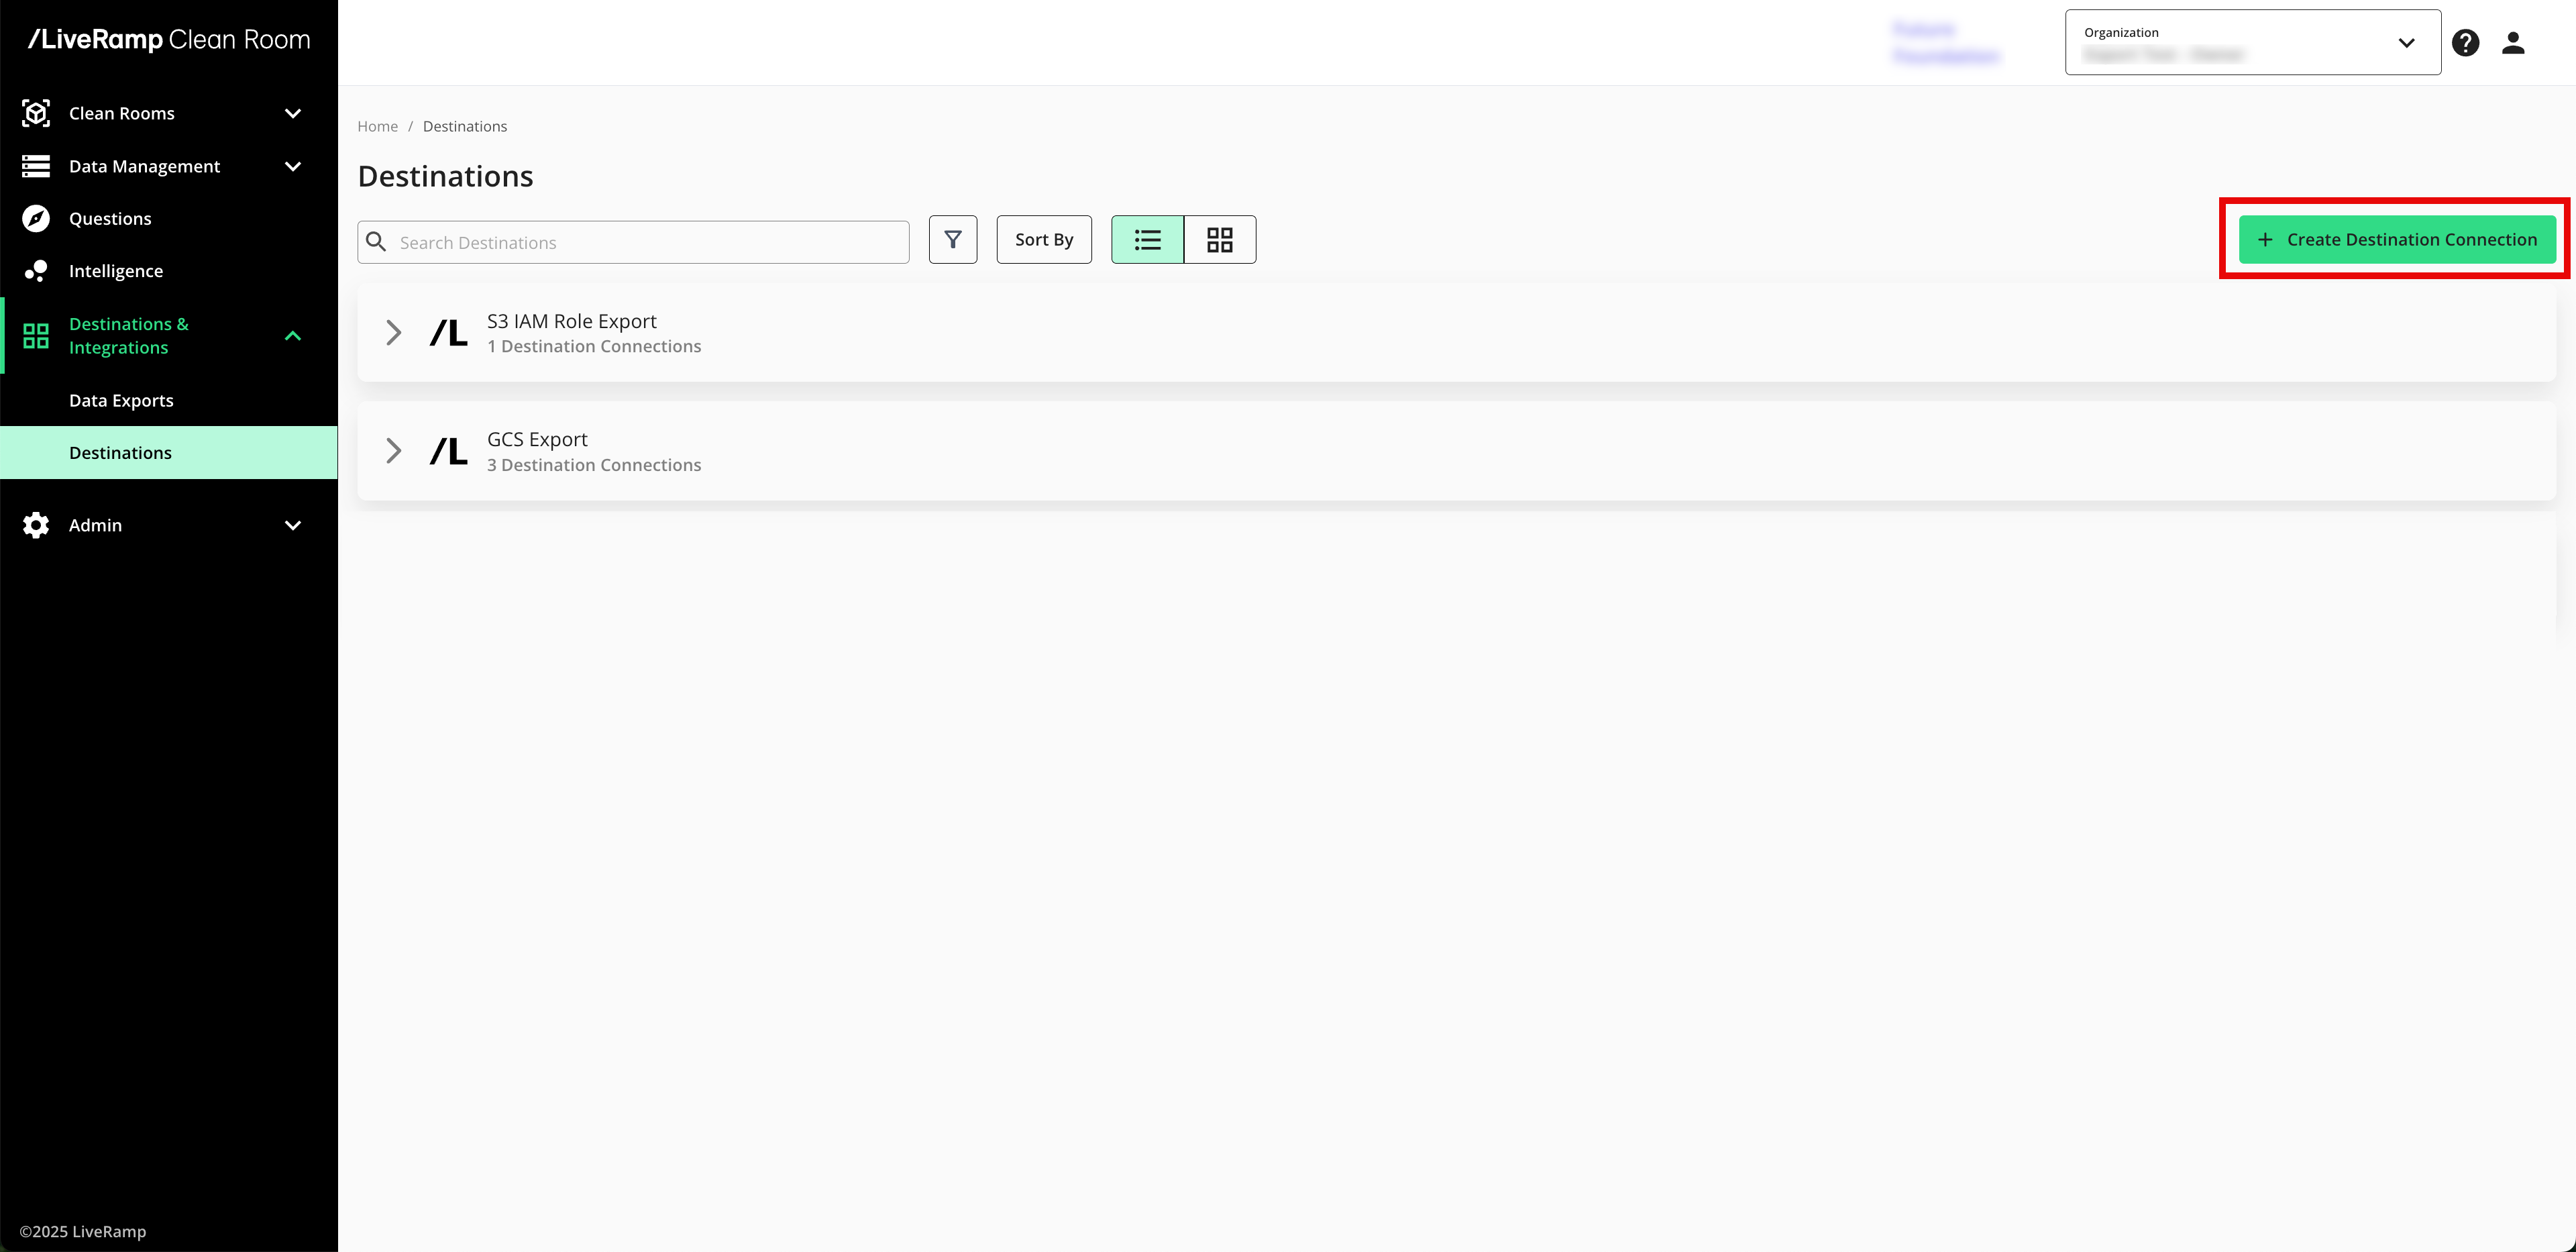
From the navigation menu, select Clean Room → Destinations to open the Destinations page.
Click .
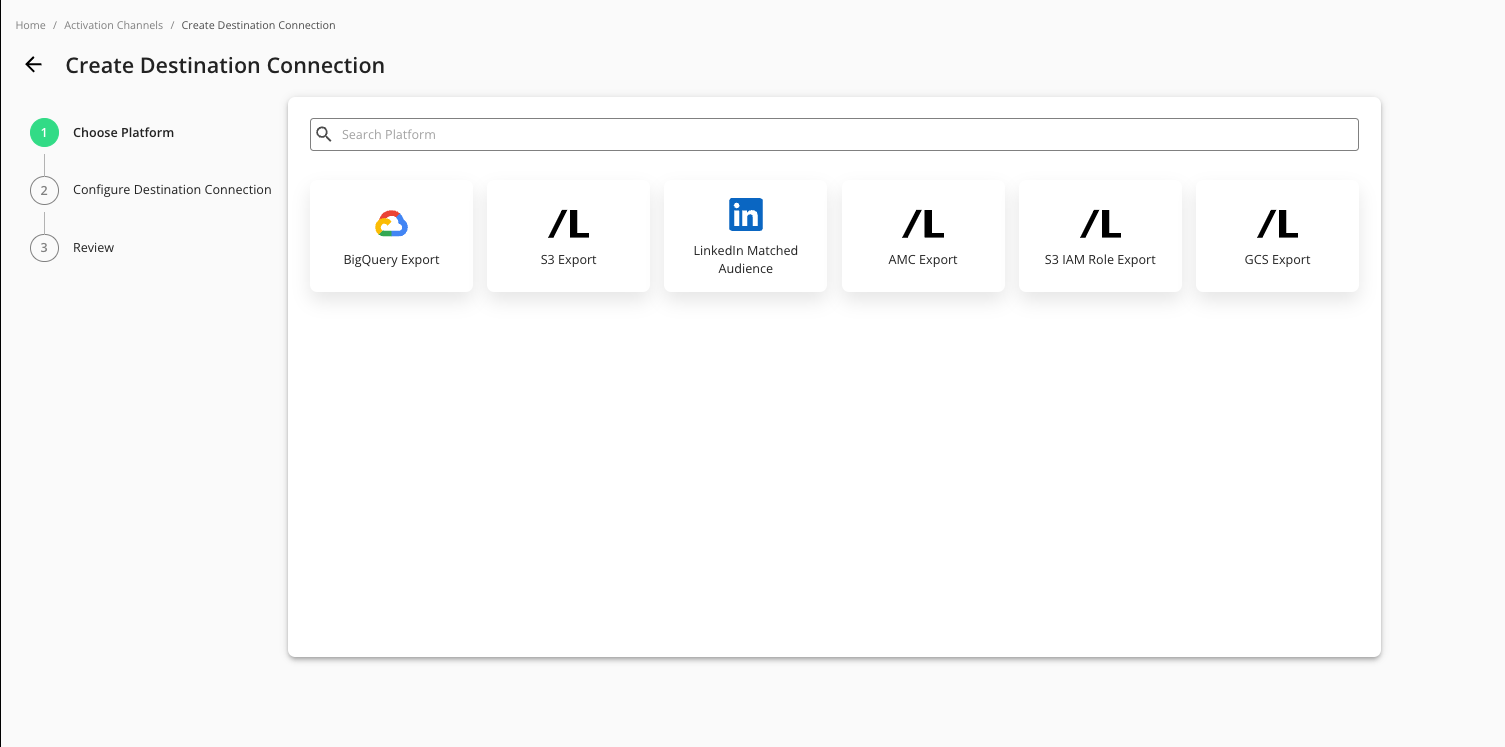
Select the platform you want to configure your account for.
Enter a descriptive name for the destination connection so that you can easily identify individual connections for a given platform.
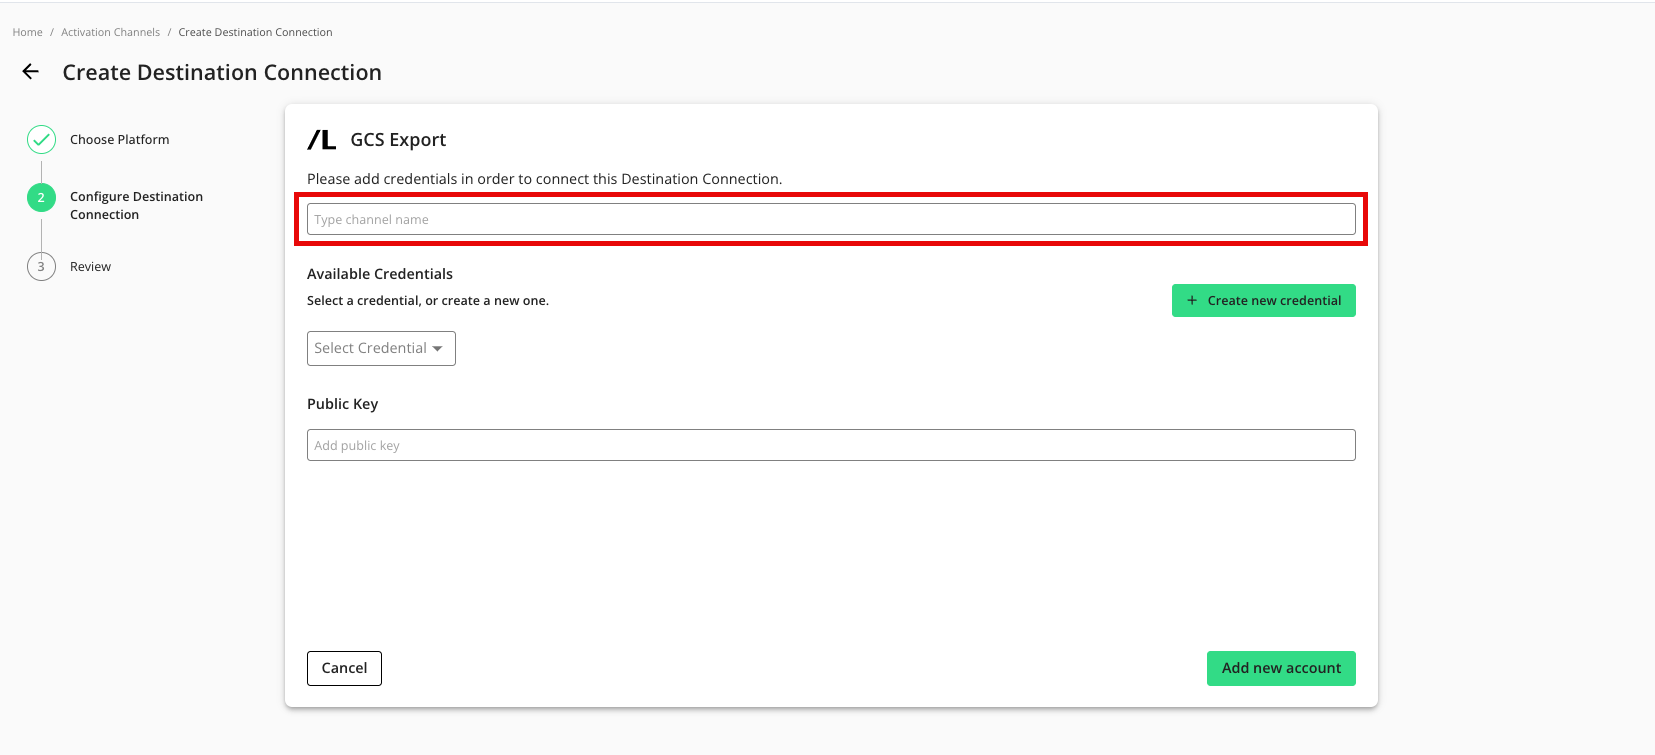
To use a preconfigured credential, select the credential from the Available Credentials dropdown and then skip the next step.
To create a new credential (if you are not selecting a pre-configured credential):
Click .
Enter a name for the new credential.
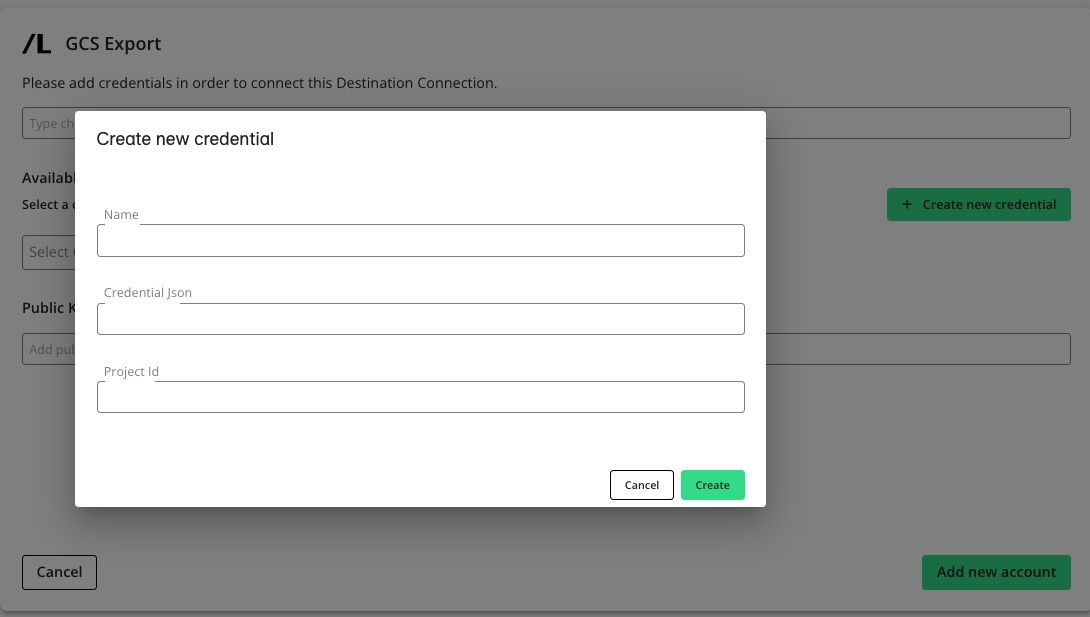
Provide the requested account-level information.
Note
When creating a new credential, you provide the requested information in order for LiveRamp Clean Room to configure a connection to a specific partner account. Credential requirements differ by platform. Credentials are saved and accessible on the Organization Credentials page (select Clean Room → Credentials from the navigation menu).
Click .
Select the new credential from the Available Credentials dropdown list.
If you're going to encrypt any fields in the data you export to this destination connection, enter your public key (otherwise, leave this field blank).
Note
Encrypting exports is only supported for exports to AWS, GCS, and Azure.
Click .
Provision a Destination Connection to the Clean Room
Once you've created a destination connection, you can provision that destination connection to the clean room you want to export results from:
Note
In most situations, only the clean room owner can provision export destinations using this method. To give clean room partners the ability to provision destinations that the owner has created, contact your LiveRamp representative.
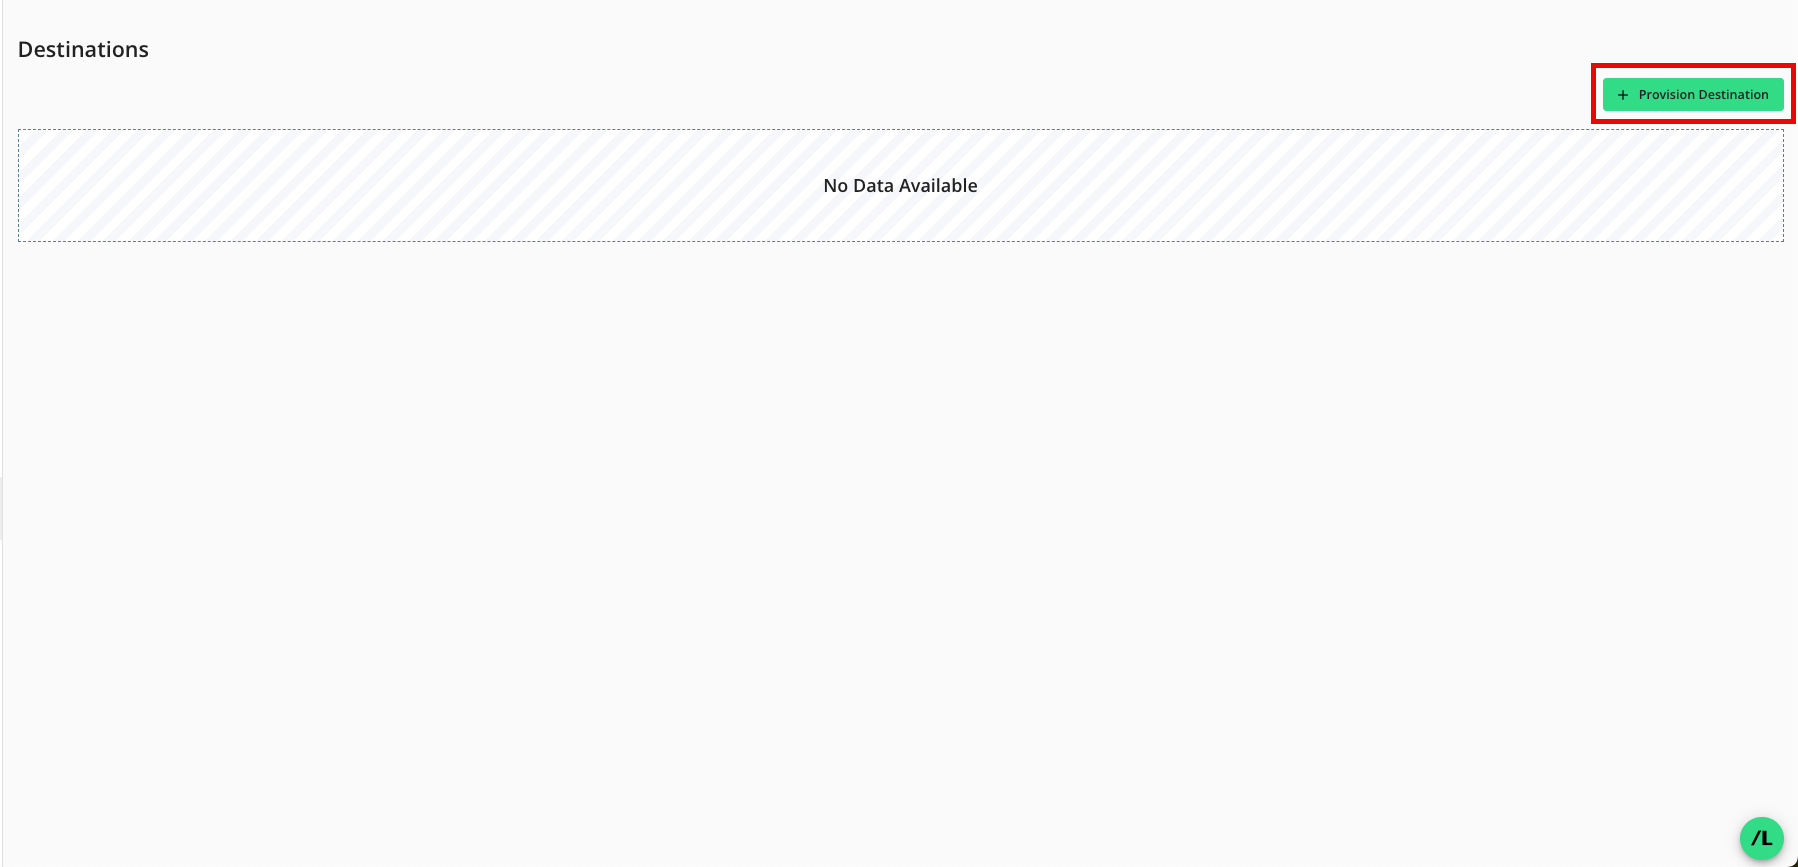
From the Clean Room navigation pane, select Destinations. The Destinations screen shows all destination connections provisioned to the clean room.
Click .
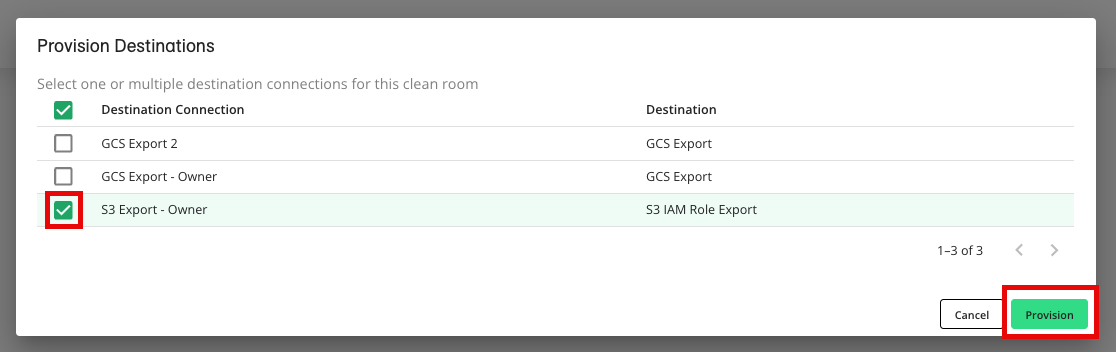
Check the check box for the desired destination connection and then click (AWS S3 example shown).
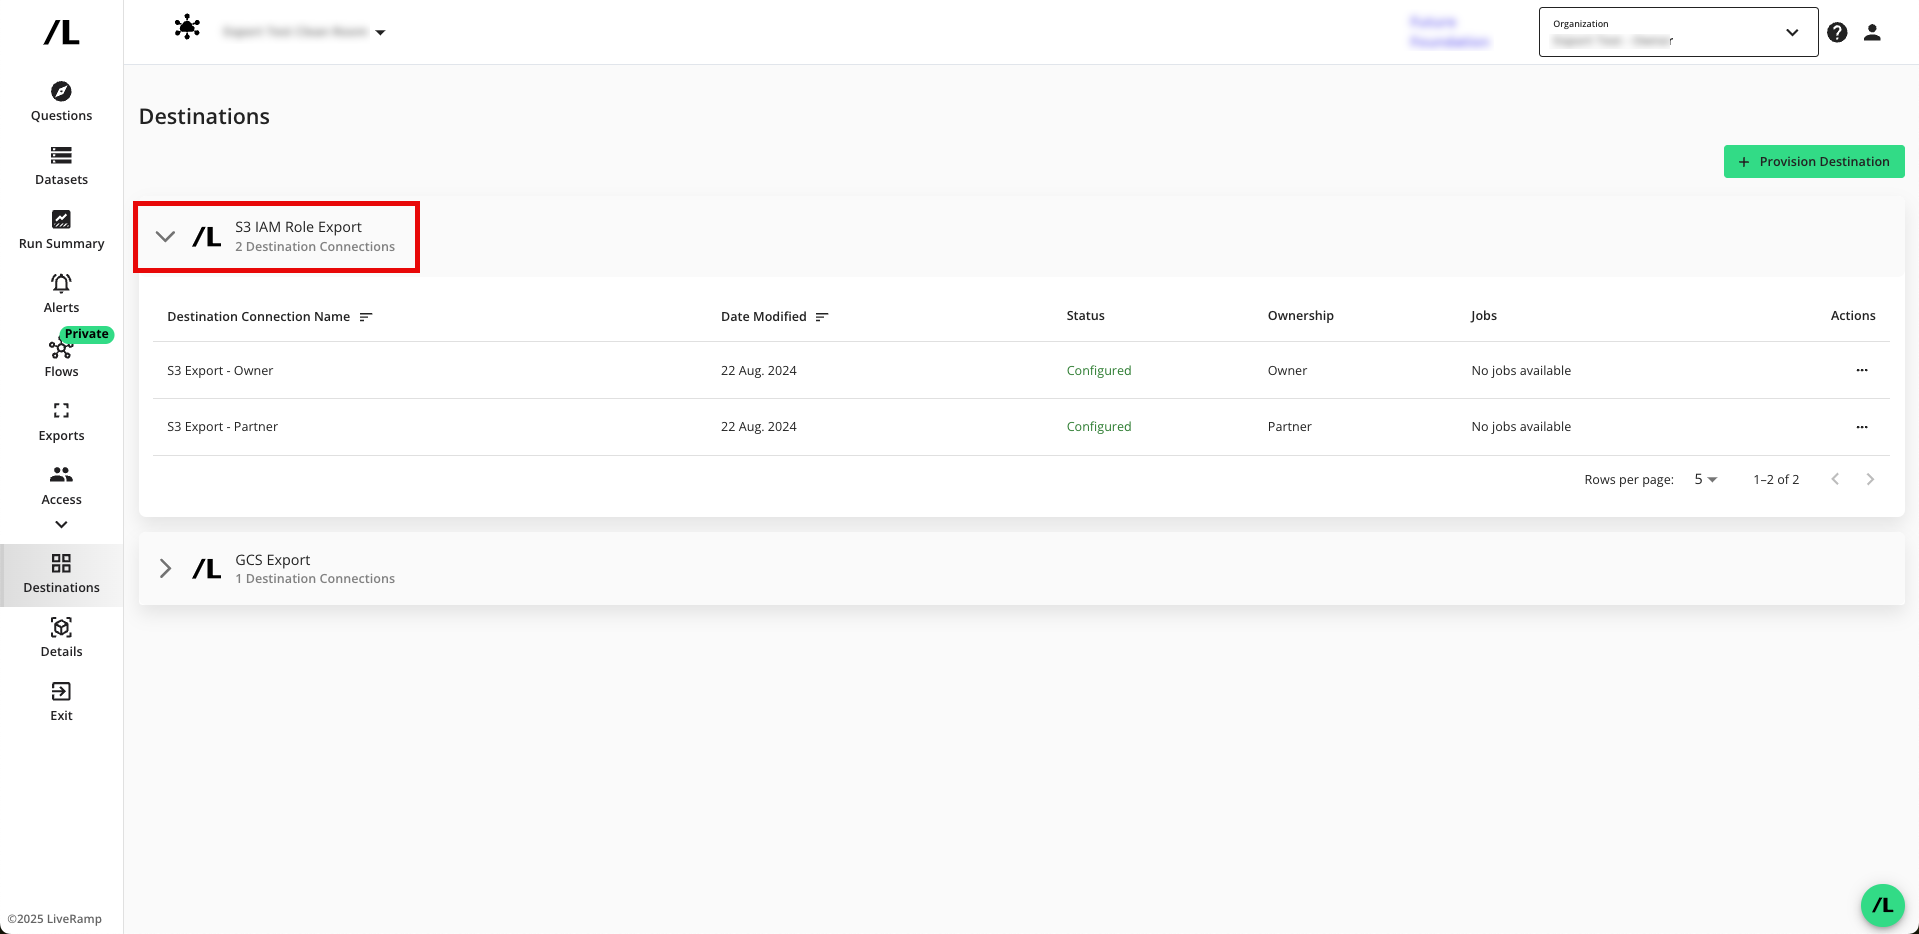
Verify that your destination connection has been added (S3 IAM example shown).
Note
If you're a clean room partner who has been given the ability to request the provisioning of export destinations, the status will show as "Configured (Pending Approval)" until the clean room owner has approved the provisioning of the destination. You can still set up your exports, but the data will not be exported until the request has been approved.
Approve a Destination Provisioning Request
If you're a clean room owner, you're clean room partners can provision export destinations in the clean room, but the status will show as "Configured (Pending Approval)" until you have approved the provisioning of the destination.
To approve the provisioning request:
From the navigation menu, select Clean Room → Clean Rooms to open the Clean Rooms page.
From the Clean Room navigation pane, select Destinations. The Destinations screen shows all destination connections provisioned to the clean room.
Click the caret next to the destination type to view the list of destination connections for that destination type.
For the destinations that show the status as "Configured (Pending Approval)", click .
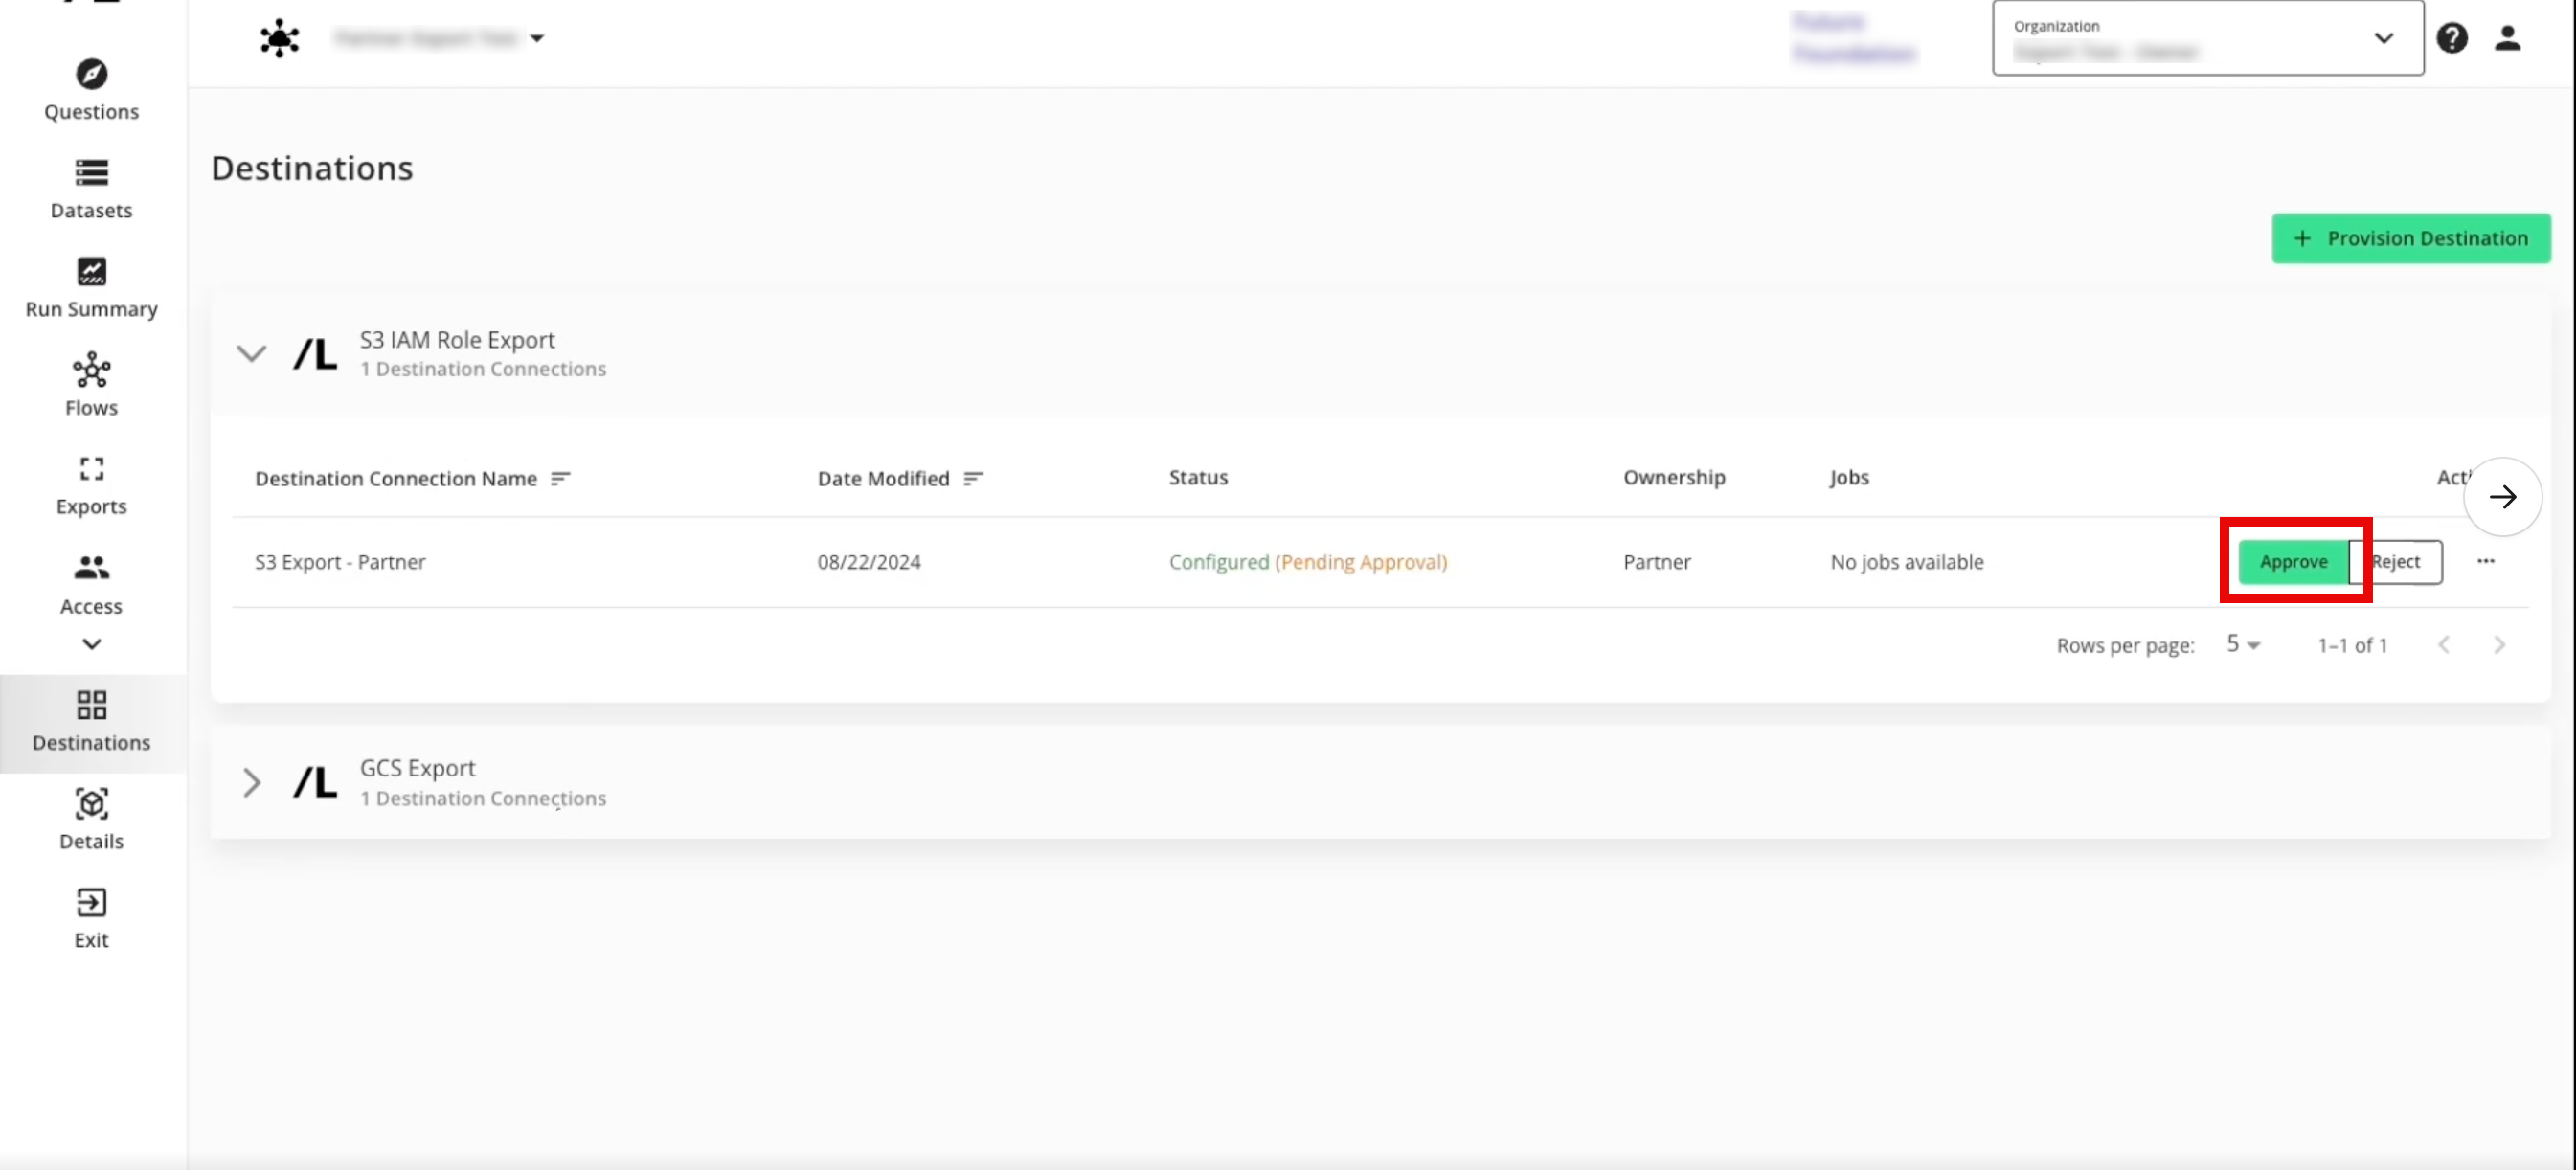
The destination status changes to "Configured".
Create a New Export
After you've provisioned the destination connection to the clean room, create a new export:
From the navigation menu, select Clean Room → Clean Rooms to open the Clean Rooms page.
From the navigation pane, select Clean Rooms → All Clean Rooms and enter a desired clean room.
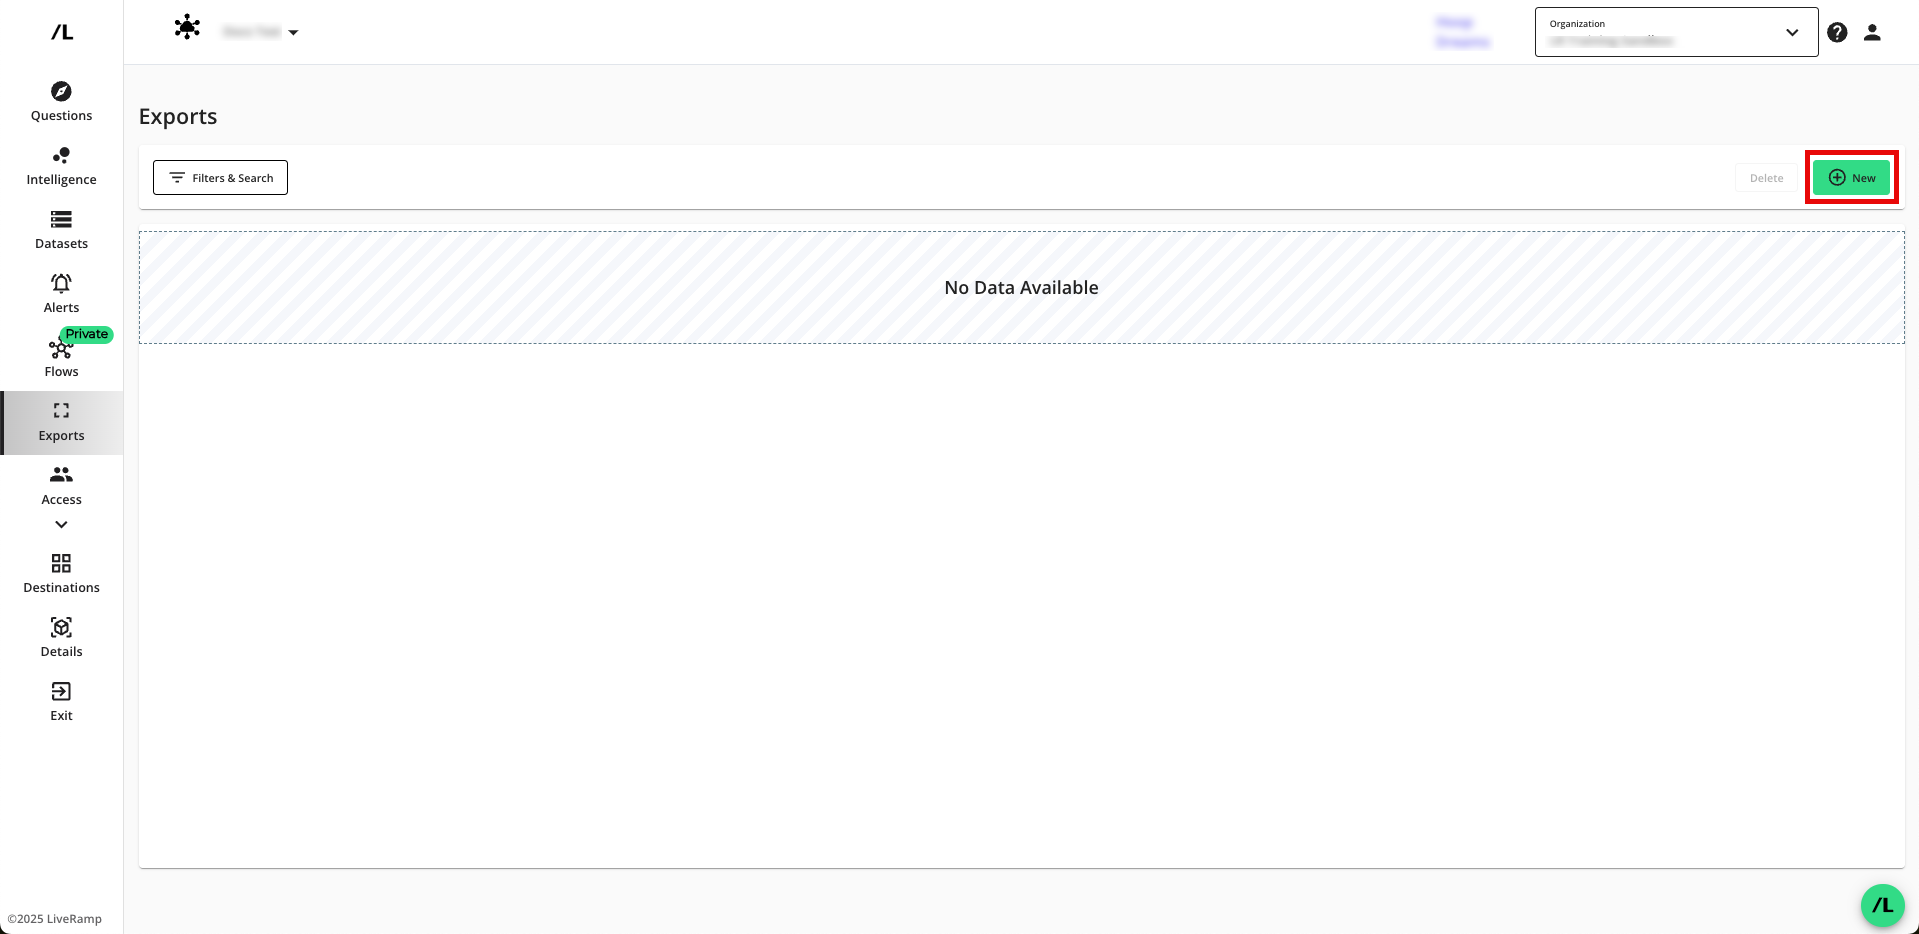
From the Clean Room navigation pane, select Exports.
Click to open the wizard to create a new export.
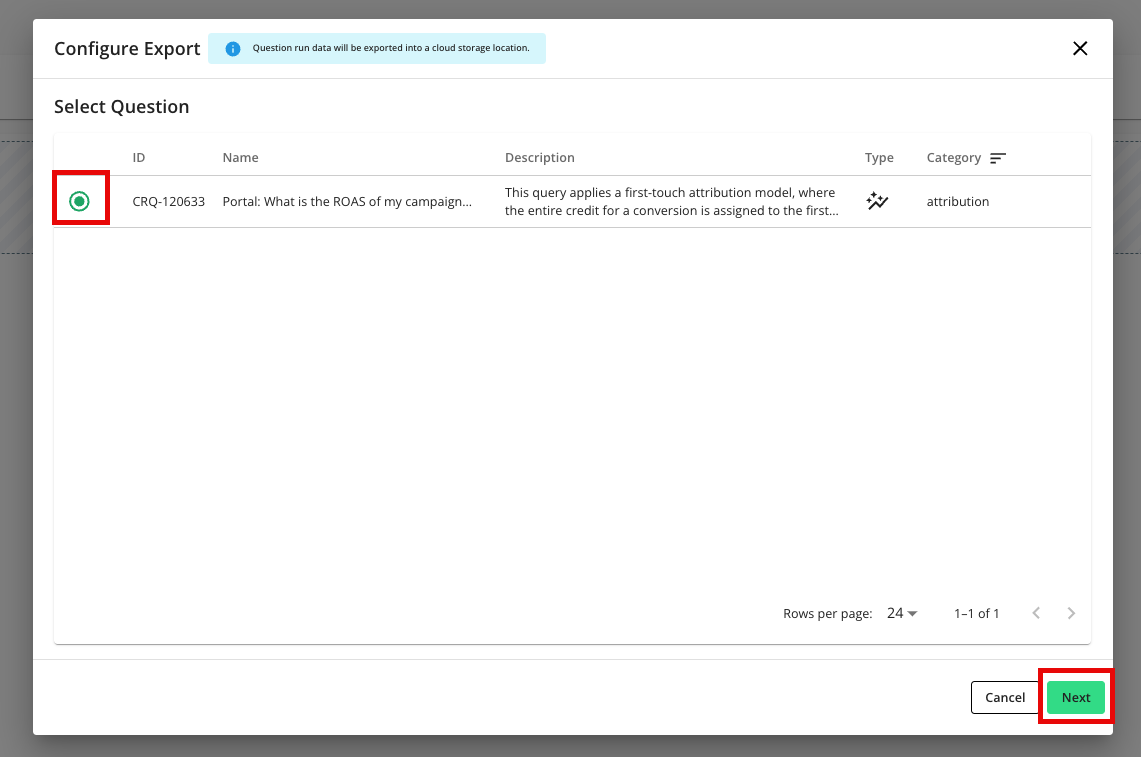
Select the question that you want to export outputs for and then click .
Note
Unless paused, all future run outputs will be exported to the configured export destination connection.
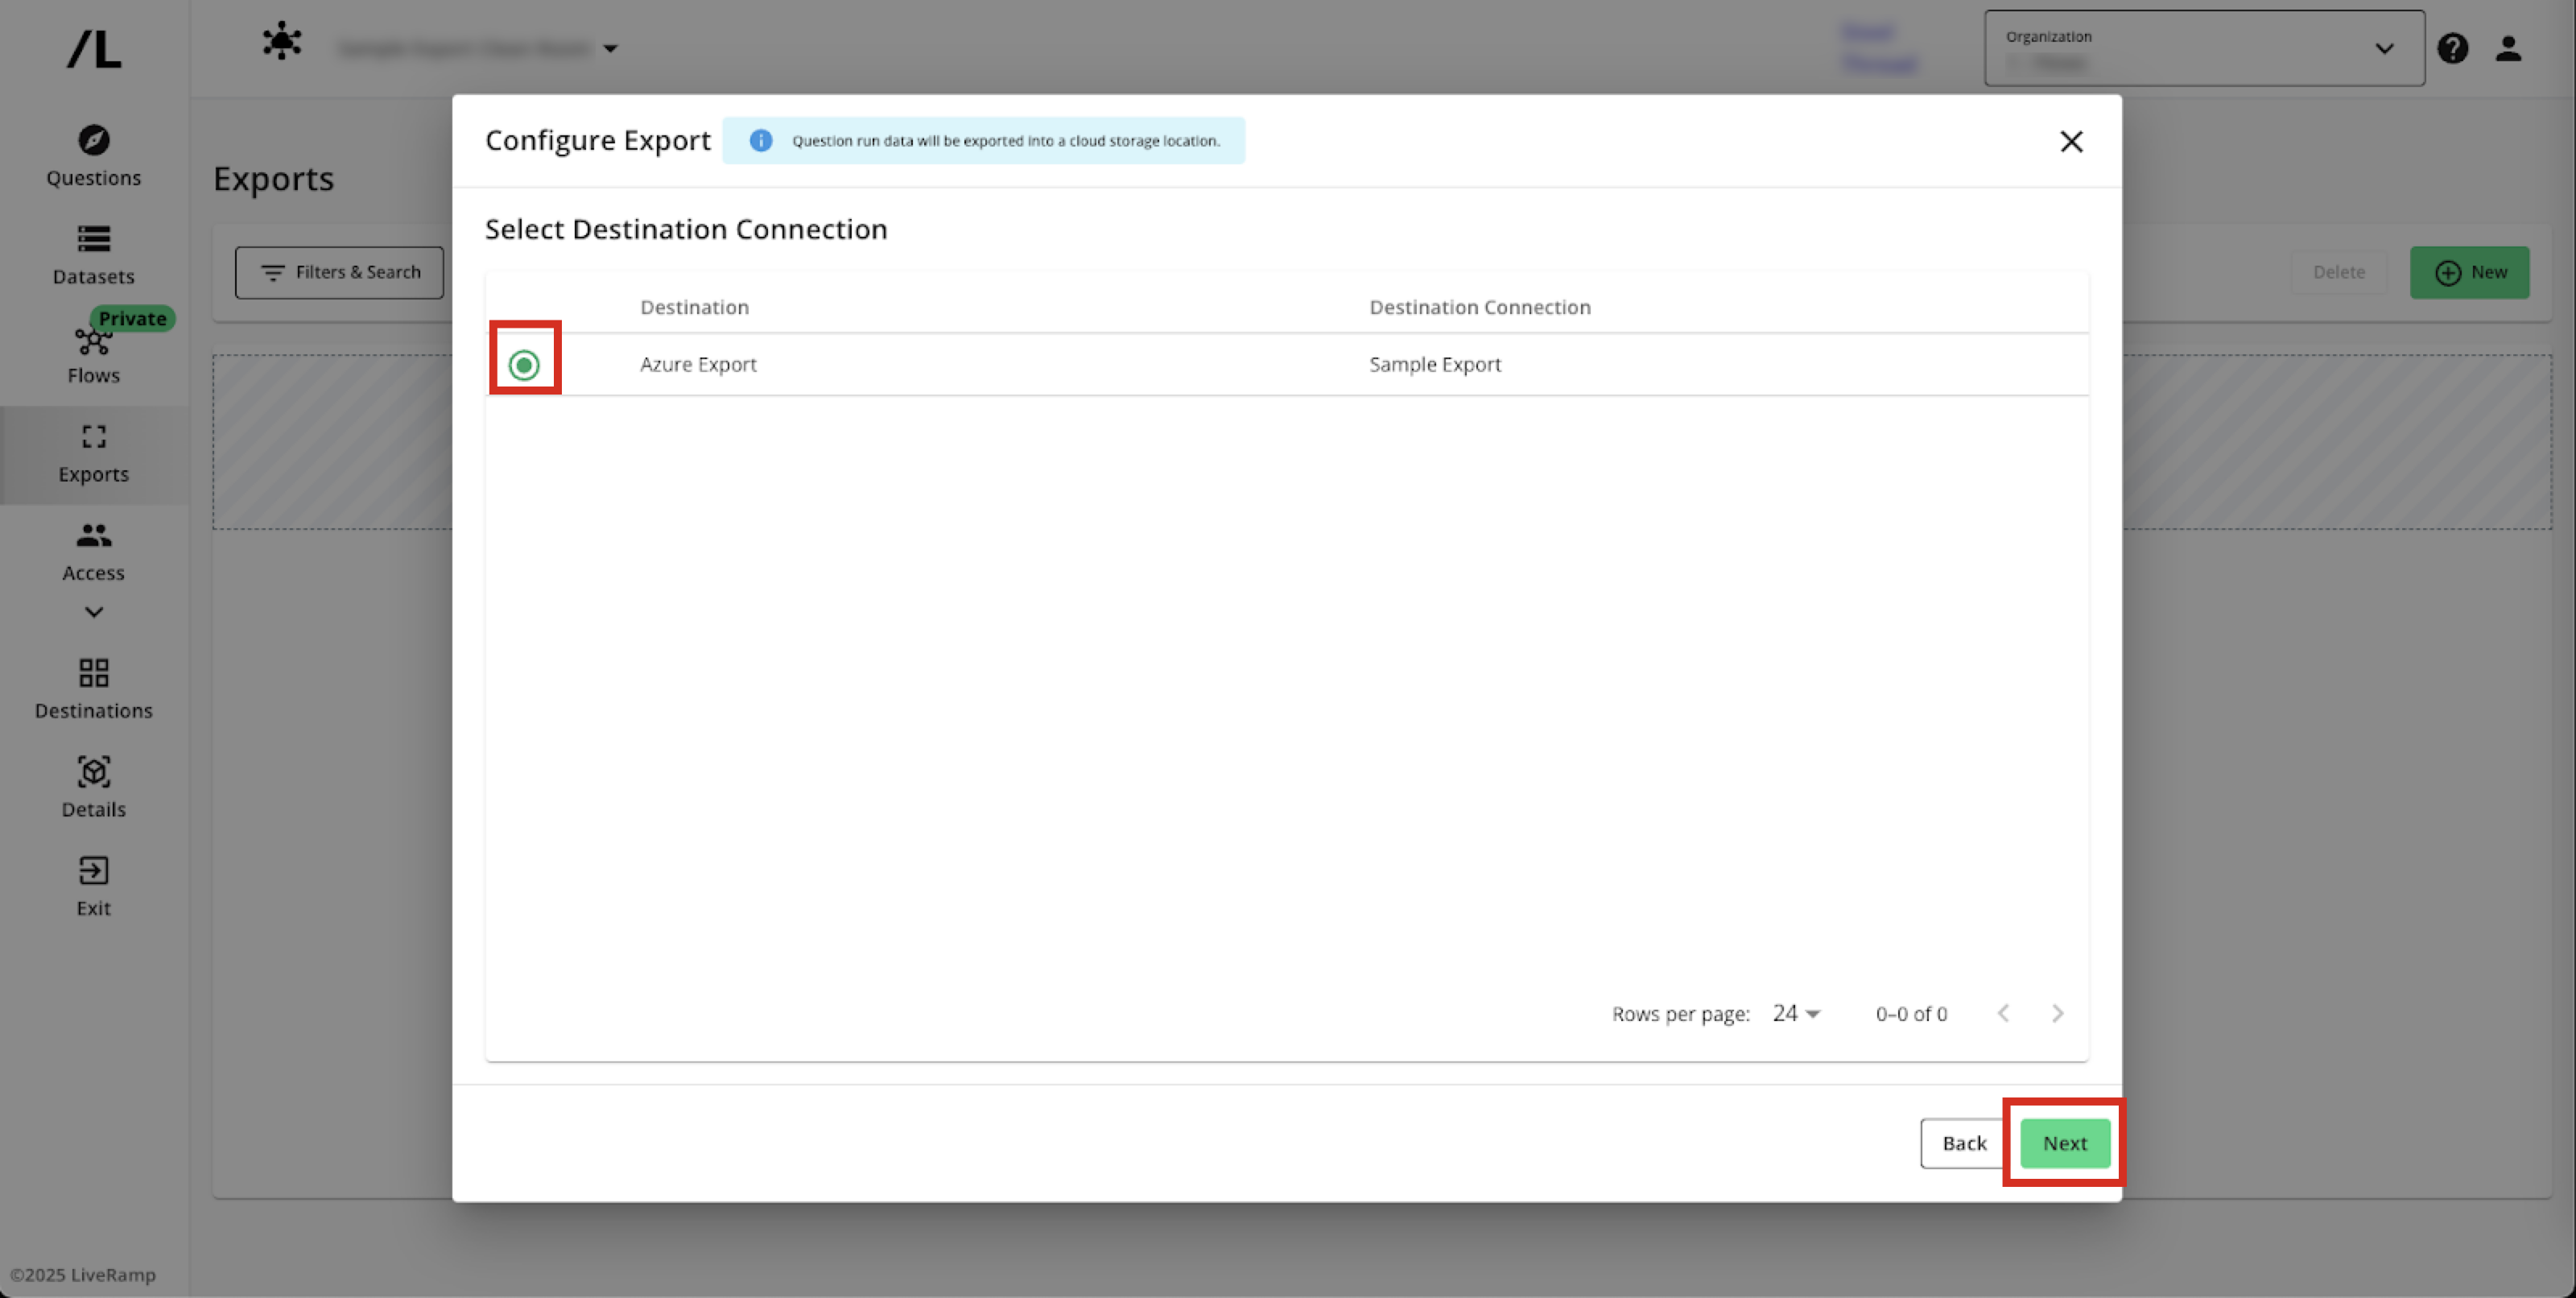
Select the destination connection you want to send run outputs to.
Enter the required information on where you would like the outputs to be exported to (GCS Export example shown).
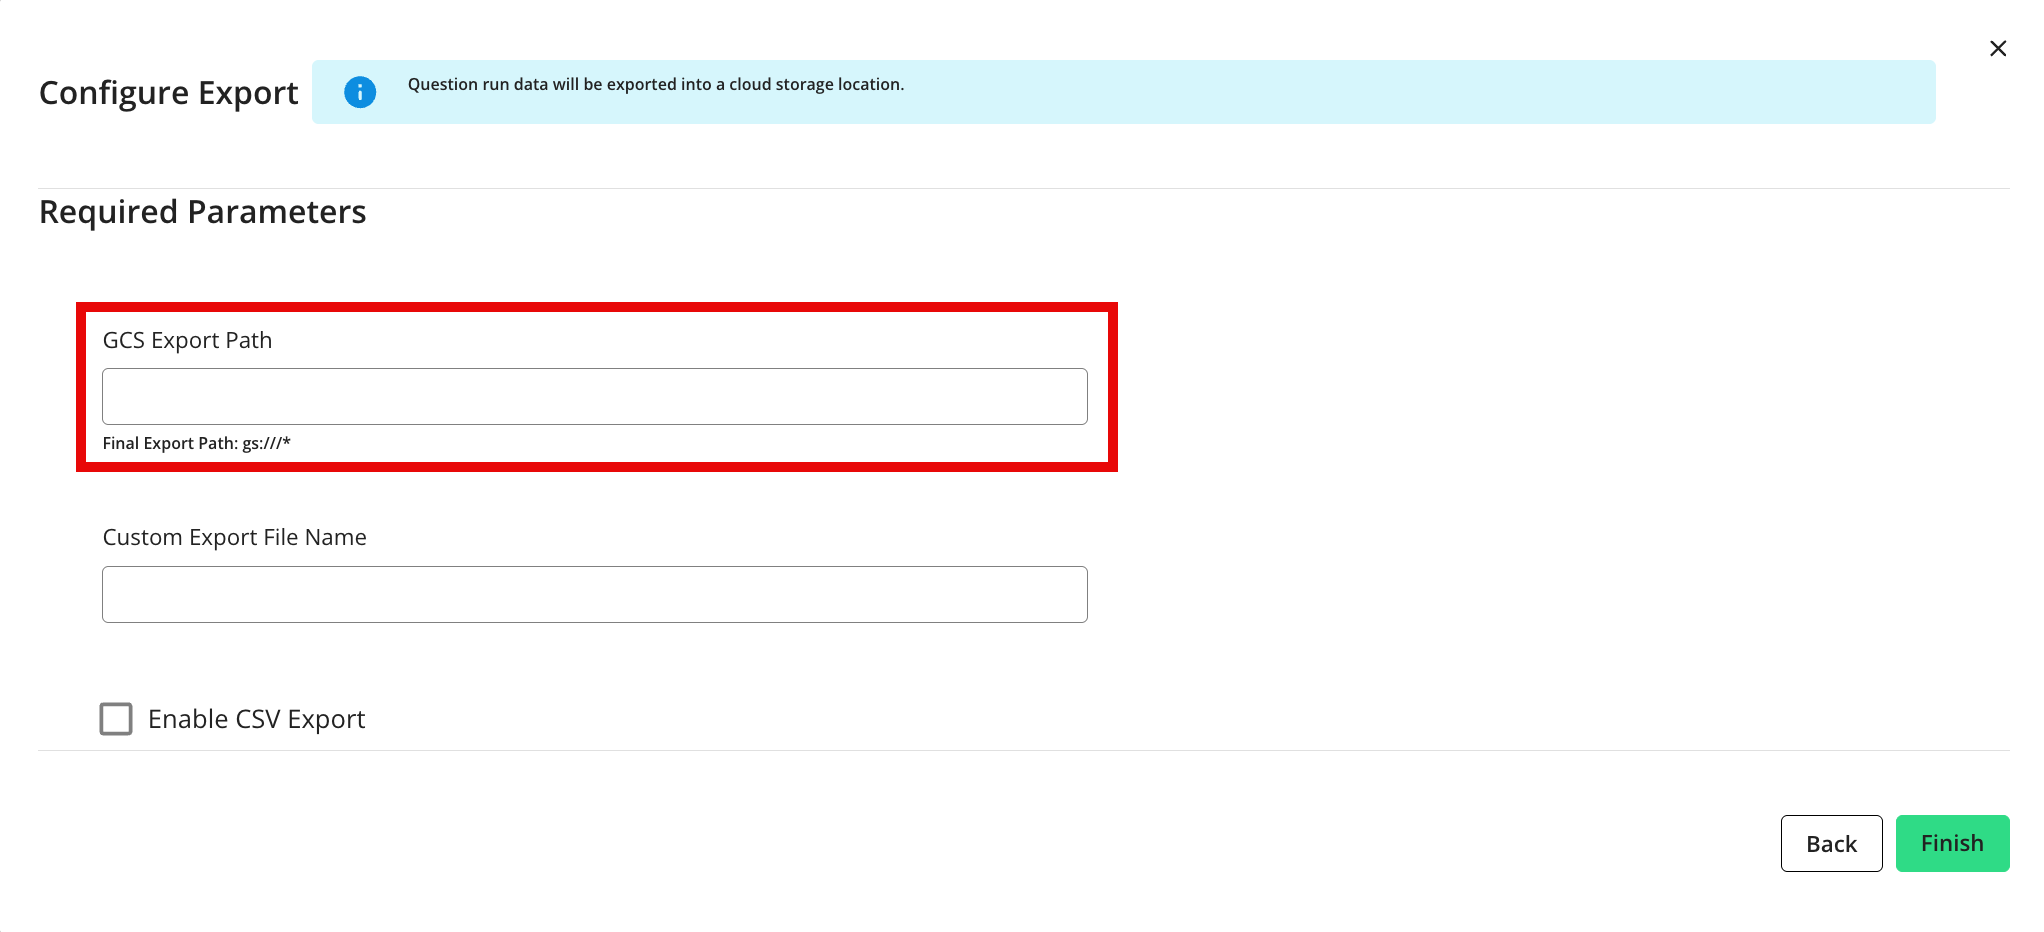
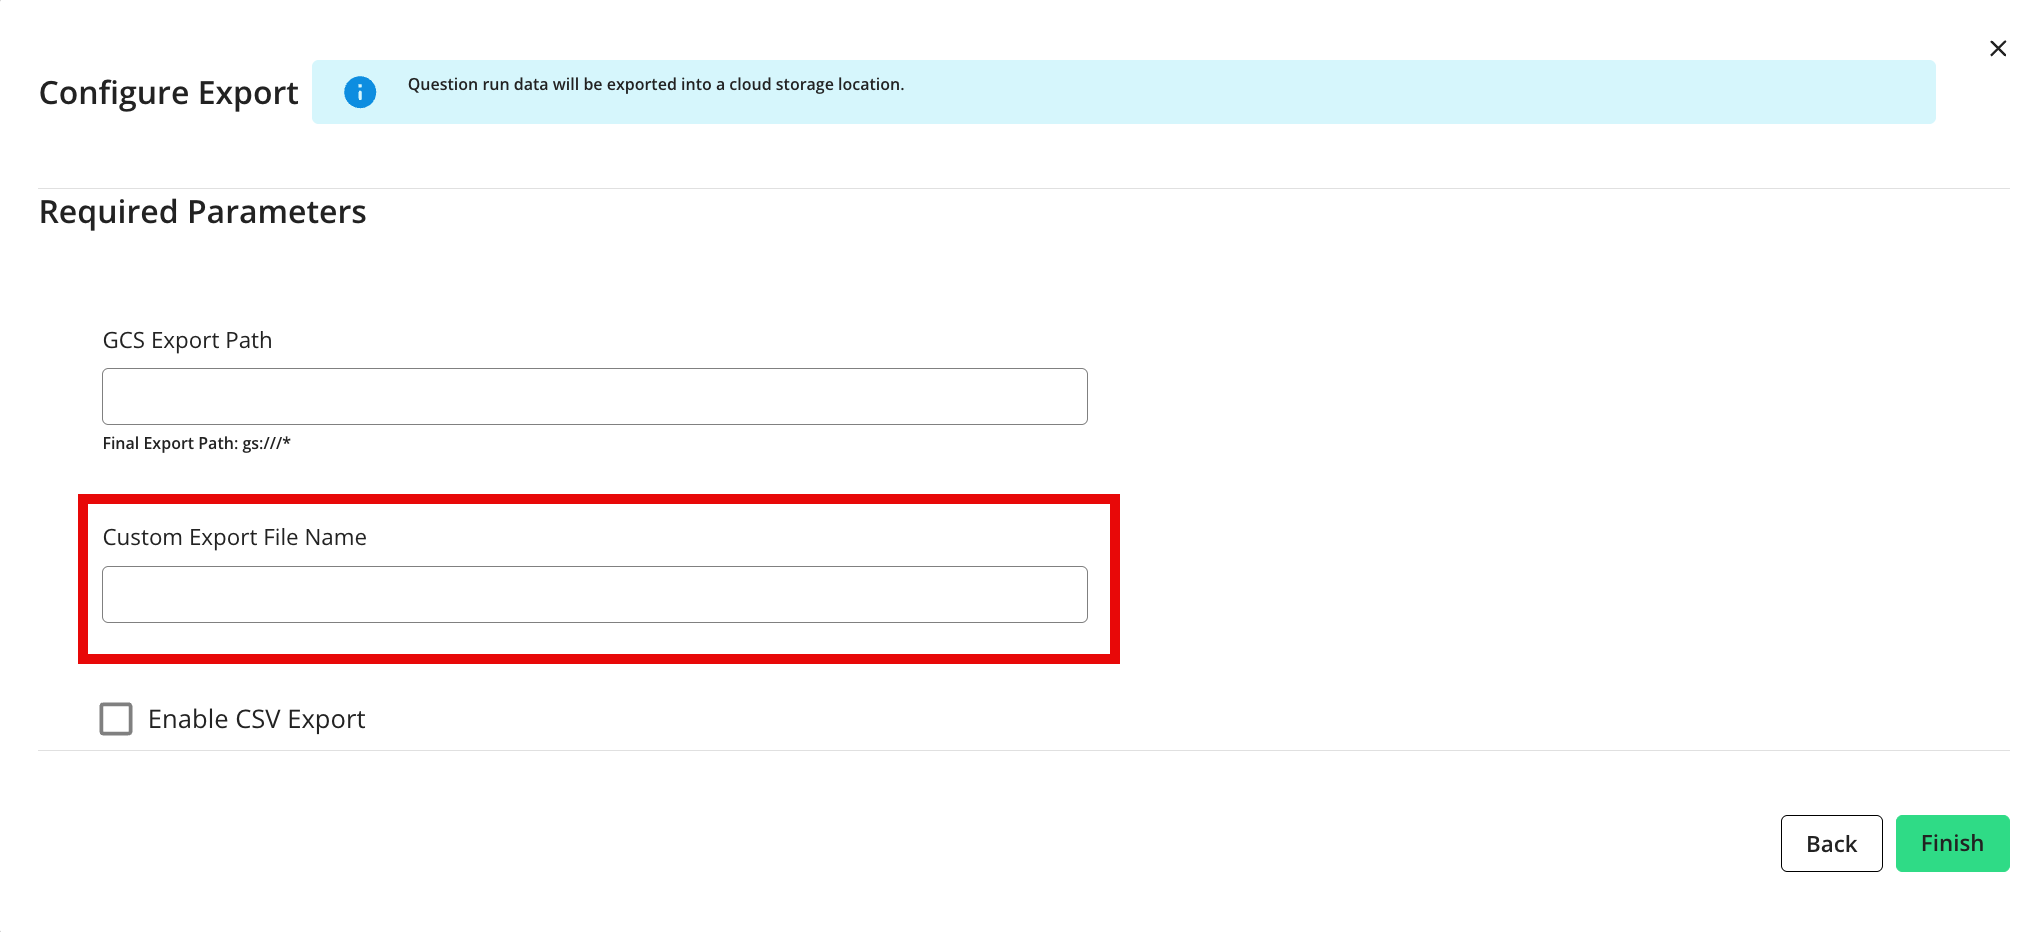
If you've been enabled to use custom export file names, enter your desired file name.
Note
If you need a custom file name prefix, work with your LiveRamp representative to enable the custom file name feature (if it is not already enabled).
For list questions, if you want to change the export file type from Parquet to CSV, check the "Enable CSV Export" check box.

Click .
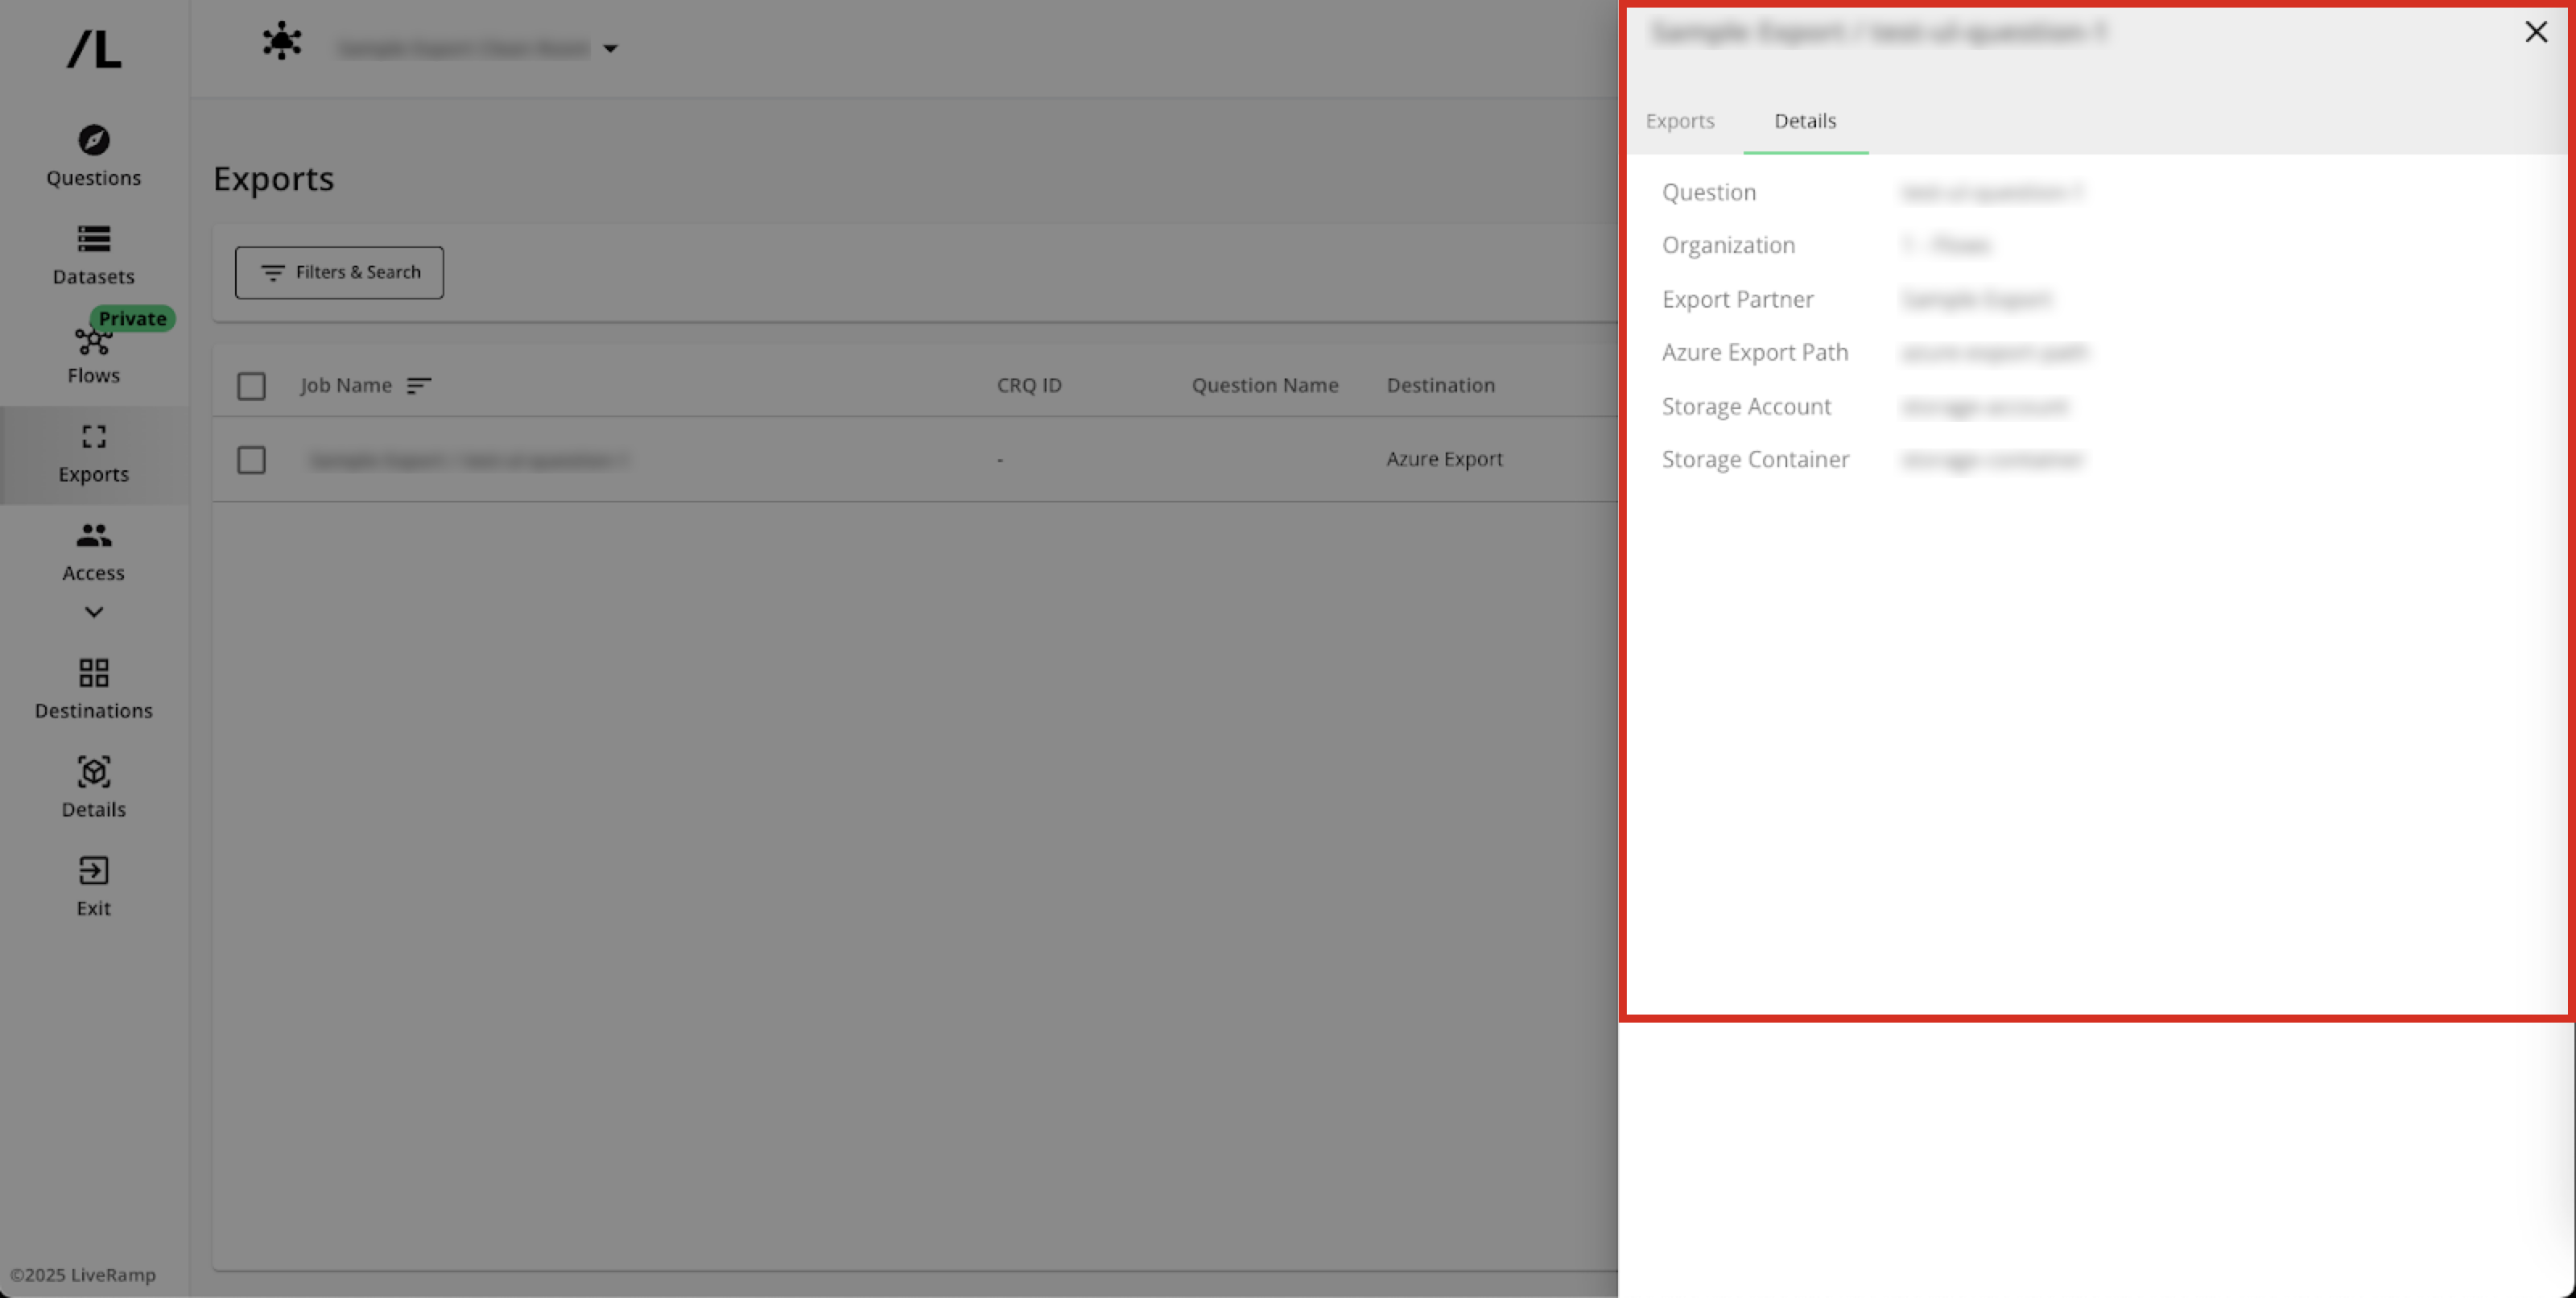
Verify that the job has been created. Exports are added to the page. You may view the details of an export by clicking on the name.
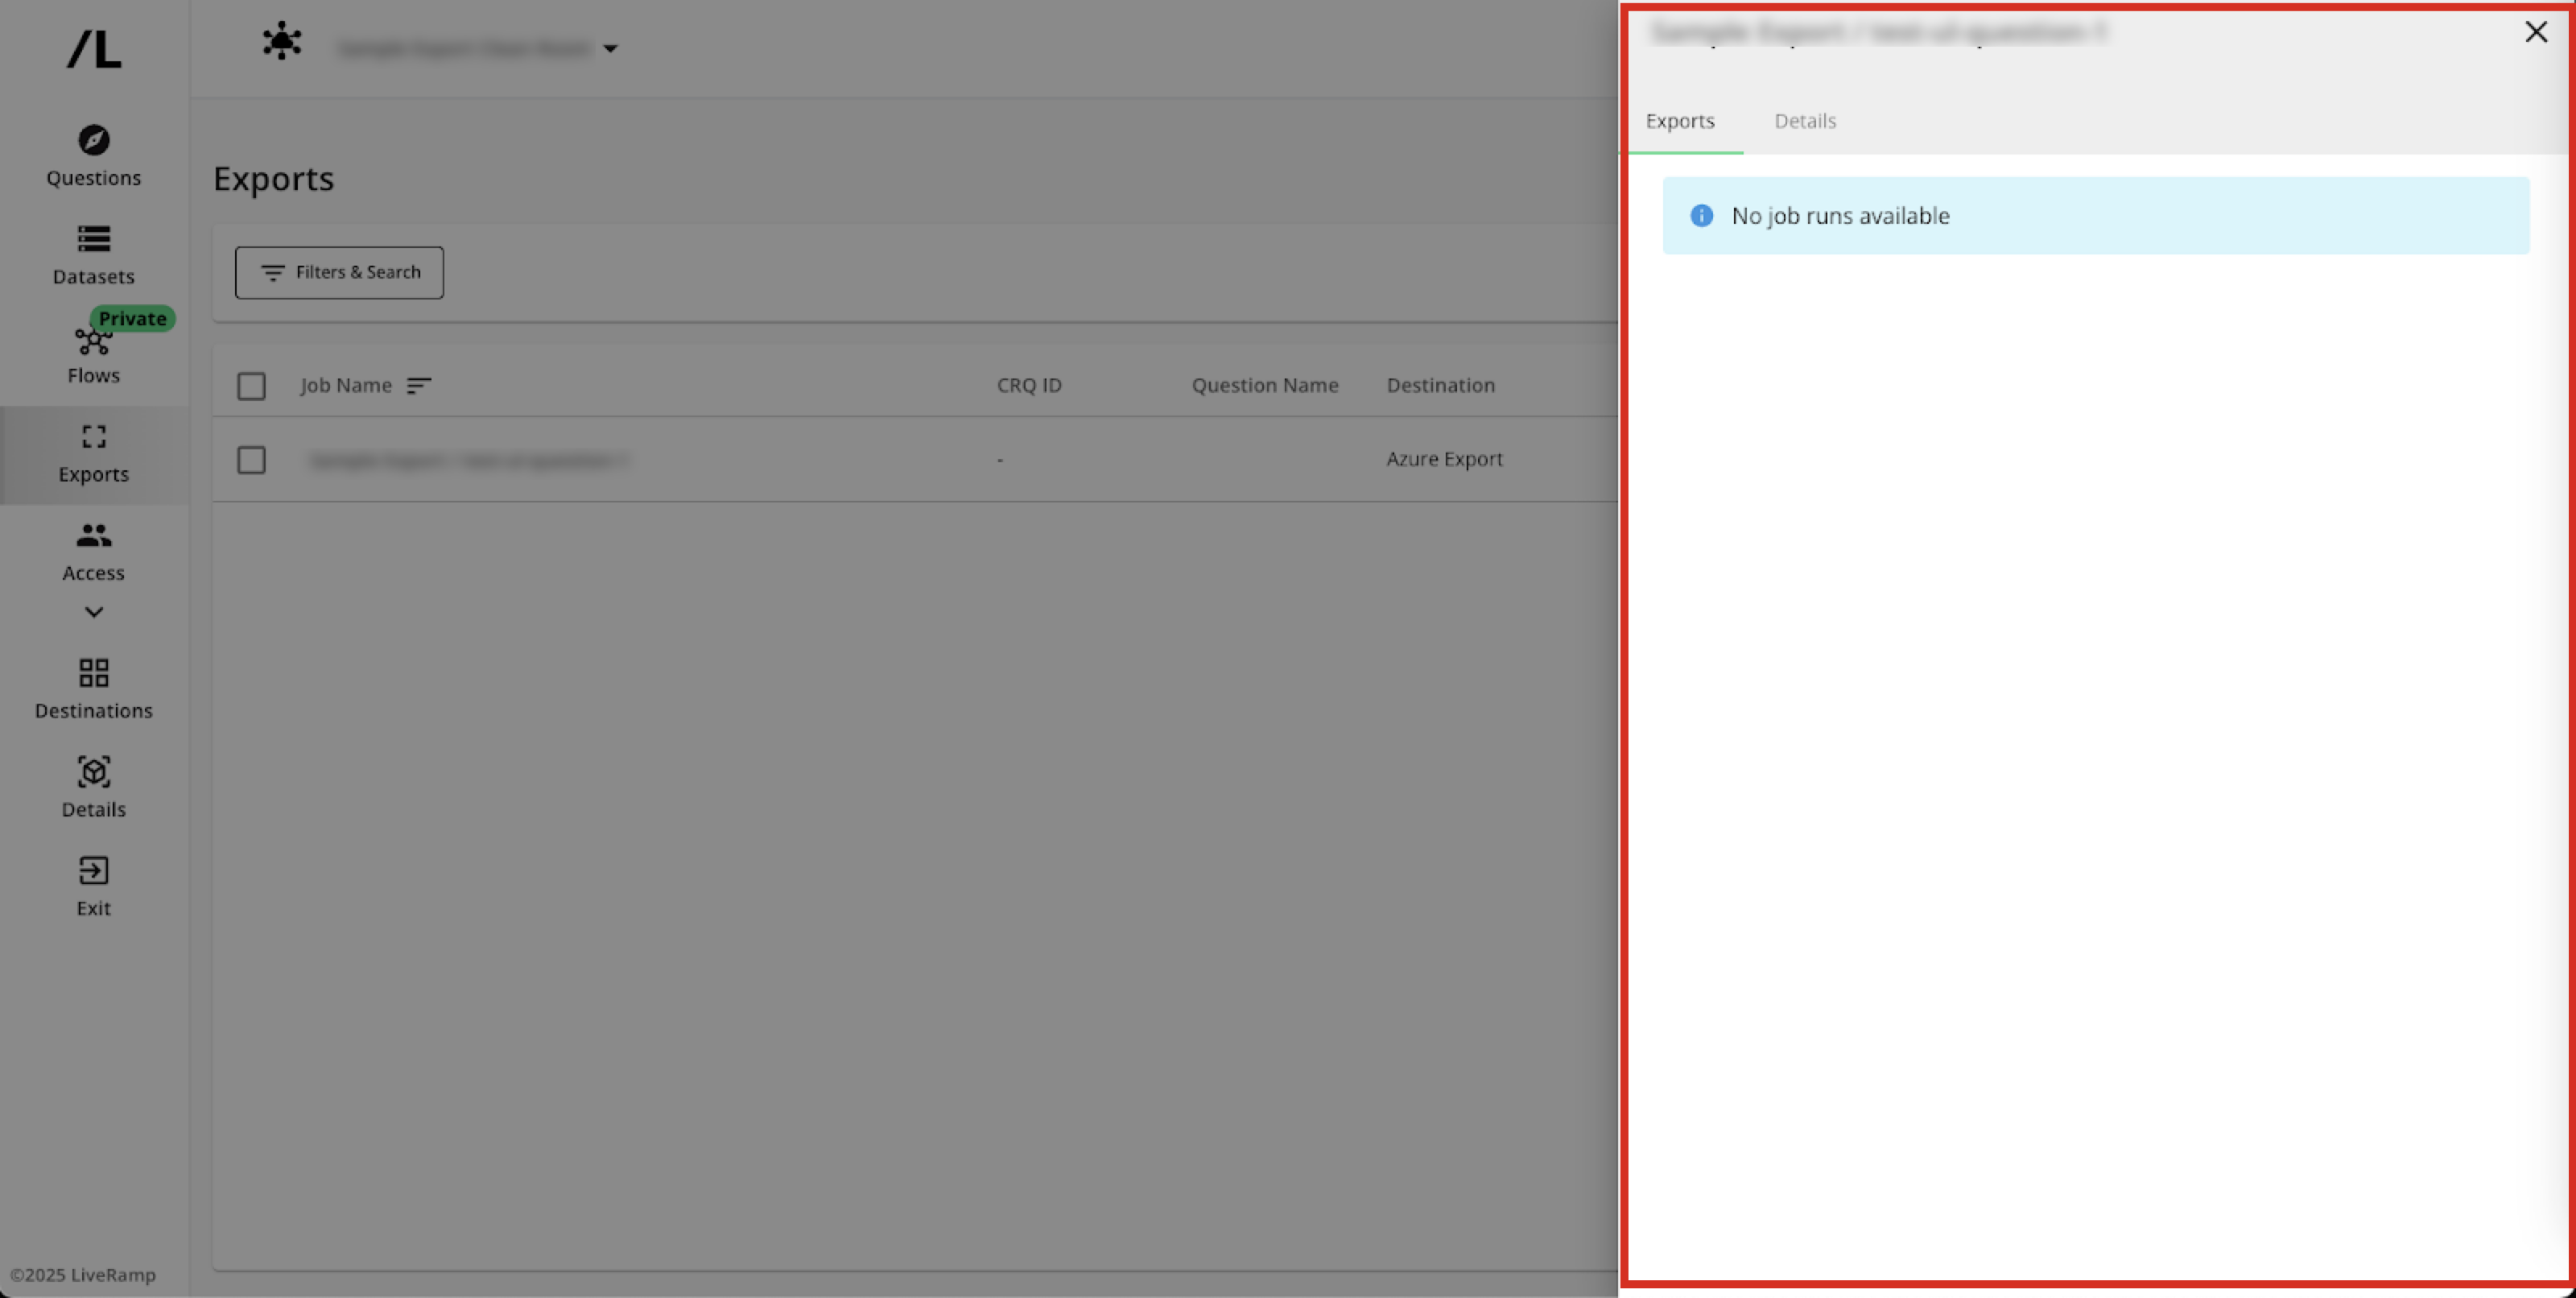
Note
Exports can be paused, which will stop them from sending data upon the completion of each run.
Exports cannot be edited or deleted. If you need to change the export, pause the export and create a new export.
Exported file names follow the patterns described in the “Export File Names” section above.
Once an export has been configured for a particular question, all future question runs will be exported. Previous question runs for analytic questions in a Hybrid clean room that are less than 90 days old can be exported (for more information, see the "Export Older Runs of Analytical Results") section below. However, previous question runs for list questions and for other clean room types cannot be exported.
Export Older Runs of Analytical Results
Once you've created a new export for a question, all future question run results will be exported automatically.
For exports of analytical results in Hybrid clean rooms, owners and partners can also export previous runs that are less than 90 days old (as long as the export is to your own destination). This can help you make sure that there are no gaps in your analysis.
Note
Older runs of analytical results can only be exported to AWS, GCS, or BigQuery and cannot be exported to Azure.
Previous runs that are older than 90 days cannot be retroactively exported.
You cannot export an older run to a destination you do not own.
The path for these exports of older runs will be different from that used for current exports, so that current data is not overwritten:
Data path: {basePath}/{date}/{runId}/data/{file}.csv
Metadata path: {basePath}/{date}/{runId}/meta/meta.csv
To export older runs for an export you’ve already created:
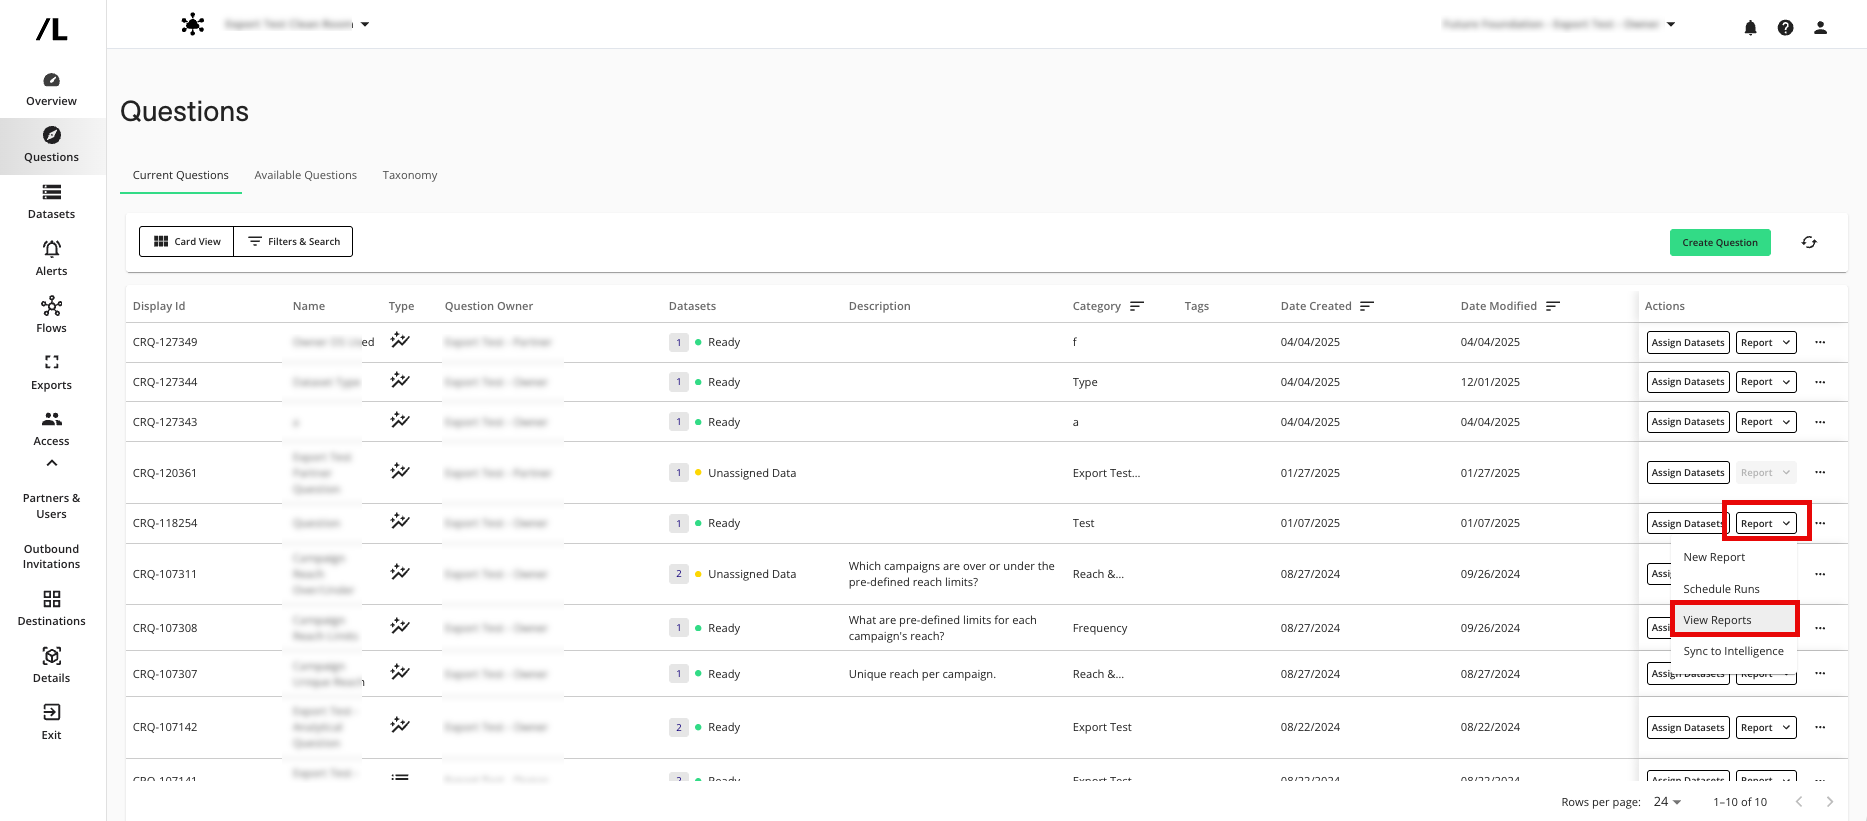
From the clean room navigation menu, select Questions to navigate to the Questions page (if needed).
In the row for a question you want to export, click the Report dropdown menu and then select View Reports.
From the Question Runs page, in the row for the specific question run you want to export, click the More options menu and then select Export Report.
From the dialog, select the destinations to export the question run to and then click .
WIthin a few minutes, you can see the details of the export from the Exports page.
View Destination Connection Details
Once you've exported results from a clean room, you can view details on currently configured destination connections:
From the navigation menu, select Clean Room → Destinations to open the Destinations page.
Select the dropdown list next to any configured export type to see the destination connection details, including:
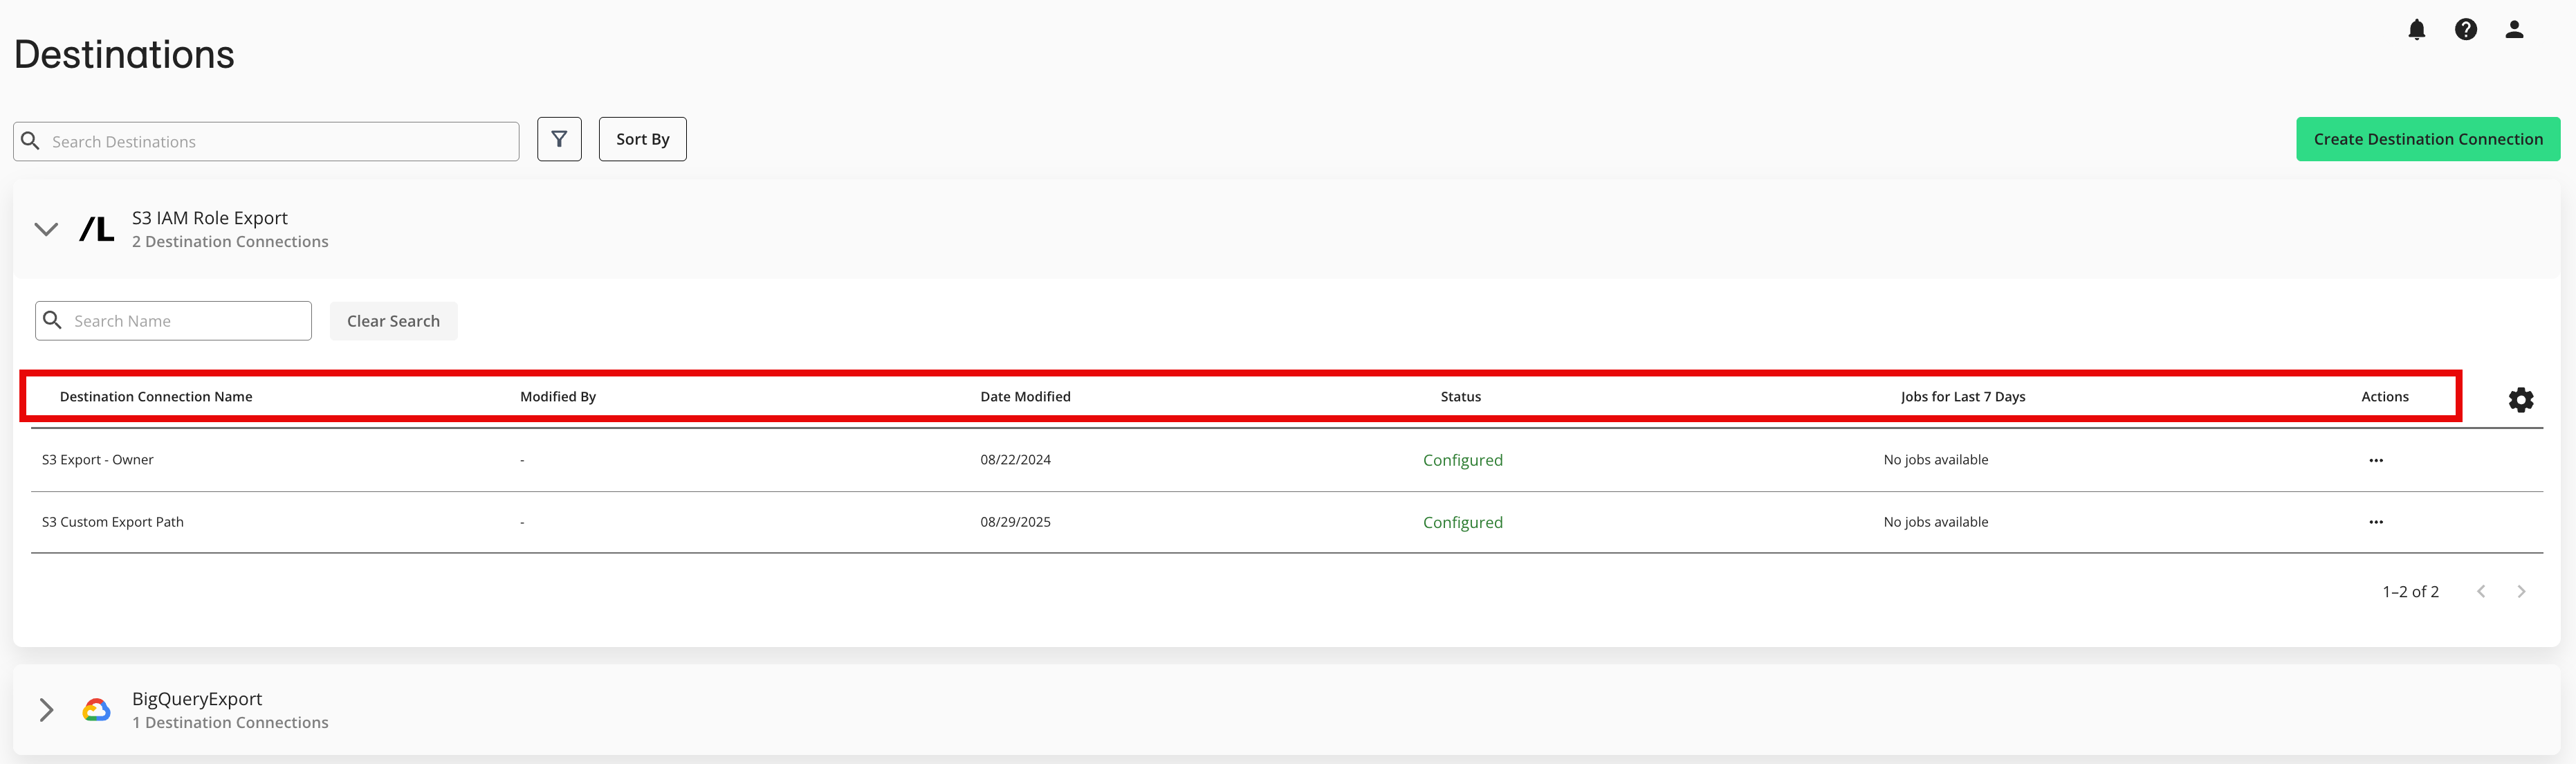
Destination Connection Name
Modified By
Date Modified
Status: Connection status for a particular account. Job statuses include:
Pending: The configuration is in progress.
Configured: The configuration is complete.
Failed: The configuration has failed. Contact your LiveRamp account team.
Jobs for Last 7 Days: Number of jobs by job status for the last 7 days.
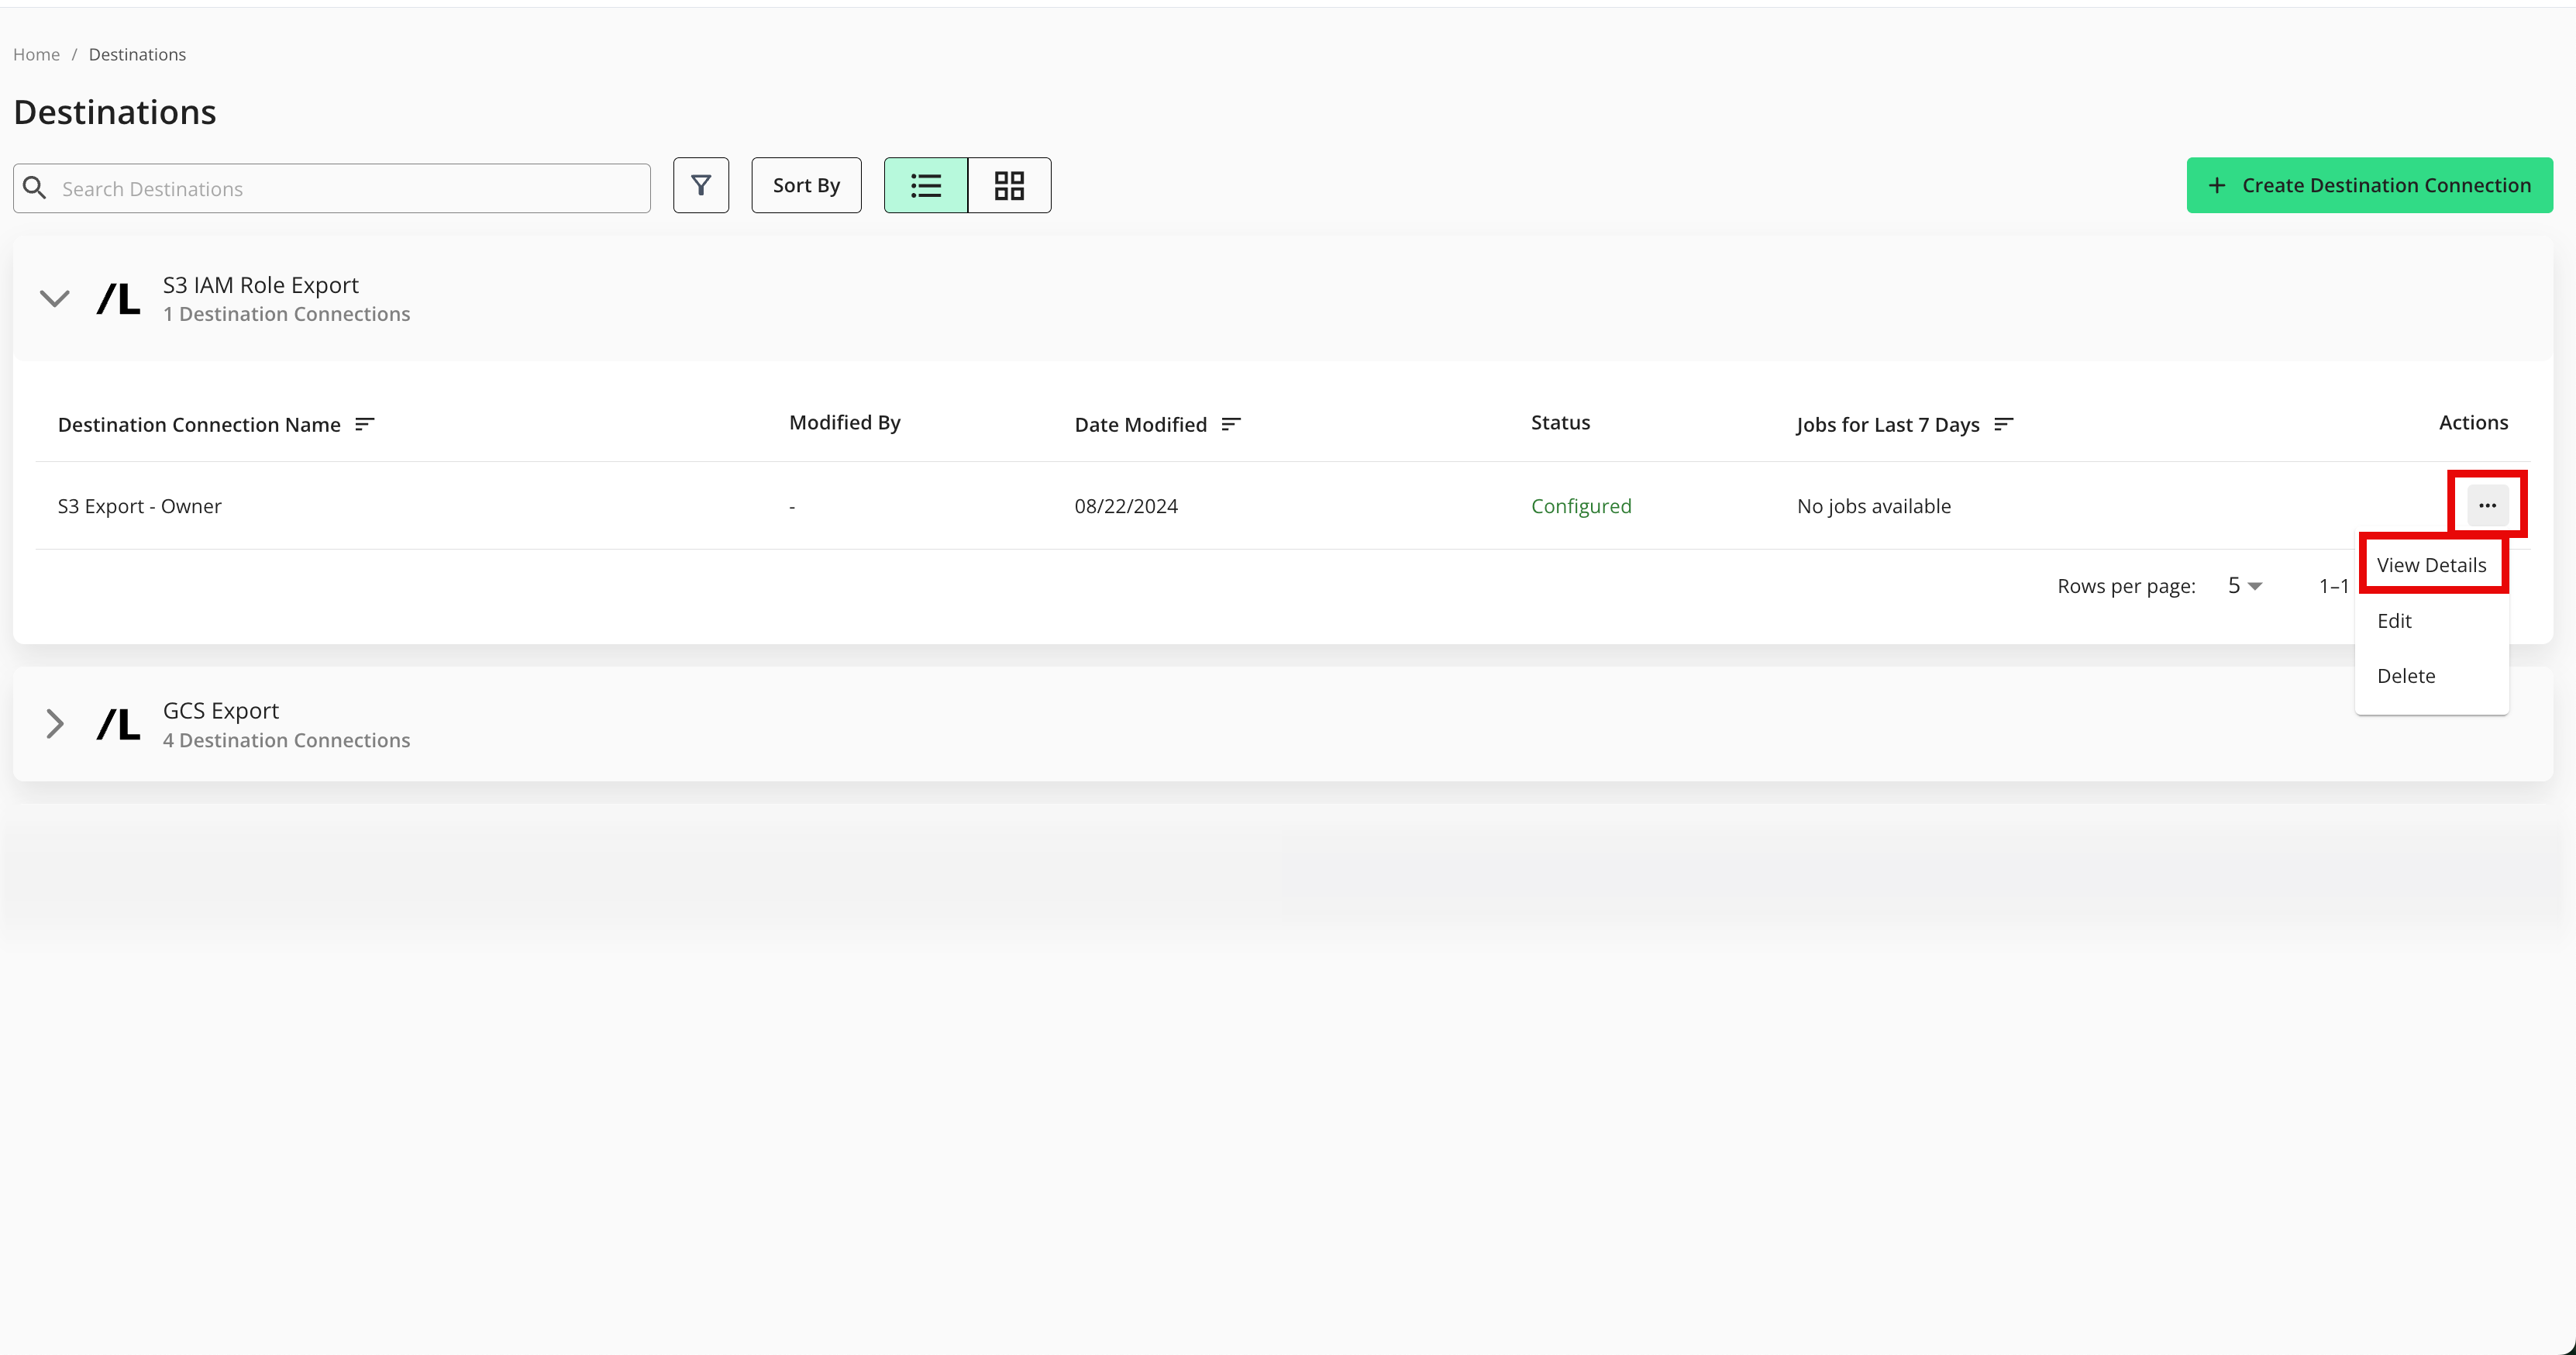
Actions: Click the More Options icon (three dots) to see a menu with available actions:
View Details: See the number of records sent based on a selected date range (7, 14, 30 days)
Edit: Update destination connection credentials
Delete: Remove a destination connection so that audiences can no longer be activated
To see job status details, click the More Options icon and then select View Details.
A list of all jobs for that particular destination connection for the last 7 days is displayed. You can adjust the range filter to show all jobs or jobs in the last 14 or 30 days.j You can also filter by job status.
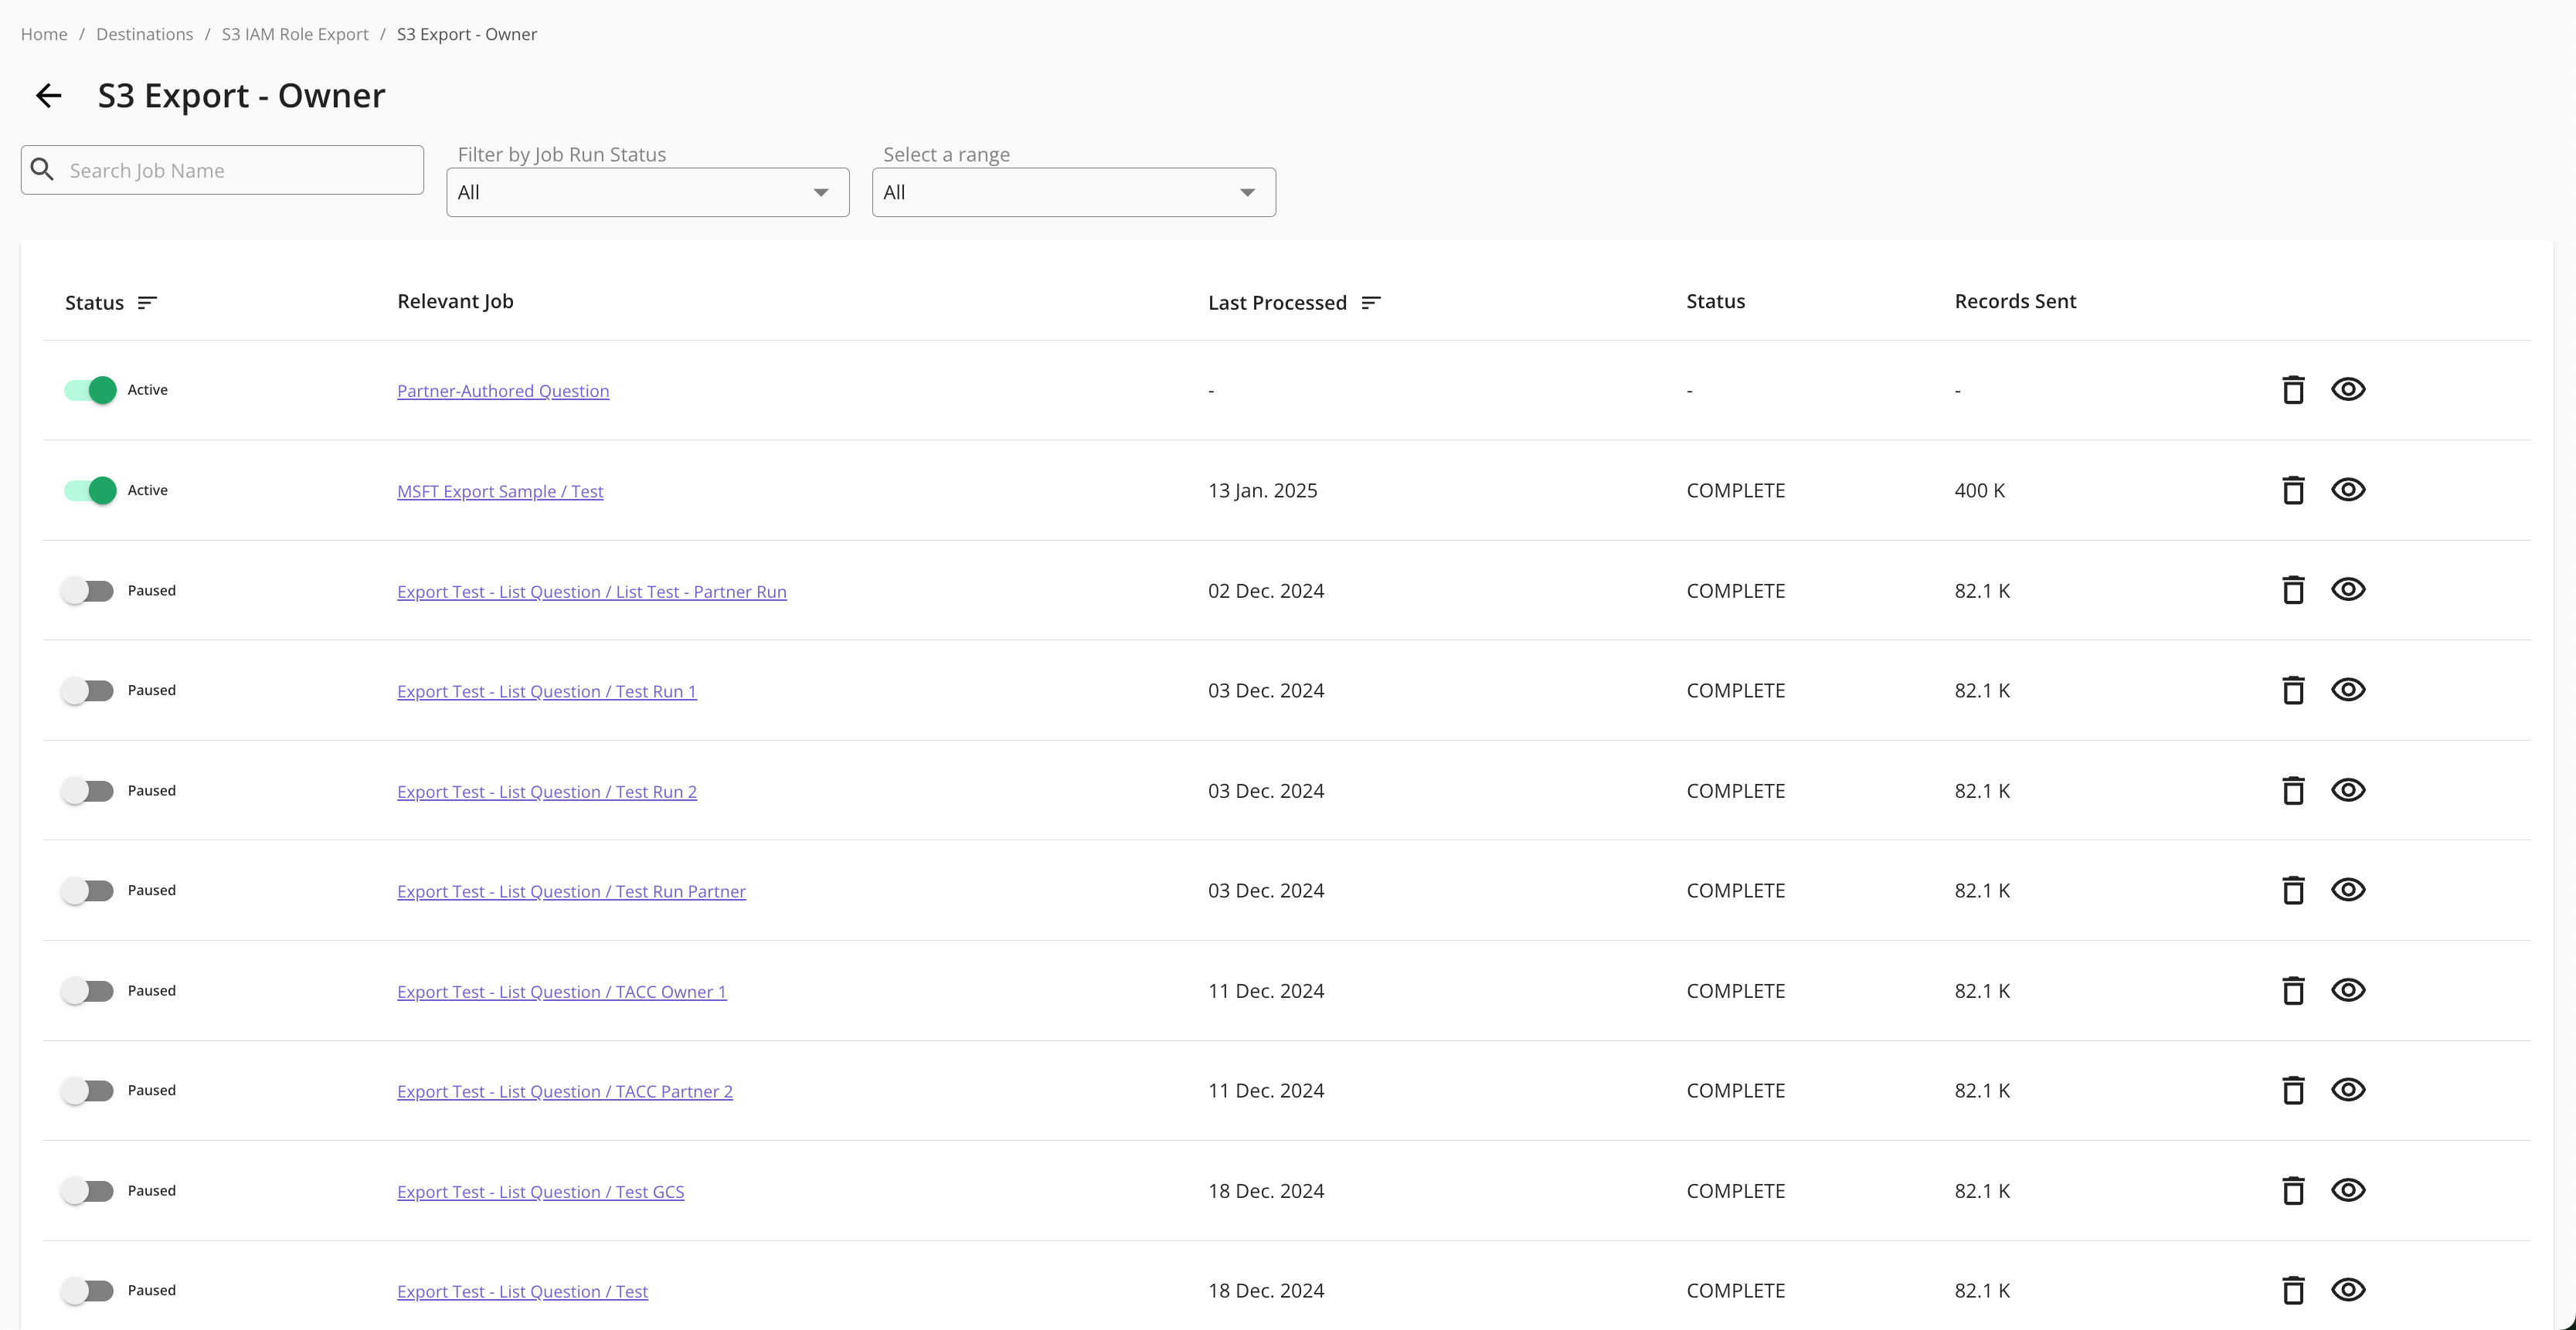
Note
For jobs in a failed or partially failed status, consider checking the associated data and data source, the export destination, or the data logs to understand where a failure may be taking place.