Configure a BigQuery Pattern Data Connection
LiveRamp Clean Room's intelligence application on top of Google BigQuery streamlines data collaboration, delivering end-to-end solutions that drive business outcomes for brands. This integration combines LiveRamp Clean Room’s flexible UI with Google BigQuery to orchestrate clean room use cases through low-code data connectors in order to access data at the cloud source with zero data movement.
To configure a BigQuery Pattern data connection, see the instructions below.
Overall Steps
Perform the following overall steps to configure a BigQuery Pattern data connection:
For information on performing these steps, see the sections below.
Prerequisites
Before proceeding, ensure you have set up the required permissions in BigQuery and configured your credentials in LiveRamp Clean Room by following the instructions in "Configuring BigQuery Permissions for BigQuery Clean Rooms".
Note
We recommend that you use partition columns in your source BigQuery tables for the best query performance. See below for configuration details.
Create the Data Connection
To create the data connection:
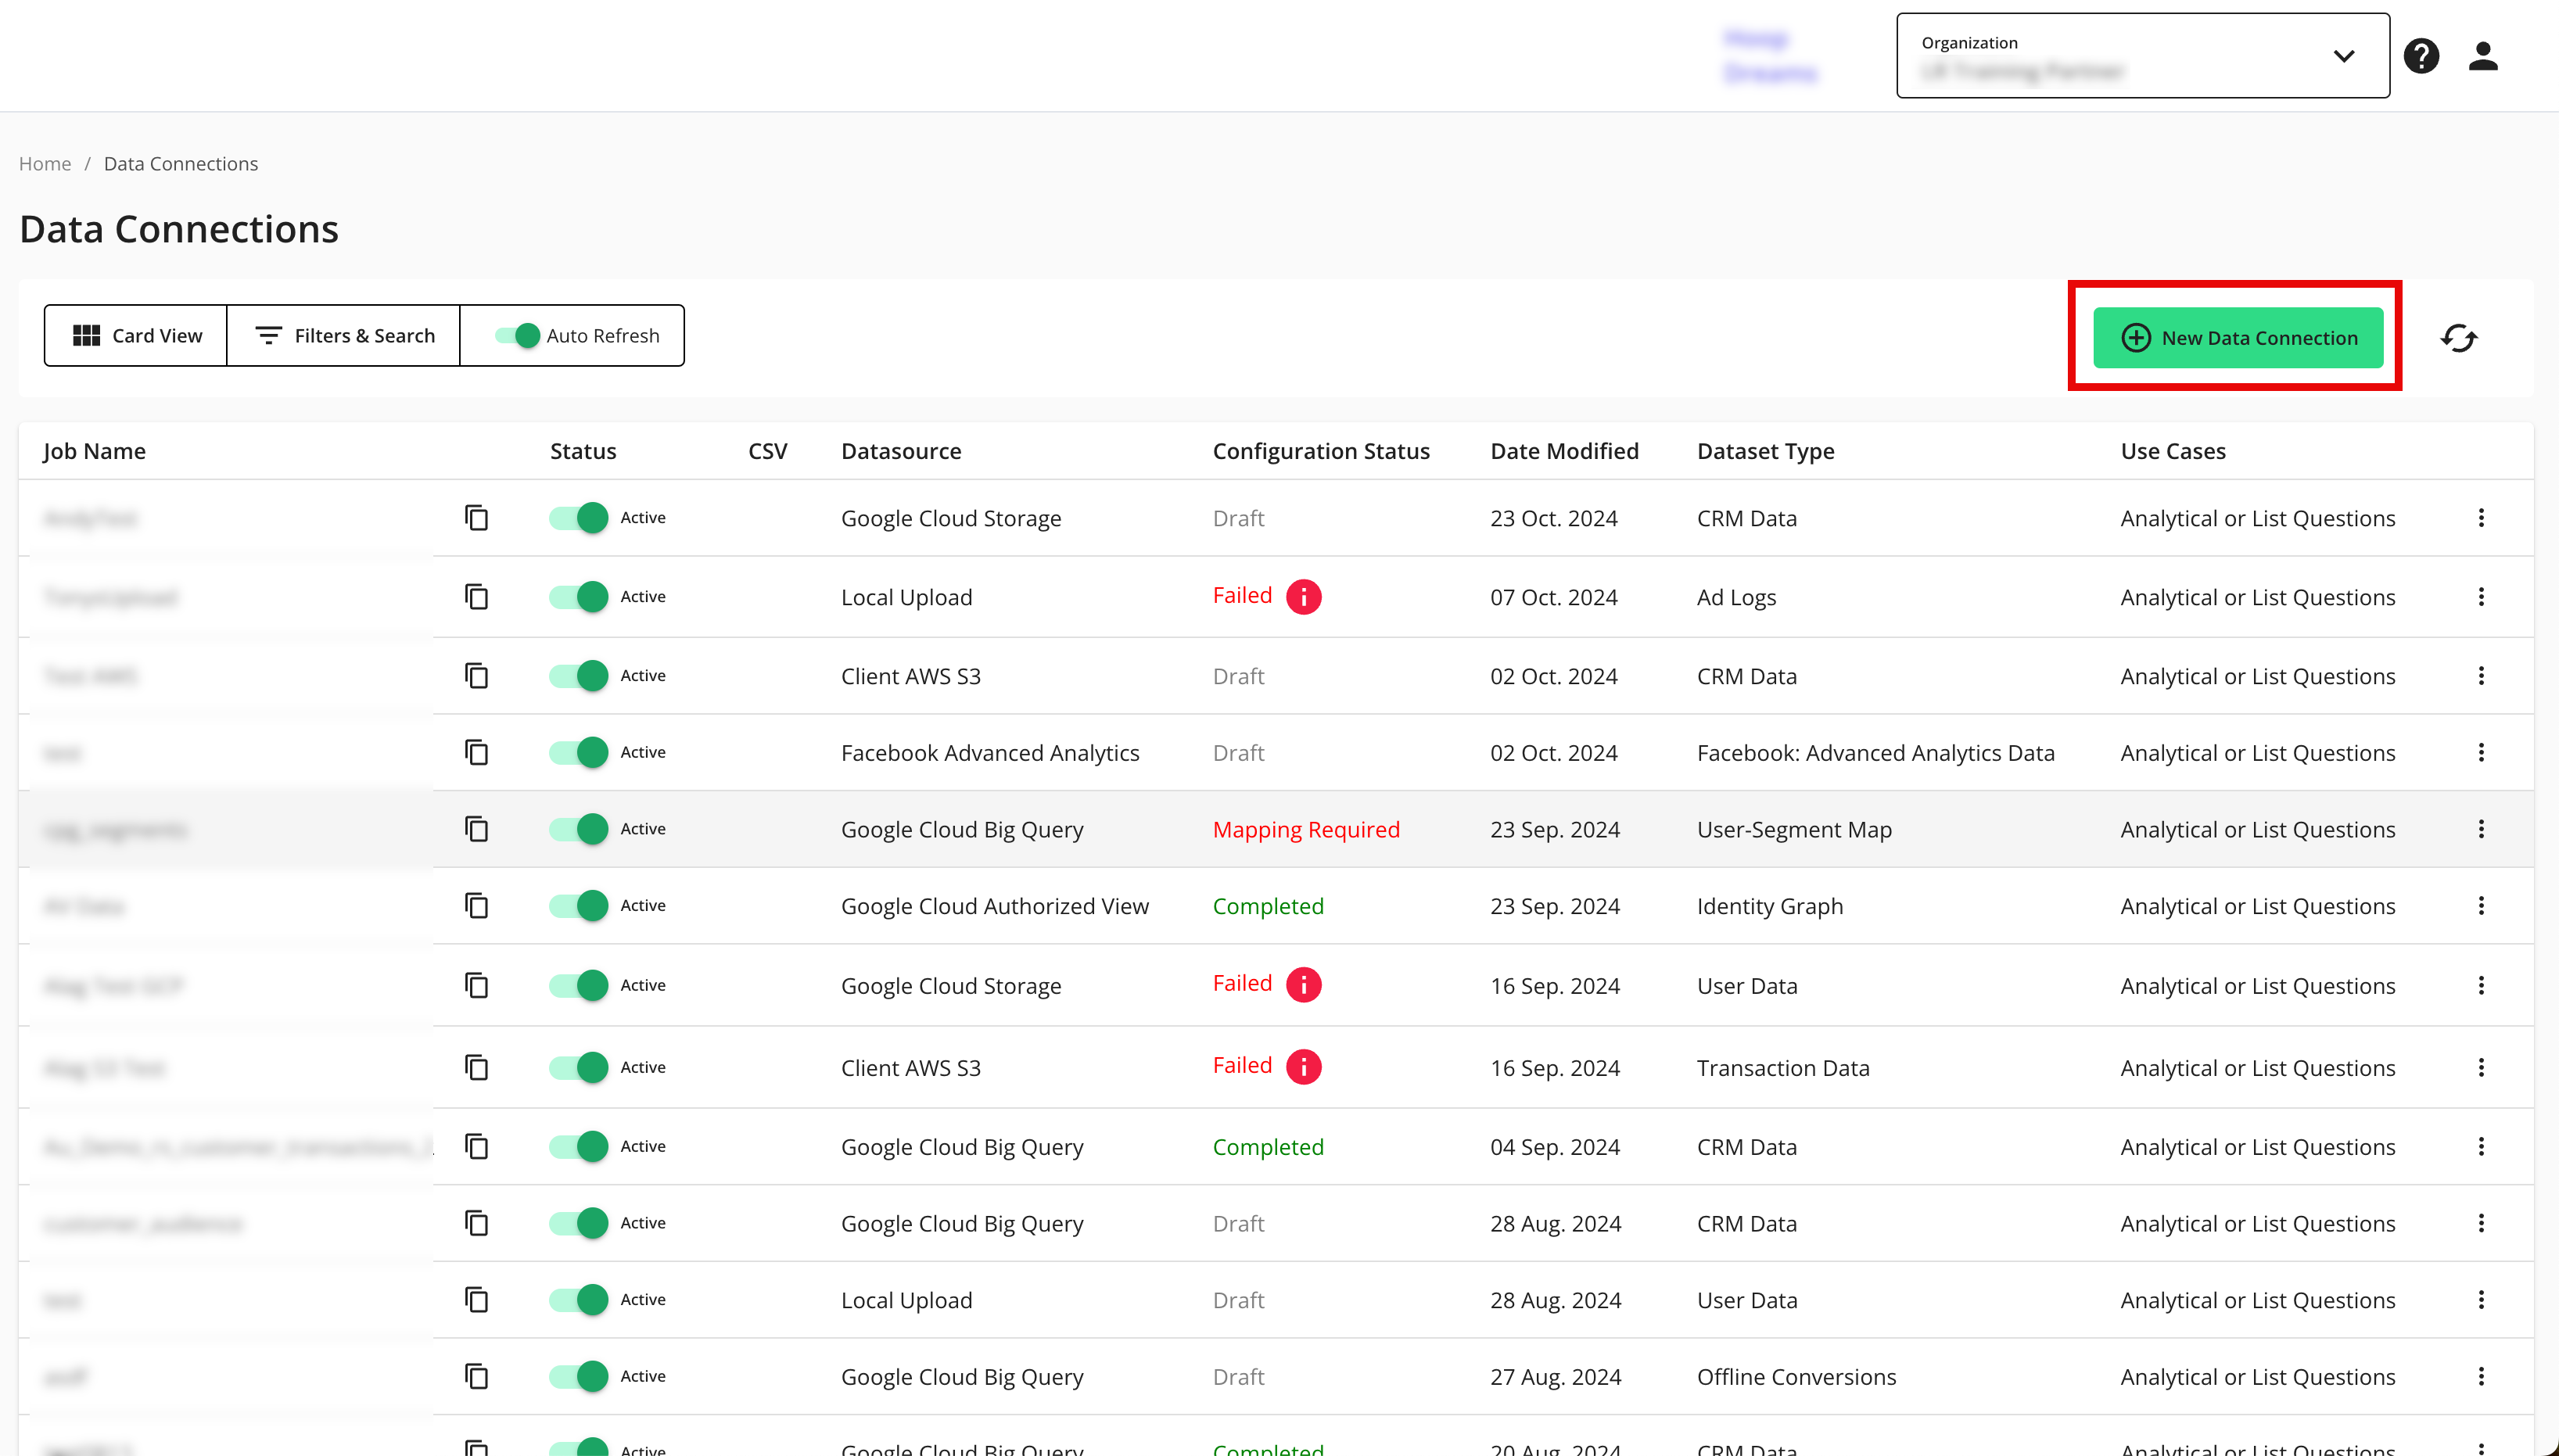
From the LiveRamp Clean Room navigation pane, select Data Management → Data Connections.
From the Data Connections page, click .
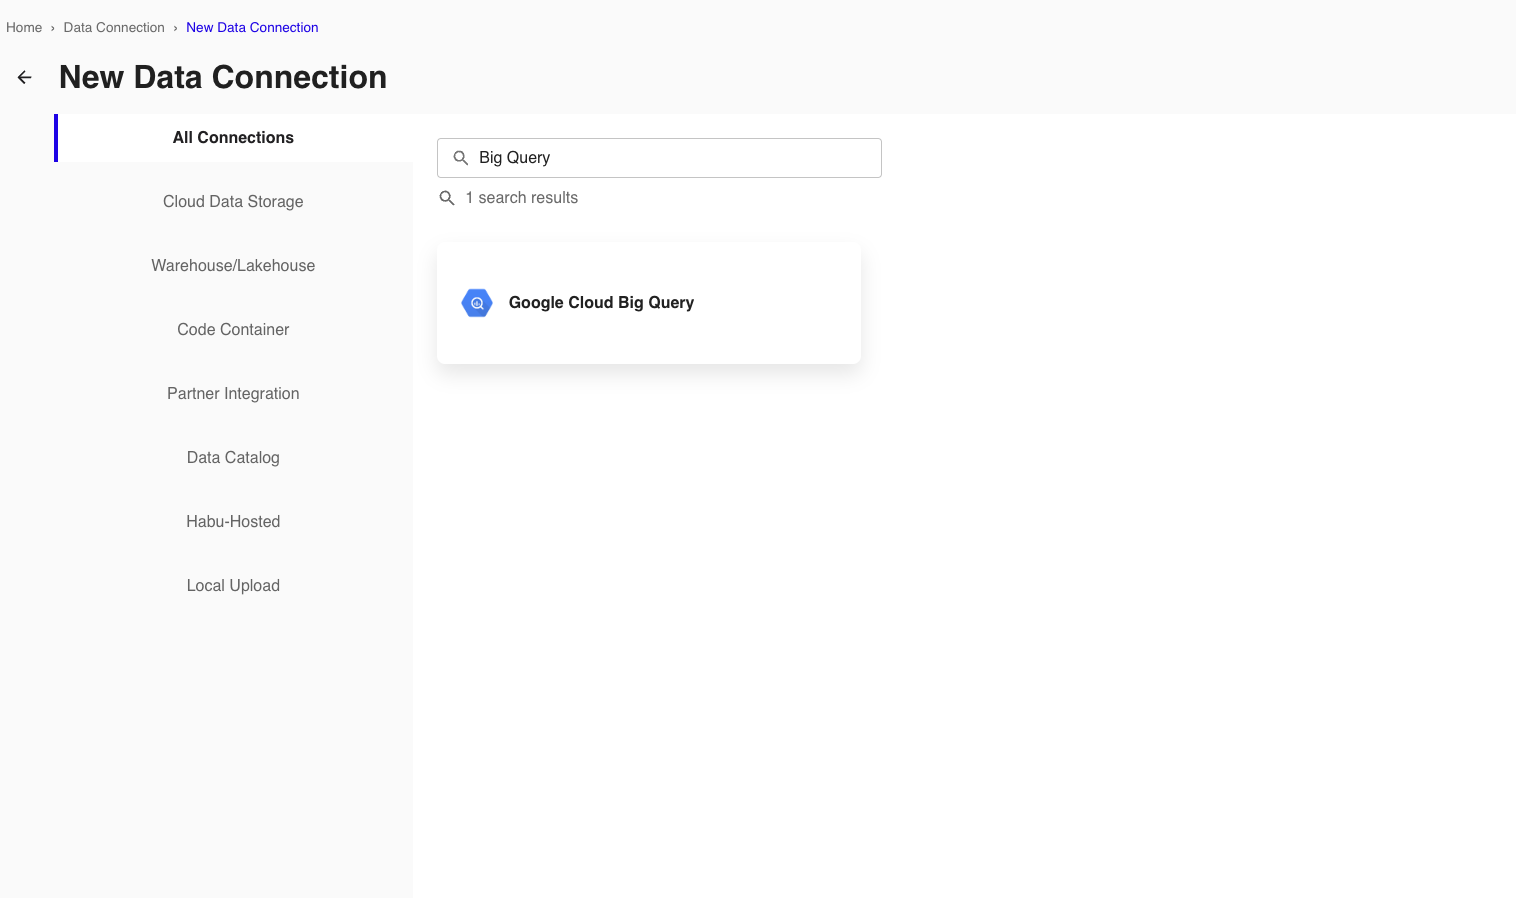
From the New Data Connection screen, select "Google Cloud Big Query".
Select the credentials created in the previous procedure from the list.
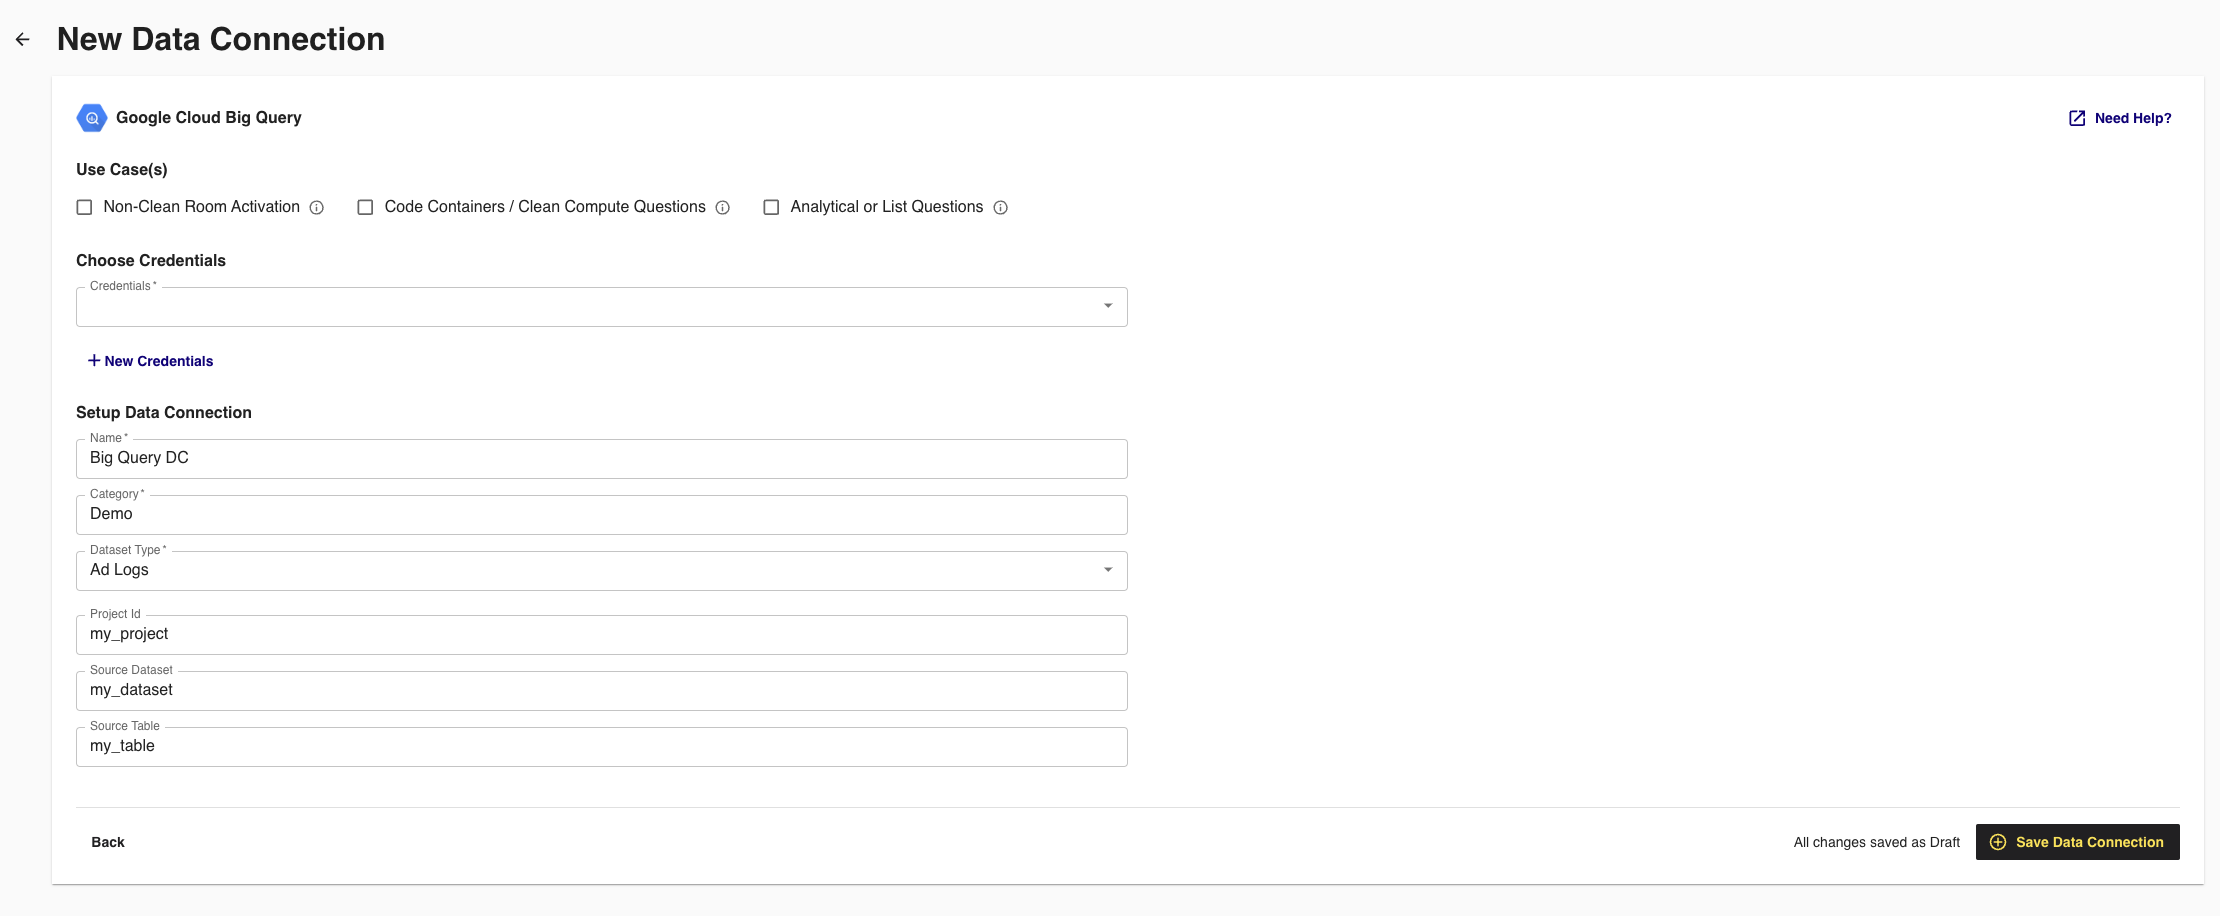
Configure the data connection:
Name: Enter a name of your choice.
Category: Enter a category of your choice.
Dataset Type: Select Generic.
Project ID: Enter your BigQuery Project ID.
Source Dataset: Enter the container from the table in your BigQuery project.
Source Table: Enter the table name of the source table in your BigQuery Project.
Note
LiveRamp Clean Room does not support BigQuery views, only BigQuery tables.
Review the data connection details and click .
Note
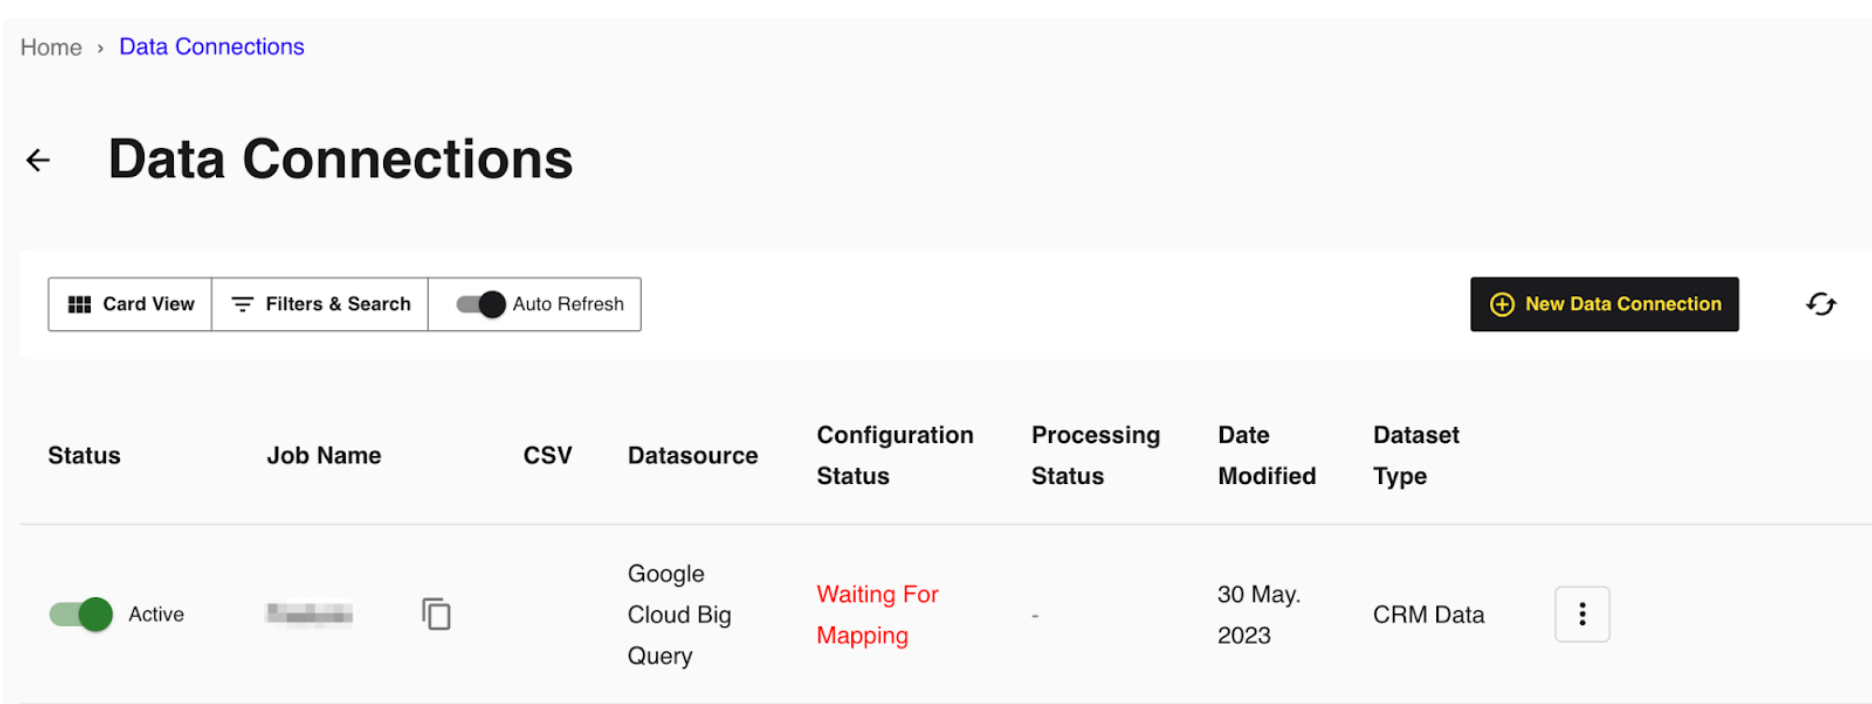
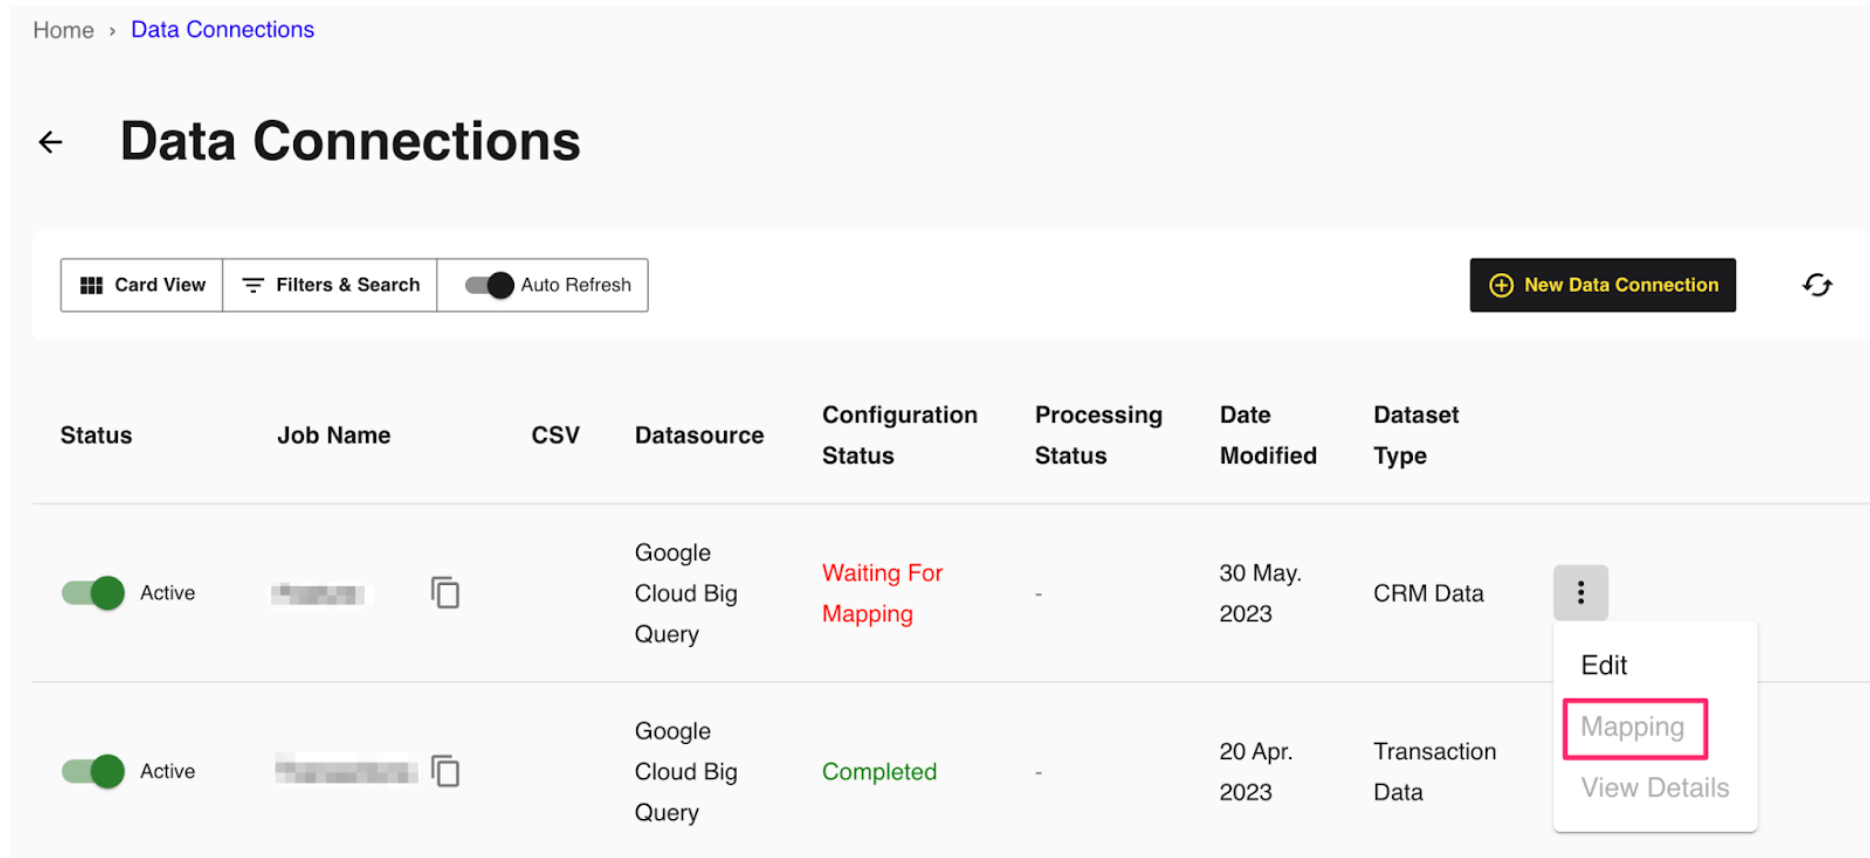
All configured data connections can be seen on the Data Connections page.
If you haven't already, upload your data files to your specified location.
When a connection is initially configured, it will show "Verifying Access" as the configuration status. Once the connection is confirmed and the status has changed to "Mapping Required", map the table's fields.
You will receive file processing notifications via email.
Map the Fields
Once the connection is confirmed and the status has changed to "Mapping Required", map the table's fields and add metadata:
From the row for the newly created data connection, click the More Options menu (the three dots) and then click .
The Map Fields screen opens, and the file column names auto-populate.
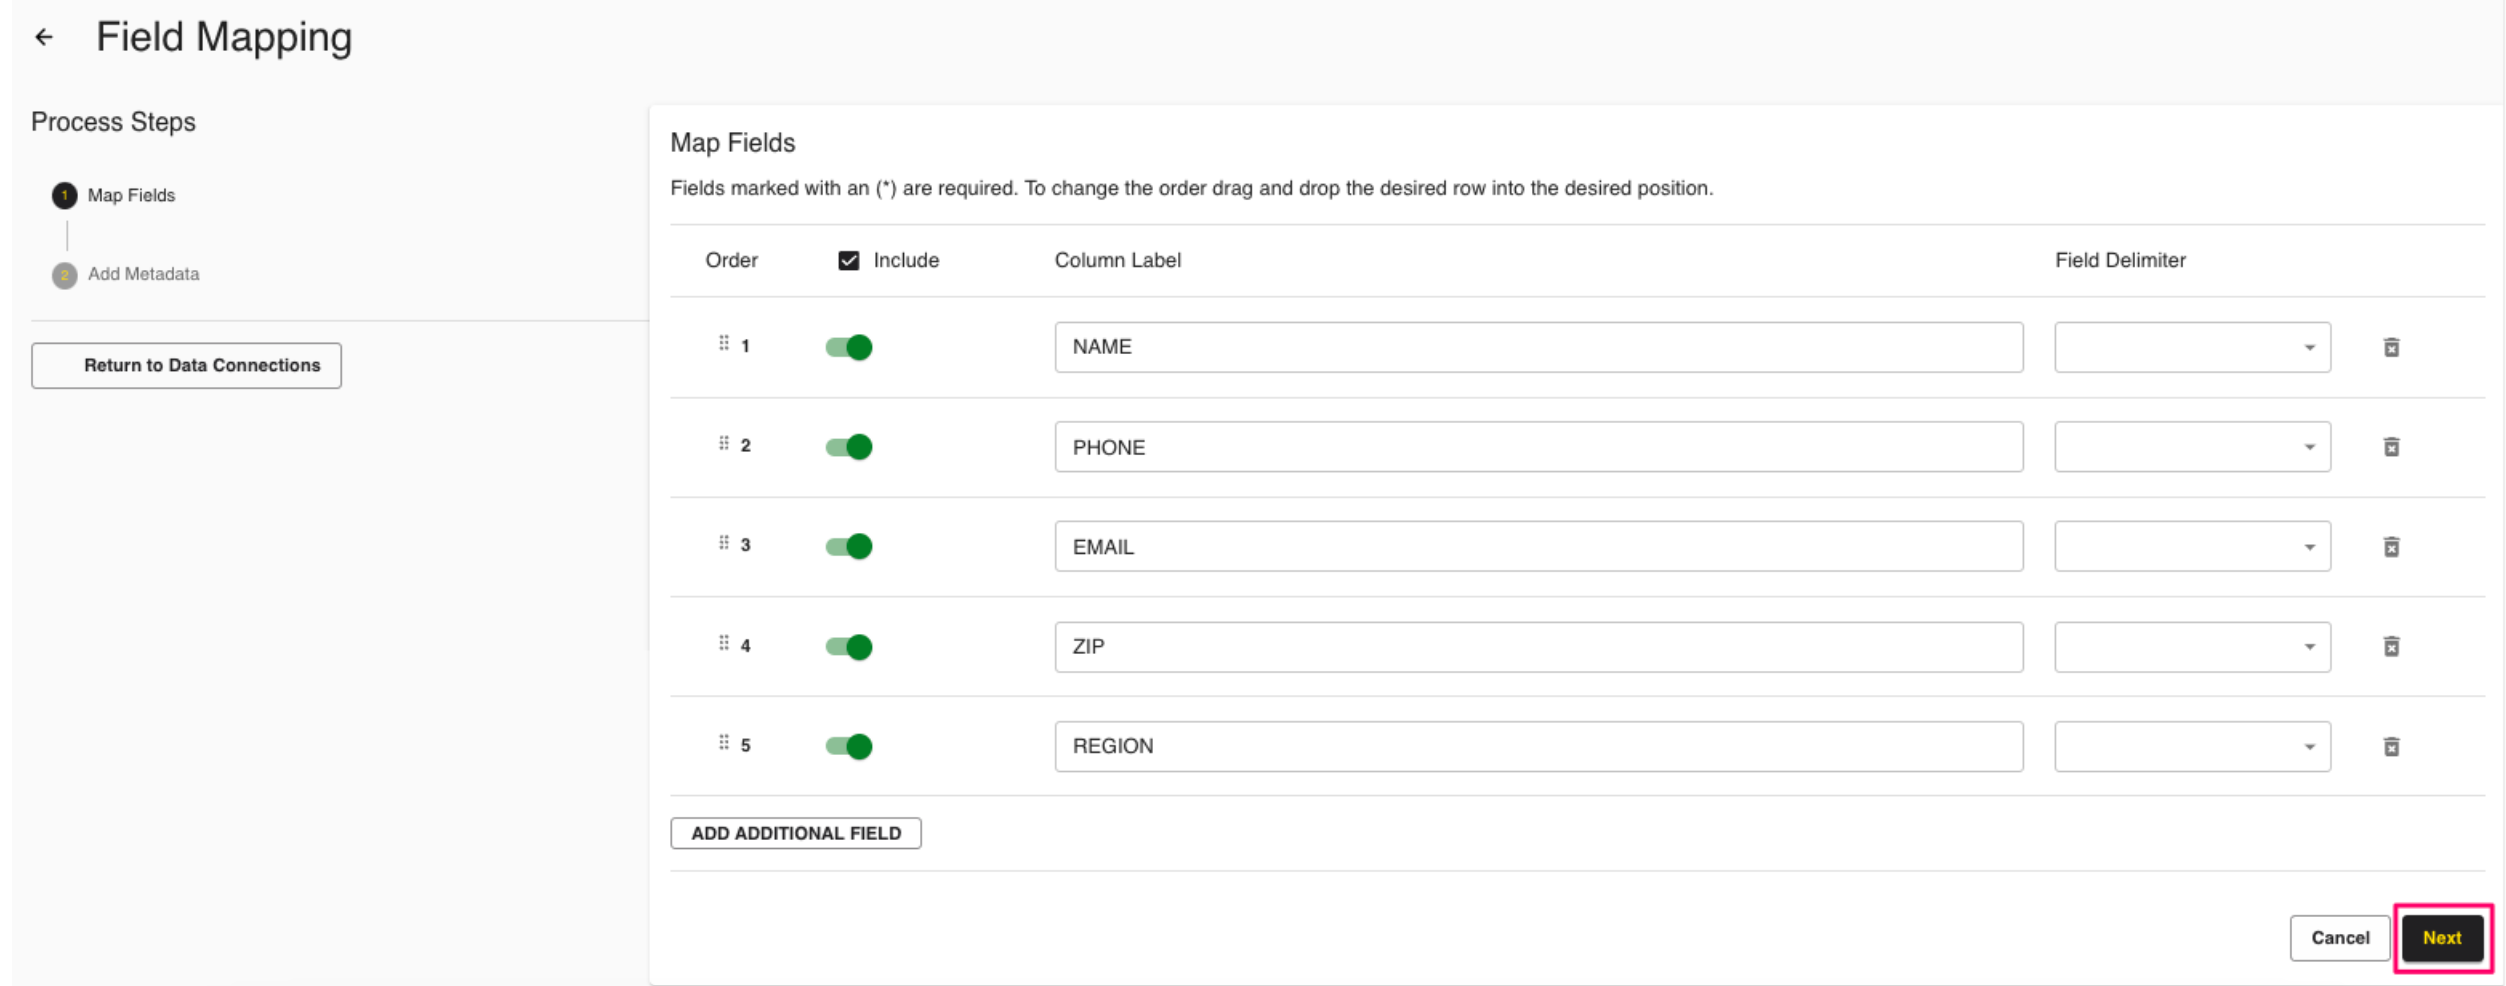
For any columns that you do not want to be queryable, slide the Include toggle to the left.
If needed, update any column labels.
Note
Ignore the field delimiter fields because this was defined in a previous step.
Click .
The Add Metadata screen opens.
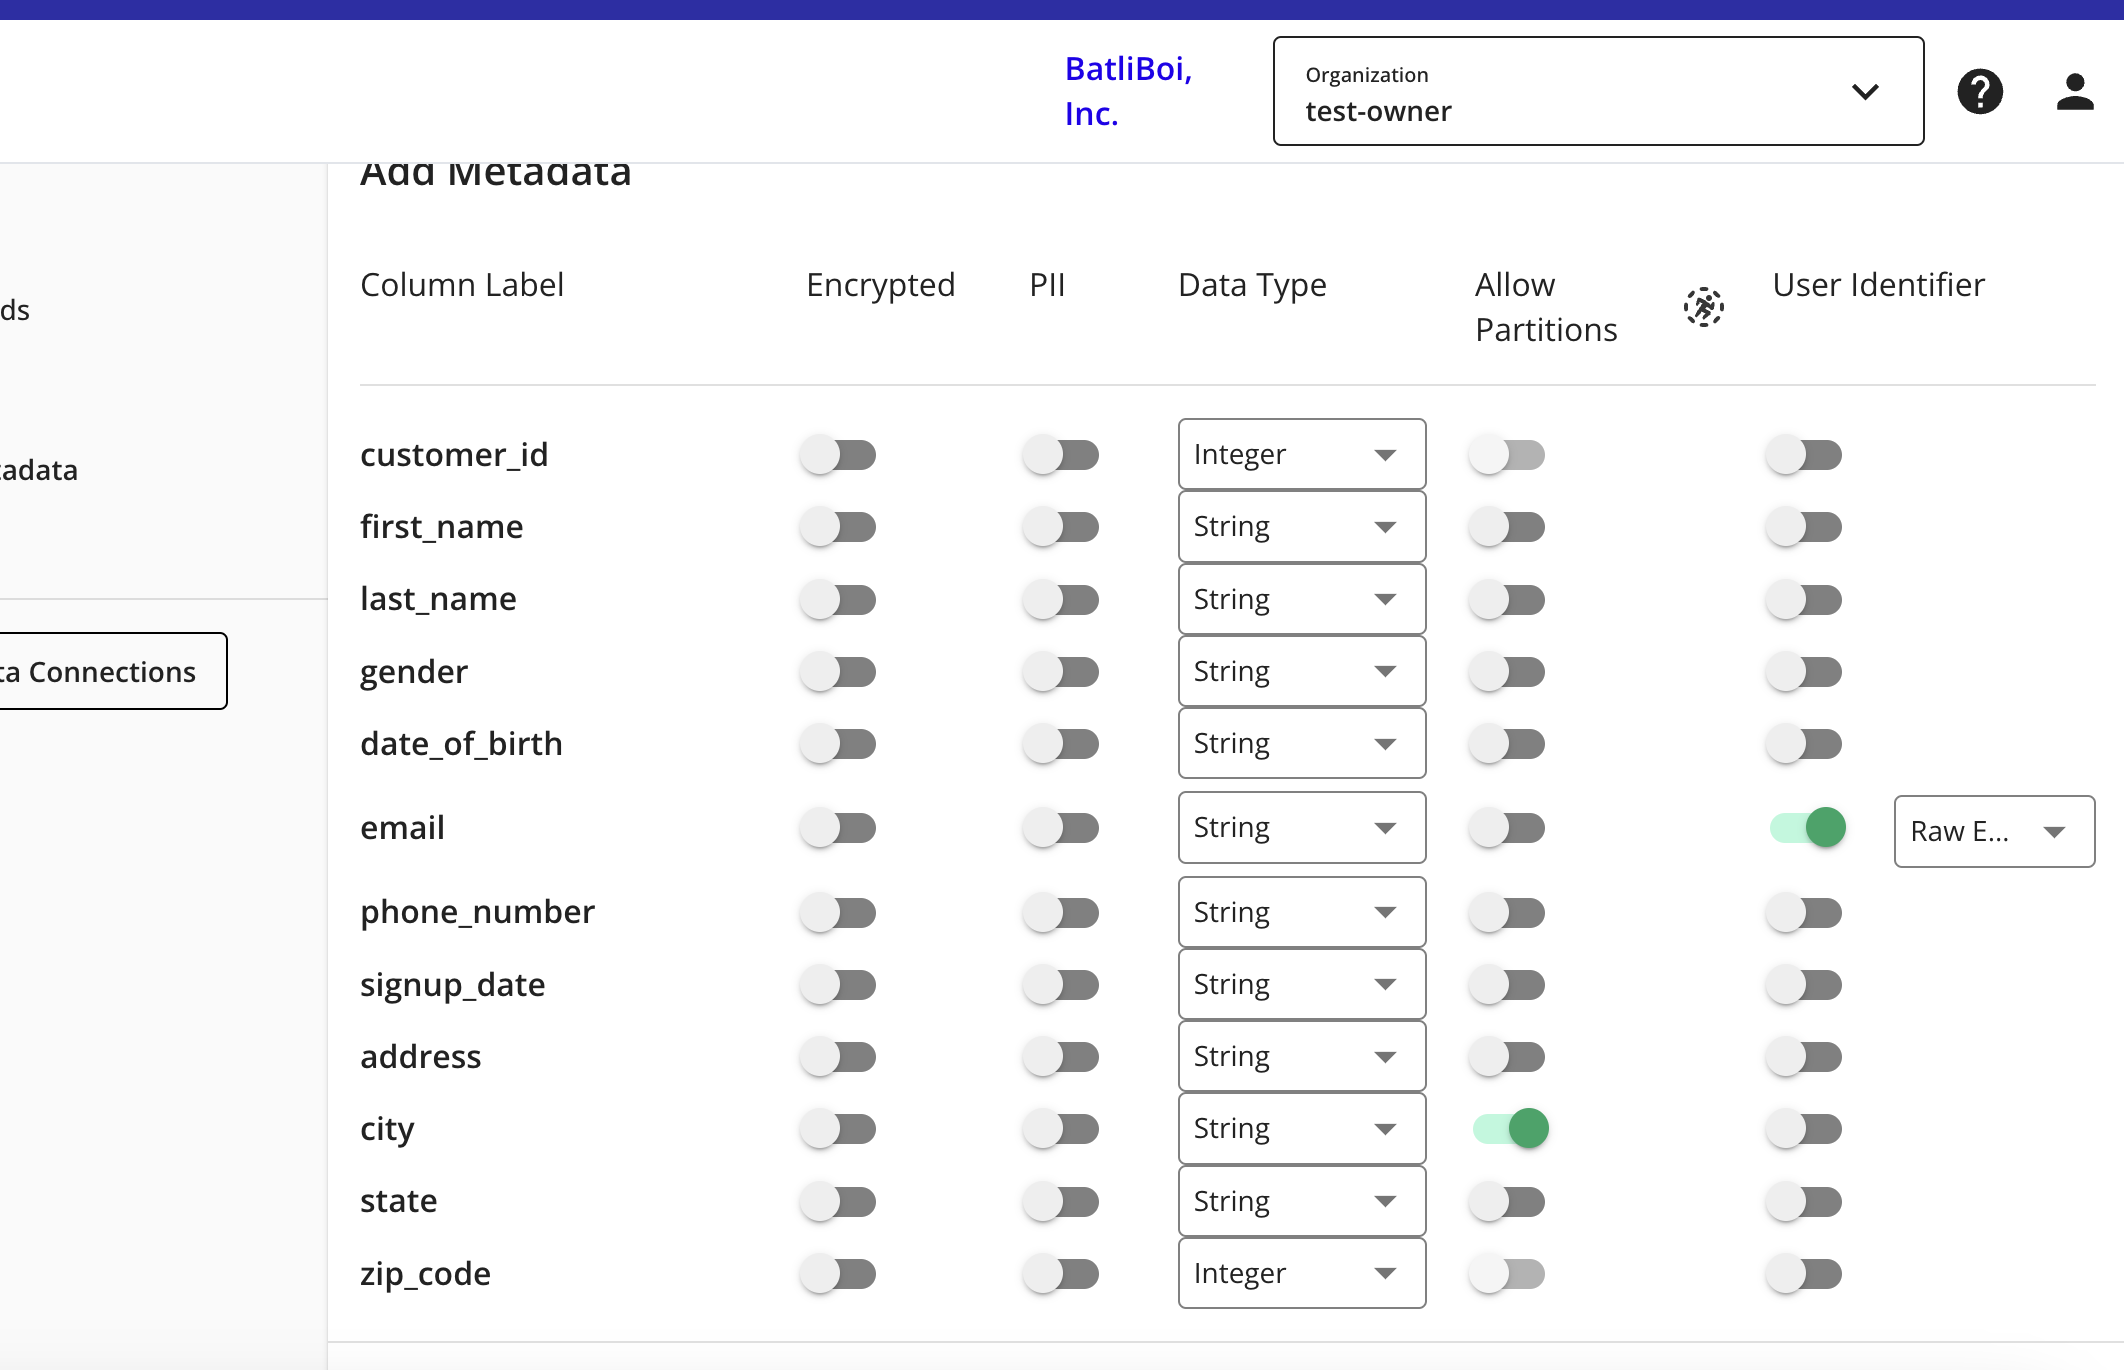
For any column that contains PII data, slide the PII toggle to the right.
Select the data type for each column.
For any partition columns, slide the Allow Partitions toggle to the right.
If a column contains PII, slide the User Identifiers toggle to the right and then select the user identifier that defines the PII data.
Click .
Your data connection configuration is now complete and the status changes to "Completed".