Export Results to GCS
You can set up an export of analytics and list results to GCS for the following clean room types:
Hybrid
Confidential Computing
Note
Partners invited to a clean room must have their export destination connections (grouped under "Destinations") approved by clean room owners. Contact your Customer Success representative to facilitate the approval.
The IAM role from LiveRamp Clean Room needs to have write/delete and read access on the customer bucket/folder.
Configuring exports outside of a clean room (such as at the organization level) is still supported, but will be deprecated. Setting up clean room question exports within a clean room is recommended.
Overall Steps
Perform the following overall steps in Google Cloud Platform to set up an export of analytics and list results to BigQuery:
Once the above steps have been performed in Google Cloud Platform, perform the following overall steps in LiveRamp Clean Room:
For information on performing these steps and for export details, see the sections below.
Perform Steps in Google Cloud Platform
Perform the steps in the sections below in Google Cloud Platform to set up an export of analytics and list results to BigQuery.
Create a Google Service Account
To create a Google service account in GCP:
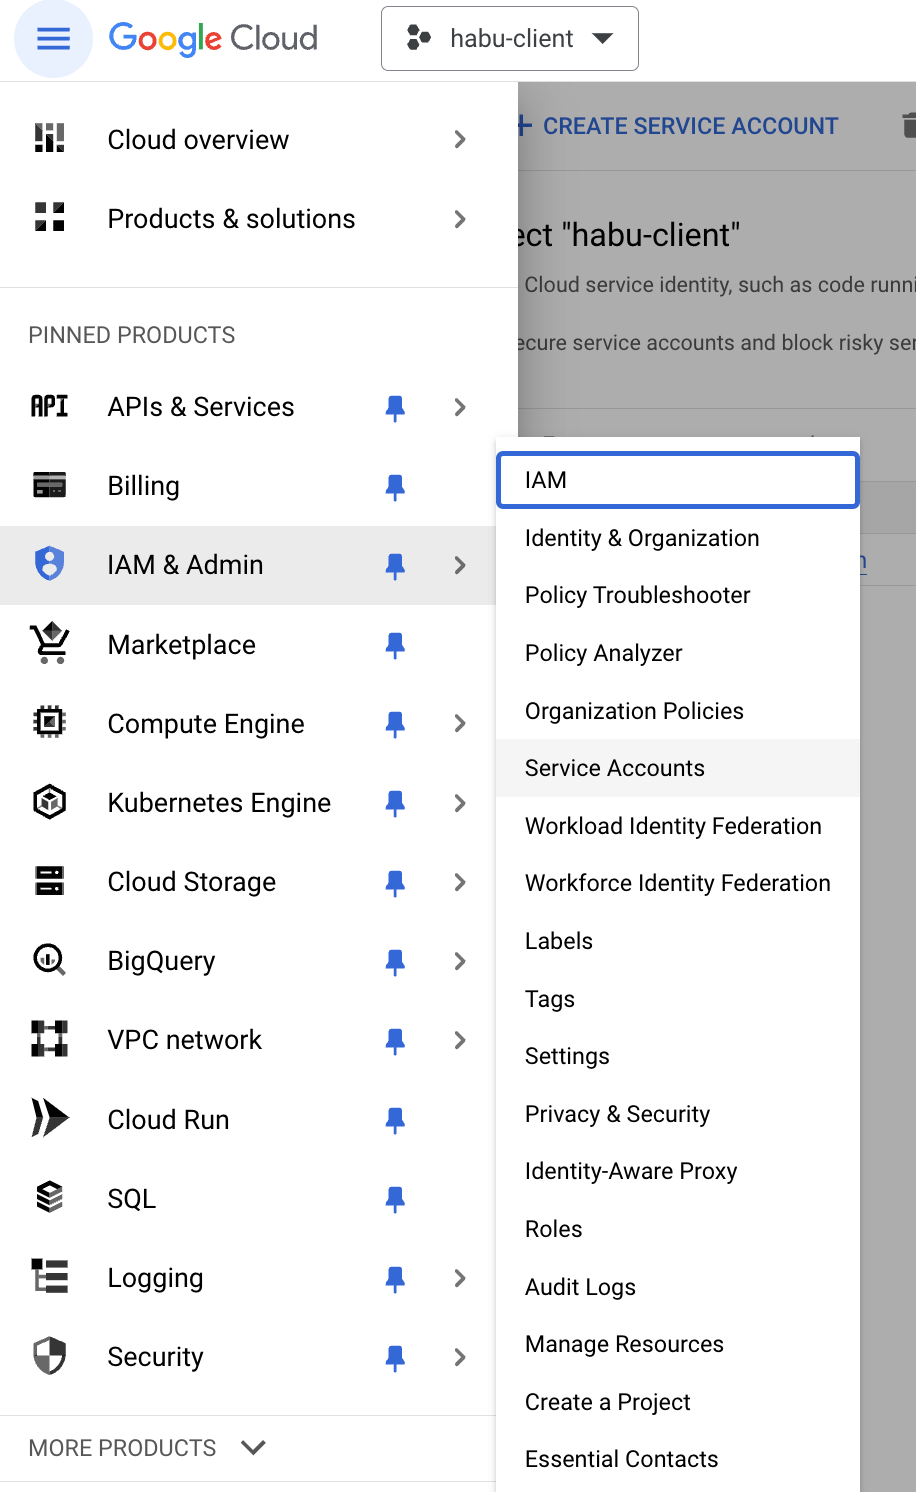
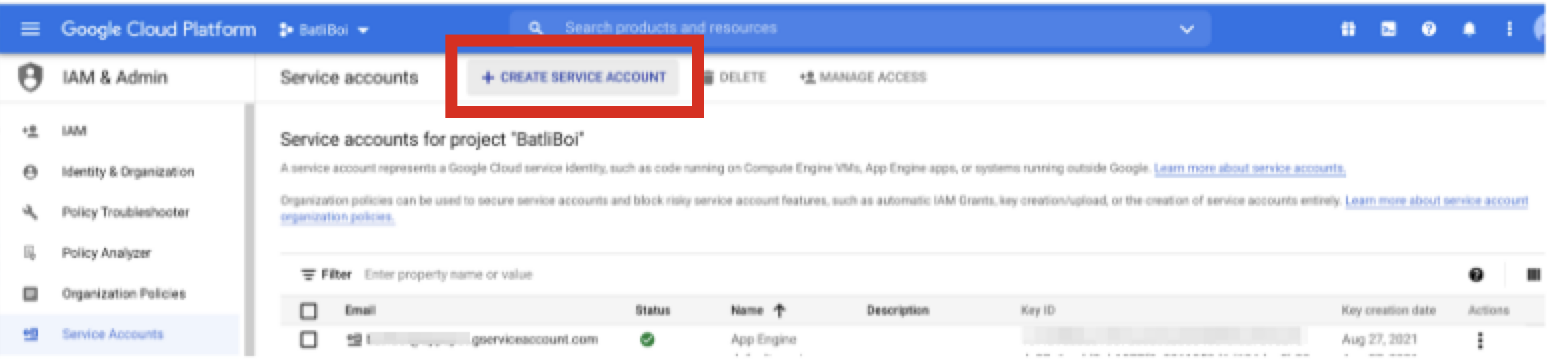
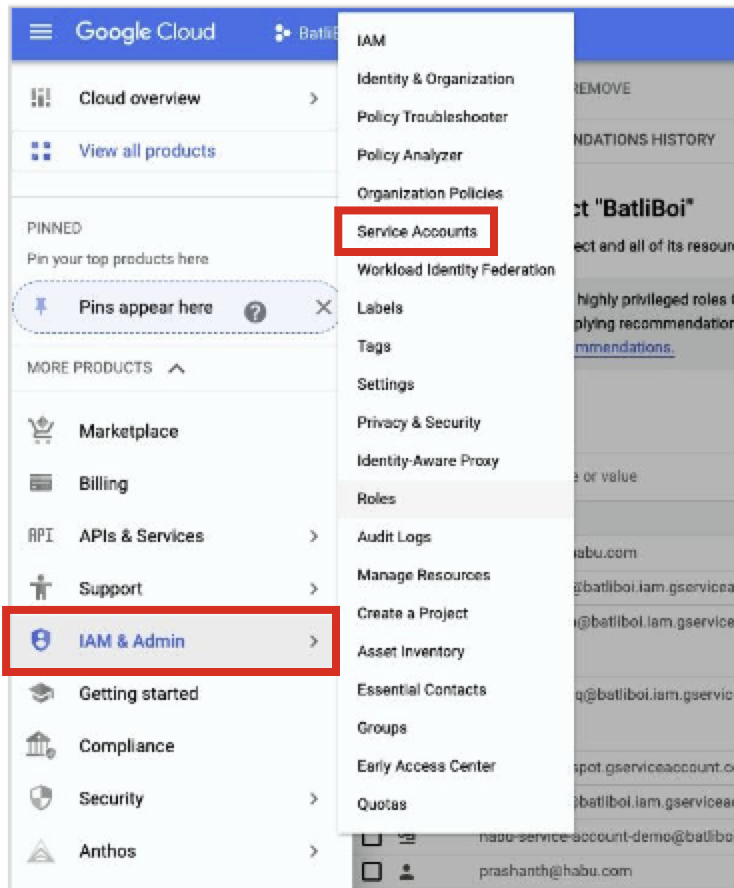
From GCP's main menu, select IAM & Admin → Service Accounts.
Click . Save the service account email because you will need it in later steps.
Enter a name for the service account.
Click .
Configure roles and additional user access as needed.
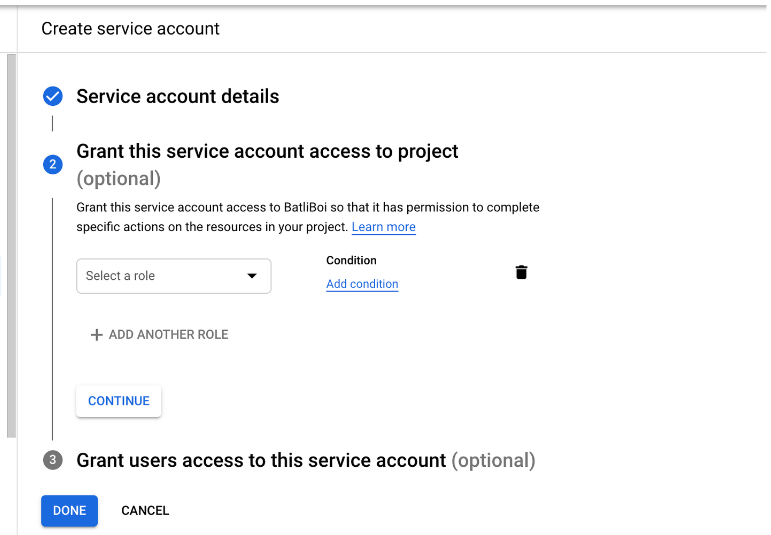
Click .
Create a Google Service Account Key
After you've created a Google service account, create a Google service account key:
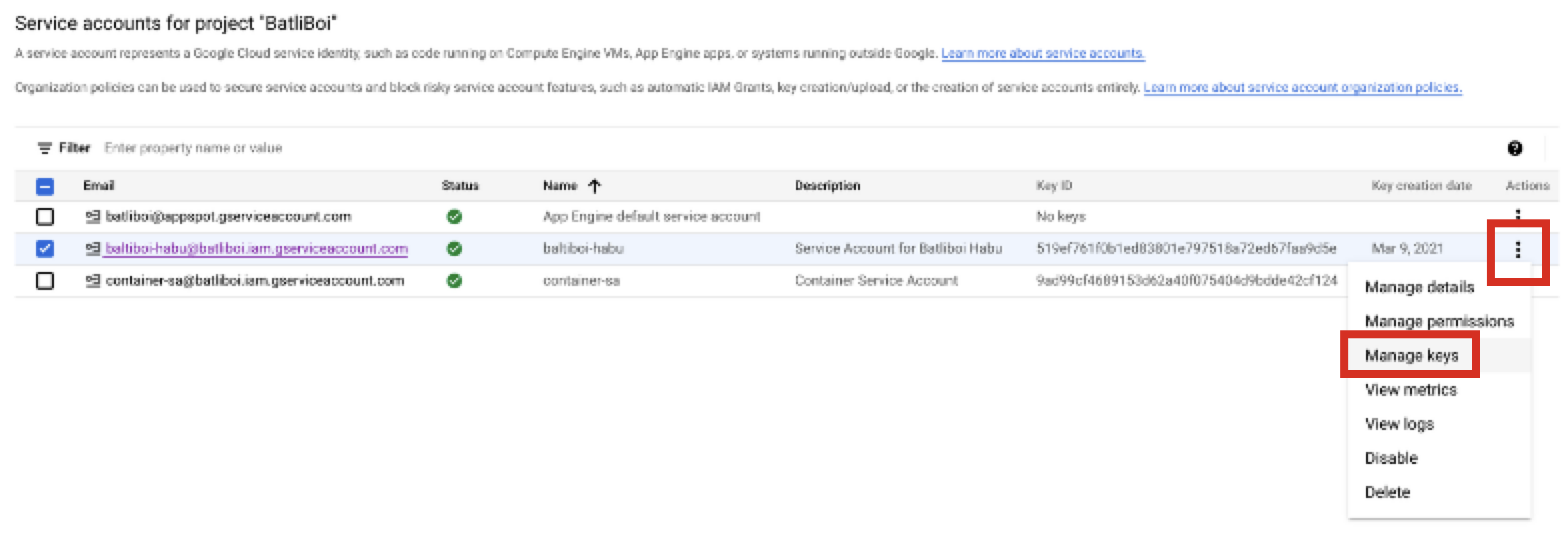
From GCP's main menu, select IAM & Admin → Service Accounts.
Select the check box for the service account you created in the previous procedure.
From the More Options menu for the service account's row, select Manage keys.
Click and then click .
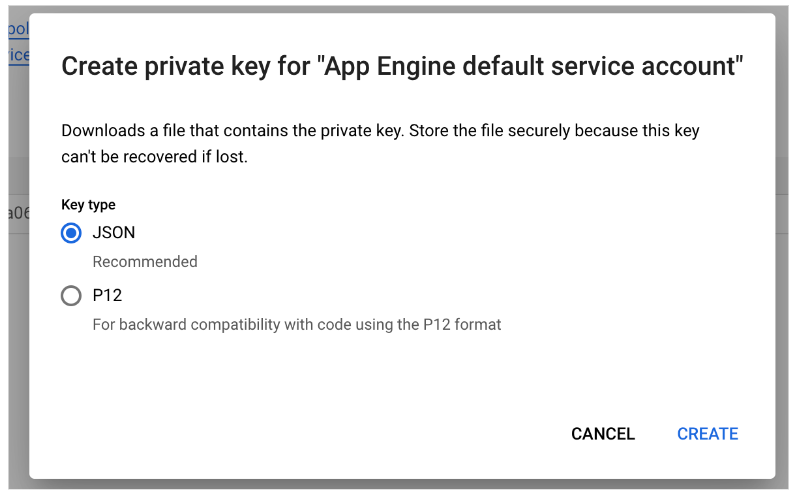
For the key type, select JSON and then click CREATE.
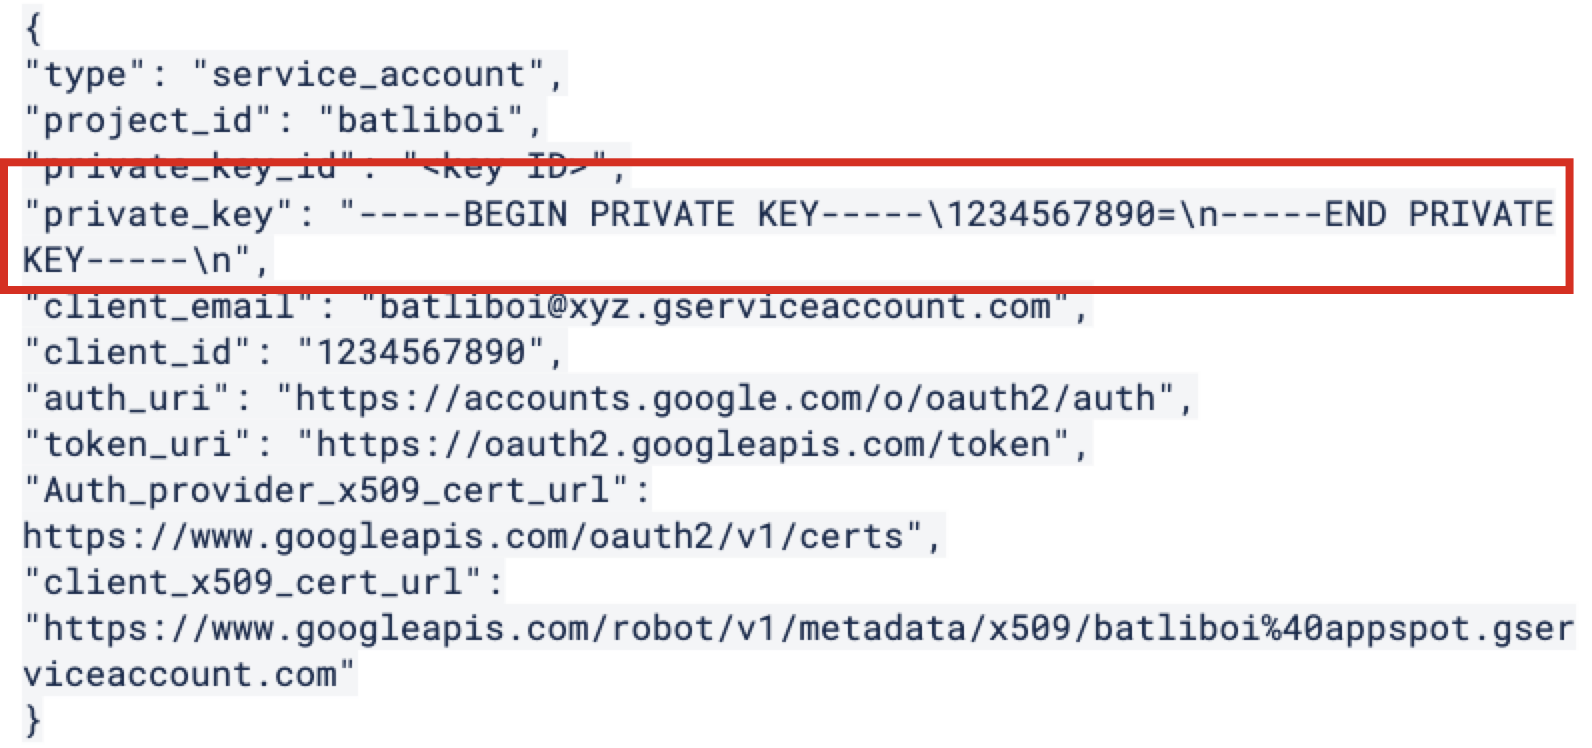
The private key will be stored in your Download folder (it will look similar to the following example). Save this for use in the “Add the Credentials” section below.
 |
Grant the Service Account Permissions to Access Bucket Objects
To grant bucket objects permissions to the service account:
From the Google Cloud Platform console, log in as a Project Editor.
From the home dashboard, select IAM & Admin → Roles.
Select CREATE ROLE.
Enter a title, description, and ID for the custom role.
Select Add permissions.
Enter "Storage Admin" in the filter.
Add the following permissions:
storage.managedFolders.create
storage.managedFolders.delete
storage.managedFolders.get
storage.managedFolders.list
storage.multipartUploads.abort
storage.multipartUploads.create
storage.multipartUploads.list
storage.multipartUploads.listParts
storage.objects.create
storage.objects.delete
storage.objects.get
storage.objects.getIamPolicy
storage.objects.list
storage.objects.overrideUnlockedRetention
storage.objects.restore
storage.objects.setIamPolicy
storage.objects.setRetention
storage.objects.update
Click .
Note
If you don’t want to set up a custom role with the above permissions, you can also assign the service account the Storage Object Admin role. Instructions on assigning a role to the service account can be found below.
Assign the Custom Role to the Cloud Storage Service Account
To assign the custom role to the cloud storage service account:
From the Google Cloud Platform console, log in as a Project Editor.
Search for "Cloud Storage".
From the home dashboard, select Storage → Browser.
Click the bucket name for the bucket you want to configure for access.
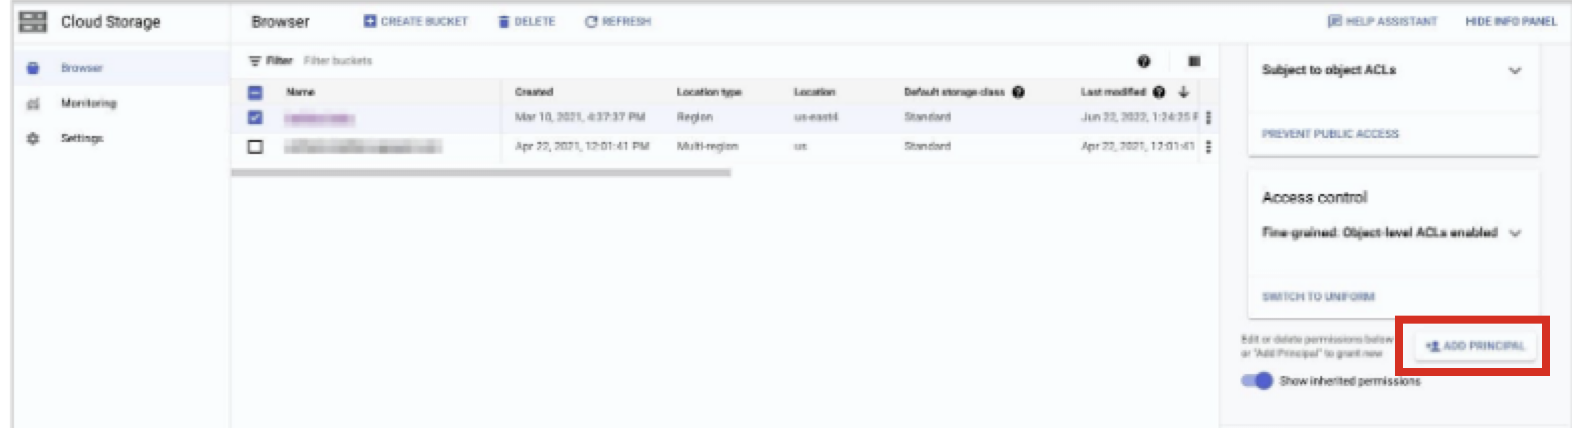
Select SHOW INFO PANEL in the upper-right corner. The information panel for the bucket displays.
From the information panel, click .
In the Add members field, add the service account.
From the Select a role dropdown, select Custom → role (where "role" is the custom Cloud Storage role you created in the previous procedure).
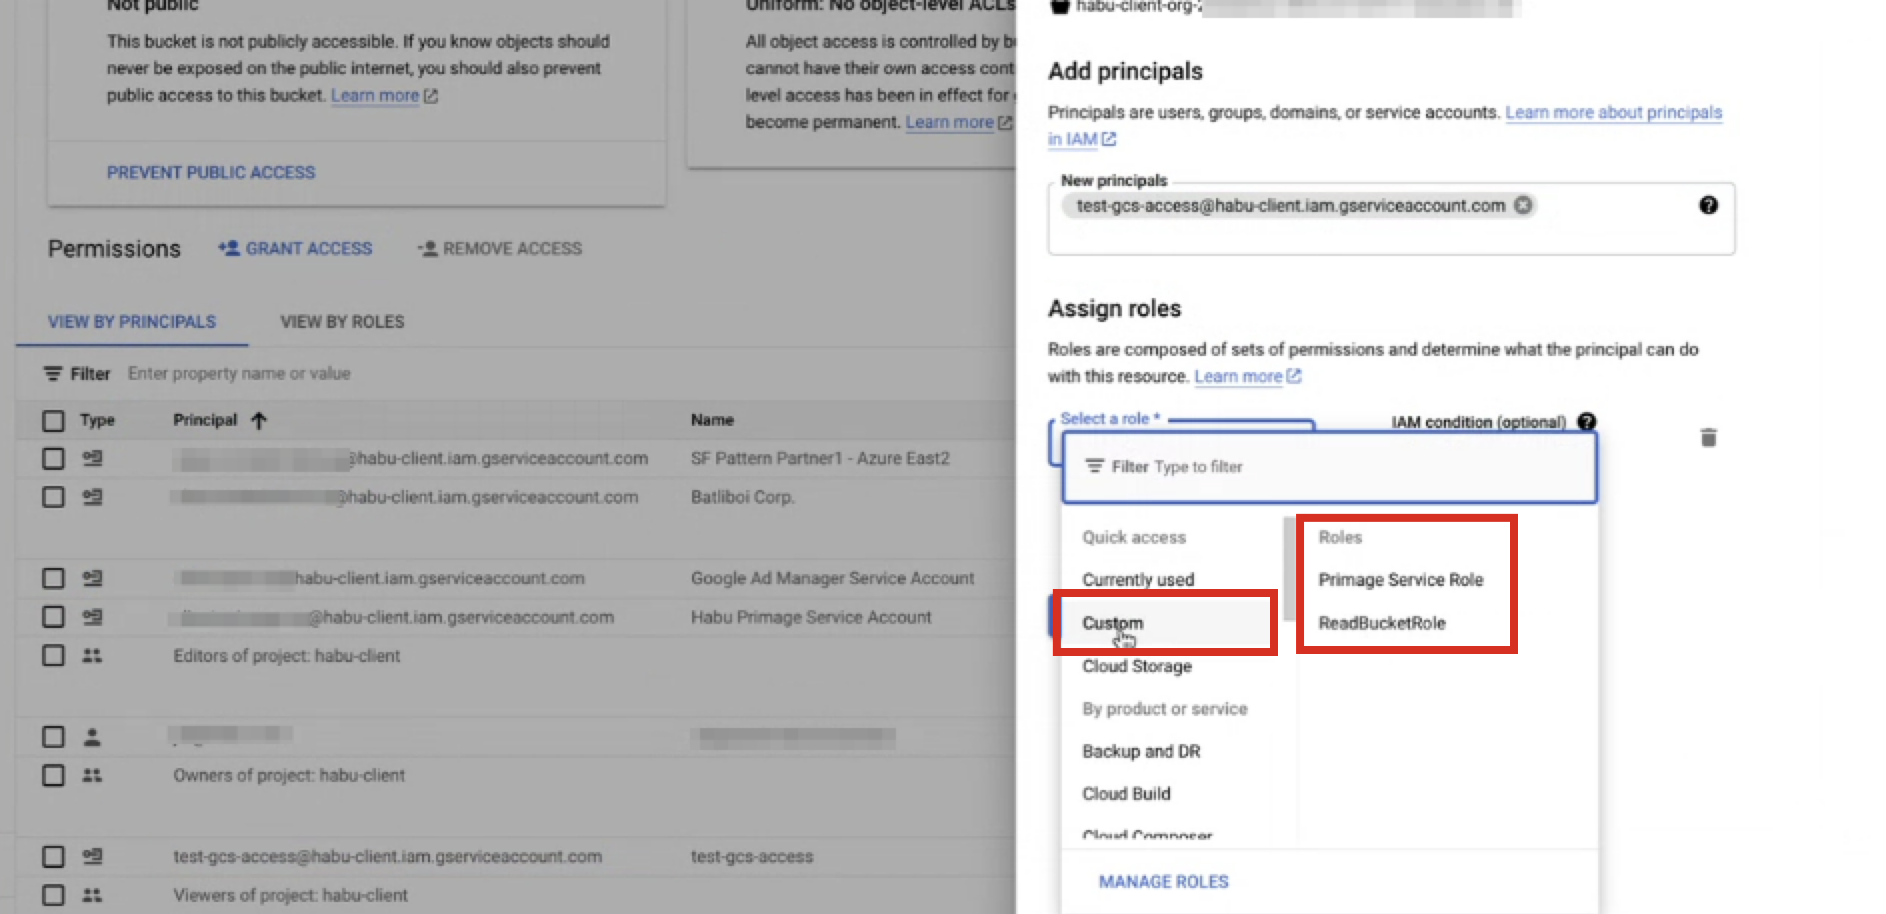
Click .
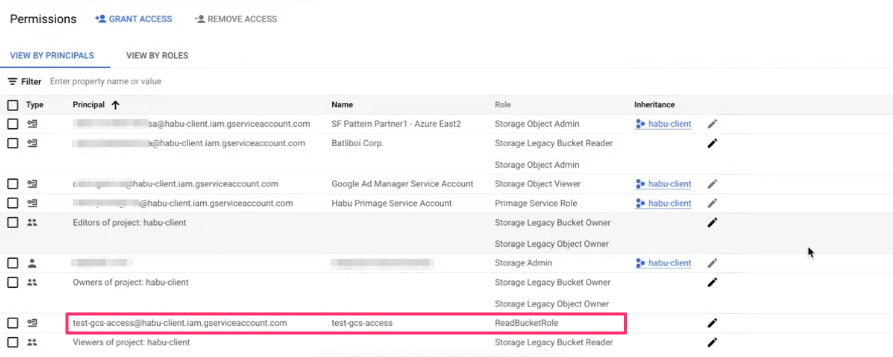
Confirm the custom role and service account are now associated with the bucket.
Perform Steps in LiveRamp Clean Room
Once the above steps have been performed in Google Cloud Platform, perform the overall steps in the sections below in LiveRamp Clean Room.
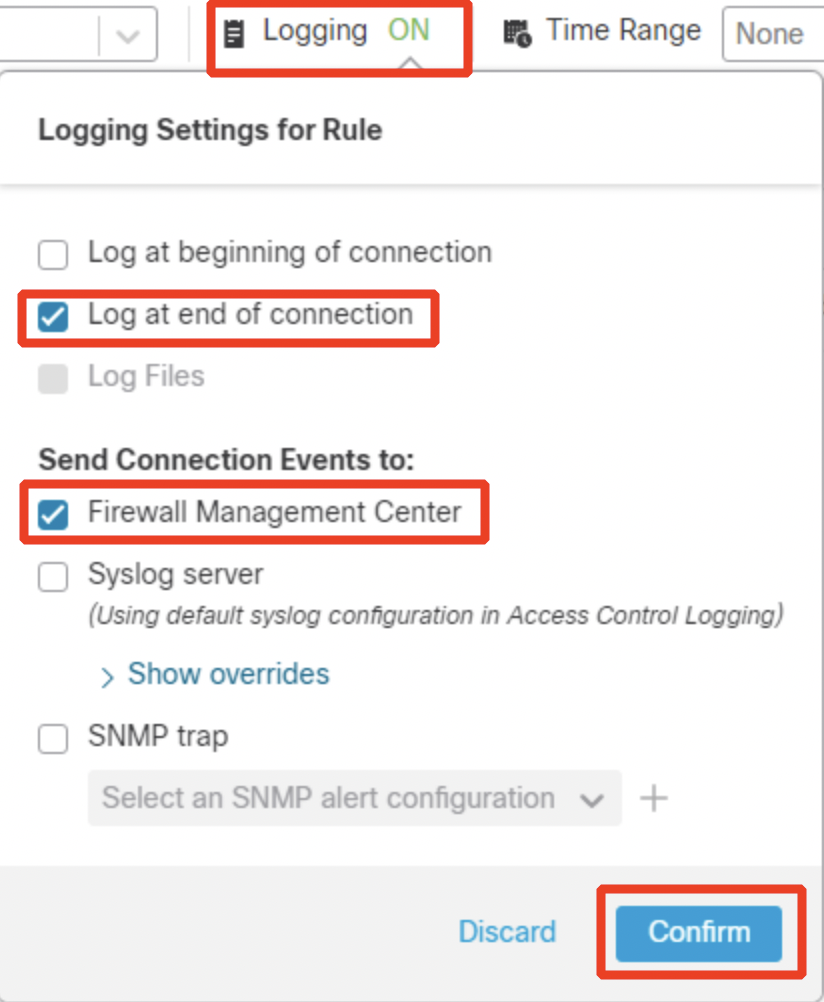
Enable the Clean Room for Exports
Before setting up an export, the clean room owner must enable exports for the selected source clean room (if not already done during clean room creation):
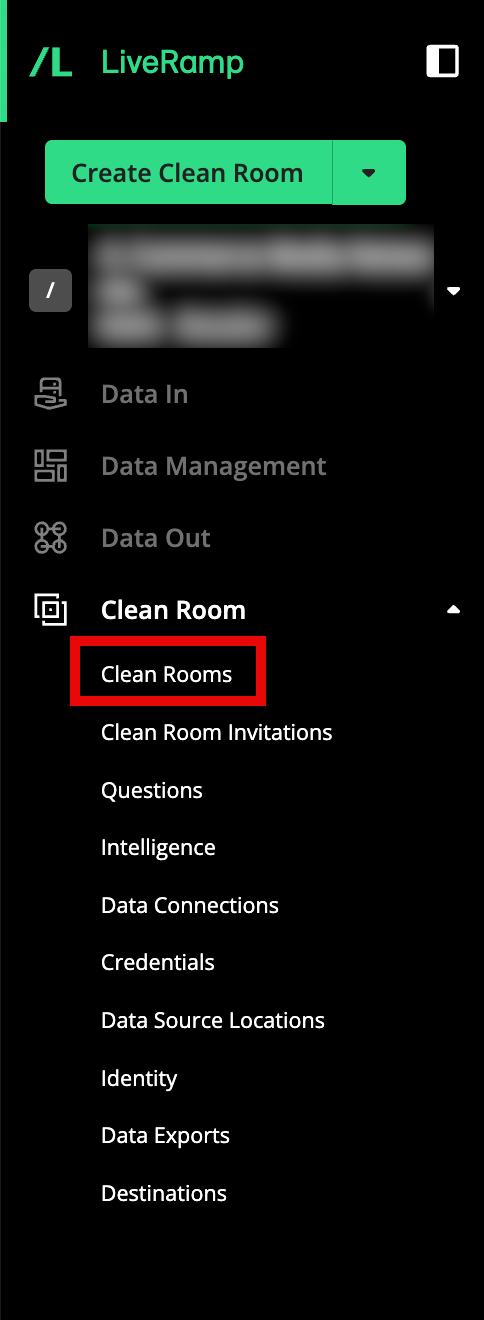
From the navigation menu, select Clean Room → Clean Rooms to open the Clean Rooms page.
In the row for the clean room you would like to export from, click the More Options menu (the three dots), and then select Edit.

From the Configuration step, click .
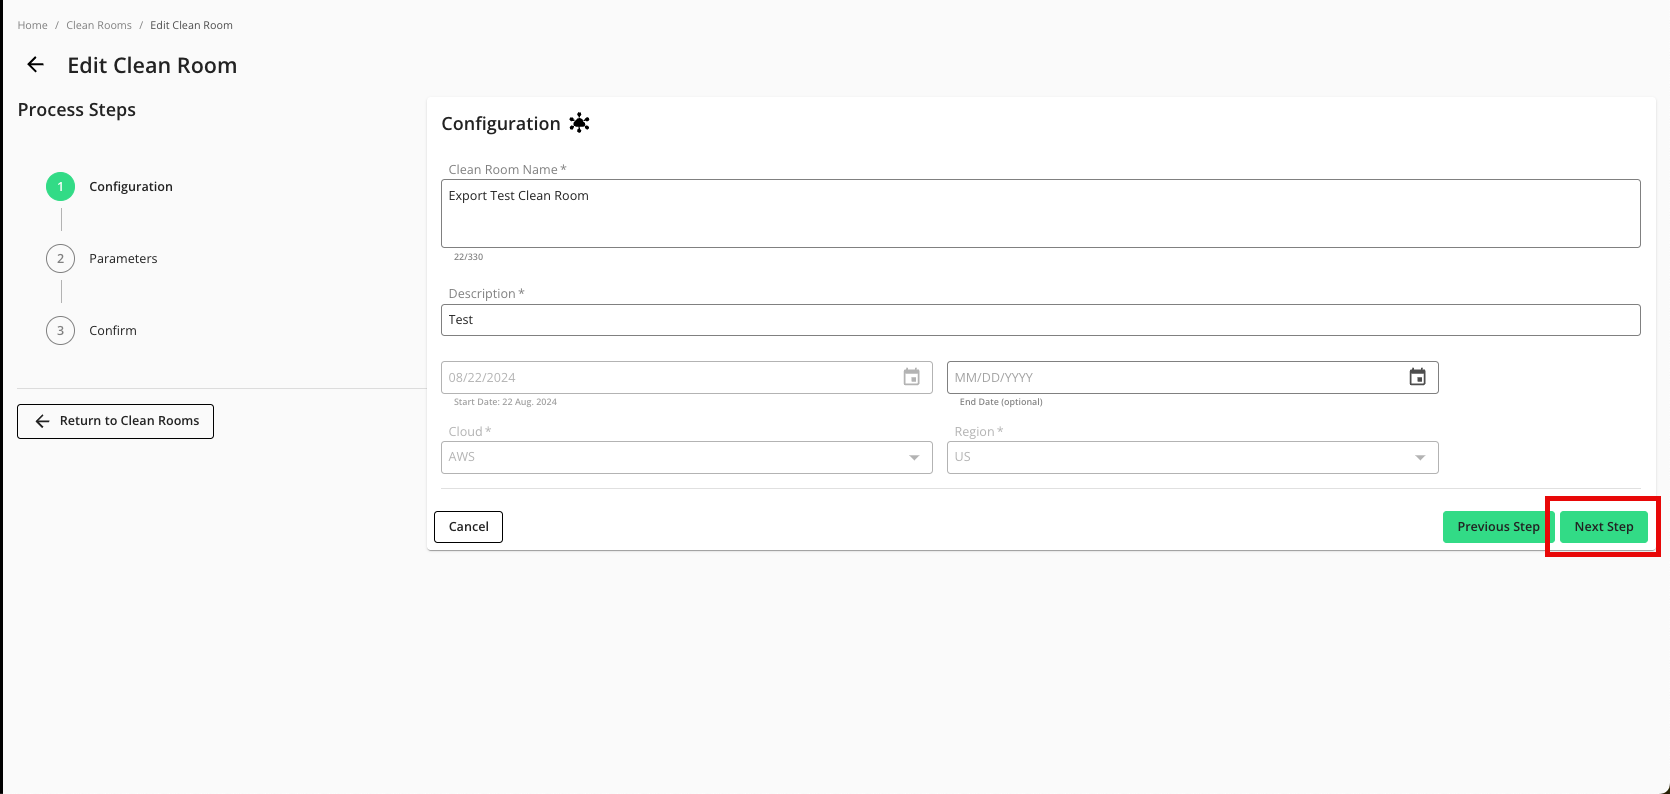
From the Parameters step, adjust any data control parameters as needed and then slide the Enable Export toggle to the right.
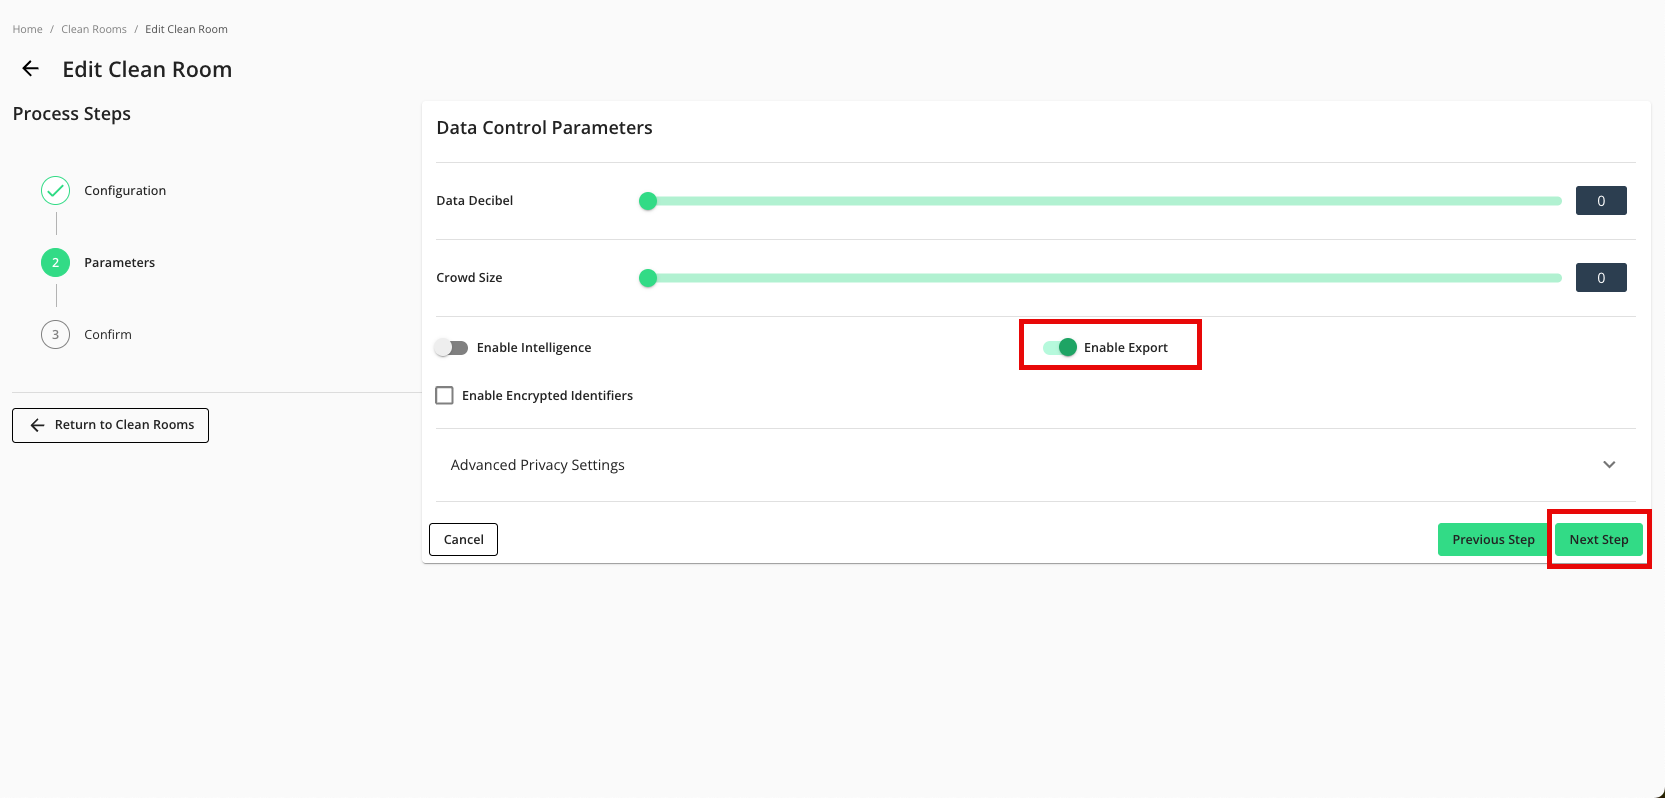
Click .
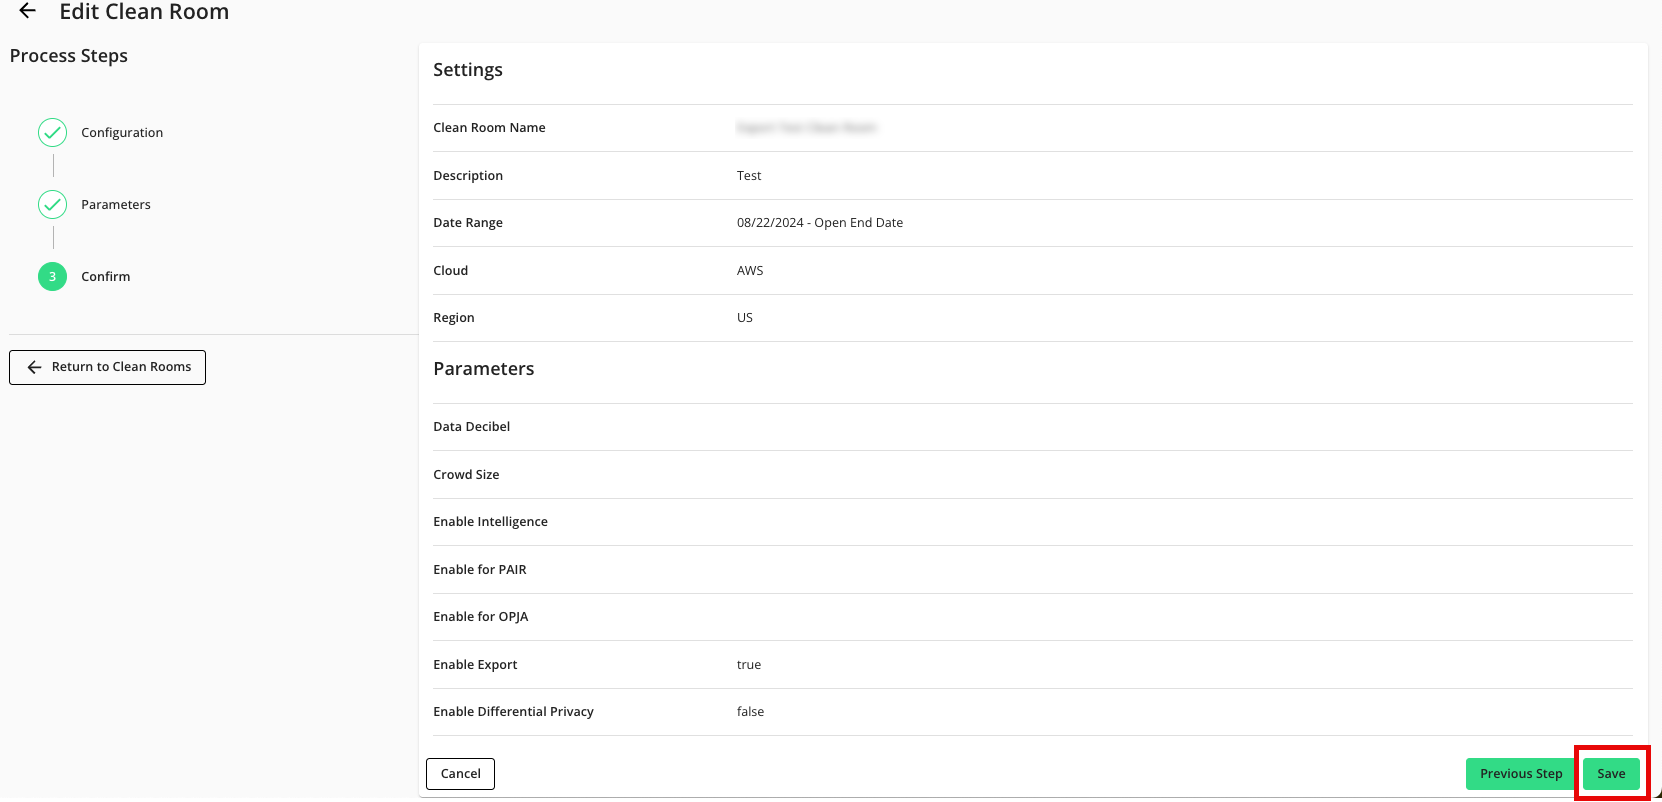
Verify that your data control parameters are correct and then click .
Add the Credentials
After enabling the clean room for exports, the clean room owner must first add either their own credentials or those of their partner for the destinations they want to export to:
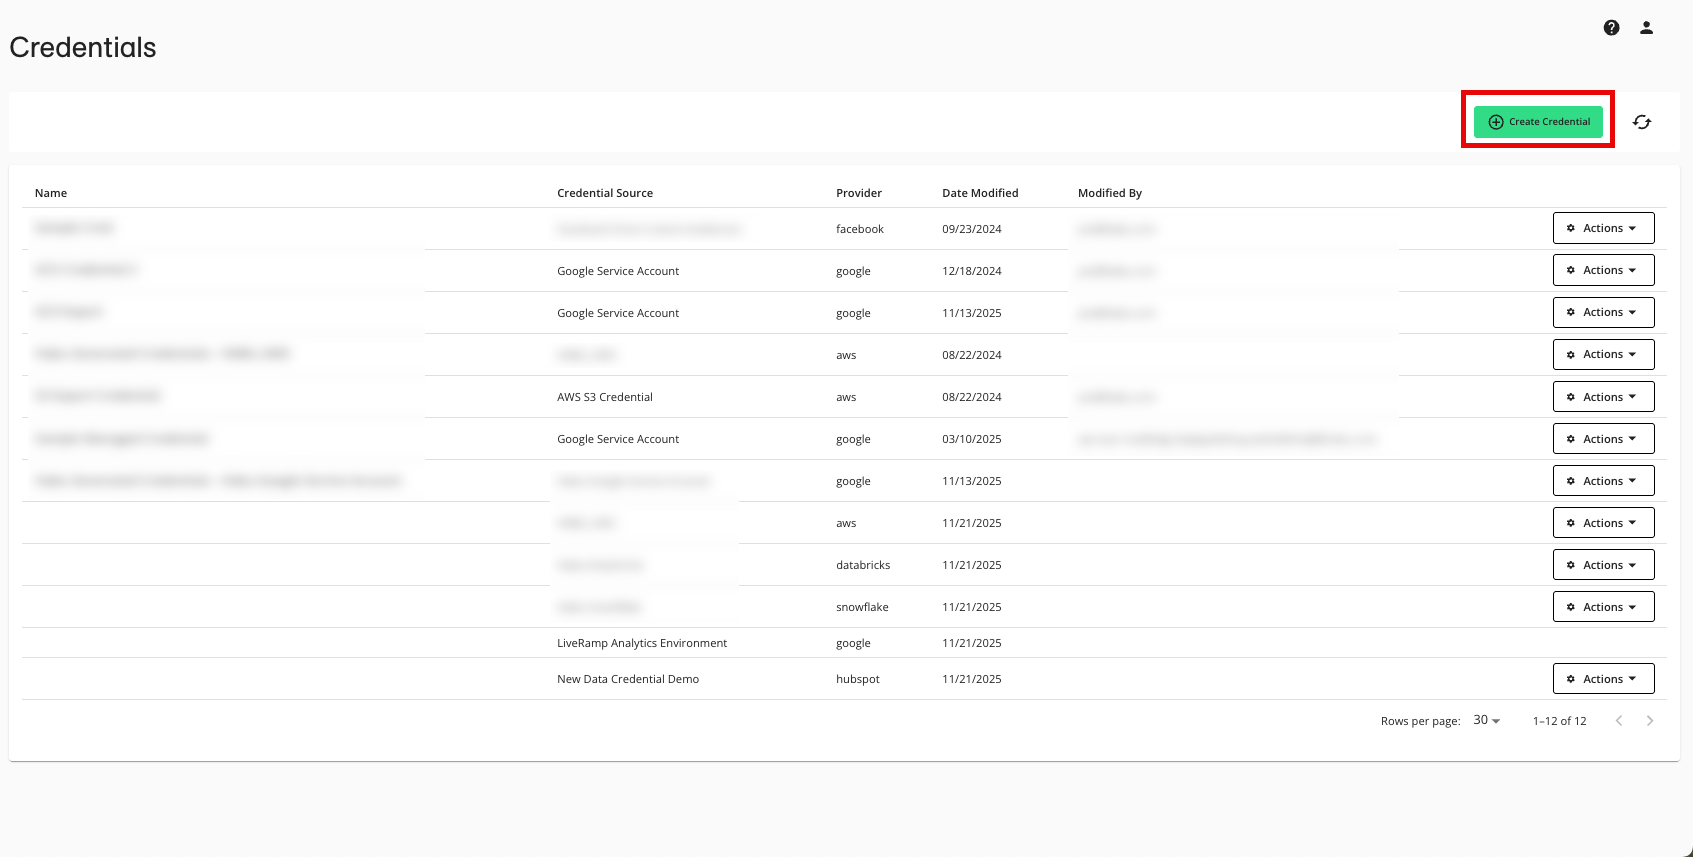
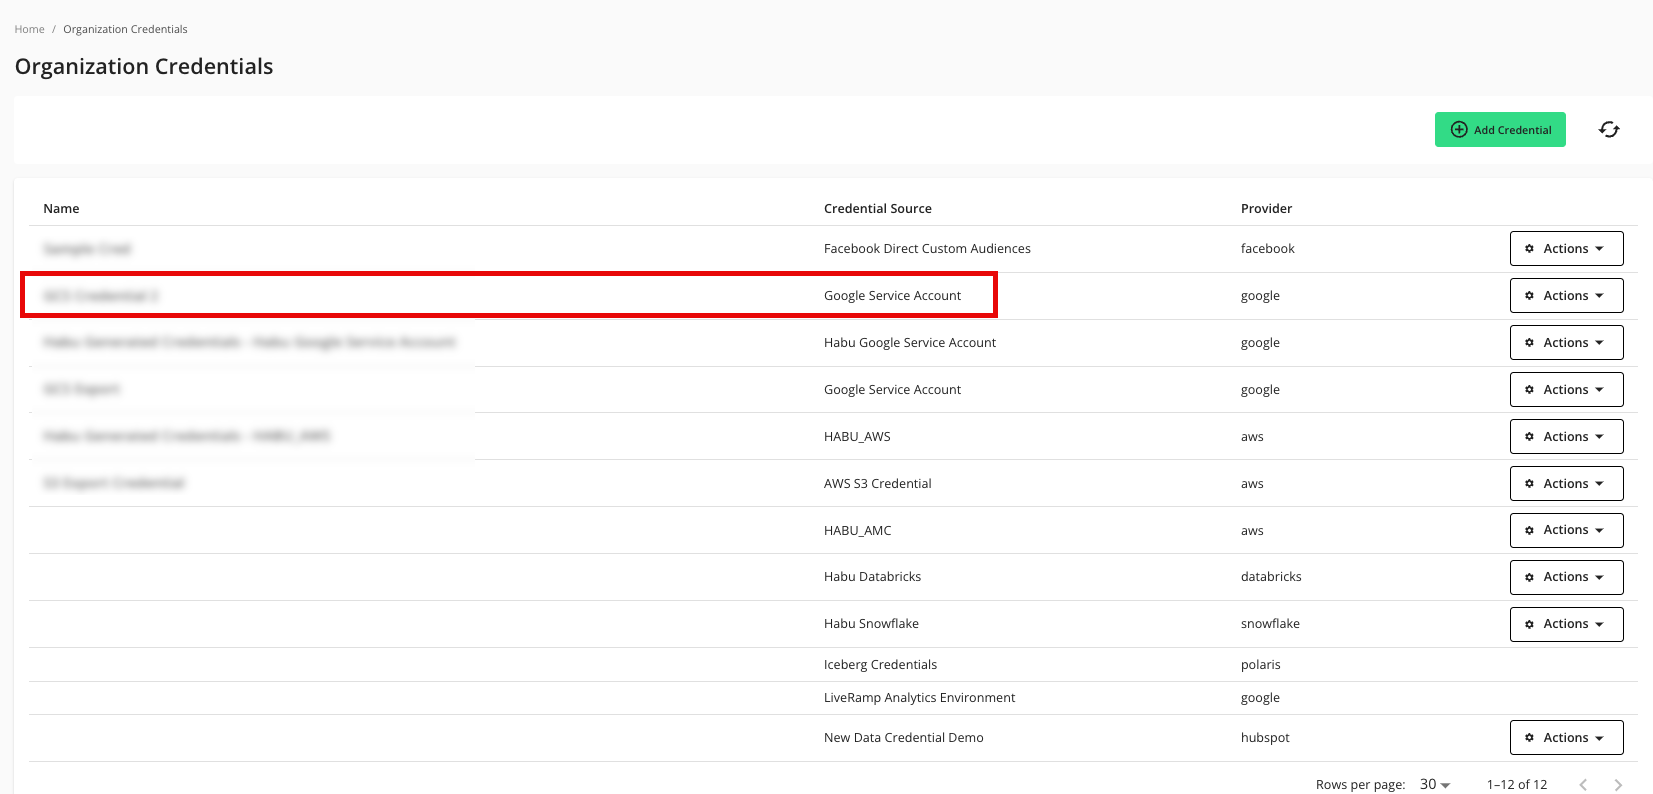
From the navigation menu, select Clean Room → Credentials to open the Credentials page.
Click .
Enter a descriptive name for the credential.
For the Credentials Type, select "Google Service Account".

For the Project ID, enter the project ID.
Enter your Credential JSON (credential JSON is hidden by default, viewable here for demonstration purposes).

Click .
Verify that your credentials have been added to LiveRamp Clean Room:
Add an Export Destination Connection
To create an export destination connection:
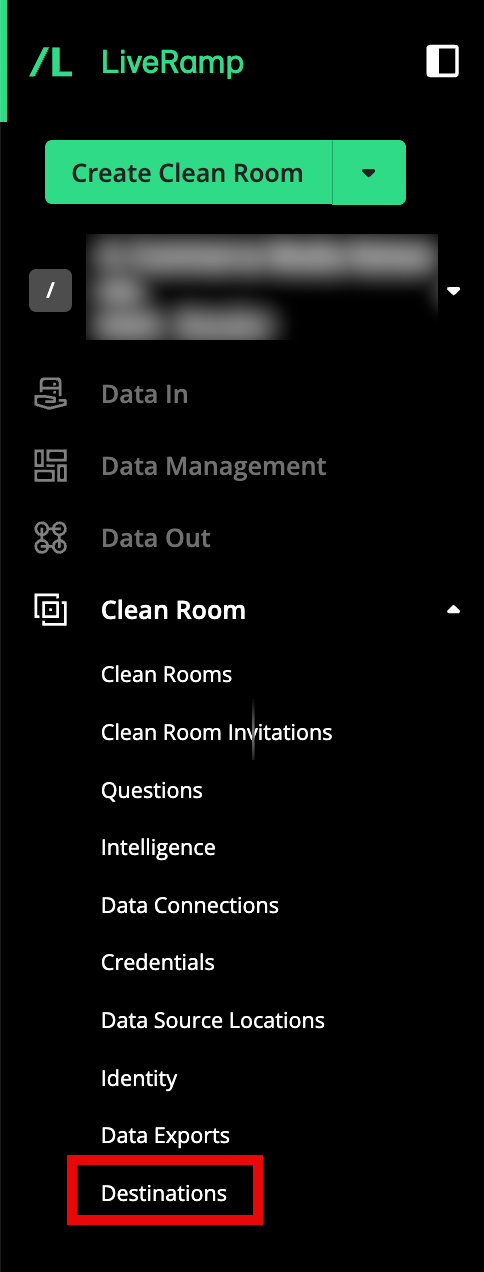
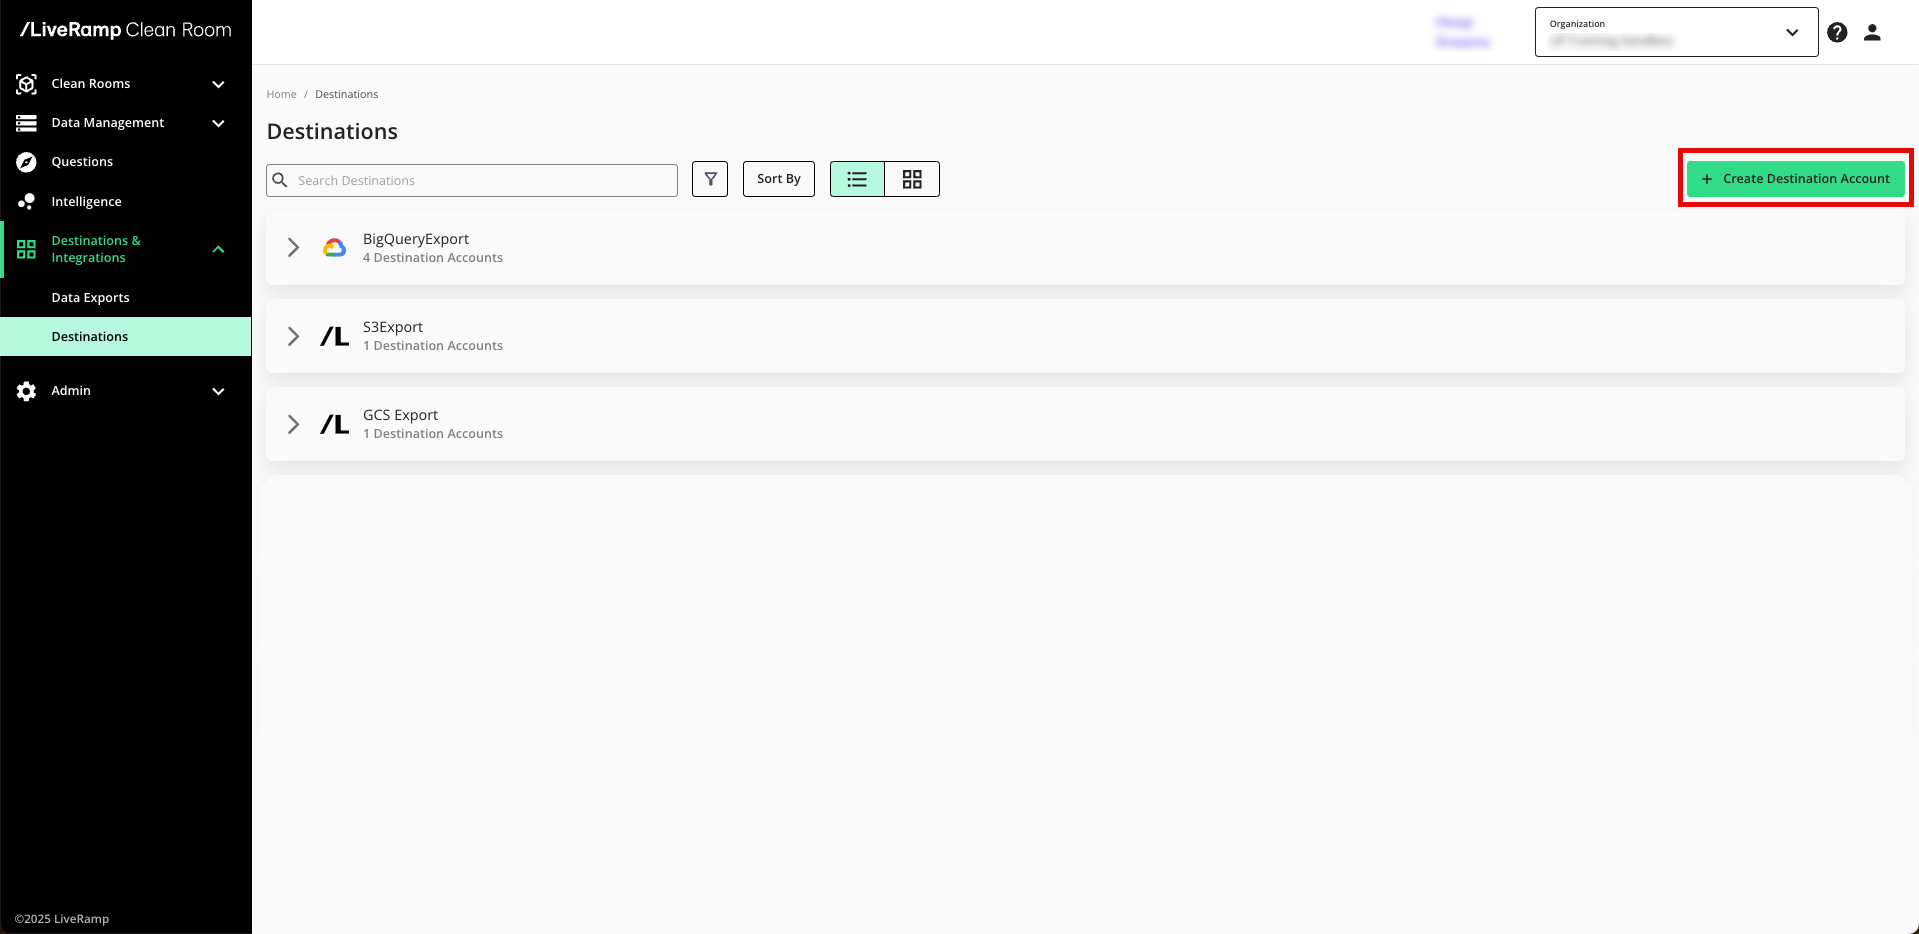
From the navigation menu, select Clean Room → Destinations to open the Destinations page.
Click .
Select GCS Export.
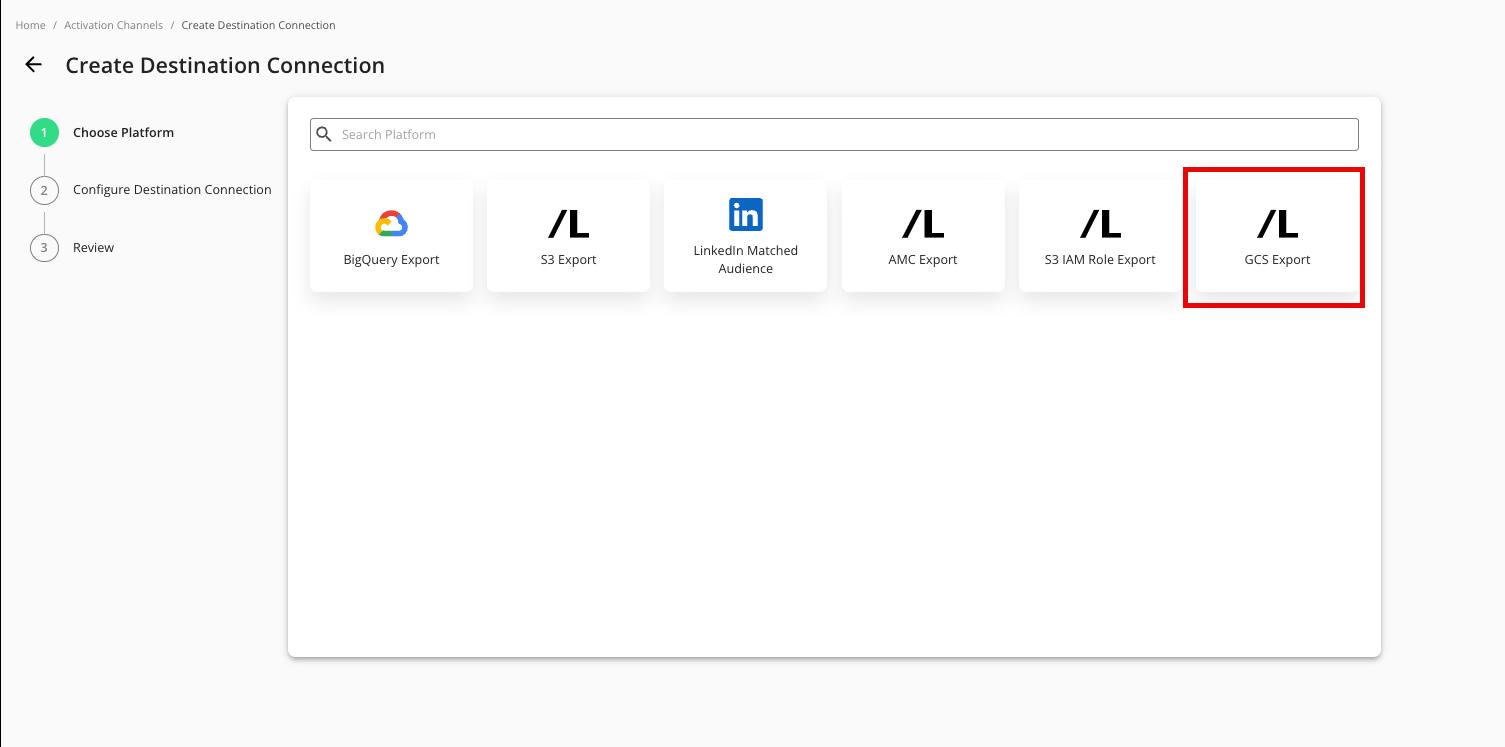
Enter a name and select the GCS Credential created in the "Add the Credentials" section above.
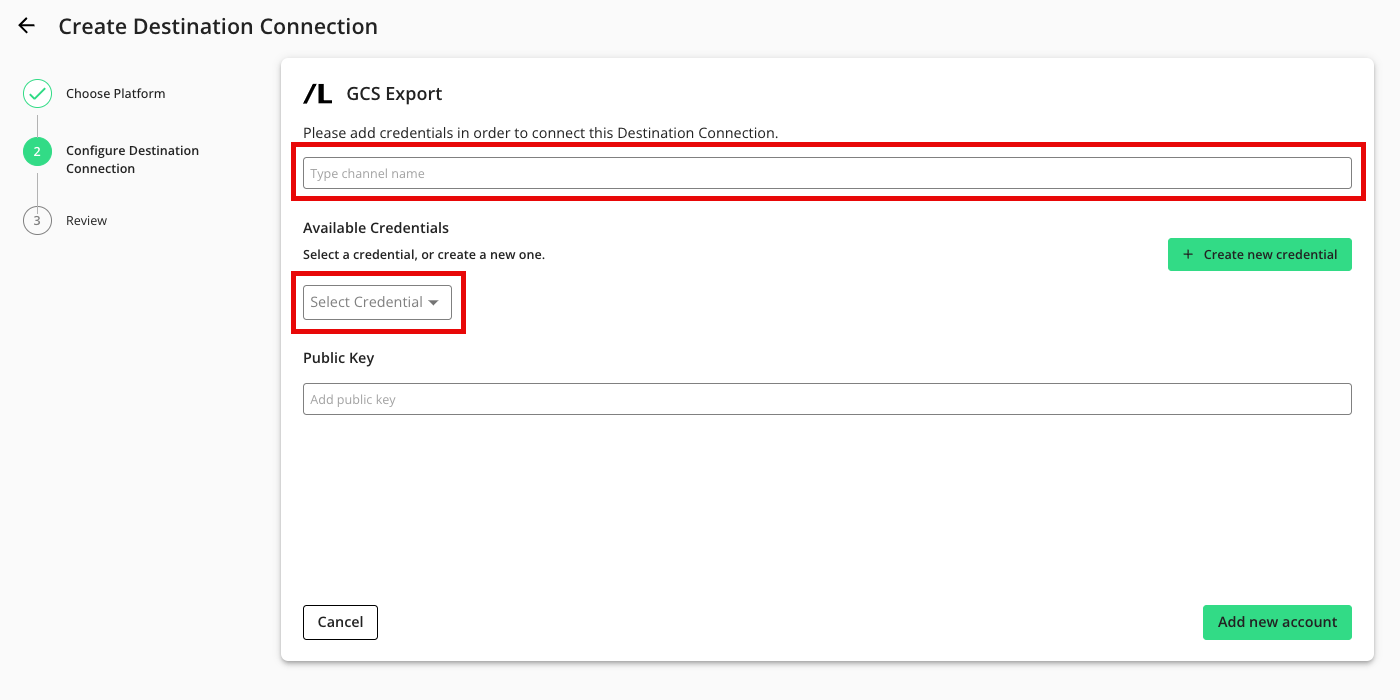
If you're going to encrypt any fields in the data you export to this destination connection, enter your public key (otherwise, leave this field blank).
Click .
Confirm that the new export has been added to your list of GCS export destination connections.
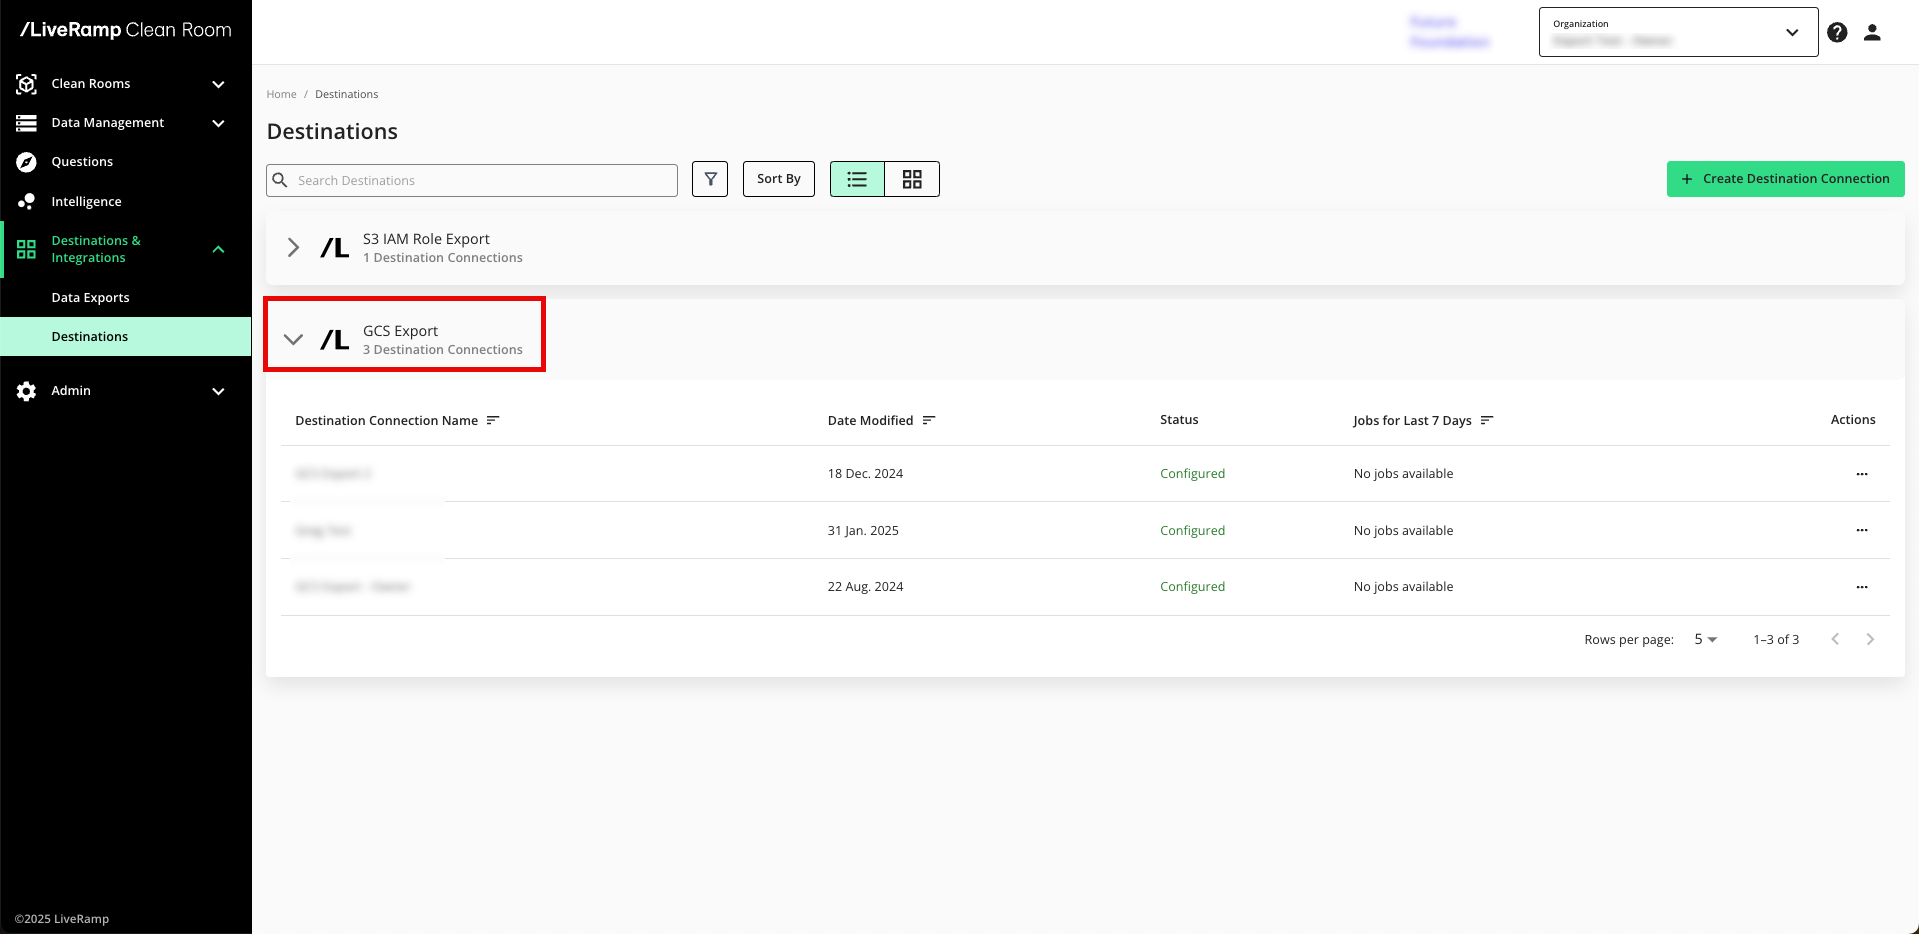
Note
The status of the destination connection will initially be "Configured", but you can continue to export data. Once the first successful export has been processed, the status changes to "Complete".
Provision a Destination Connection to the Clean Room
Once you've created a destination connection, you can provision that destination connection to the clean room you want to export results from:
Note
In most situations, only the clean room owner can provision export destinations using this method. To give clean room partners the ability to provision destinations that the owner has created, contact your LiveRamp representative.
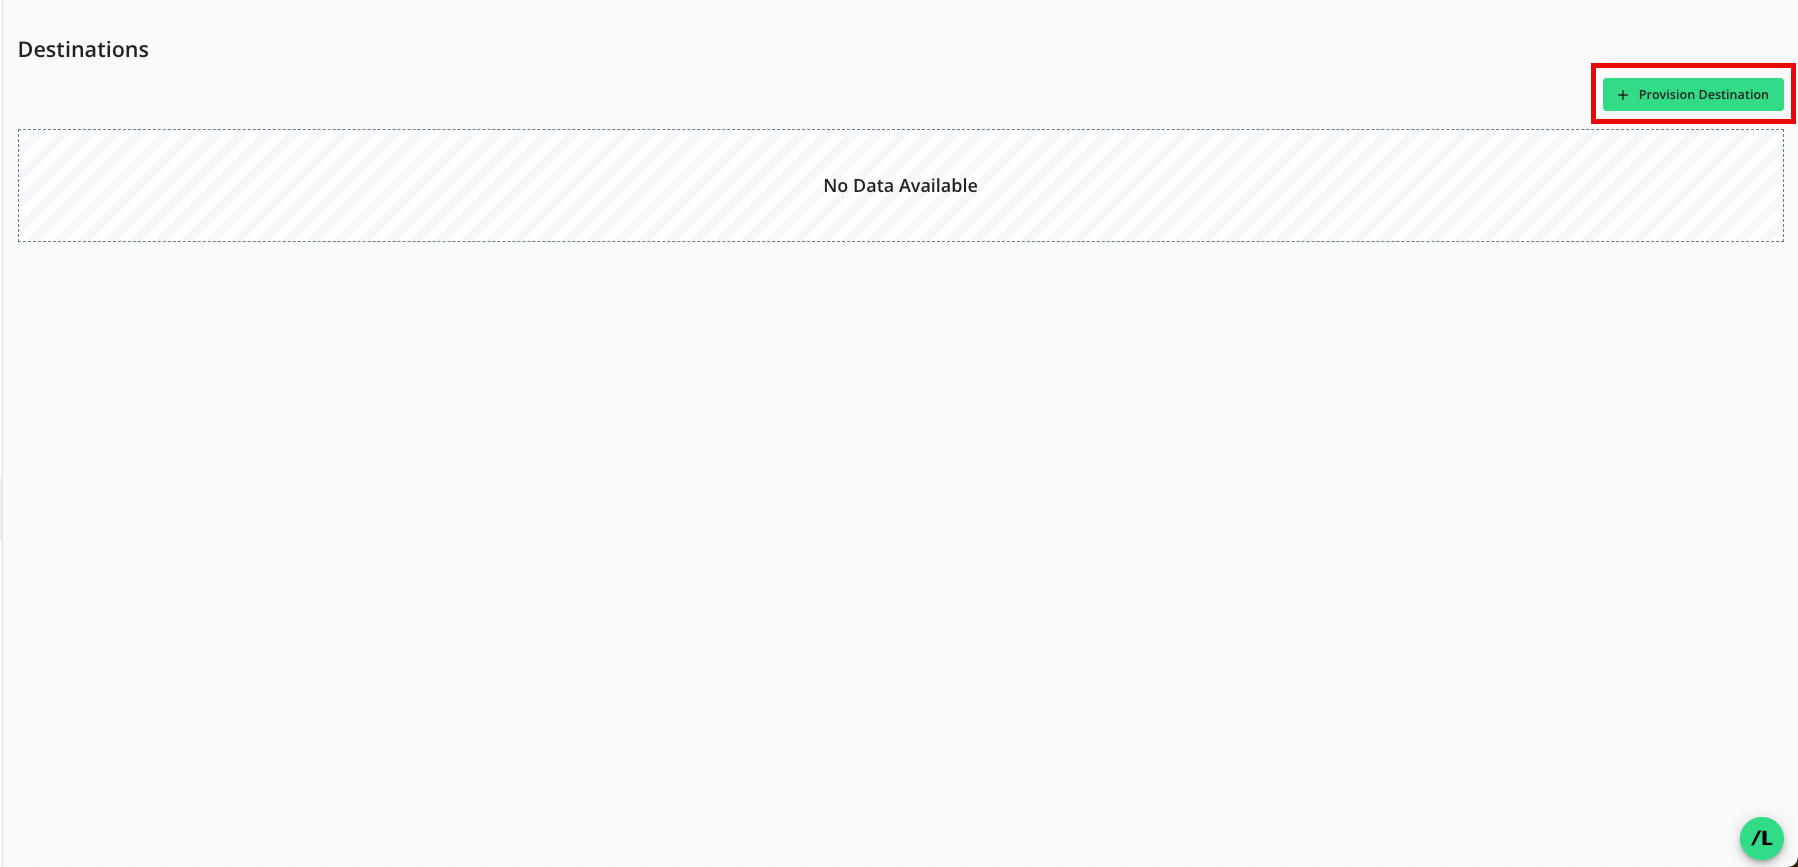
From the Clean Room navigation pane, select Destinations. The Destinations screen shows all destination connections provisioned to the clean room.
Click .
Check the check box for the desired destination connection and then click (AWS S3 example shown).
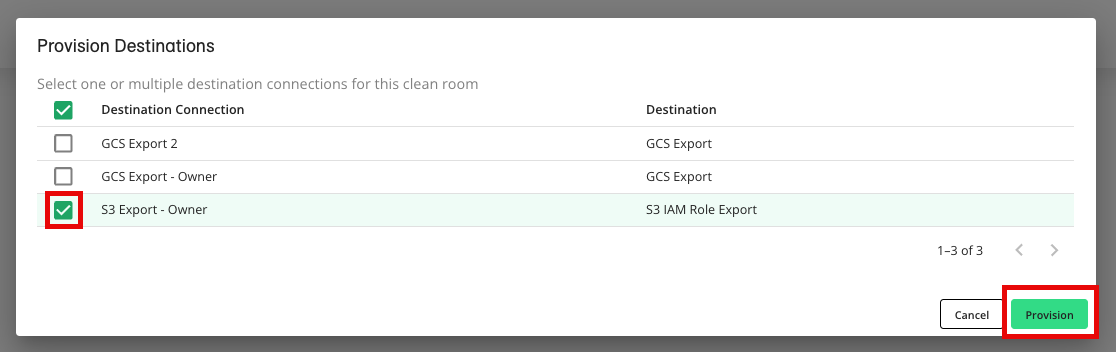
Verify that your destination connection has been added (S3 IAM example shown).
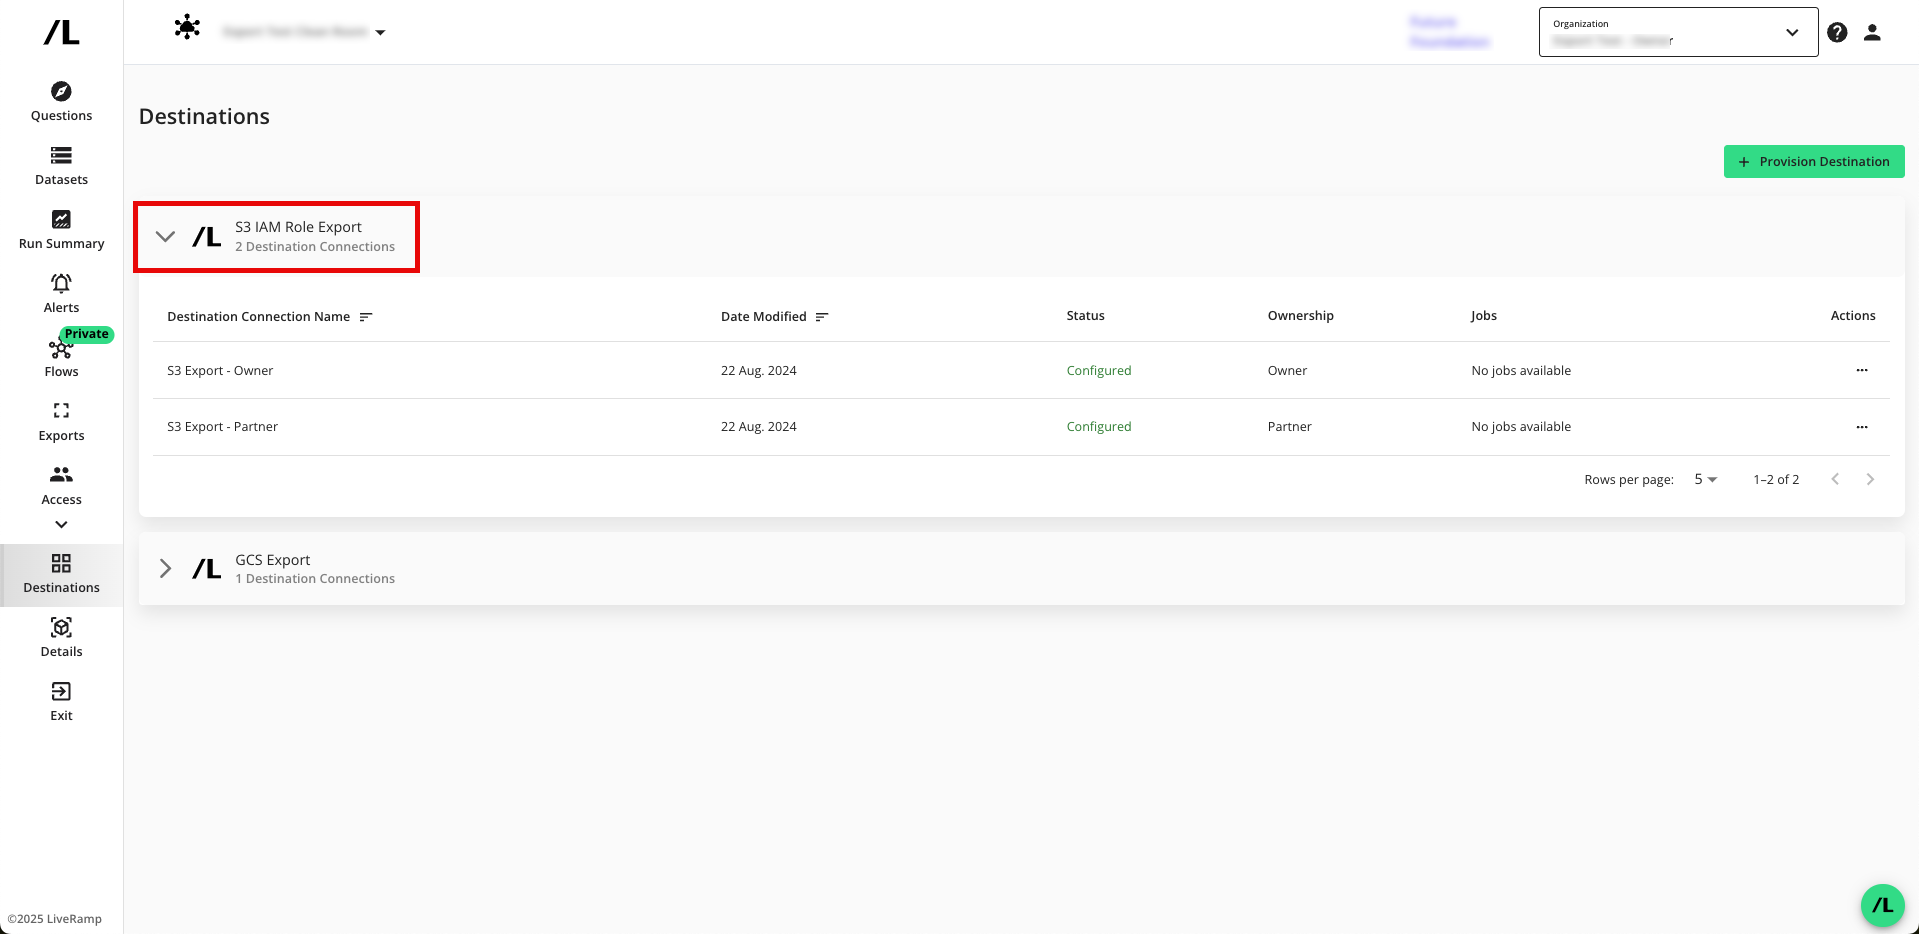
Note
If you're a clean room partner who has been given the ability to request the provisioning of export destinations, the status will show as "Configured (Pending Approval)" until the clean room owner has approved the provisioning of the destination. You can still set up your exports, but the data will not be exported until the request has been approved.
Approve a Destination Provisioning Request
If you're a clean room owner, you're clean room partners can provision export destinations in the clean room, but the status will show as "Configured (Pending Approval)" until you have approved the provisioning of the destination.
To approve the provisioning request:
From the navigation menu, select Clean Room → Clean Rooms to open the Clean Rooms page.
From the Clean Room navigation pane, select Destinations. The Destinations screen shows all destination connections provisioned to the clean room.
Click the caret next to the destination type to view the list of destination connections for that destination type.
For the destinations that show the status as "Configured (Pending Approval)", click .
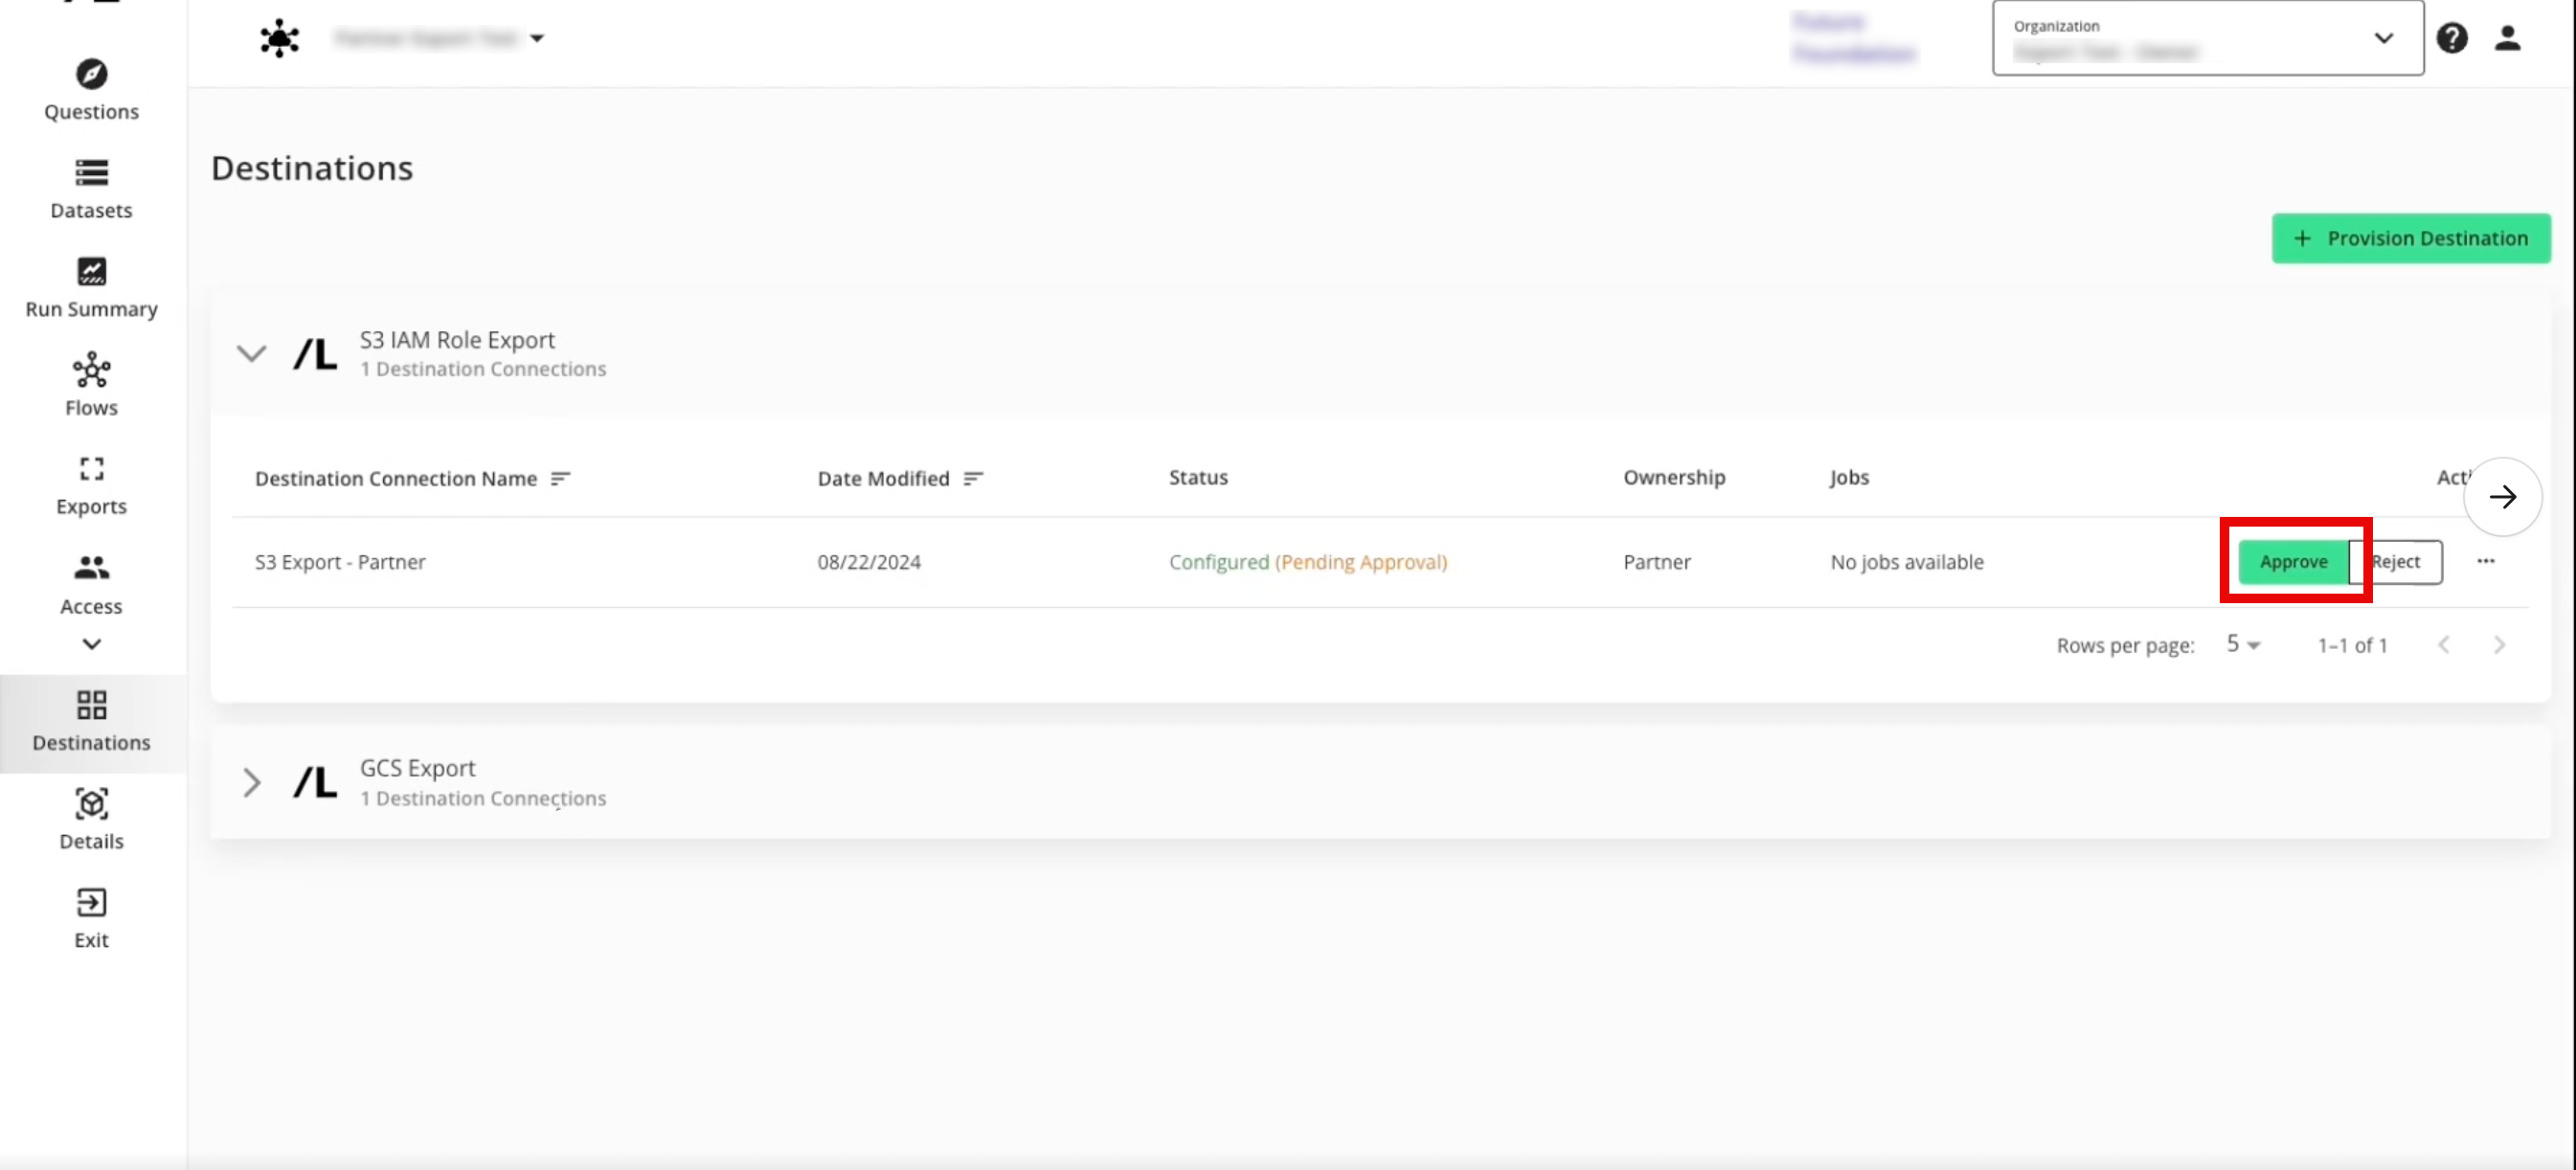
The destination status changes to "Configured".
Create a New Export
After you've provisioned the destination connection to the clean room, create a new export:
From the navigation menu, select Clean Room → Clean Rooms to open the Clean Rooms page.
From the navigation pane, select Clean Rooms → All Clean Rooms and enter a desired clean room.
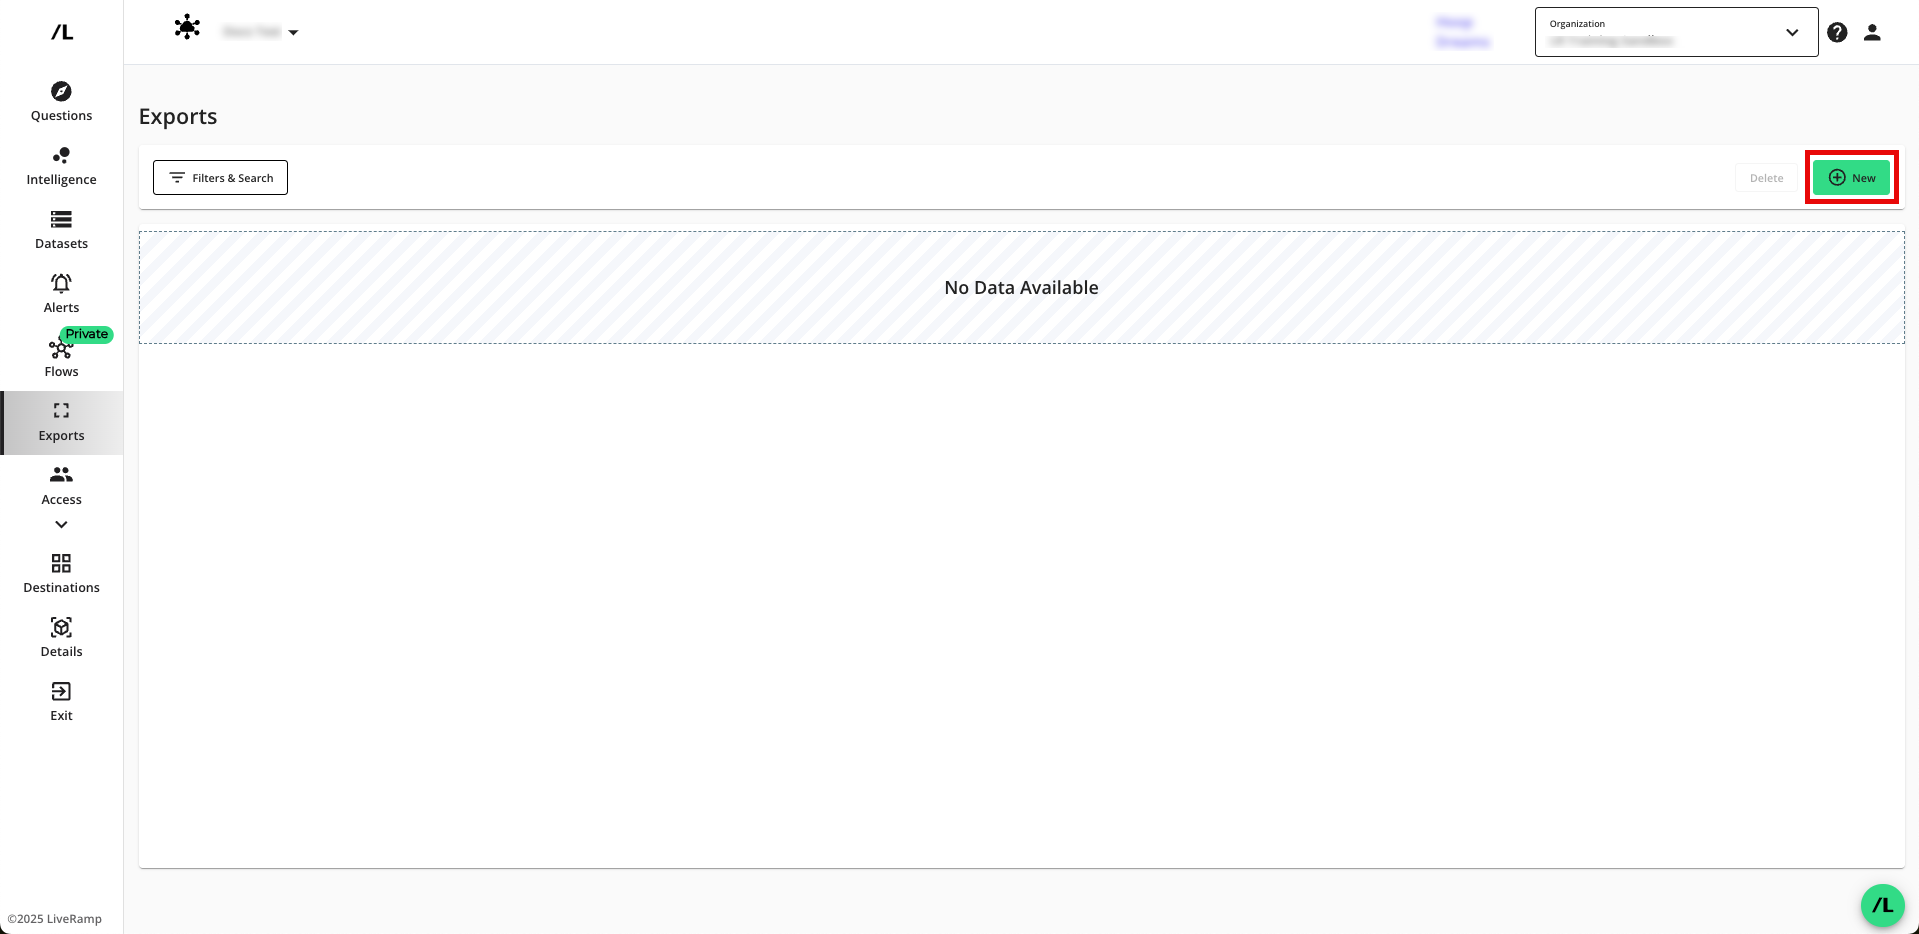
From the Clean Room navigation pane, select Exports.
Click to open the wizard to create a new export.
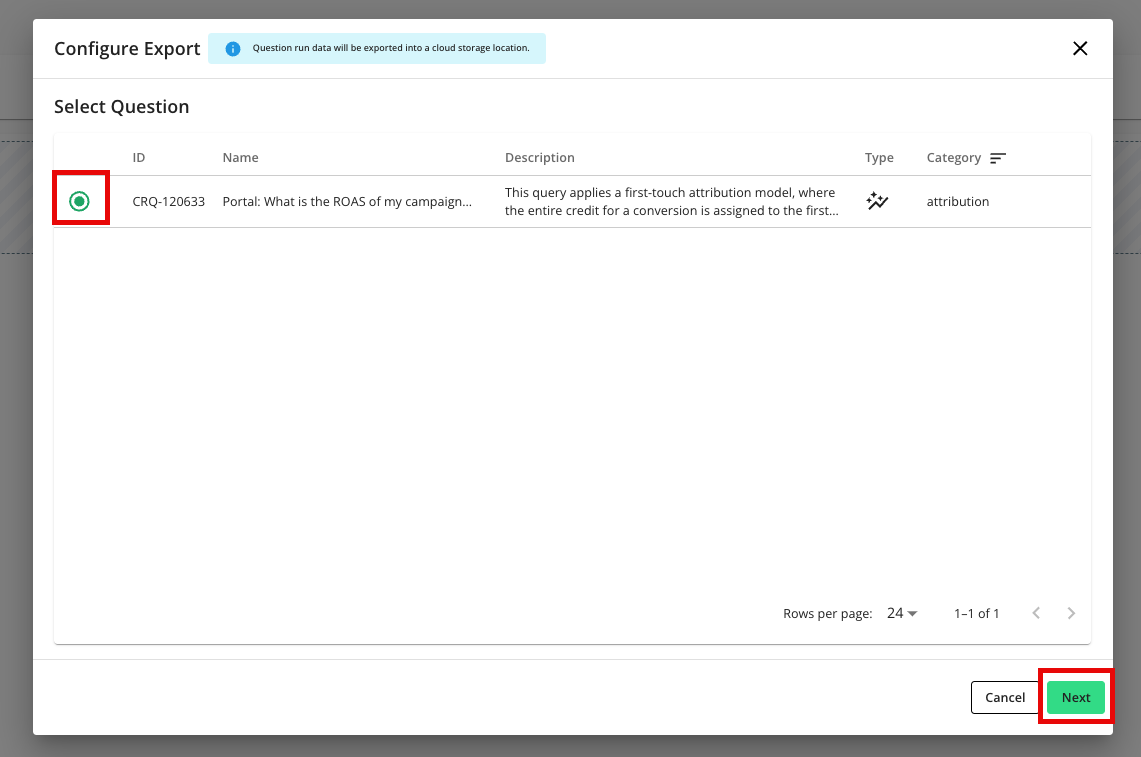
Select the question that you want to export outputs for and then click .
Check the radio button for the specific GCS destination connection you want to send run outputs to.
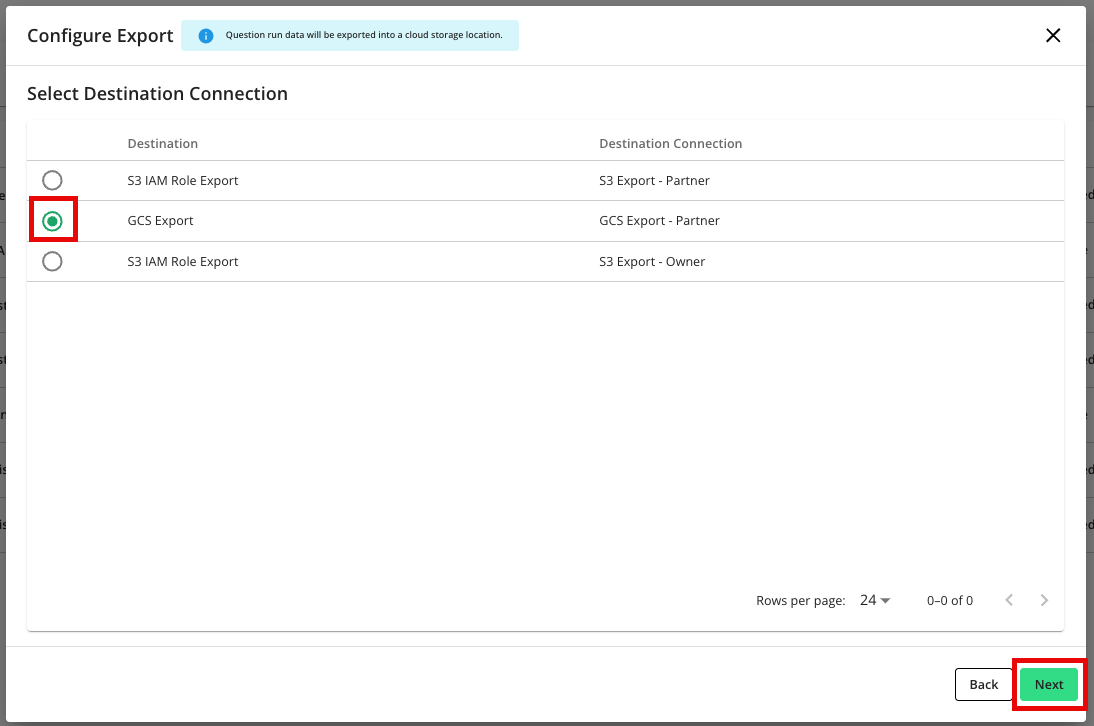
Enter the GCS export path to save the results to, and then click .
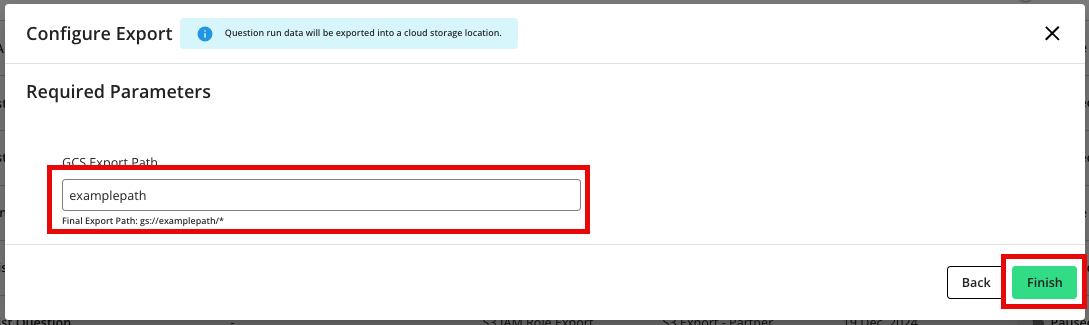
Note
Provide only the bucket name for the analytical or user list outputs. Do not include the
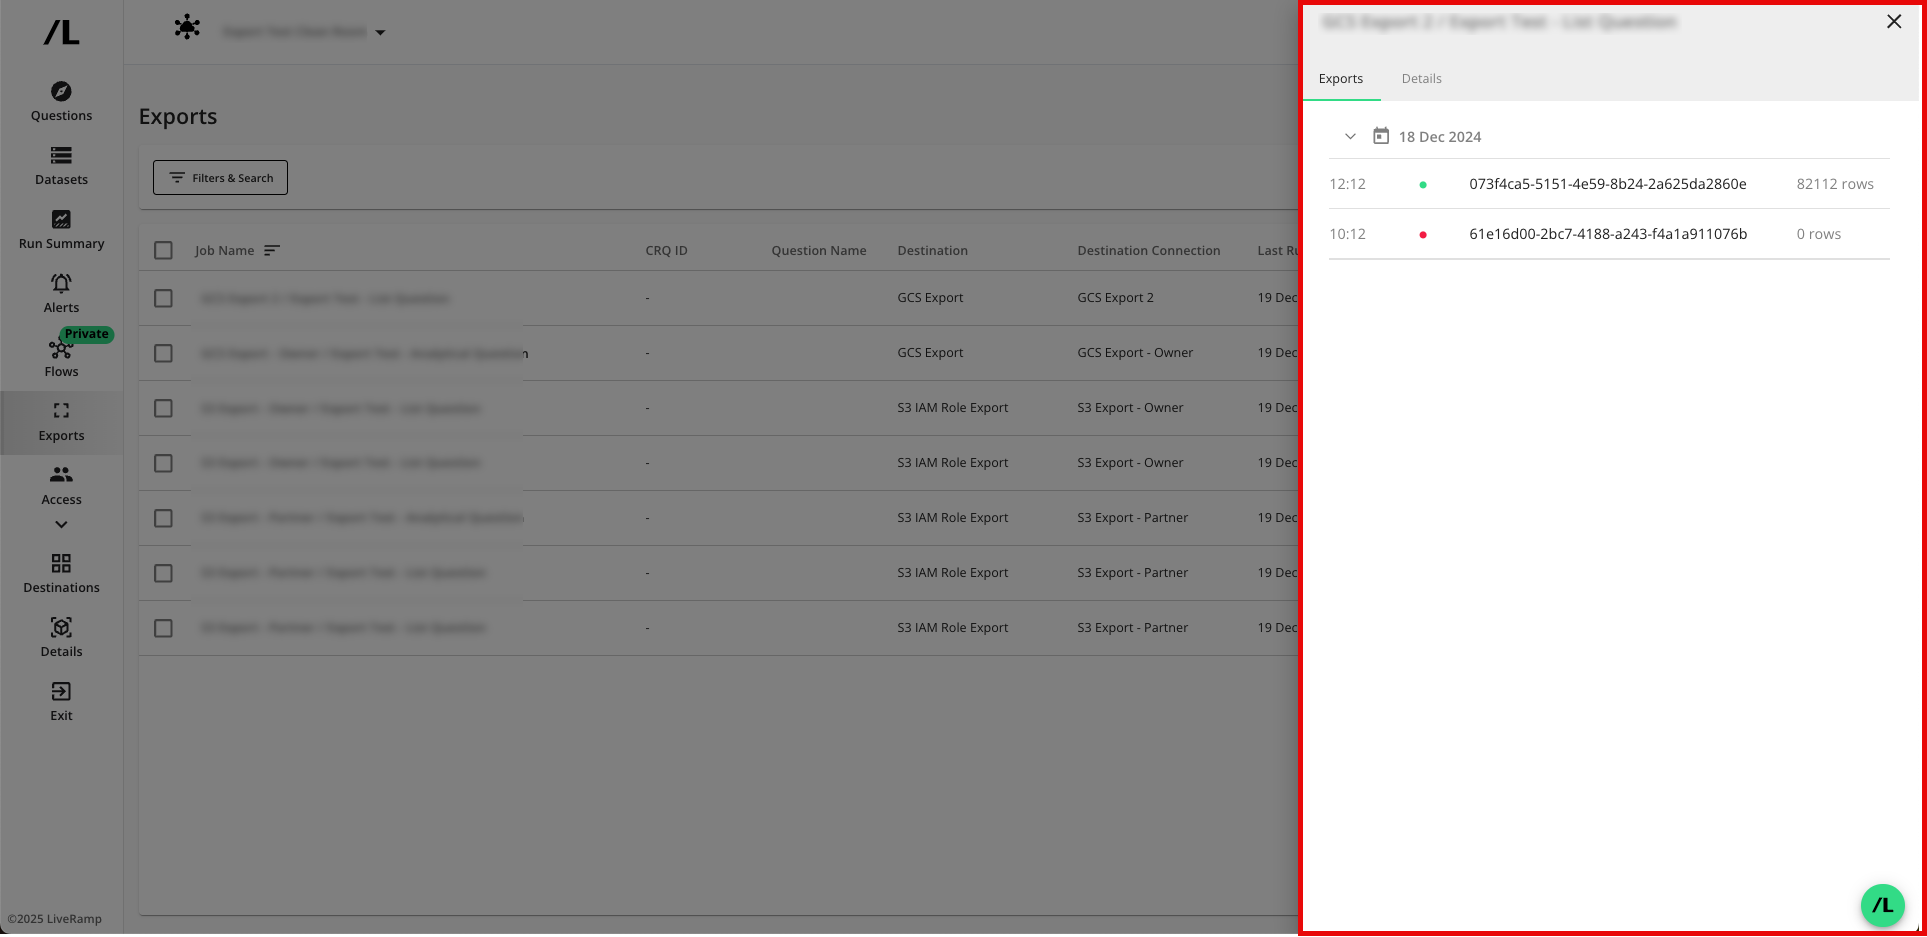
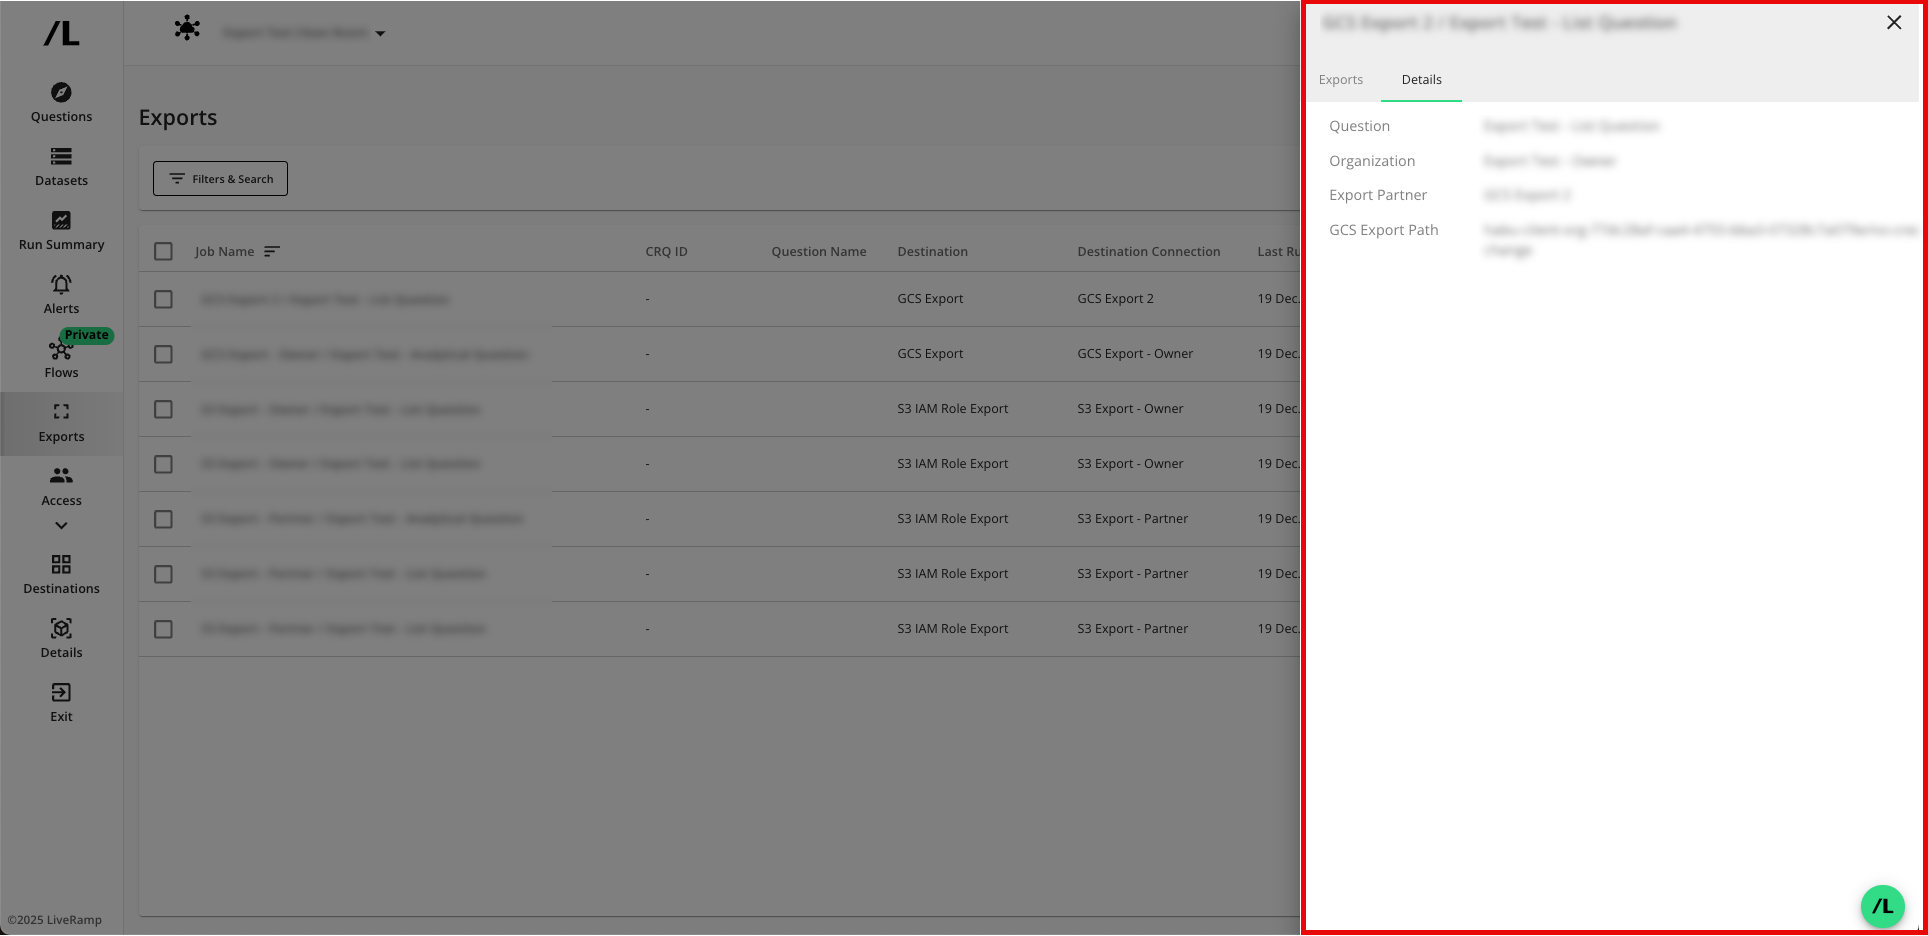
gs://prefix before the bucket name.Verify that the job has been created. Exports are added to the page. You may view the details of an export by clicking on the name.
Note
Exports can be paused, which will stop them from sending data upon the completion of each run.
Exports cannot be edited or deleted. If you need to change the export, pause the export and create a new export.
Exported file names follow the patterns described in “Export File Names”.
If you need a custom file name prefix, work with your LiveRamp representative to enable the custom file name feature (if it is not already enabled).
Export Details
When a question runs, the results will be written to the defined bucket. Each row will have an associated "Run ID" column. There will be a second metadata table created. Users can join on Run ID to get run metadata (Run Name, Runtime Parameters, etc.).
GCS Export File Structure
gs://<data-source-location>/<custom-prefix>
/date=<yyyy-mm-dd>
/cleanroom=<clean-room-id>
/question=<clean-room-question-id>
/run=<run-id>
/data
For Analytical Questions, this contains 1 .csv file. For List Questions, this contains 1+ .parquet files with List data.
Note
List files do not contain column headers.
metadata.json
metadata.json ← This contains each column header name, data type, and whether it is encrypted. If encryption is used, the dek and kek are also provided.