Install Databricks CLI Framework
The integration of LiveRamp Clean Room’s intelligence applications with Databricks streamlines data collaboration and delivers end-to-end solutions that drive business outcomes for brands. It combines LiveRamp Clean Room's flexible UI with Databricks Data Cloud to orchestrate clean room use cases through low code data connectors to access data at the cloud source with zero data movement.
This article details the CLI installation update for version 1.1.1.
Overall Steps
Perform the following steps to install the Databricks CLI framework:
For information on performing these steps, see the instructions below.
Preinstallation Requirements
The following preinstallation steps will help ensure a more seamless installation process:
Log in to your Databricks account by visiting https://dbc-123-4567.cloud.databricks.com.
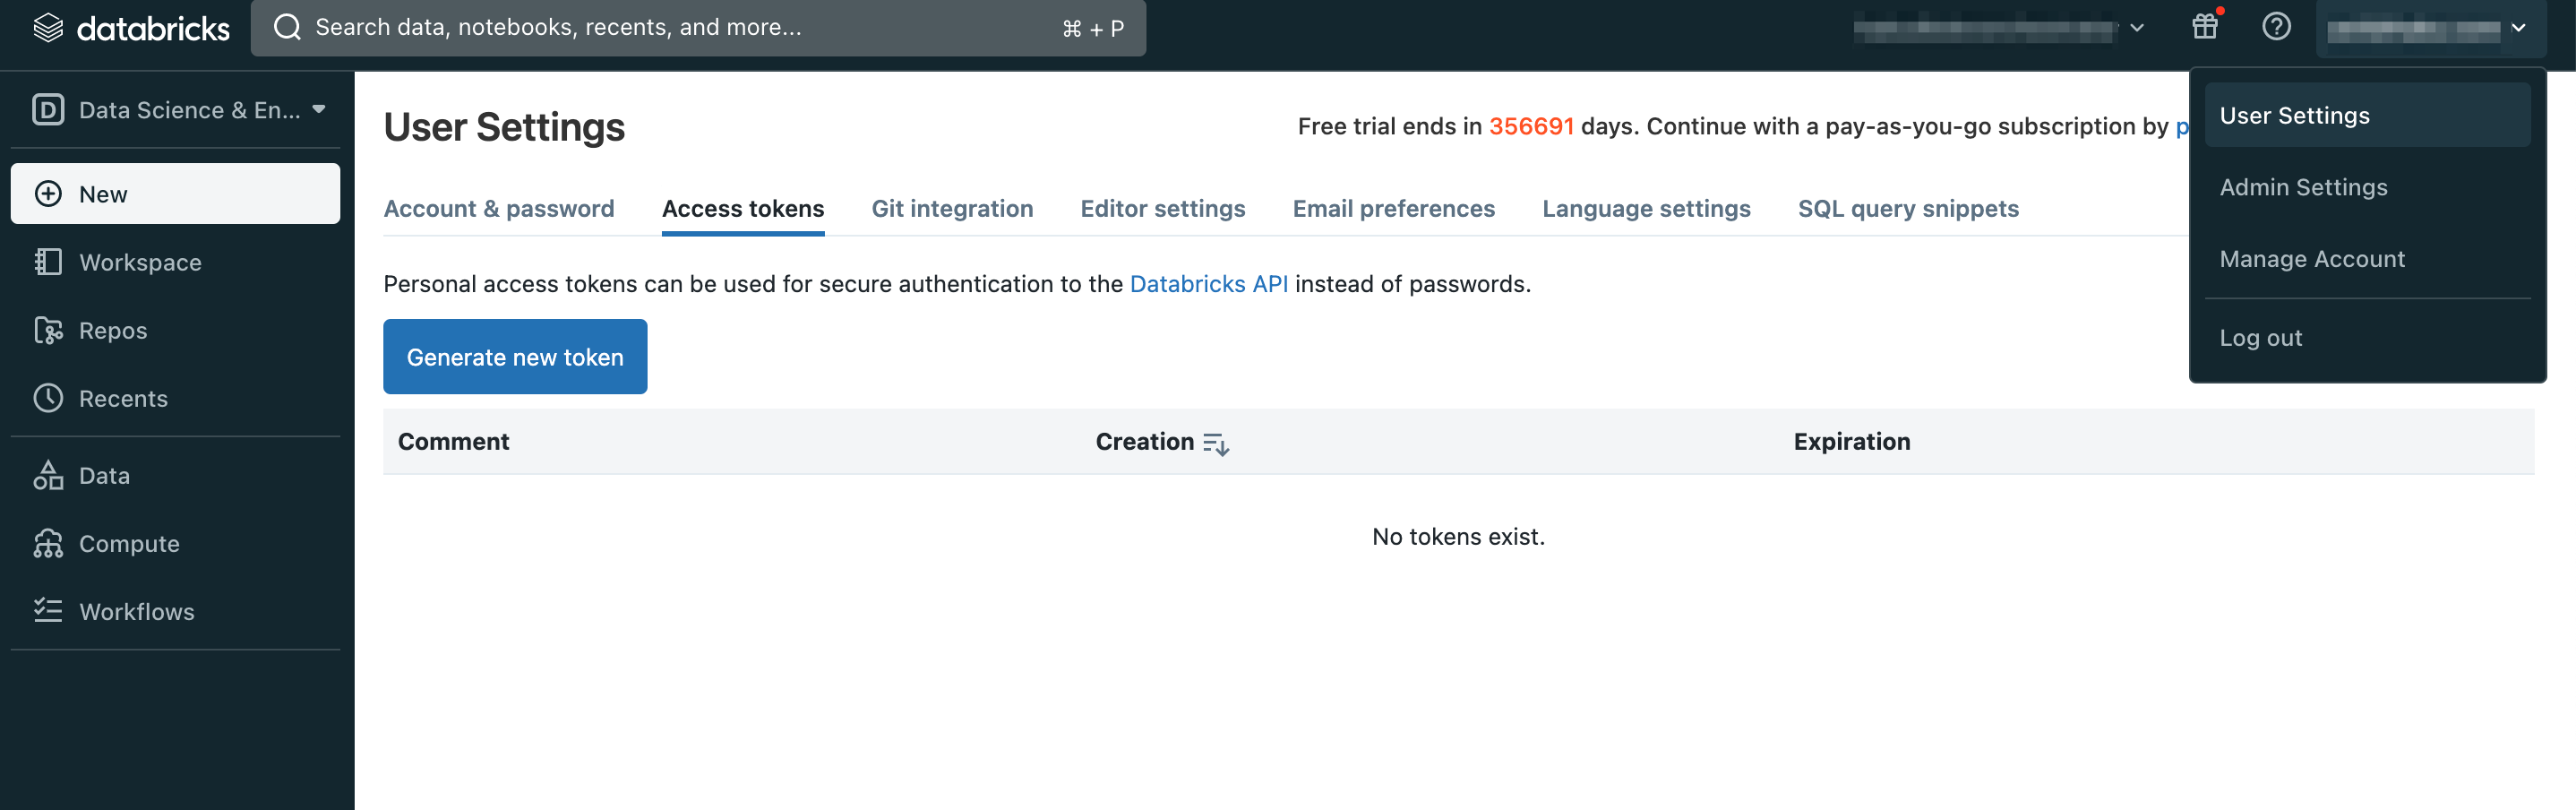
Once logged in, navigate to User Settings and click to generate a new access token. You can use this token for authentication purposes.
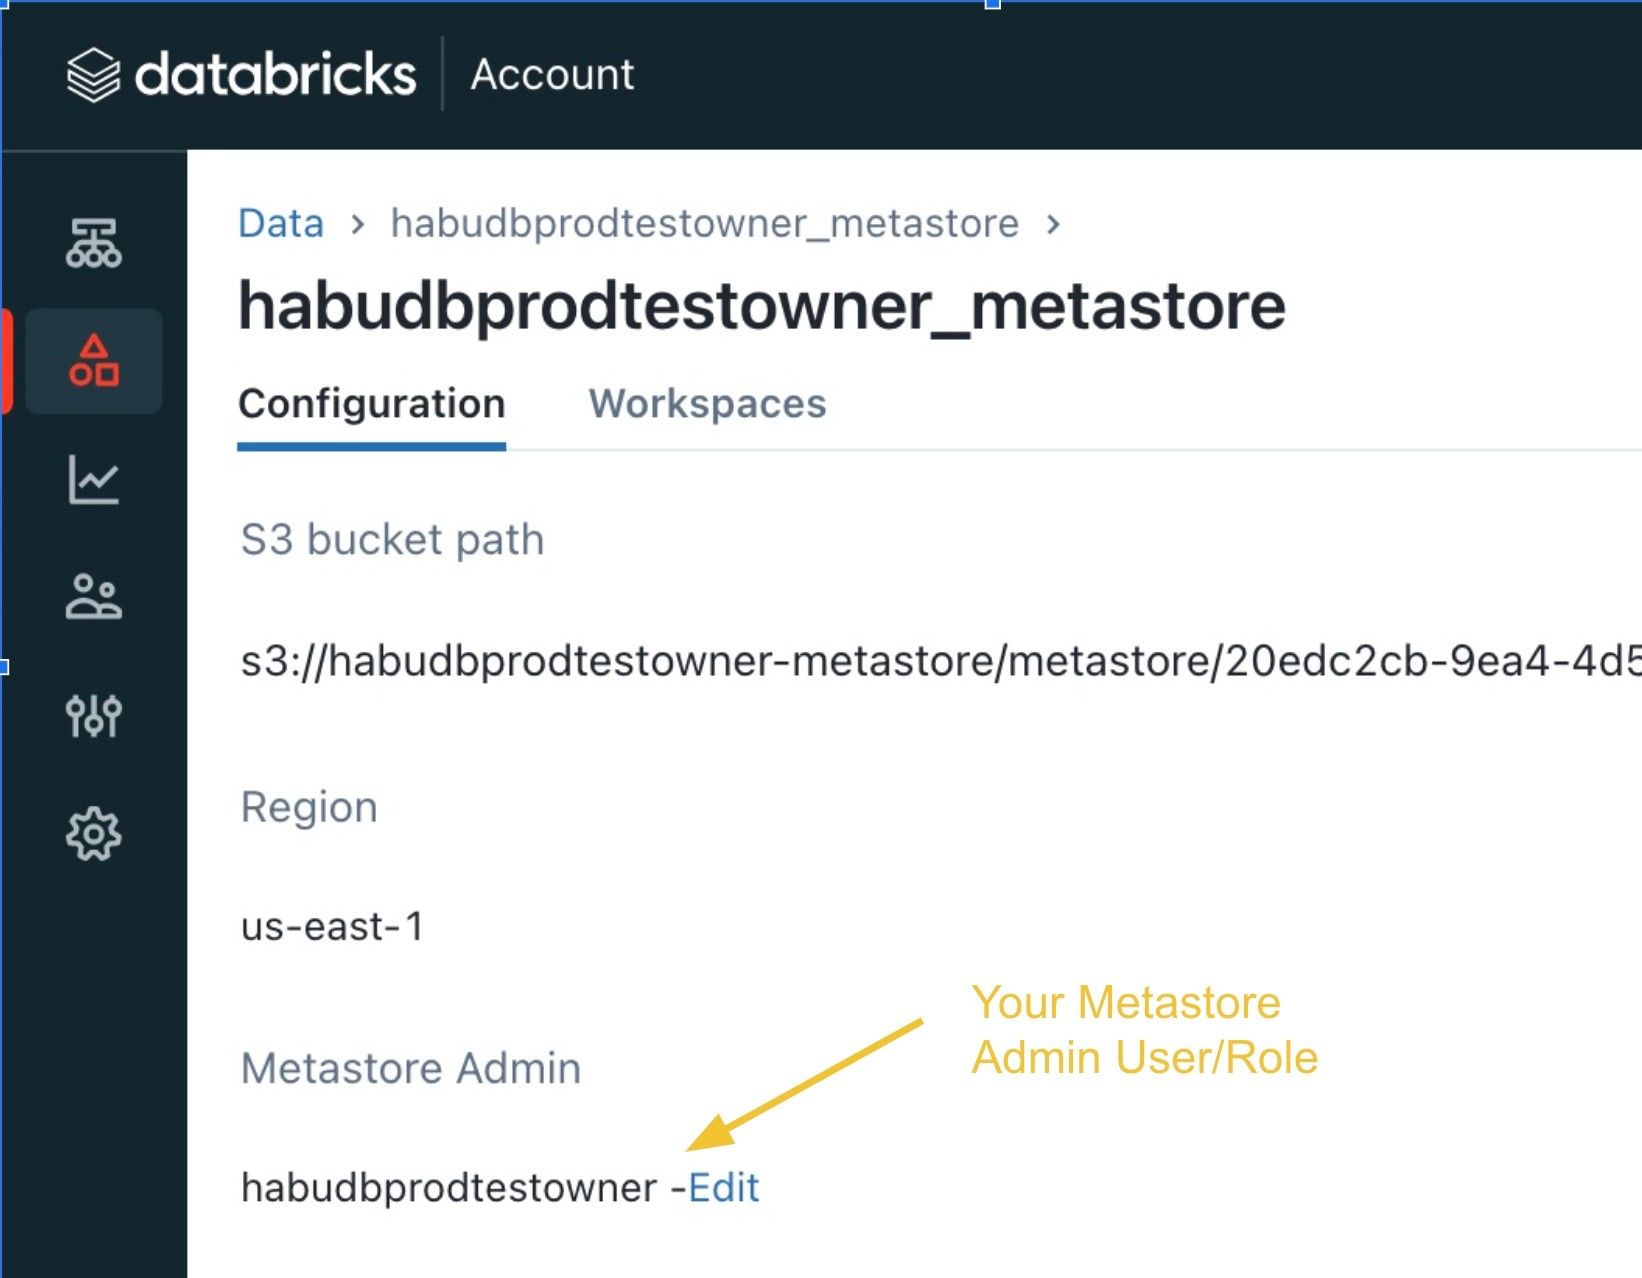
Check with your workspace owner to confirm you have Metastore Admin access on the workspace.The metastore is the main container that holds various objects in Unity Catalog. Having Admin role access allows you to manage and control these objects effectively.
Log in to the workspace account using a separate browser or window.
From the navigation pane, select Data Explorer → Delta Sharing → Shared with me.
Locate the Databricks Sharing identifier on the Shared with me page. A Sharing Identifier is a way to identify a recipient of data within a specific Unity Catalog metastore in Databricks. This identifier allows for sharing data between different Databricks instances. The Sharing Identifier is a string that includes information about the metastore's cloud, region, and a unique identifier (UUID). For example, the Sharing Identifier might look like this: "aws:us-east-1:12abc3de-4fg5-6h78-i90a-1234b56cd78e". You can copy the Sharing Identifier by clicking the copy icon next to Sharing identifier.

Enable Python and the Python Virtual Environment. Python is a programming language designed to be easy to understand and use. LiveRamp Clean Room Databricks CLI works with Python version 3.7.10 or later.
Note
Although it's not required, it's a good idea to set up a Python Virtual Environment, since it lets you install Python packages separately so they don't interfere with other Python projects on your computer.
Configure a LiveRamp Clean Room Databricks Connection
Ensure you have LiveRamp Clean Room access before proceeding.
Note
There are two options for configuring a LiveRamp Clean Room Databricks Connection:
"Always On": This configuration enables LiveRamp Clean Room to connect to your Databricks Account and scan for updates on an ongoing basis.
"Ad Hoc": This configuration enables LiveRamp Clean Room to connect to your Databricks workspace via a service role credential. This only triggers the LiveRamp Clean Room agent when someone from your organization makes a change or request in the LiveRamp Clean Room UI.
Both options achieve the same outcome, though the second option may be less costly to your Databricks account. Work with your team to determine which is the best option for your business and security requirements.
You'll need to configure a Databricks credential to use when configuring a Databricks connection. There are two types of Databricks credentials you can create:
Databricks Account Credential: Use this if you want to connect via your Databricks account.
Databricks Service Role Credential: Use this if you want to grant LiveRamp Clean Room a service role in your workspace.
Configure a Databricks account credential by doing the following:
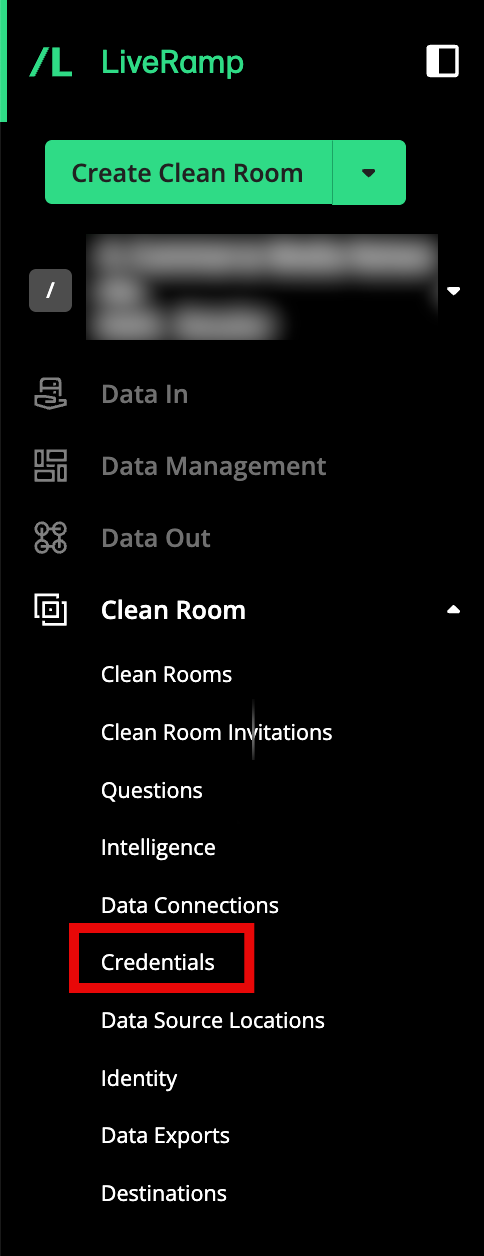
From the navigation menu, select Clean Room → Credentials to open the Credentials page.
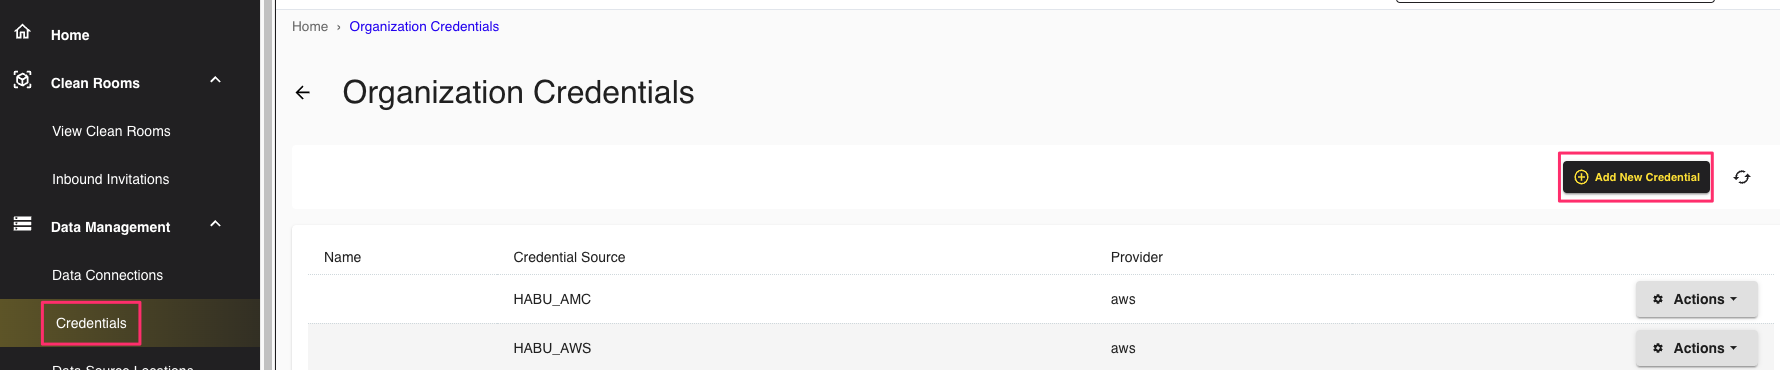
Click .
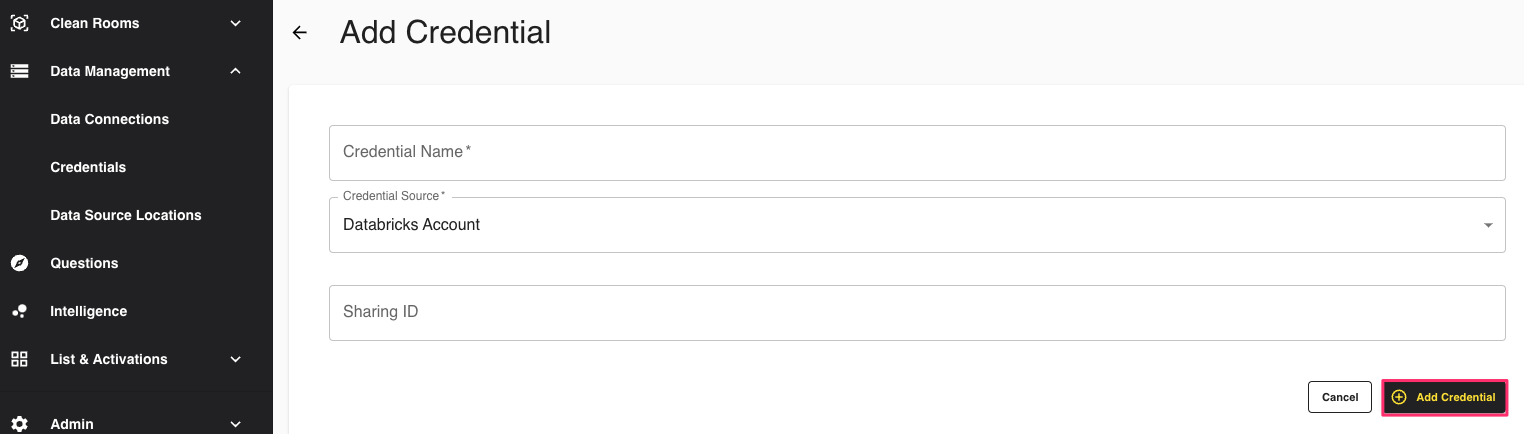
Add the following information:
Name: Enter a credential name.
Credentials Type: Select Databricks Account from the dropdown list.
Sharing ID: Enter your Databricks "Sharing ID" (see Preinstallation Requirements).
Click .
Verify the connection by doing the following:
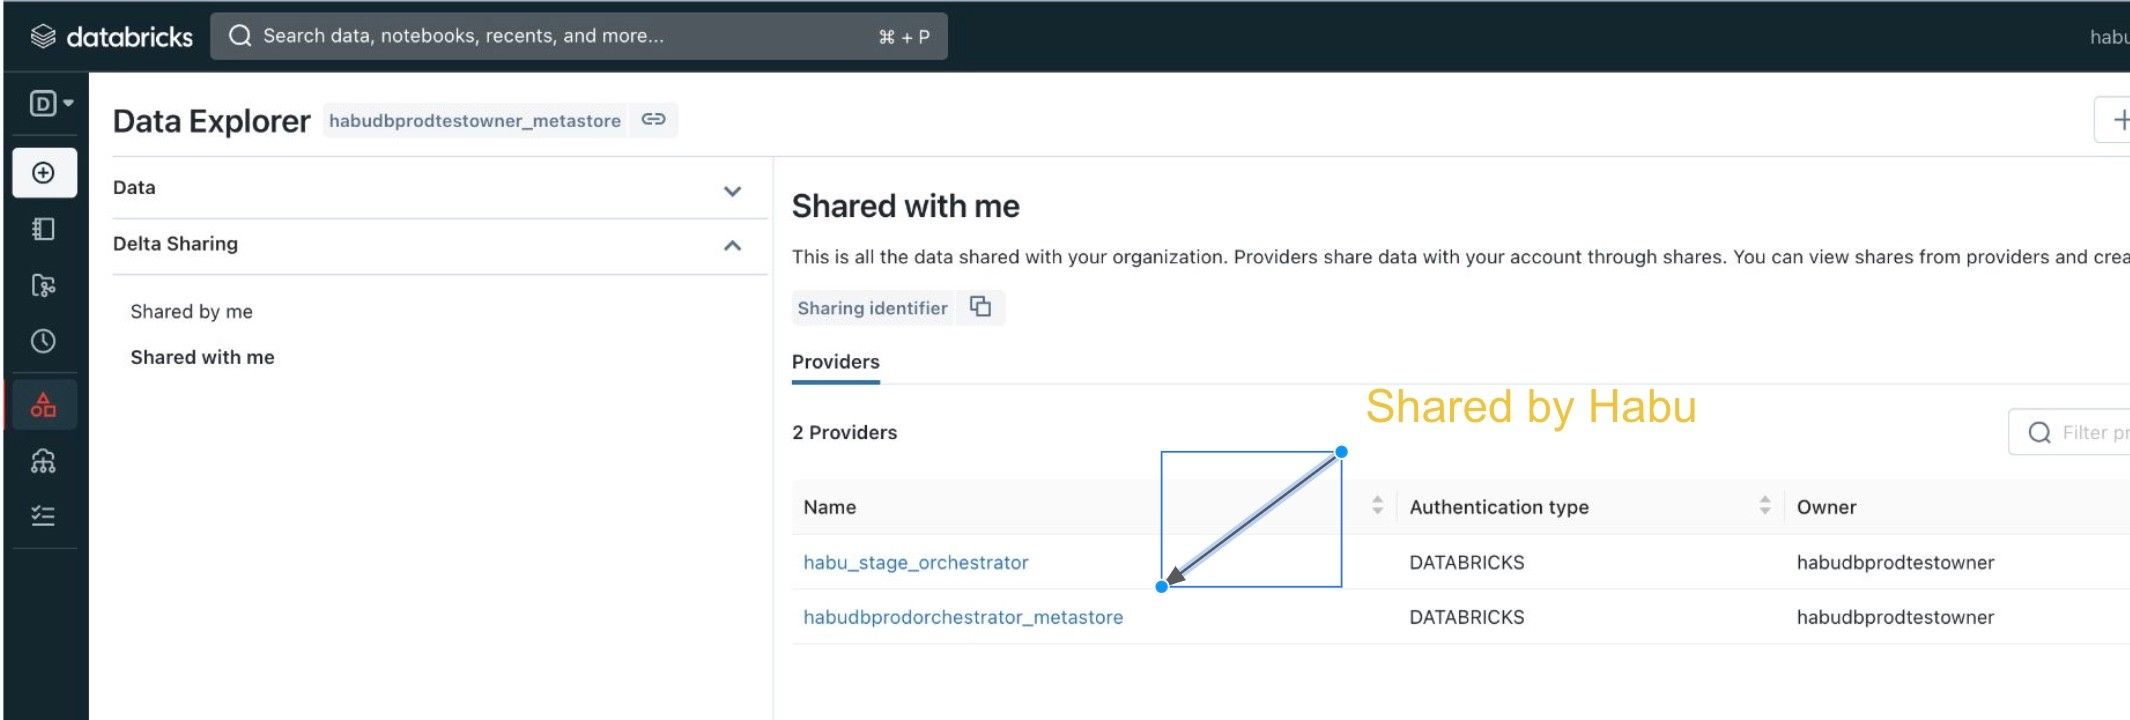
Log in to your Databricks workspace account.
Select Data Explorer → Delta Sharing.
Select Shared with me to view connection providers that have been shared with your account.
Configure a Databricks service role credential by doing the following:
Note
To create a Databricks service role credential, you will need the token for the service role you created on behalf of LiveRamp Clean Room. To create a service role for LiveRamp Clean Room to use, see these instructions from Databricks.
From the navigation menu, select Clean Room → Credentials to open the Credentials page.
Click .
Add the following information:
Name: Enter a credential name.
Credentials Type: Select Databricks Service Role Credentials from the dropdown list.
Workspace ID: Enter the ID for the workspace to which you’d like to provision the service role.
Token: Enter the token for the service role you created on behalf of LiveRamp Clean Room.
Click .

Install LiveRamp Clean Room Databricks CLI
The LiveRamp Clean Room Databricks CLI is a collection of tools designed to assist in setting up your Databricks instance. It provides various functionalities and commands that facilitate the configuration and management of your LiveRamp Clean Room Databricks environment.
To install the LiveRamp Clean Room Databricks CLI, do the following:
Open a terminal (for Mac) or a command prompt (for Windows).
Run the following command with the compatible Python version (3.7.10 through 3.11.0):
pip install habu-databricks-cli==1.1.1
Set Up the Databricks Framework
To implement the Databricks Pattern, you will need to execute a sequence of CLI commands. These commands are designed to create databases and tables within your Databricks account. By following these steps, you can set up the necessary data structures to organize and manage LiveRamp Clean Room collaborations effectively.
To set up the Databricks framework so you can execute CLI commands, you will need to:
Create a YAML configuration file
Initialize the LiveRamp Clean Room Framework
You will need the following information to create a YAML file for your Databricks account:
Databricks instance ID
Token
Databricks user name
To create a YAML configuration file, do the following:
Open a terminal (for Mac) or a command prompt (for Windows).
Run the following command (update each parameter accordingly):
hdb-cli config -c sample_config.yaml
Databricks instance id: [ENTER INSTANCE ID]
Databricks user name: [ENTER USER NAME EMAIL}
Token: [ENTER TOKEN]
Verify that the generated YAML file is correct. For example:
2023-06-01 15:07:45,489 - root - INFO : Config file created successfully
Contents of the sample_config.yaml
databricks_instance_id: dbc-xyzzxy-abcd.cloud.databricks.com
autotermination_minutes: 10
token: dapi1234567891011
user: habu@habu.com
To initialize the LiveRamp Clean Room framework, do the following:
Run the following command:
Note
Replace the "sample_config.yaml" in the example with the file name of your YAML file.
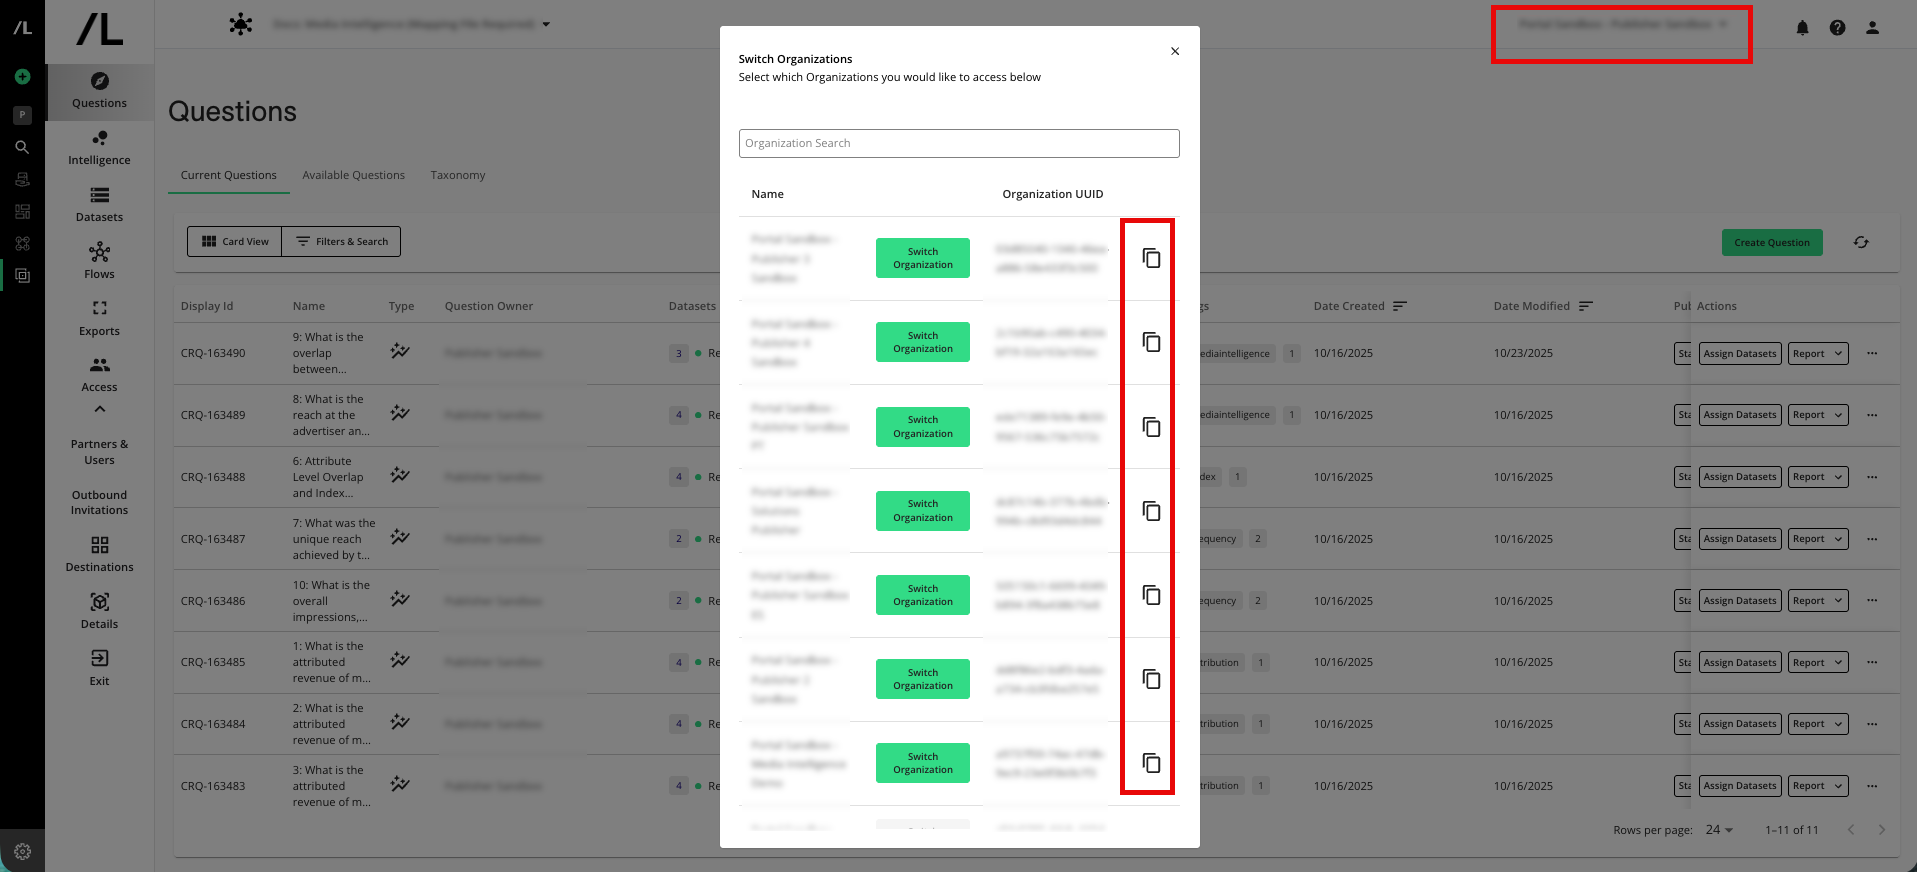
To find your Organization UUID in LiveRamp Clean Room , enter any clean room and then open the Organization dropdown list in the upper right. Your Organization UUID is displayed under the Organization UUID column and you can copy it by clicking the copy icon.
hdb-cli init --org-id <organization uuid> --config-file sample_config.yaml
The command sets up two workflows and one cluster.
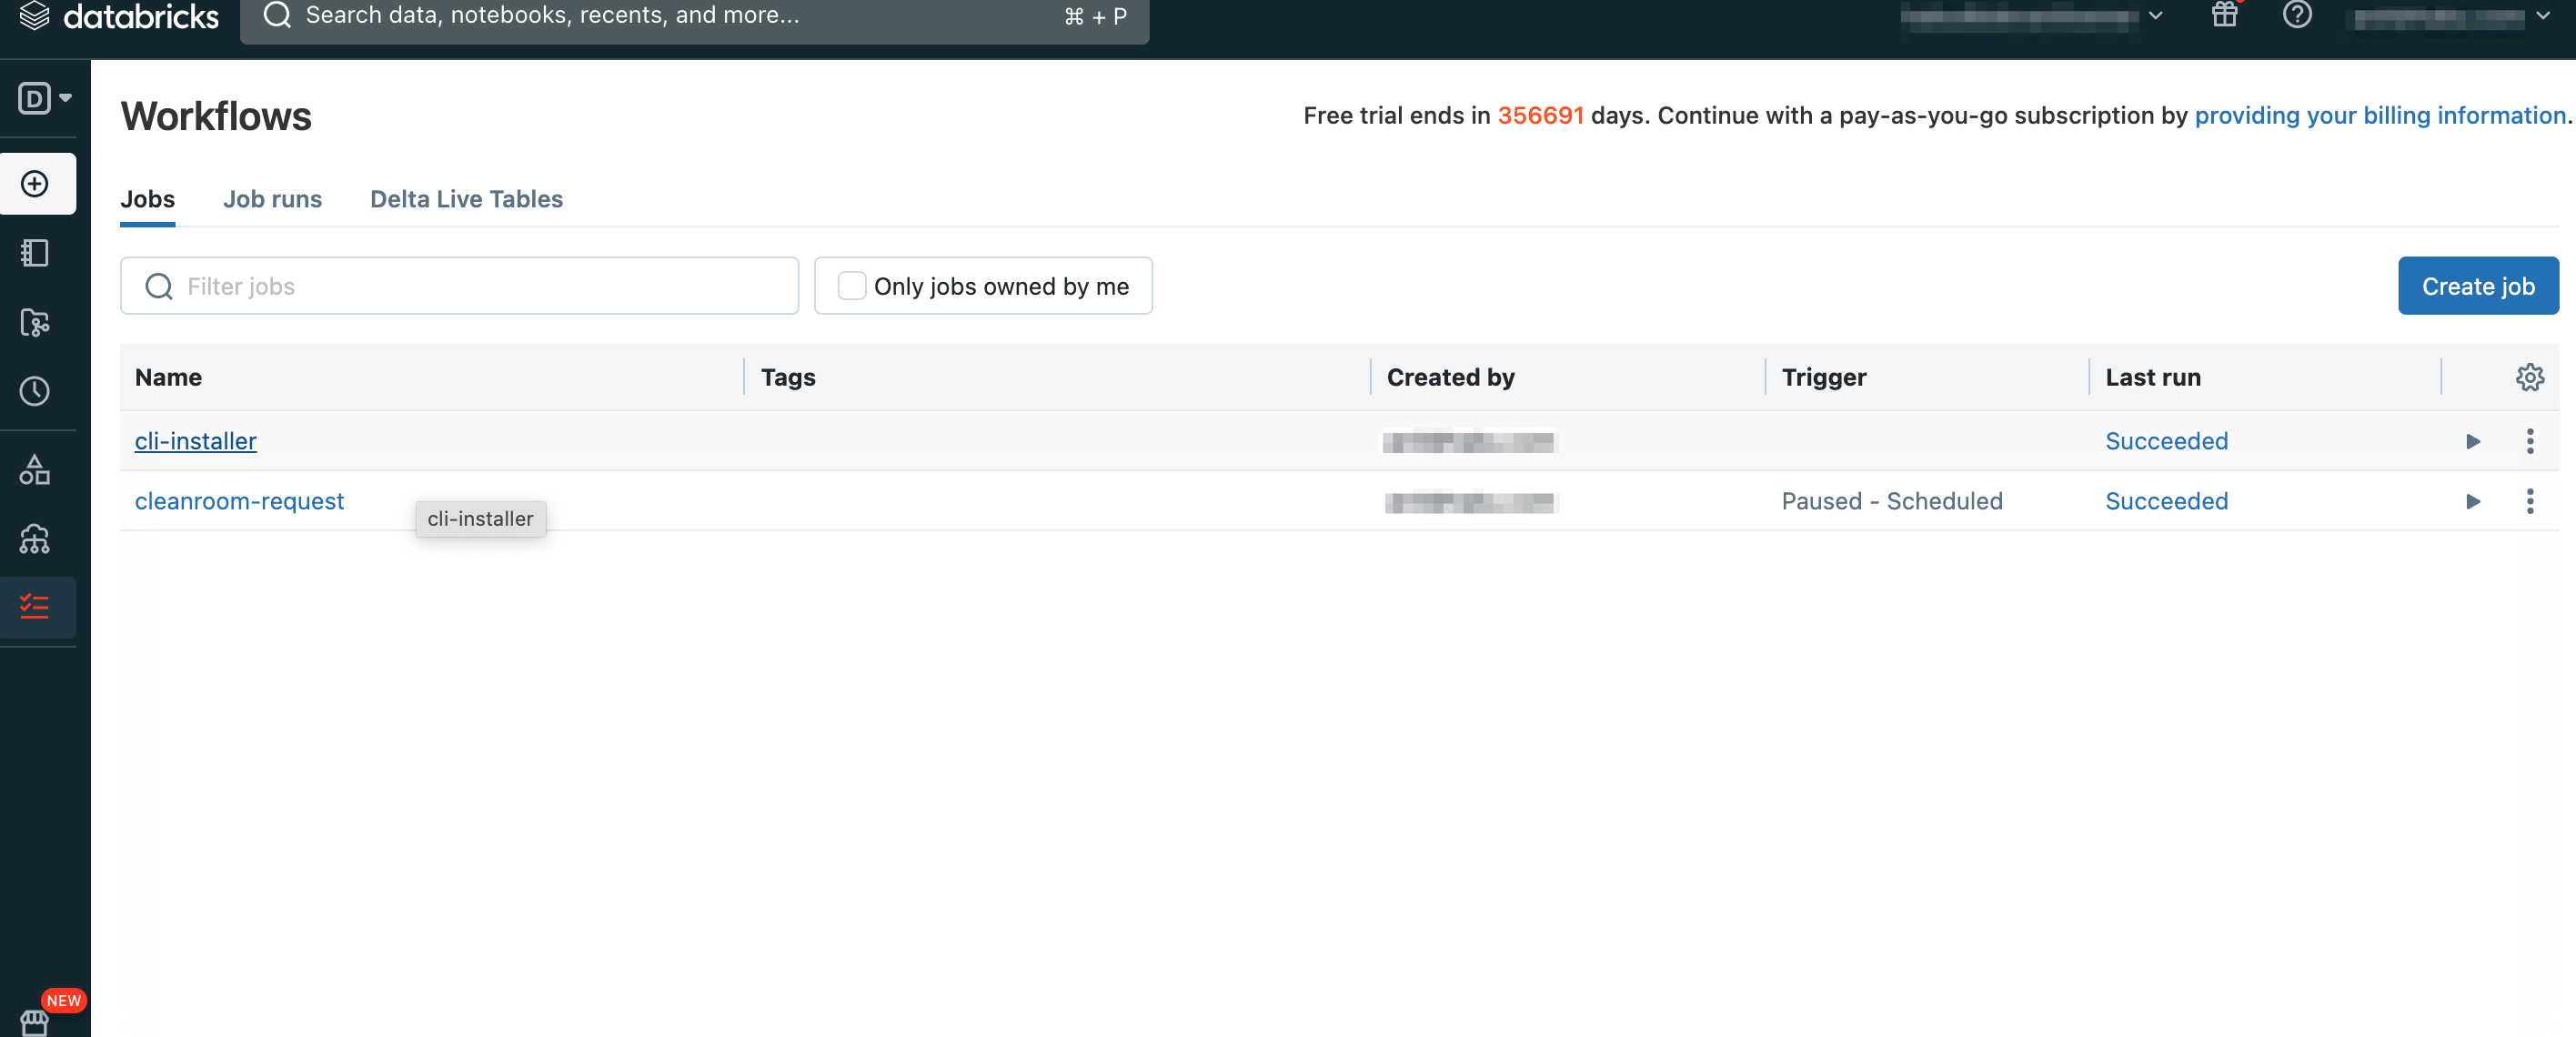
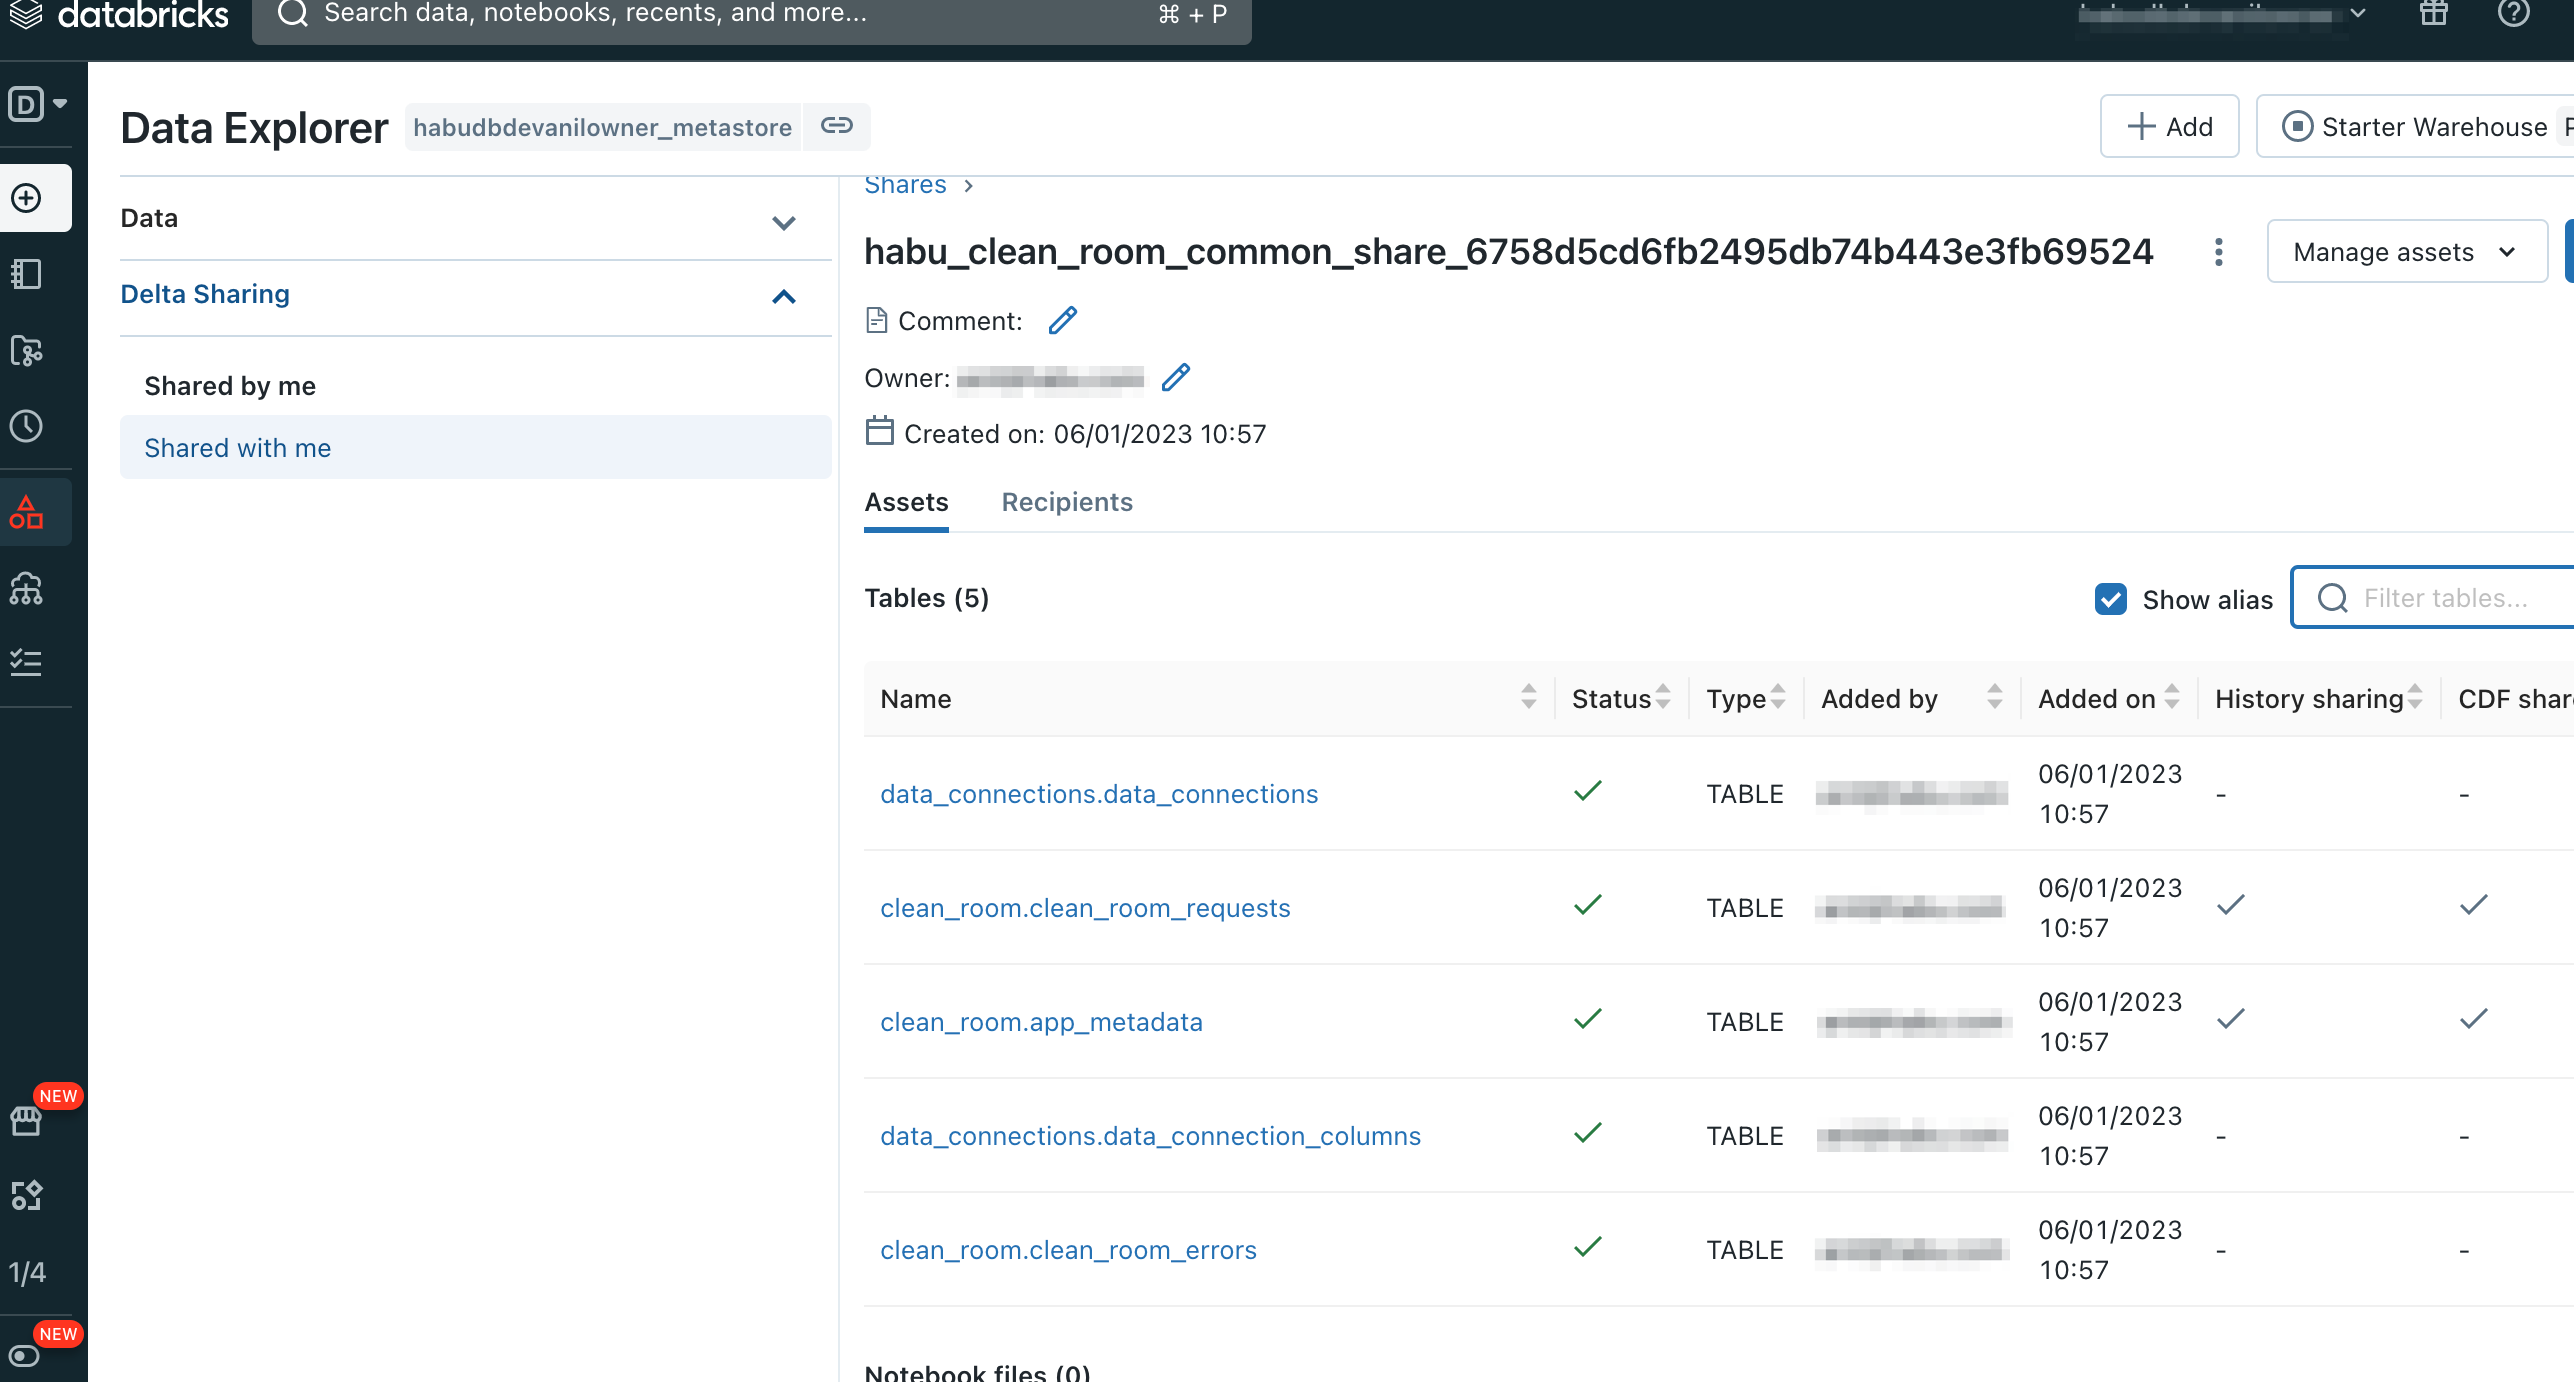
Trigger the "cli-installer" workflow to create and share the "habu_clean_room_common_share_<<ORG_ID>>" database with LiveRamp Clean Room.
The "cleanroom-request" workflow will resume and continuously monitor for any updates or changes from LiveRamp Clean Room. It will persistently poll for new information and automatically initiate appropriate actions on the client account based on the received updates. This ensures that the workflow stays up to date and responds accordingly to maintain synchronization between LiveRamp Clean Room and the client account.
Now that you have successfully installed the LiveRamp Clean Room Databricks CLI, you can configure a data connection. For more information see Configure a Databricks Data Connection for a Databricks Clean Room .