Install Snowflake CLI Framework for Mac
The integration of LiveRamp Clean Room's intelligence applications with Snowflake streamlines data collaboration and delivers end-to-end solutions that drive business outcomes for brands. It combines a flexible UI with Snowflake’s Data Cloud to orchestrate clean room use cases through low-code data connectors to access data at the cloud source with zero data movement.
Overall Steps
As part of the implementation, the LiveRamp Clean Room agent must be installed on your Snowflake instance. This document details the end-to-end CLI installation process specifically for Mac. Perform the following overall steps to install the Snowflake CLI framework for Mac:
For information on performing these steps, see the instructions below. After you complete these steps, you can create and modify data connections directly in LiveRamp Clean Room using the steps in "Configuring a Snowflake Data Connection".
Note
Only one Snowflake account should be configured in a given LiveRamp Clean Room organization and each Snowflake account should only be configured for one LiveRamp Clean Room organization. Configuring multiple Snowflake accounts in an organization or configuring one Snowflake account for multiple LiveRamp Clean Room organizations is not supported.
If you previously completed the prerequisites and set up connections, you can start at the "Install LiveRamp Clean Room Snowflake Command-Line Interface (CLI)" section below.
Prerequisites
Ensure that you do the following before configuring the installation of the LiveRamp Clean Room Snowflake CLI Framework:
Identify your Snowflake Edition. LiveRamp Clean Room Snowflake CLI supports both Snowflake Enterprise Edition and Snowflake Business Critical Edition.
Identify your Snowflake Authentication method. LiveRamp Clean Room Snowflake CLI supports the following authentication methods:
User and Password
Key Pair in PKCS8
Single Sign-on (SSO)
Locate your Snowflake Account Identifiers from your Snowflake account.
Note
Users with the ORGADMIN role can execute the SQL command:
SELECT current_account() AS accountID, current_account_alias() AS accountName, system$return_current_org_name() AS OrgName;
Identifiers include:
Account name
Organization name
Organization UUID
Locator
Role
Warehouse
User
Confirm you have ACCOUNTADMIN (ie; Account Administrator) access. ACCOUNTADMIN is a role that encapsulates the SYSADMIN and SECURITYADMIN system-defined roles.
Confirm you have the following Python environment.
Python Version 3.9.7 or later.
Python Virtual Environment
Python pip-tools
Confirm you have access to LiveRamp Clean Room. If you need access to LiveRamp Clean Room, contact LiveRamp Community portal.
Add the Credentials
The following steps must be completed for both the collaboration provider and requester.
Note
For detailed steps to identify Snowflake account information, see "Find Your Snowflake Account Information."
To create the Snowflake credentials:
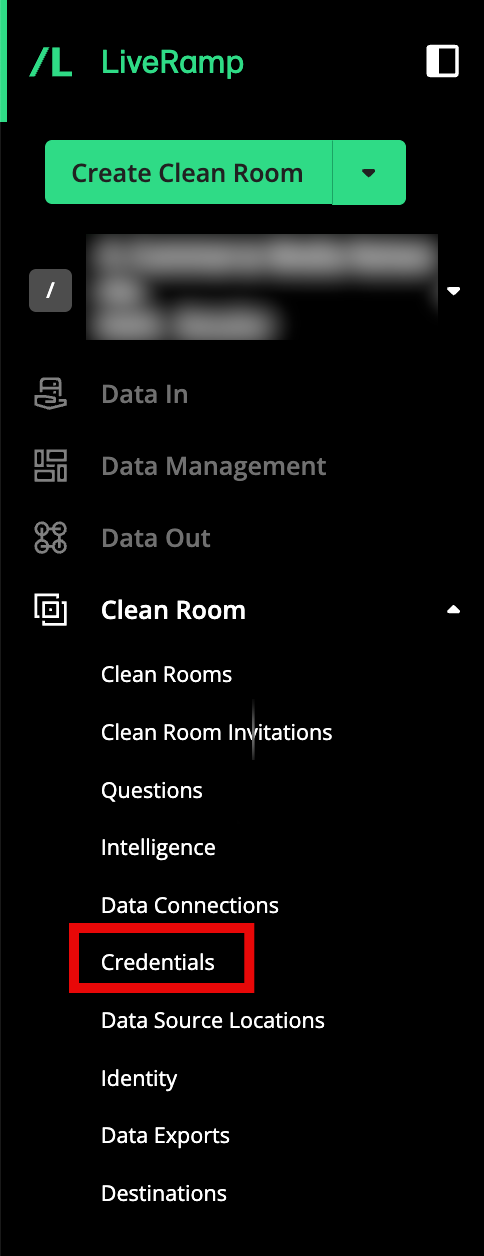
From the navigation menu, select Clean Room → Credentials to open the Credentials page.
Click
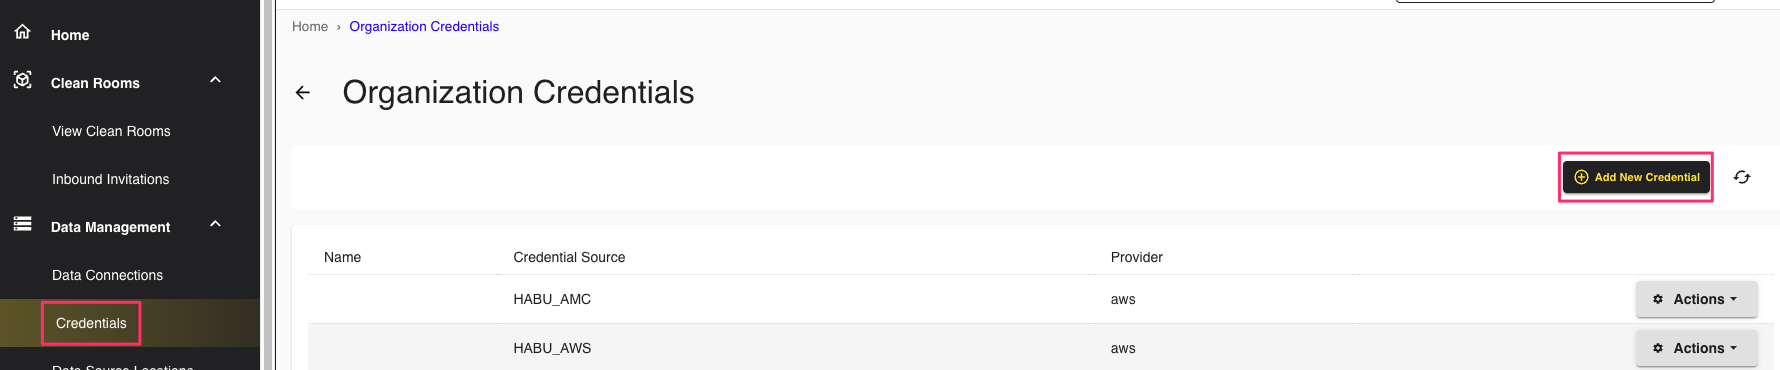
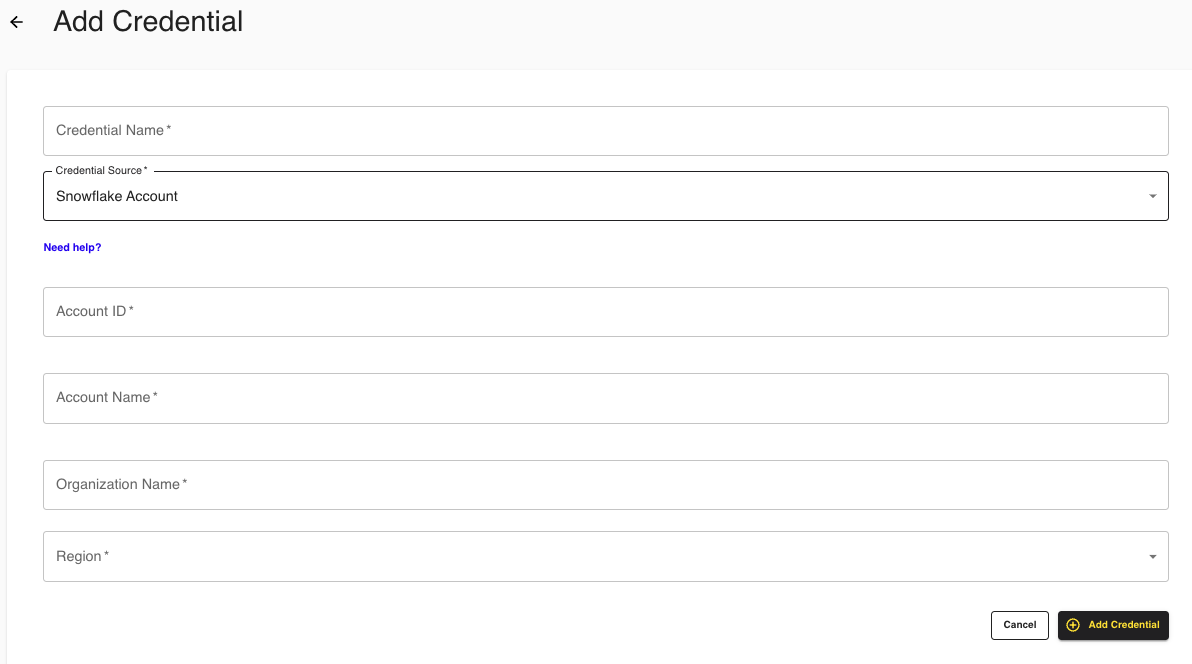
Complete the following fields:
Name: Enter the [Organization] Snowflake account name.
Credentials Type: Select Snowflake Account from the dropdown list.
Account ID: Enter the 8-digit account ID for your organization; alphanumeric characters should be capitalized (for example, "AB123456")
Account Name: Enter your Snowflake account name (unique within your organization).
Organization Name: Enter your Snowflake organization name (unique within Snowflake).
Region: Select the region associated with your Snowflake account from the dropdown list.
Click .
To verify the added credential:
Log in to your Snowflake account as an ACCOUNTADMIN.
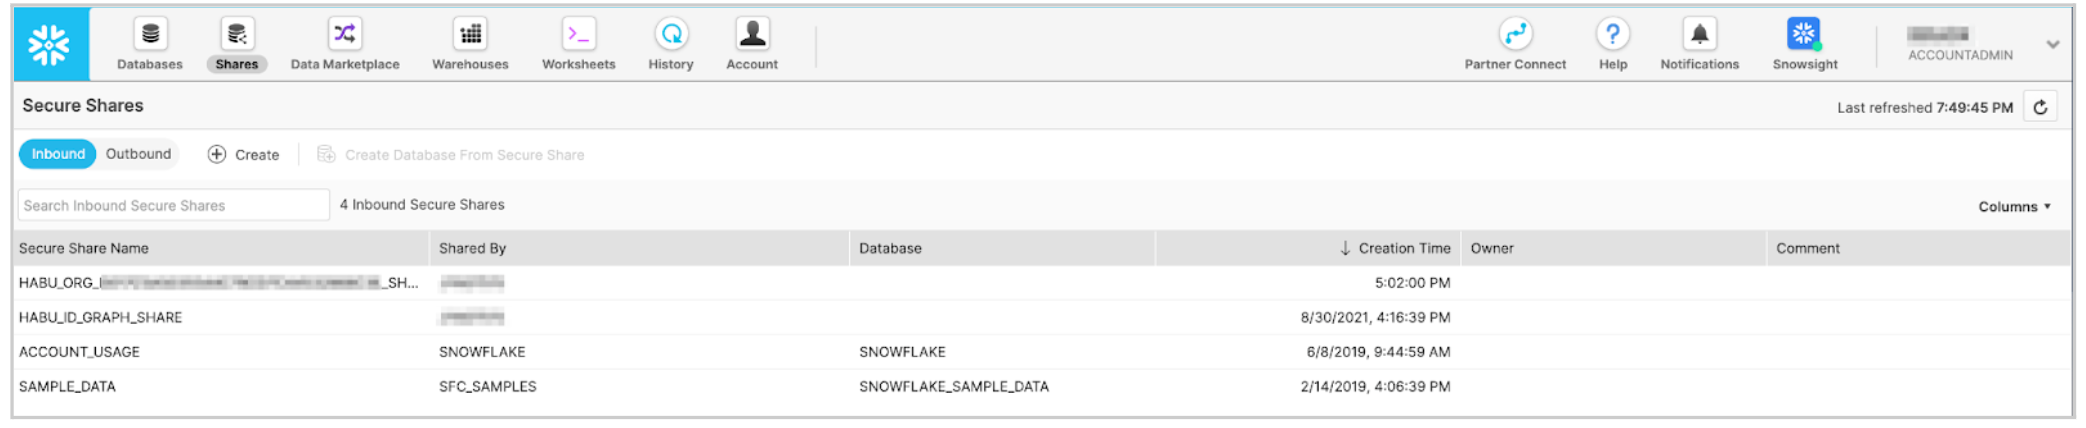
Select two inbound shares. For example:
HABU_ID_GRAPH_SHARE_DB (LiveRamp Clean Room’s Identity Graph)
HABU_ORG_UUID_SHARE (LiveRamp Clean Room Snowflake Database shared to your Snowflake account)
Install LiveRamp Clean Room Snowflake Command-Line Interface (CLI)
LiveRamp Clean Room Snowflake CLI is a toolset used to support confirmation of your provider and requester instances.
To install LiveRamp Clean Room Snowflake CLI, do the following:
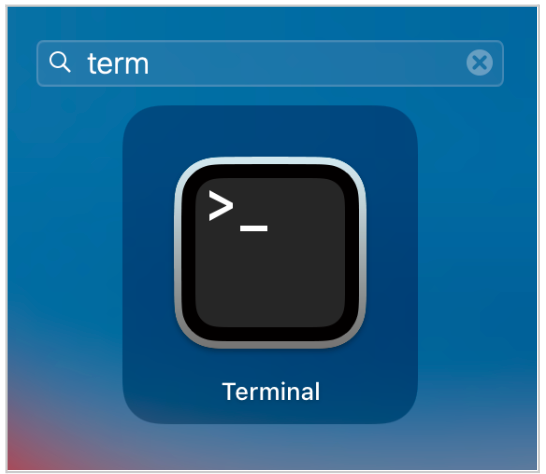
Select Launchpad in the dock and search for "Terminal".
Open Terminal
MacOS uses either Bourne Again SHell (bash) or Zshell (zsh). LiveRamp recommends you use bash for the install. You can switch to bash by running the
bashcommand.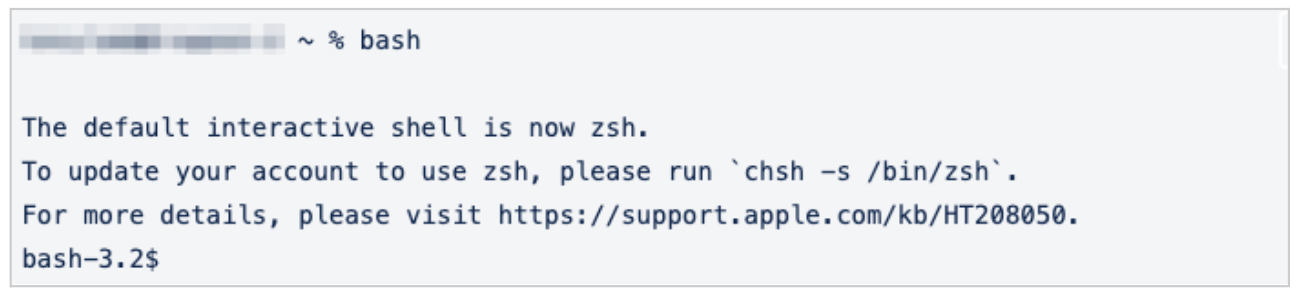
Verify that you have Python 3 version 3.9.7 or later by running the following command:
python3 --versionThe Python 3 version you have should display, for example,
Python 3.9.7.Note
If your version is earlier than Python 3.9.7, you can upgrade by running the following command:
brew upgrade python3
A virtual environment is recommended to facilitate the installation. Virtual environments isolate installation directories and allow you to localize the CLI installation without forcing you to install them system-wide.
If you do not have the Python Virtual Environment installed, install it by using the following command syntax (modifying appropriately):
python3 -m venv <environmentname>source <environmentname>/bin/activateFor example, if you named the virtual environment "snowflake", you would run the following command to create the virtual environment:
bash-3.2$ python3 -m venv snowflakeTo launch the virtual environment, you would run the following command:
bash-3.2$ source snowflake/bin/activate
(snowflake) bash-3.2$
You can now run the LiveRamp Clean Room CLI by running the following command:
pip install habu-snowflake-cli==5.1.0
Create a YAML Configuration File
Note
You will need the following Snowflake account information in the steps below: account name, organization name, role, warehouse, user, and password. See the "Prerequisites" section above for more information.
YAML is commonly used for configuration files and in applications where data is being stored or transmitted. You will need to create a YAML configuration file for your Snowflake account based on your authentication method. LiveRamp Clean Room supports three authentication options:
User and Password Authentication
Key Pair Authentication
Single Sign-on (SSO) Authentication
You create a YAML configuration file by running the redbeard generate-config command. The command writes the inputs you pass in as arguments. In each of the following options, these inputs include account name, organization name, role (ACCOUNTADMIN), warehouse, and user.
To create a YAML configuration file, do the following:
Run the following command:
redbeard generate-configNote
Running
redbeard generate-configcreates the default "habu_snowflake_config_yaml" YAML file. You can create a custom named YAML file by using the-cfunction as follows:redbeard generate-config -c <FILENAME.yaml>For example (modify accordingly):
(snowflake) bash-5.1$ redbeard generate-config -c custom_habu_snowflake_config.yaml
Enter the appropriate information according to the authentication option you are implementing. See the examples for each option below:
To enable user and password authentication, enter the appropriate information at the prompts: For example (modify accordingly):
(snowflake) bash-5.1$ redbeard generate-config
Client account name: HABU_DEV1_OWNER
Client organization name: HABU_ORG
Role to use: MUST USE ACCOUNTADMIN
Warehouse to use for installation: X-SMALL WH NAME
Clean room user: SNOWFLAKE ADMIN USER
Authentication Type (sso, keypair, password) [sso]: password
Please enter password:
Verify the content of the YAML file by running the following command: cat habu_snowflake_config.yaml.
For example:
(snowflake) bash-3.2$ cat habu_snowflake_config.yaml
accountName: HABU_DEV1_OWNER
organizationName: HABU_ORG
role: MUST USE ACCOUNTADMIN
warehouse: X-SMALL WH NAME
user: SNOWFLAKE ADMIN USER
password: changeme
Note
To learn more about key pair authentication, see "Snowflake Key Pair Authentication and Key Pair Rotation".
To enable key pair authentication, enter the appropriate information at the prompts: For example (modify accordingly):
(snowflake) bash-5.1$ redbeard generate-config
Client account name: HABU_DEV1_OWNER
Client organization name: HABU_ORG
Role to use: MUST USE ACCOUNTADMIN
Warehouse to use for installation: X-SMALL WH NAME
Clean room user: SNOWFLAKE ADMIN USER
Authentication Type (sso, keypair, password) [sso]: keypair
Please enter keypair file path: /Users/jdoe/.ssh/rsa_key.p8
Please enter keypair file password:
Verify the content of the YAML file by running the following command: cat habu_snowflake_config.yaml.
For example:
(snowflake) bash-3.2$ cat habu_snowflake_config.yaml
accountName: HABU_DEV1_OWNER
organizationName: HABU_ORG
role: MUST USE ACCOUNTADMIN
warehouse: X-SMALL WH NAME
user: SNOWFLAKE ADMIN USER
key_path: /Users/jdoe/.ssh/rsa_key.p8
key_pass: abc123
Note
If you currently log in to your Snowflake account via SSO, CLI can be configured using SSO authentication.
To enable SSO authentication, enter the appropriate information at the prompts: For example (modify accordingly):
(snowflake) bash-5.1$ redbeard generate-config
Client account name: HABU_DEV1_OWNER
Client organization name: HABU_ORG
Role to use: MUST USE ACCOUNTADMIN
Warehouse to use for installation: X-SMALL WH NAME
Clean room user: SNOWFLAKE ADMIN USER
Authentication Type (sso, keypair, password) [sso]: sso
Verify the content of the YAML file by running the following command: cat habu_snowflake_config.yaml.
For example:
(snowflake) bash-3.2$ cat habu_snowflake_config.yaml
accountName: HABU_DEV1_OWNER
organizationName: HABU_ORG
role: MUST USE ACCOUNTADMIN
warehouse: X-SMALL WH NAME
user: SNOWFLAKE ADMIN USER
Initialize the LiveRamp Clean Room Snowflake Framework
After you create the YAML configuration file, you can initialize the framework. To initialize the framework, do the following:
Note
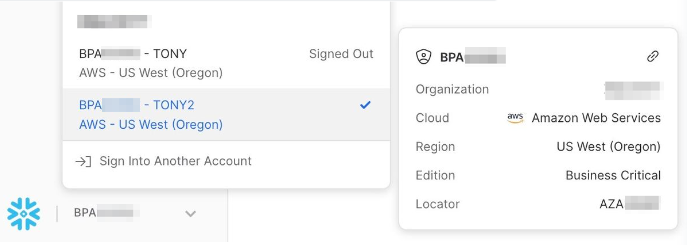
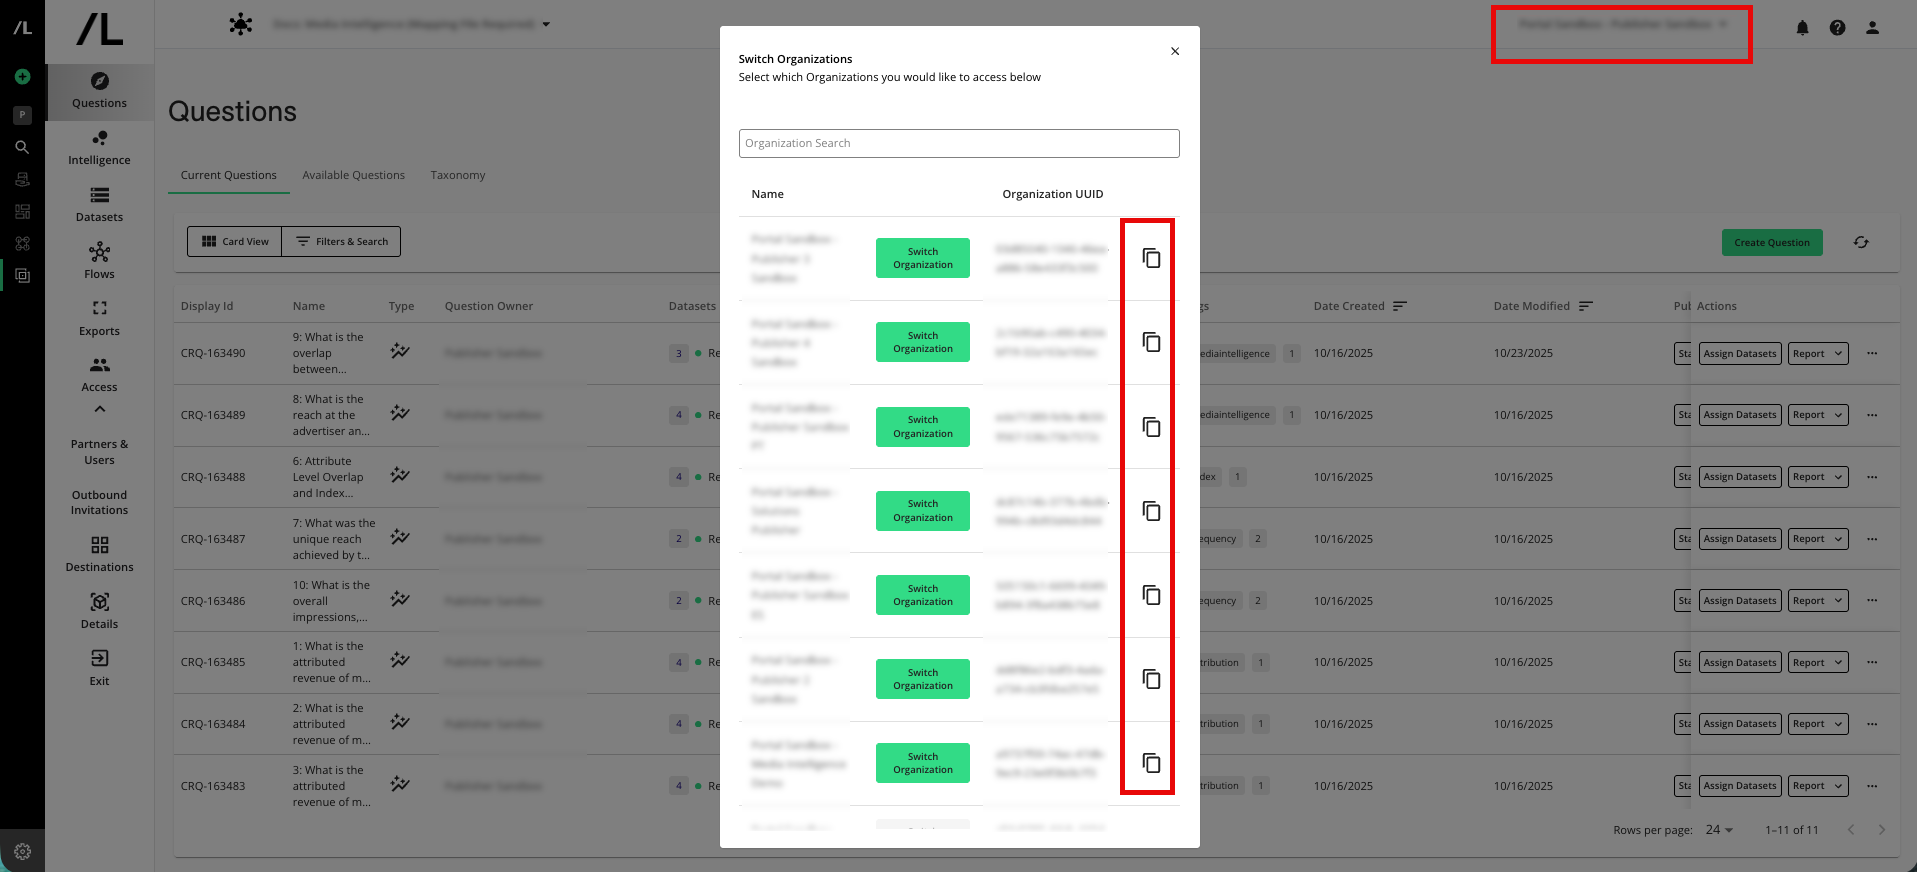
To find your Organization UUID in LiveRamp Clean Room , enter any clean room and then open the Organization dropdown list in the upper right. Your Organization UUID is displayed under the Organization UUID column and you can copy it by clicking the copy icon.
If you configured the YAML file as the default "habu_snowflake_config.yaml", add your "Organization UUID" to the following command and run the command:
redbeard init habu-framework -o <organization uuid>For example (modify accordingly):
redbeard init habu-framework -o f593e343-452c-4ad2-8f6b-fea01658e4e8Note
If you used a custom YAML file name, add your "Organization UUID" and the custom "YAML file name" to the following command and run the command:
redbeard init habu-framework -o <organization uuid> -c <YAML file name>
The command creates two databases: "HABU_CLEAN_ROOM_COMMON" and "HABU_DATA_CONNECTIONS" and shares them with LiveRamp Clean Room.
"HABU_DATA_CONNECTIONS" stores the metadata information for LiveRamp Clean Room (i.e., Columns and Column Data Types) and the identity graph (i.e., Parent’s ID).
 |
It also accepts a shared database called "HABU_ID_GRAPH_SHARE_DB" from LiveRamp Clean Room. This is LiveRamp Clean Room’s identity graph.
To implement the Snowflake pattern, you run a set of CLI commands. These commands create and share databases and tables in the account. To learn more, see "Configure a Snowflake Data Connection for a Snowflake Clean Room".
Note
Databases and tables are often referred to as objects.