Use Code Containers
LiveRamp Clean Room supports the application of multi-party modeling using the Clean Compute feature. Common use cases include complex data enrichment and machine learning. Clean Compute establishes a trusted execution environment (TEE) that is auto-provisioned at runtime and decommissioned post-processing. Analysis templates are individually containerized with execution instructions, including required inputs and compute requirements, and a privacy-safe result set is produced prior to data being deleted and runtime infrastructure being securely spun down.
This article explains how various components work together with containers in LiveRamp Clean Room.
Create an Image in a Supported Container Registry
Create an image and host it in one of two supported container registries: AWS Elastic Container Registry (ECR) or Docker Hub. If your image is hosted in a different cloud, contact your LiveRamp representative.
When configuring your environment, remember that all Python code snippets referenced below are meant as guidance:
LiveRamp Clean Room currently supports Docker images built for x86 platforms (Linux/AMD64).
os.environ[  "TMPDIR"  ]   =   os.environ.get(  "OUTPUT_DATA"  )
 os.environ["MPLCONFIGDIR"  ] = os.environ.get( "OUTPUT_DATA"  ) # for
 matplotlib
The data input for code execution is typically in the form of a data connection, which is mapped to environment variables available at runtime. The following sample code provides a list file location and reads the contents into a dataframe.
#Method   to   read   input   contents
def   read(input_folder):
    all_files   =   glob.glob(input_folder   +   "/*"  )
    li   =   []
    for   filename   in   all_files:
       df   =   pd.read_csv(filename,   header=  0  )
       li.append(df)
    frame   =   pd.concat(li,   axis=  0  )
    return   frame

#List   file   path   for   "INPUT_DATA"   environment   variable
input_loc_1   =   os.environ.get(  'INPUT_DATA'  )
input_loc_1_files   =   []
if   input_loc_1:
   for   root,   dirs,   files   in   os.walk(input_loc_1):
        for   filename   in   files:
           local_path   =   os.path.join(root,   filename)
            input_loc_1_files.append(local_path)

#Populate   dataframe   using   read   method
df   =   read(os.environ.get(  'INPUT_DATA'  ))
As container logs are made available after a clean room question run processes, extensive logging is encouraged to help with debugging. The following Python code snippet can be used to set up logging:
#   setup   logging   handler
logs_directory   =   os.environ.get(  'HABU_CONTAINER_LOGS'  )
log_file   =   f  "  {logs_directory}/container.log  "
logging.basicConfig(
   handlers=[logging.FileHandler(filename=log_file,encoding=  'utf-
8'  ,   mode=  'a+'  )],
   format=  "%(asctime)s %(name)s:%(levelname)s:%(message)s"  ,
   datefmt=  "%F %A %T"  ,
   level=logging.INFO,
)

logging.info(f  "  start   processing...  "  )
A data output must be written to the location referenced by the
OUTPUT_DATAenvironment variable:
plt.savefig(os.environ.get(  'OUTPUT_DATA'  )+  "/output.jpg"  )
forecast.to_csv(os.environ.get(  'OUTPUT_DATA'  )+  "/output.csv"  )
Add the Registry Credentials
To add credentials:
From the navigation menu, select Clean Room → Credentials to open the Credentials page.
Click .
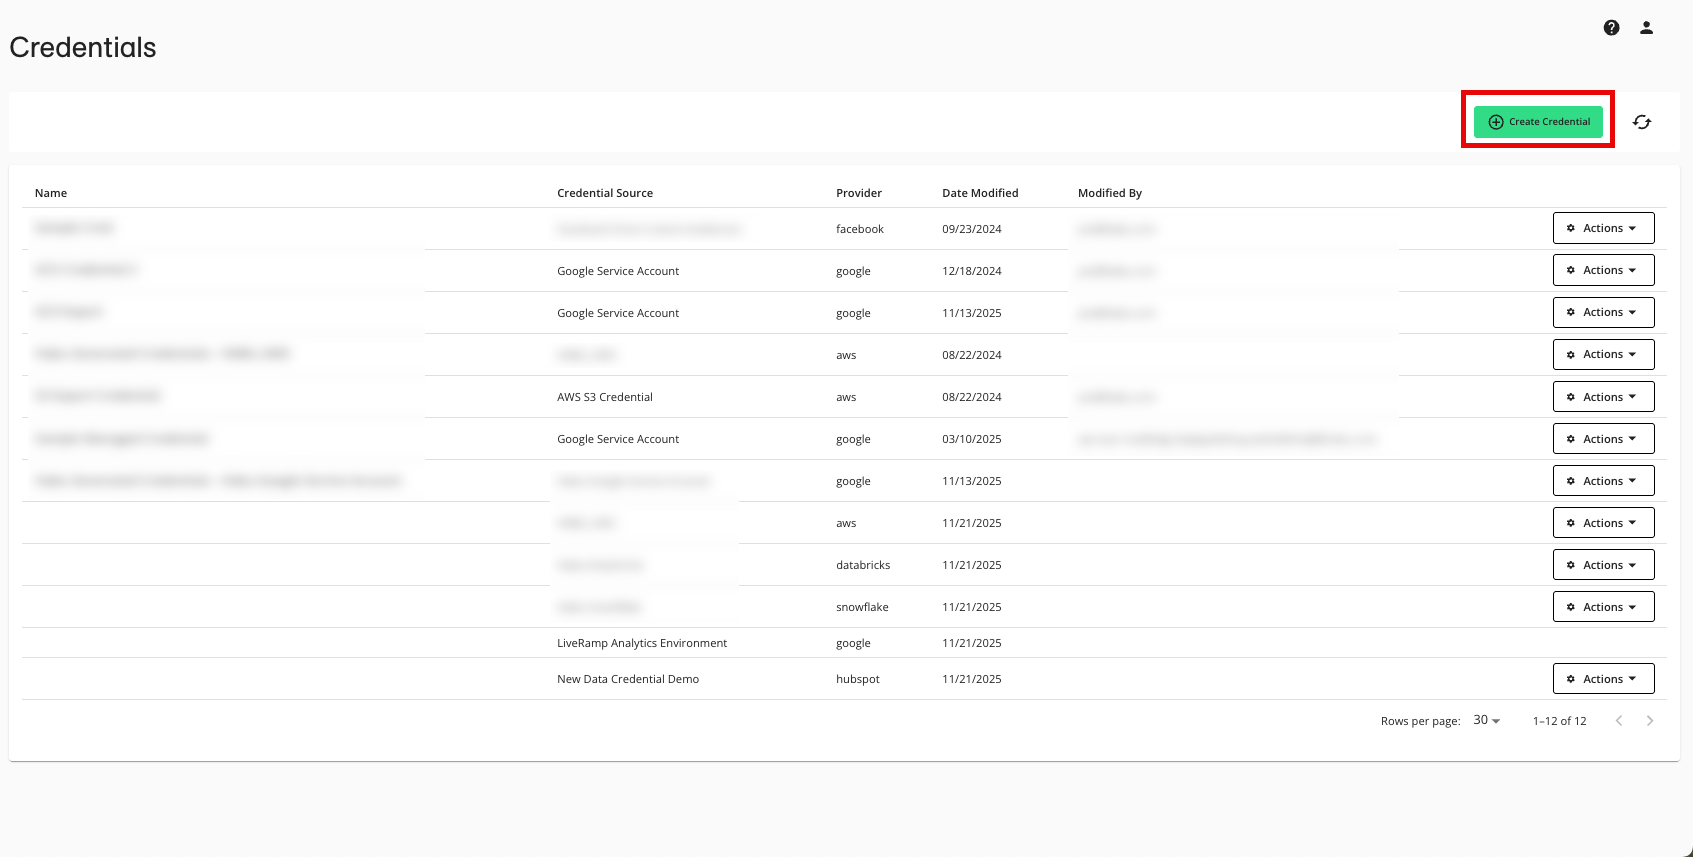
Enter a descriptive name for the credential.
Select your credential source:
AWS ECR
Docker Registry (if you're using a Google Service Registry)
Note
If using AWS ECR, the AWS IAM user needs List and Read permissions.
For Docker Registry, enter the following information:
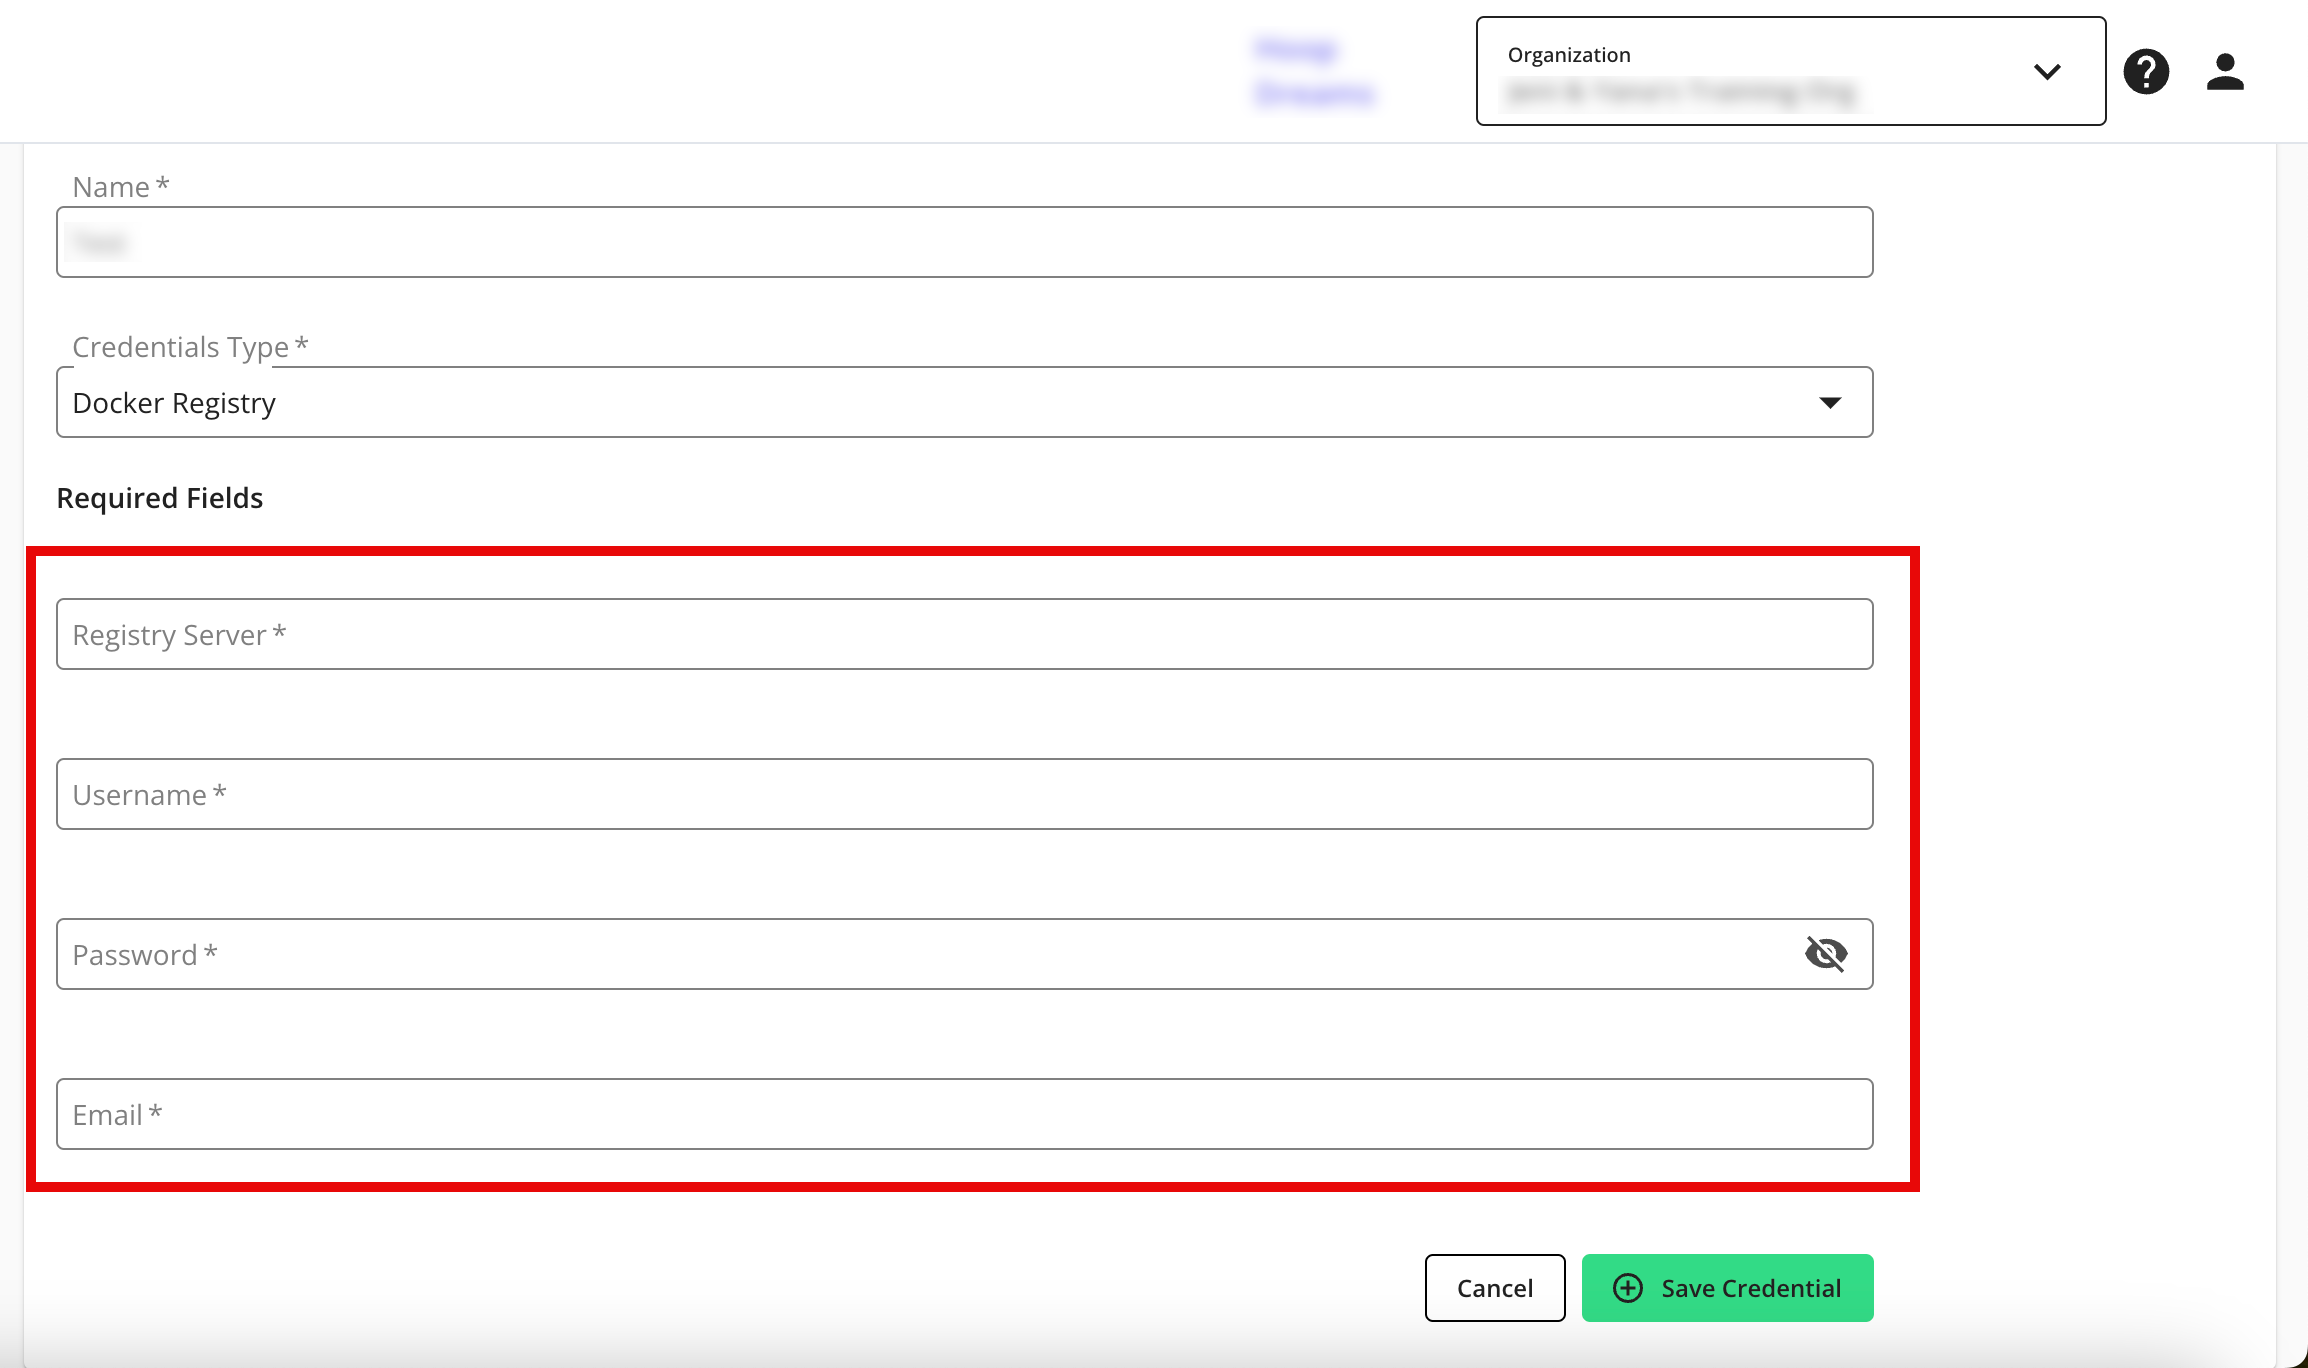
Registry Server
Username: _json_key
Password: Enter your API Key
Email: Enter your Google Service Account email
For AWS ECR Registry, enter the following information:
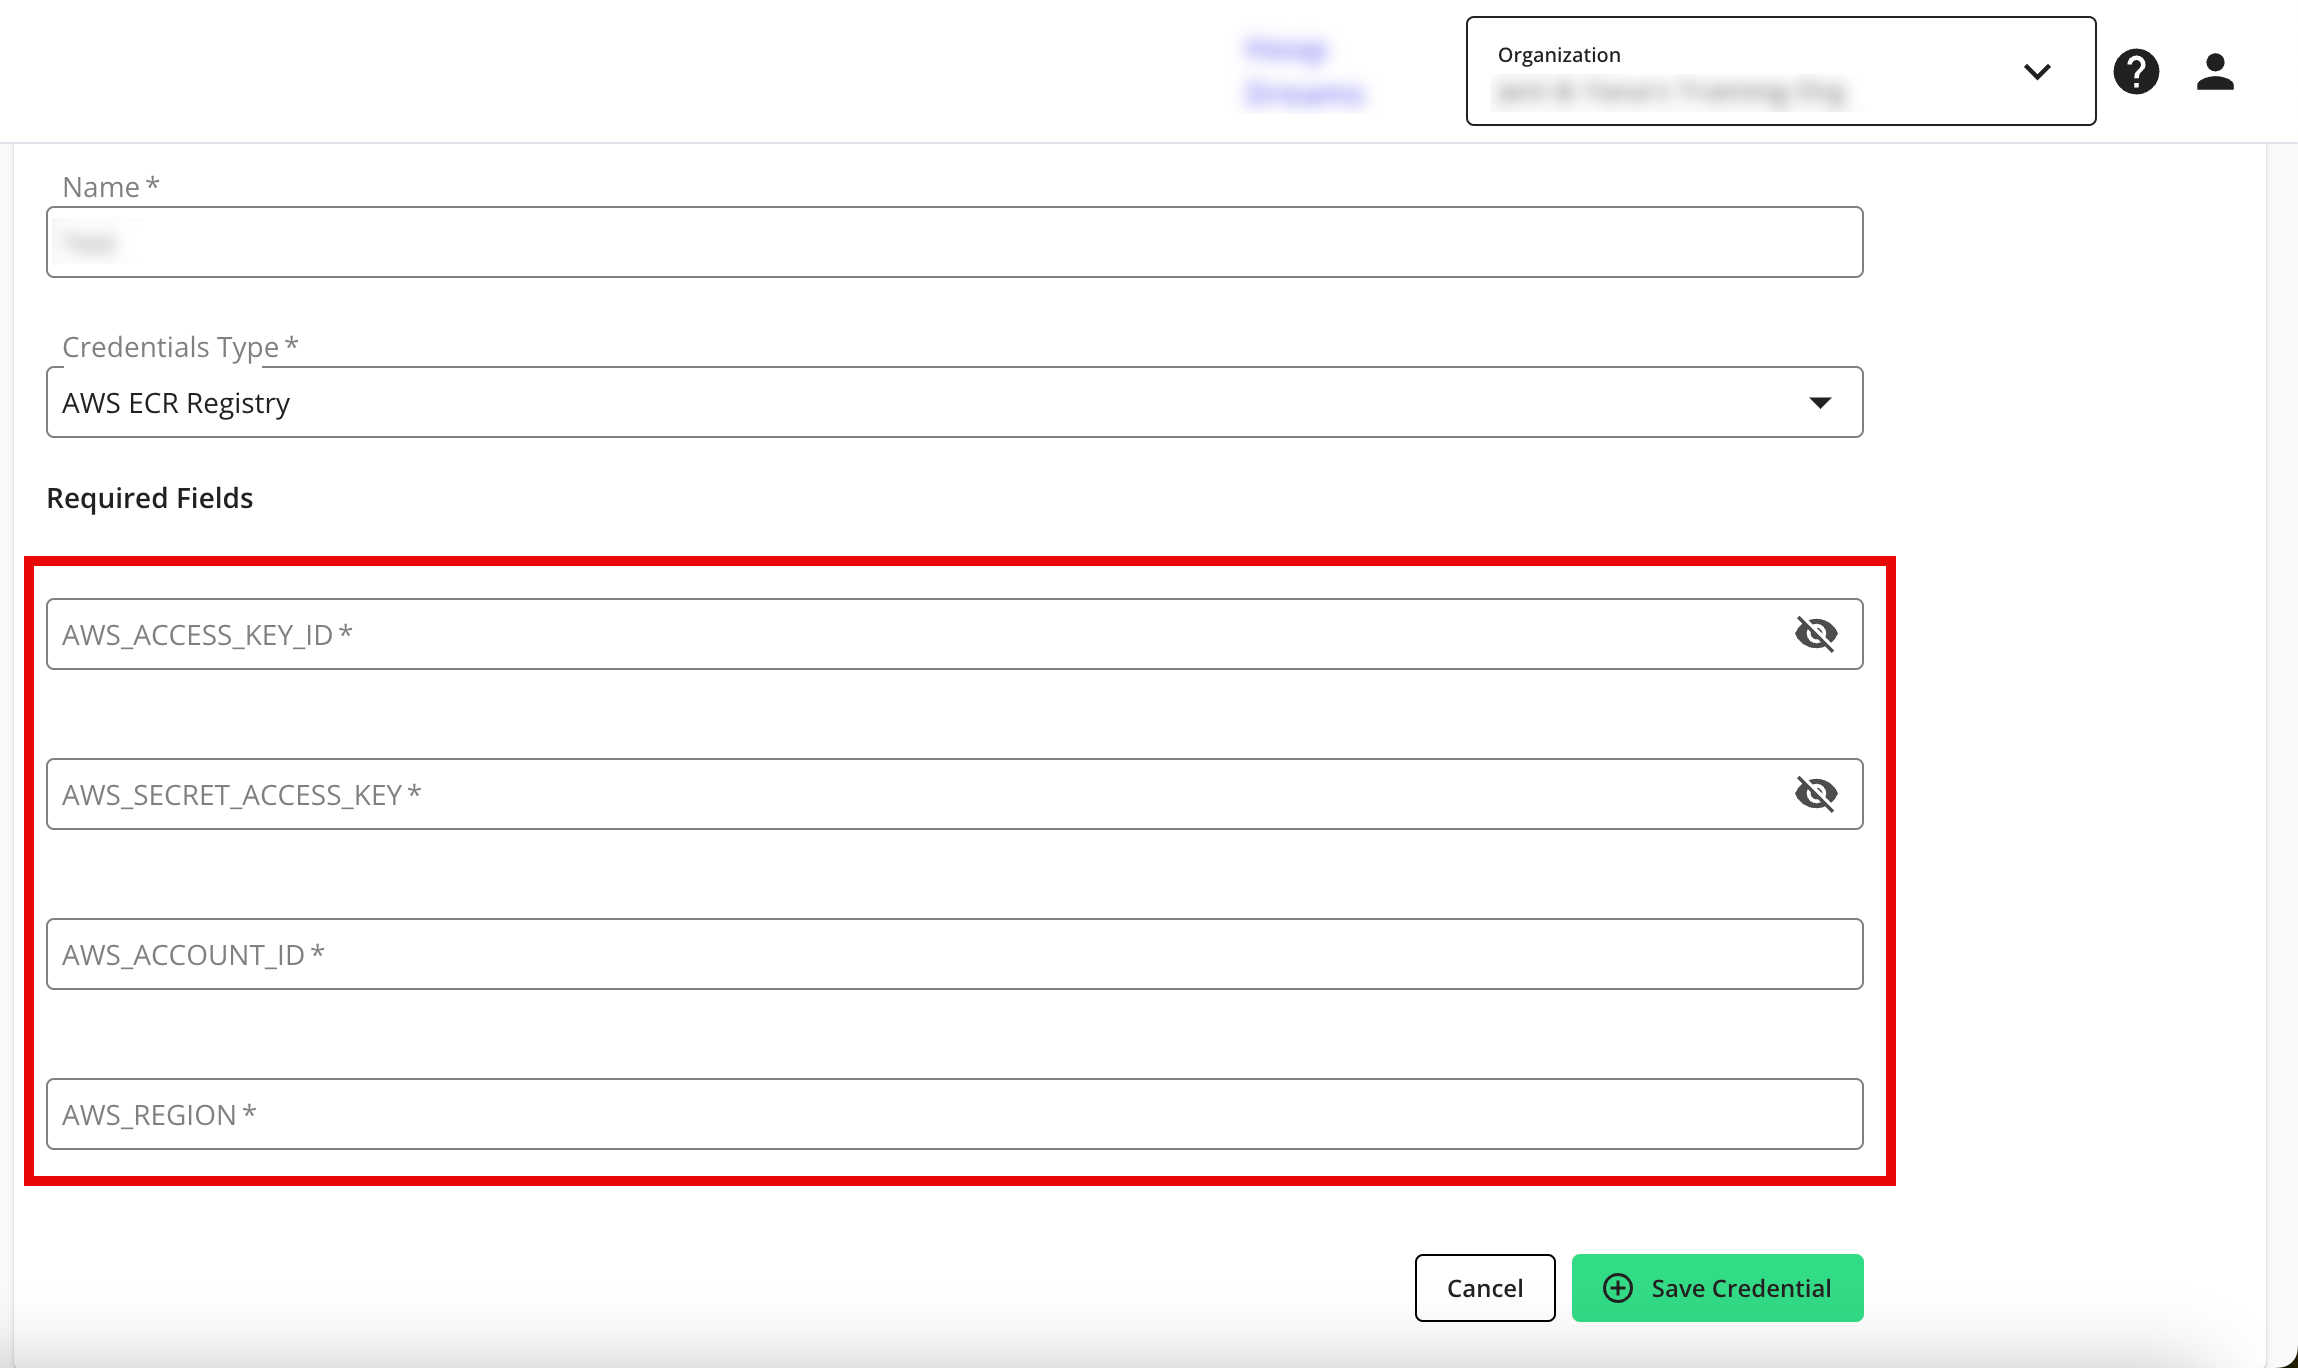
AWS_ACCESS_KEY_ID
AWS_SECRET_ACCESS_KEY
AWS_ACCOUNT_ID
AWS_REGION
Click .
Create the Data Connection
To set up the image as a data connection:
From the LiveRamp Clean Room navigation pane, select Data Management → Data Connections.
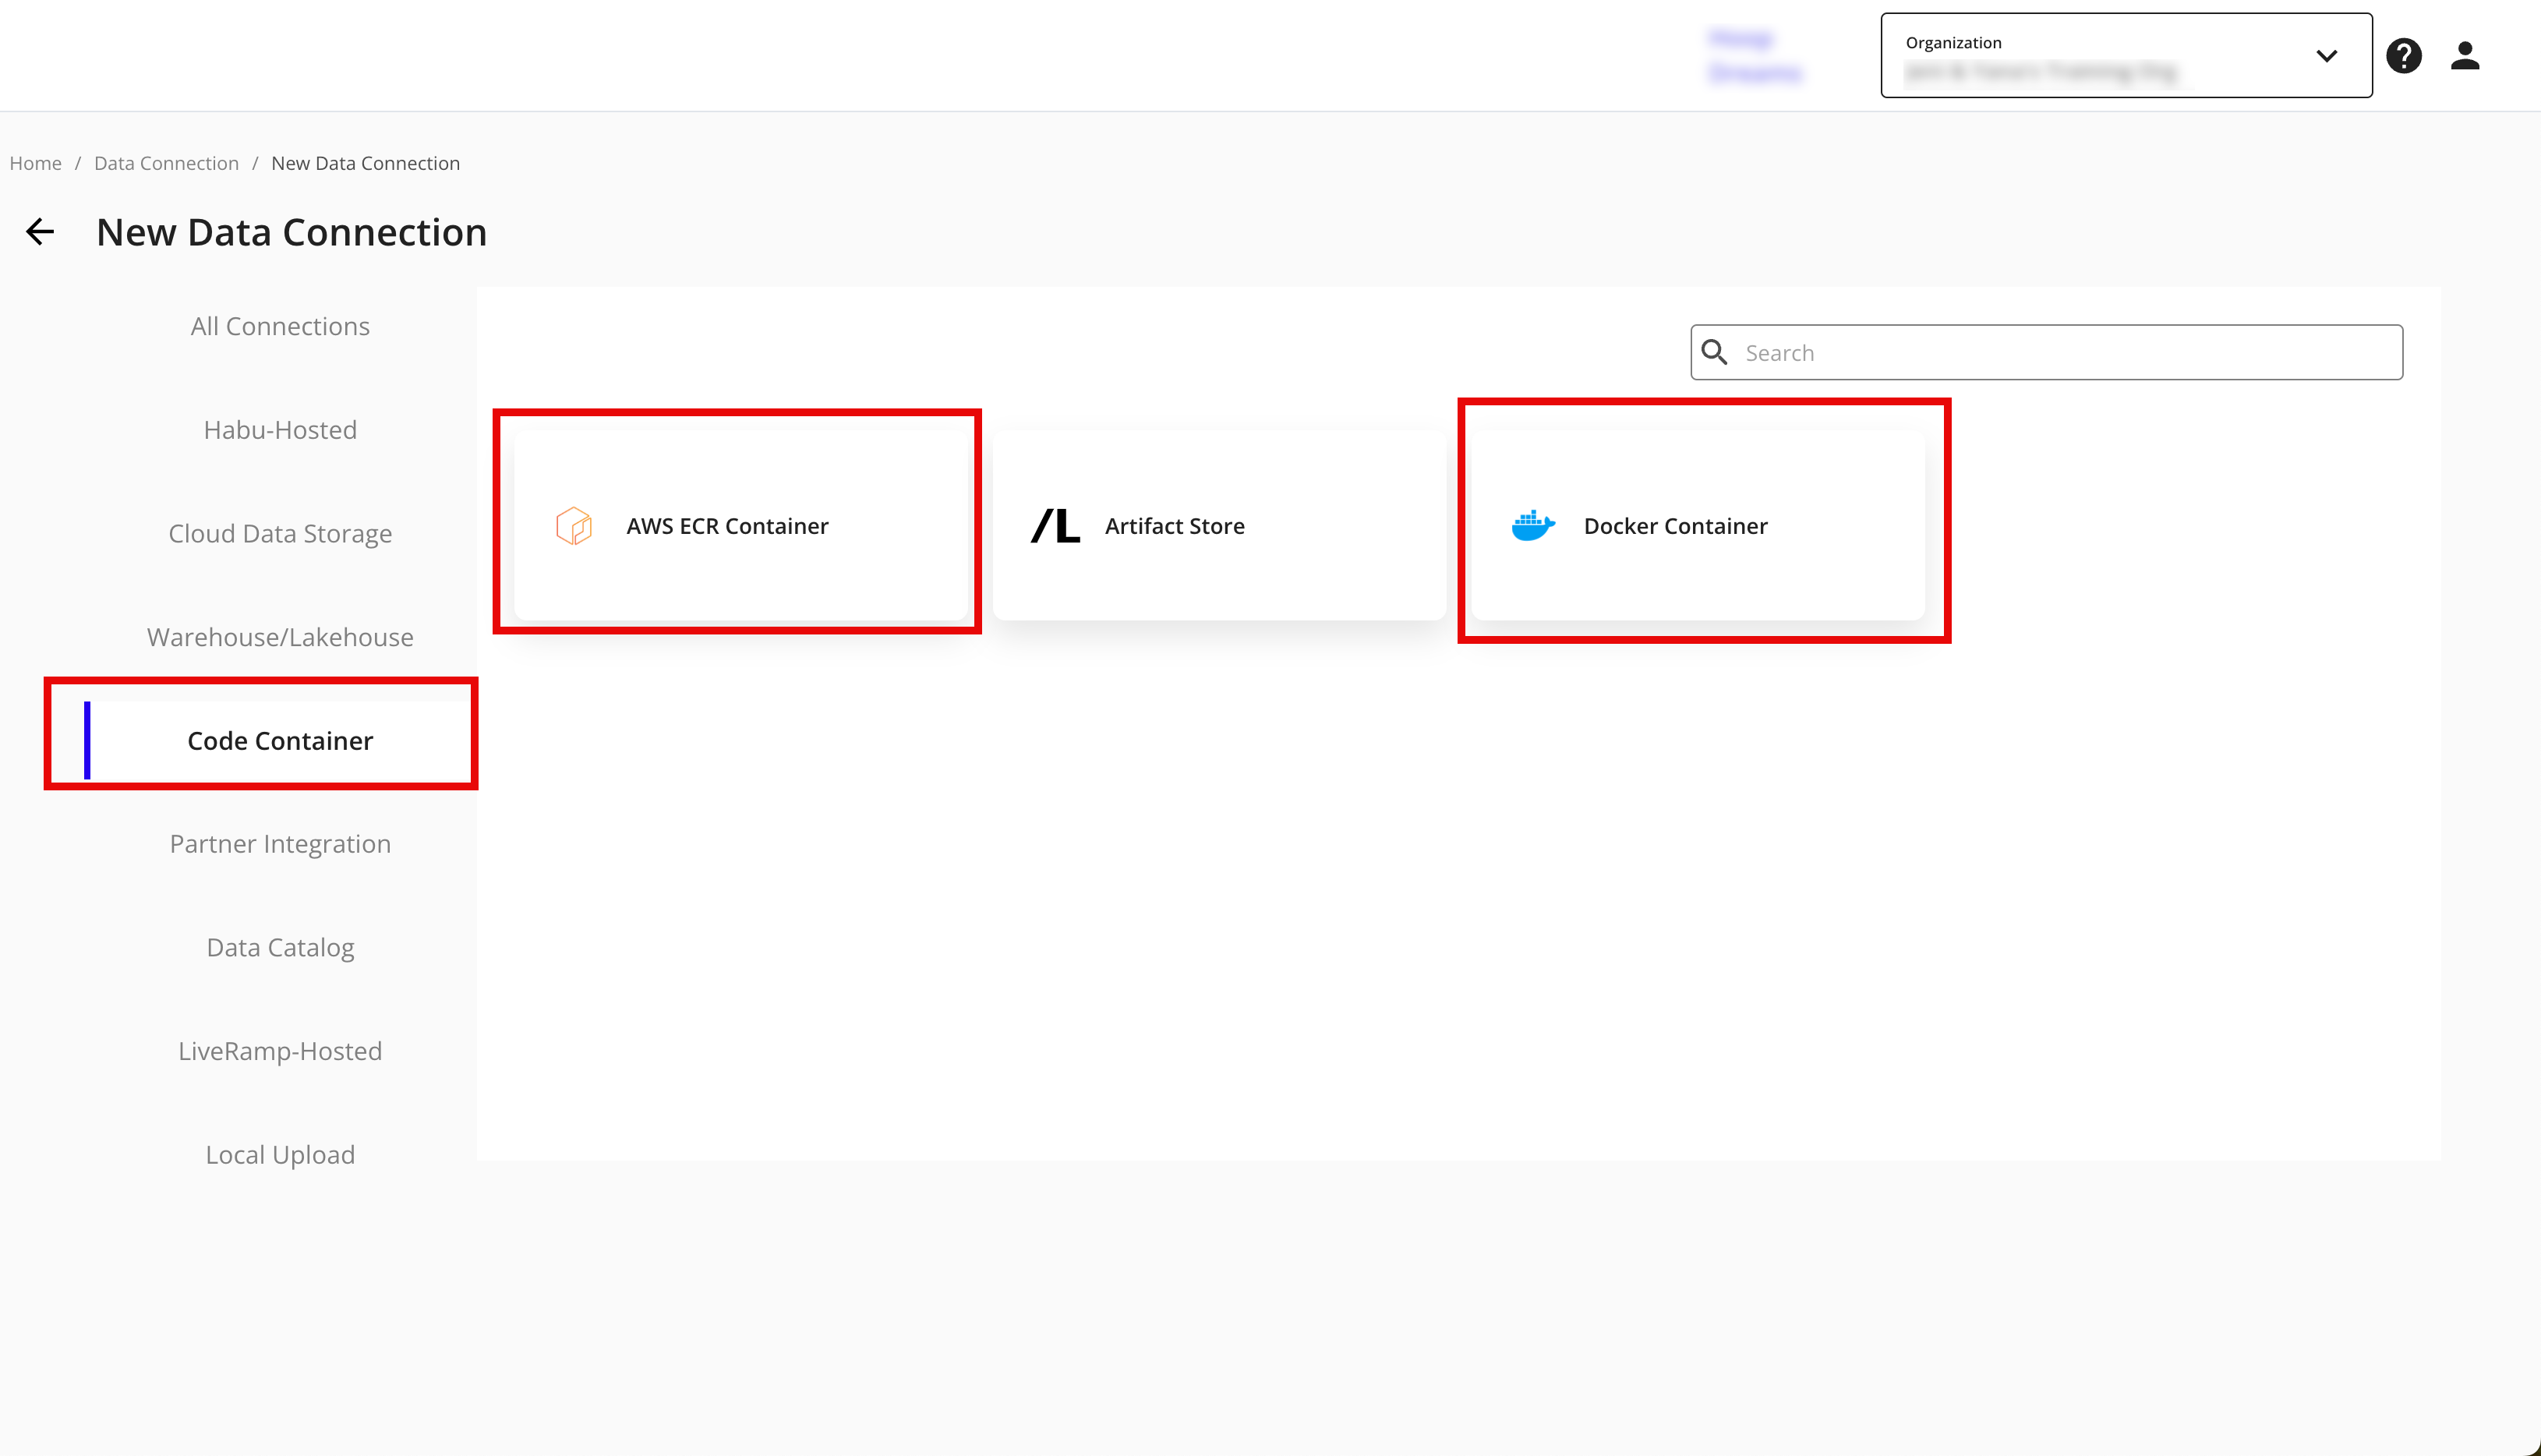
From the Data Connections page, click .

From the Code Container section of the available options, select "Docker Container" or "AWS ECR Container".
Select the credentials created in the previous procedure from the list.
Complete the following fields in the Set up Data Connection section:
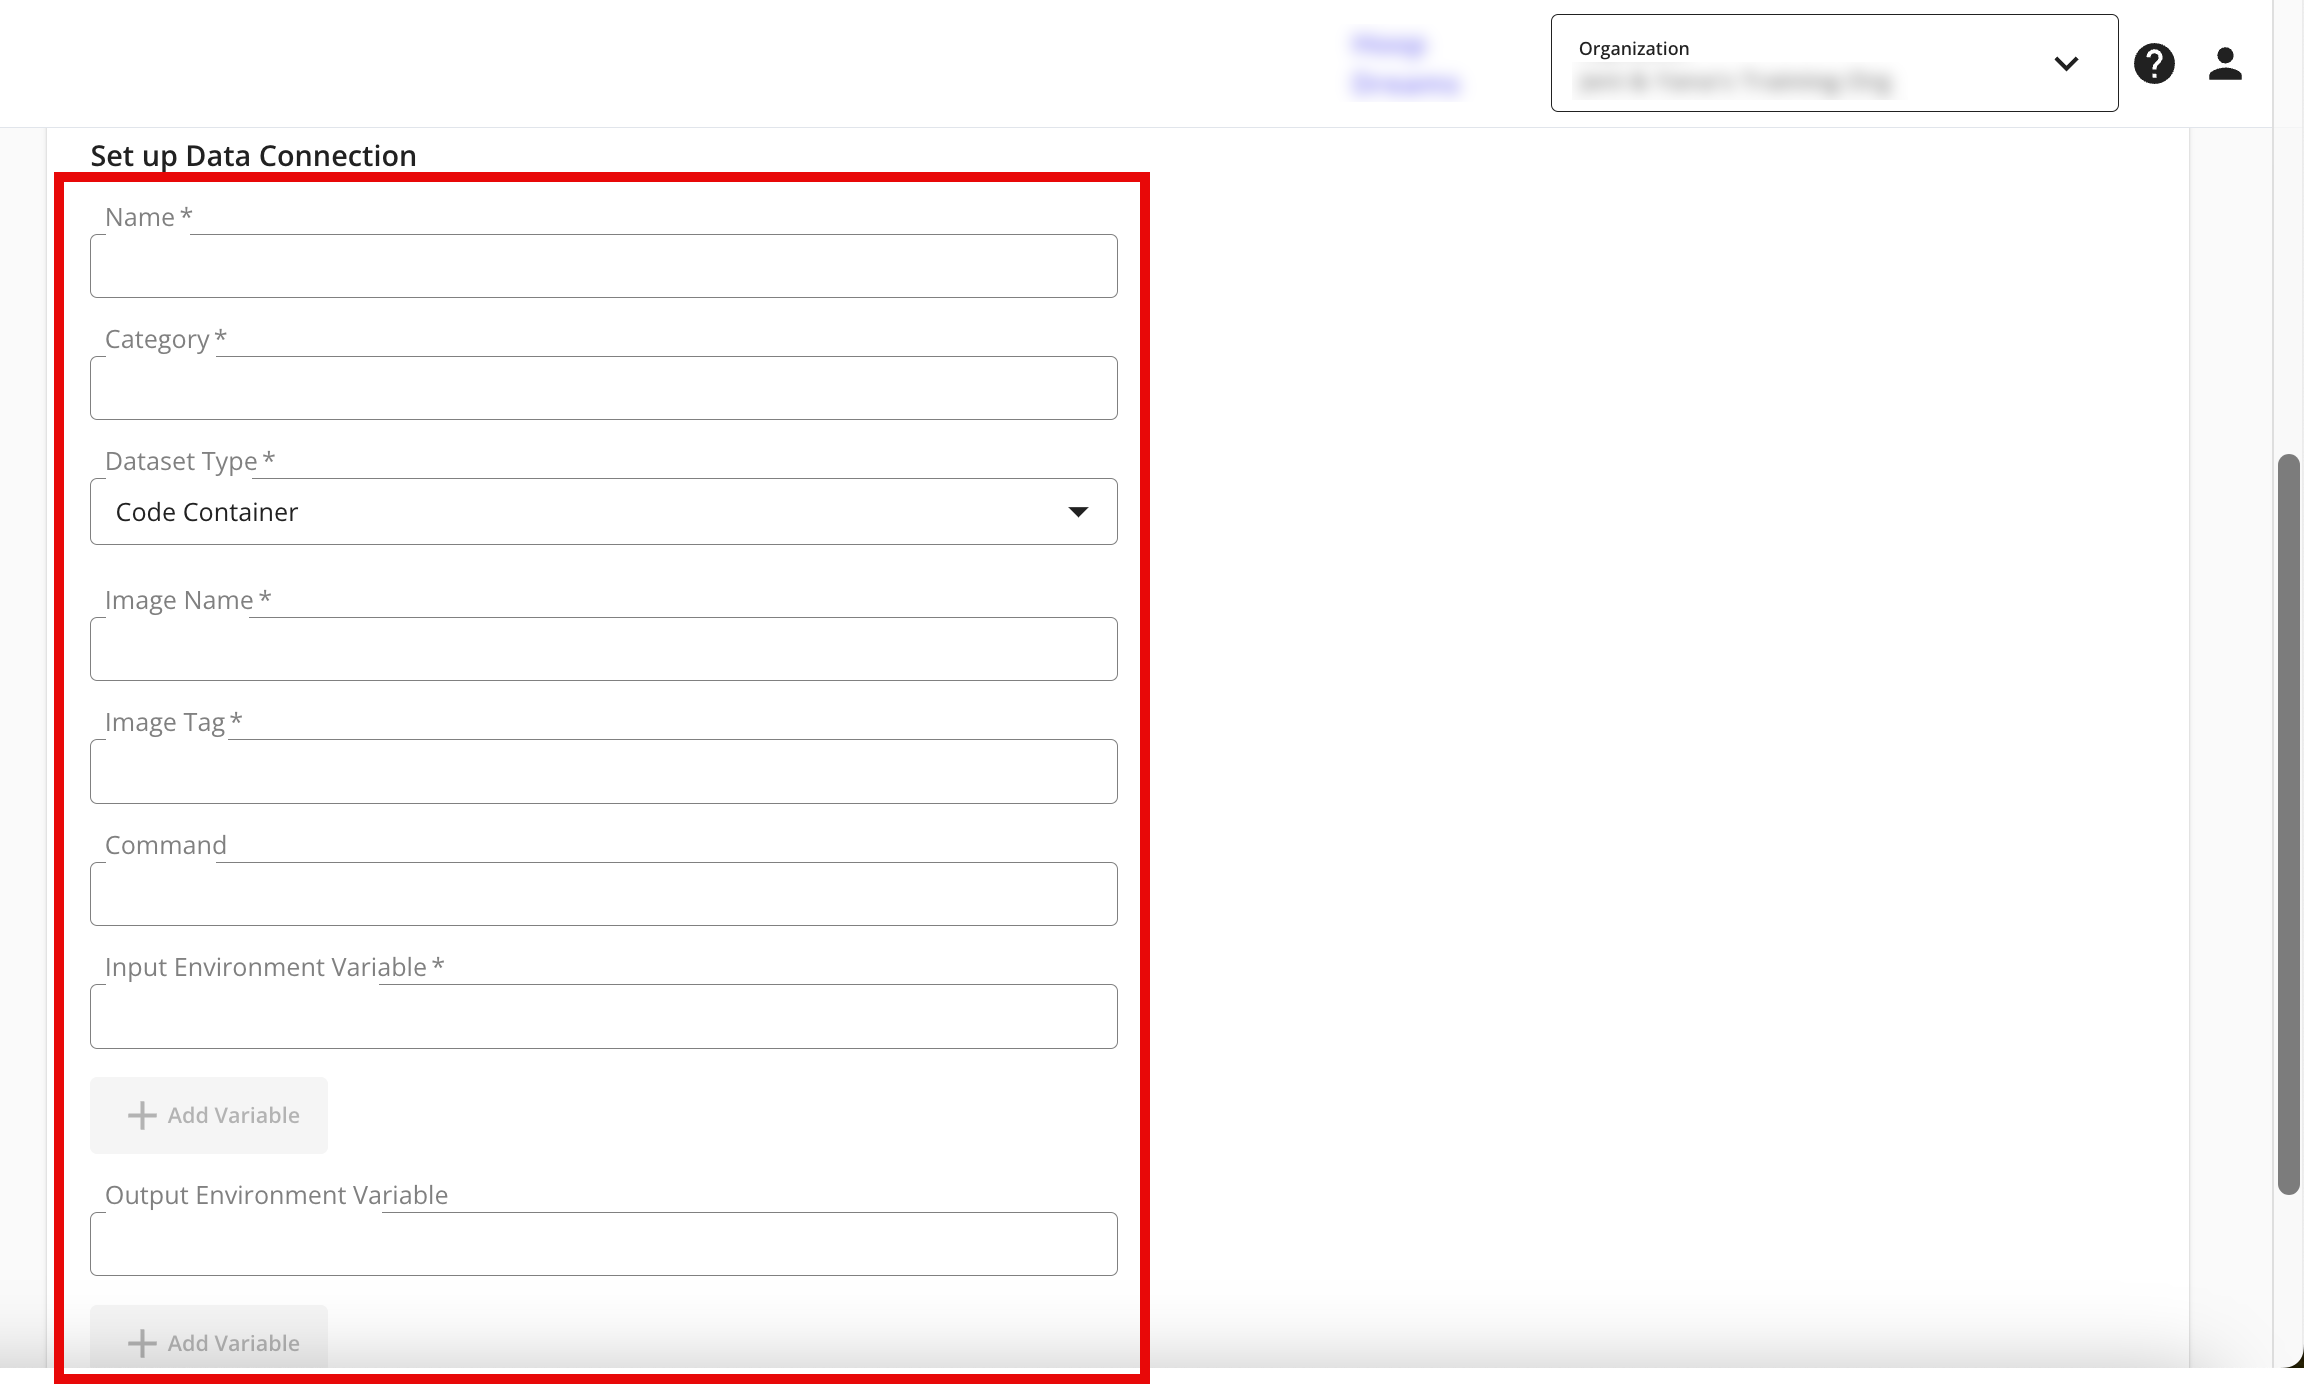
Name: Enter a name for the data connection (this will be the name for the dataset that you'll provision to clean rooms).
Category: Enter a category of your choice.
Dataset Type: Select Code Container.
Image Name:
Image Tag:
Command:
Input Environmental Variable: Specify the input environment variables used in your code. See the INPUT_DATA code snippet example for reference. If you have more than one input environment variable, click .
Note
Environment variables must be all upper case.
Output Environmental Variable: Specify the output environment variables used in your code. See the OUTPUT_DATA code snippet example for reference. If you have more than one output environment variable, click .
Click .
Note
If you are using Docker Container, leave the Repository Name box empty in the Datasource Specific Configurations section. Enter an image name, image tag, and command to be run if the Docker file does not include CMD.
Runtime parameters are also read as environment variables in the code. However, because they are configured as part of a clean room question, they do not need to be included in the data connection configuration.
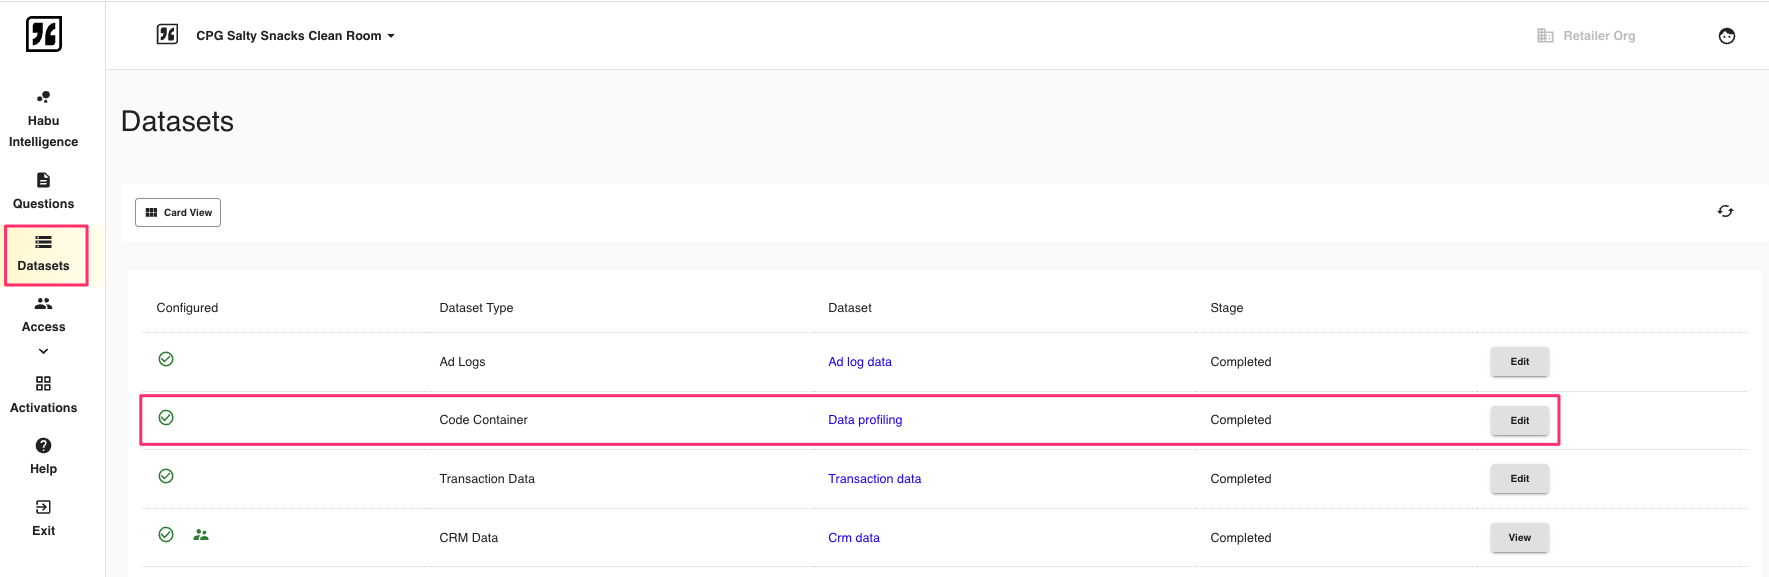
Configure Clean Room Datasets
Navigate to the clean room where the new dataset should be configured. Select Datasets from the Clean Room menu.
Select Configure next to the code container dataset. Then, select Complete Configuration. The code container dataset will show a green check mark, confirming it has been fully configured in the clean room.
Next, contact your LiveRamp representative to author a clean room question with the necessary data connections and runtime parameters.
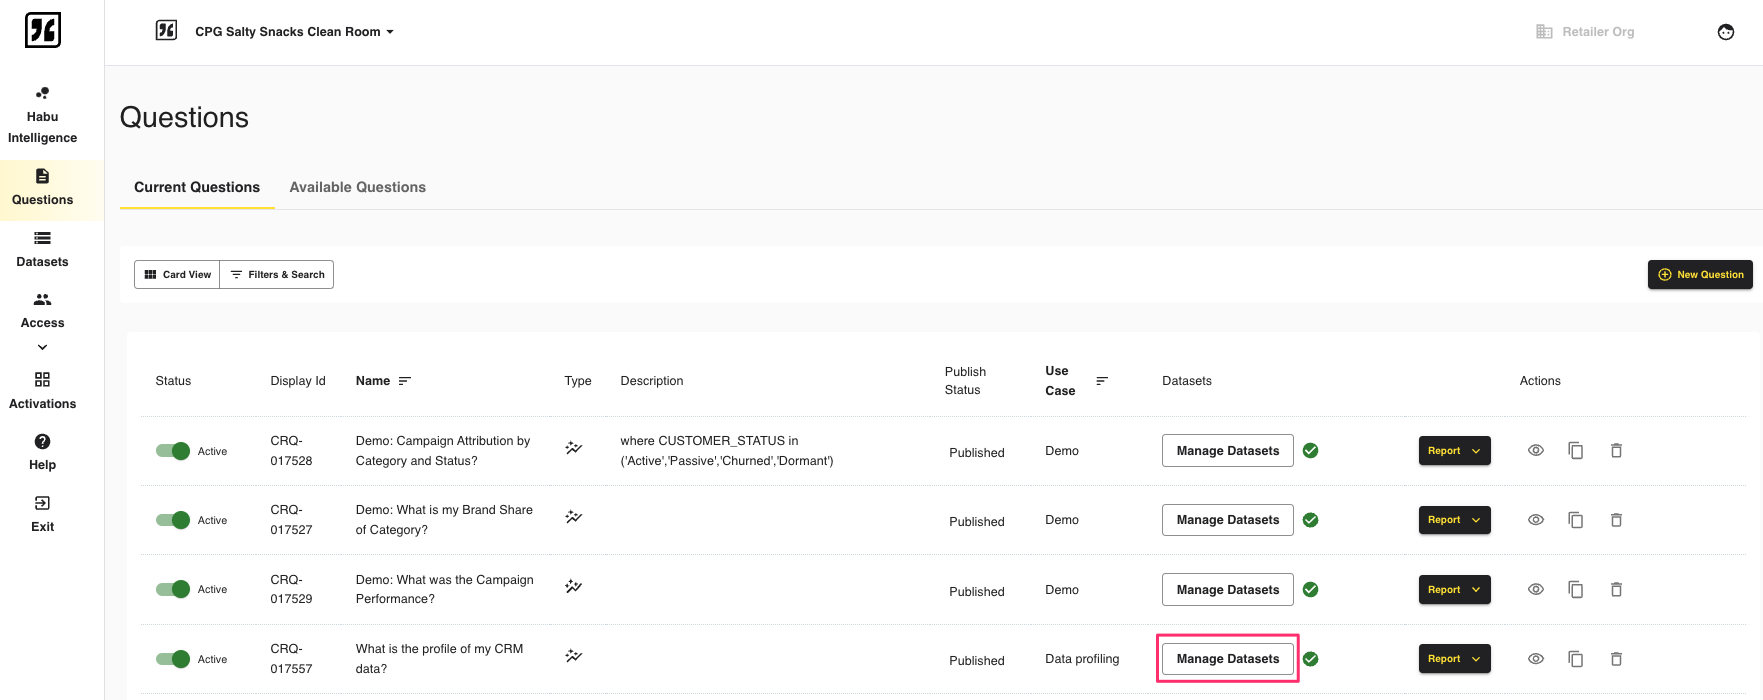
Once the clean room question is set up, from the question view, select Manage Datasets next to the question.
Assign your organization as the owner of the code container dataset. Click .
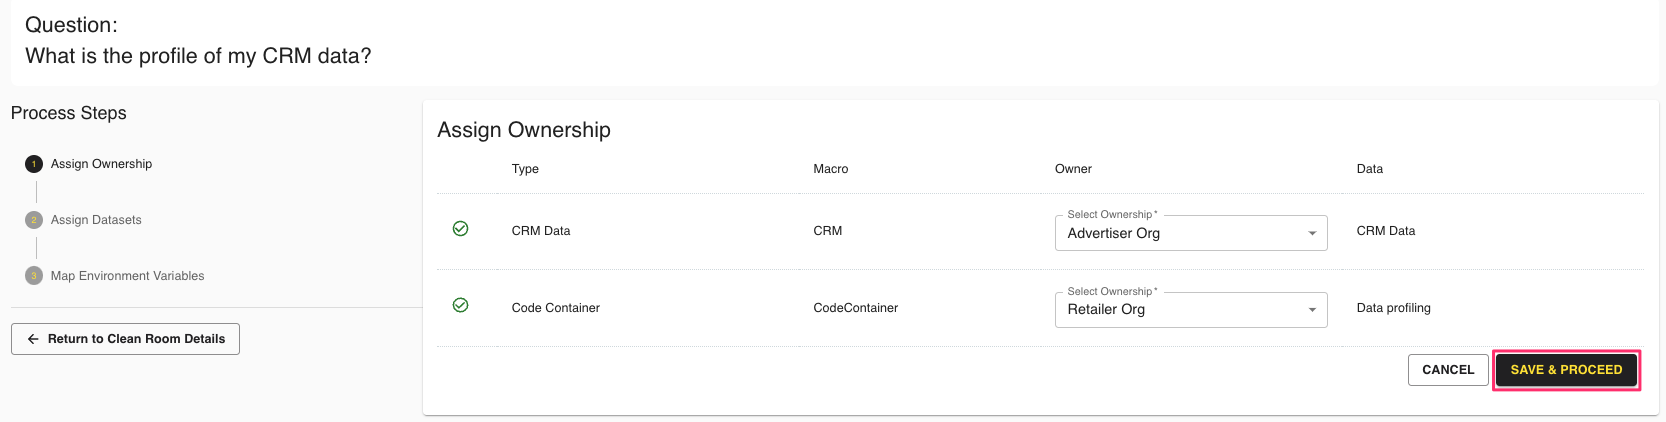
In the next step, assign your code container dataset to the dataset type. Click .
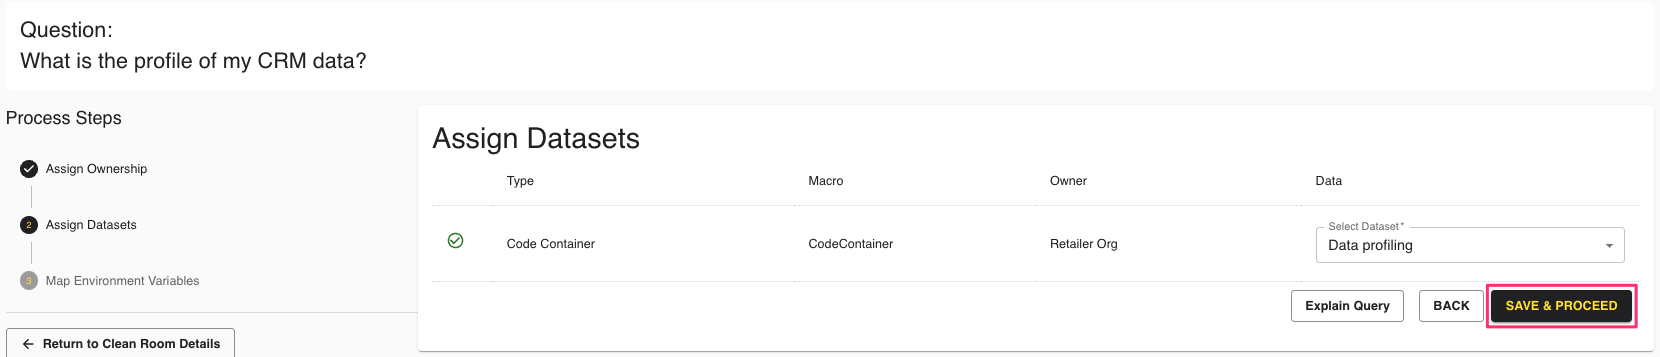
Map your input environment variables and click .
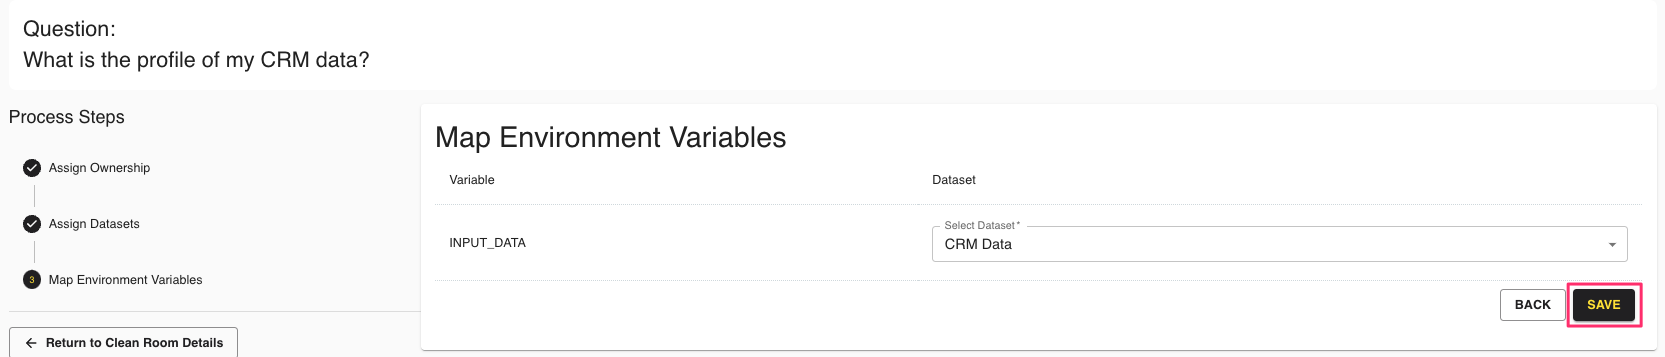
Your code container dataset is now configured for the specified question.
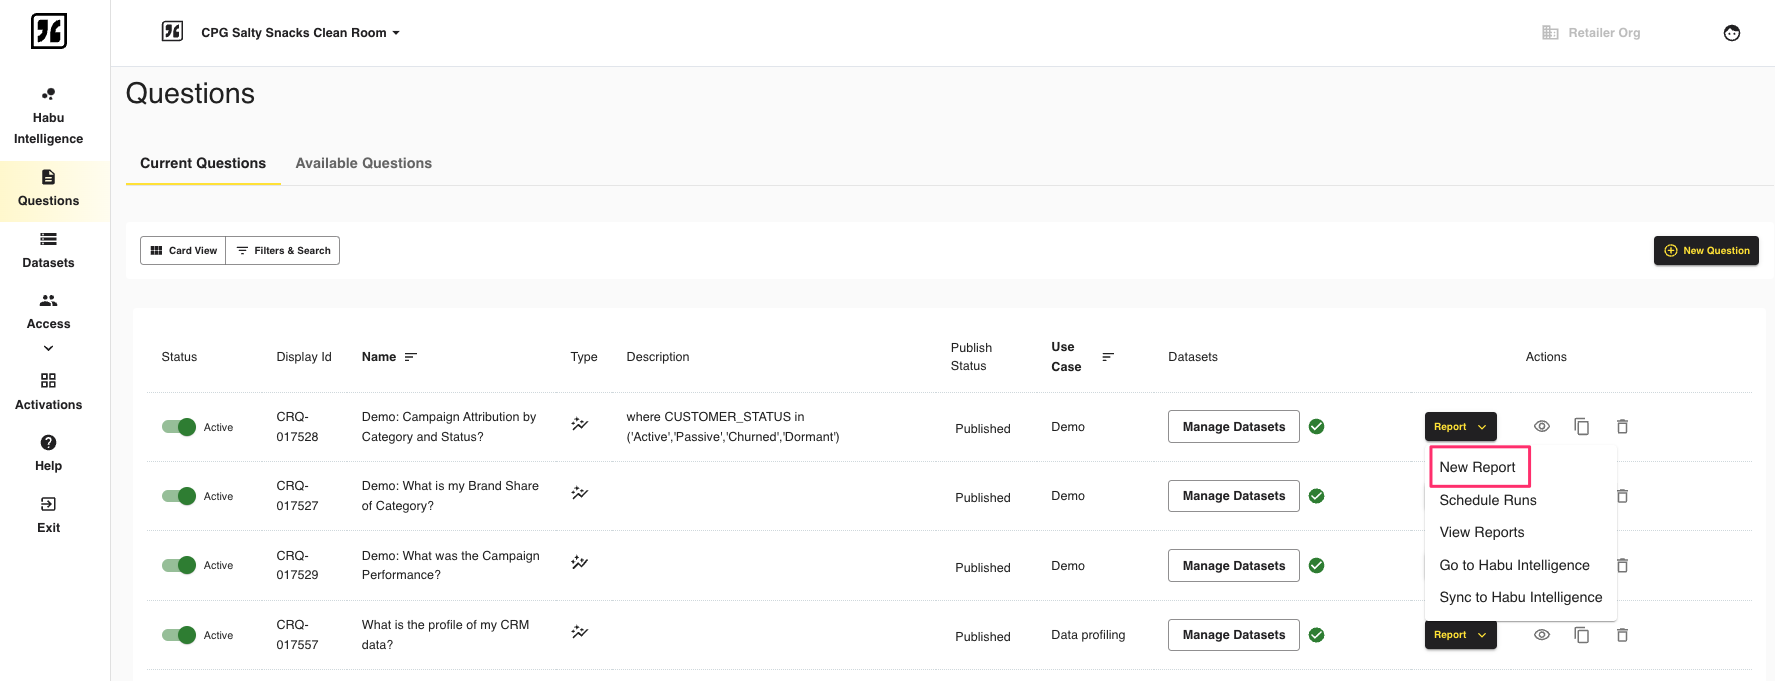
Create a Question Run and View the Output
To trigger a question run, click → next to the question. Complete the run fields and click .
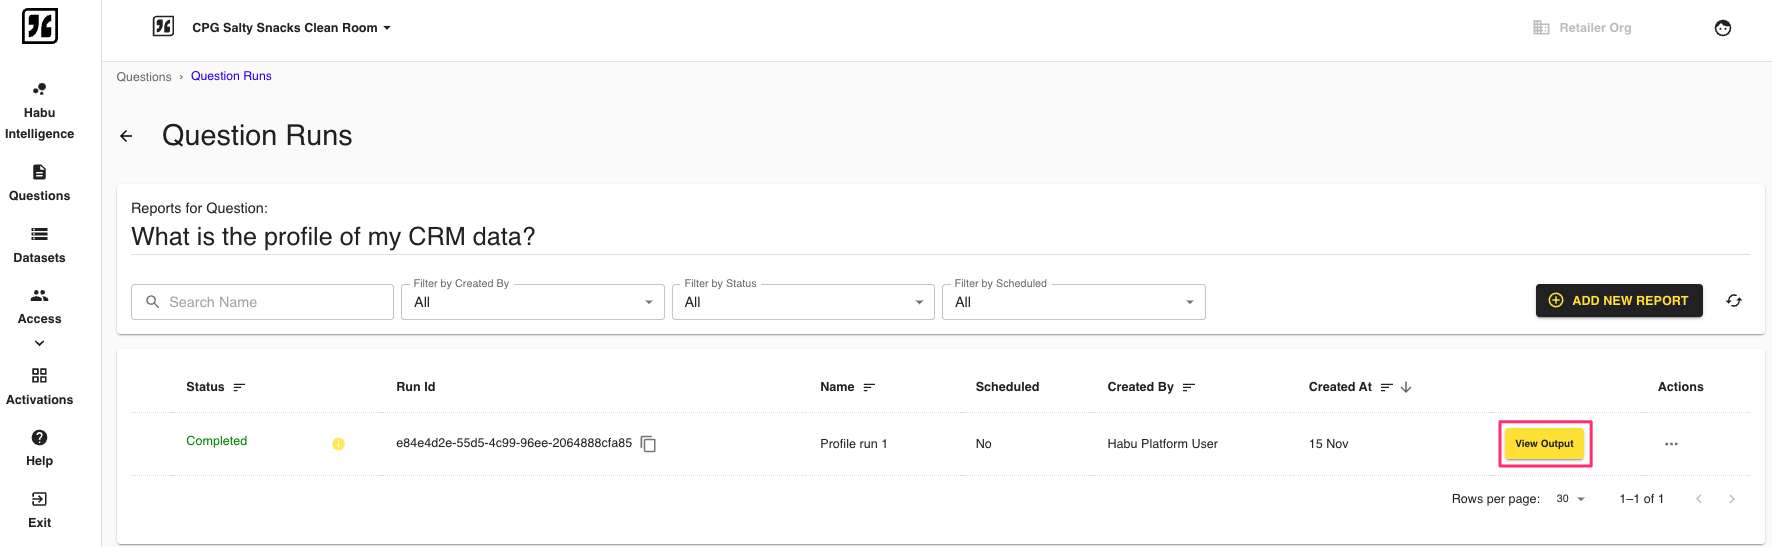
The run will process and show in Completed status once processing completes. Click to view the result files. Results and log files from the code container are saved to the owner's instance. Results are saved to an S3 location and the S3 URL is shared with the user.
Use a Code Container Output as a New Data Connection
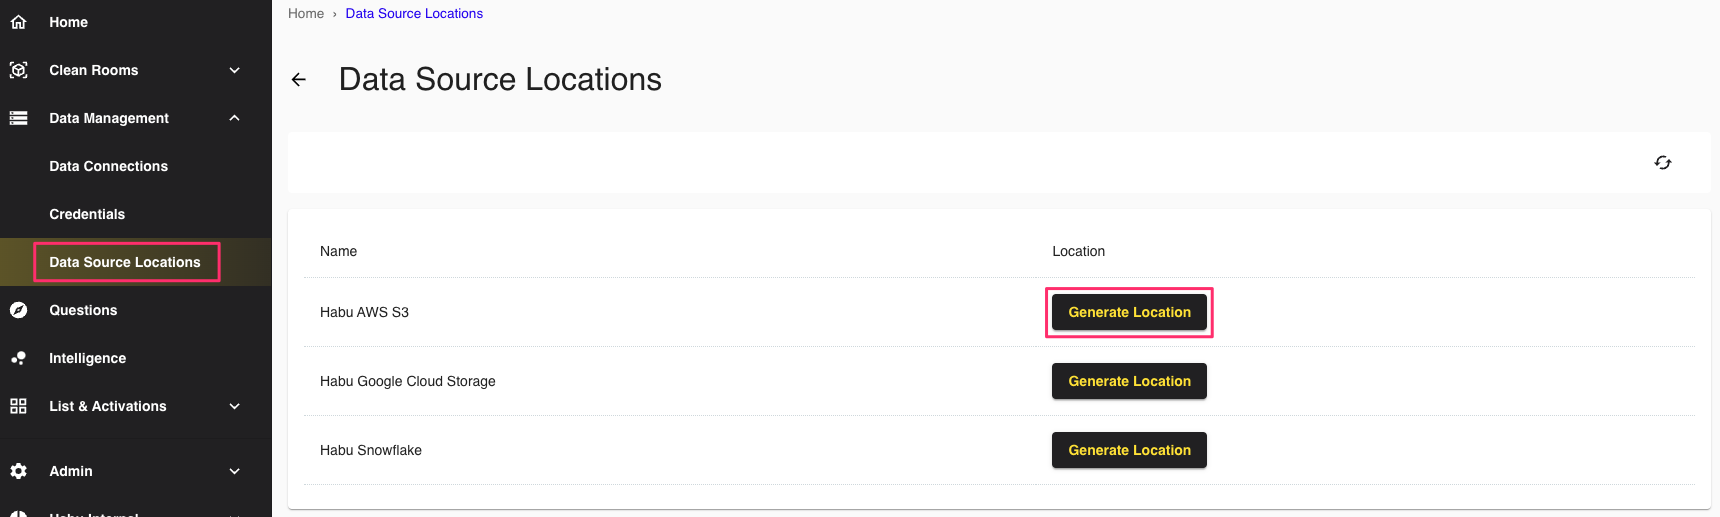
To create a report or user list from the results of the code container output, create a data connection. Generate a new AWS S3 data location by navigating to Data Management → Data Source Locations. Click next to AWS S3.
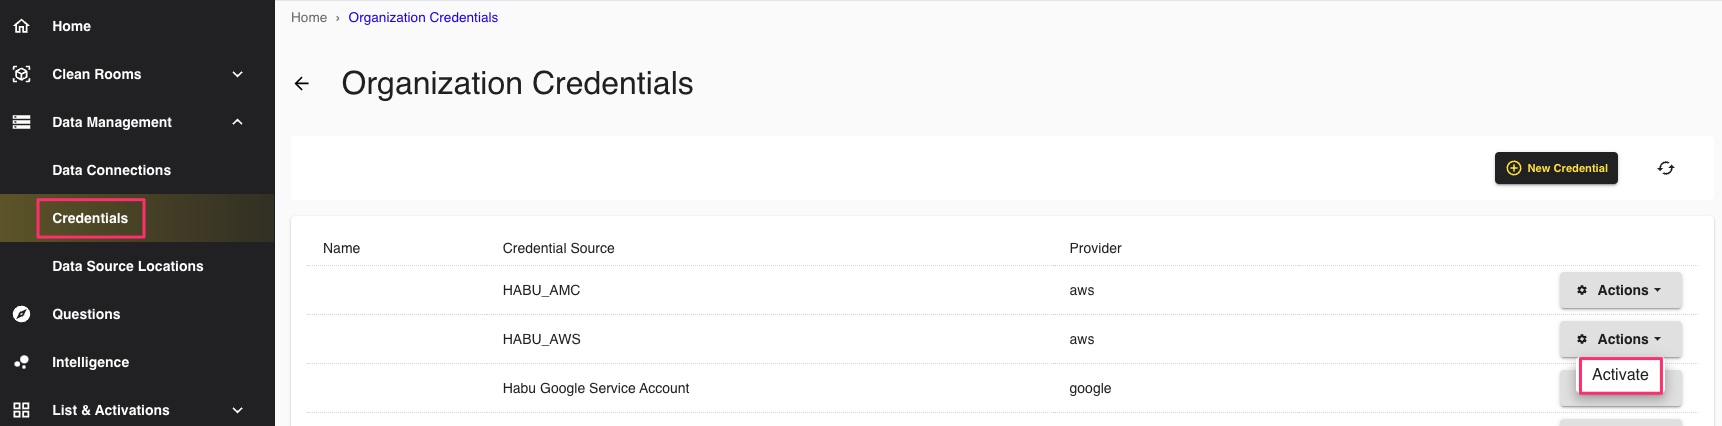
Navigate to Data Management → Credentials and select Activate from the Actions list next to the HABU_AWS credential source.
Copy the objects from the original S3 location to a new S3 location using the below code snippet. Be sure to use copy-object and not sync or cp.
aws   s3api   copy-object   --copy-source
habu-client-org-***/downloads/clean-room-id=***/clean-room-question-id=***/
clean-room-question-run-id=***/output=OUTPUT_DATA/filename.csv
--bucket   habu-client-org-***
--keyuploads/***  /***/  daily/yyyy-MM-dd/full/filename.csv
Then, navigate to Data Management → Data Connections → New Data Connection to create a new job.

Select AWS S3 as the data source and User Data as the dataset type.
Under Credentials select Habu Generated Credentials - HABU_AWS from the list.
Give the job a descriptive name and a category.
Select the file format, field delimiter, and identifier type (the quote character is optional). The data location will automatically generate and is where the input file should be dropped. Next, select the job frequency. Select Full for the data refresh type.
Note
Be sure to document the data location and replace {yyyy-MM-dd} with the actual date of the file upload. The scored output from the code container must be copied to this location using the snippet above.
Click .
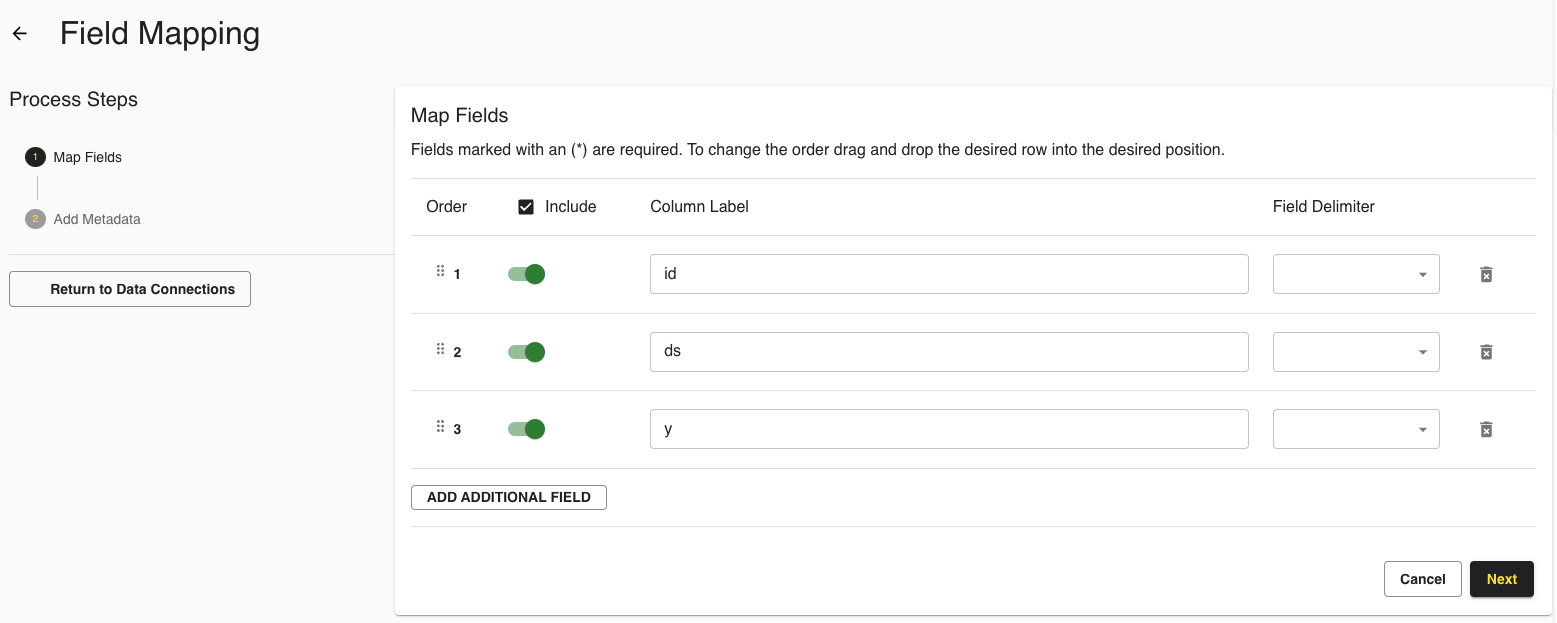
Once the results files are dropped in the S3 location, the Mapping Required data connection job status is displayed. To map fields, select Mapping.
In the Map Fields step, only select a field delimiter if the data is a list of string or integer values. If neither, leave this field blank. Click .
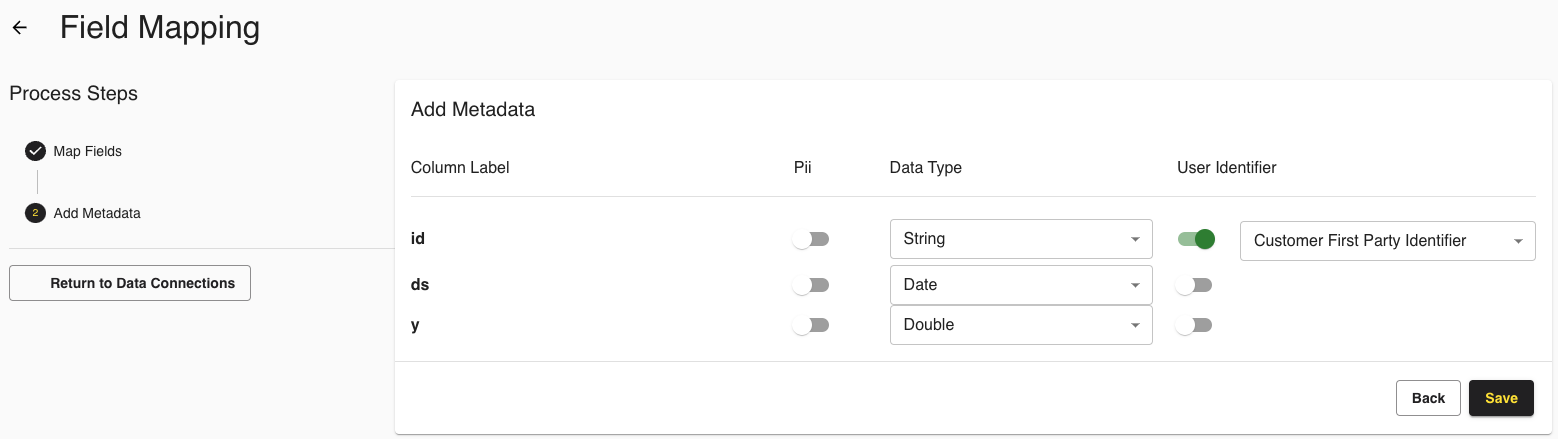
In the Add Metadata step, use the PII toggle for any PII-based data based on your business requirements. This column will be ignored during processing. Switch on User Identifier for at least one data type and select the corresponding identifier type from the list. Click .
The data connection job will run every hour and will display the Completed status once processing is finished. Select View Details to see more information about the job.