The RFP Builder Page
From the RFP Builder page, you can see all the data loaded in your account, search that data, build segments from that data, and continually edit and refine your segments until you are ready to save an RFP from those segments. See “Build an RFP” for instructions on RFP-building tasks.
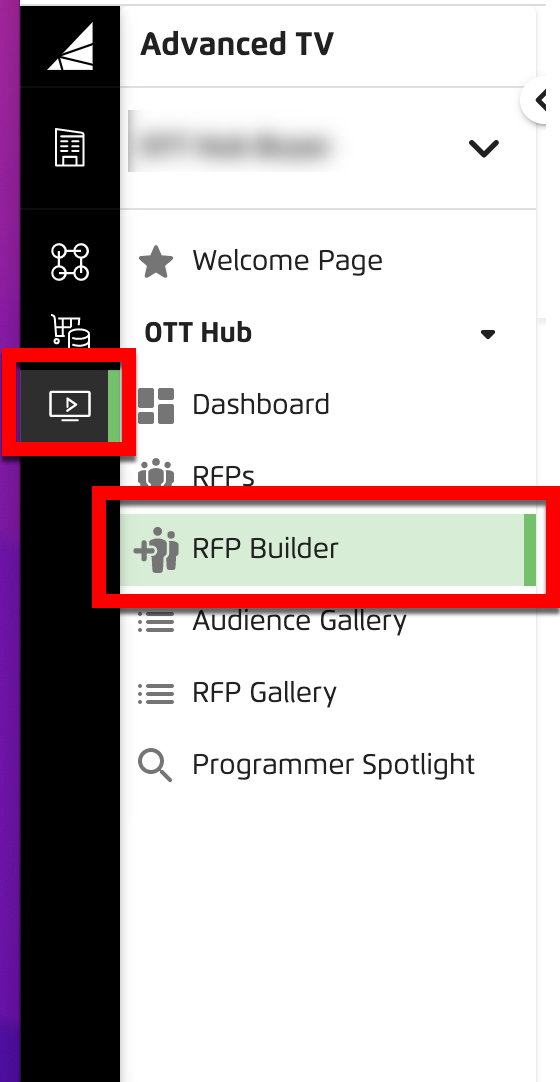
To access the RFP Builder page for OTT Hub, click RFP Builder in the OTT Hub section of the Advanced TV navigation menu.
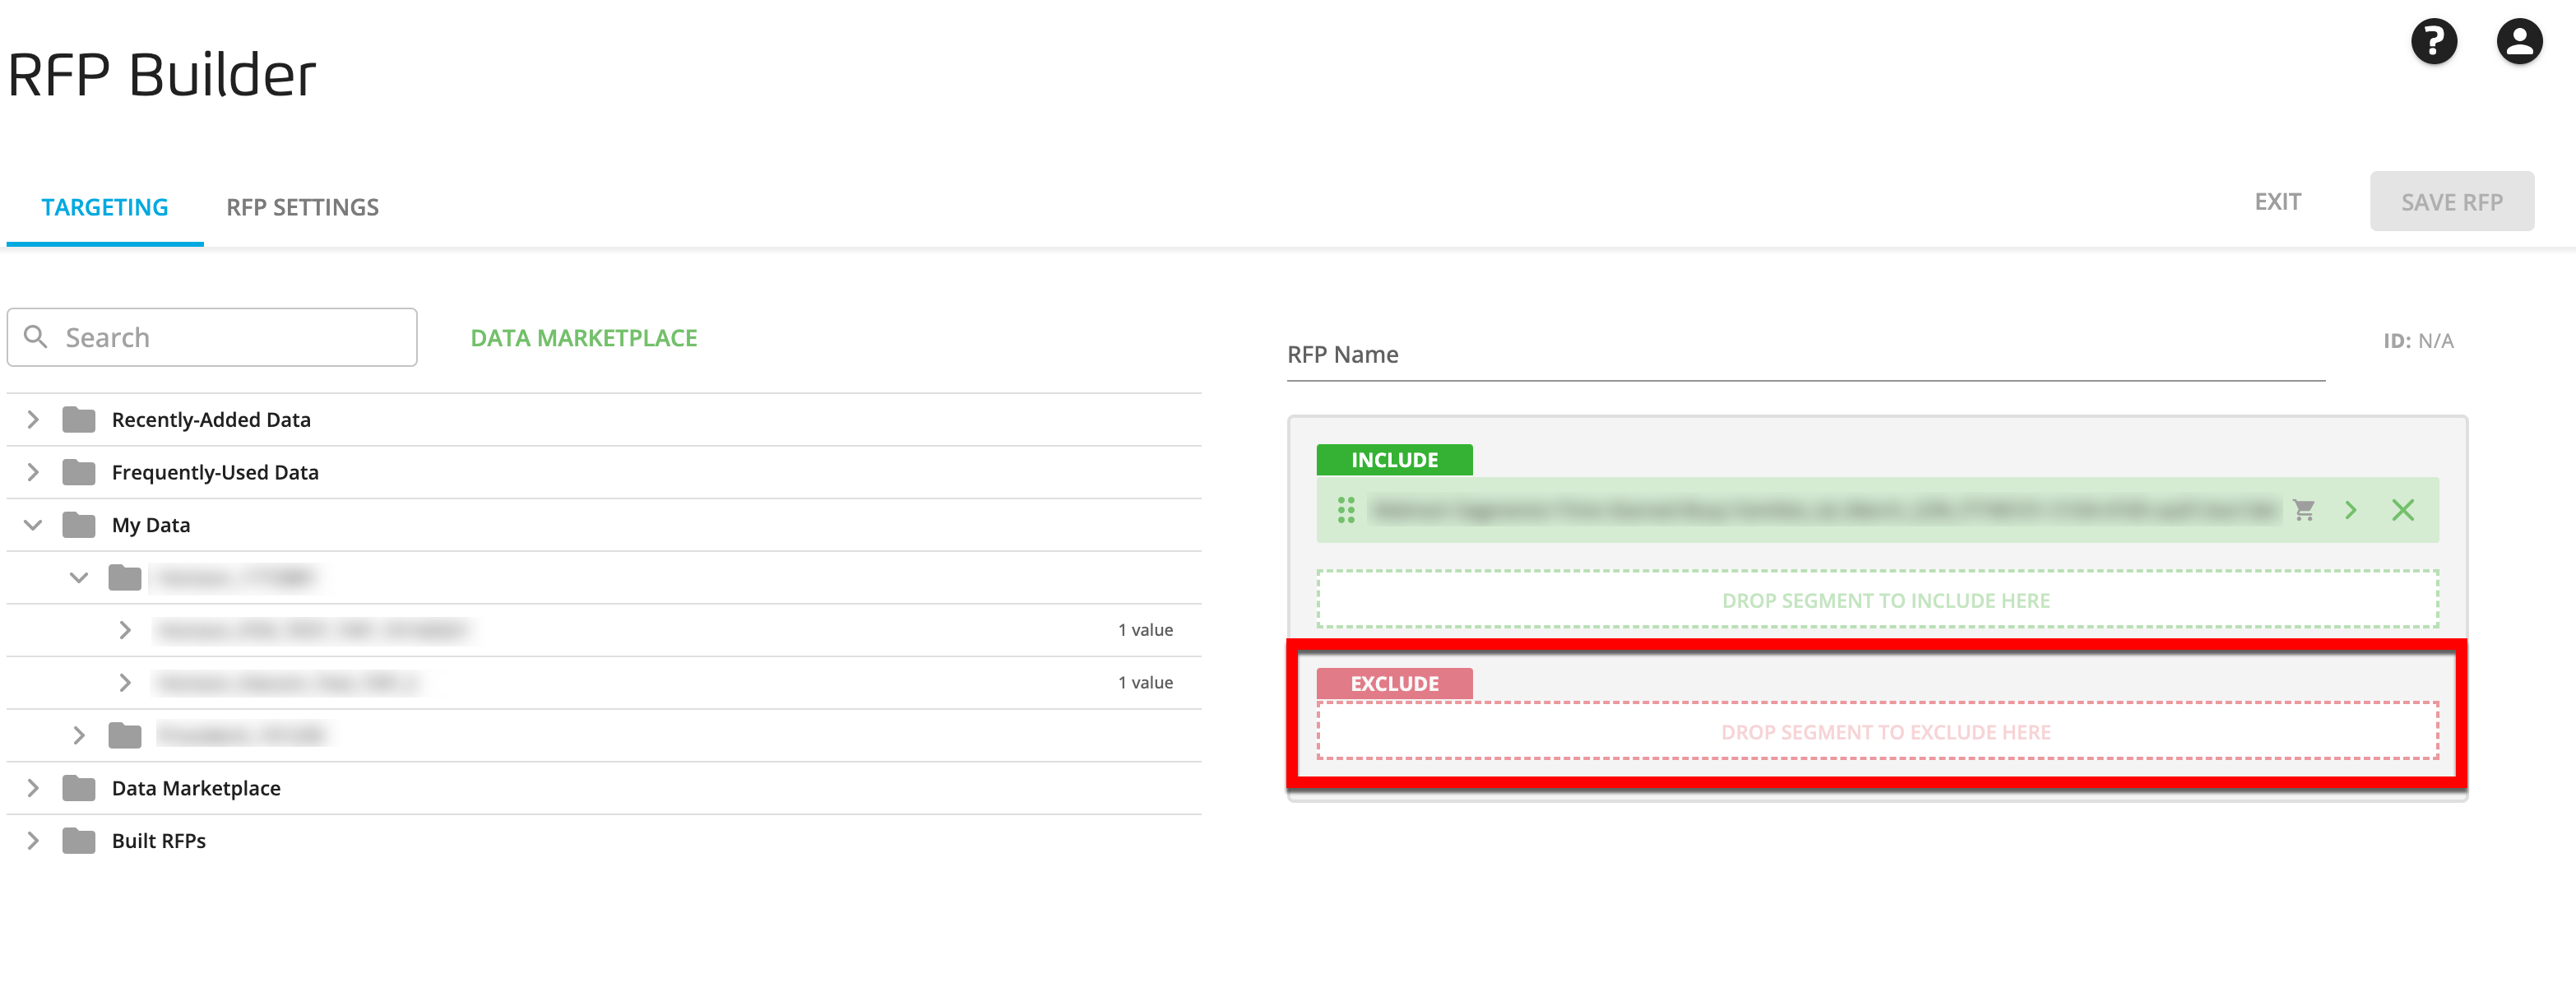
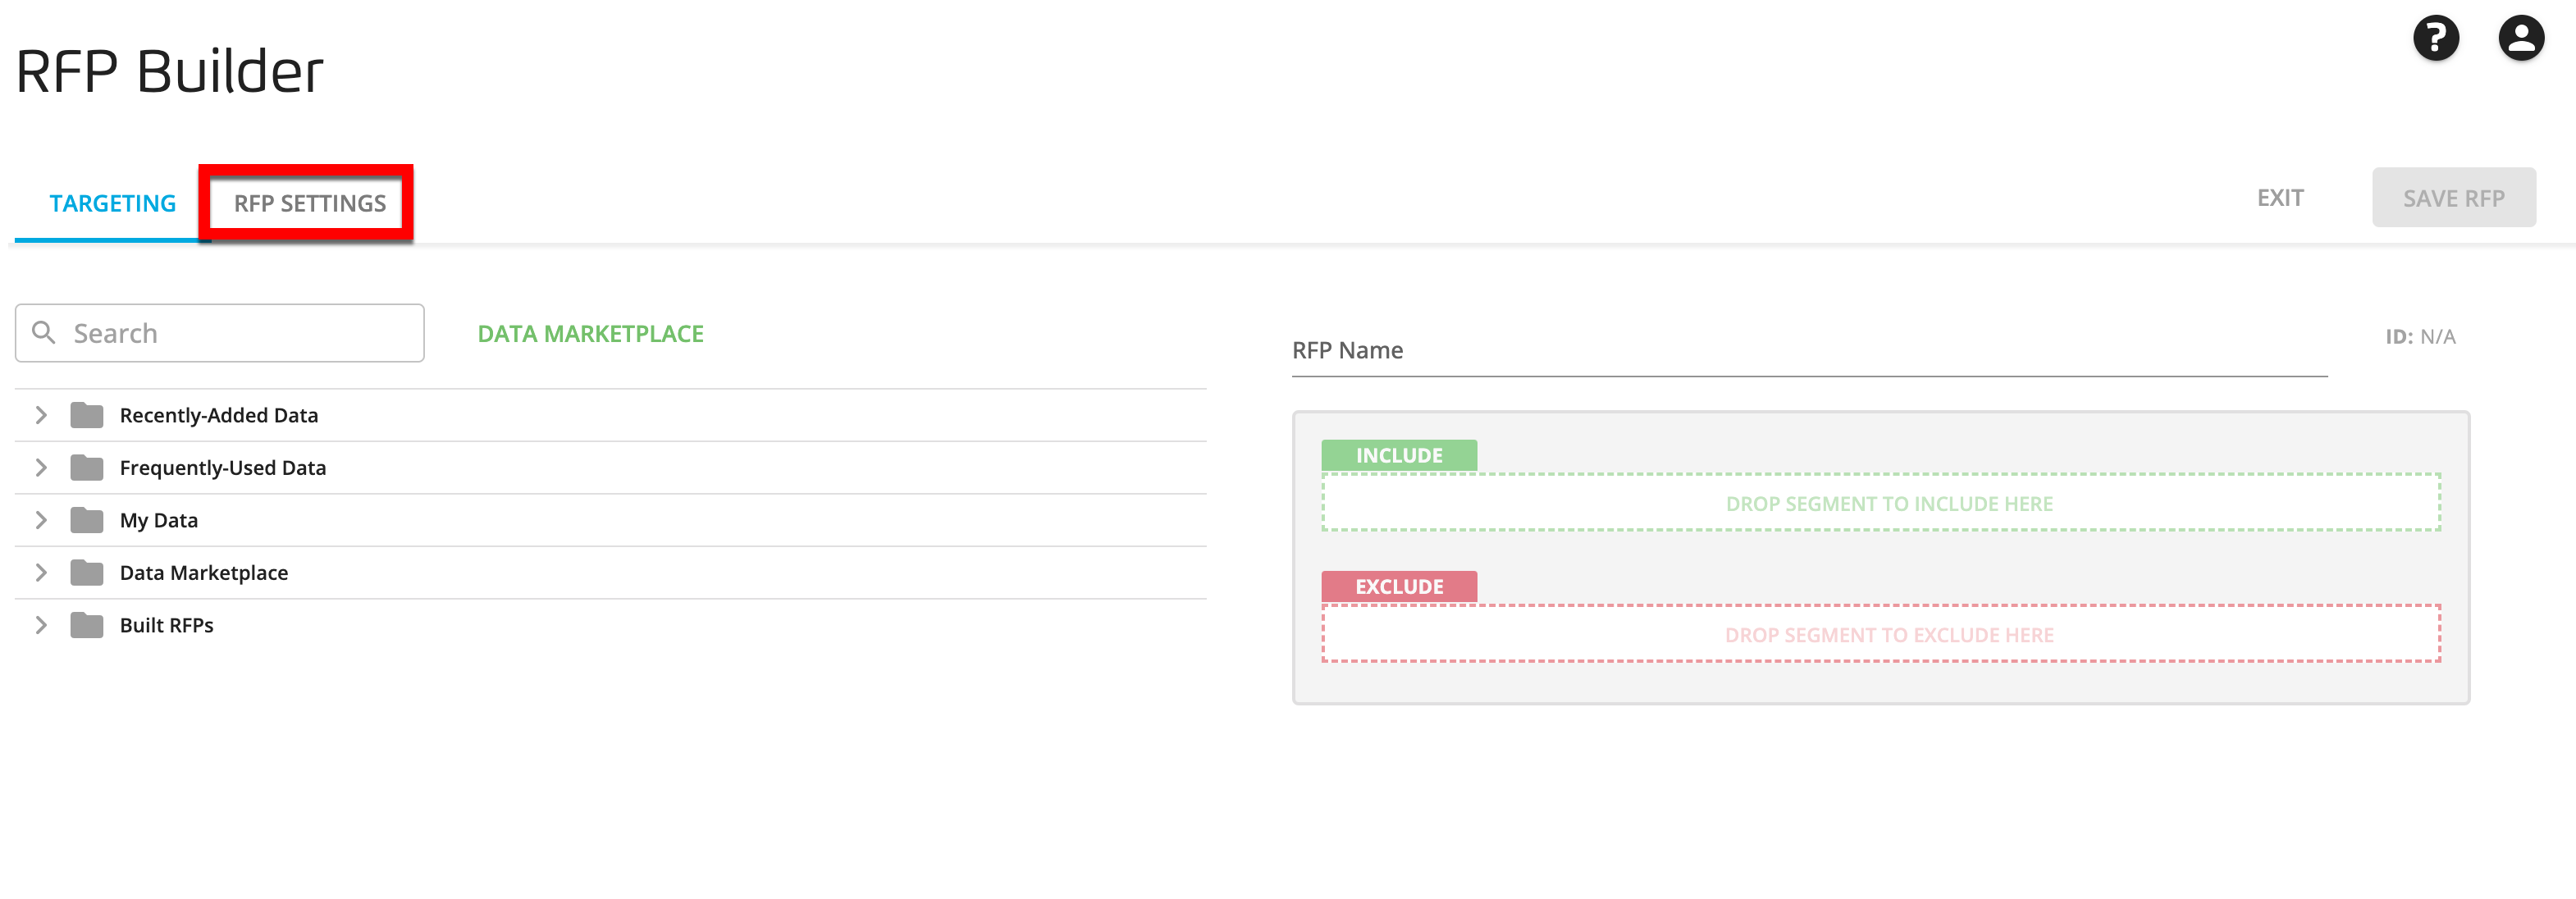
The RFP Builder page is divided into three areas:

The tabs area (which defaults to the TARGETING tab, but includes the RFP SETTINGS tab)
The data area
The sandbox area
The Data Area
From the TARGETING tab, the left hand side of this screen is the data area, which contains all the data you can use to build RFPs. You can click the carets to expand the folders and subfolders, or if you already know the data you want to use, you can use the Search bar to search for that data. You can also perform an advanced search that includes one or more search filters by clicking the advanced search icon in the search bar (see "Perform an Advanced Search in a Builder" for more information).
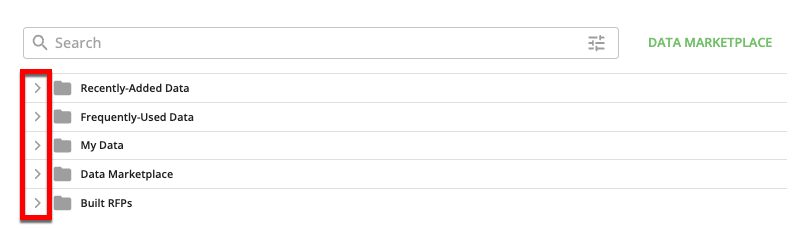
Available folders:
Recently-Added Data: This contains up to 30 of the most recently-added segment categories, in descending order with most recently added first.
Note
The segment categories displayed in this folder have been duplicated from their original folder location, and have not been moved from their original folder location.
Frequently-Used Data: This contains up to 30 of the segment categories most frequently added to RFPs in the last 3 months, in descending order with the most frequently used displayed first.
Note
The segment categories displayed in this folder have been duplicated from their original folder location, and have not been moved from their original folder location.
My Data: This contains your first-party data.
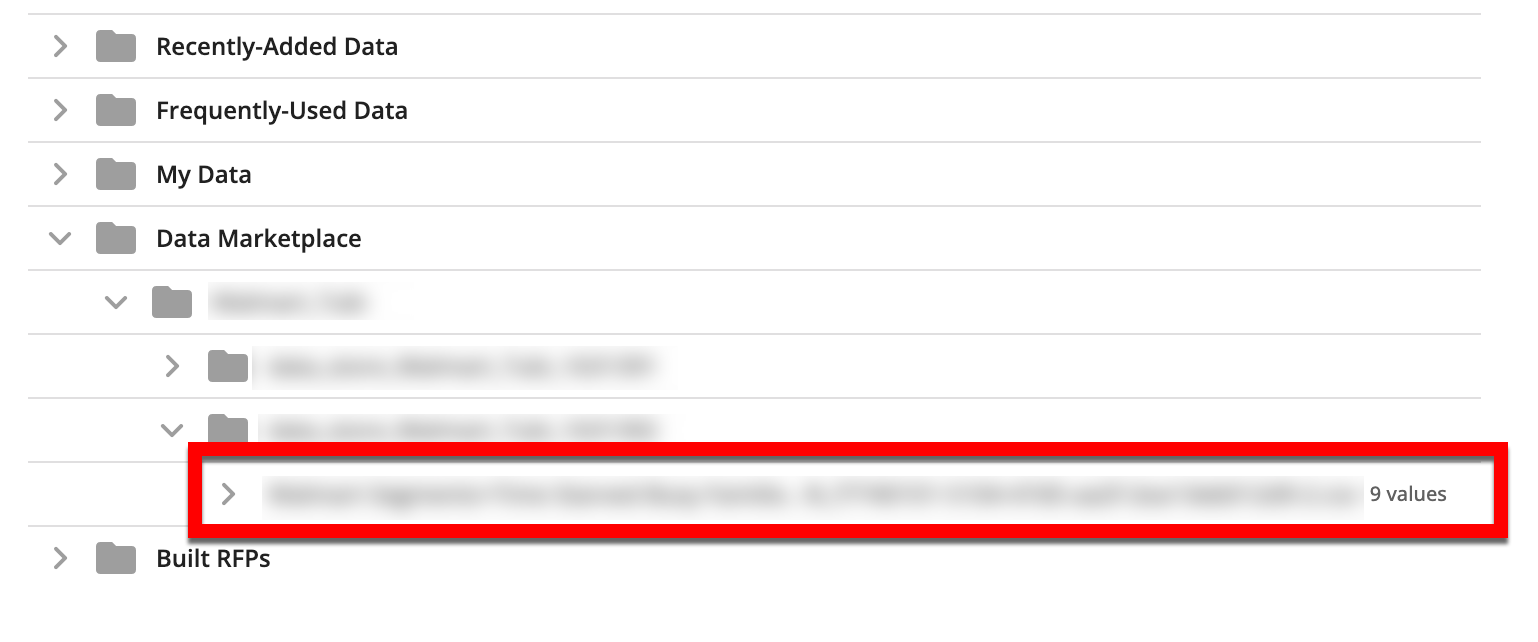
Data Marketplace: This contains data (typically third-party) from the LiveRamp Data Marketplace that is approved for TV targeting, and is offline based (or modeled beforehand).
Note
Don't see the type of Data Marketplace data that you need? Click DATA MARKETPLACE to navigate to the Data Marketplace in your Connect account.
If you aren't finding the Data Marketplace segments that fit your needs, LiveRamp's Audience Solutions team can help suggest data providers that are best suited to your goals, across diverse data sets like demo, location, behavior, and more. Email the Audience Solutions team at DataMarketplace@liveramp.com to get started.
Client Data: This contains advertiser data that has been distributed from within the Connect UI to your account in Advanced TV.
Built RFPs: This contains every RFP that has previously been built in this account. This allows users to either target or suppress a group of people that have been defined in another RFP. This functionality is useful to ensure test and control groups do not become intermingled when running many related campaigns.
Caution
Data merging limitations: We do not currently allow merging across multiple advertiser's first-party sources.
Note
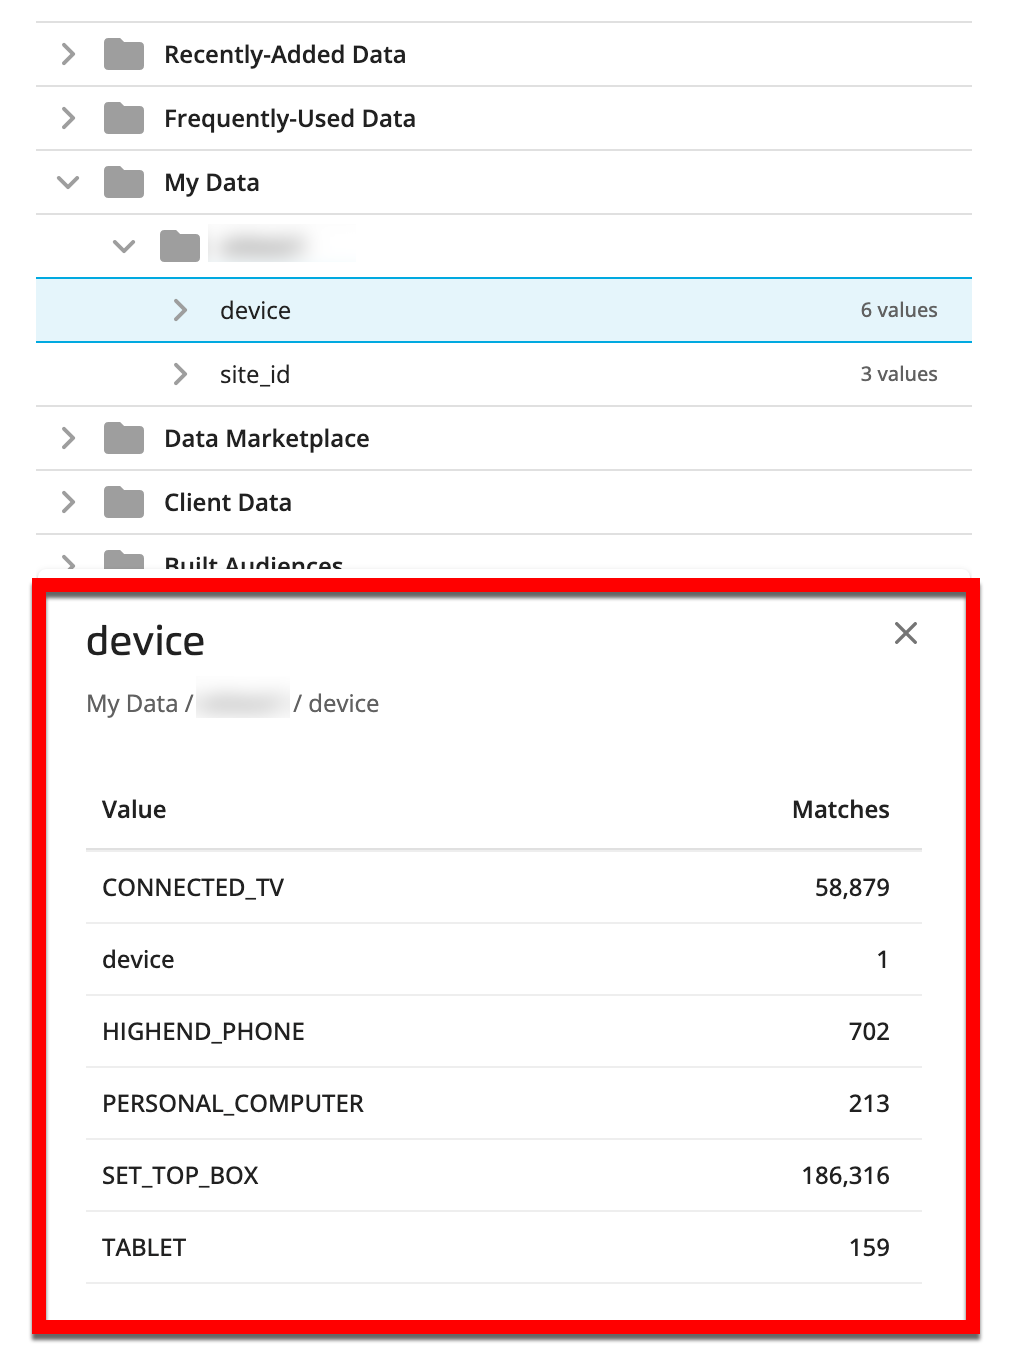
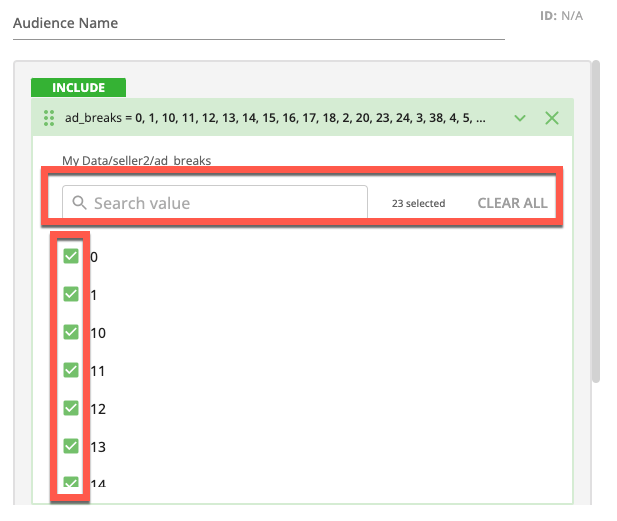
To display all of the available values within a given segment category, click the caret to the left of the segment category name.
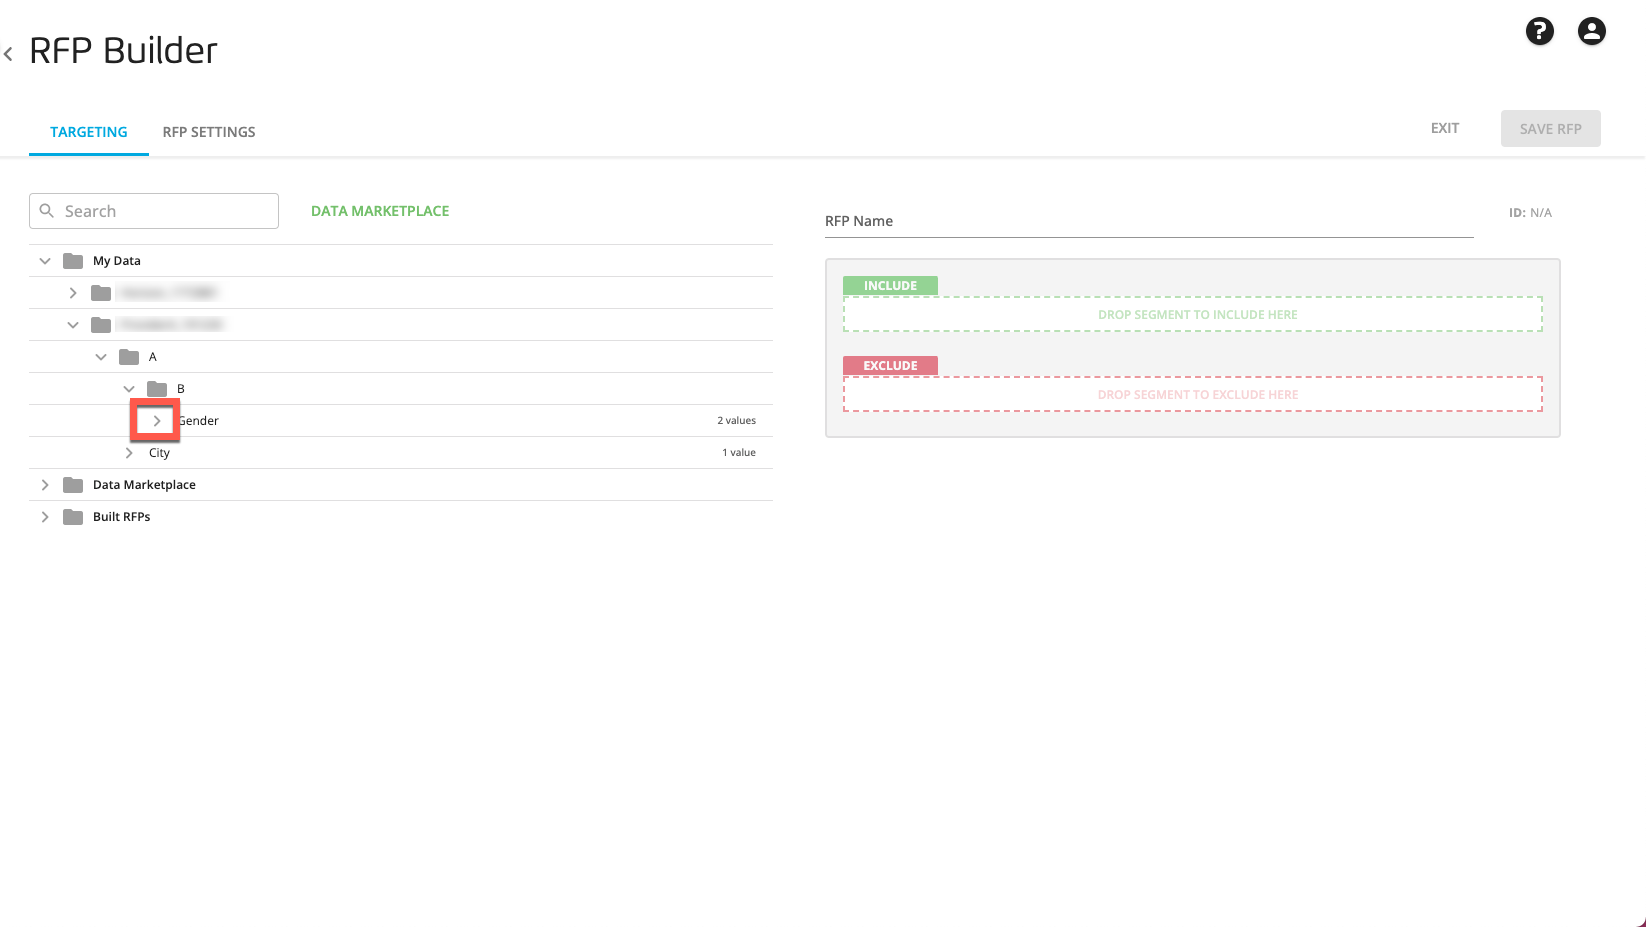
You can also click anywhere in the segment row to open a panel below the folder tree. For Data Marketplace segments, the panel will also display a segment description and the CPM for each segment value.
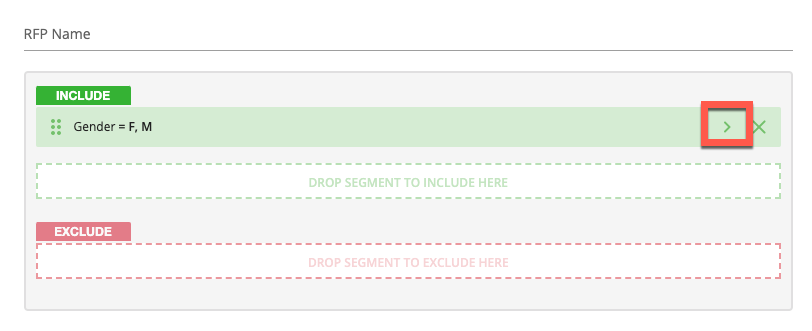
When building an RFP, you can drag either a segment category or a specific segment value into the sandbox area:
Note
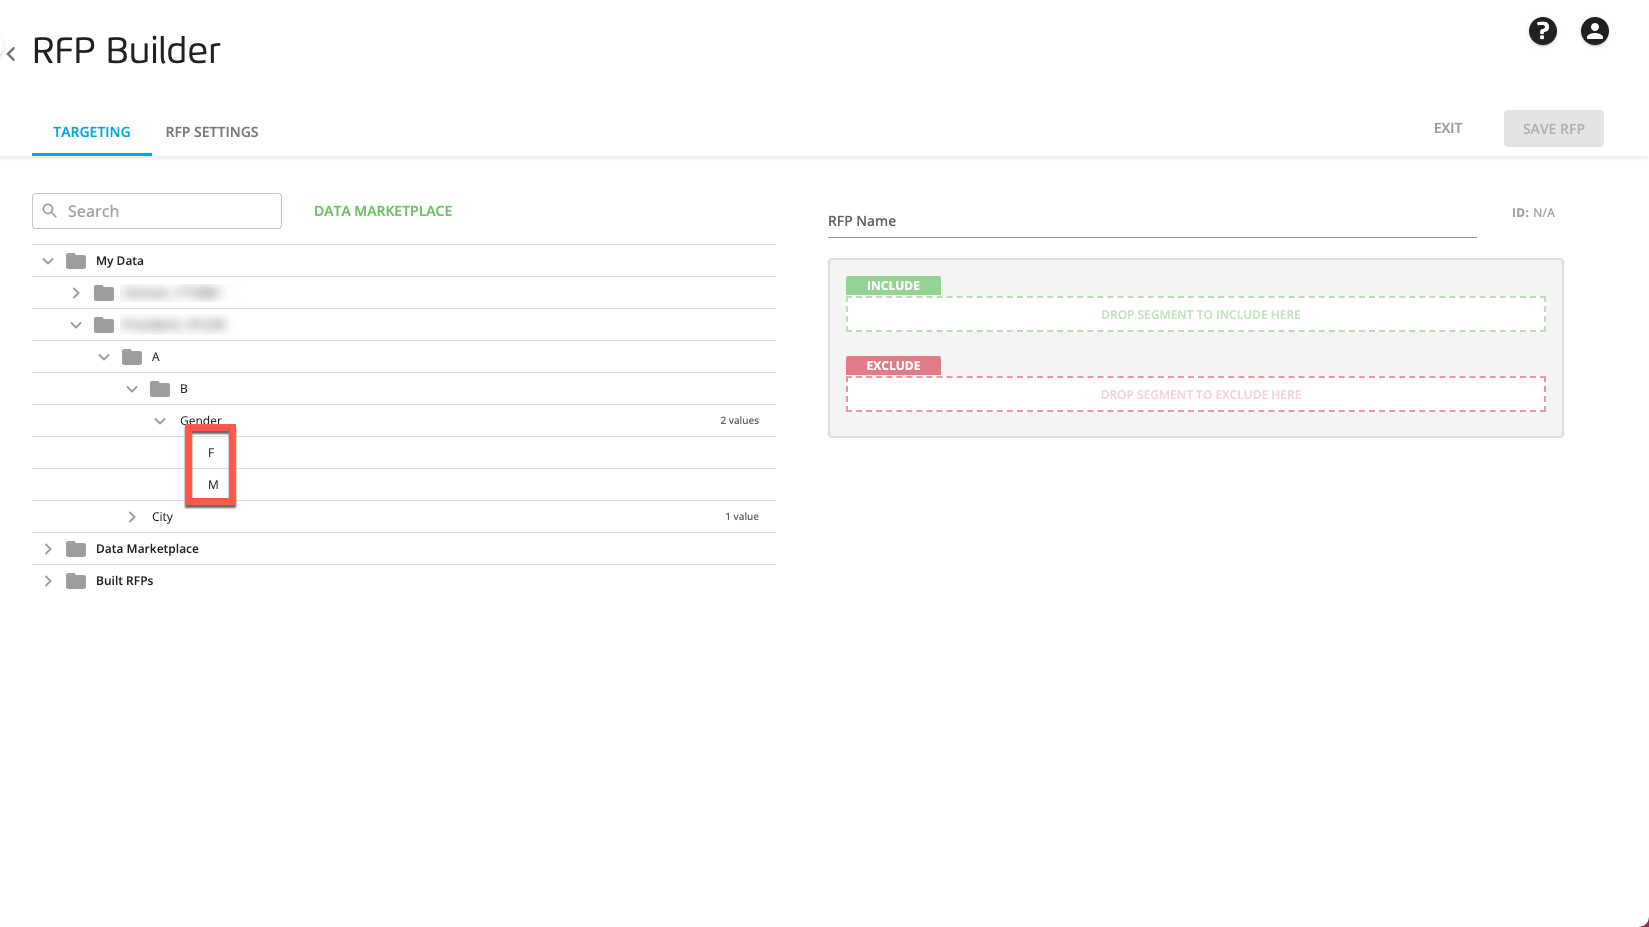
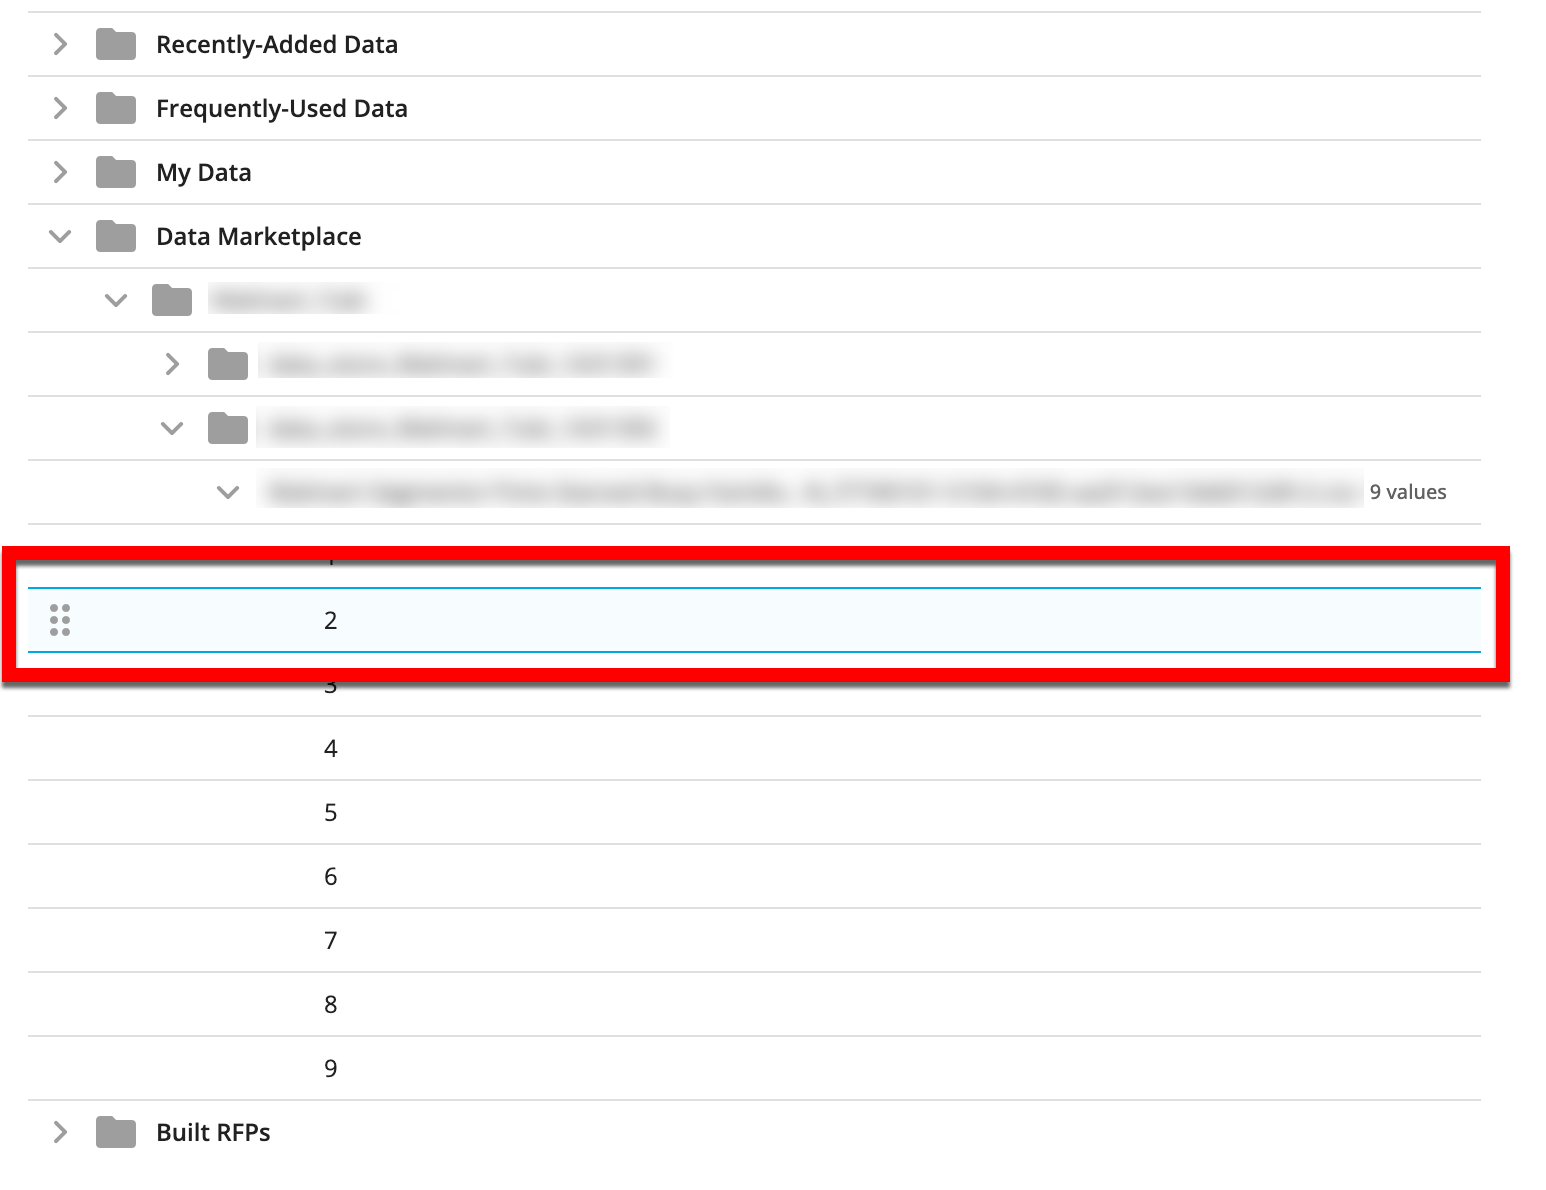
When you drag a segment category, all of the values for that category are included by default. You can click the caret in the row for the segment you just created to display the list of all values for that category and then select or deselect any desired values. If the category contains seven or more values, you can also use the search bar or the select all/clear all functionality.
Note
You can select multiple segment categories and/or segment values and then drag them into the box as a group.
The Sandbox Area
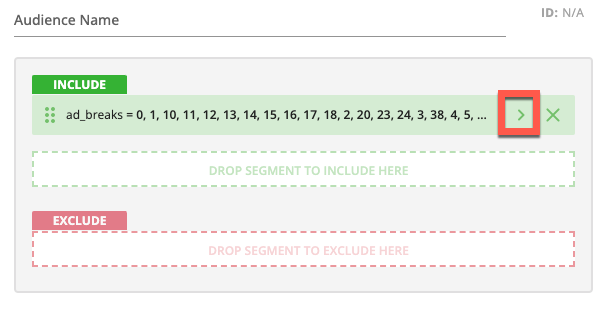
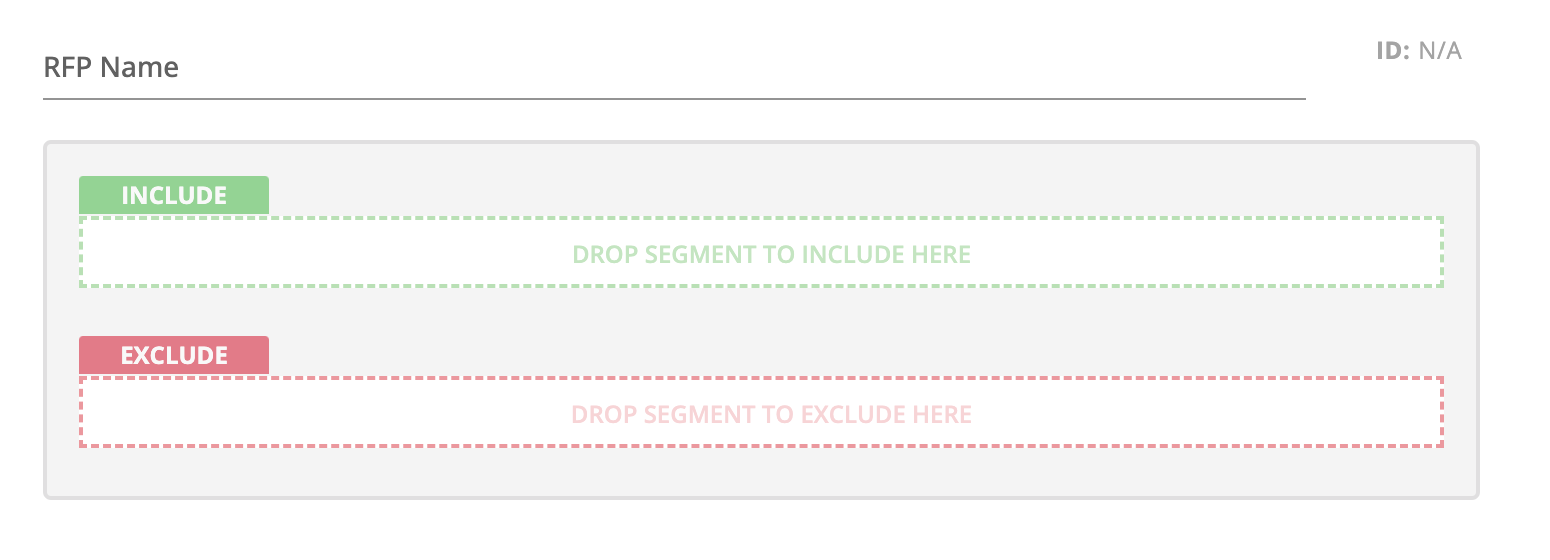
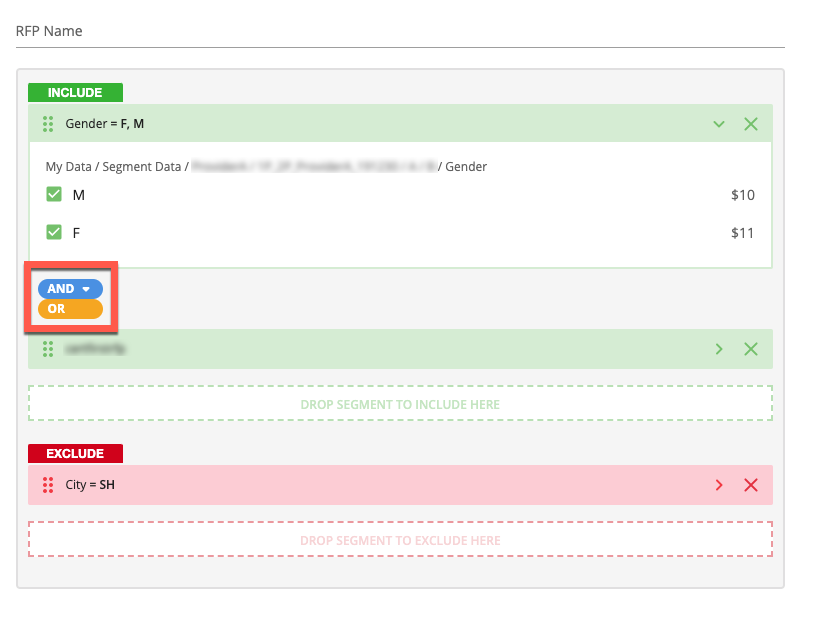
From the TARGETING tab, the sandbox area is the area you use to build an RFP. You start by dragging a segment category or value into the INCLUDE box in the sandbox.
Note
You can also use a previously-created RFP as a component of your new RFP by opening the "Built RFPs" folder. However, no segment values will appear.
When you drag a segment category, all of the values for that category are included by default. You can click the caret in the row for the segment you just created to display the list of all values for that category and then select or deselect any desired values. If the category contains seven or more values, you can also use the search bar or the select all/clear all functionality.

If you want to exclude certain members (or devices) from the RFP, drag an additional segment category or value into the EXCLUDE box, and then select or deselect any segment value check box(es) to adjust the values included in the segment (unless you've dragged a previously-created audience from the "Built RFPs" folder).
Note
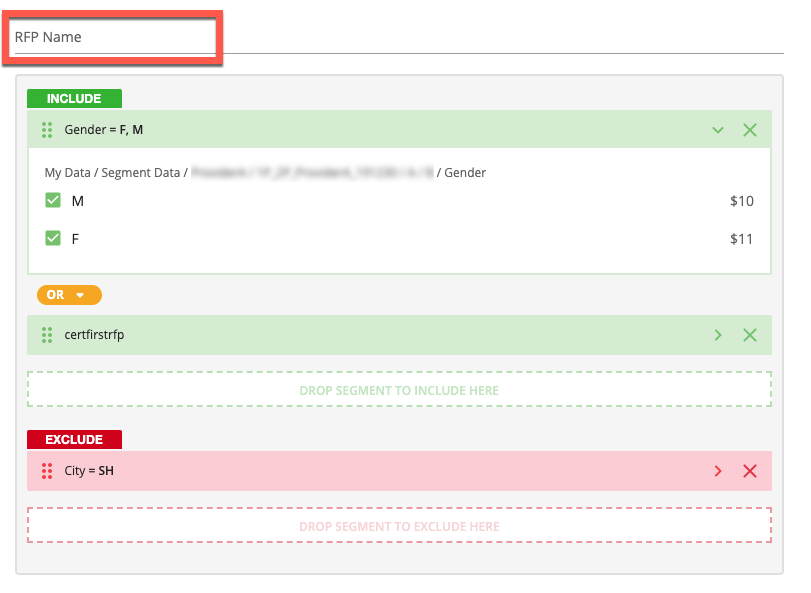
The individual segment components in the same segment box can be joined either by “And” (to include only subscribers or devices who are in both categories) or “Or” (to include all subscribers or devices who are in at least one of the included categories). Click the AND/OR selector to change the join method.
Use the RFP Name field to enter a name for the RFP.
Caution
The RFP name can only contain letters, numbers, hyphens, underscores, or spaces, and cannot be longer than 240 characters.
See “Build an RFP” for more information.
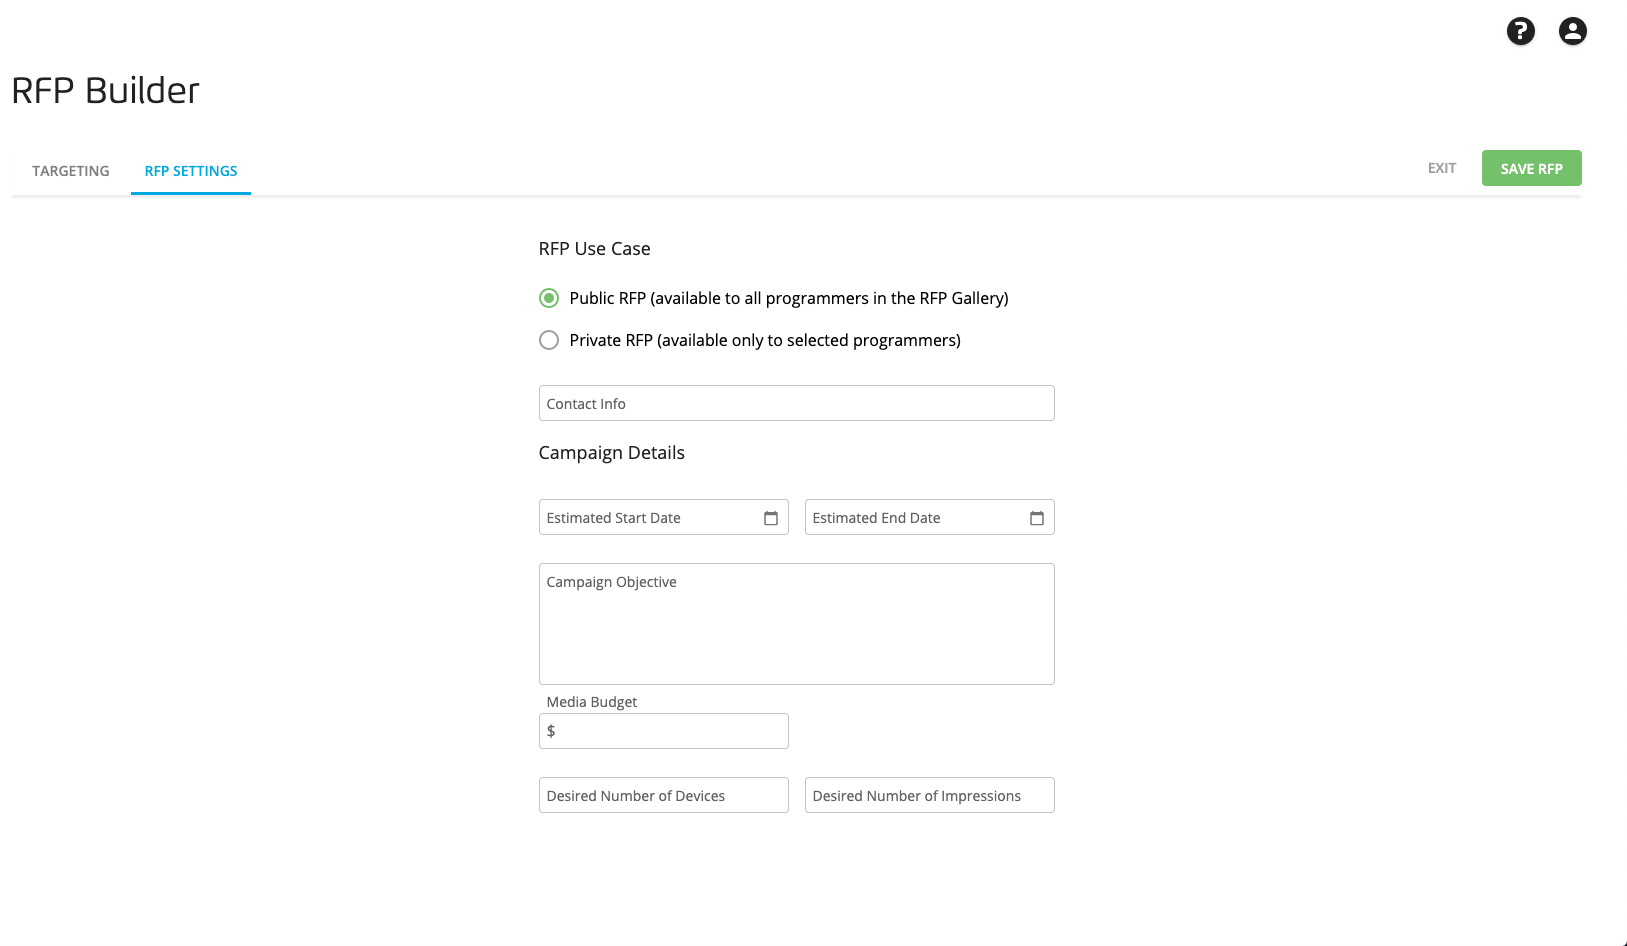
The RFP SETTINGS Tab
The RFP SETTINGS tab allows you to add RFP settings:
Note
RFP settings can also be added after the RFP has been saved.
RFP Use Case:
Public RFP (available to all programmers in the RFP Gallery)
Private RFP (available only to selected programmers)
Programmer: The programmer(s) you'd like to make the RFP available to (select from the drop-down list) (for private RFPs only).
Deal ID: The Deal ID to be used for this audience (for private RFPs only).
Contact Info: The email address of the person to contact to obtain a Deal ID for the audience.
Estimated Start Date
Estimated End Date
Campaign Objective: A description of the objective of your campaign.
Media Budget
Desired Number of Devices
Desired Number of Impressions