Configure a Google Cloud Storage Data Connection (Customer-Hosted)
If you have data in Google Cloud Storage (GCS) and want to be able to use that data in questions in LiveRamp Clean Room, you can create a Google Cloud Storage data connection.
Note
You can connect GCS to LiveRamp Clean Room using a LiveRamp-hosted GCS instance instead of using your own. For more information, see "Configure a Google Cloud Storage Data Connection (LiveRamp-Hosted)".
A customer-hosted Google Cloud Storage data connection can be used in the following clean room types:
Hybrid
Confidential Computing
Note
For Confidential Computing clean rooms, clean room partners should use these instructions for this data connection type. Clean room owners of Confidential Computing clean rooms need to use the CSV Catalog data connection type (contact your LiveRamp account team for more information).
BIgQuery
Note
For more information on clean room types, see "Configure Clean Rooms".
To view an interactive walkthrough demo of the process of connecting to your cloud-based data by creating a data connection, click here.
After you’ve created the data connection and Clean Room has validated the connection by connecting to the data in your cloud account, you will then need to map the fields before the data connection is ready to use. This is where you specify which fields can be queryable across any clean rooms, which fields contain identifiers to be used in matching, and any columns by which you wish to partition the dataset for questions.
Note
To utilize partitioning for cloud storage data connections, you need to organize your data into folders that reflect the partition columns. LiveRamp encourages users to use Hive-style partitioning, typically by date (such as s3://bucket/path/date=YYYY-MM-DD/). For more information, see "Partition a Dataset in LiveRamp Clean Rooms".
After fields have been mapped, you’re ready to provision the resulting dataset to your desired clean rooms. Within each clean room, you’ll be able to set dataset analysis rules, exclude or include columns, filter for specific values, and set permission levels.
To configure a customer-hosted Google Cloud Storage (GCS) data connection, see the instructions below.
Overall Steps
Perform the following overall steps in Google Cloud Platform to configure a customer-hosted GCS data connection:
Once the above steps have been performed in Google Cloud Platform, perform the following overall steps in LiveRamp Clean Room:
For information on performing these steps, see the sections below.
Perform Steps in Google Cloud Platform
Perform the steps in the sections below in Google Cloud Platform to configure a customer-hosted GCS data connection.
Create a Google Service Account
To create a Google service account in GCP:
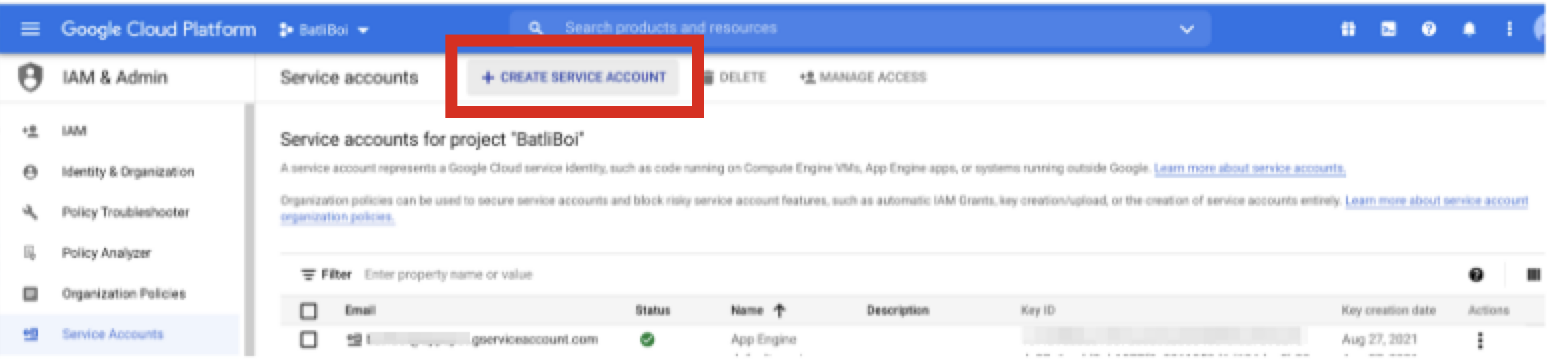
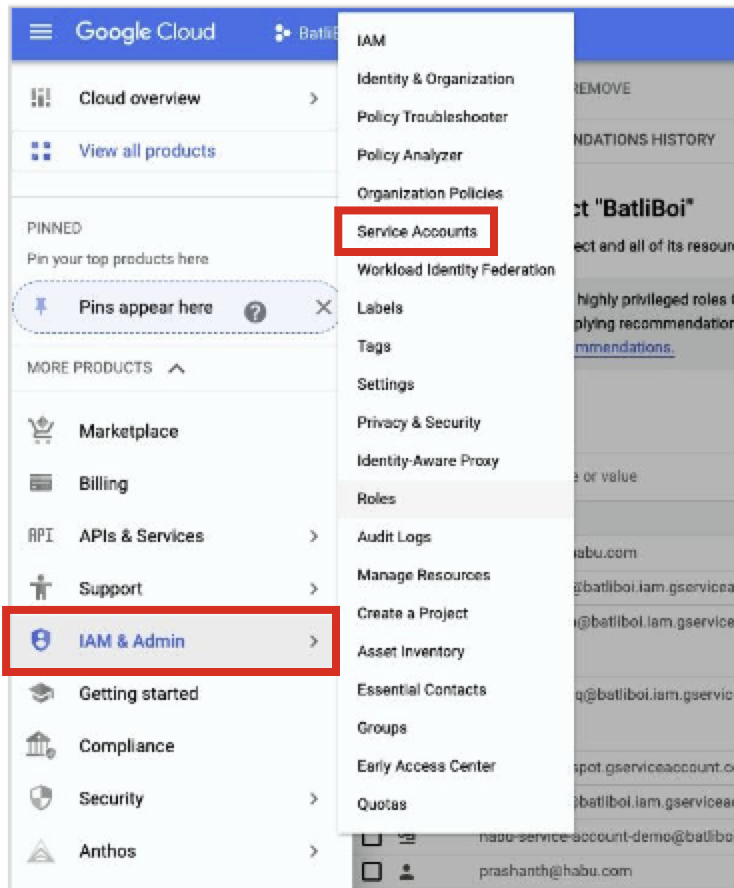
From GCP's main menu, select IAM & Admin → Service Accounts.
Click . Save the service account email because you will need it in later steps.
Enter a name for the service account.
Click .
Configure roles and additional user access as needed.
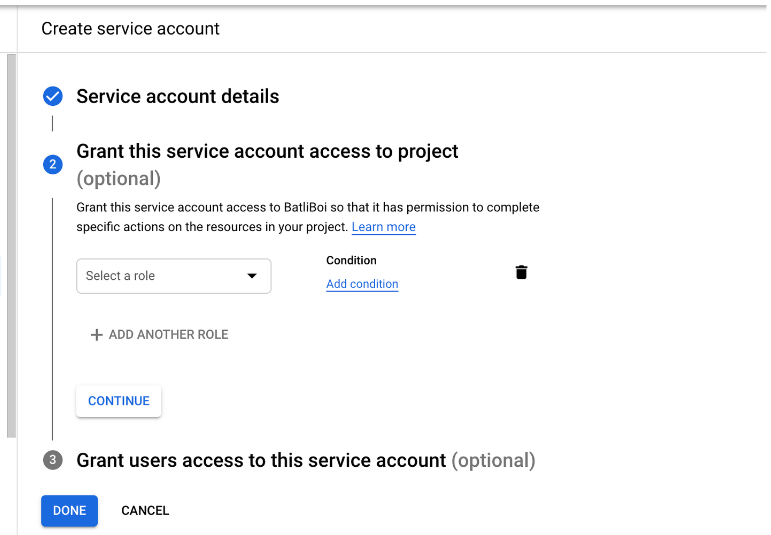
Click .
Create a Google Service Account Key
After you've created a Google service account, create a Google service account key:
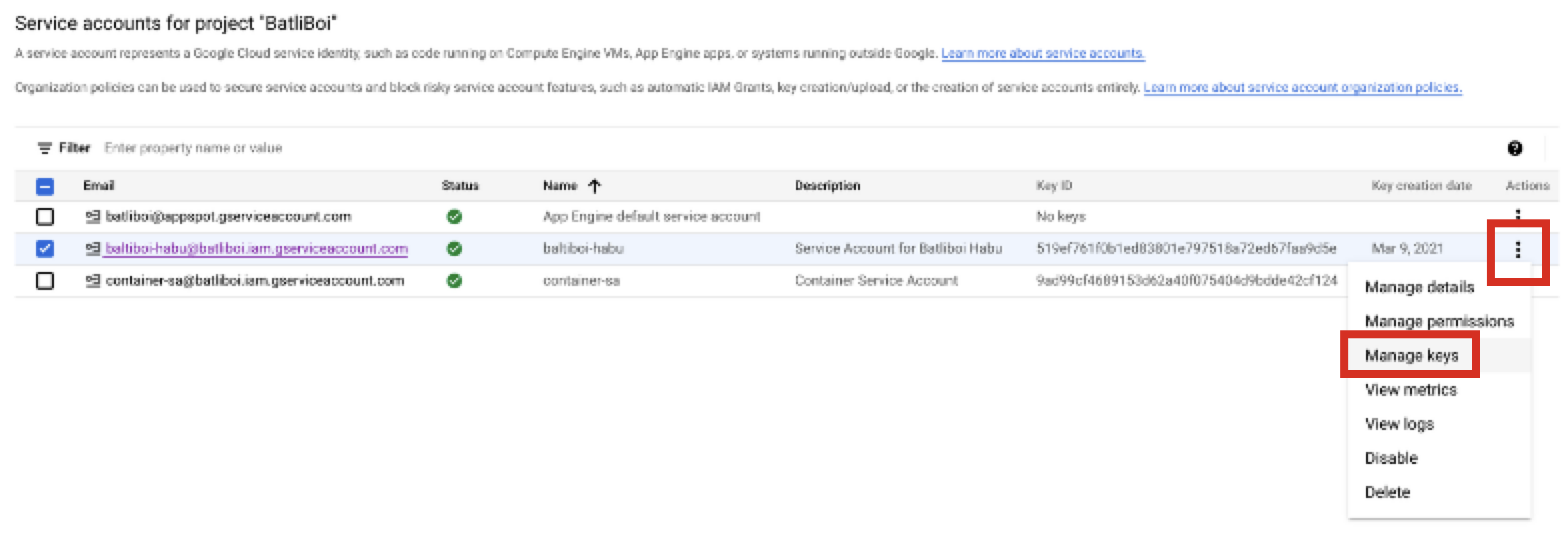
From GCP's main menu, select IAM & Admin → Service Accounts.
Select the check box for the service account you created in the previous procedure.
From the More Options menu for the service account's row, select Manage keys.
Click .
For the key type, select JSON and then click CREATE.
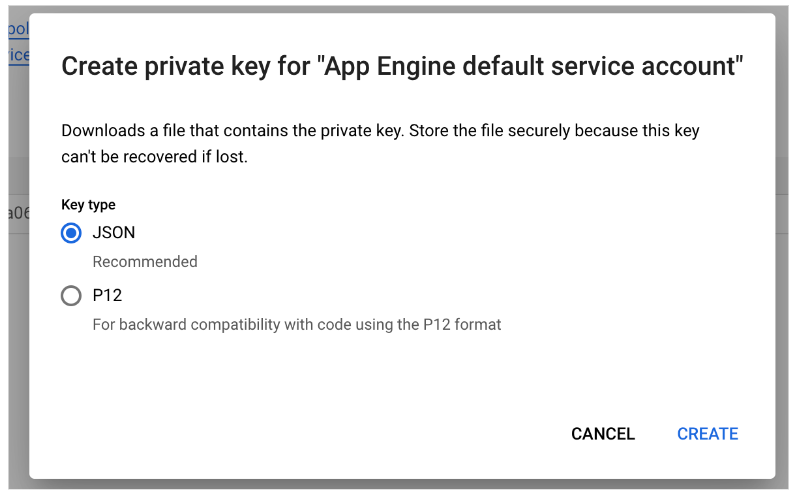
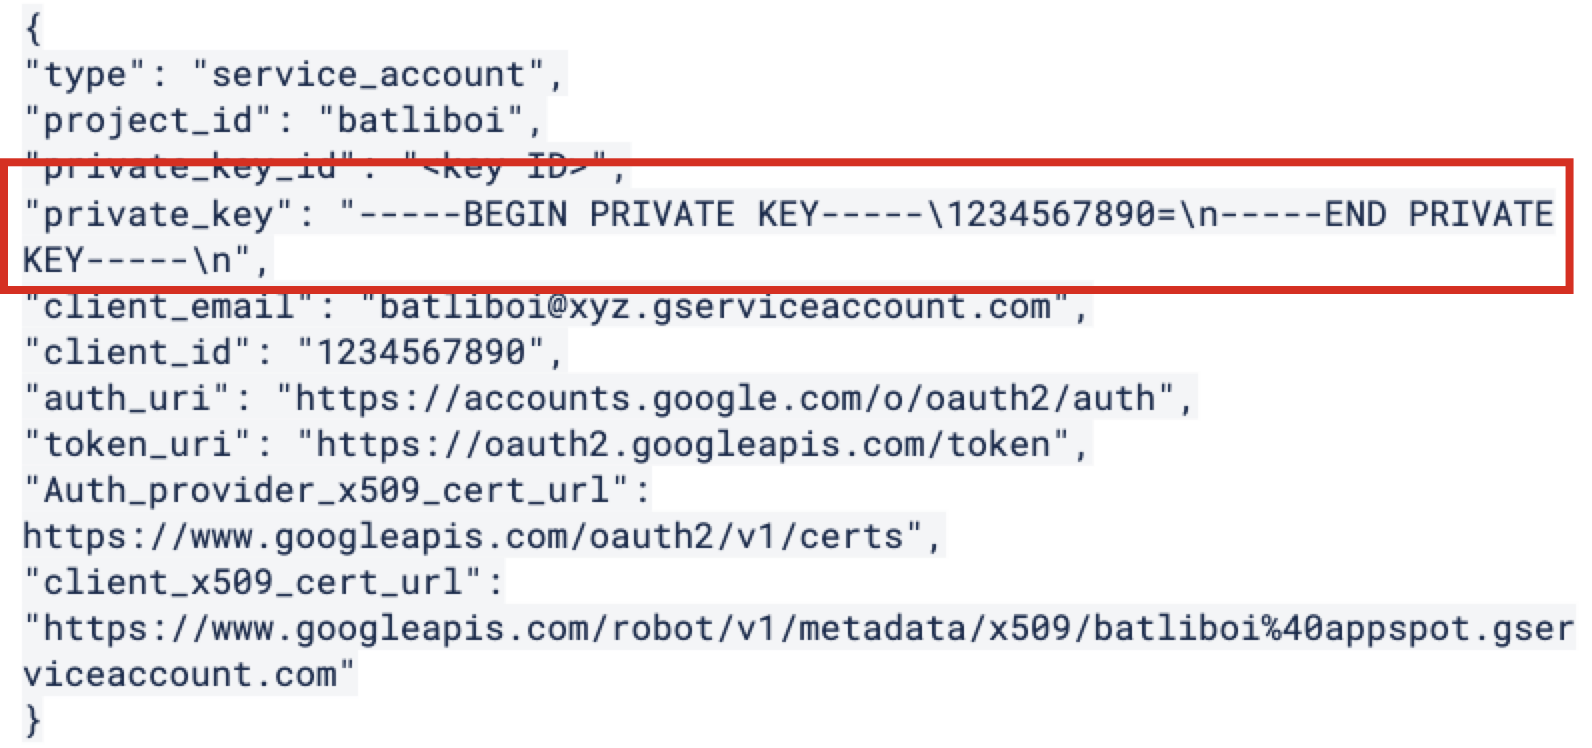
The private key will be stored in your Download folder (it will look similar to the following example). Save this for use in the "Add the Credentials in LiveRamp Clean Room" section below.
Grant the Service Account Permissions to Access Bucket Objects
To grant bucket objects permissions to the service account:
Note
If you haven’t already created a bucket, create a bucket by following these Google instructions.
From GCP's main menu, select IAM & Admin → Service Accounts.
Select CREATE ROLE.
Enter a title, description, and ID for the custom role.
Select Add permissions.
Enter "Storage Admin" in the filter.
Add the following permissions:
storage.buckets.get
storage.objects.get
storage.objects.list
Click .
Assign the Custom Role to the Cloud Storage Service Account
To assign the custom role to the cloud storage service account:
From the Google Cloud Platform console, search for "Cloud Storage".
From the navigation menu, select Buckets.
Click the bucket name for the bucket you want to configure for access.
Select the Permissions tab.
Click.
Select SHOW INFO PANEL in the upper-right corner. The information panel for the bucket displays.
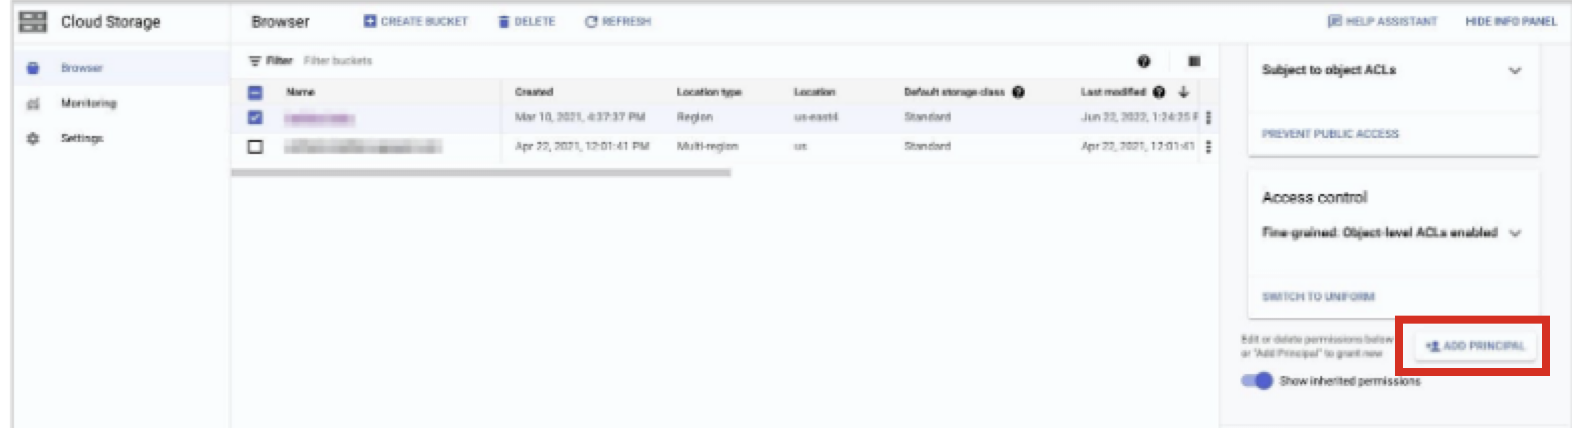
From the information panel, click .
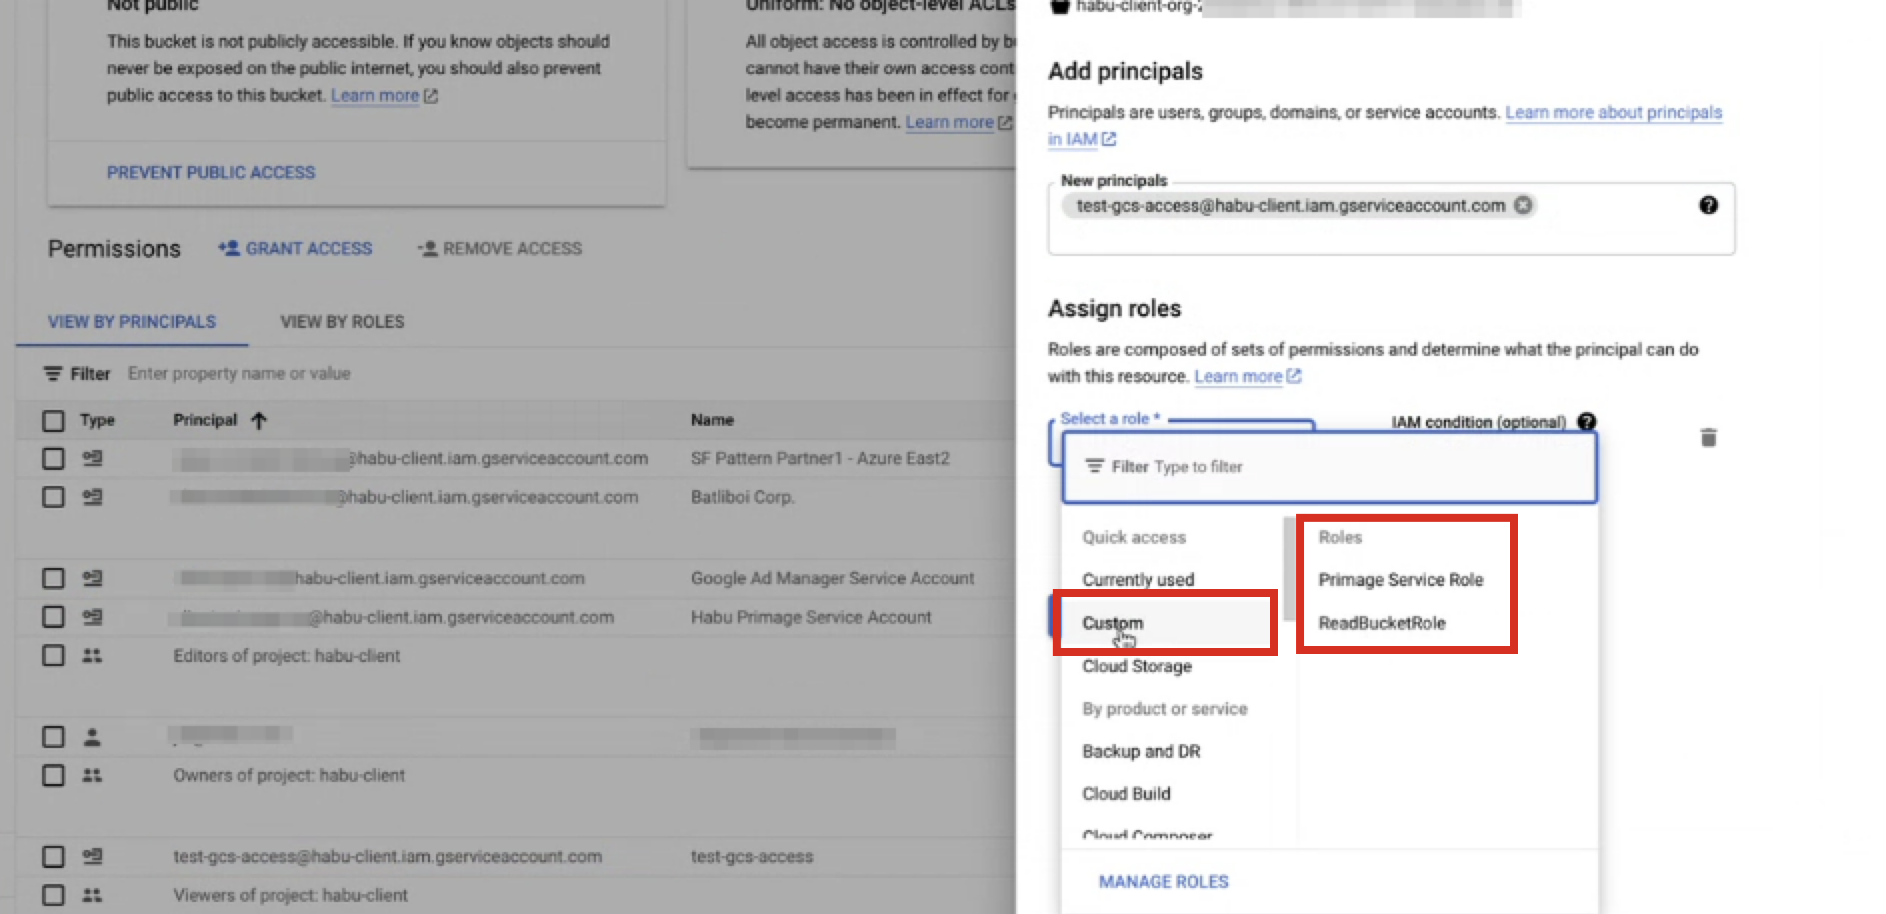
In the Add members field, add the service account.
From the Select a role dropdown, select Custom → role (where "role" is the custom Cloud Storage role you created in the previous procedure).
Click .
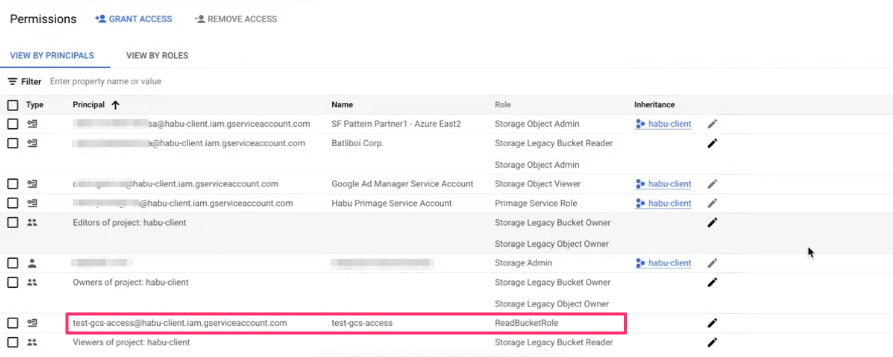
Confirm the custom role and service account are now associated with the bucket.
Capture the Data Location
During the process of creating the data connection, you will need to enter the data location in the form of the GCS bucket file path.
From the Google Cloud Platform console, search for "Cloud Storage".
From the navigation menu, select Buckets.
Select the Objects tab.
From the More Options menu (the three dots) in the row for the bucket, select Copy gsutil URL.
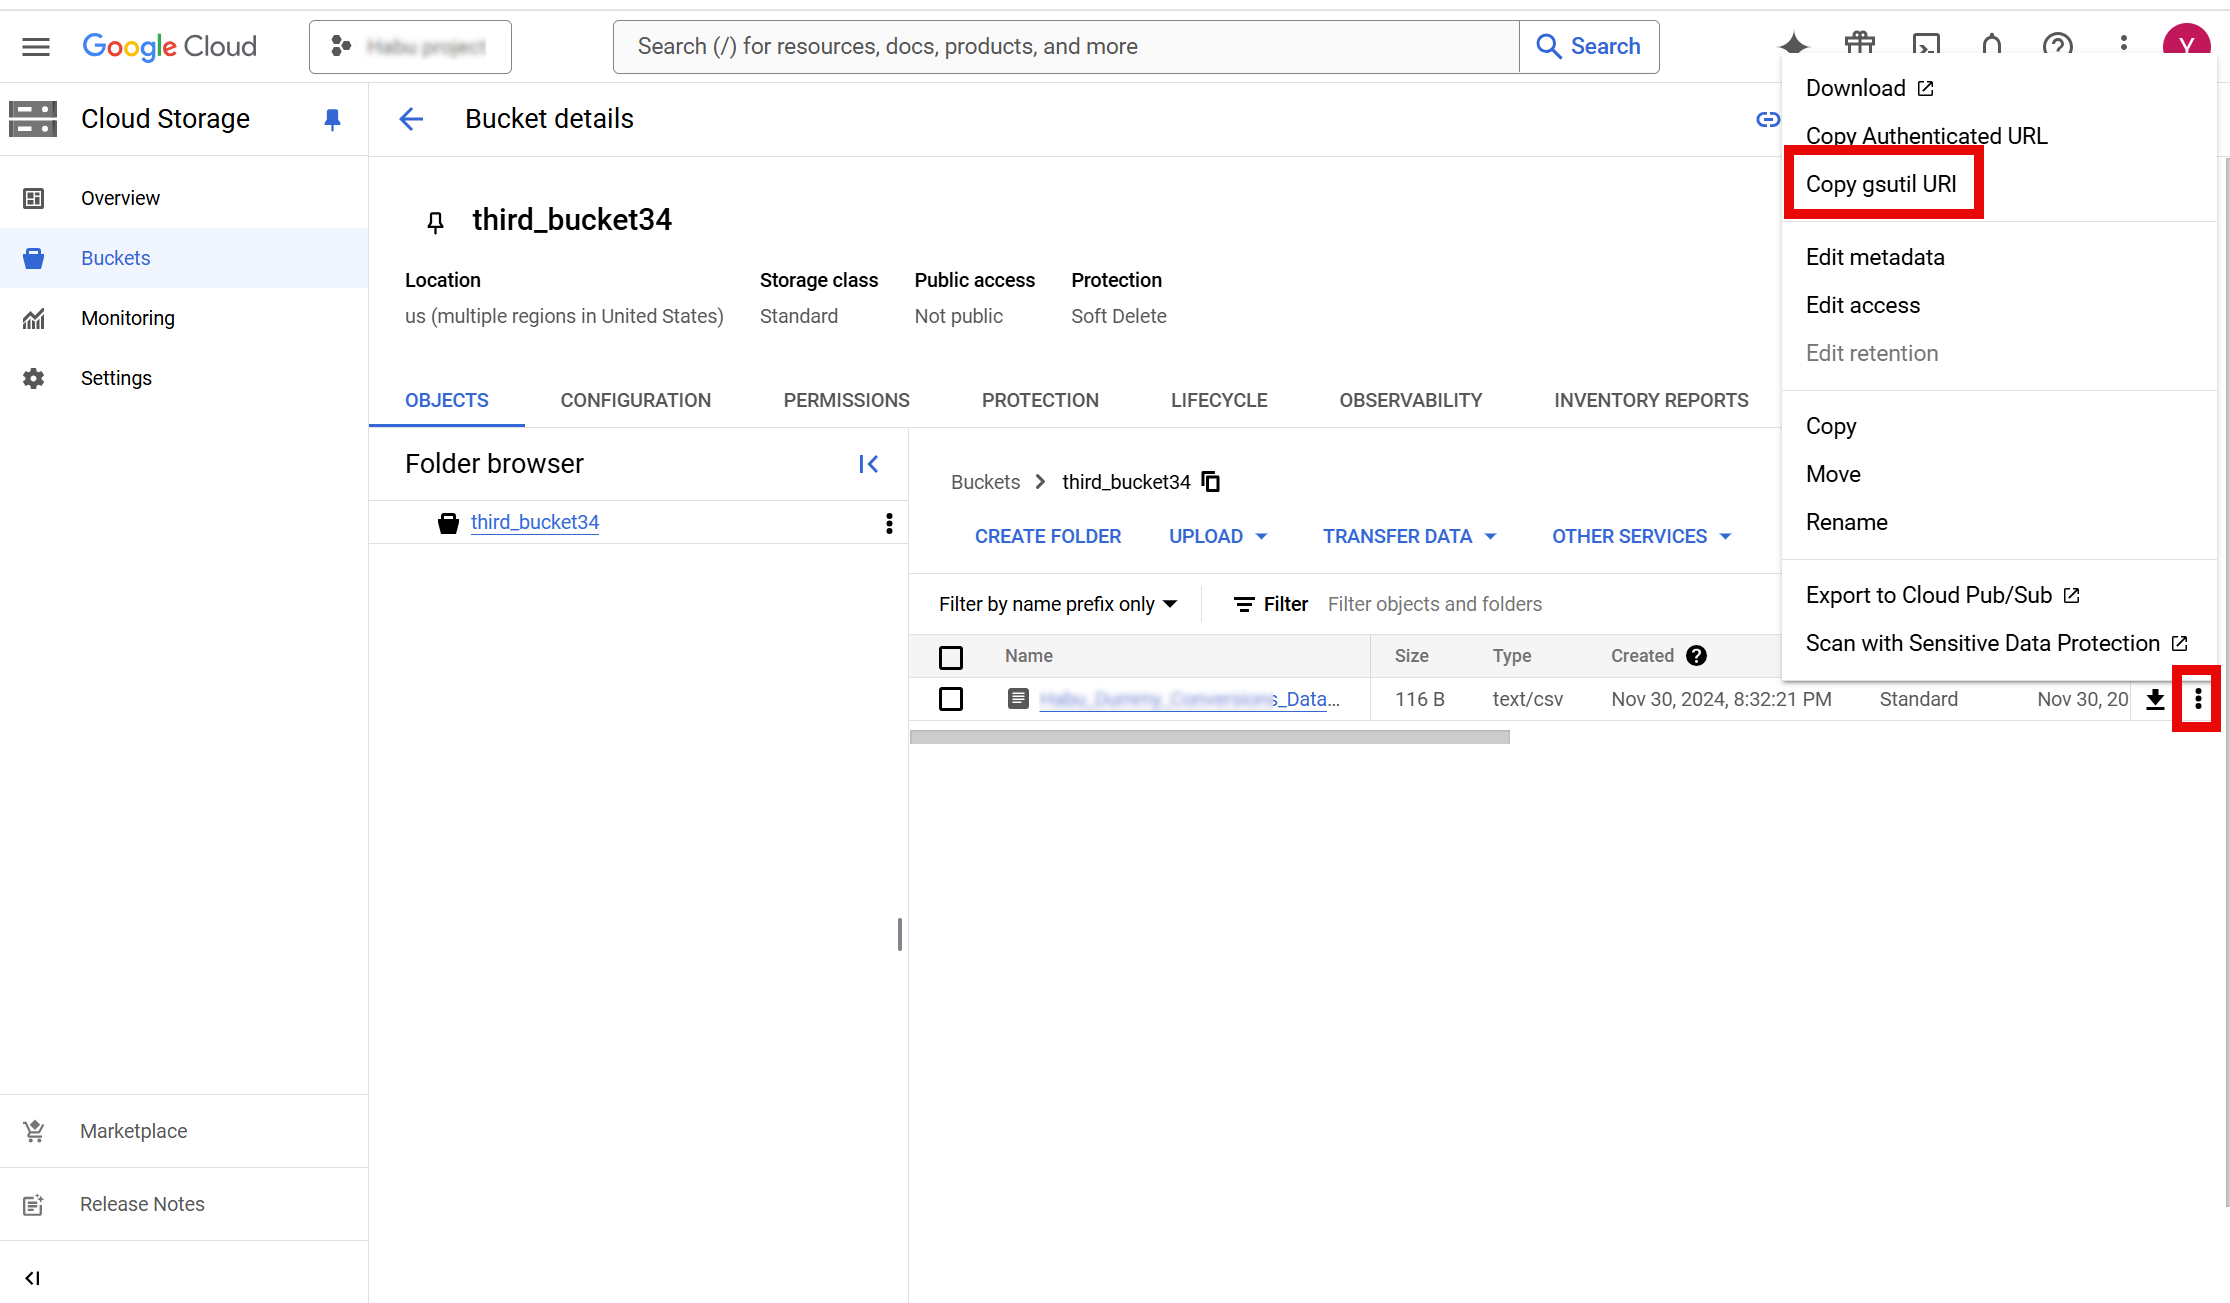
Save the bucket file path for use in the “Create the Data Connection” section below.
Perform Steps in LiveRamp Clean Room
Once the above steps have been performed in Google Cloud Platform, perform the overall steps in the sections below in LiveRamp Clean Room.
Note
if your cloud security limits access to only approved IP addresses, talk to your LiveRamp representative before creating the data connection to coordinate any necessary allowlisting of LiveRamp IP addresses.
Add the Credentials in LiveRamp Clean Room
To add credentials:
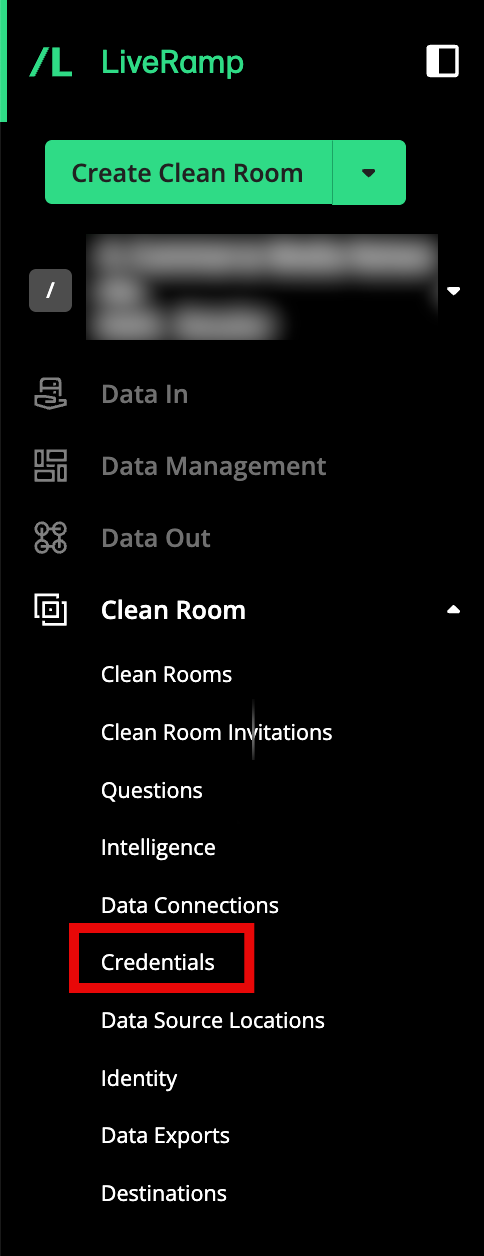
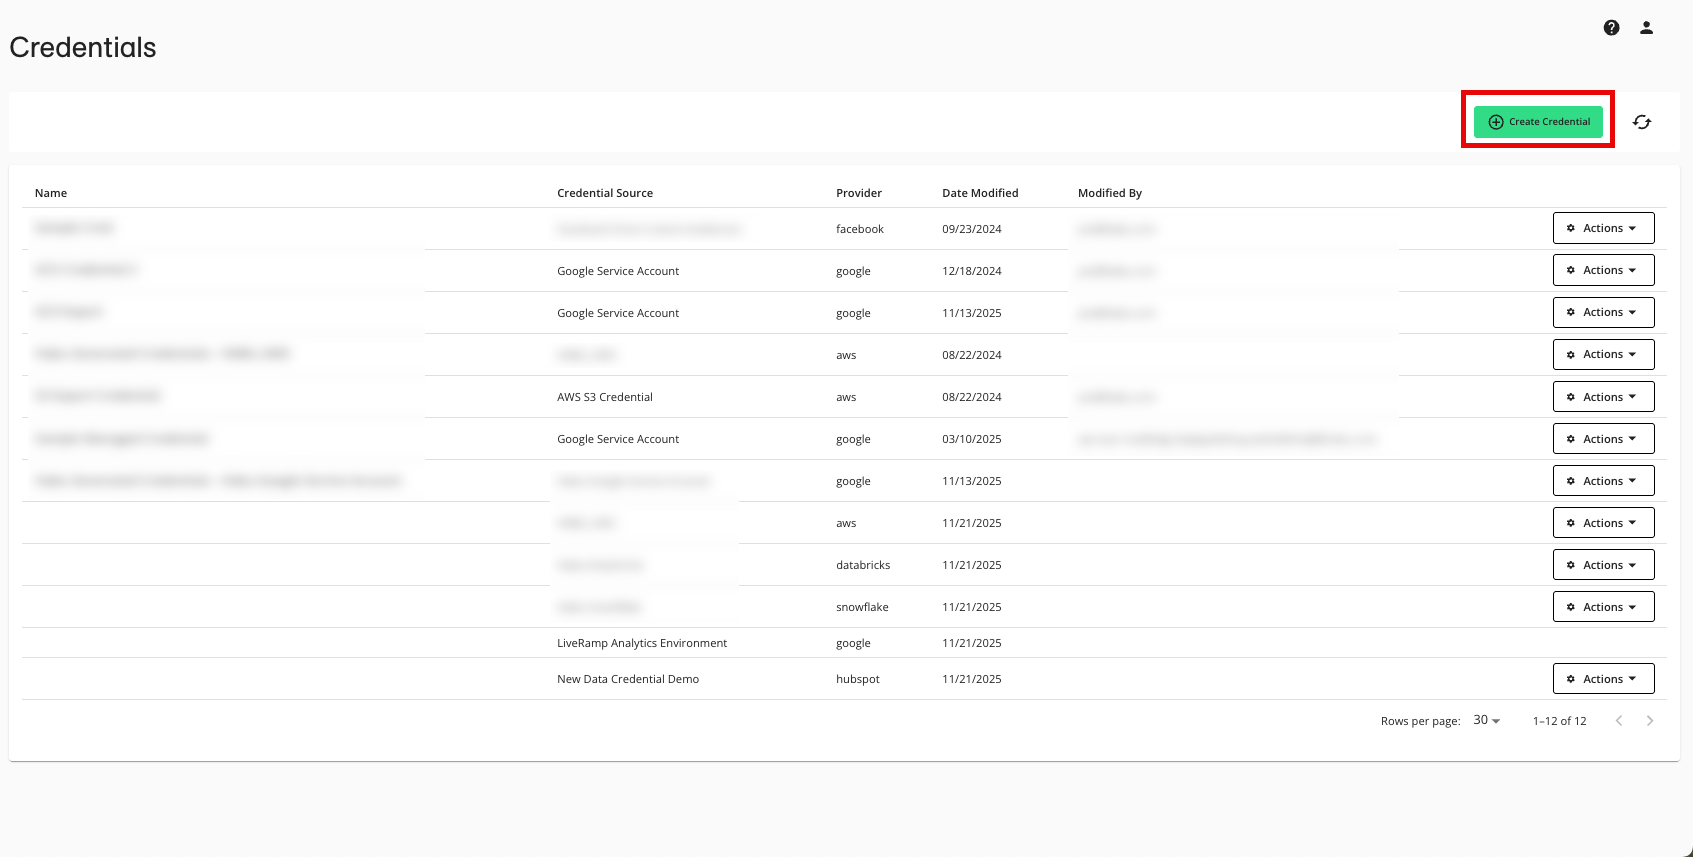
From the navigation menu, select Clean Room → Credentials to open the Credentials page.
Click .
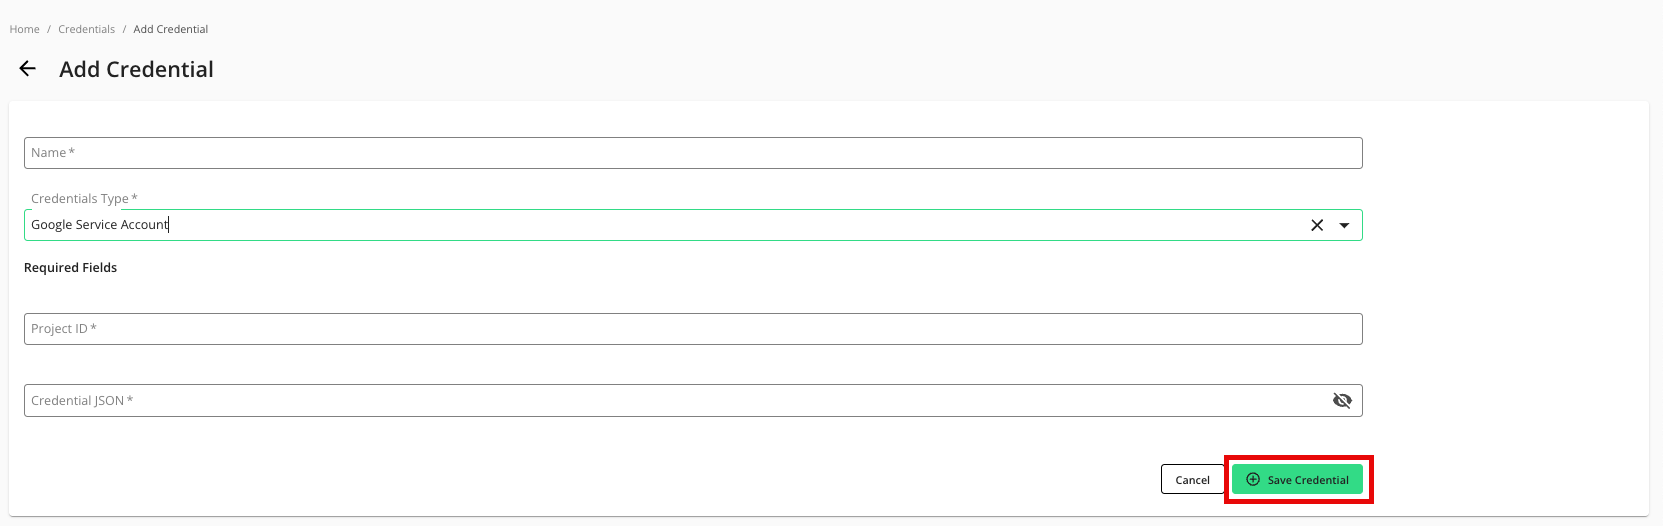
Enter a descriptive name for the credential.
For the Credentials Type, select "Google Service Account".
For the Project ID, enter the project ID.
Enter the Credential JSON you stored in the "Create a Google Service Account Key" procedure above.
If needed, adjust the selection for whether your organization cloud security policy requires an allowlist for IP addresses and Google Project IDs for this credential (this is not common).
Note
Allowlists only need to be utilized for credentials used in Hybrid and Confidential Computing clean rooms where the processing of question runs might need to be load balanced across different data planes. You do not need to require an allowlist for other clean room types.
For more information on credential allowlists, see "Create and Manage Credential Allowlists".
If your organization requires an allowlist, we recommend that you talk to your LiveRamp representative before creating the credential.
Click .
Create the Data Connection
To create the data connection:
Note
When you create the data connection, the dataset type is set to Generic by default.
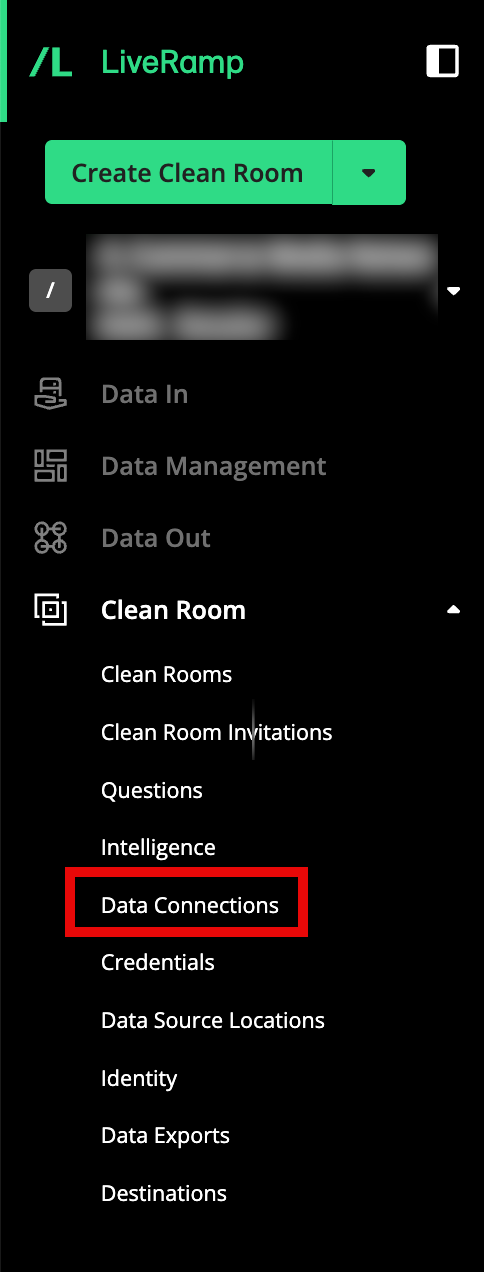
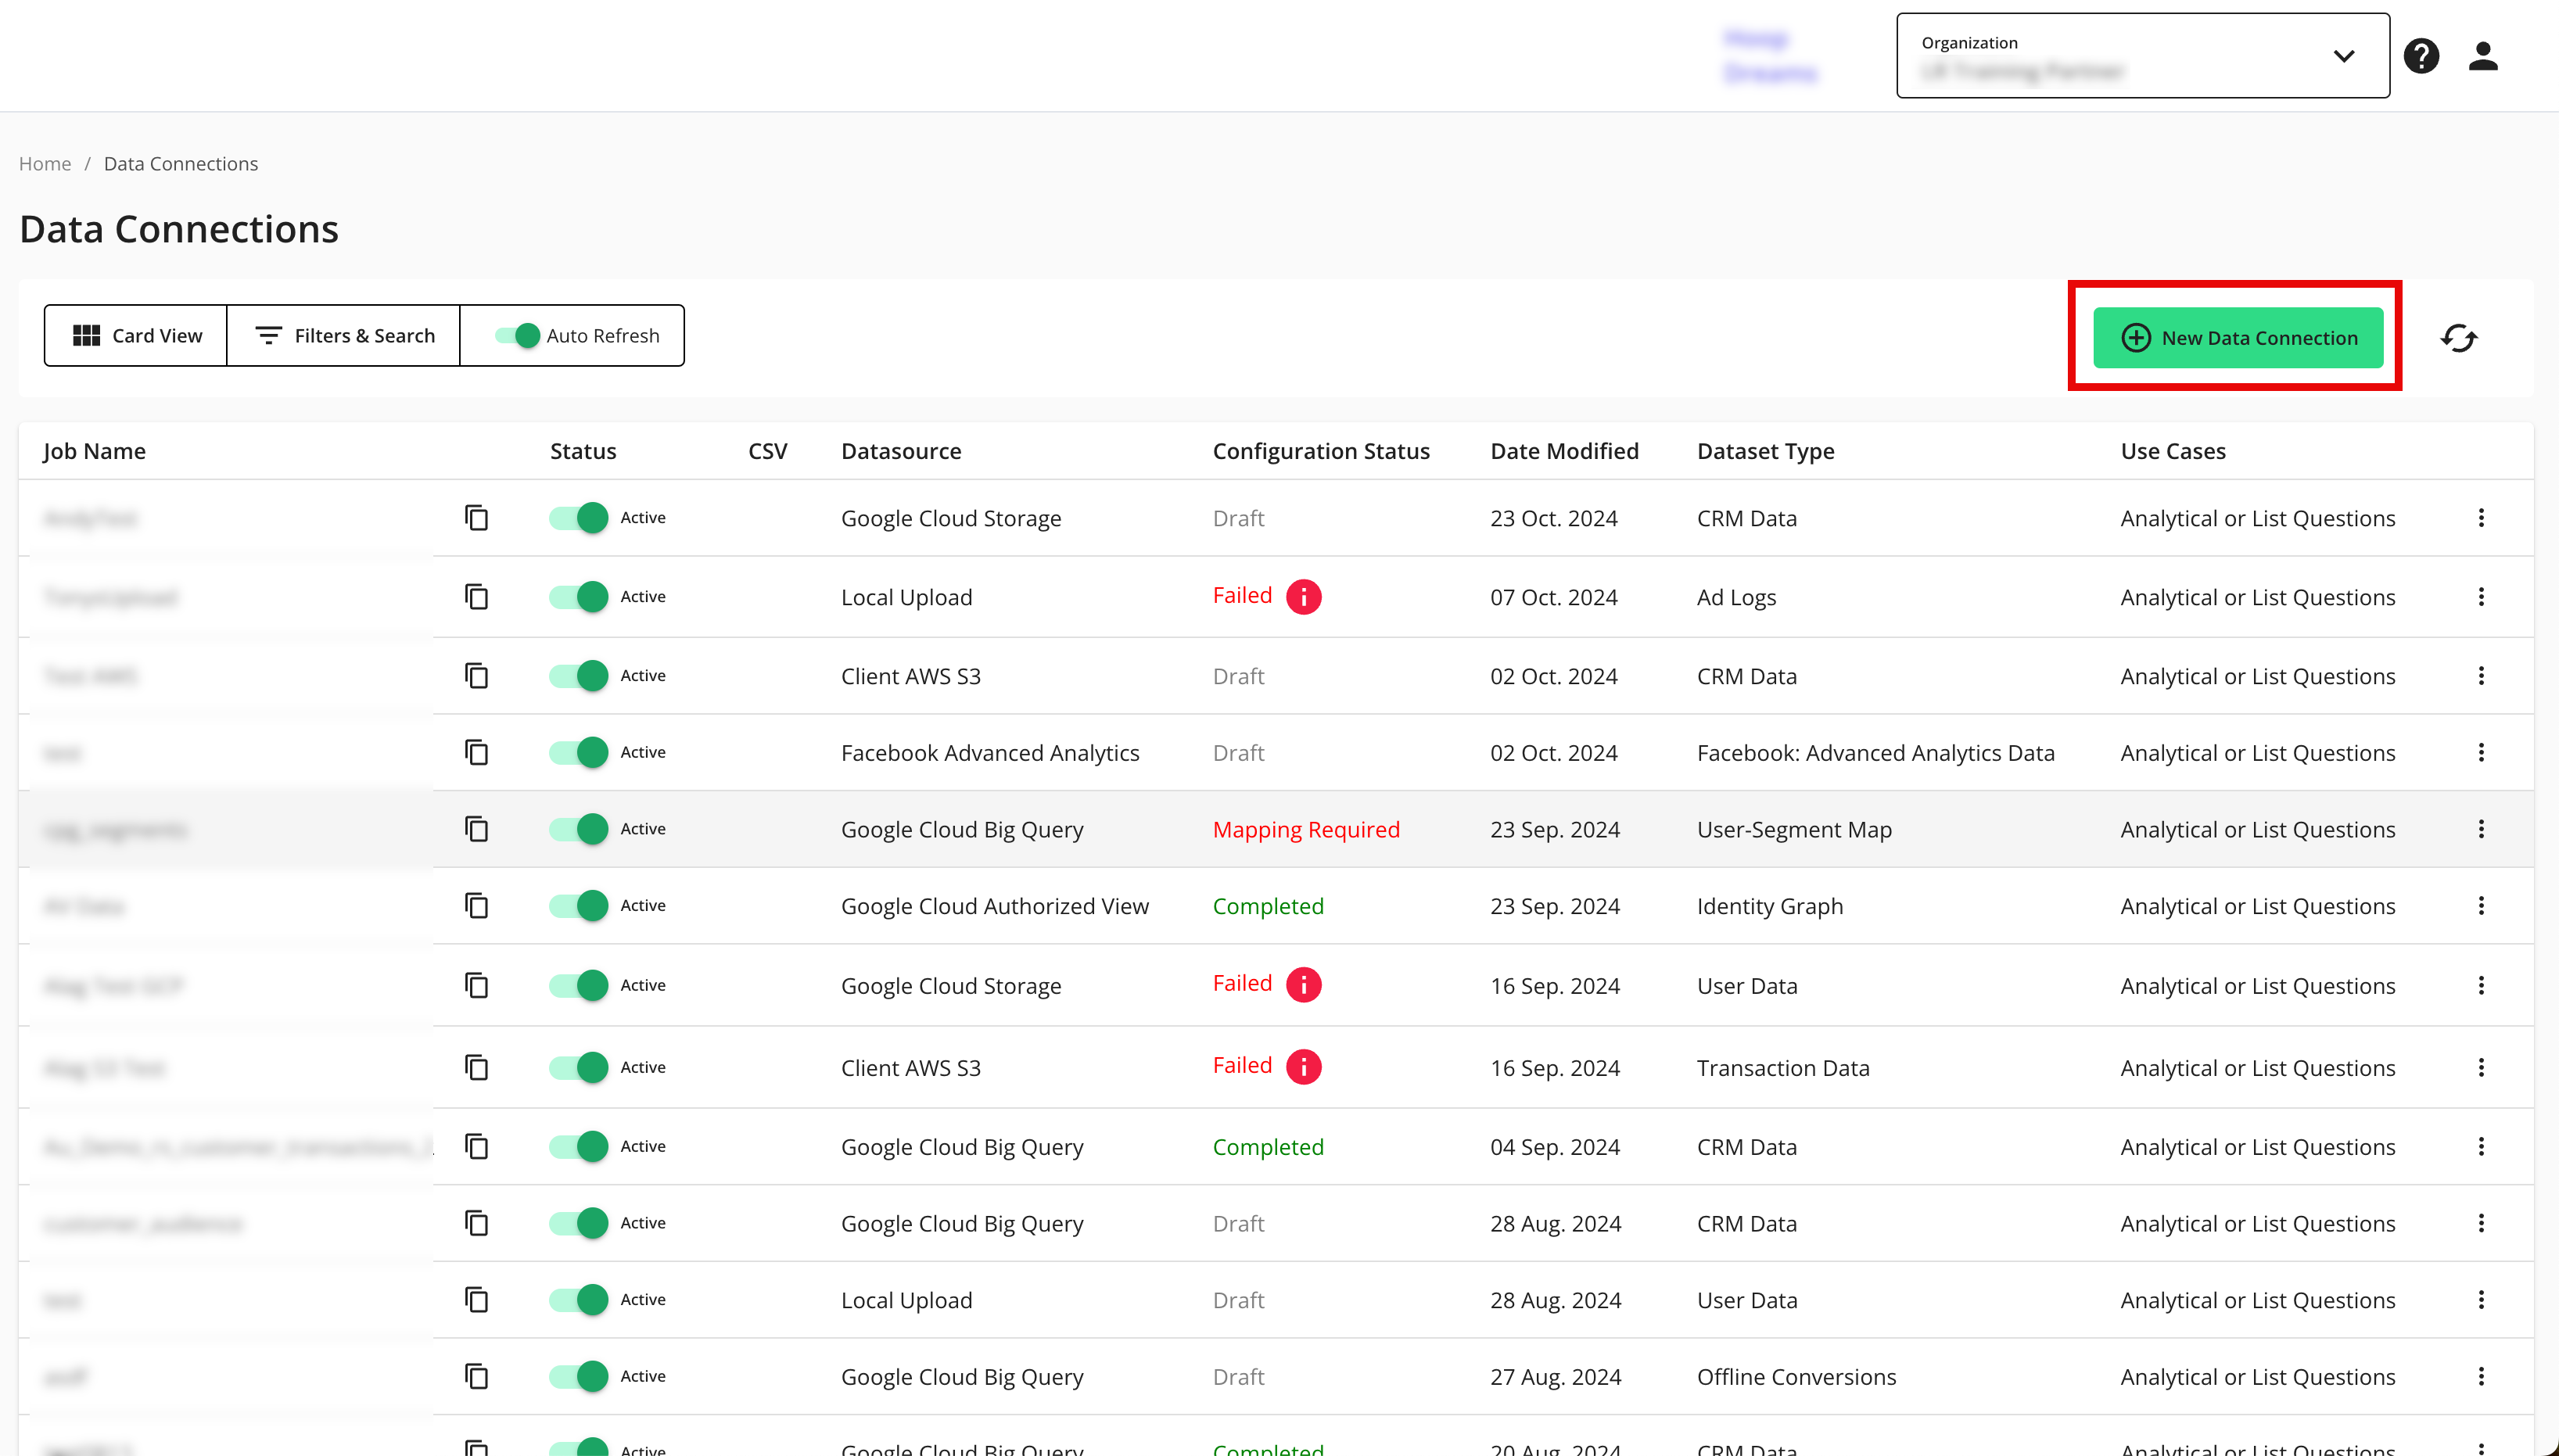
From the navigation menu, select Clean Room → Data Connections to open the Data Connections page.
From the Data Connections page, click .
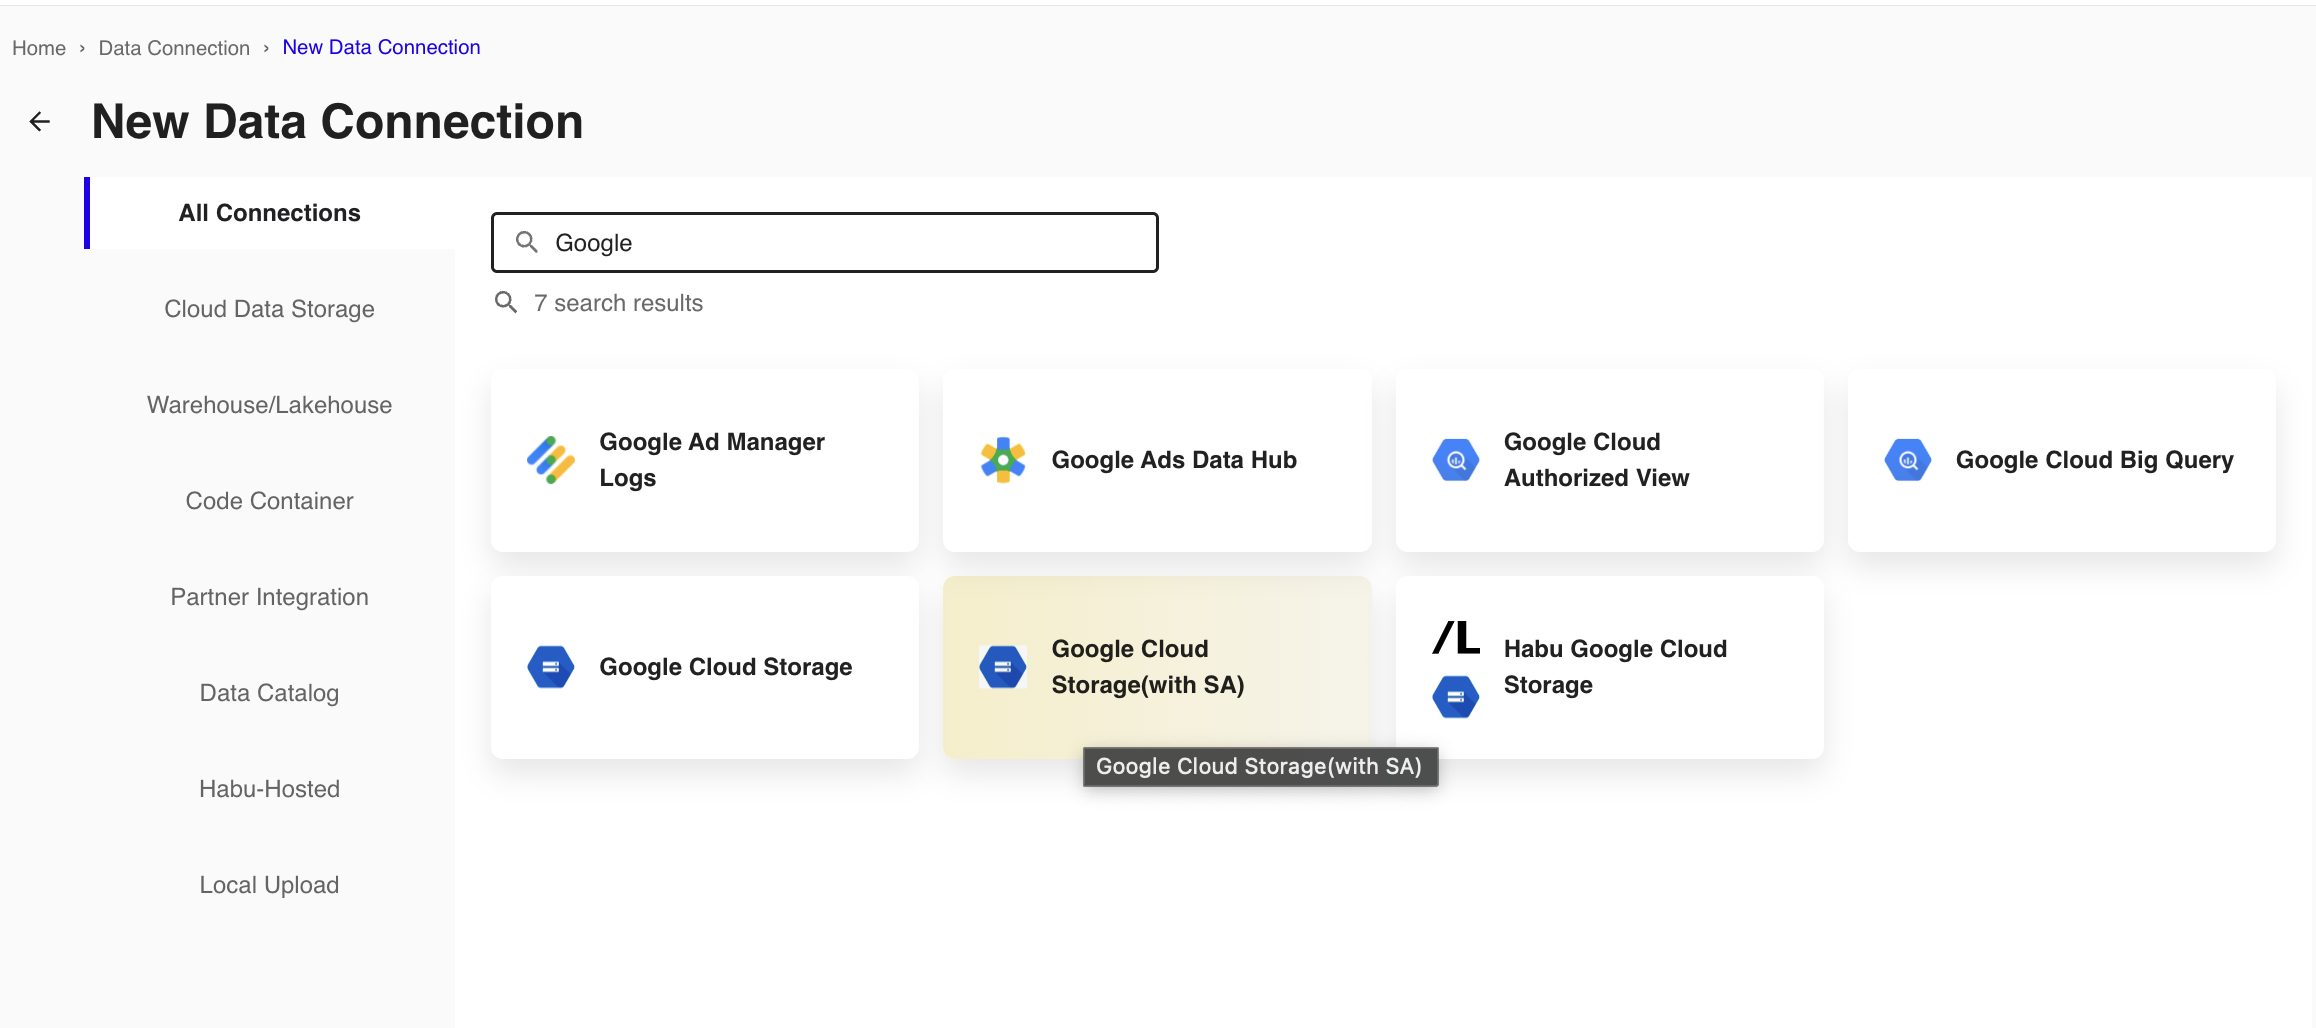
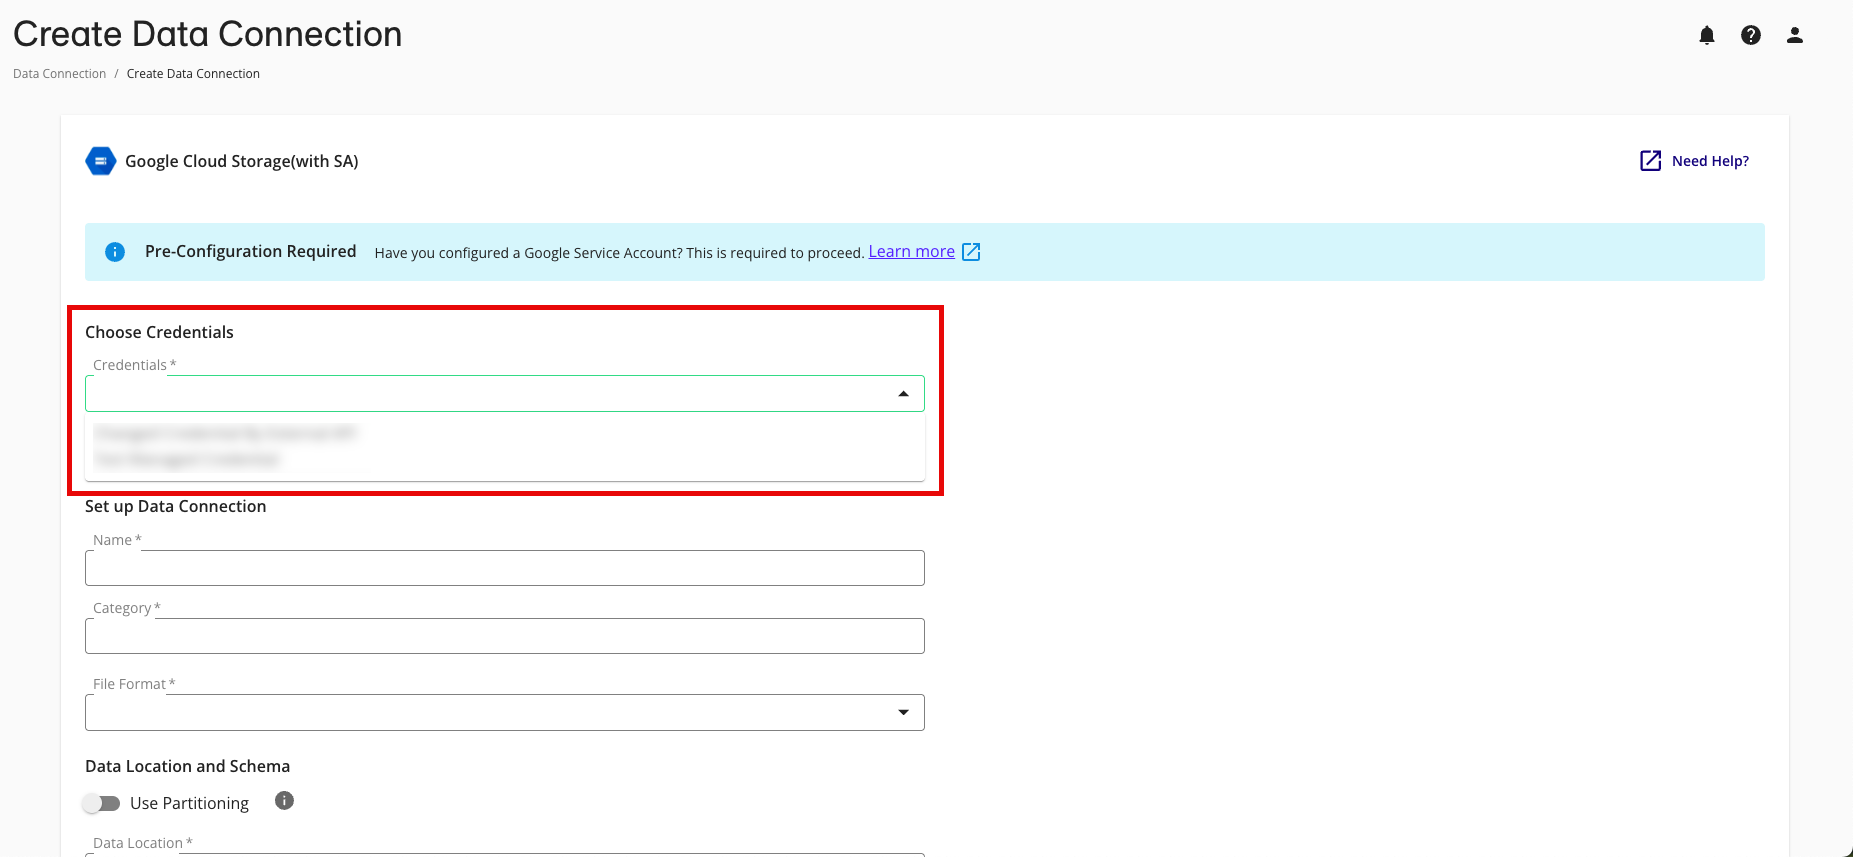
From the New Data Connection screen, select "Google Cloud Storage (with SA)".
Select the credentials created in the previous procedure from the list.
Complete the following fields in the Set up Data Connection section:
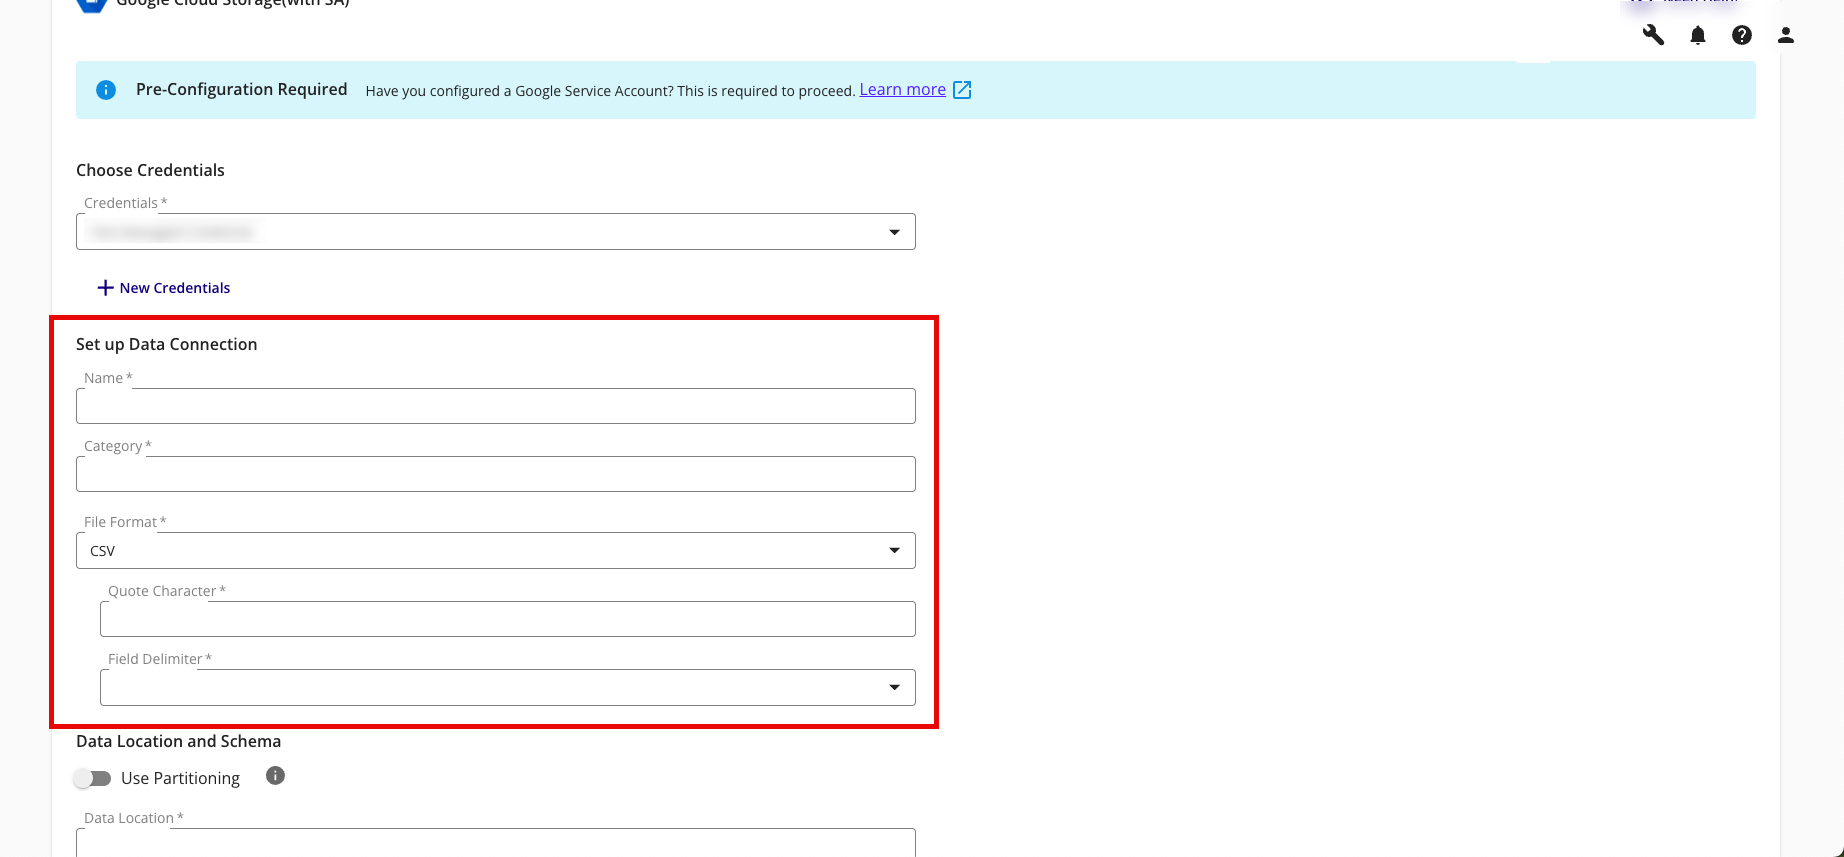
Name: Enter a name for the data connection (this will be the name for the dataset that you'll provision to clean rooms).
Category: Enter a category of your choice.
File Format: Select CSV, Parquet, or Delta.
Note
All files must have a header in the first row. Headers should not have any spaces or special characters and should not exceed 50 characters. An underscore can be used in place of a space.
If you are uploading a CSV file, avoid double quotes in your data (such as "First Name" or "Country").
Quote Character: If you're uploading CSV files, enter the quote character you'll be using (if any).
Field Delimiter: If you're uploading CSV files, select the delimiter to use (comma, semicolon, pipe, or tab).
Complete the following tasks and fields in the Data Location and Schema section:
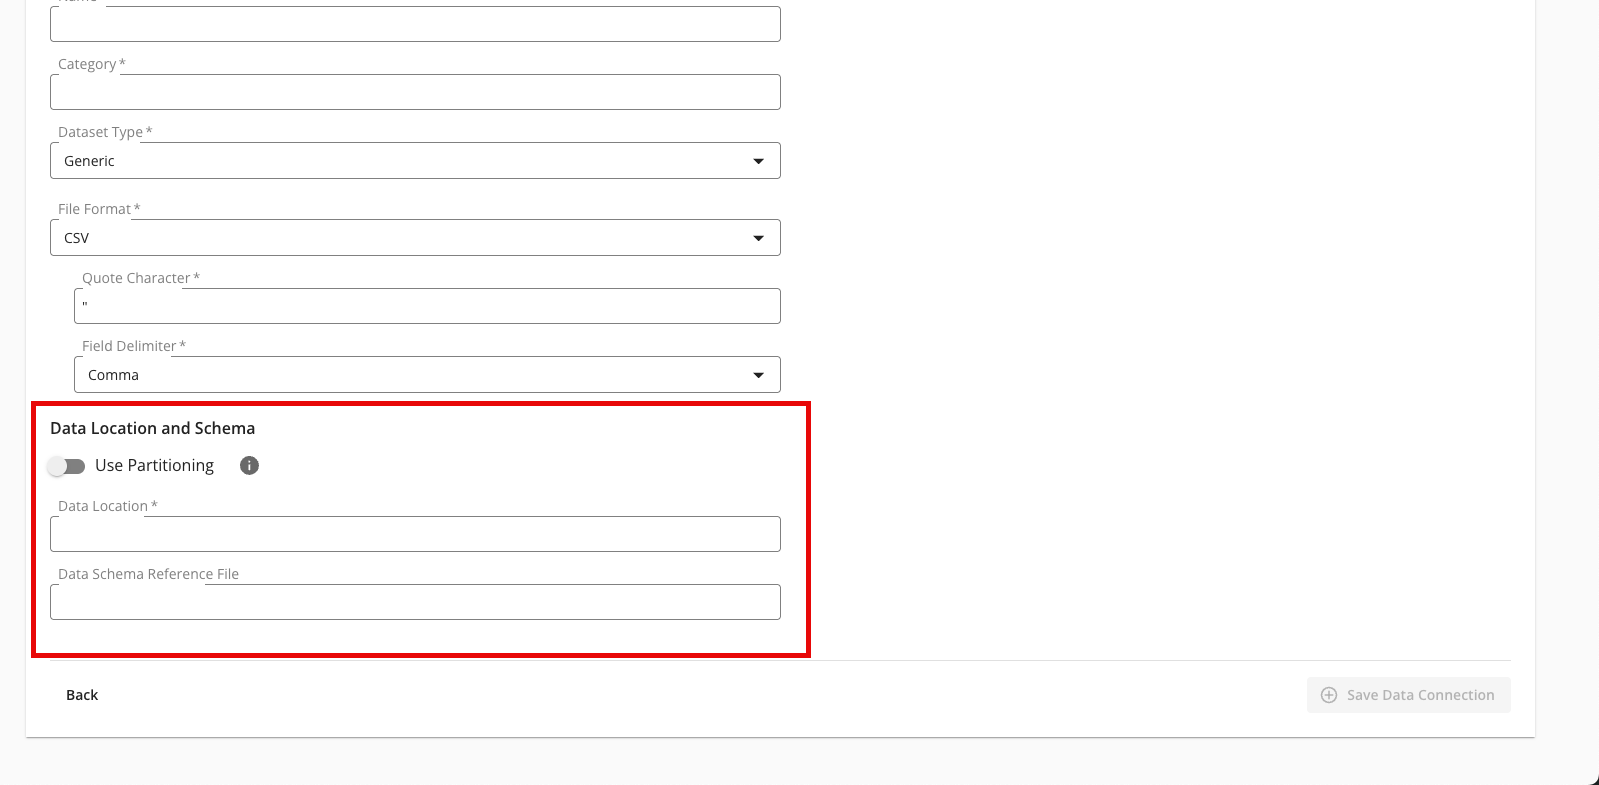
To use partitioning on the dataset associated with the data connection, slide the Use Partitioning toggle to the right.
Note
If the dataset uses partitioning, the dataset can be divided into subsets so that data processing occurs only on relevant data during question runs, which results in faster processing times. When using partitioning for a cloud storage data connection, a data schema reference file is required to be entered below. For more information, see "Partition a Dataset in LiveRamp Clean Rooms".
Data Location: Enter the GCS bucket location captured in the “Capture the Data Location” section above. For example, "gs://clean-room-client-org-123ab456-7d89-10e1-a234-567b891c0123/purchase_events/date=yyyy-MM-dd/".
Note
The data location must start with "gs://" and end with a forward slash ("/").
Make sure that the bucket path you use for the data connection is distinct from any bucket paths you use for existing GCS export destination connections in LiveRamp Clean Room. For example, to use the same bucket for both exports and data connections, make sure to use a distinct folder in that bucket for exports and a distinct folder for each data connection.
Data Schema Reference File: If you enabled partitioning above, enter the location of a data schema reference file, where the headers in the file show LiveRamp how your folders are structured with the partition values.
Note
The data schema reference file name must start with "gs://" and end with a valid file extension (such as ".csv").
The header row of the data schema reference file should include the complete partition folder structure so LiveRamp Clean Room can infer the schema and properly recognize partitioning for query filters.
The file should also contain a few rows of sample data so that LiveRamp can understand the field type for each column.
The data schema reference file must be hosted in a static location and must have been uploaded within the last seven days.
Review the data connection details and click .
All configured data connections can be seen on the Data Connections page.
If you haven't already, upload your data files to your specified location.
When a connection is initially configured, it will show "Verifying Access" as the configuration status. Once the connection is confirmed and the status has changed to "Mapping Required", map the table's fields.
You will receive file processing notifications via email.
Map the Fields
Once the above steps have been performed in Google Cloud Platform, perform the overall steps in the sections below in LiveRamp Clean Room.
Note
Before mapping the fields, we recommend confirming any expectations your partners might have for field types for any specific fields that will be used in questions.
From the row for the newly created data connection, click the More Options menu (the three dots) and then click .

The Map Fields screen opens, and the file column names auto-populate.

For any columns that you do not want to be queryable, slide the Include toggle to the left.
If needed, update any column labels.
Note
Ignore the field delimiter fields because this was defined in a previous step.
Click .
The Add Metadata screen opens.
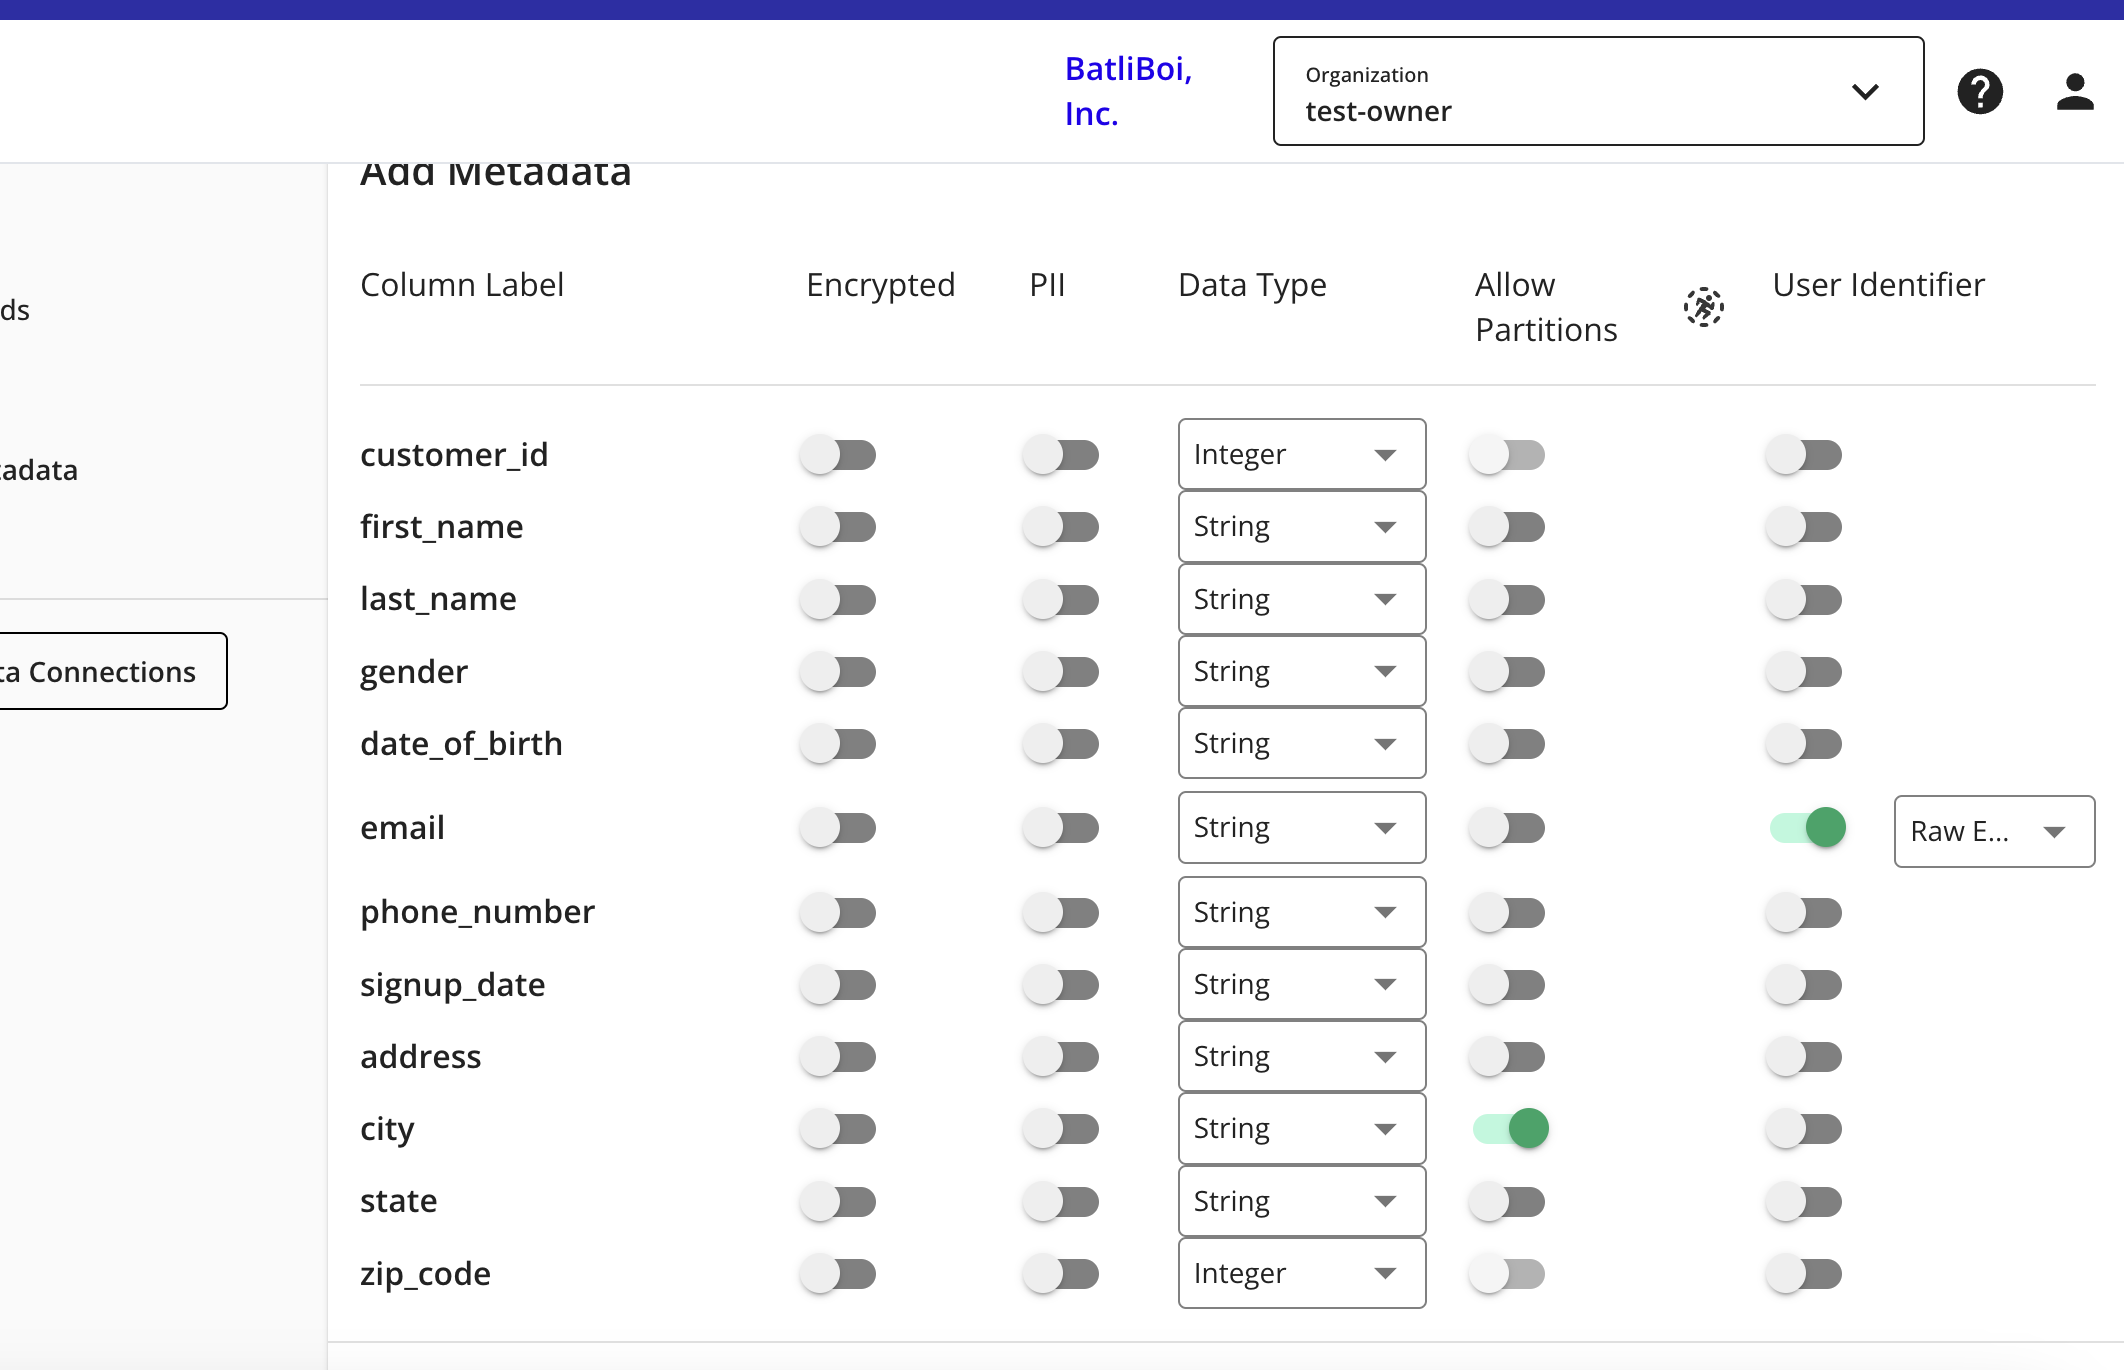
For any column that contains PII data, slide the PII toggle to the right.
Note
If your data contains a column with RampIDs, do not slide the PII toggle for that column. Mark the RampID column as a User Identifier and select "RampID" as the identifier type. If the data contains a RampID column, no other columns can be enabled as PII.
Select the data type (field type) for each column (for more information on supported field types, see "Field Types for Data Connections").
For any partition columns, slide the Allow Partitions toggle to the right.
Note
If you've used hive-style partitioning and enabled partitioning during the data connection process, your partition fields should automatically have the Allow Partitions toggle enabled.
If a column contains PII, slide the User Identifiers toggle to the right and then select the user identifier that defines the PII data.
Note
When you select "Raw Email" as the user identifier for an email column, those email addresses will be automatically SHA256 hashed. The resulting hashed emails are then available for query within your clean rooms.
Click .
Your data connection configuration is now complete and the status changes to "Completed".
You can now provision the resulting dataset to your desired Hybrid, Confidential Computing, or BIgQuery clean room.