Configure a Salesforce Hybrid Data Connection
LiveRamp Clean Room's application layer enables companies to securely connect distributed datasets with full control and flexibility while protecting the privacy of consumers and the rights of data owners.
To configure a Salesforce Hybrid data connection, see the instructions below.
Note
This solution is designed for Salesforce solutions that use Salesforce's "traditional" infrastructure, like Salesforce Sales Cloud. As a company, Salesforce has built and acquired a wide and diverse range of products. But that diversity means that everything labeled "Salesforce" may not fit the instructions below. As a result, Salesforce-owned solutions that do not use the features mentioned below (e.g., Objects) will require further development and discussions.
Overall Steps
Perform the following overall steps in Salesforce to configure a Salesforce Hybrid data connection:
Note
For additional information, see these Salesforce resources
For Salesforce instructions for Connected Apps, see the Salesforce article "Help and Training Community".
For a Salesforce Trailhead tutorial on creating connected apps, see "Access Data with API Integration".
Once you've performed the procedures above in Salesforce, perform the following overall steps in LiveRamp Clean Room:
For information on performing these steps, see the sections below.
After you've performed all of the overall steps, the data will be ready to be provisioned into a clean room and a query. For instructions, see "Clean Room Owner Implementation Guide".
Create a Salesforce Connected App
In Salesforce, log in with your developer account.
In the upper-right corner, hover over the gear icon and then select .

In the left-hand pane, search for “App Manager” and open it.

Click .
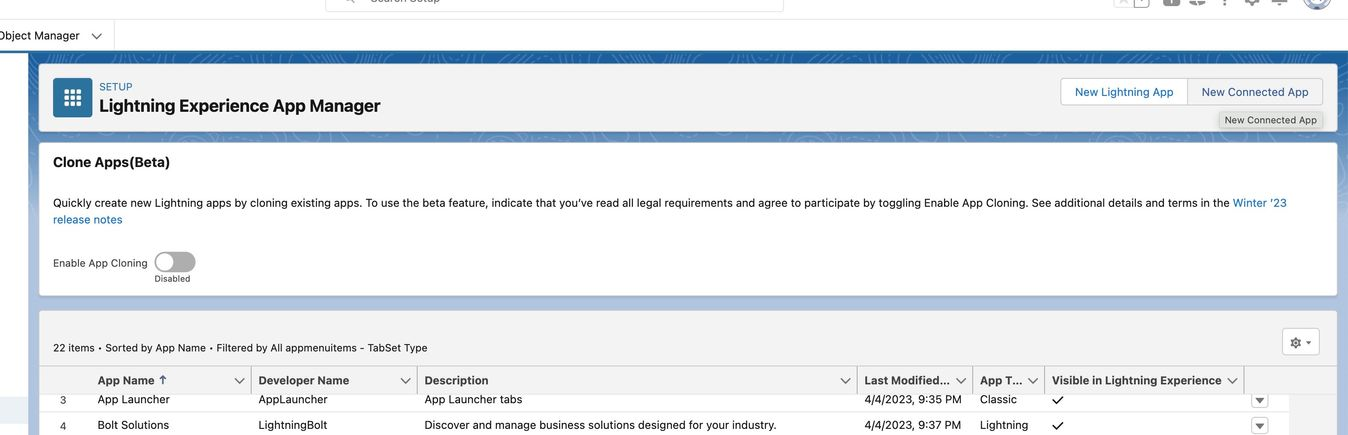
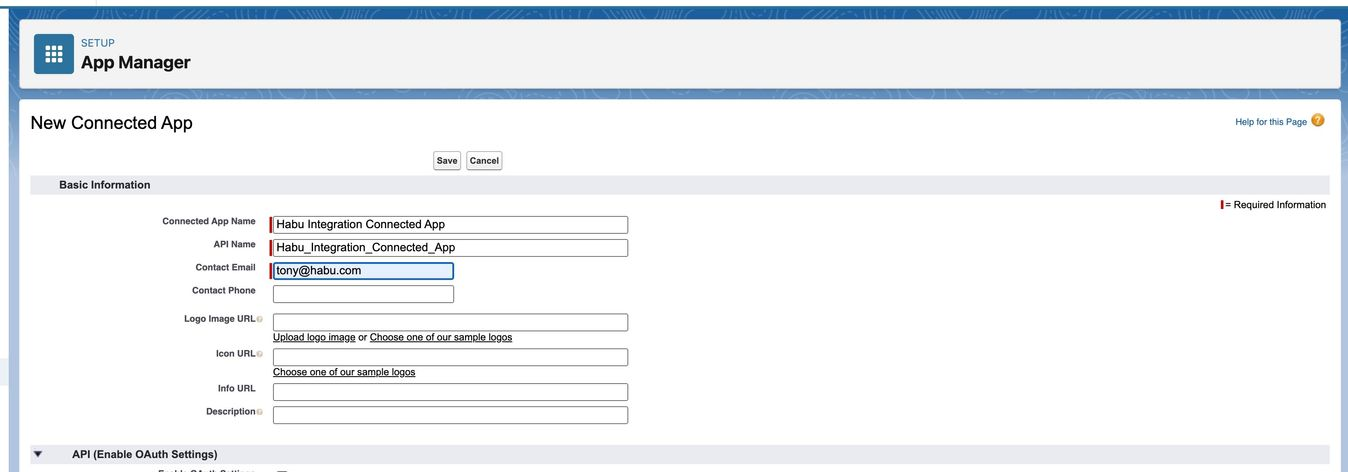
On the New Connected App page, enter the Connected App name, API name, and contact email.
Note
A client would enter the email address of someone who is creating the Connected app or a generic email.
Scroll down to "API (Enable OAuth Settings)" and select the check box for "Enable OAuth Settings".
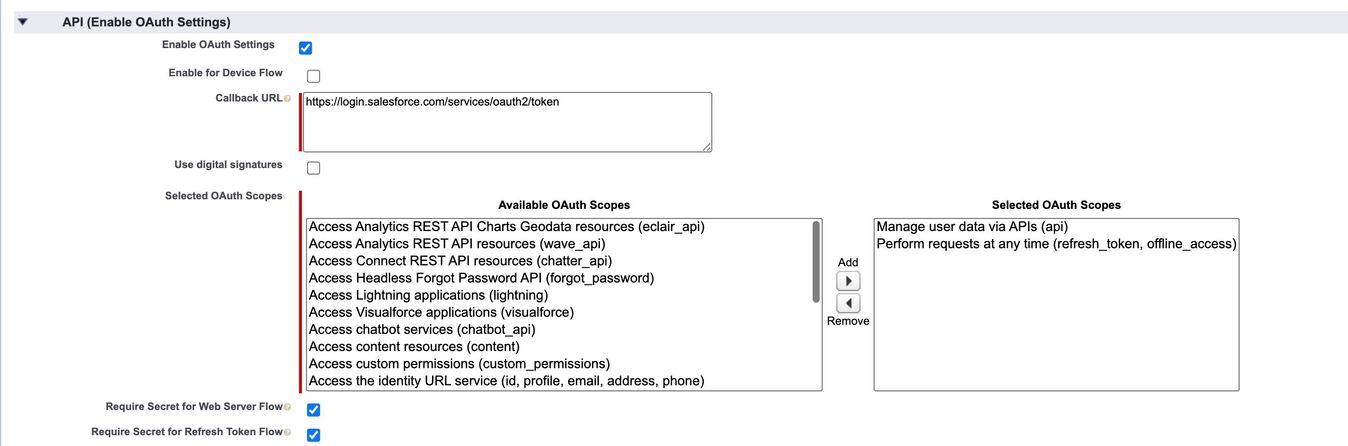
For the Callback URL, provide a Callback (for example, "https://www.liveramp.com").
For the Selected OAuth Scopes, select one of the following options:
Manage user data via APIs (api)
Perform requests at any time (refresh_token, offline_access)
Click
The New Connected App can take up to 10 minutes to take effect.

Configure the Connected App
From the Manage Connected Apps page in Salesforce, click for the app you created in the previous procedure.
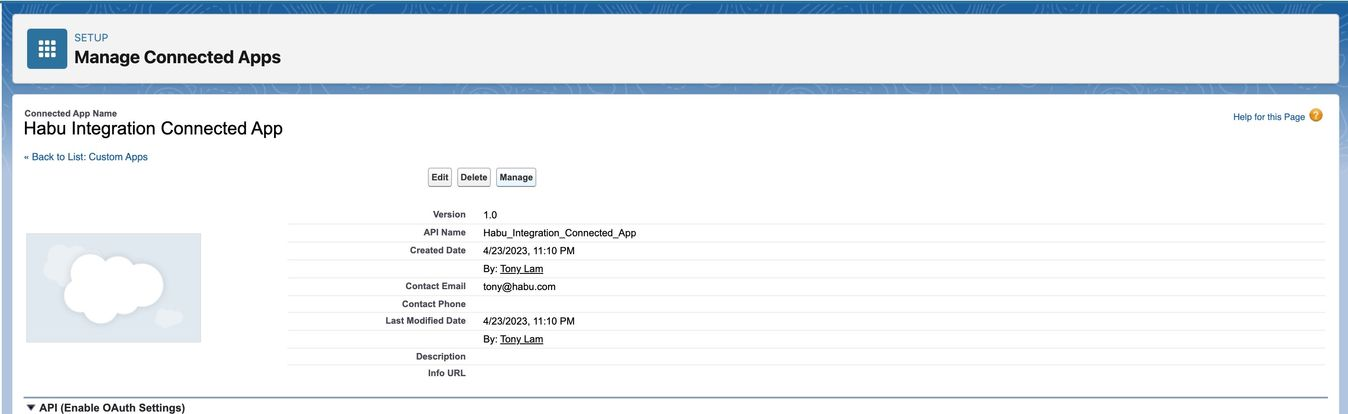
From the page that opens, click .
Make the following settings:
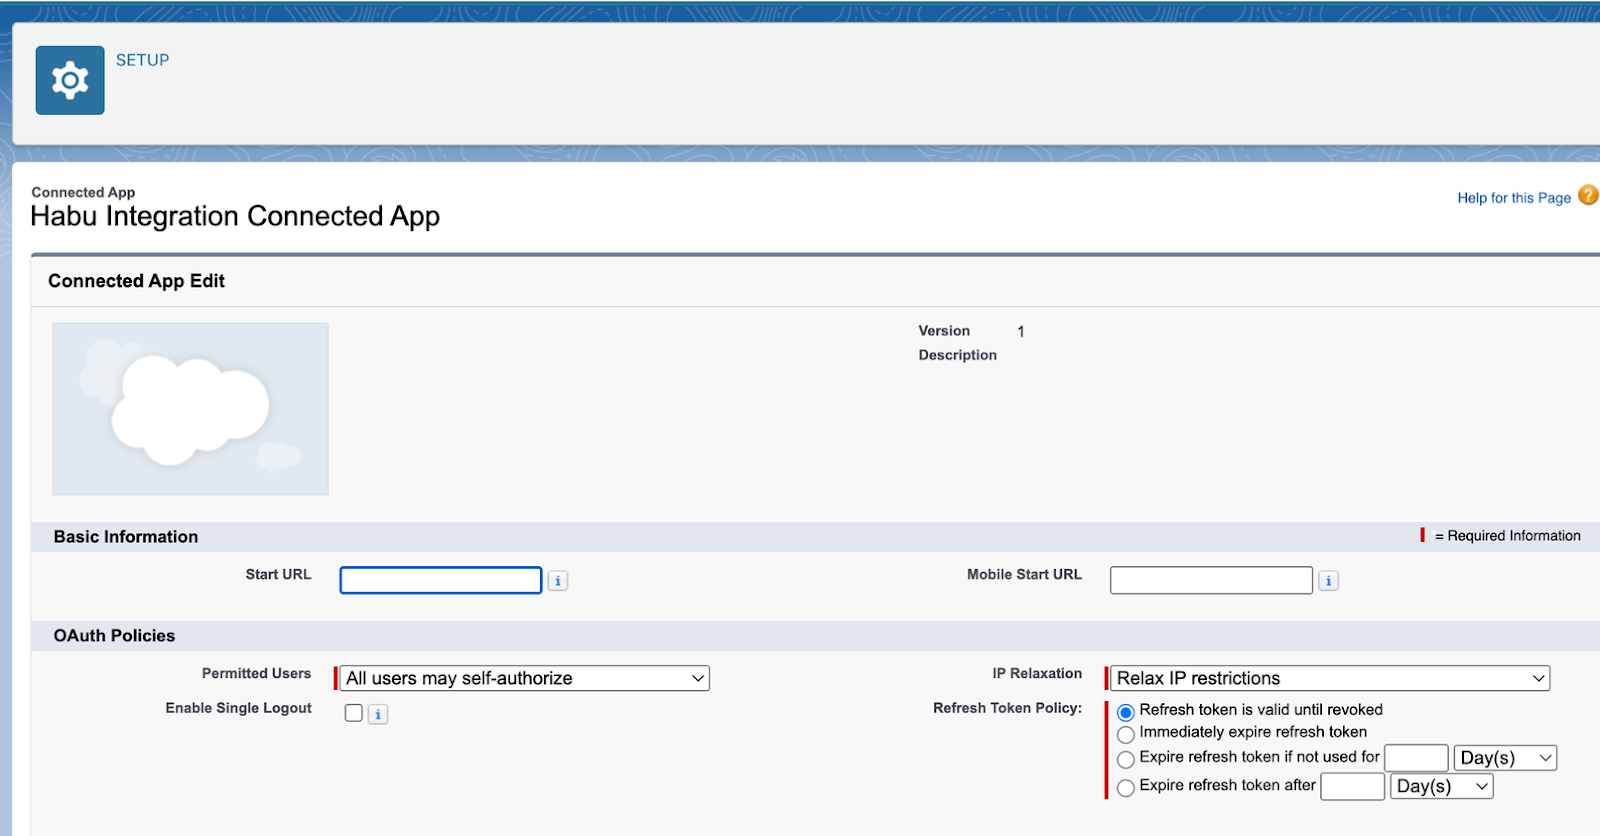
Permitted Users: All users may self-authorize.
IP Relaxation: Relax IP restrictions.
Refresh Token Policy: The refresh token is valid until revoked.
Click .
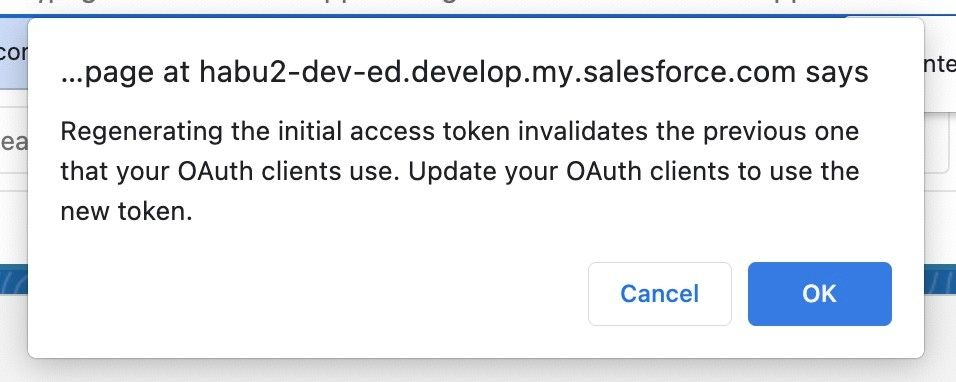
Generate an Initial Access Token
In Salesforce, navigate back to the Connected App list and select Manage.
From the row for the Connected App, select "Manage" from the dropdown on the far right of the row.

Scroll to "Initial Access Token for Dynamic Client Registration" and click .

Click to confirm.
Get the Consumer Key and Consumer Secret
Note
Disable any pop-up blockers before performing these steps.
In Salesforce, navigate to the Connected App list.
From the row for the Connected App, select "View" from the dropdown on the far right of the row.
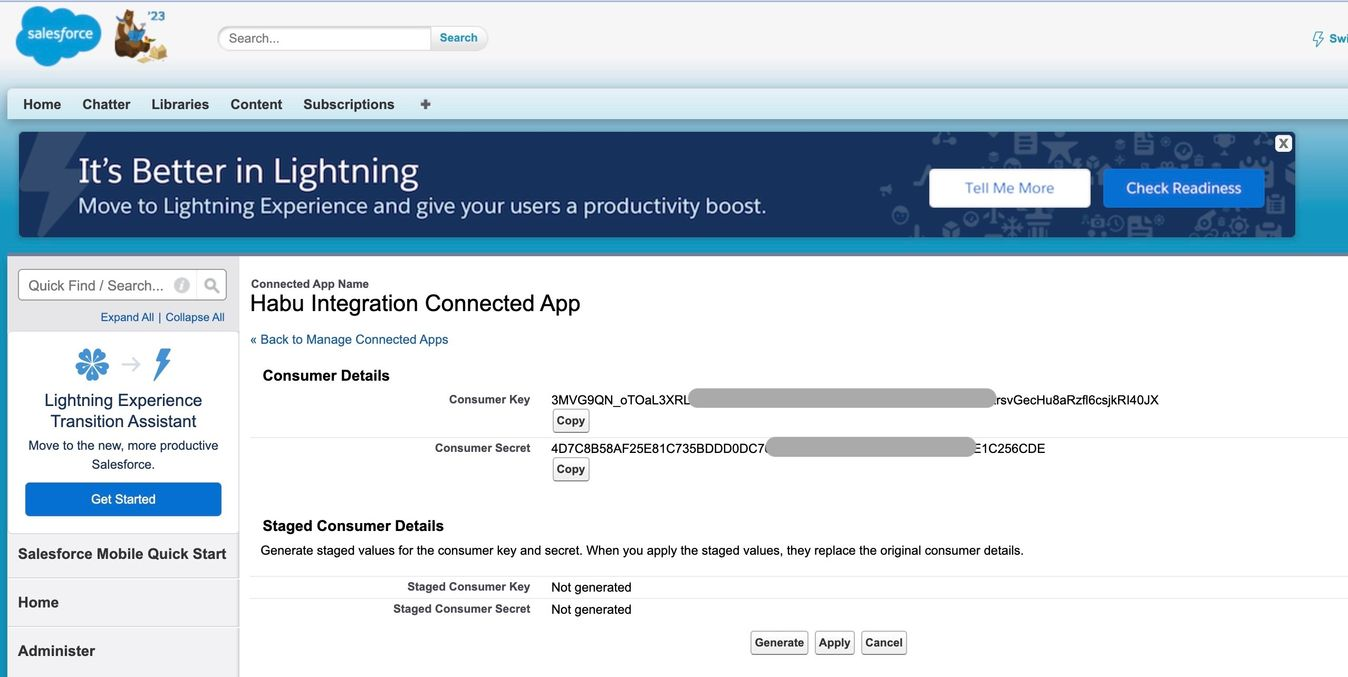
Go to the API (Enable OAuth Settings) section, and click Manage Consumer Details.
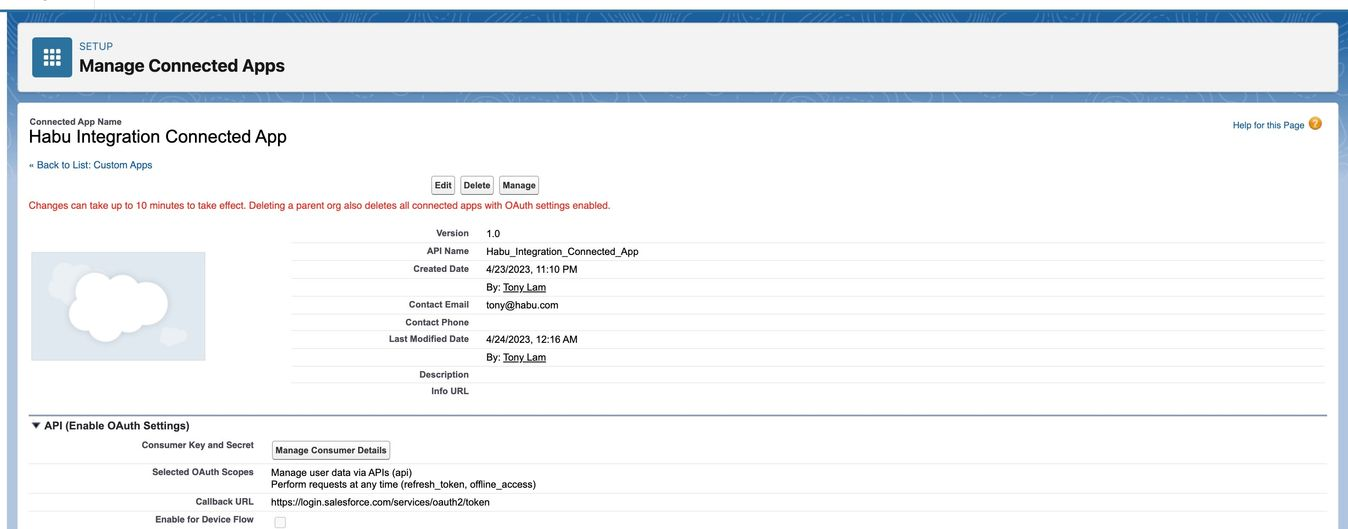
Take note of the Consumer Key and Consumer Secret.
Create or Clone an Existing Profile
In Salesforce, navigate to Profiles under .
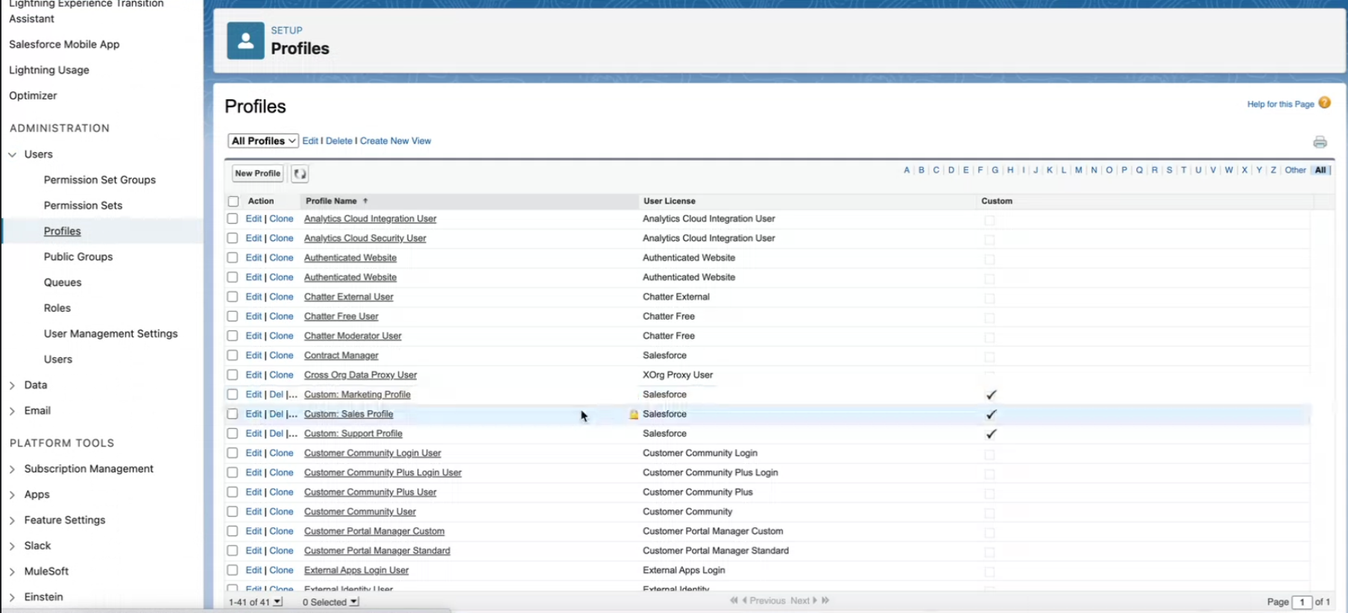
Clone a profile and give it a name (such as "LiveRamp API Profile").
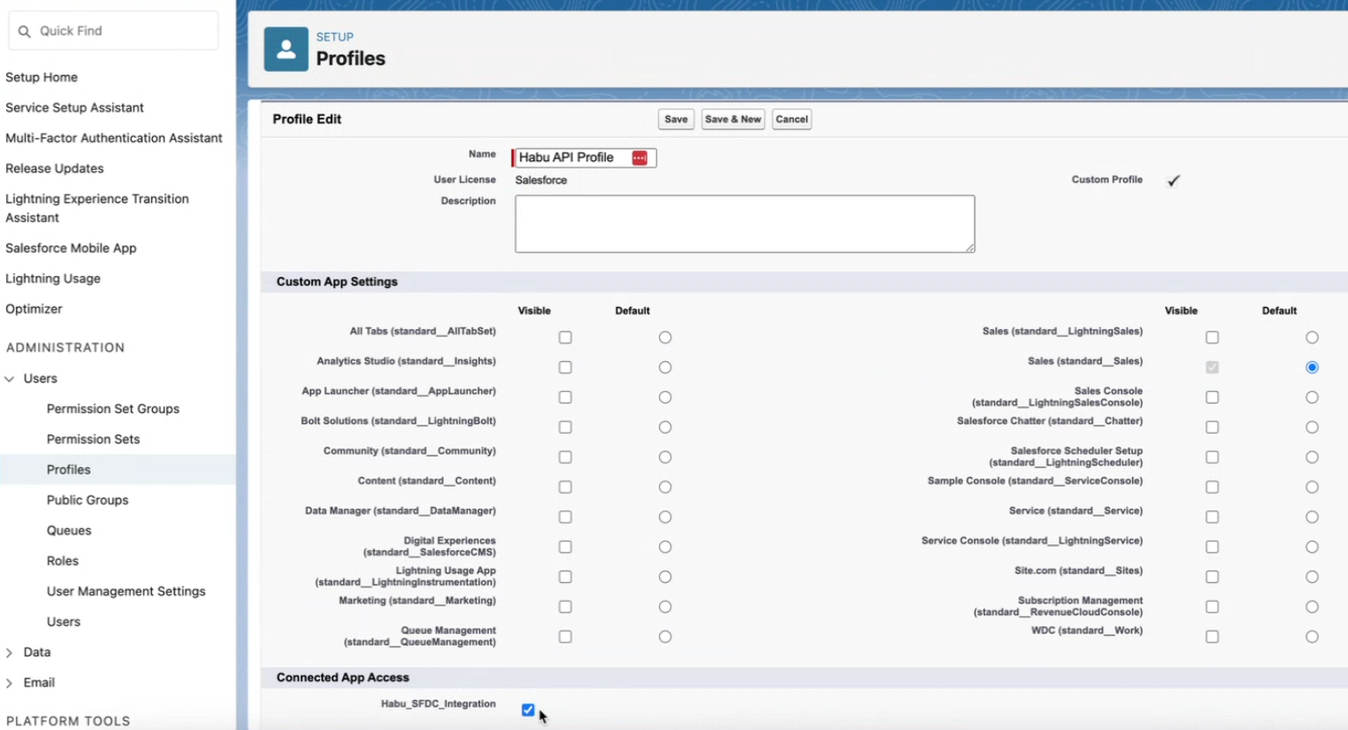
After the profile has been successfully created, select the new profile and click .
Under "Custom App Settings", uncheck any check boxes that are checked.
Under "Connected App Access", check the check box for the newly created connected app.
Under "Administrative Permissions", check the check boxes for "API Enabled" and "Api Only".
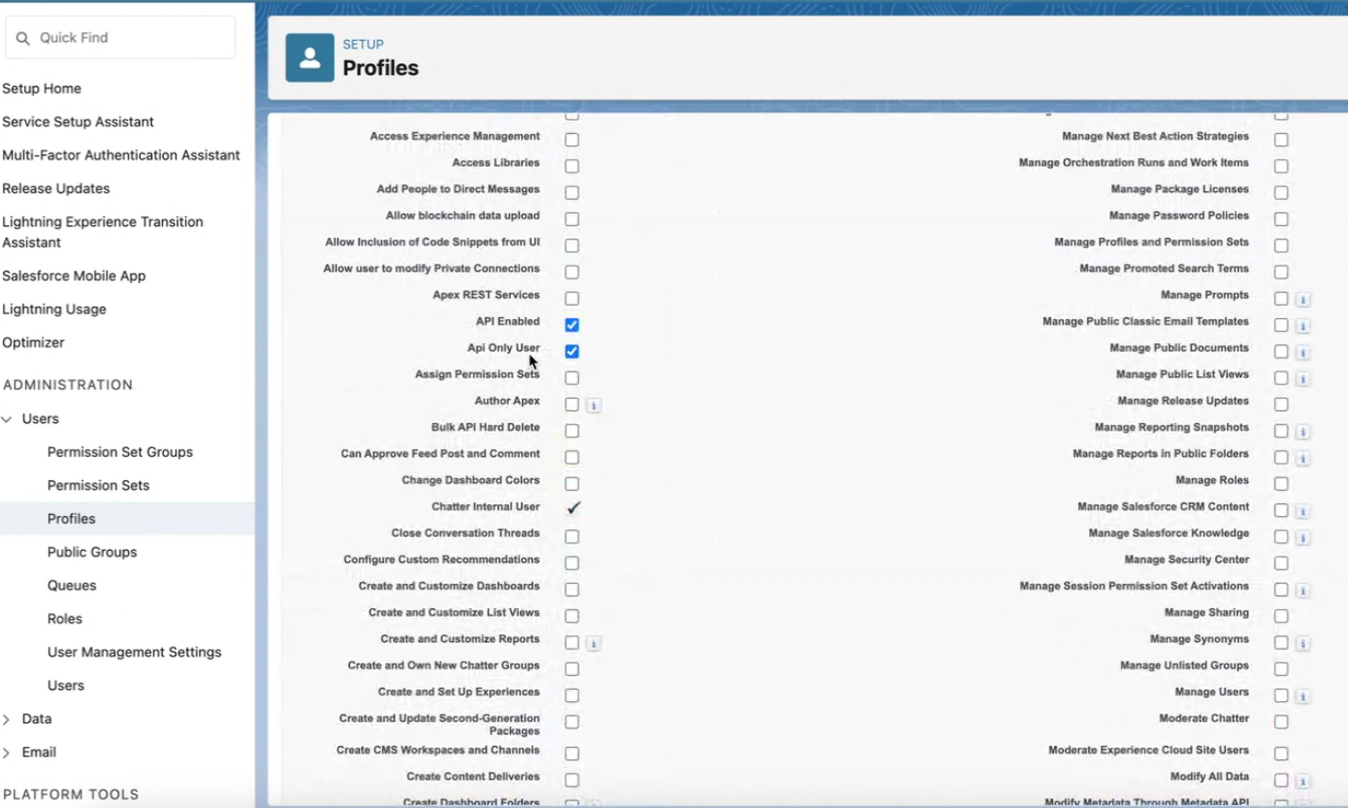
Under "General User Permissions", clear any check boxes that are selected.
Under "Standard Object Permissions", select the check boxes for the objects that the profile should have access to (such as "Contacts").
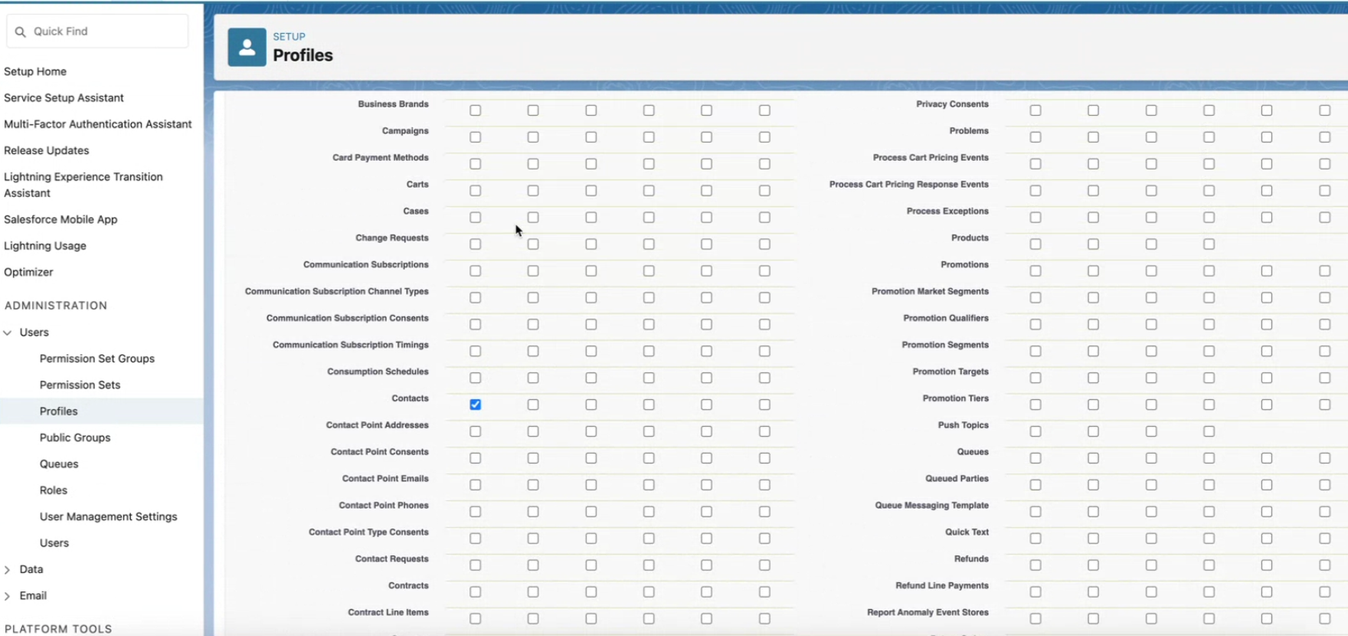
Click .
Navigate back to the Profile page.
Under "Field-level Security", select the checkbox for the object that this profile has access to (such as "Contacts").
Click and select the check boxes for the fields that this profile should have access to.
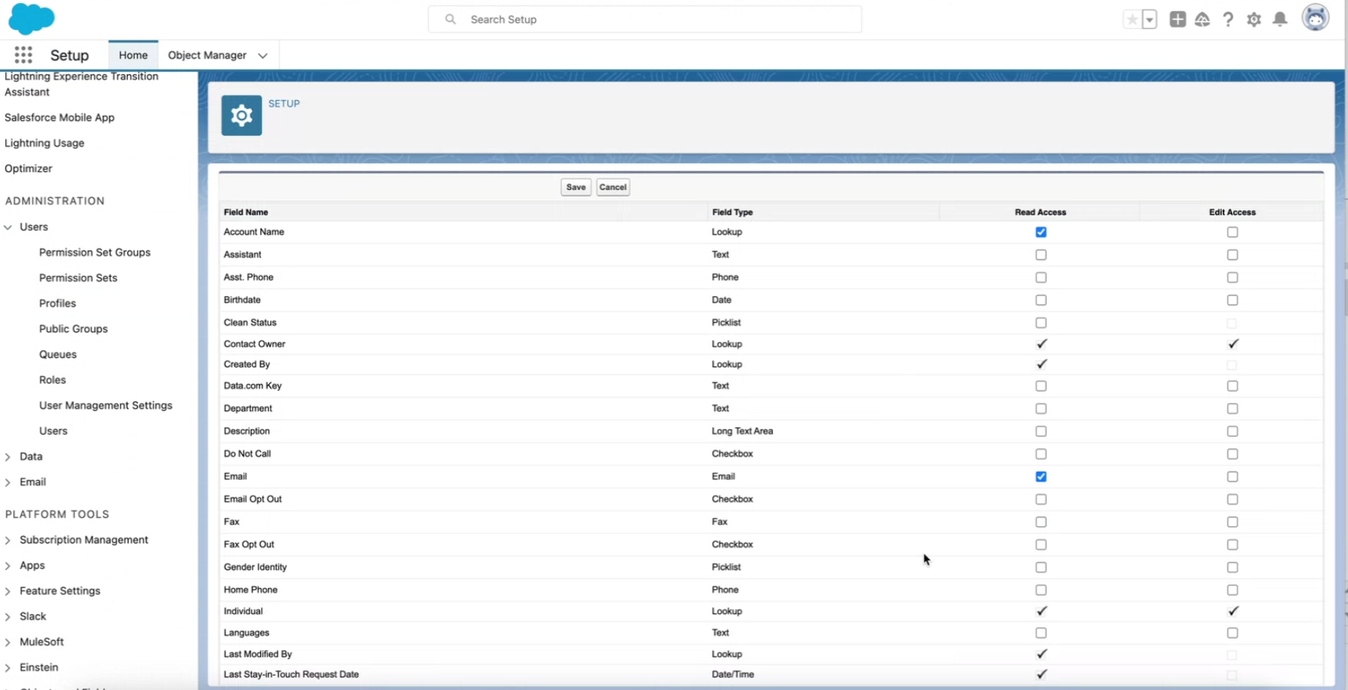
Click .
Create a New User
From the profile in Salesforce that was created above, navigate to the View Users page and click .
Create a new user (such as "Api User LiveRamp") and then click .

Log in to Salesforce with the new user created above. Note the UserName and Password.
Navigate to the Settings and select Reset My Security Token.
Click to have the token emailed to you.
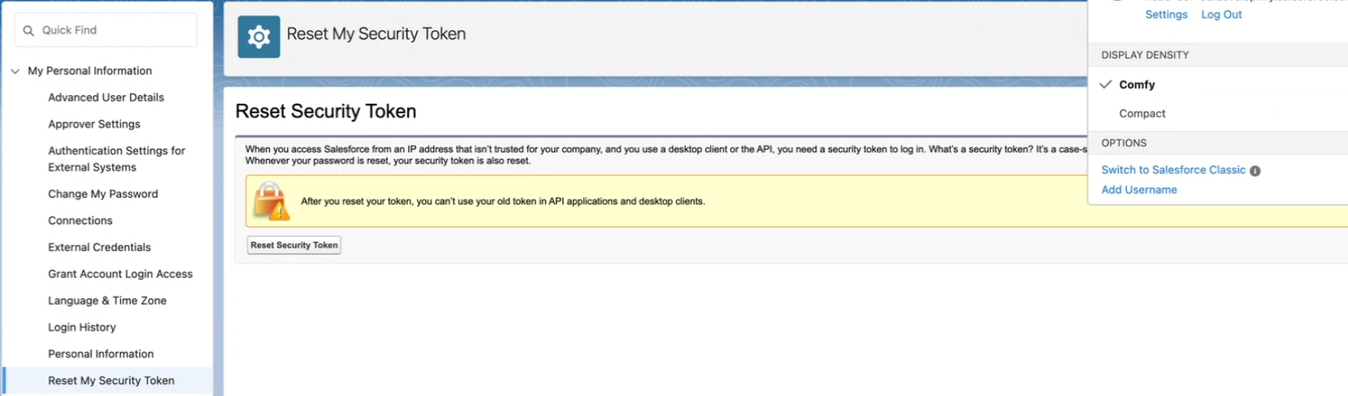
Once the email arrives, note the token.
Add the Credentials
Note
Make sure you are adding to the correct organization in LiveRamp Clean Room (e.g., don't add to the "HQ" organization).
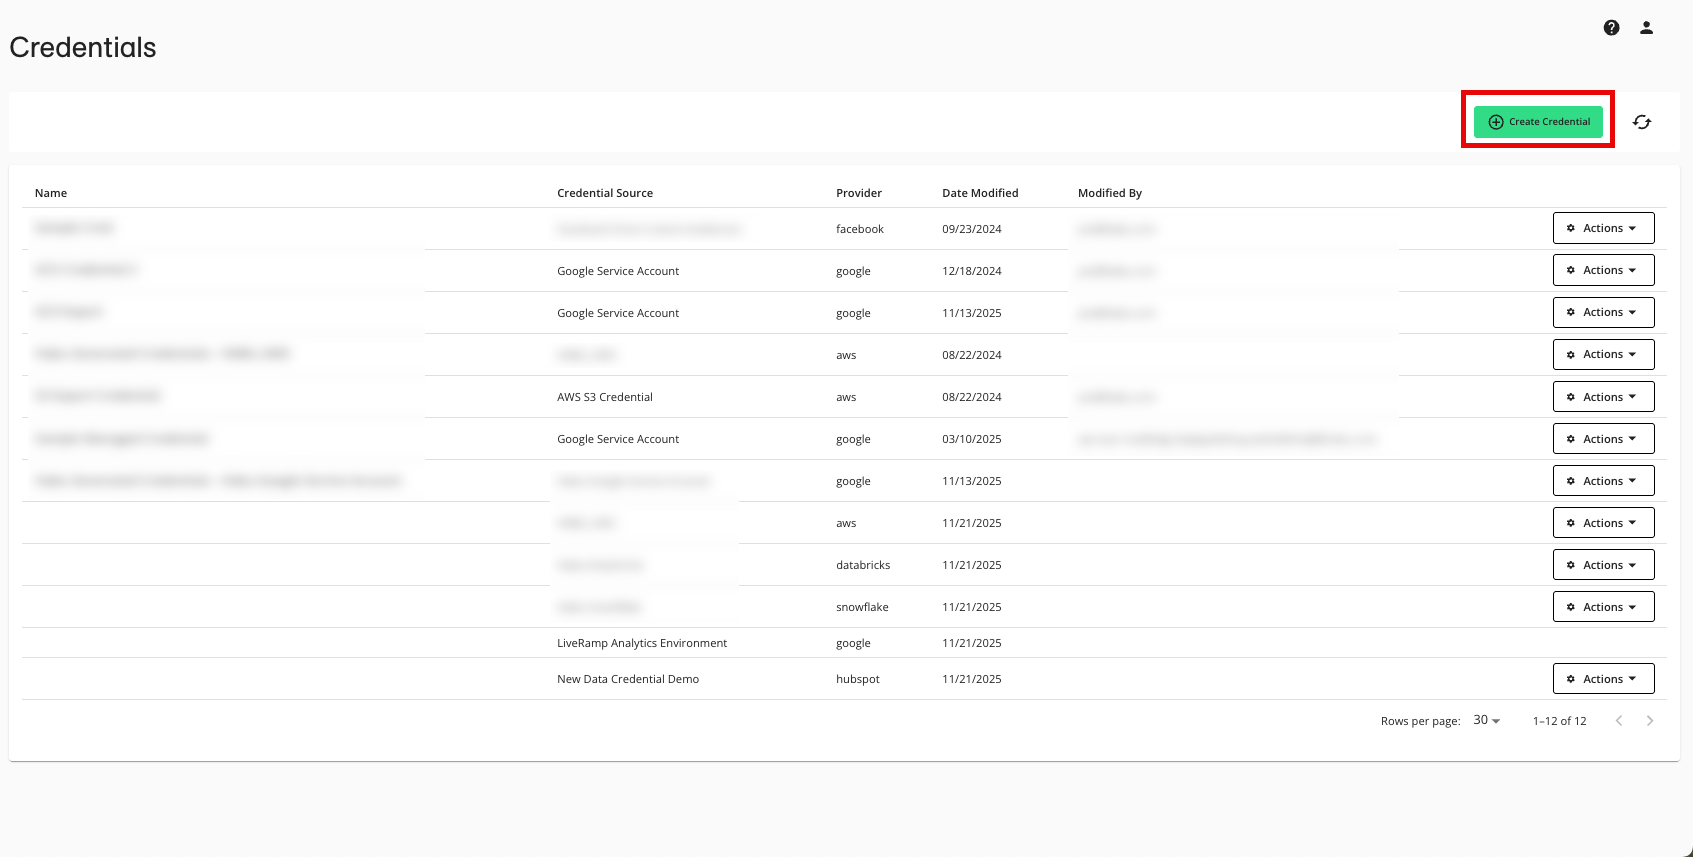
From the LiveRamp Clean Room navigation pane, select Data Management → Credentials.
Click .
Enter a descriptive name for the credential.
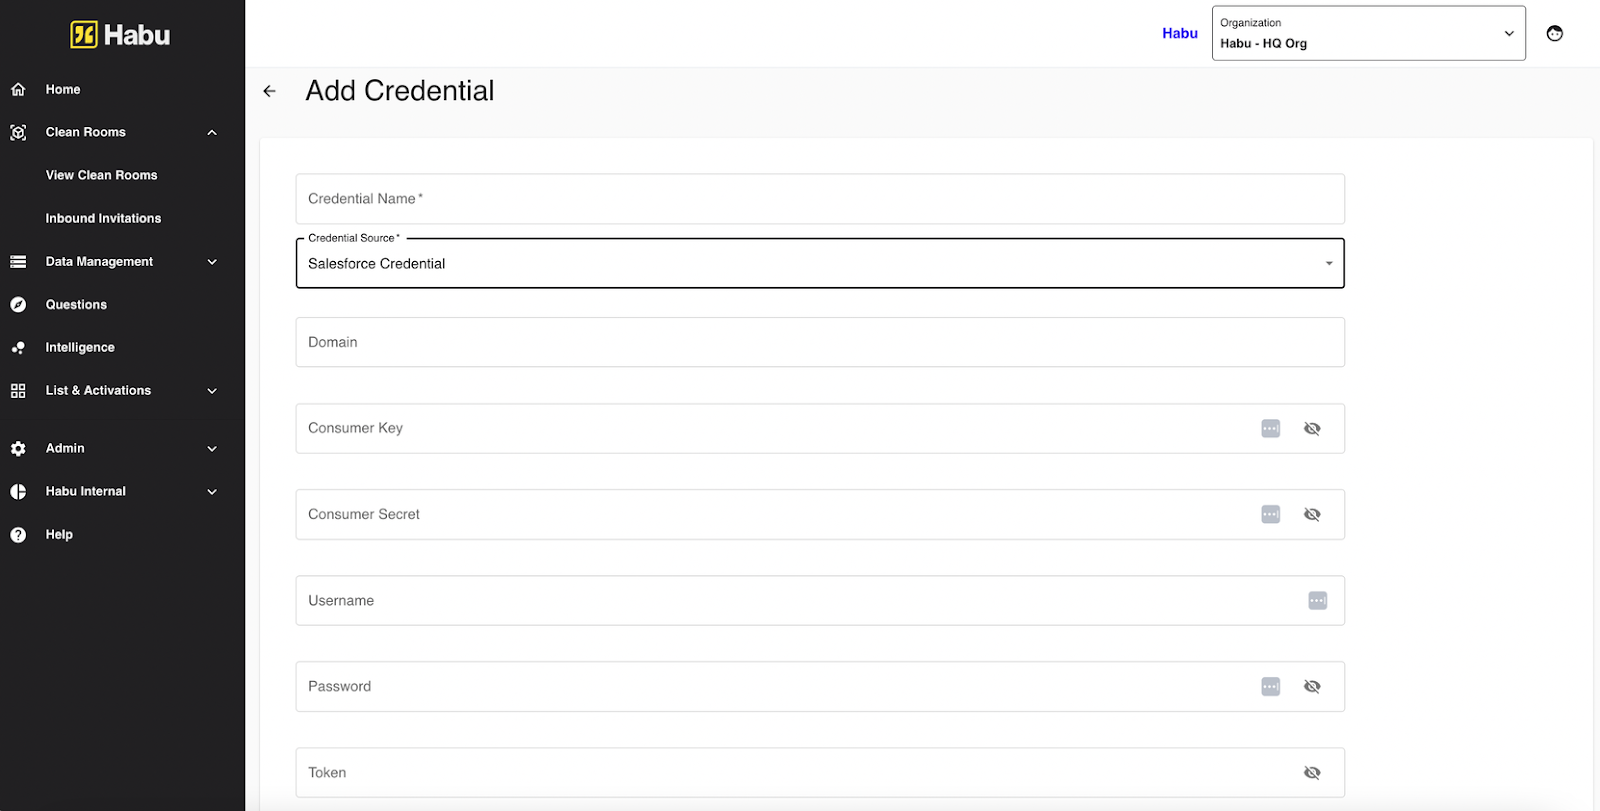
Complete the fields as follows:
Domain: Enter the domain name used as your org-specific subdomain in Salesforce login and application URLs.
Consumer Key and Consumer Secret: Enter the Consumer Key and Consumer Secret.
Note
These can be found from Setup, enter Apps, then select App Manager, then select View. Next to Consumer Key and Secret, click Manage Consumer Details.
Username: Enter the username generated in the "Create a New User" section above.
Password: Enter the password generated in the "Create a New User" section above.
Security Token: Enter the token generated in the "Create a New User" section above.
Click .
You can specify which object and fields (comma-separated fields) the data connection is for, restricting the data pull to those specific Salesforce objects and fields.
Create the Data Connection
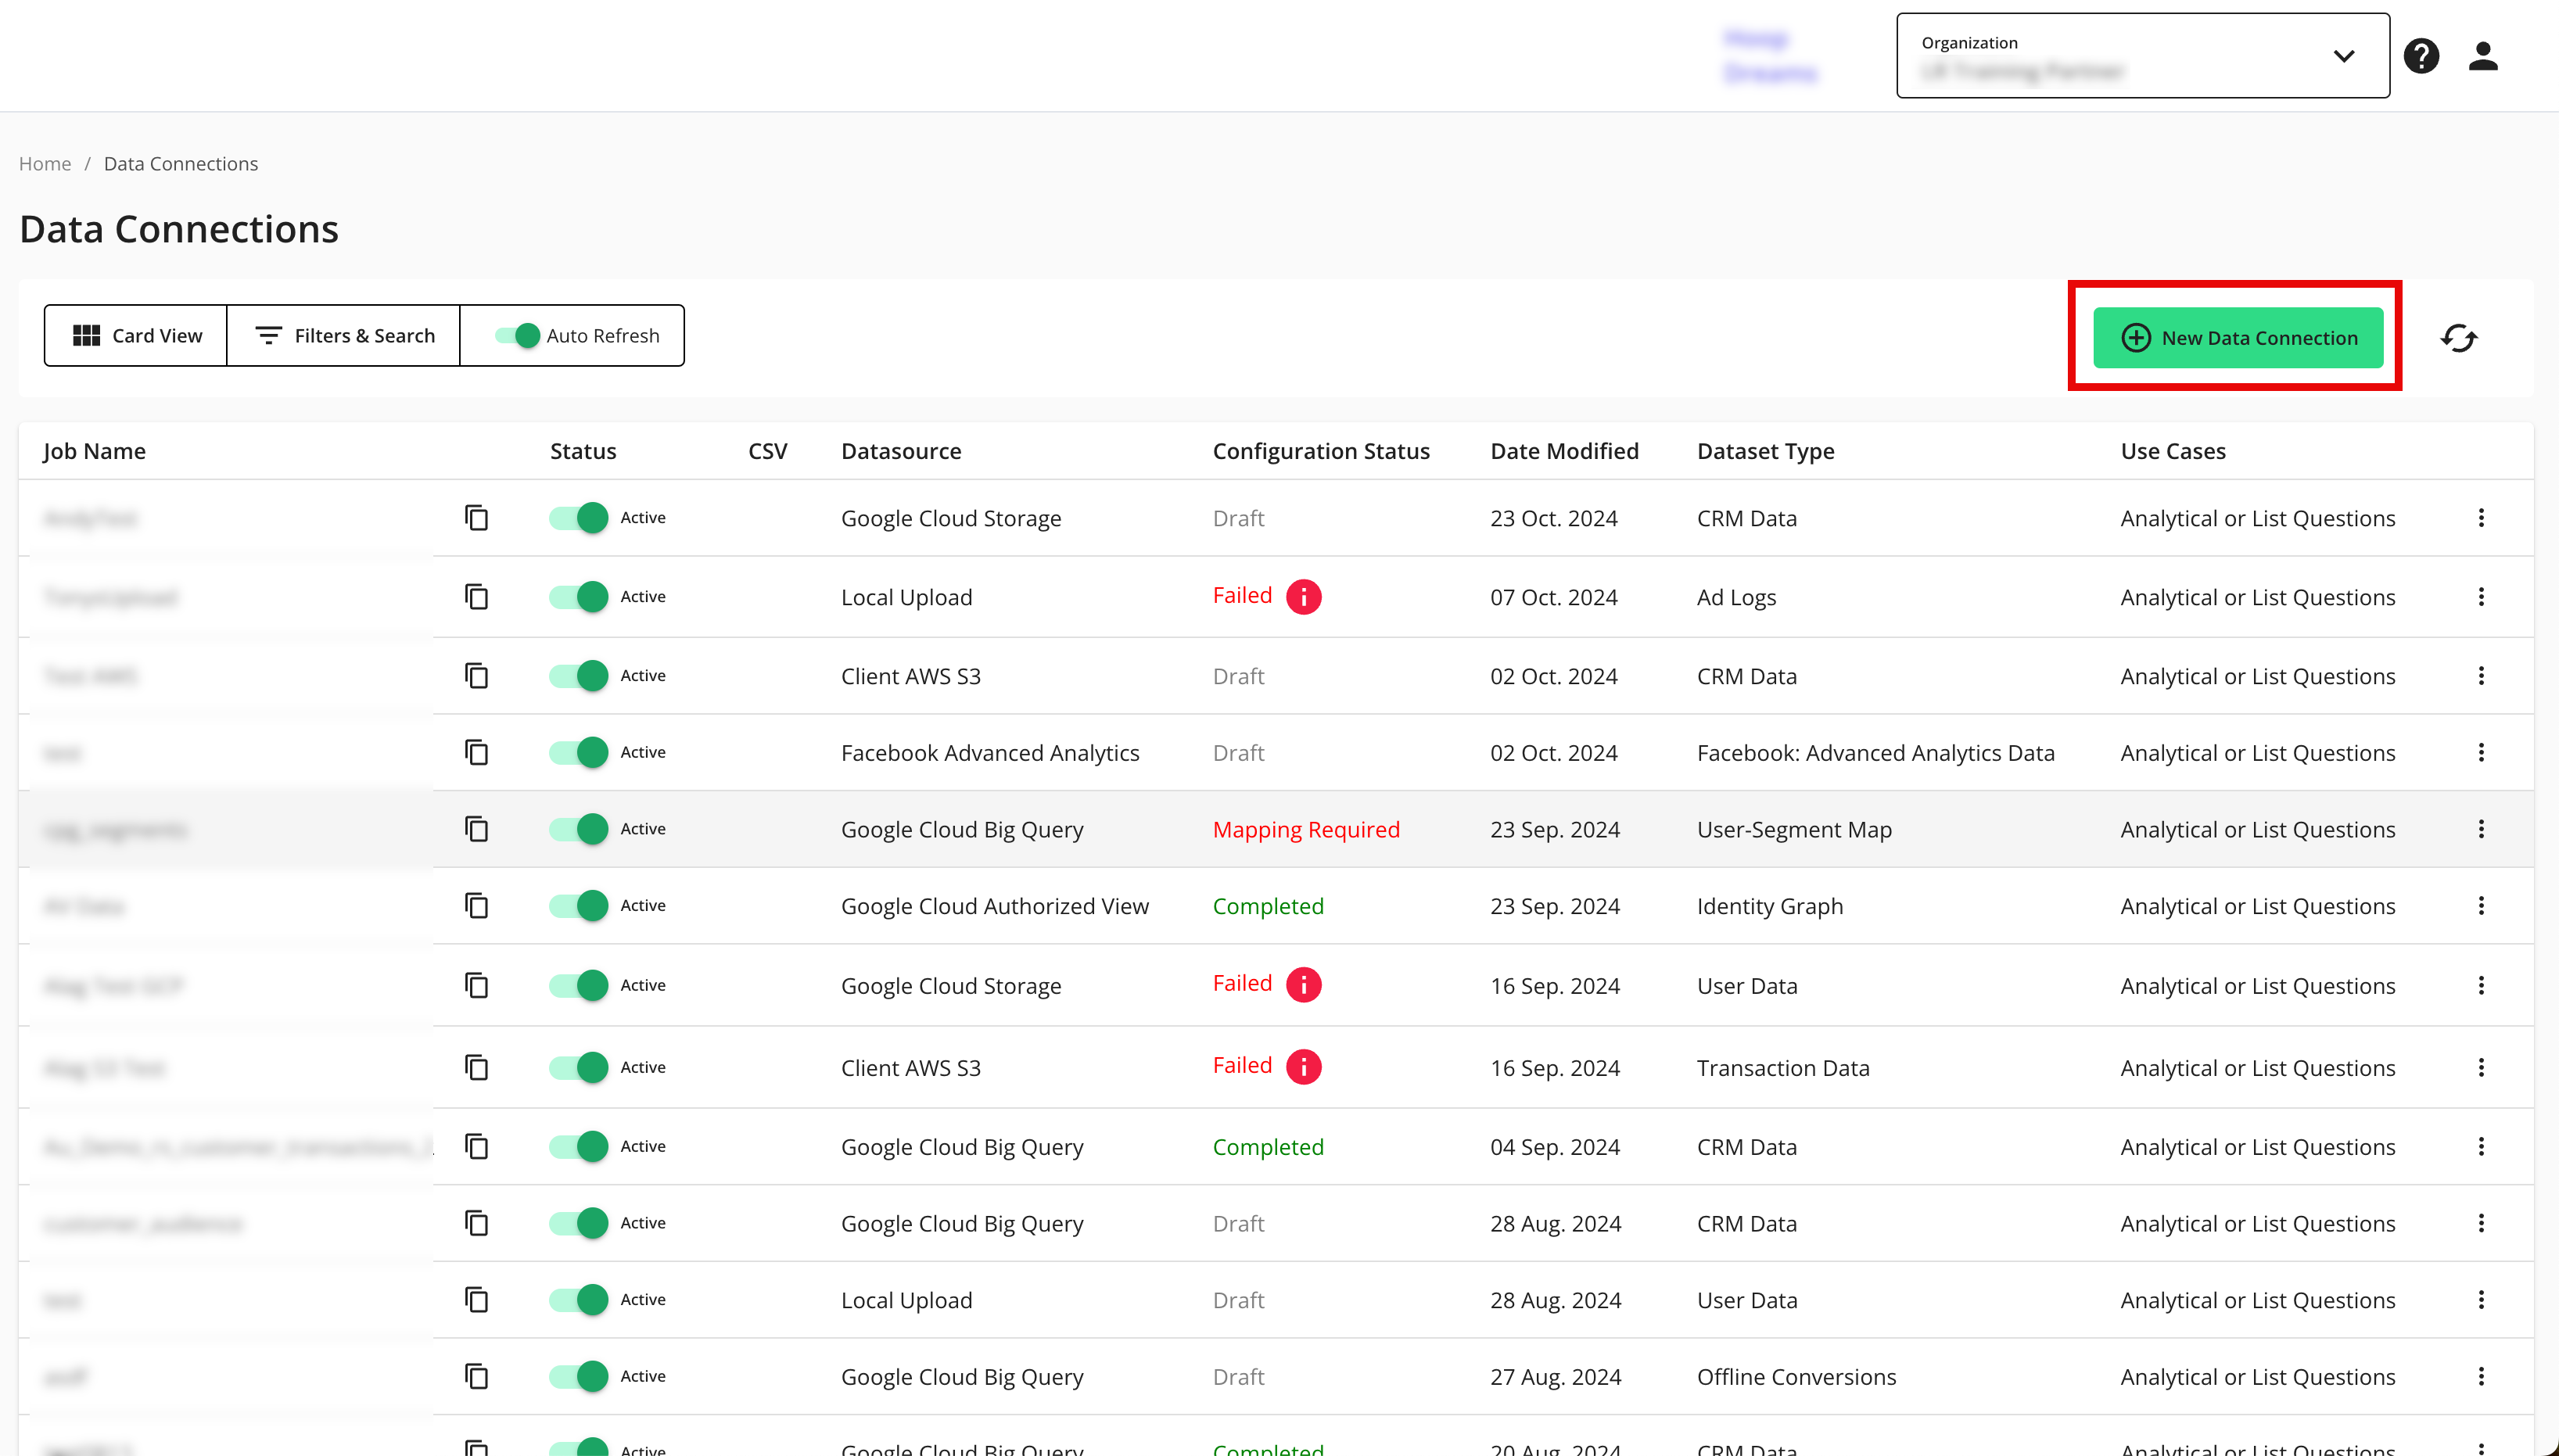
From the LiveRamp Clean Room navigation pane, select Data Management → Data Connections.
From the Data Connections page, click .
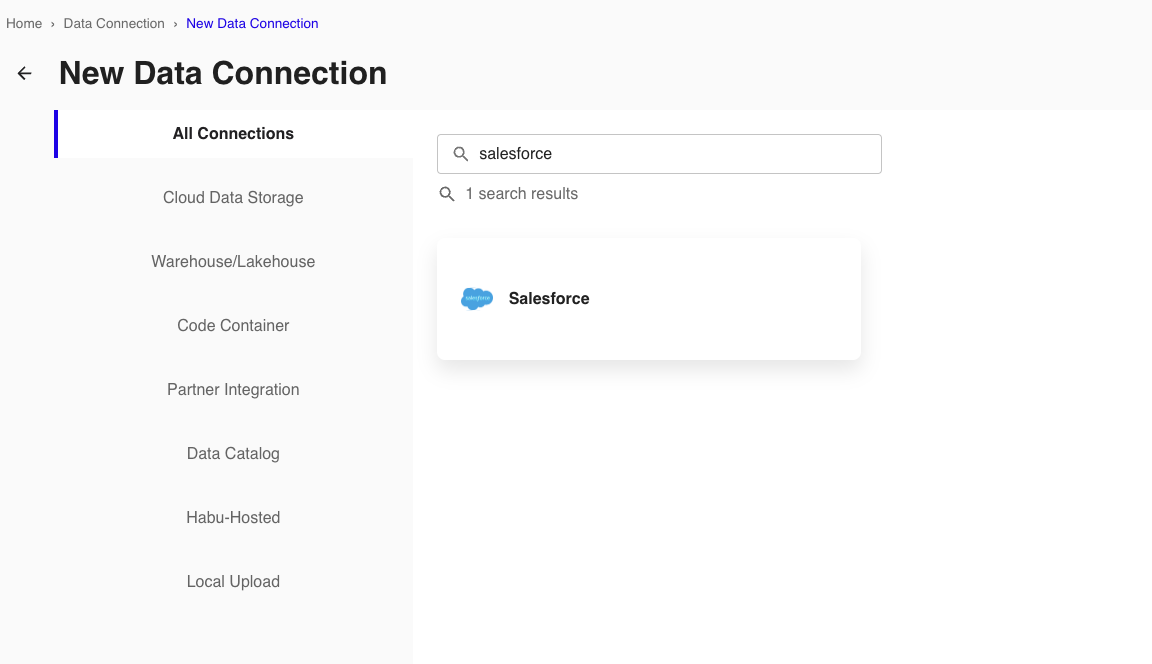
From the New Data Connection screen, select "Salesforce".
Select the credentials created in the previous procedure from the list.
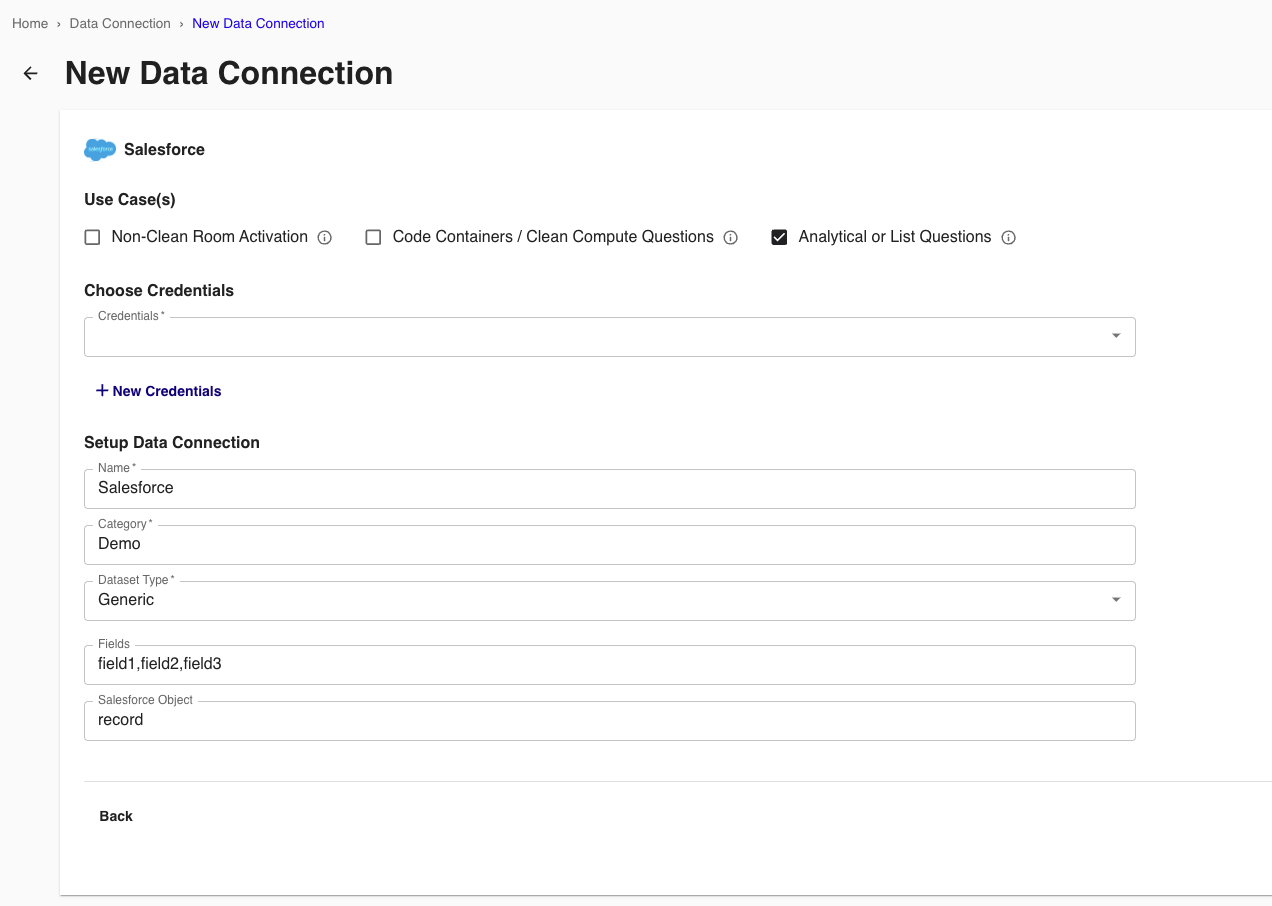
Configure the data connection:
Name: Enter a name of your choice.
Category: Enter a category of your choice.
Dataset Type: Select Generic.
Fields: Specify which fields (comma-separated fields) the data connection is for.
Salesforce Object: Specify which Salesforce object the data connection is for.
Note
The data pull is restricted to the specified Salesforce objects and fields.
Review the data connection details and click .
All configured data connections can be seen on the Data Connections page.