Configure LiveRamp-Managed IAM Role Credentials for Customer AWS S3 Bucket
LiveRamp Clean Room’s application layer enables companies to securely connect distributed datasets with full control and flexibility while protecting the privacy of consumers and the rights of data owners.
To configure a LiveRamp-managed IAM Role for a customer-hosted S3 bucket, see the instructions below.
Note
A LiveRamp-managed IAM with customer-managed S3 buckets is a less common configuration. Confirm with your LiveRamp success team before using these instructions.
If your bucket is SSE-KMS protected, you'll need to update your bucket policy to grant the Habu role the necessary permissions to access the KMS key.
LiveRamp follows a "least privilege" approach and uses a LiveRamp-managed, per-client IAM role for this AWS S3 credential. To grant access, add a bucket policy that trusts the LiveRamp-managed role ARN shown in the Clean Room UI. This credential does not support a customer-owned assume-role or ExternalId pattern. Access can be limited to only the buckets or prefixes granted in the bucket policy. If the bucket uses SSE-KMS, required KMS permissions must also be granted to the role.
Overall Steps
Perform the following overall steps to configure a LiveRamp-managed IAM Role for a customer-hosted S3 bucket:
If your bucket is SSE-KMS protected and you encrypt your data, update your KMS key policy.
For information on performing these steps, see the sections below.
Once you've performed these steps, follow the steps in "Configure an Amazon Web Services Data Connection (Customer-Hosted)" to create an AWS data connection.
Note
When selecting your credentials, you will see the IAM Role in the Credentials dropdown.
Add the Credentials
To add credentials:
Make sure you know the location of the provisioned S3 bucket.
Note
If your S3 bucket is encrypted, contact your LiveRamp CSM before to performing these steps to properly enable the encrypted bucket to be used in LiveRamp Clean Room.
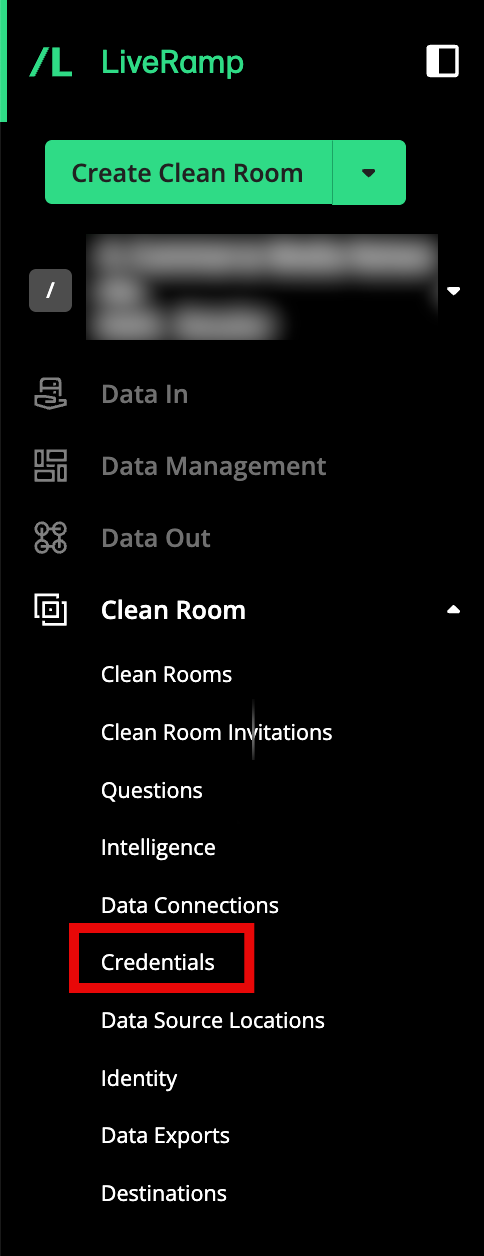
From the navigation menu, select Clean Room → Credentials to open the Credentials page.
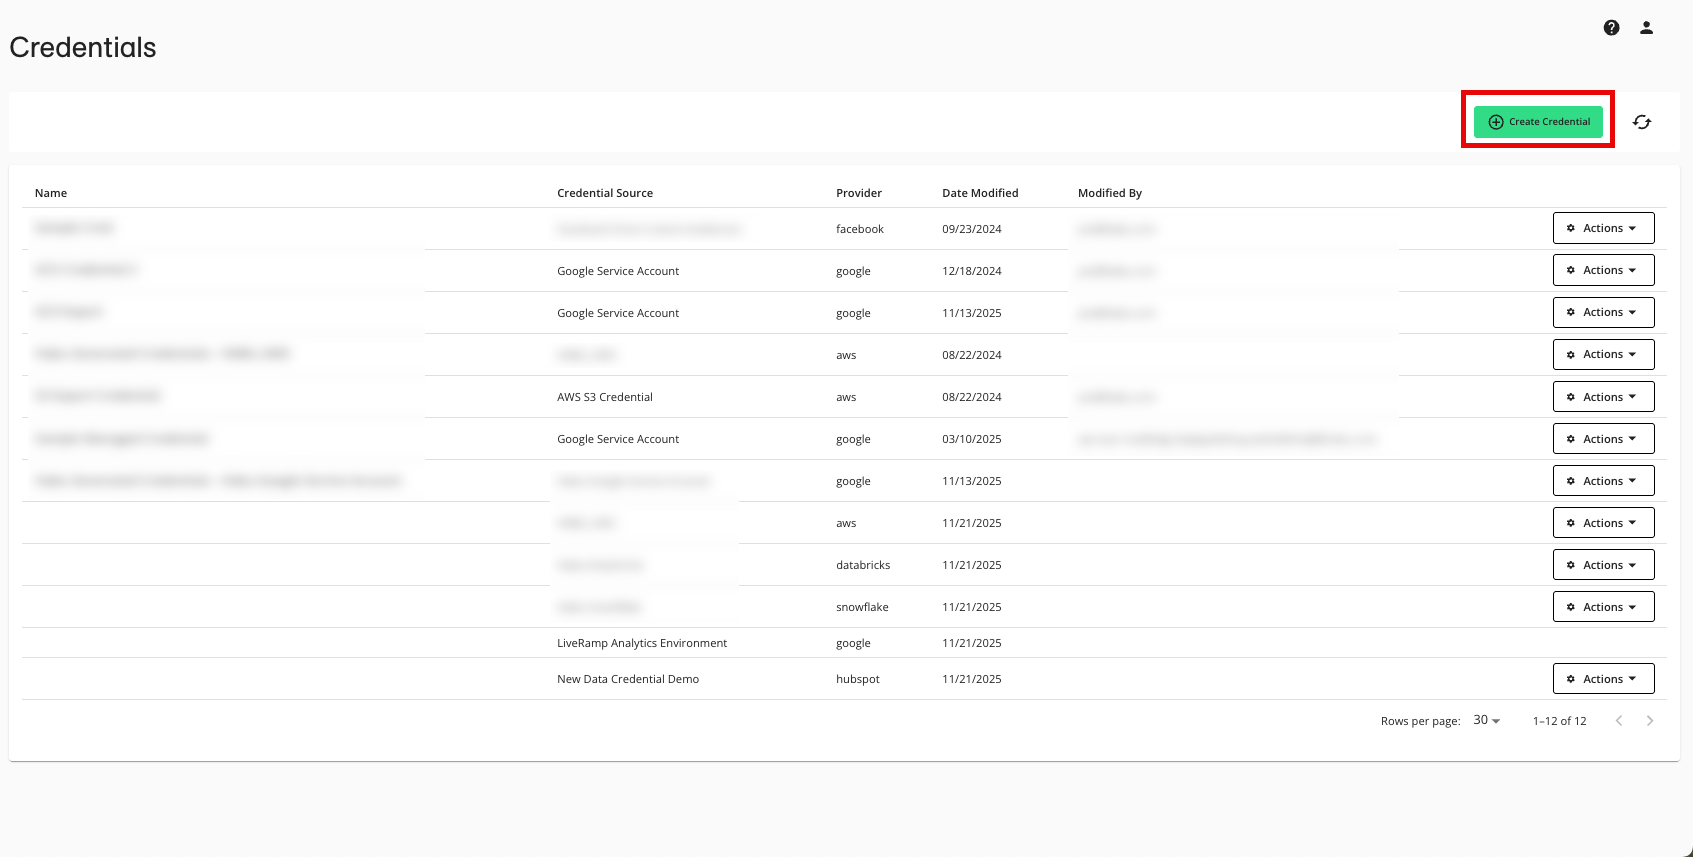
Click .
Enter a descriptive name for the credential.
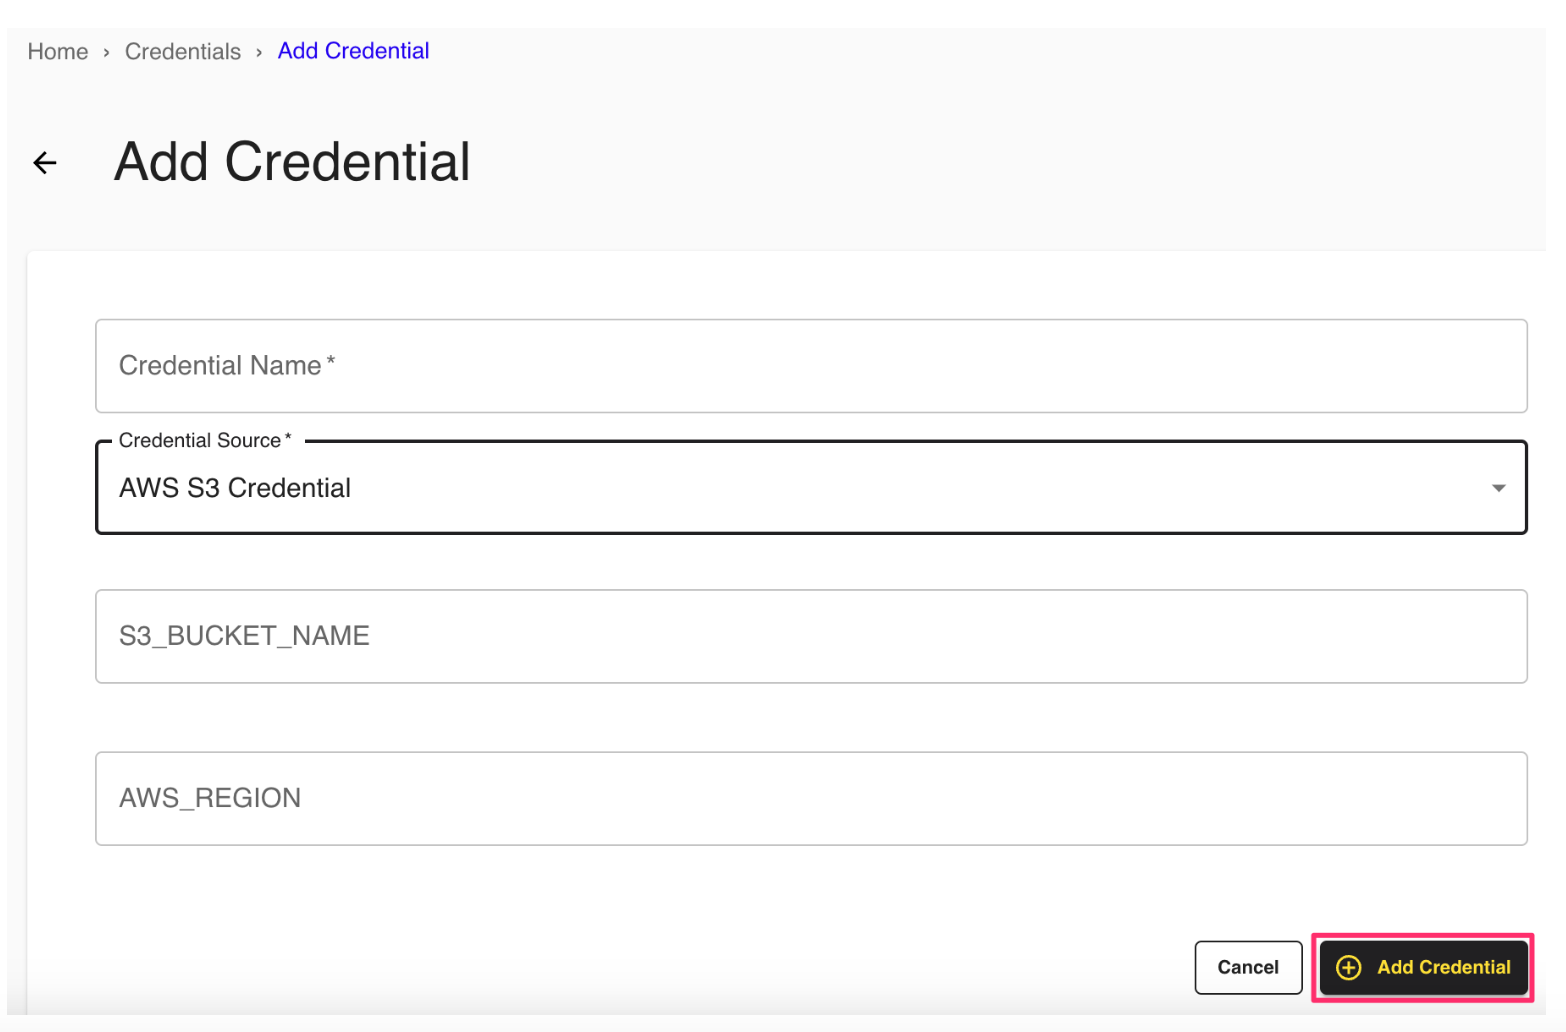
For the Credentials Type, select "AWS S3 Credential" .
In the S3 Bucket Name field, enter your S3 bucket name without the brackets.
Note
This is the portion of the S3 path prior to the first slash and without the "s3://". For example, if you were using the S3 bucket "s3:// example-bucket/uploads/daily/date=yyyy-MM-dd", you would enter "example-bucket"
In the AWS Region field, enter the region where your S3 bucket is provisioned (such as "us-east-1").
Click .
Update S3 Bucket Permissions
Now that the LiveRamp IAM role credential has been created, apply the below bucket policy and Role ARN to your S3 bucket:
From the navigation menu, select Clean Room → Credentials to open the Credentials page.
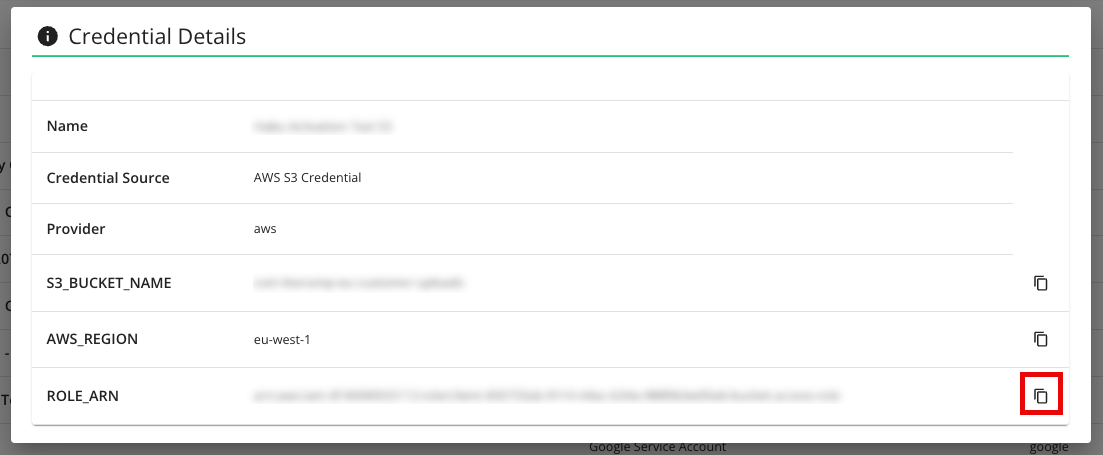
In the row for your AWS S3 credential, select View Source from the Actions dropdown.
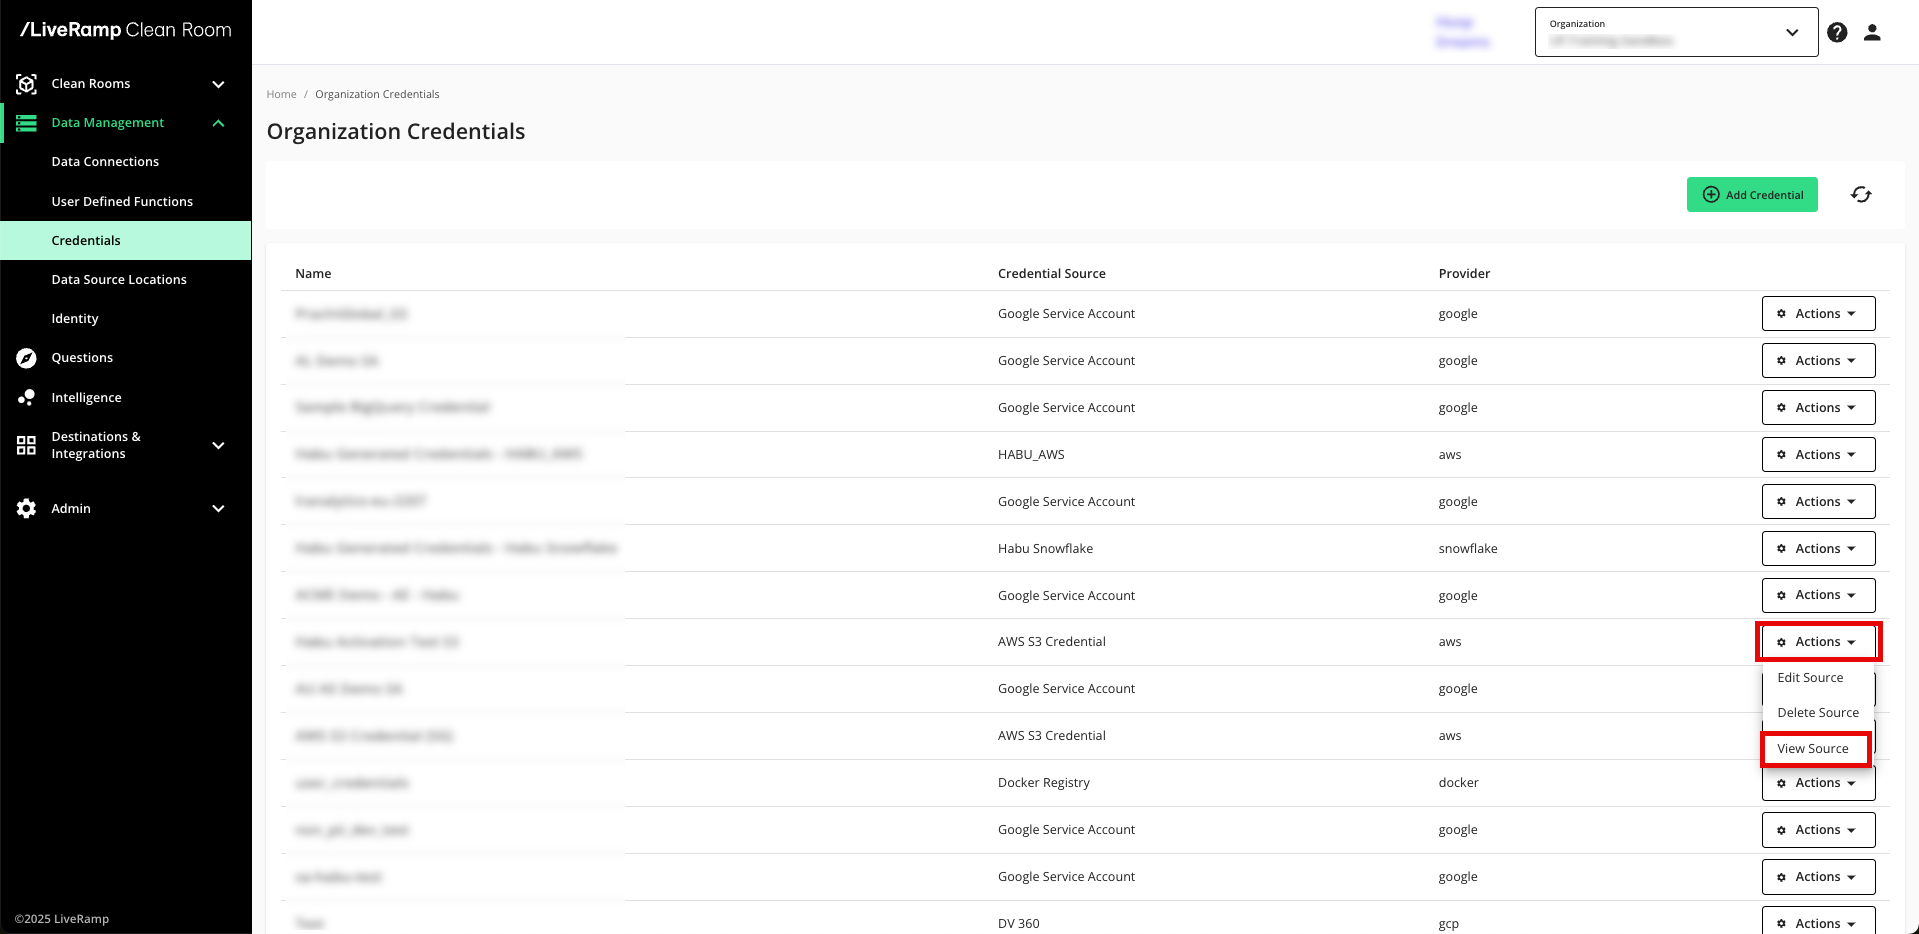
From the Credential Details screen, copy the Role ARN.
Apply the below policy to your S3 bucket after modifying the policy in order to grant LiveRamp’s IAM Role access:
Paste the Role ARN into the policy where it states "ENTER YOUR ROLE_ARN OBTAINED ABOVE" between the double quotes.
Enter your S3 bucket name without the brackets into both lines of the policy where it says "[ENTER YOUR S3 BUCKET NAME]".
Note
This is the portion of the S3 path prior to the first slash and without the "s3://".
{
   "Version": "2012-10-17",
   "Statement": [
      {
         "Sid": "GetAndList",
         "Effect": "Allow",
         "Principal": {
            "AWS": "ENTER YOUR ROLE_ARN OBTAINED ABOVE"
         },
         "Action": [
            "s3:GetObject",
            "s3:ListBucket"
         ],
         "Resource": [
            "arn:aws:s3:::[ENTER YOUR S3 BUCKET NAME]",
            "arn:aws:s3:::[ENTER YOUR S3 BUCKET NAME]/*"
         ]
      }
   ]
}
Alternatively, you may use the below policy in order to restrict LiveRamp read access to a specific path within the S3 bucket:
{
     "Version": "2012-10-17",
     "Statement": [
         {
               "Sid": "GetPath",
               "Effect": "Allow",
               "Principal": {
                    "AWS": "ENTER YOUR ROLE_ARN OBTAINED ABOVE"
               },
               "Action": "s3:GetObject",
               "Resource": "arn:aws:s3:::[ENTER YOUR S3 BUCKET NAME]/[PATH TO FOLDER]/*"
          },
          {
               "Sid": "ListPath",
               "Effect": "Allow",
               "Principal":
                    { "AWS": "ENTER YOUR ROLE_ARN OBTAINED ABOVE"
               },
               "Action": "s3:ListBucket",
               "Resource": "arn:aws:s3:::[ENTER YOUR S3 BUCKET NAME]",
               "Condition": {
                    "StringLike": {
                         "s3:prefix": "[PATH TO FOLDER]/*"
                     }
                }
          }
     ]
}
Once you've performed these steps, follow the steps in "Configure an Amazon Web Services Data Connection (Customer-Hosted)" to create an AWS data connection.
Note
When selecting your credentials, you will see the IAM Role in the Credentials dropdown.
Update the KMS Key Policy
If your bucket is SSE-KMS protected and you encrypt your data, you'll need to update your KMS key policy.
Note
If you do not encrypt your data in an SSE-KMS protected bucket, you do not have to perform this step.
The KMS key policy must explicitly allow the Habu role to use the key. Without this, even if the role has the correct IAM permissions, it will not be able to decrypt or encrypt objects in the S3 bucket.
Add a statement like the following to your KMS key policy:
{

 "Sid": "AllowHabuRoleToUseKey",

 "Effect": "Allow",

 "Principal": {

   "AWS": "arn:aws:iam::ACCOUNT-ID:role/<habu-client-role>"

 },

 "Action": [

   "kms:Decrypt",

   "kms:Encrypt",

   "kms:ReEncrypt*",

   "kms:GenerateDataKey*",

   "kms:DescribeKey"

 ],

 "Resource": "*",

 "Condition": {

   "StringLike": {

     "kms:EncryptionContext:aws:s3:arn": "arn:aws:s3:::YOUR_BUCKET_NAME/*"

   }

 }

}