Map the Fields for a Data Connection
Once you’ve created a data connection, Clean Room attempts to connect to your data and read its schema. Once that's successful, the status for the data connection changes from "Verifying Access" to "Mapping Required".
Once the status is “Mapping Required”, you need to map the dataset’s fields before the dataset associated with that data connection is ready to use.
Field mapping gives LiveRamp Clean Room various information about the data connection:
Which columns users can query
Which columns contain identifiers for matching records
Which columns contain PII
Which columns can be used to partition the data for questions and (optionally) the values users can enter for those partition parameters when running questions that use this dataset.
Whether identity resolution should be performed to create additional datasets resolved to LiveRamp identifiers and the schedule for monthly full refreshes of those datasets.
Note
Before mapping the fields, we recommend confirming any expectations your partners might have for field types for any specific fields that will be used in questions.
To map the fields for a data connection:
Note
The screens and fields referenced might vary based on your organization’s configuration, enabled features, permissions, and the selected connection type. Some steps or fields may not appear for your organization.
From the row for the newly-created data connection, click the More Options menu (the three dots) and then click .
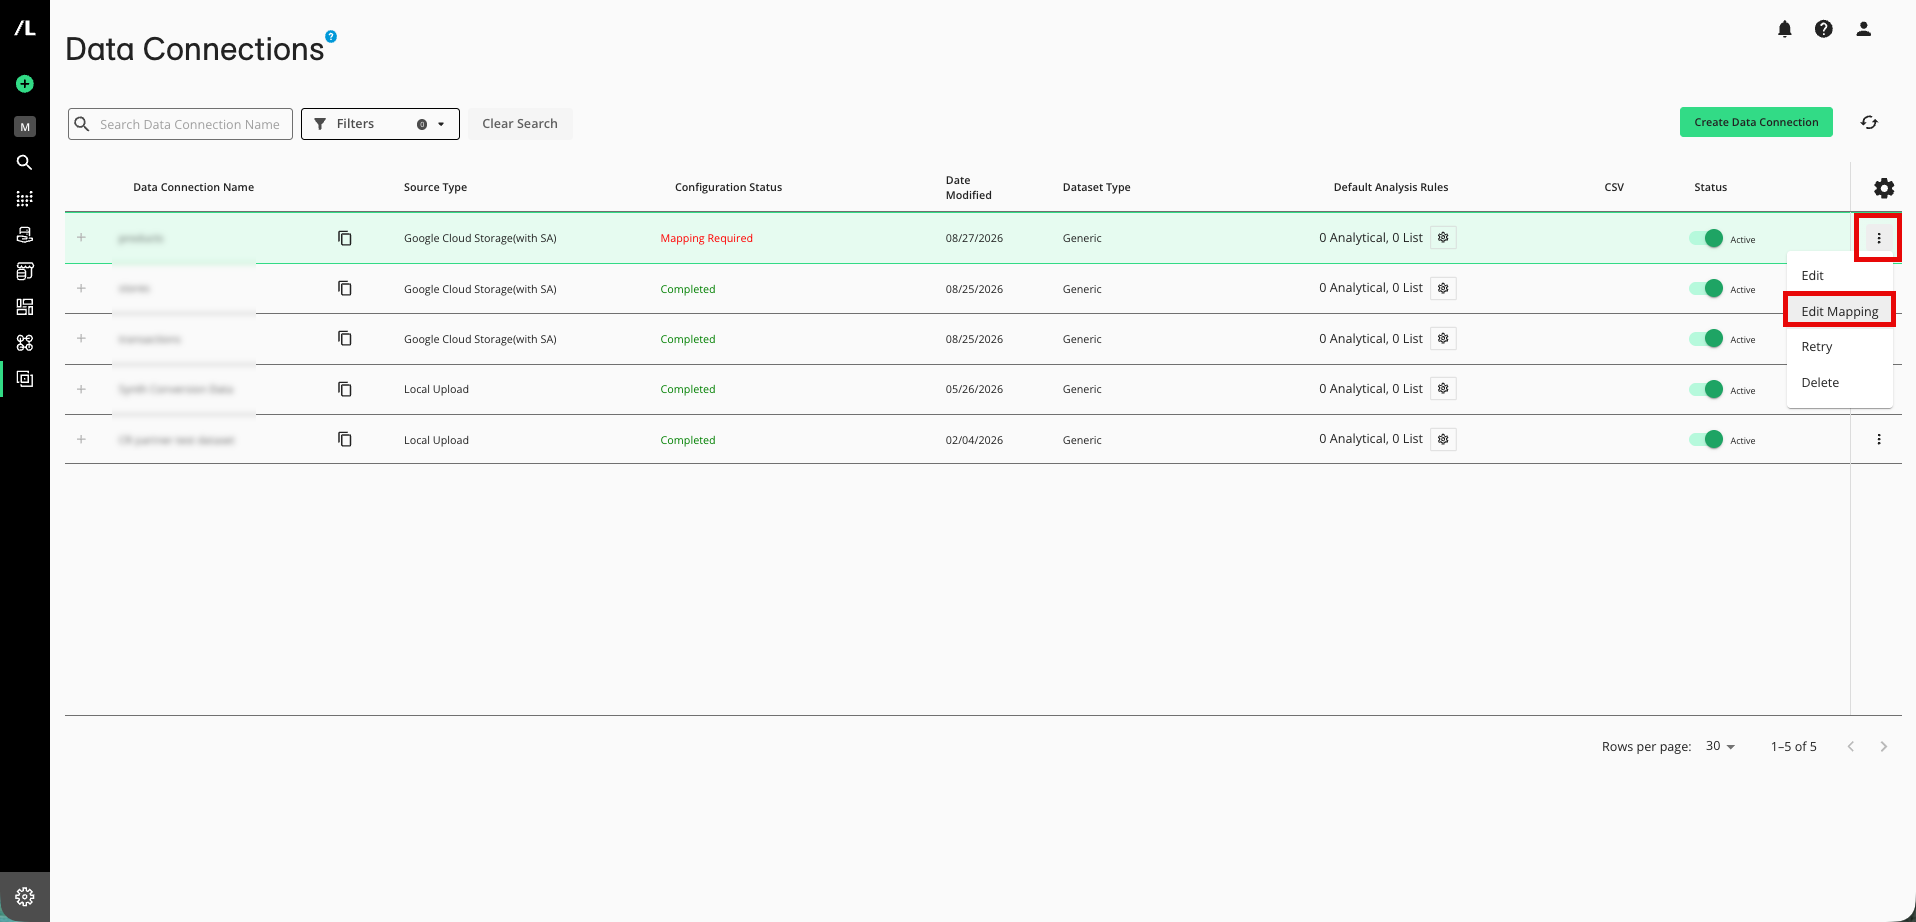
The Map Fields screen opens and the file's column names auto-populate.
From the Map Fields screen, perform the following steps and then click :
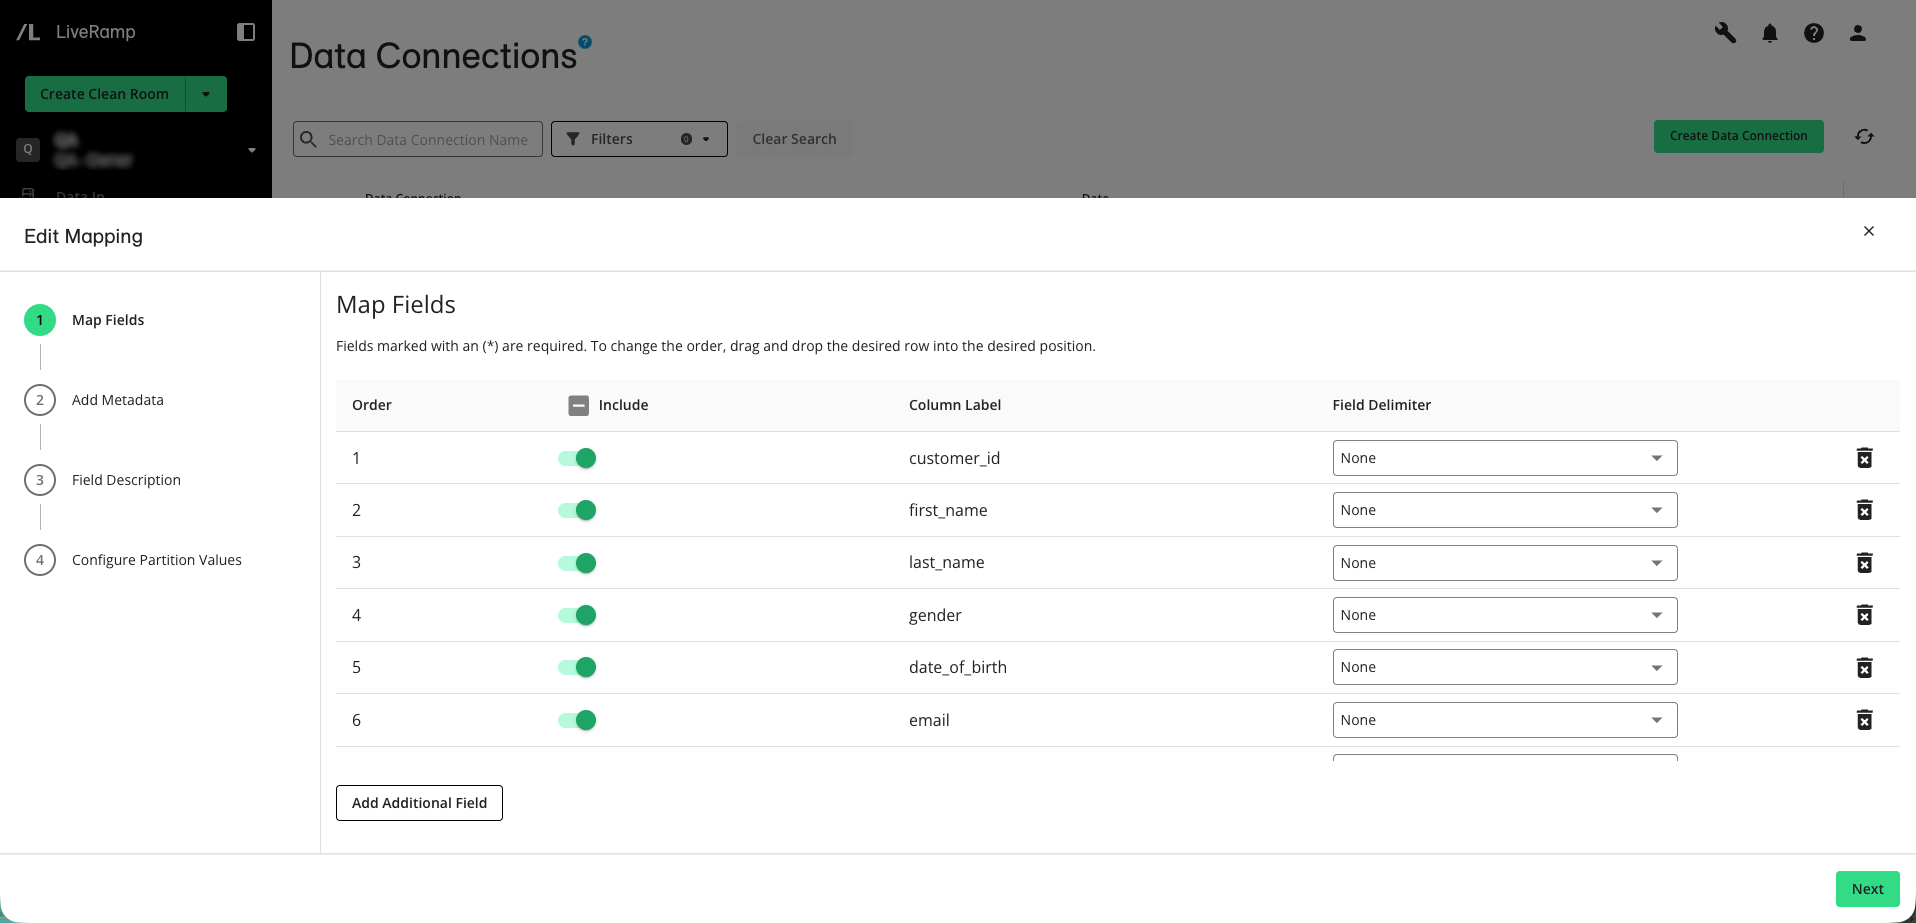
For any columns that you do not want to be queryable, slide the Include toggle to the left.
If needed, adjust the field delimiter for any fields where the delimiter has not been parsed correctly.
Note
This is not common.
If you need to add an additional field, click and then enter a column name.
Note
Once you’ve added a field, you can edit the column label. You can also delete the added field by clicking the delete icon.
From the Add Metadata screen, perform the following steps and then click :
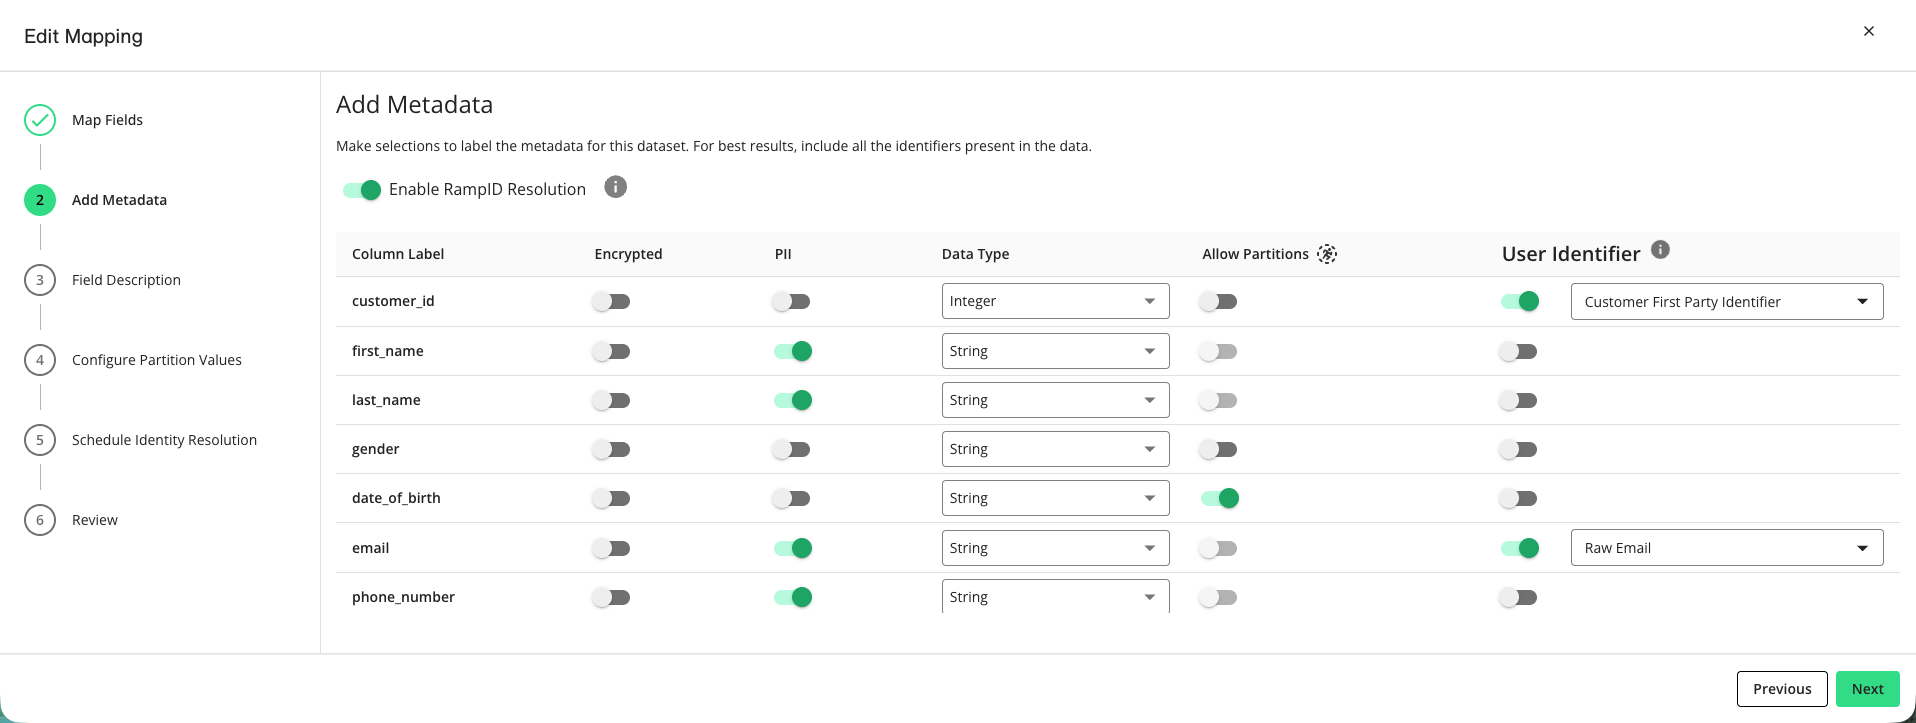
If you want to create additional datasets where all of the identifiers are resolved to LiveRamp identifiers (RampIDs and/or Known IDs), slide the “Enable Identity Resolution” toggle to the right.
Note
This toggle is only displayed if your organization has been enabled for Identity Resolution in LiveRamp Clean Room. For more information, see "Getting Started with Identity Resolution in LiveRamp Clean Room".
If the values in a field are encrypted in the source data and must be decrypted during processing, slide the “Encrypted” toggle to the right (leave it to the left for plaintext values).
For any column that contains PII data, slide the PII toggle to the right.
Note
If your data contains a column with RampIDs, do not slide the PII toggle for that column. Mark the RampID column as a User Identifier and select "RampID" as the identifier type. If the data contains a RampID column, no other columns can be enabled as PII.
Fields labeled as PII are protected from being returned as columns in analytical question results by default.
Adjust the data type (field type) for any column where the data type parsed by the system is incorrect (for more information on supported field types, see "Field Types for Data Connections").
Note
Make sure to select a field type that accurately reflects the data in that field.
For columns that you want to partition, slide the Allow Partitions toggle to the right.
If a column contains PII or any other type of identifier, slide the User Identifier toggle to the right and then select the appropriate user identifier type.
Note
When you select "Raw Email" as the user identifier for an email column, those email addresses will be automatically SHA256 hashed. The resulting hashed emails are then available for querying in your clean rooms.
If you are using Identity Resolution on this data connection, you must mark the CID field as a User Identifier with Customer First Party Identifier selected.
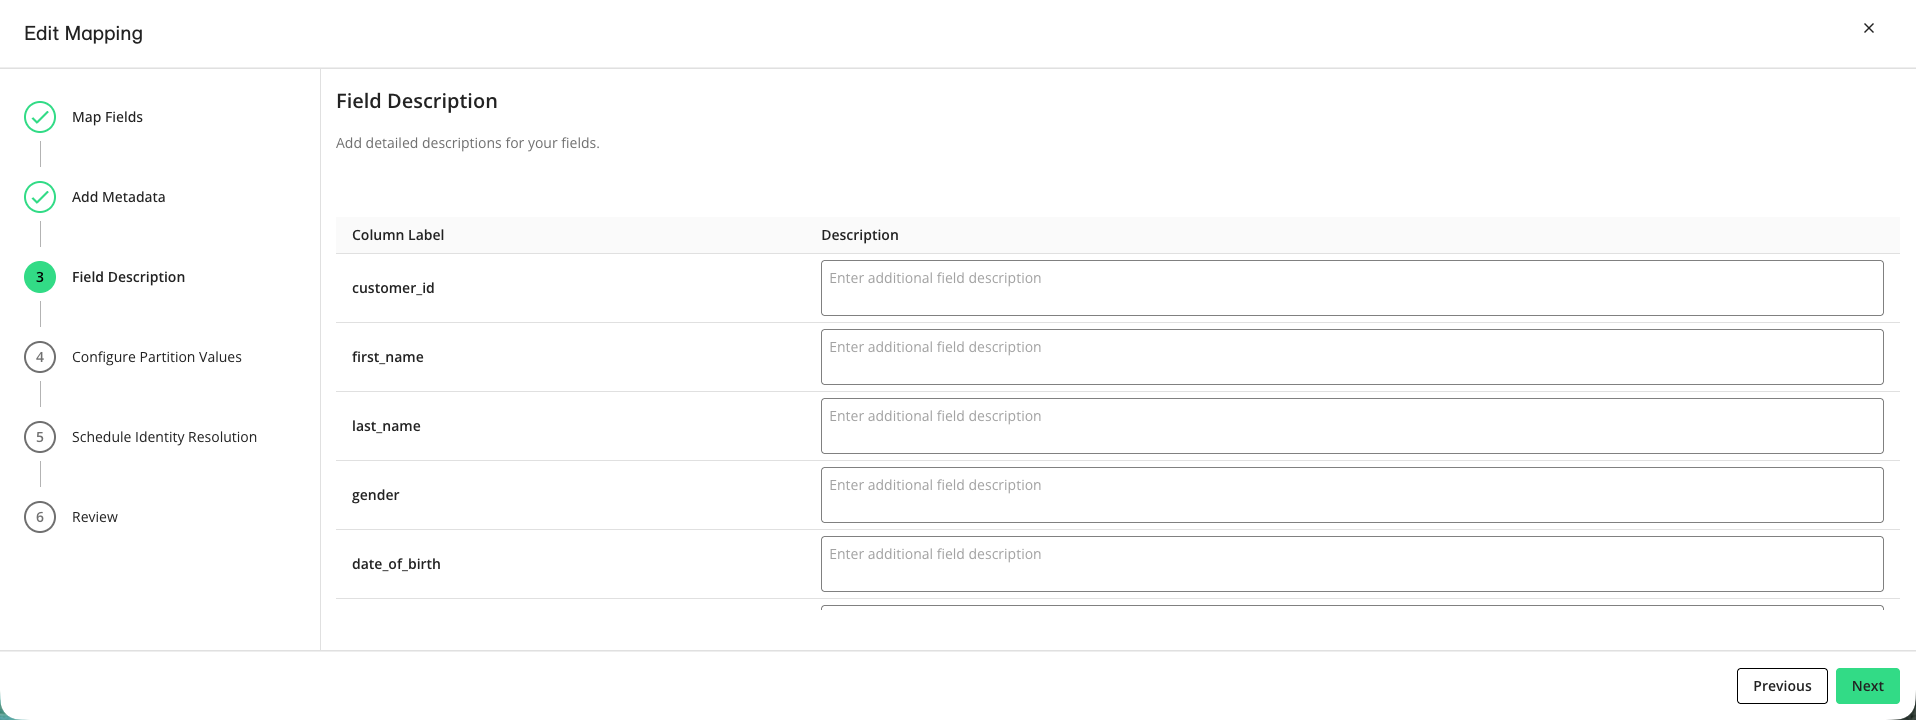
From the Field Description step, add any desired descriptions for the fields and then click .
From the Configure Partition Values screen, perform the steps in “Configure Partition Parameter Values” if you want to configure allowed values for any fields that you have enabled for partitioning. When done, click .
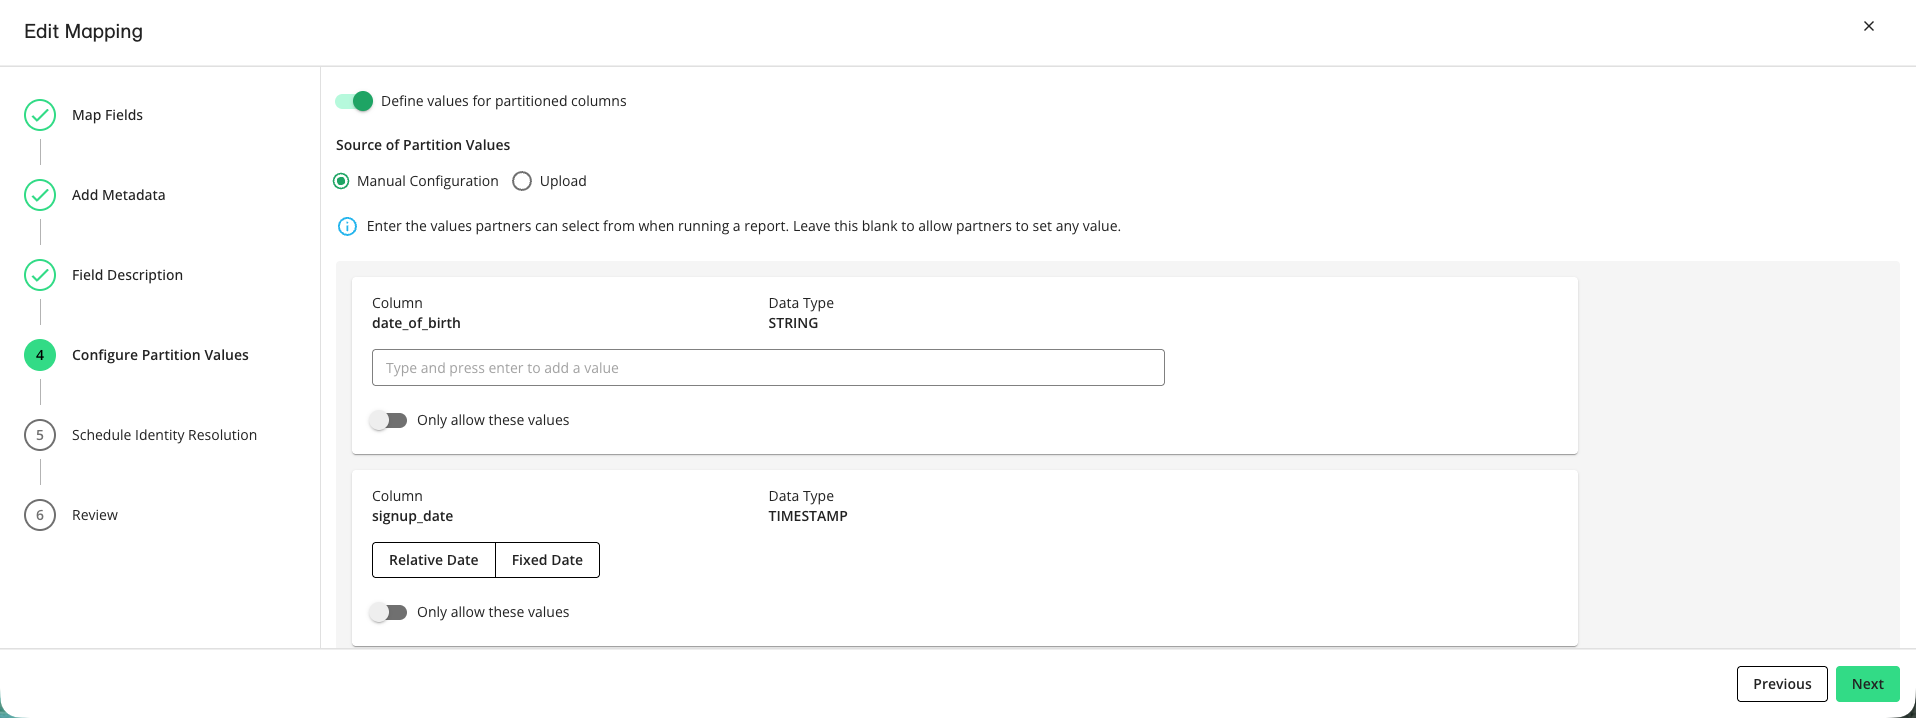
From the Schedule Identity Resolution screen, perform the following steps and then click :
Note
This step is only displayed if you enabled the toggle for “Enable Identity Resolution” during the Add Metadata step.
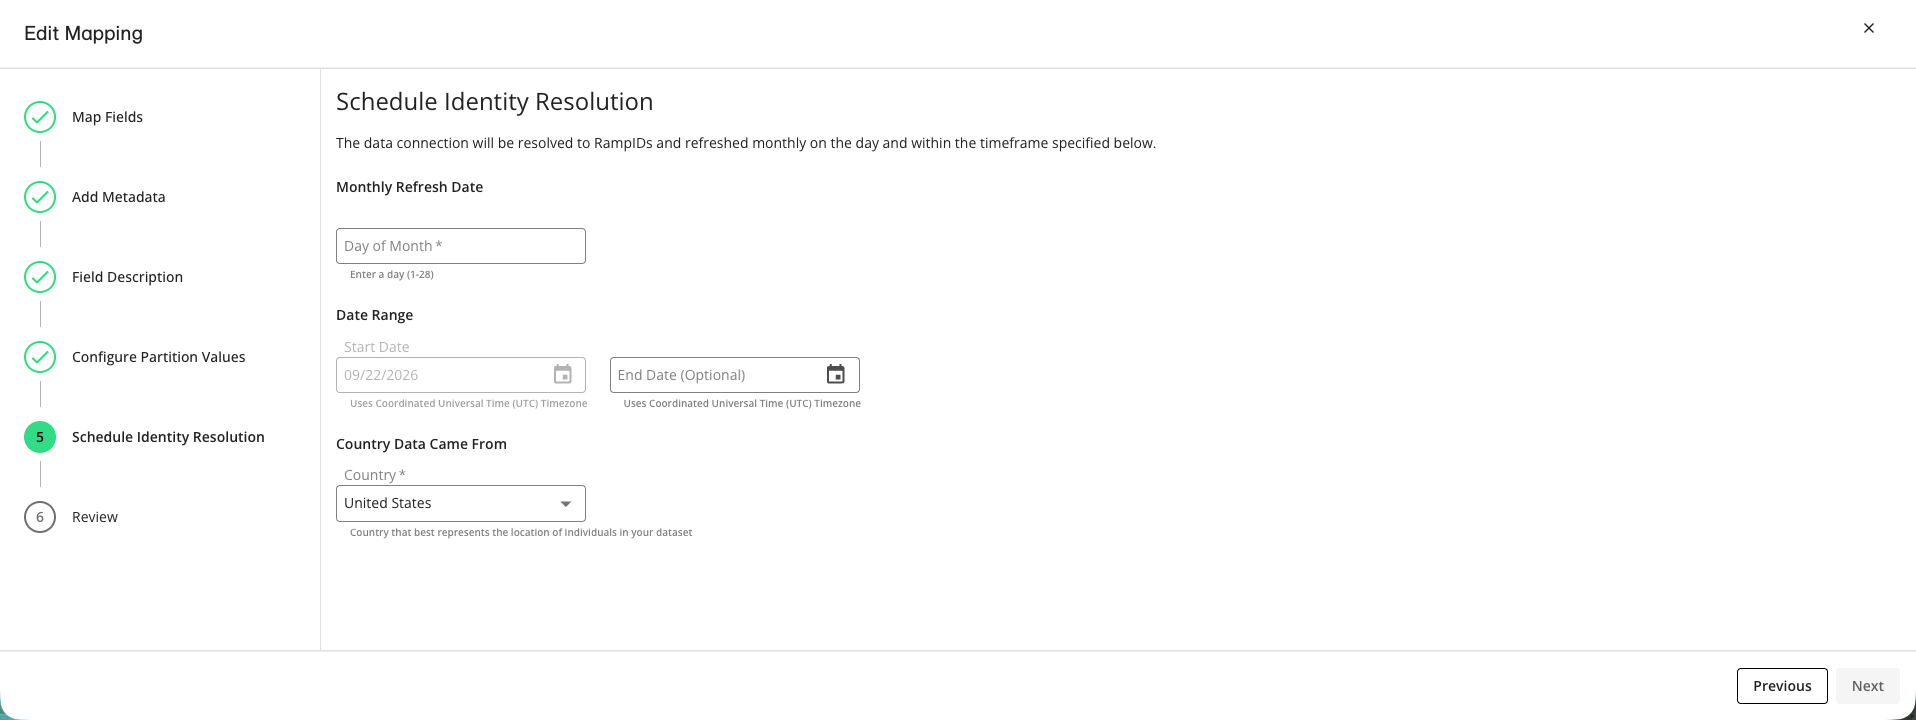
Enter the day of the month (a number from 1 to 28) when you want the monthly full identity resolution refresh to take place.
In the Date Range area, enter or select an optional end date (in UTC) for the identity resolution process.
Note
The start date defaults to the current date and is not editable.
In the Country Data Came From area, select the country where the data originated.
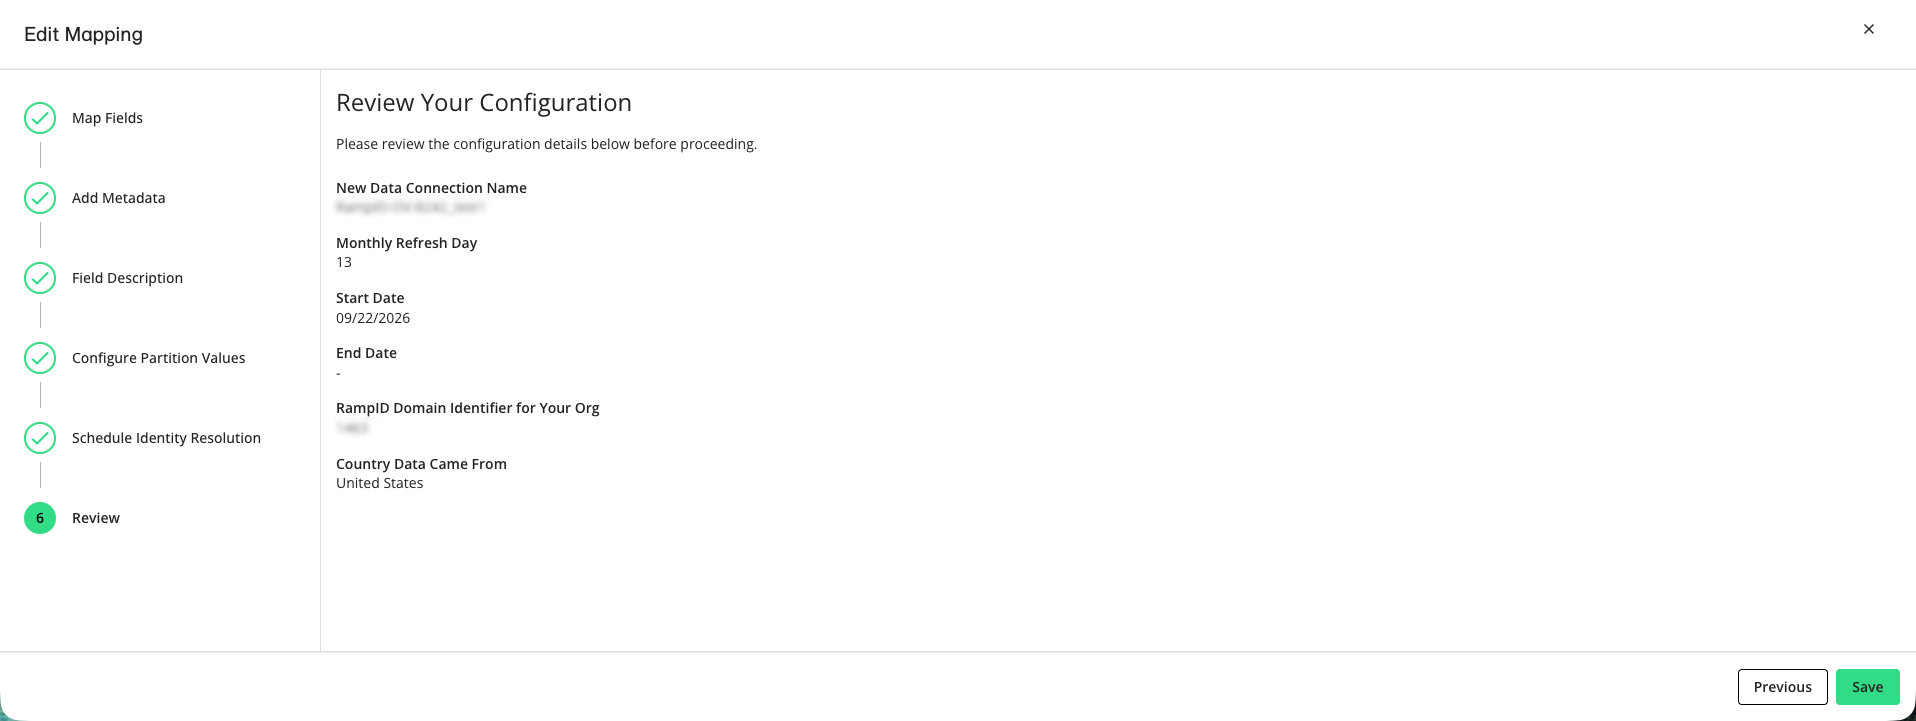
From the Review screen, look over all the configuration details and then click .
Note
If your organization does not yet have a RampID domain identifier (domain encoding), click to configure one. Enter a name and a valid four-character alphanumeric RampID domain identifier. If one is already configured, it will appear in place of the button. If you’re unsure which domain identifier to use, contact your LiveRamp representative.
Your data connection configuration is now complete and the status changes to "Completed".
You can now provision the resulting dataset to your desired clean rooms.