View Delivery Status
If you want to check on the status of the segment deliveries in a particular destination account or troubleshoot a delivery issue, you can view the delivery status for each of your actively distributing destination accounts in the following ways, depending on the level of detail you want to see:
If you want to check on the status of the segment deliveries in a particular destination account or troubleshoot a delivery issue, you can view the delivery status for each of your actively distributing destination accounts in the following ways, depending on the level of detail you want to see:
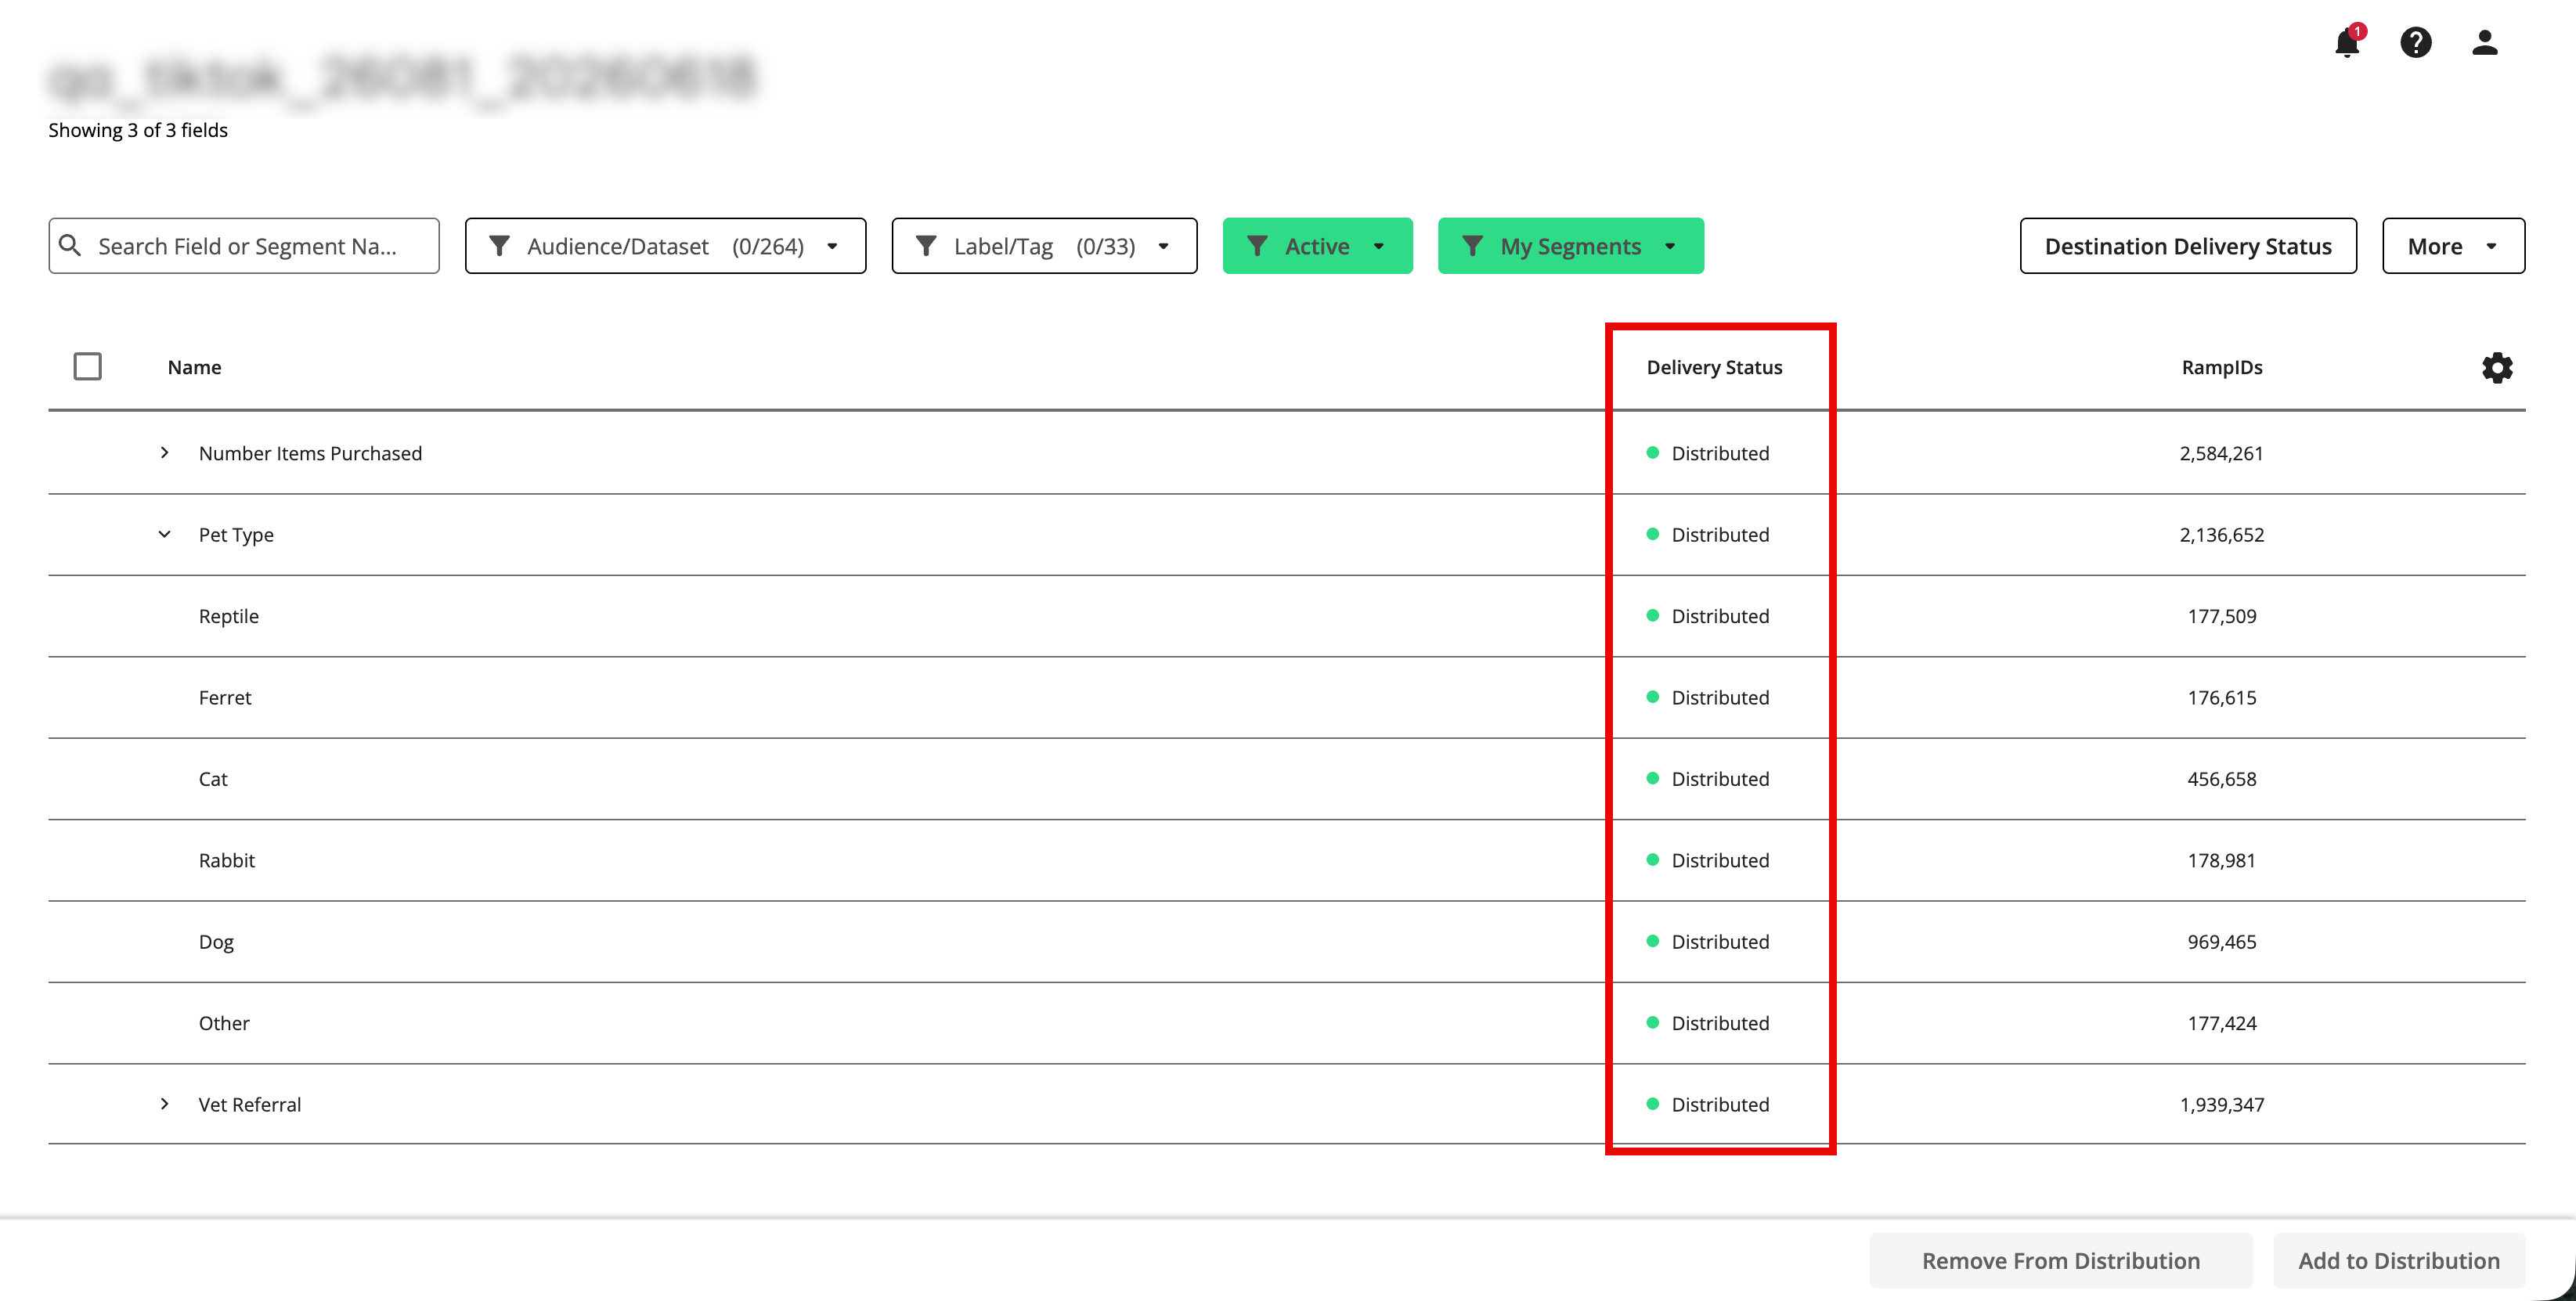
Overall segment delivery status: From the Manage Segments page, you can view the overall delivery status for each actively-distributing field and segment.
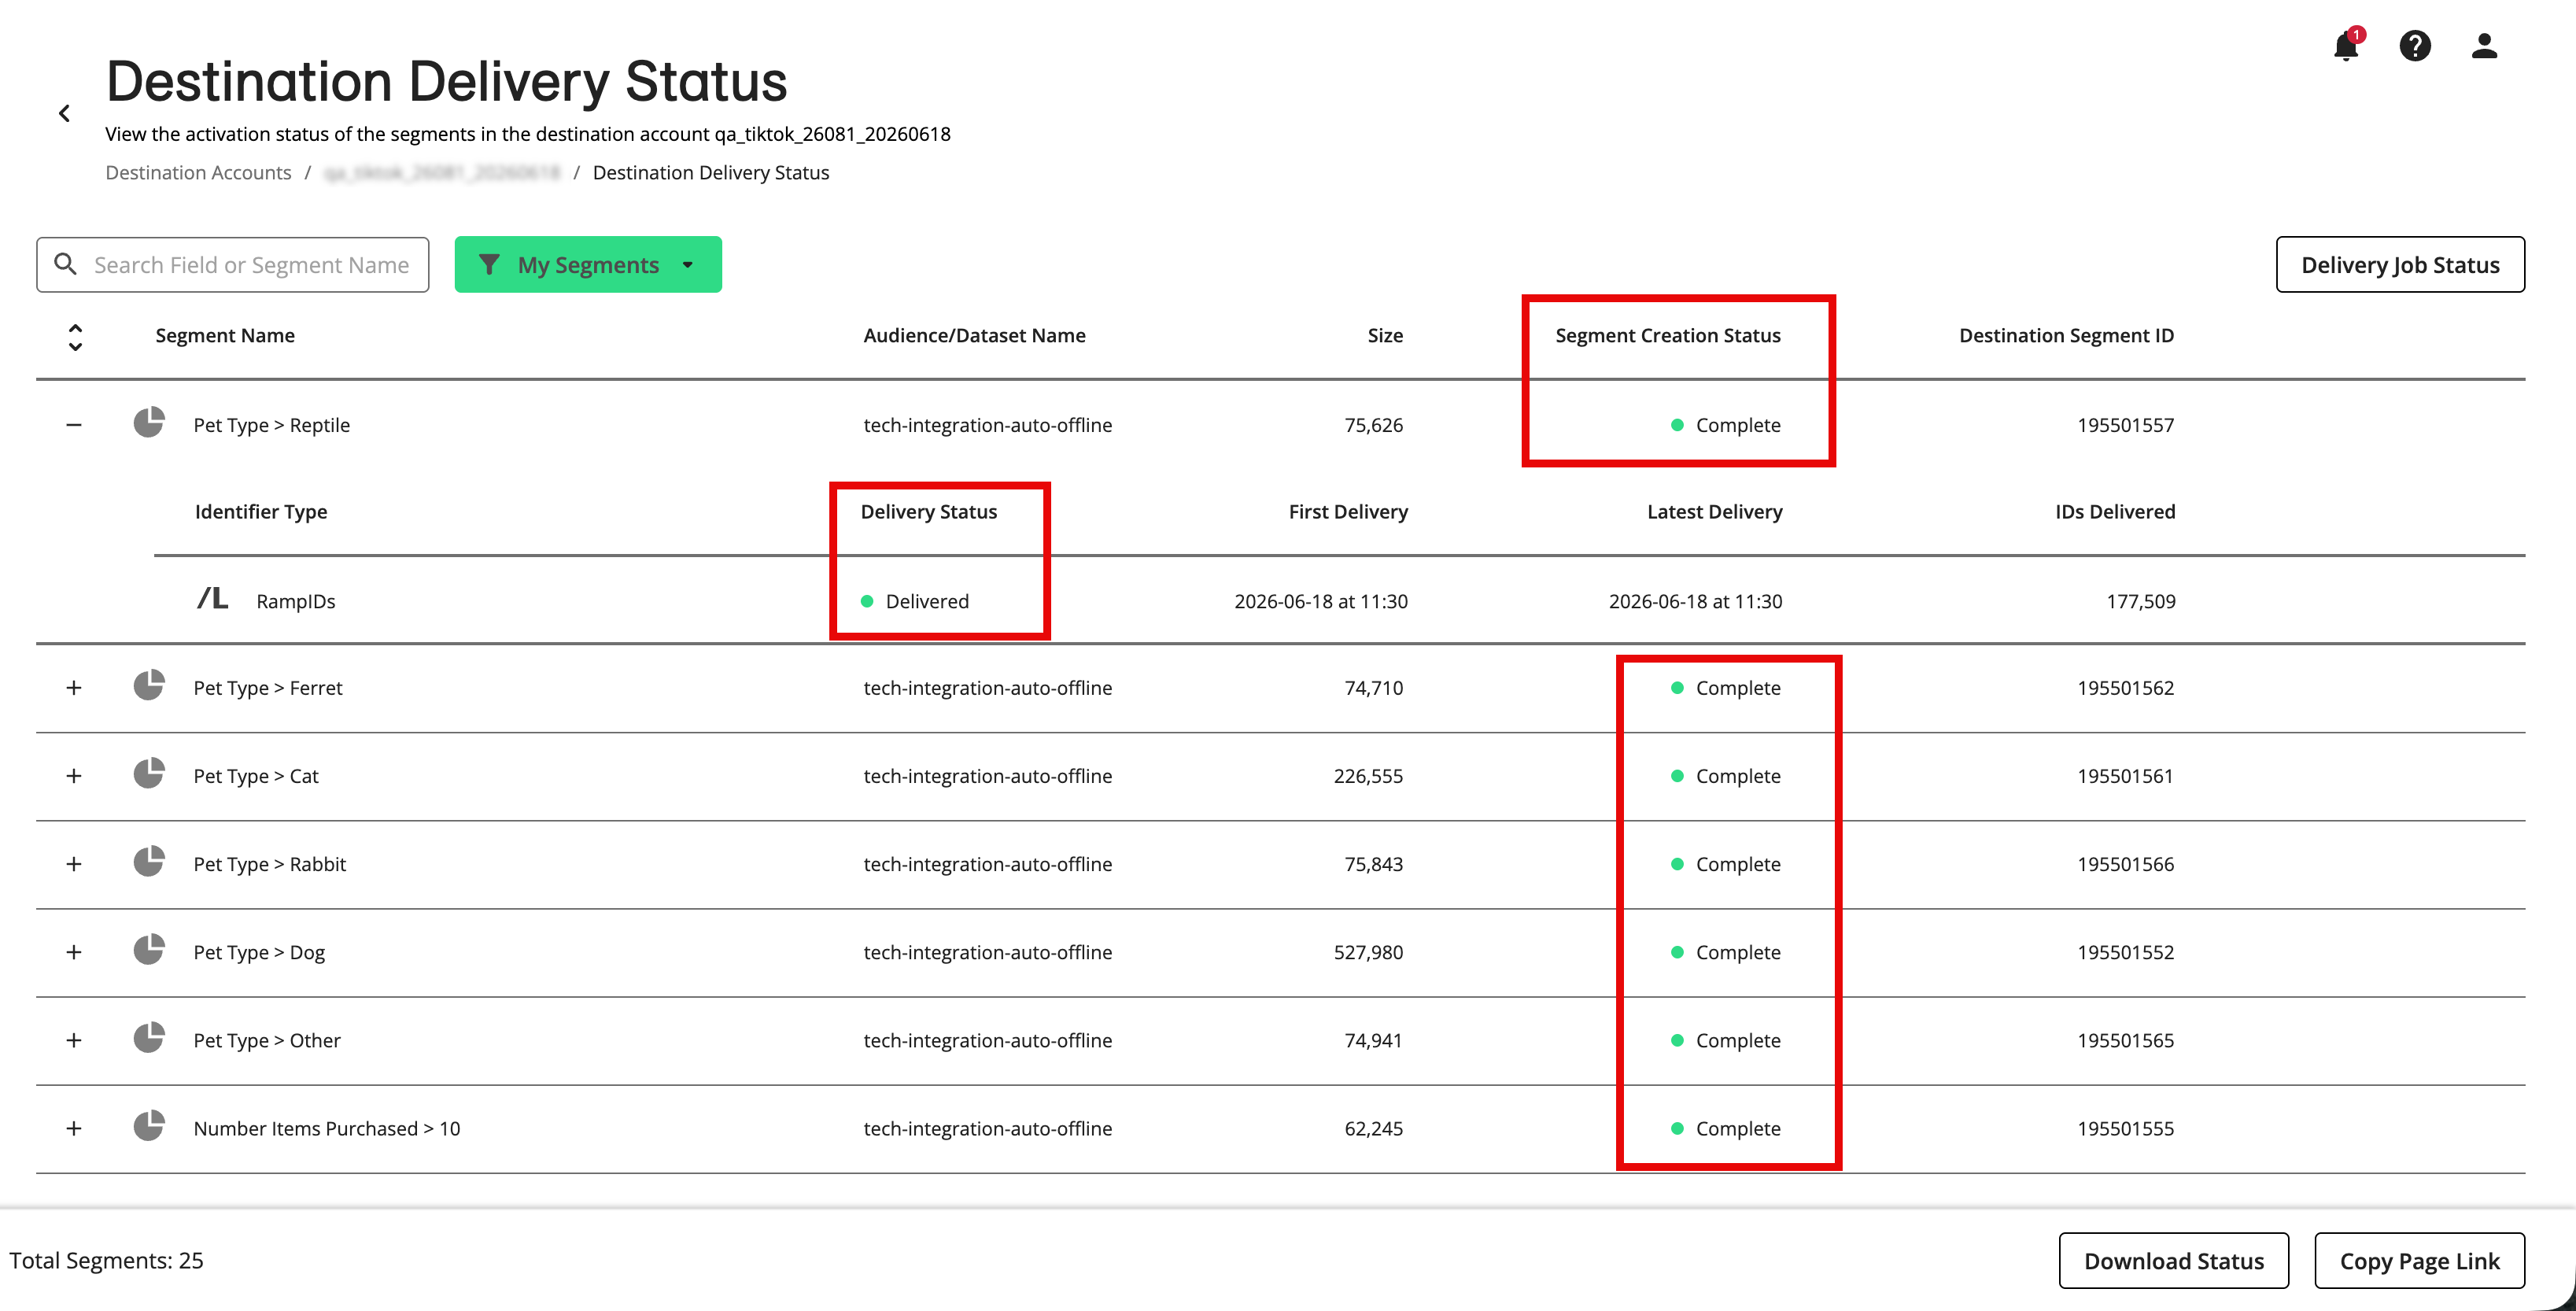
Latest delivery job status: From the Destination Delivery Status page, you can see the latest activation status of each actively-distributing segment, including the status for the latest individual delivery jobs (broken out by identifier type) for those segments.
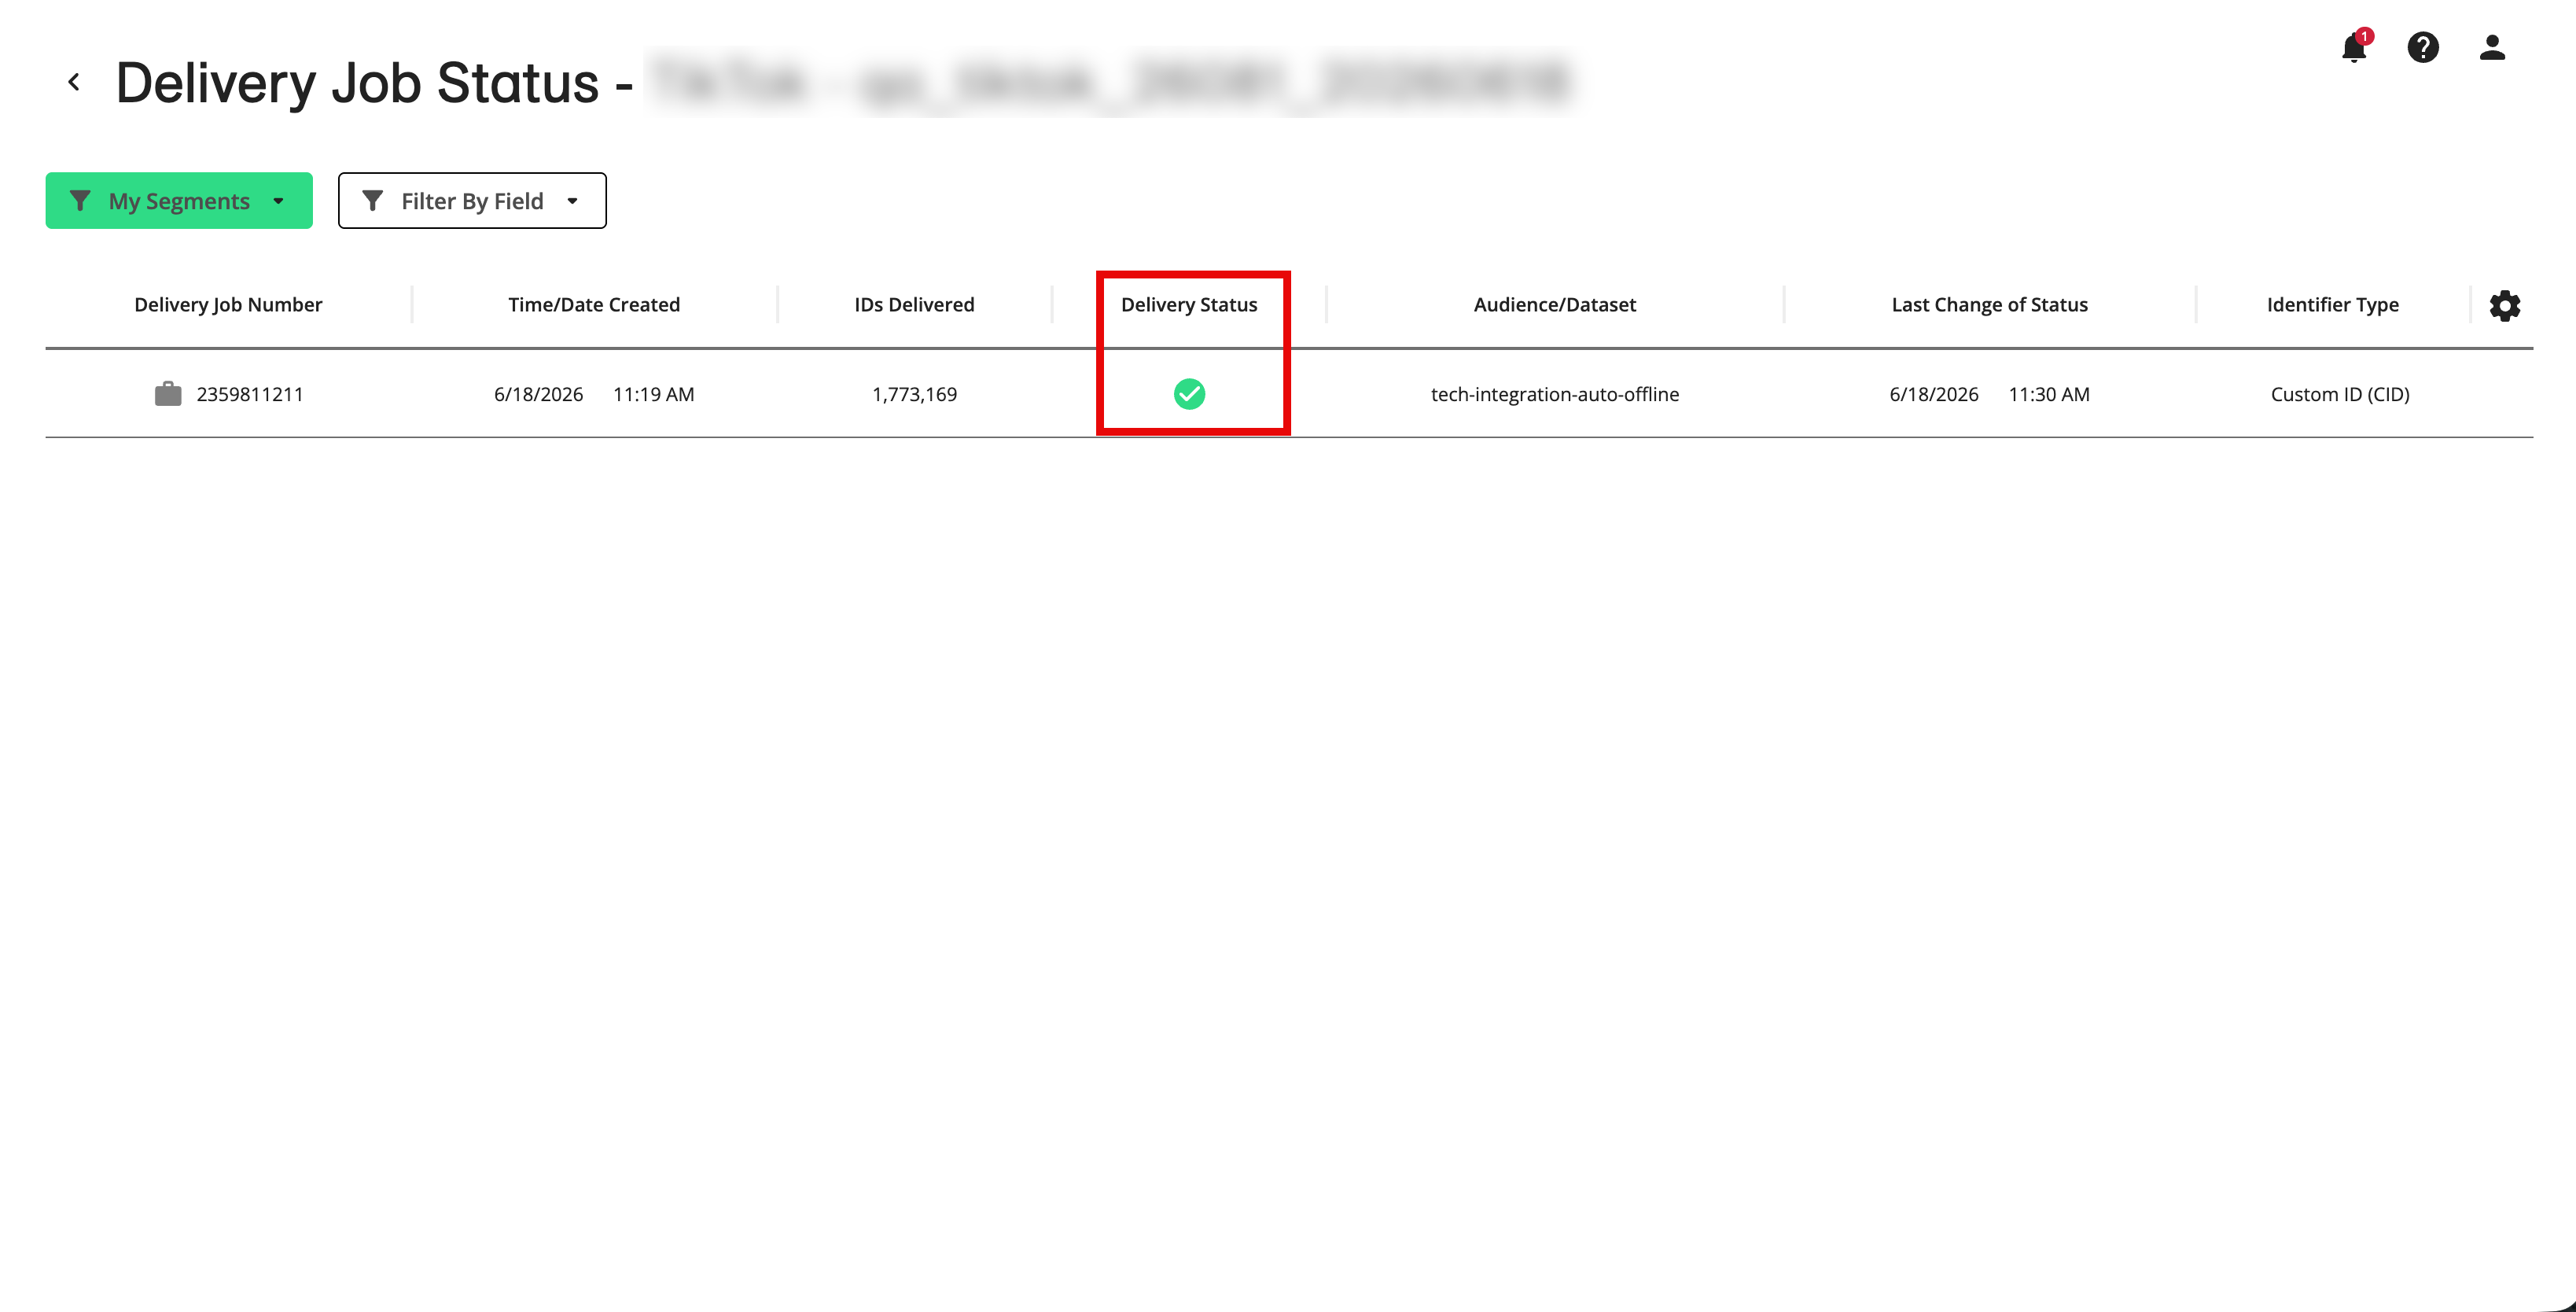
Comprehensive delivery job status: From the Delivery Job Status page, you can see details and delivery status for all delivery jobs for each segment.
Note
Once you've distributed your data, it typically takes 1-3 days for the data to arrive at the destination platform and another 1-3 days for stats to calculate and populate within Connect.
If you still don't see your data at the platform after three days, you can share the following information with the platform (which can be found by following the steps in 'View Comprehensive Delivery Job Status for a Destination Account" below):
For batch file deliveries, provide the platform with the file name(s) associated with the job.
For streaming (API) deliveries, provide the platform with the timestamp of when the job was delivered.
For more information and to understand how LiveRamp delivers data, see the appropriate sections below.
How LiveRamp Delivers Data
LiveRamp sends data to the destination whenever you add segments to the distribution for that destination account or update the data for existing segments that are being distributed (by uploading additional files). Data are also refreshed after a certain number of days, depending on device type. See “How LiveRamp Refreshes Distributed Data” for more information.
Each delivery is split up into individual delivery jobs based on the dataset that contains the data and the device type. For example, if you’re distributing cookies and mobile device IDs to a particular destination, there will be individual jobs for cookies, IDFAs, and AAIDs.
Data are delivered in one of two methods (depending on our integration with the destination):
Batch: For deliveries made via batch files, where the files associated with the job are displayed once the delivery is complete.
Streaming: For deliveries made via API call, where no files are associated with the job.
View Overall Segment Delivery Status
After you add segments to distribution for a particular destination account, you can check the overall delivery status for each field and segment that is actively distributing in that destination account.
You can also view details on all delivery jobs for a particular field.
Note
After you initiate distribution, we start the process to match your segment data to the destination's identifiers before delivery. Segments take about 8 hours to deliver after we start the matching process.
To view the delivery status for a segment or field:
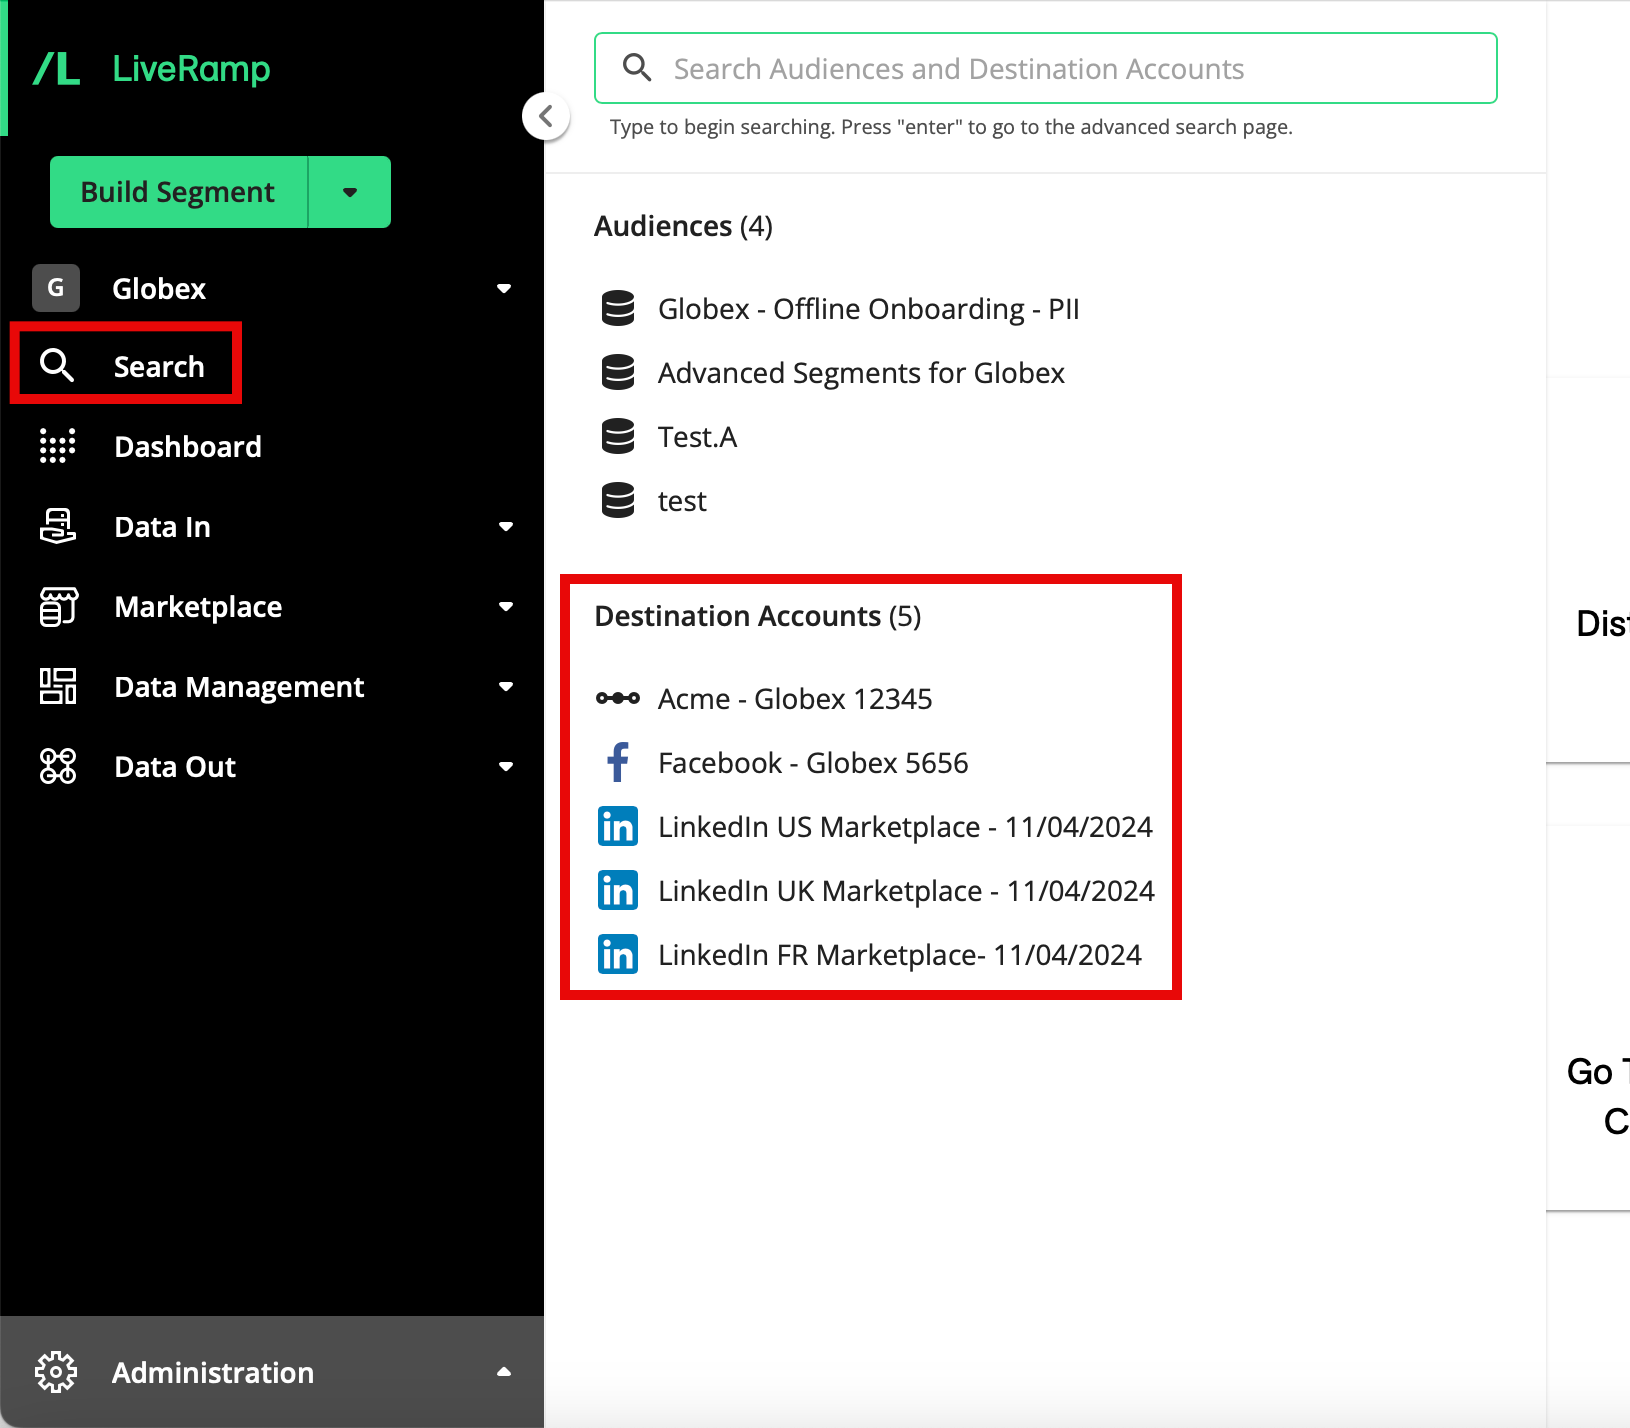
From the navigation menu, click Search to open the global search pane, and then select or search for the desired destination account to navigate to the Manage Segments page for that destination account.
Note
For other methods to navigate to the Manage Segments page, see "The Segment Distribution Page".
To view only the fields and segments that are "active" (being distributed), select Active in the filter area.
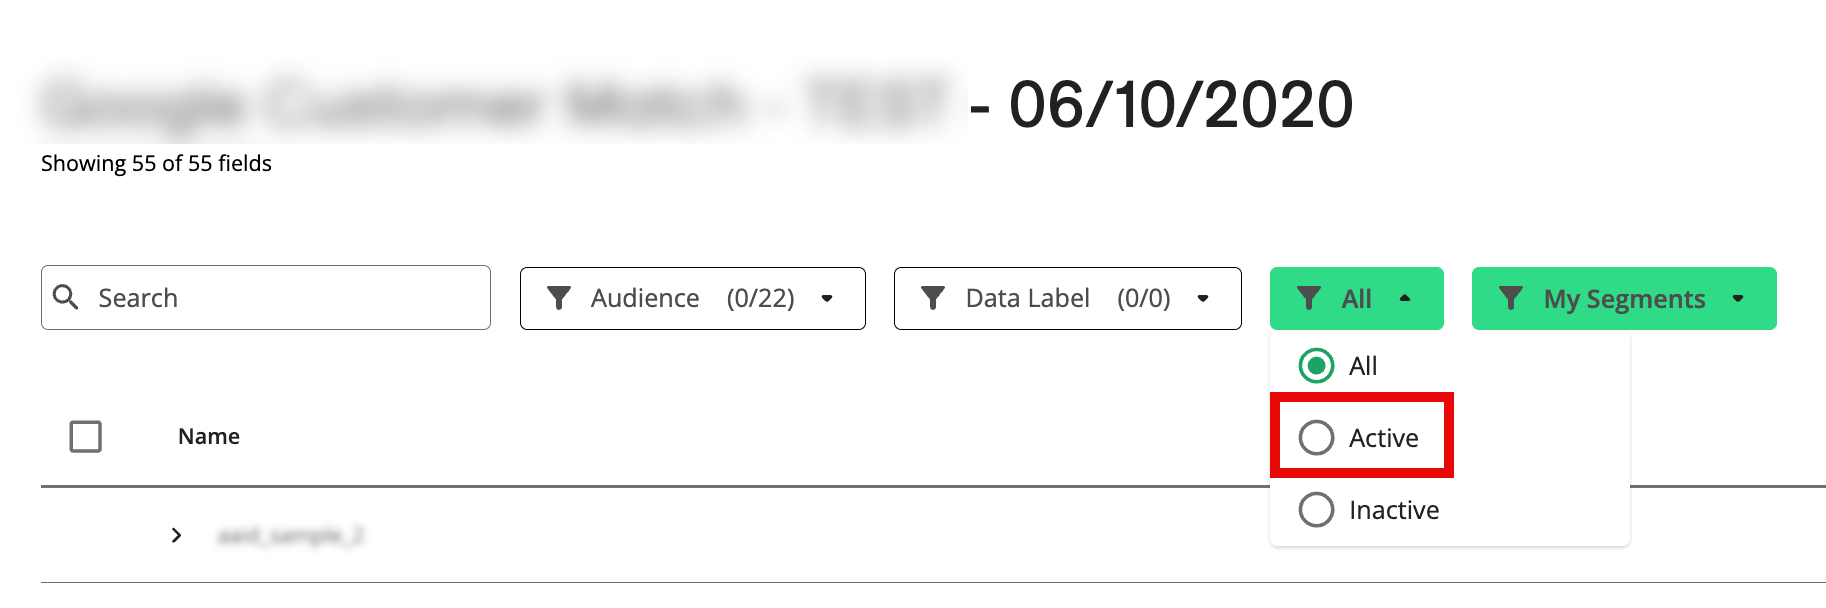
You can also filter the table by searching for a field or segment name, as well as by filtering by dataset, label, or data type.
For the overall status of the distribution of a particular field or segment, check the entry in the "Status" column:
Note
To see the delivery status of the individual segments within a given field, click the caret to the left of the field name.
If no value is shown, the segment is not actively distributing.
"Queued" indicates that the segment has been added to distribution for that destination account but a delivery job has not started yet.
"In Progress" indicates that we are actively sending your data to the platform.
"Distributed" indicates that at least one of the delivery jobs for the segment has been successful (although it may take a day or two for the segment to appear in the destination platform after the initial delivery is complete).
Note
This status represents the initial delivery. Later deliveries and delivery jobs might have a different status, which can be viewed on the Destination Delivery page and the Delivery Jobs Status page. For more information, see the sections below.
"Canceled" indicates that the initial delivery jobs associated with this segment were canceled.
"Needs Attention" indicates that one or more identifier types associated with this segment distribution have never had a successful delivery job. If this status continues for more than 24 hours, create a support case.
"Failed" indicates that the delivery jobs associated with this segment failed. If this status persists for more than 24 hours, create a support case.
"No Matches" indicates that the segment had no matched records to deliver. Make sure that the most recent file for the dataset that contains this segment has completed ingestion, is properly formatted, and contains valid records. If it is, create a support case.
Note
The “No Matches” status will temporarily display if the segments are added for distribution before the file ingestion has completed. This is because the segments do not yet have records populated and therefore we have no data to deliver downstream at that point.
"Segment Creation Failed" indicates that the taxonomy/segment creation step did not complete successfully. Make sure that your destination account settings are correctly configured for your ad account at the destination platform. If the settings are correct, create a support case.
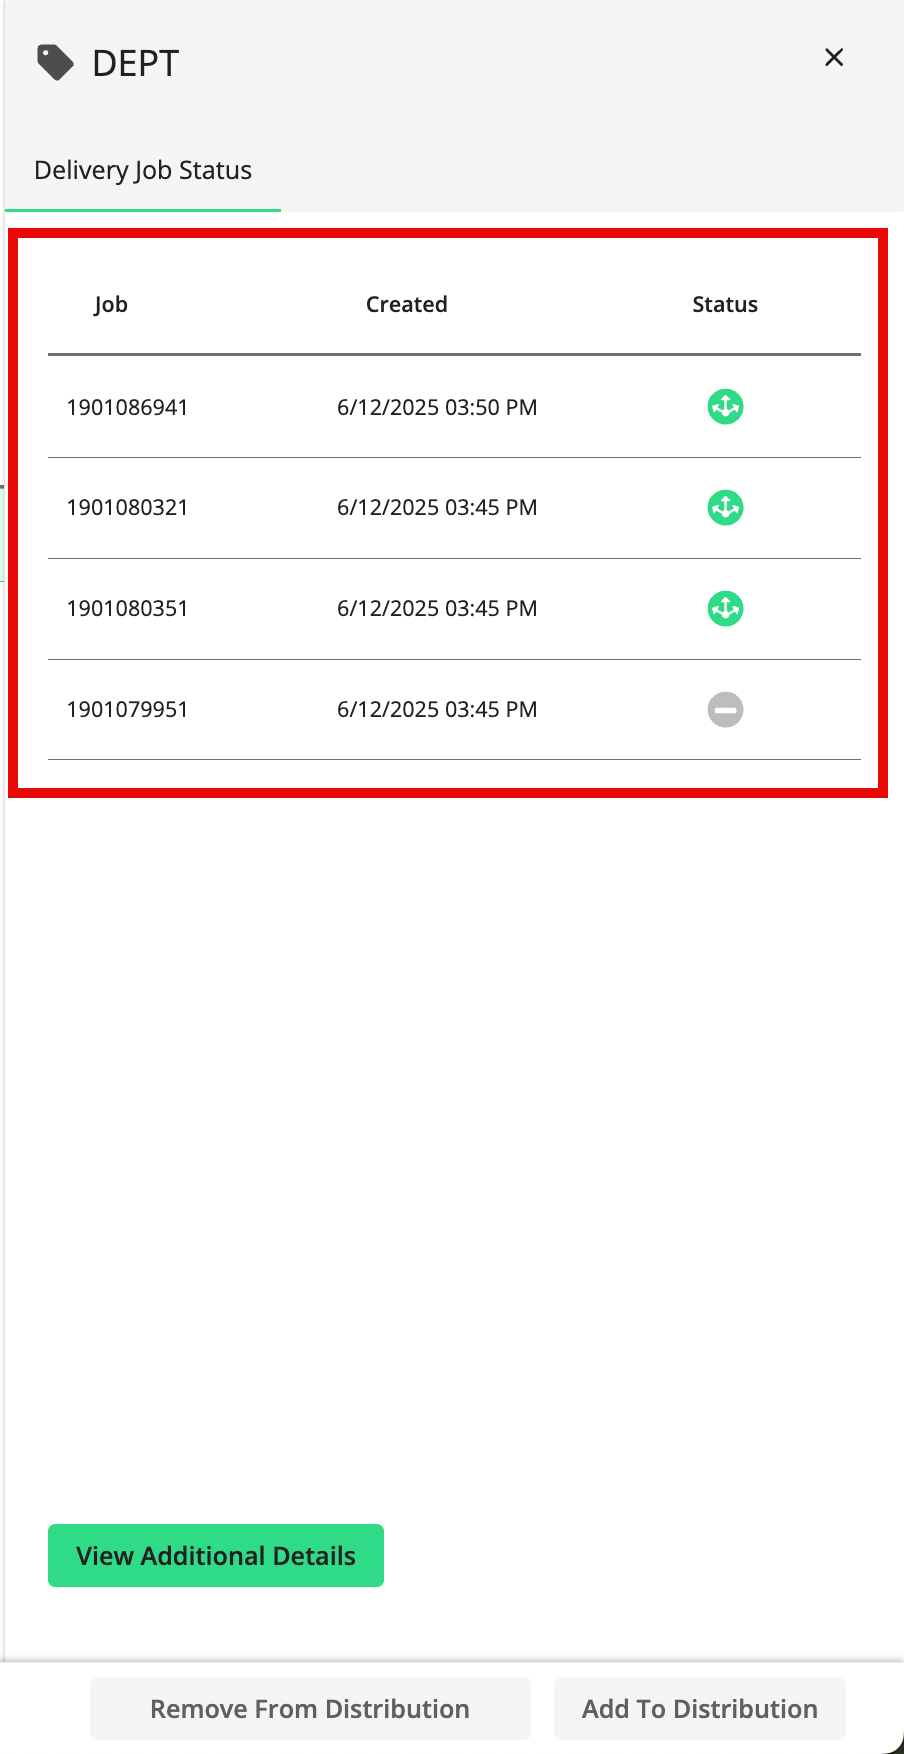
To see all delivery jobs associated with a particular field, click the row for that field to open a details panel with information on the job number, date and time the job was created, and the job status:
Note
From the details panel, you can add or remove the field (and its segments) from distribution.
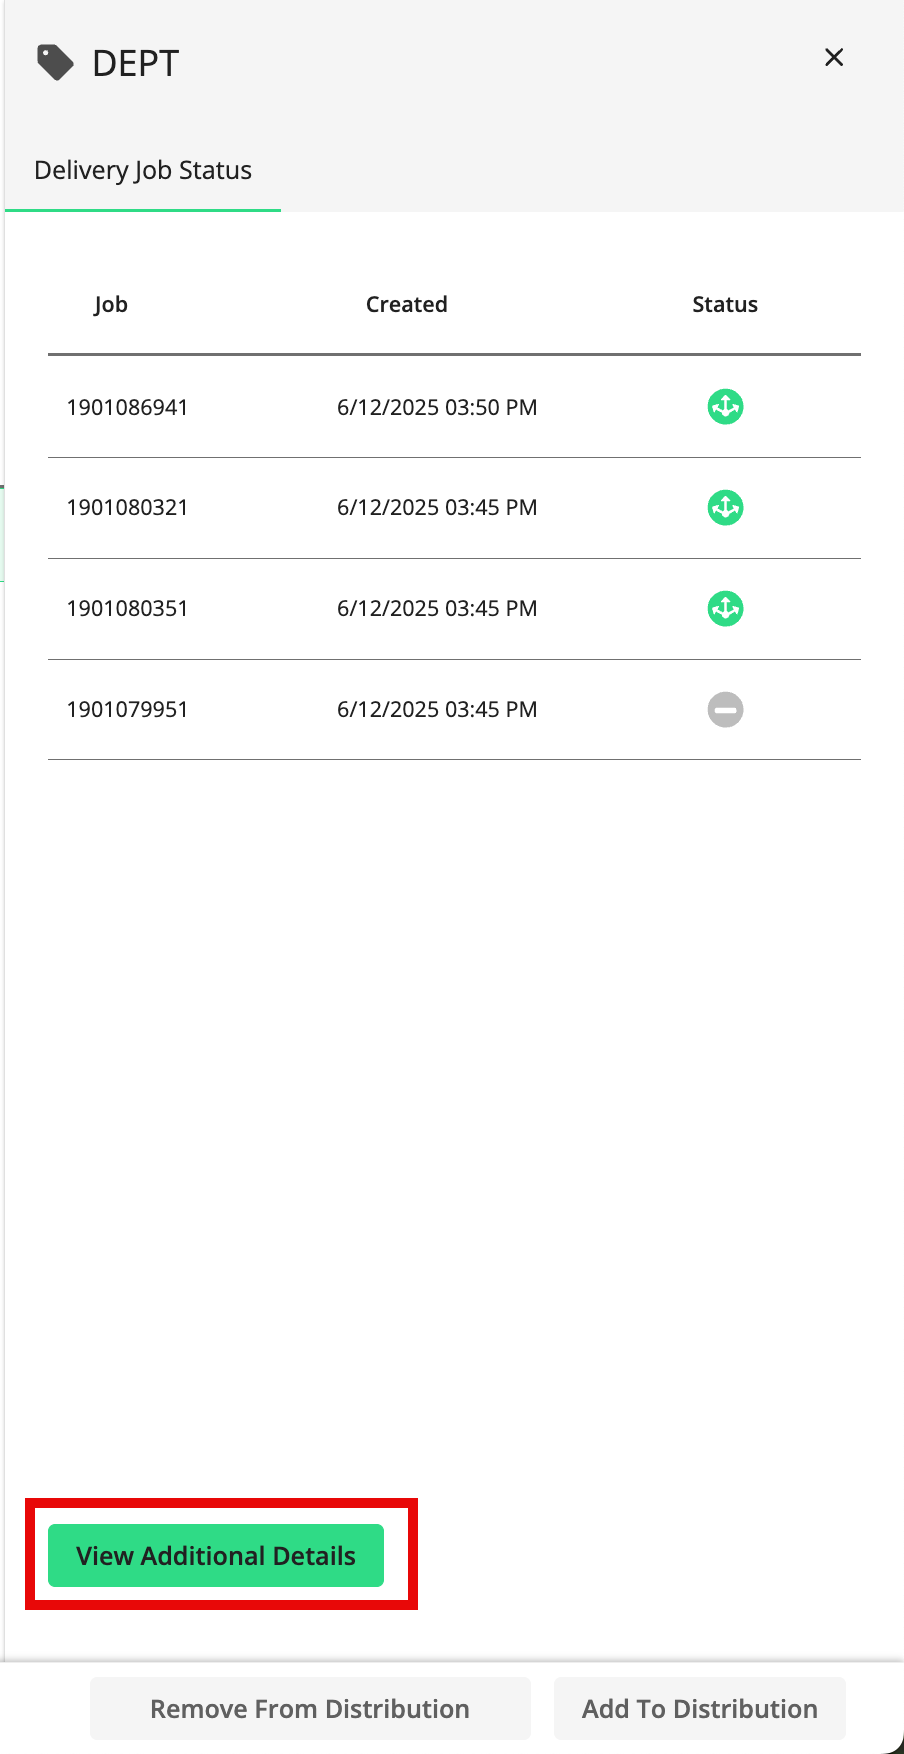
To see additional delivery job status info for this field, click View Additional Details to open the Delivery Job Status page filtered for that segment.
Note
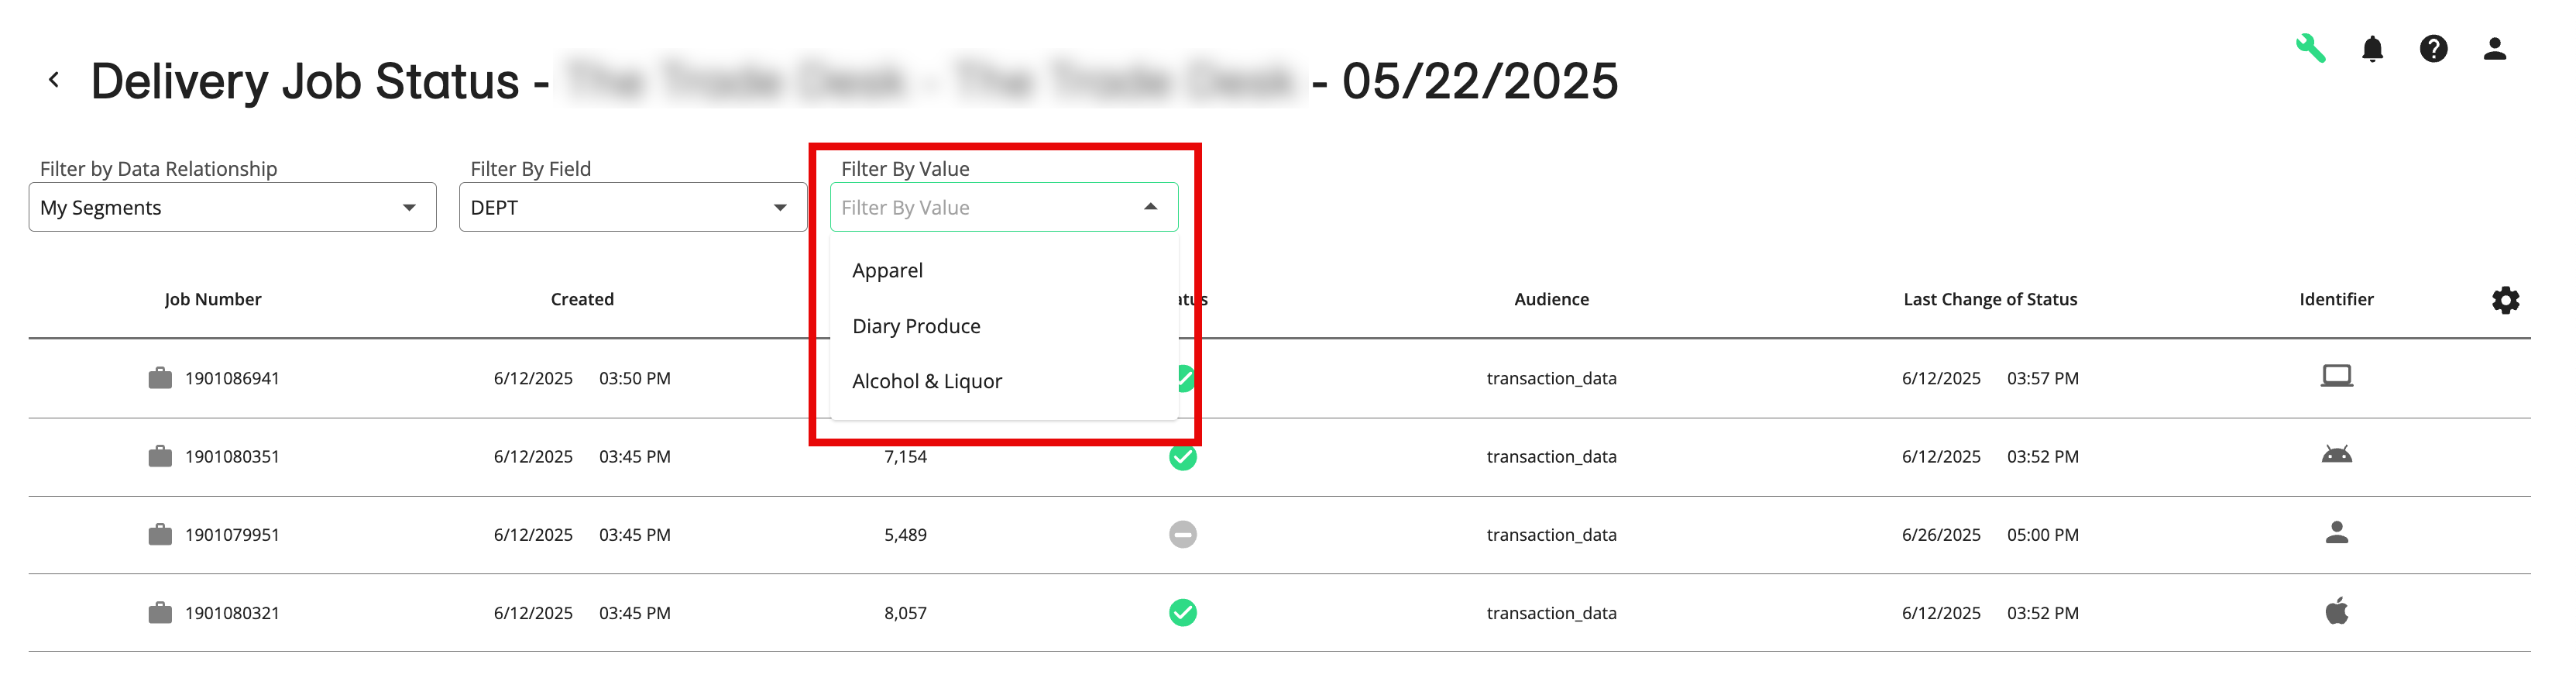
If desired, you can use the Filter by Value options to refine the list to view stats for a particular segment value.
Note
We will send you an email notification when new segment data has successfully been delivered to your destinations. You can change the frequency of these notifications.
View the Most Recent Deliveries for a Destination Account
To view the most recent activation status of each actively-distributing segment, including the status for the latest individual delivery jobs (broken out by identifier type) for those segments:
From the navigation menu, click Search to open the global search pane, and then select or search for the desired destination account to navigate to the Manage Segments page for that destination account.
Note
For other methods to navigate to the Manage Segments page, see "The Segment Distribution Page".
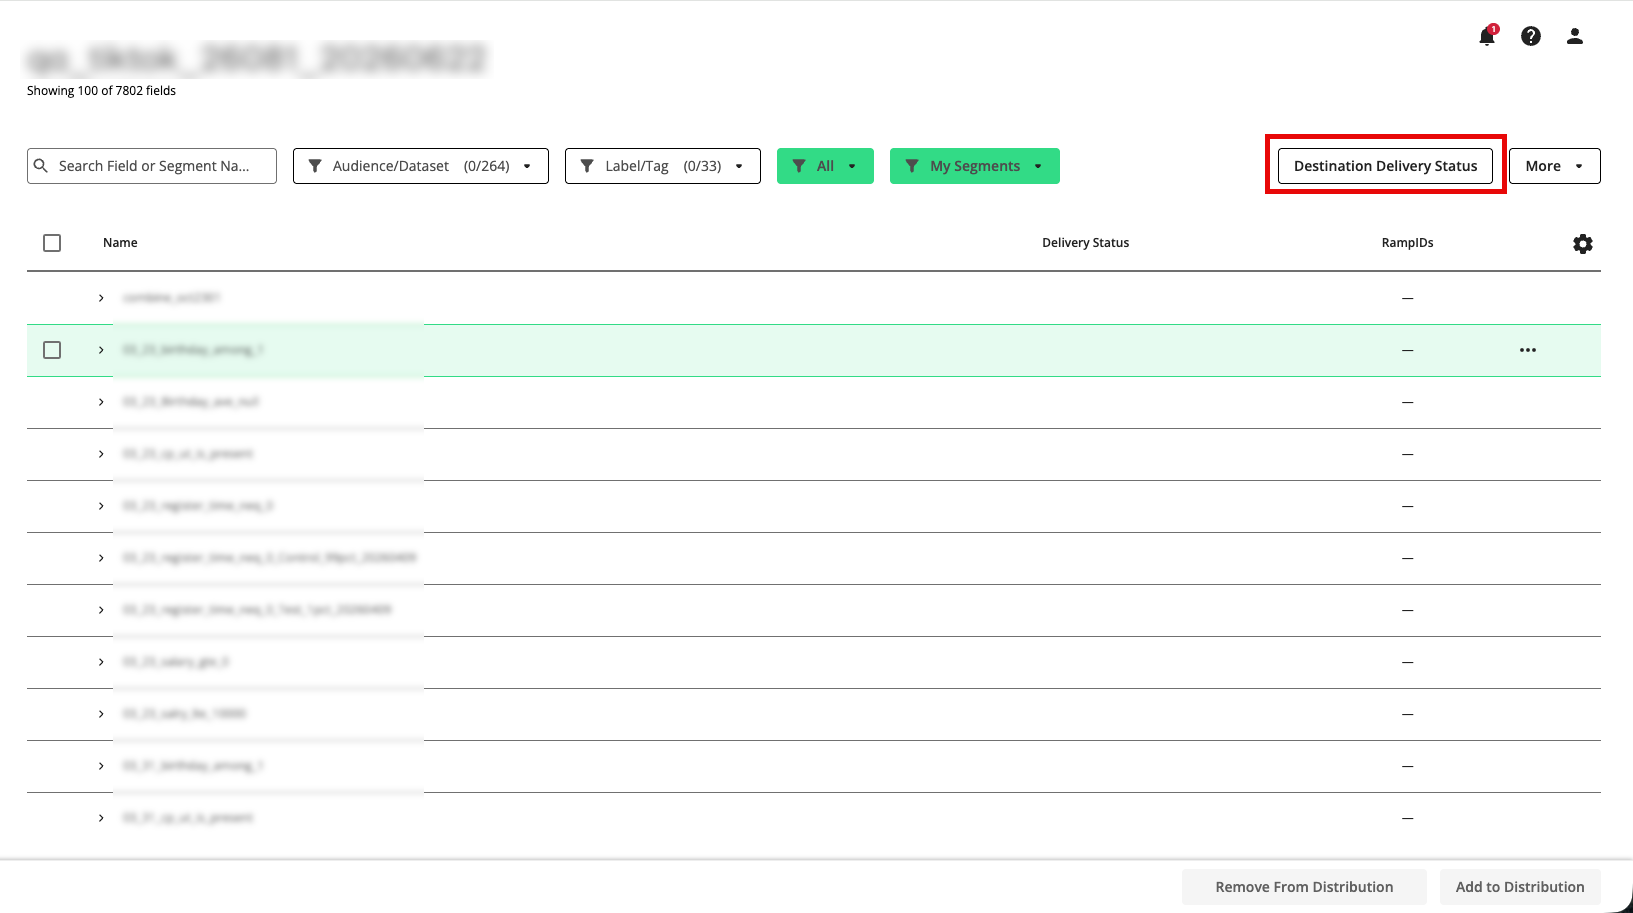
Click .
Note
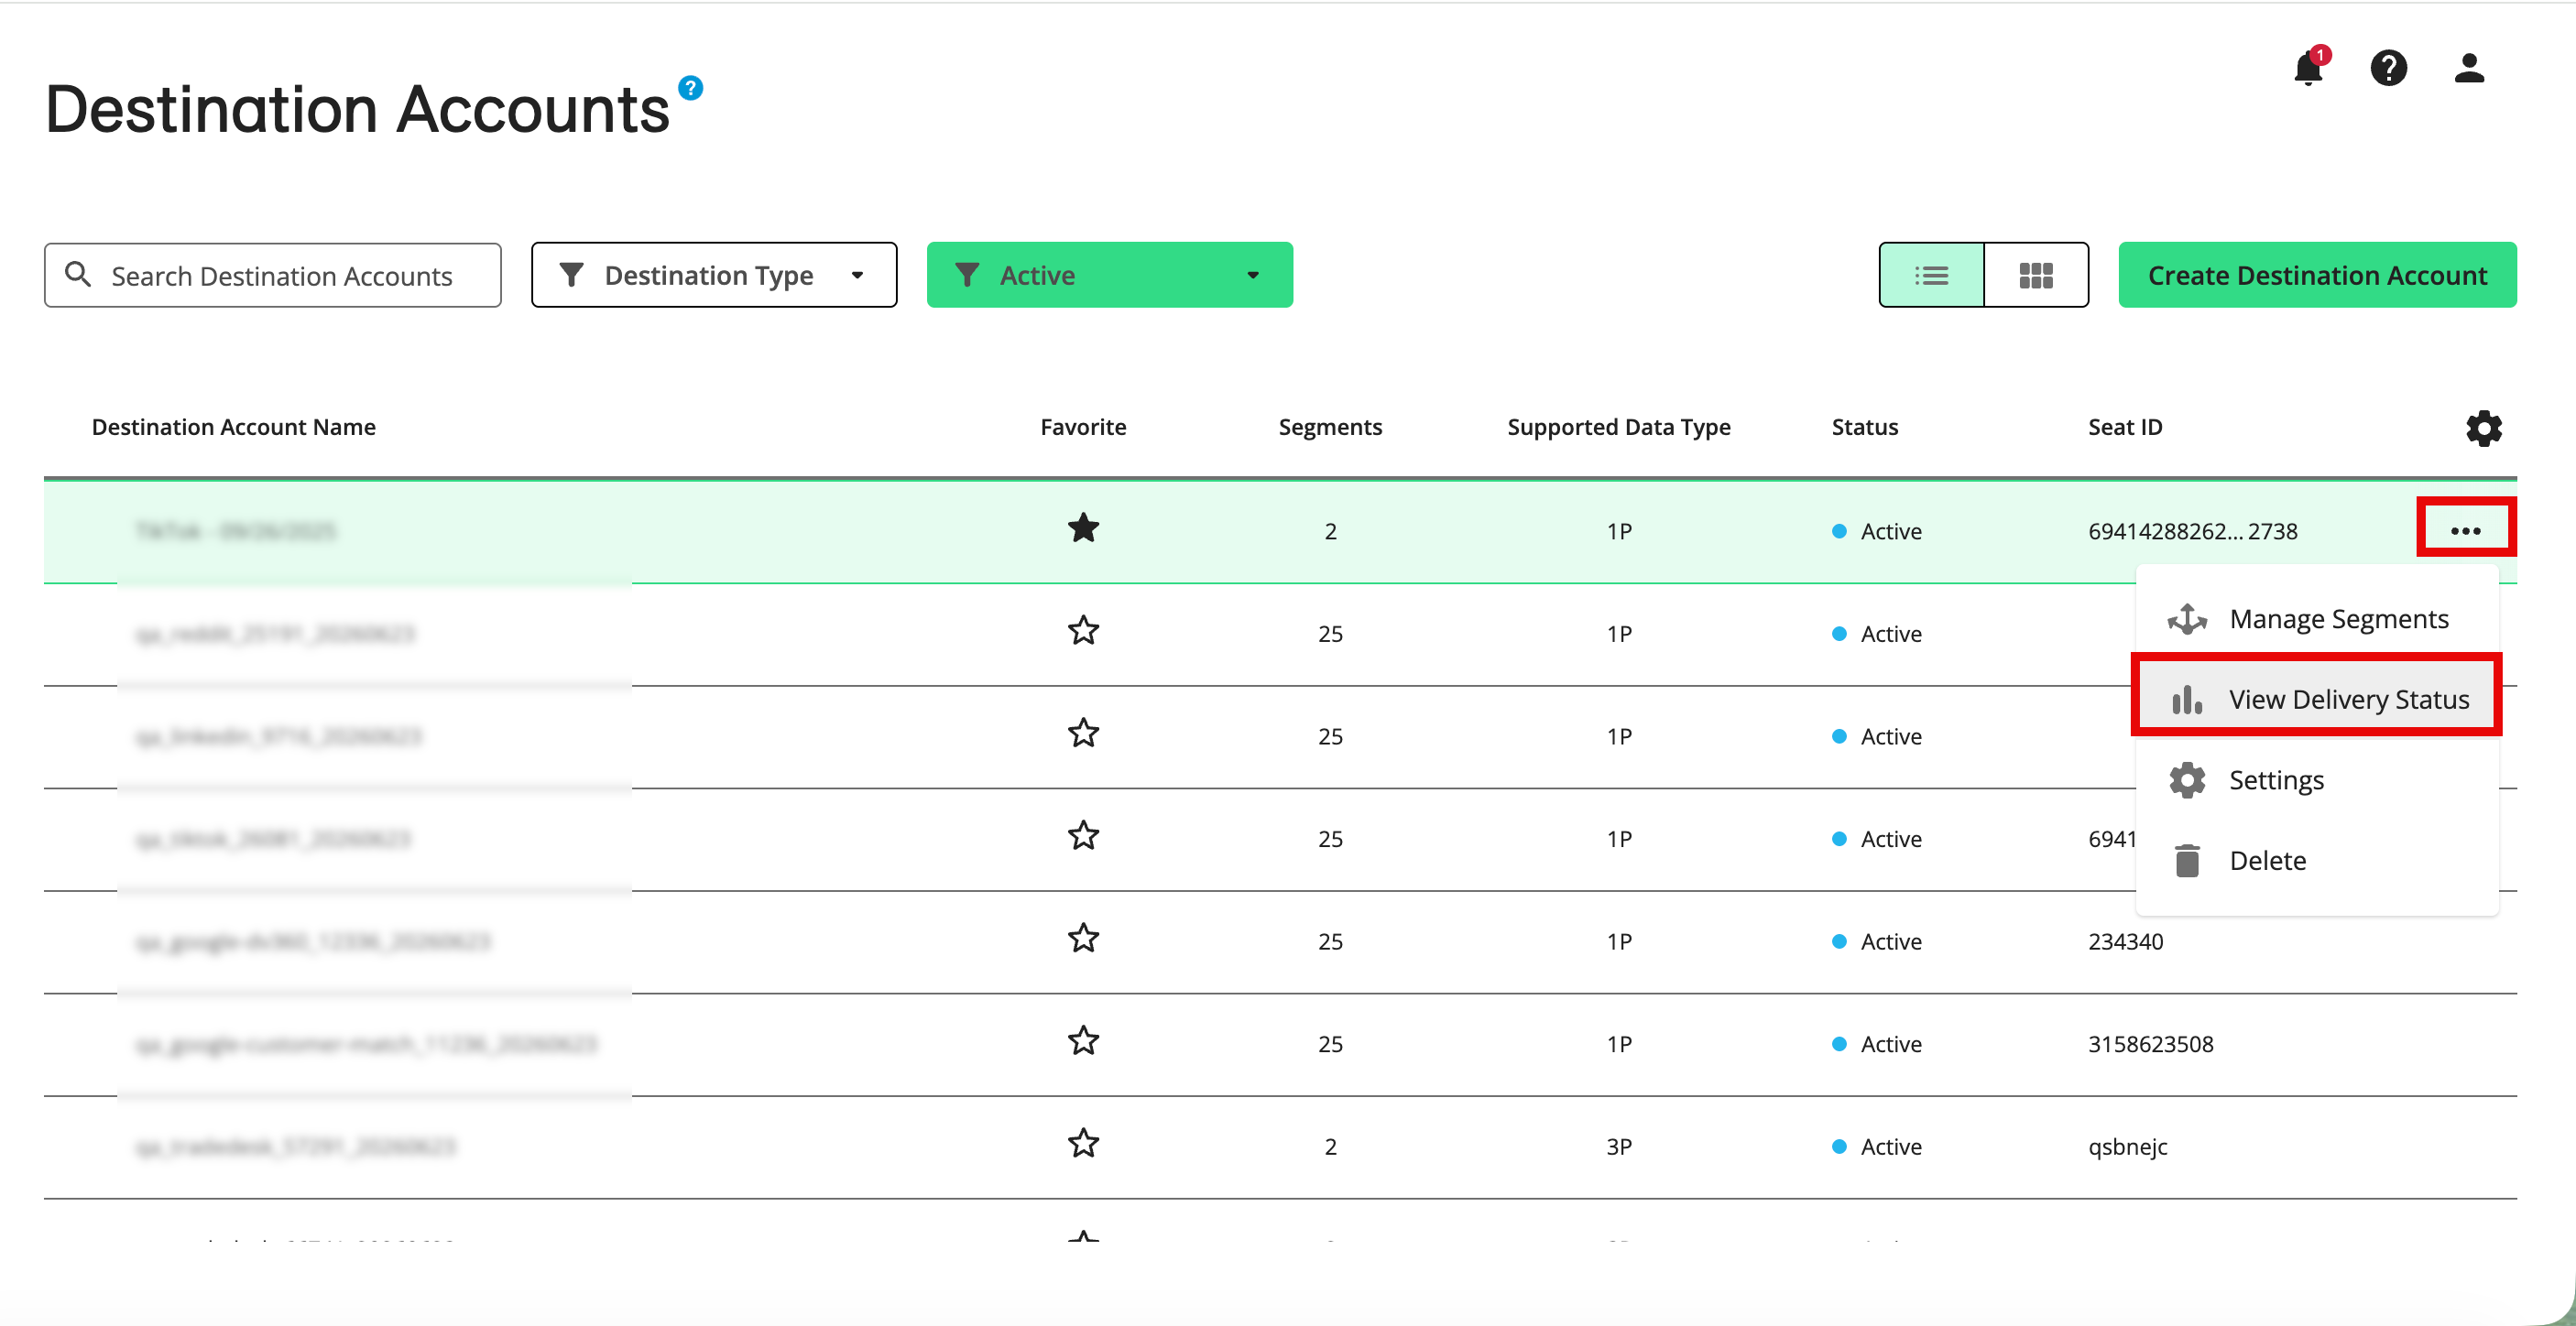
You can also access the Destination Delivery Status page from the Destination Accounts page by clicking from the more options menu in the row for the destination account.
From the Destination Delivery Status page, you can view the following information for each actively-distributing segment:
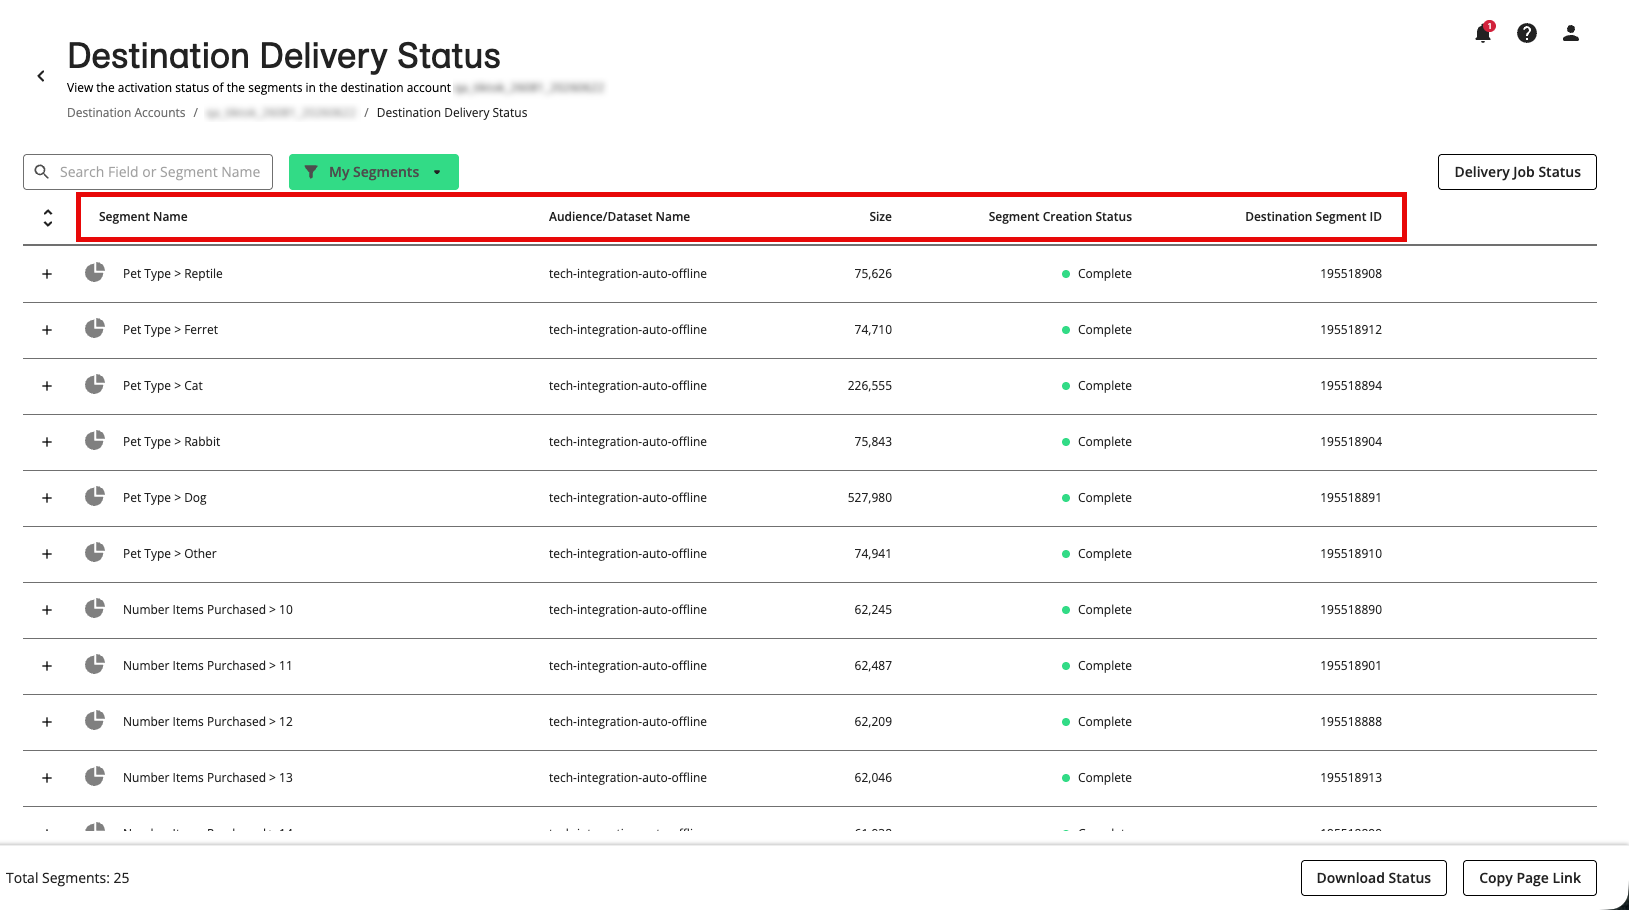
Segment Name: The name of the segment.
Data Seller Name: The name of the data seller who owns the segment
Size: The size of the segment
Segment Creation Status:
Note
For Google PAIR destination accounts, this column will not show a value, because we create separate segment delivery jobs for each publisher (rather than showing one segment-creation status).
"Queued" indicates that the request to create or update the segment at the destination has been queued, but the segment-creation job has not started yet.
"In Progress" indicates that the segment-creation process is currently running.
"Complete" indicates that segment creation at the destination succeeded, and identifier delivery jobs have started.
"Failed" indicates that segment creation at the destination failed (identifier delivery jobs will not start or continue until this is fixed). Make sure that your destination account settings are correctly configured for your ad account at the destination platform.
Destination Segment ID: The ID given to the segment at the destination platform
To see the delivery status on the most recent delivery jobs (by identifier type) for a particular segment, click the plus symbol (+) to the left of the segment name:
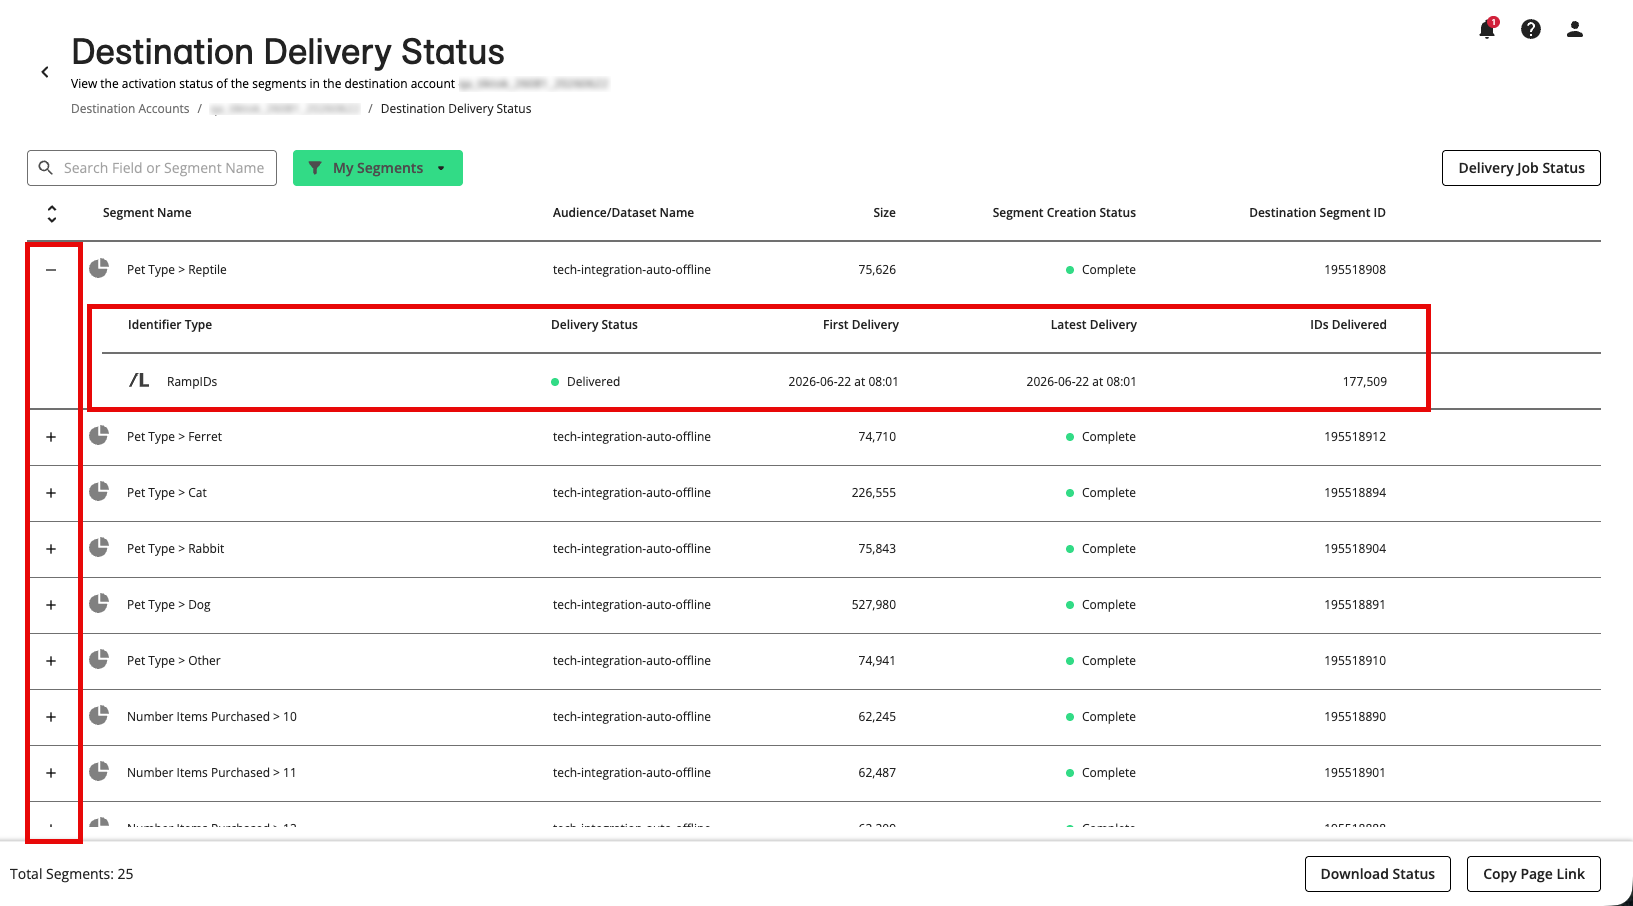
"Delivered" indicates that the delivery job for the specified identifier has been successfully delivered.
"Queued" indicates that the delivery job has been added to distribution for that destination account but a delivery job has not started yet.
"In Progress" indicates that we are actively delivering the identifiers to the platform.
"Canceled" indicates that the most recent delivery job for this identifier was canceled.
"Failed" indicates that the delivery job for this identifier failed. If this status persists for more than 24 hours, create a support case.
"No Matches" indicates that the segment had no matched records to deliver. Make sure that the most recent file for the dataset that contains this segment has completed ingestion, is properly formatted, and contains valid records. If it is, create a support case.
Note
The “No Matches” status will temporarily display if the segments are added for distribution before the file ingestion has completed. This is because the segments do not yet have records populated and therefore we have no data to deliver downstream at that point.
Note
You can also view the following information on the delivery job:
The identifier type that was delivered
The dataset name
The date and time of the first delivery for that identifier type
The date and time of the latest (most recent) delivery for that identifier type
The number of IDs delivered to the destination platform
If desired, click to download a CSV file with the status information.
To get a URL that other users in your Connect organization can use to go directly to this page, click .
View Comprehensive Delivery Job Status for a Destination Account
To view all delivery jobs for a particular destination account:
From the navigation menu, click Search to open the global search pane, and then select or search for the desired destination account to navigate to the Manage Segments page for that destination account.
Note
For other methods to navigate to the Manage Segments page, see "The Segment Distribution Page".
Click .
Click Delivery Job Status.
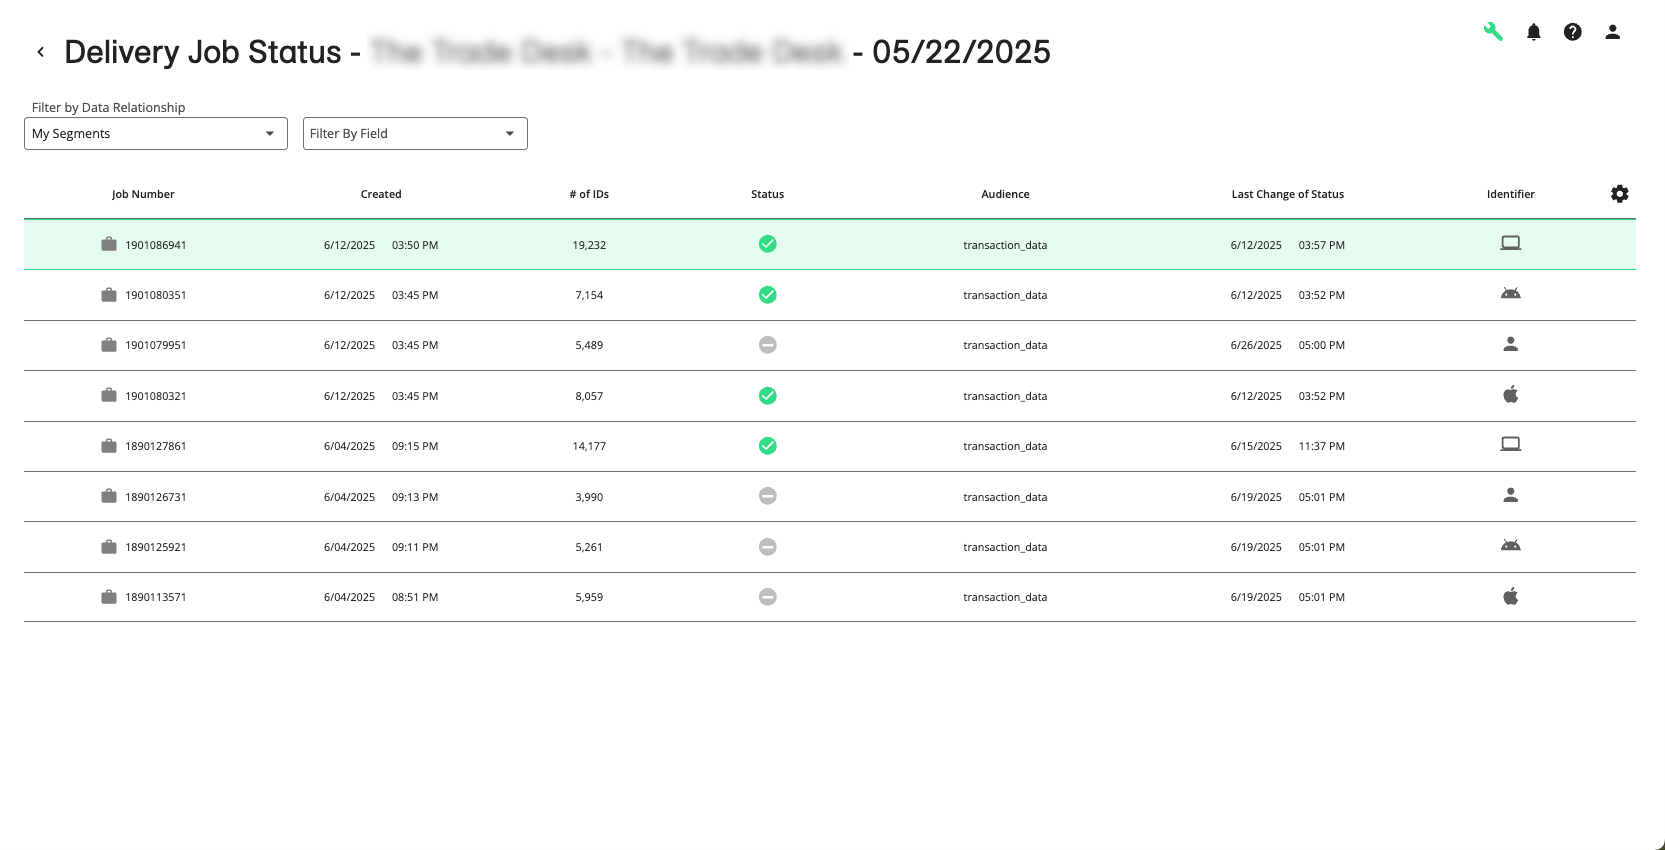
The Delivery Job Status page opens and displays a table of all the delivery jobs for that destination account with the following headings:
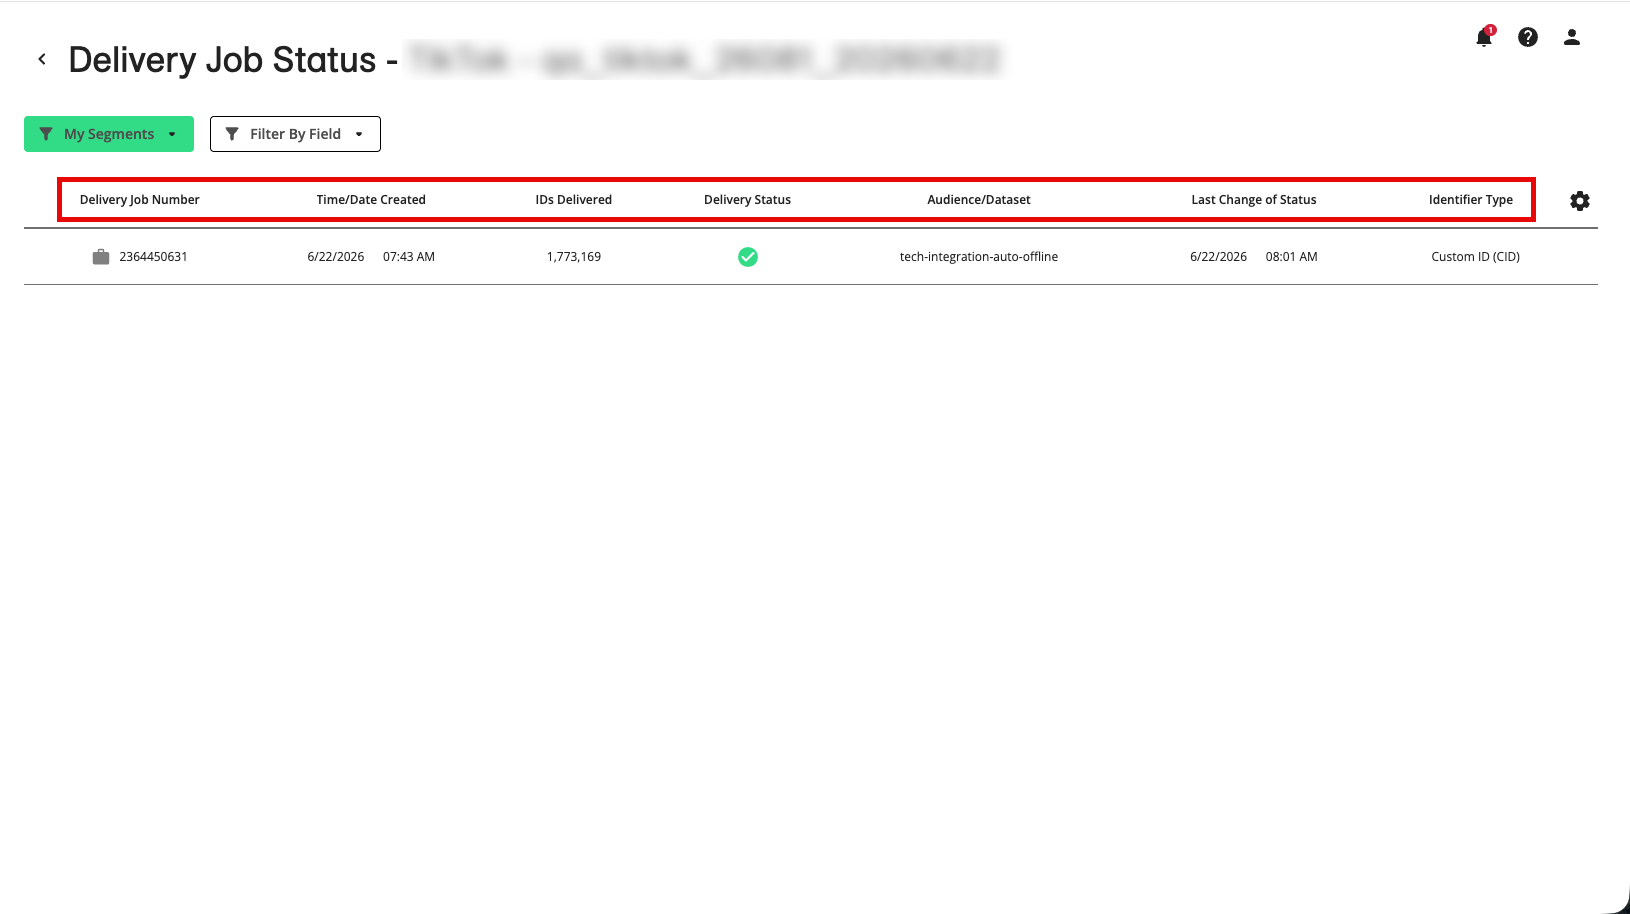
Delivery Job Number: The job number for this specific delivery job. Use the job number when troubleshooting a delivery issue with LiveRamp Technical Operations.
Time/Date Created: The date and time that this delivery job was created.
IDs Delivered: The number of identifiers sent as part of this delivery job. For Record Sync-enabled destination accounts (other than Facebook), delivery jobs containing deletions will be displayed as negative numbers. See "Keep Destination Data Fresh with Record Sync" for more information.
Note
This column is not displayed for non-Record Sync-enabled destination accounts.
Delivery Status: Whether the job is pending, in progress, delivered, canceled, or failed.
Audience/Dataset: The dataset that the data came from.
Data Provider: The name of the data seller who owns the segment.
Last Change of Status: The date and time when the job last changed from one status to another.
Identifier Type: The type of identifier that the job is delivering (such as cookies (web), mobile device IDs (such as AAIDs or IDFAs), or platform-specific IDs).
Caution
Counts not matching? The numbers you see on this page are the number of identifiers (devices or platform-specific IDs) we delivered to the destination platform. However, these numbers might not match the numbers you see in the platform, as platforms often calculate these numbers differently. These numbers also might not match the numbers you see on the Manage Segment page, as some delivery jobs represent only a subset of the total number of identifiers delivered.
If you have segments distributing that were built from data from LiveRamp Clean Room, use the filter to view the desired delivery jobs:
To see job for fields and segments that were not created from Clean Room data, select My Segments
To see job for fields and segments that were created from Clean Room data, select either Non-Monetized Clean Room Segments (for a retailer-managed workflow) or Monetized Clean Room Segments (for a brand self-service workflow)
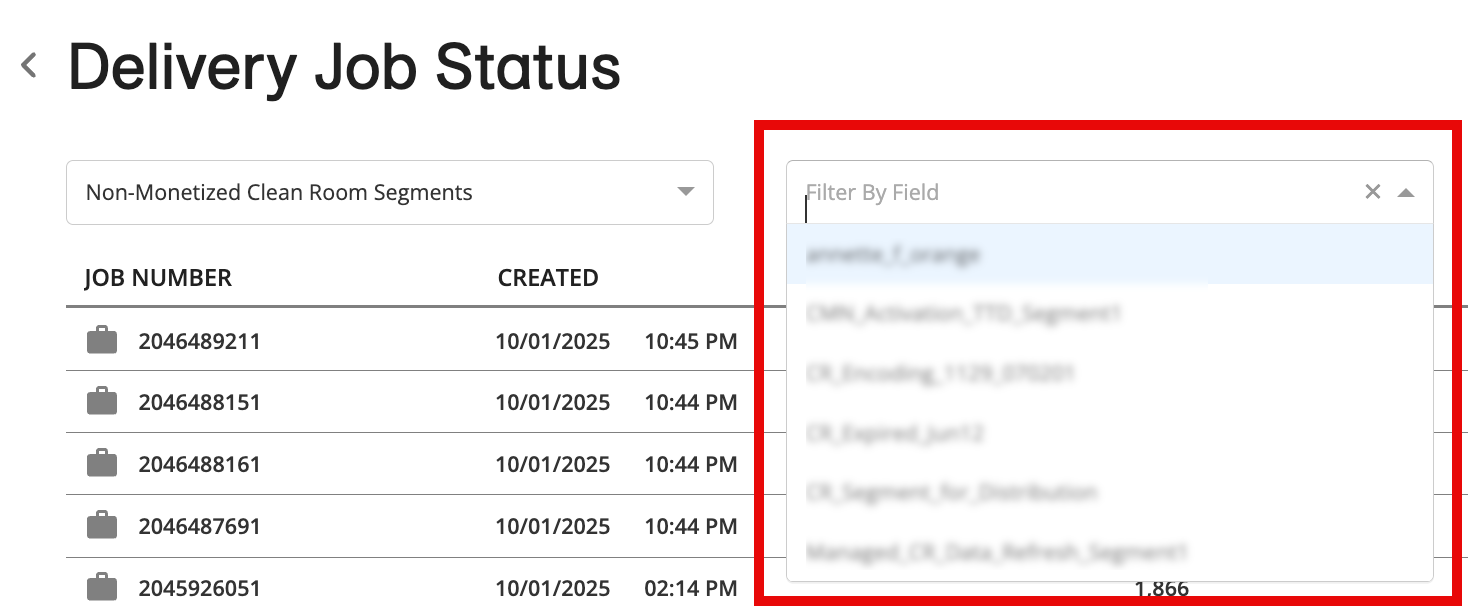
To filter the table by a particular field, use the Filter by Field dropdown to select the desired field. To filter by a particular field value (segment), use the Filter by Value dropdown to select the desired value.
Note
For Data Marketplace destination accounts, you can filter the table by Data Marketplace segment name.
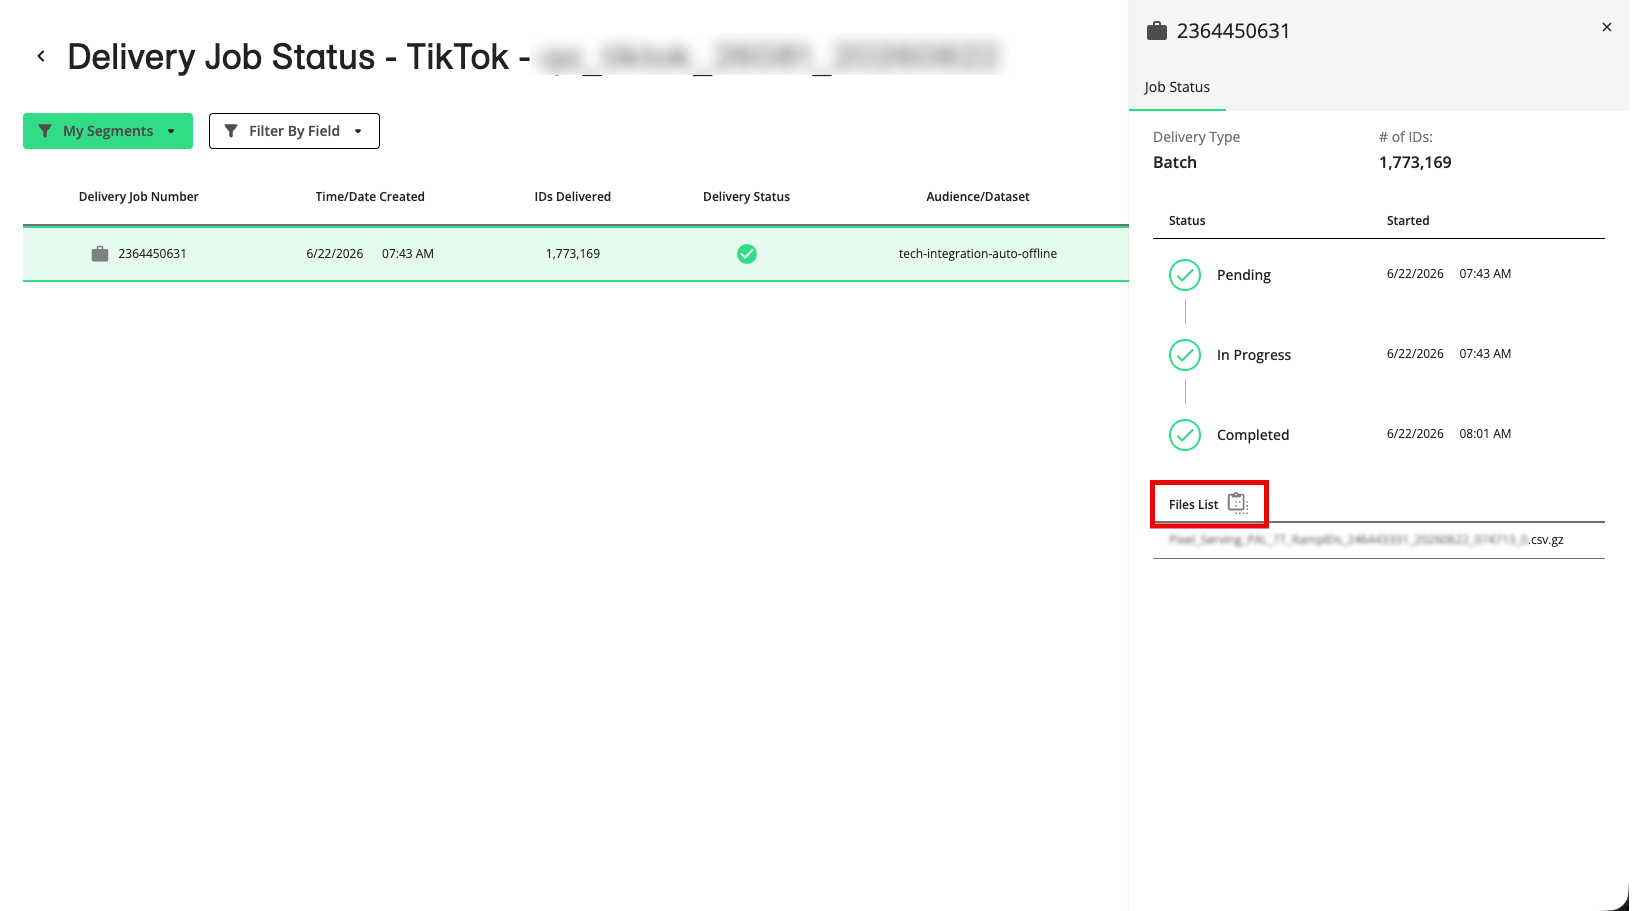
To open a details panel for a particular delivery job, click the row for that job.
The details panel opens and displays information on the type of delivery, as well as each status the job has been in and the current status (indicated with a green check mark). For batch delivery jobs that have reached the “Delivered” status, a list of the files associated with the job is displayed at the bottom.
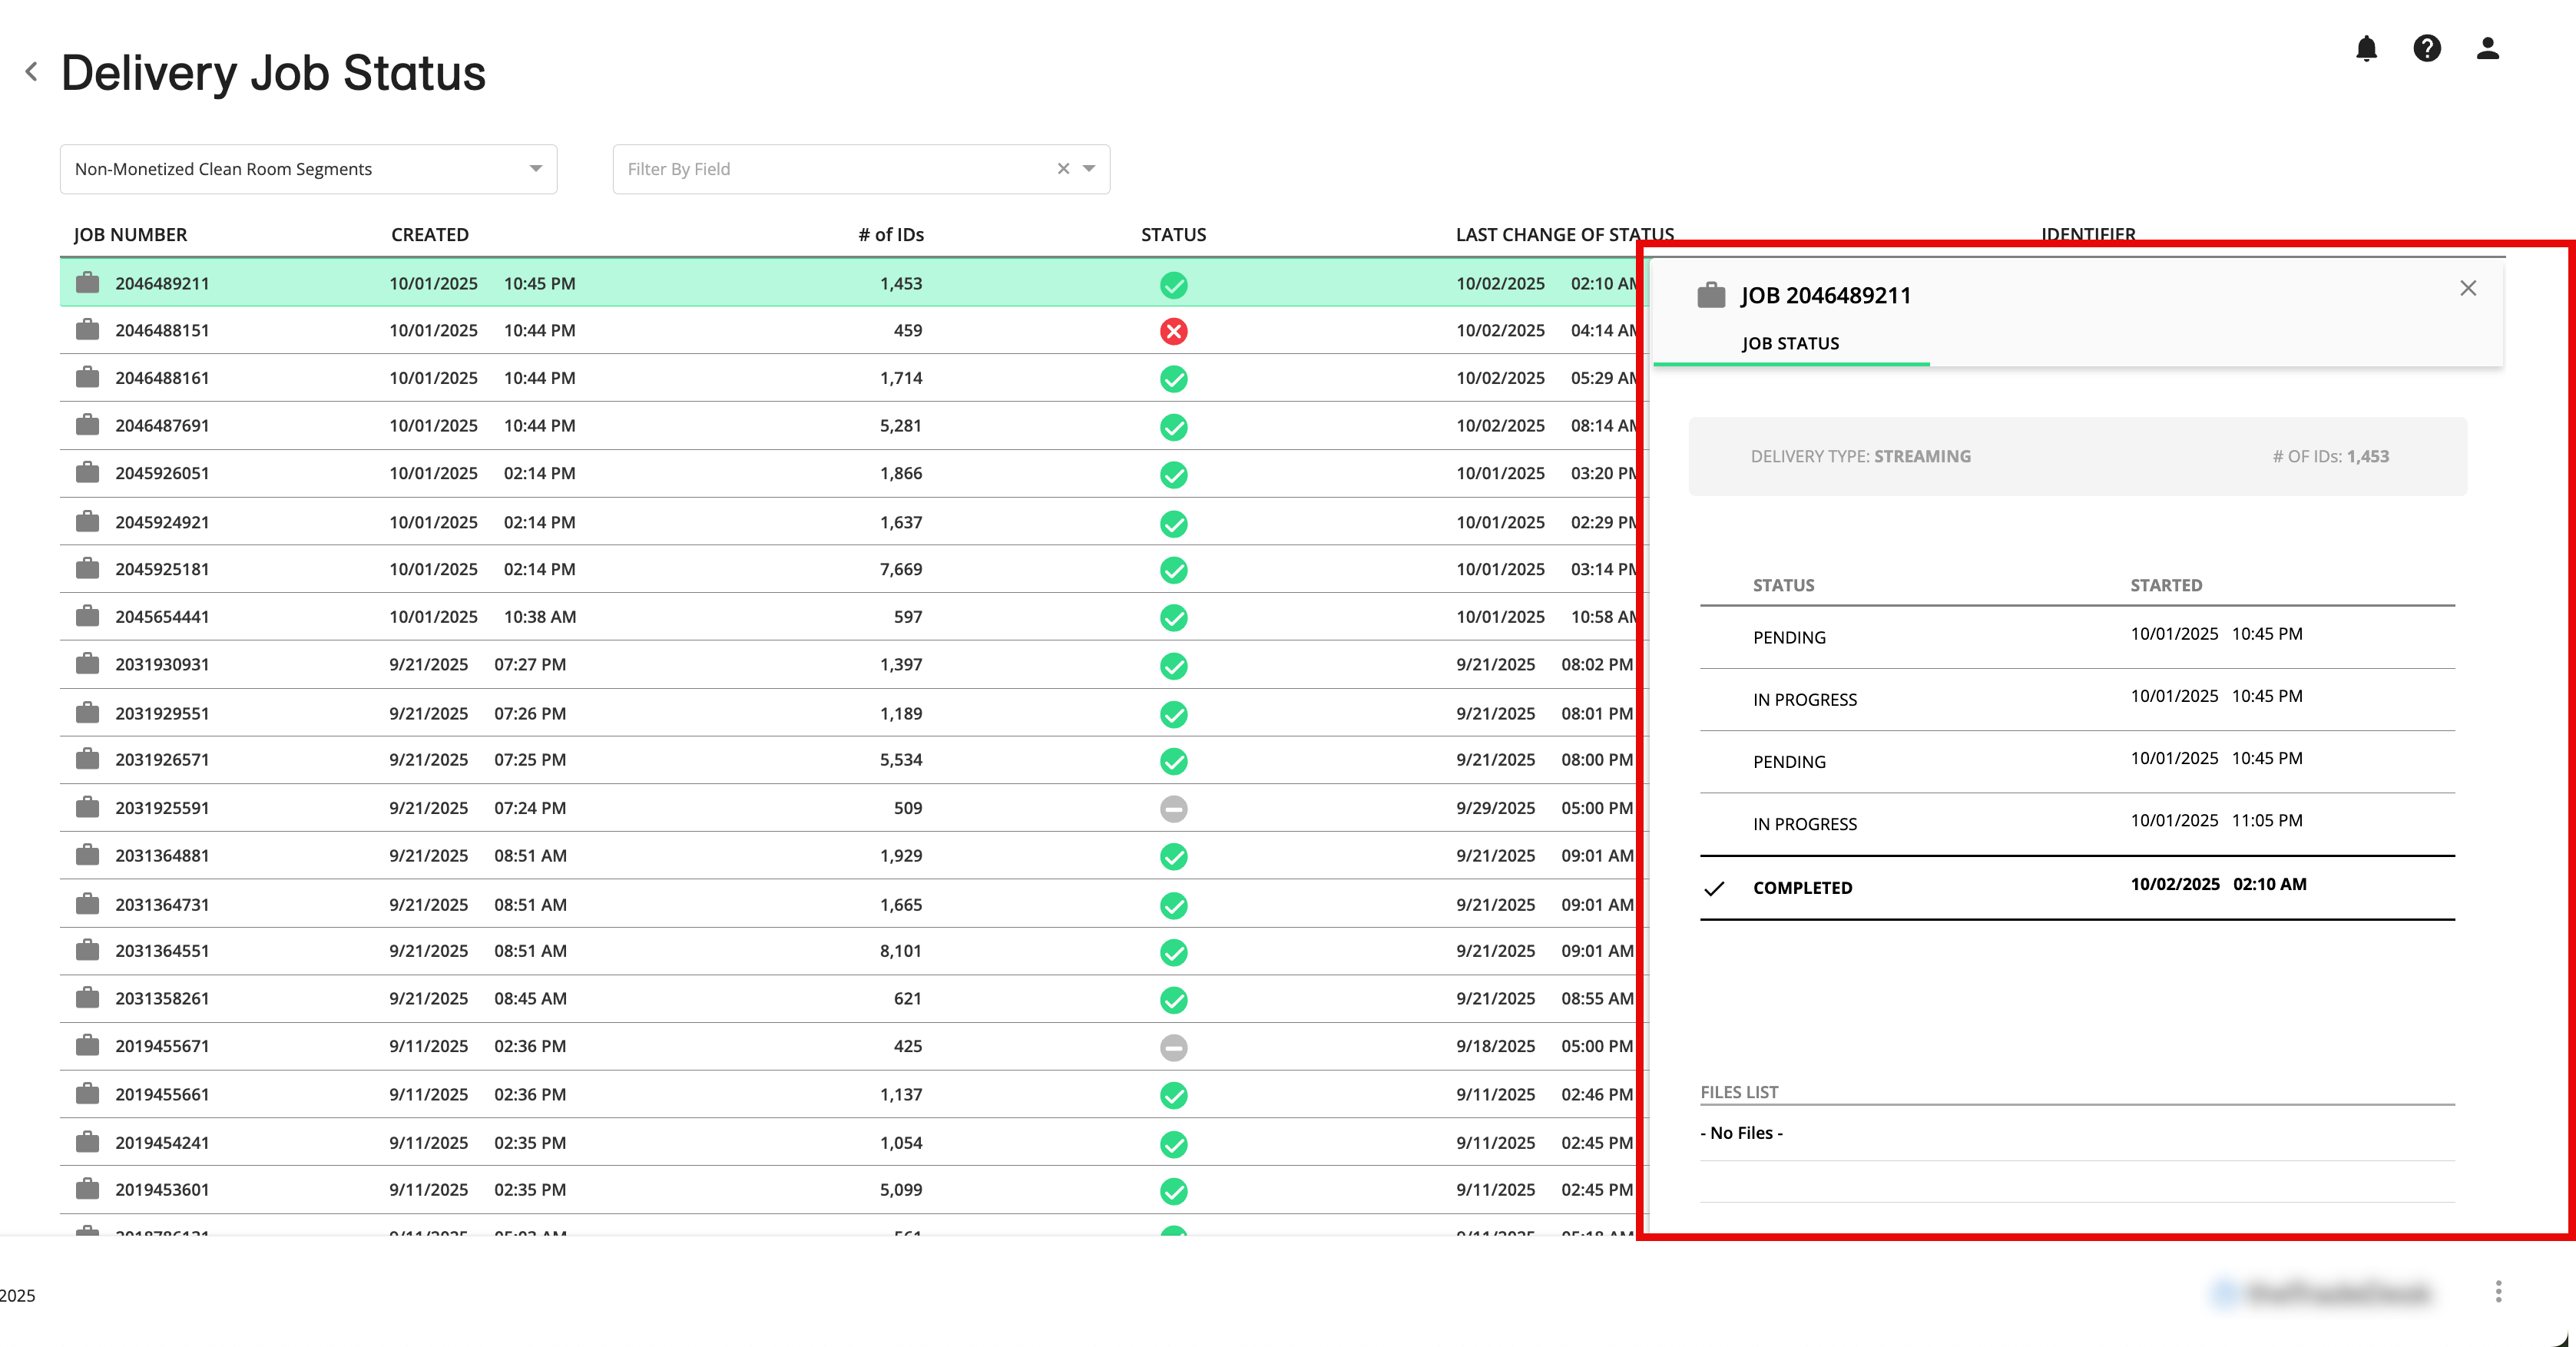
To copy a list of any files shown to your clipboard, click the Copy icon next to “Files List”.
Note
For "Streaming" deliveries (which are made via API call), there will not be any files associated with the job. Only "Batch" deliveries will have associated files.
Use the file names when troubleshooting a delivery issue.