Changing the Table Display
For many tables in Connect, you can change the way the table displays in some or all of the following areas:
The columns that are displayed
The order in which the columns are displayed
The width of the columns
The sort order
The spacing of the table rows
The filtering of the table
Note
The images shown in this section are from the Files page, but the features work in a similar way to other tables that allow you to change the way the table displays. Not all tables have all features.
See the sections below for more information.
Changing the Columns that are Displayed
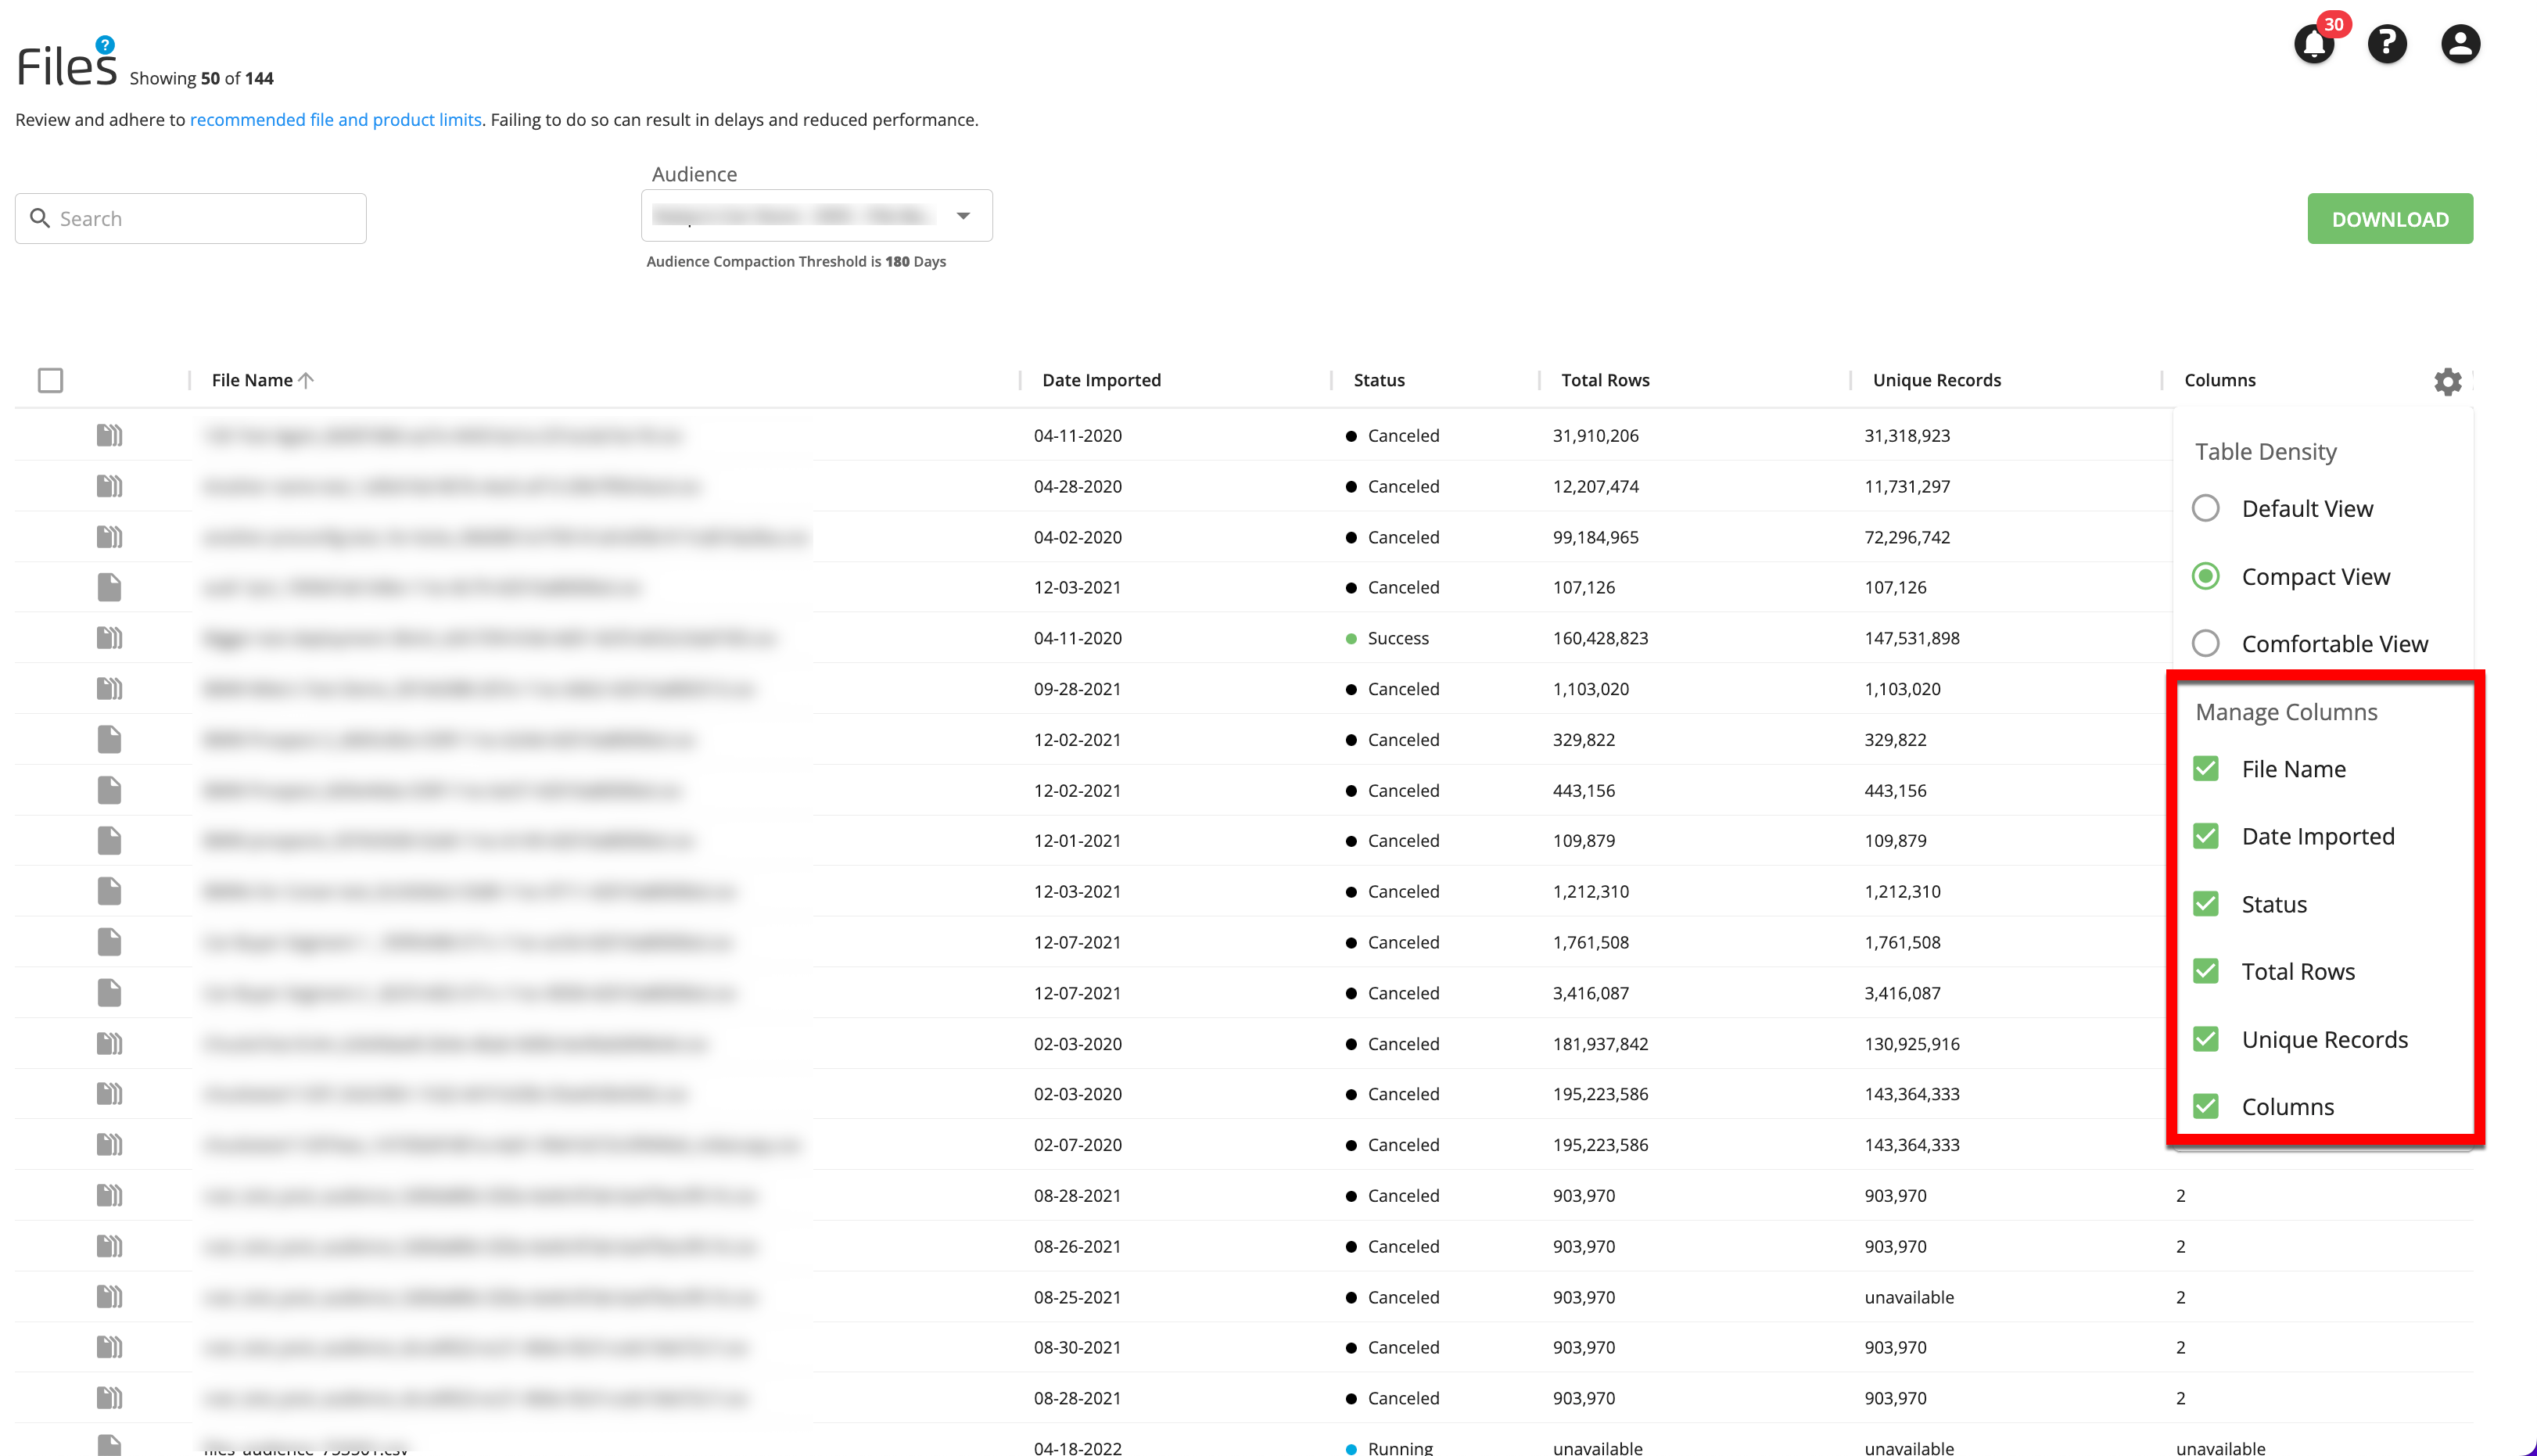
To change the columns that are displayed, click the table settings icon (the "gear" icon) on the right side of the table.

From the Manage Columns area of the panel that opens, check or uncheck the appropriate check boxes for the columns you want to display or hide.
Note
Click anywhere outside of the panel to close it.
Changing the Column Order
To change the order of the table columns, click and drag each column heading into your desired location.
Changing the Column Width
To change the width of a particular column, click and drag the small vertical line at the right edge of that column heading.
Changing the Table Sort Order
You can change the table sort order, including the column the table is sorted on and whether the sort is ascending or descending:
Note
When you first open the page, the table is sorted by the first column in an "ascending" sort by default.
To sort the table by a particular column, click the column heading.
Note
When you first click a column heading, the sort method defaults to "ascending", and an upward-pointing arrow appears on the right side of the column heading.
Not all columns can be used to sort the table. If the column can be used to sort the table, an up or down arrow will appear next to the column name when you hover over the column name. If no arrow appears next to the column name when you hover, you cannot sort the table by that column.
You might also be able to sort the table by a particular column by clicking the "more actions" menu on the right edge of that column (three vertical dots) and then selecting the desired sorting method. You can also use that menu to unsort the table and return to the default sort.


To change the sort method for the column the table is being sorted on from "ascending" to descending," click the column heading again. A downward-pointing arrow appears on the right side of the column heading.
Changing the Table Row Spacing
To change the table row spacing (the "table density"), click the table settings icon (the "gear" icon) on the right side of the table.
From the Table Density area, check the desired radio button:

Default view
Compact view spaces the rows more closely together than the default view
Comfortable view spaces the rows further apart than the default view
Note
Click anywhere outside of the panel to close it.
Filtering the Table
In addition to the search bar and any filters above the table, you might also be able to sort the table via the "more actions" menu in each column heading.
To filter the table:
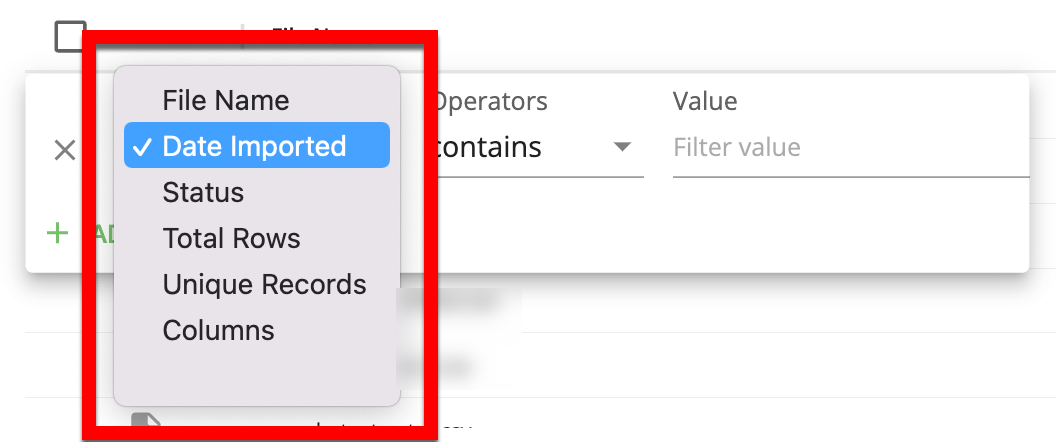
Click the "more actions" icon that appears when you hover over a column heading, and then select .

Note
If the "more actions" icon does not appear when you hover over the column heading, this type of filtering is not available for that particular table.
From the Columns dropdown list in the filter box, select the column you want to use to filter.

Note
By default, the column whose "more actions" menu you clicked on is selected.
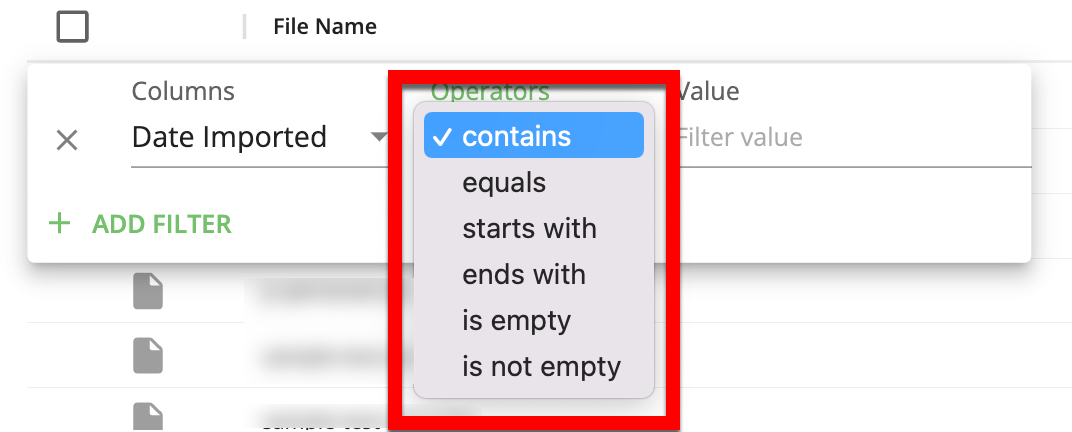
From the Operators dropdown list, select the operator you want to use for the filter.
Note
The operators that are available is determined by the data type of the column you've selected.

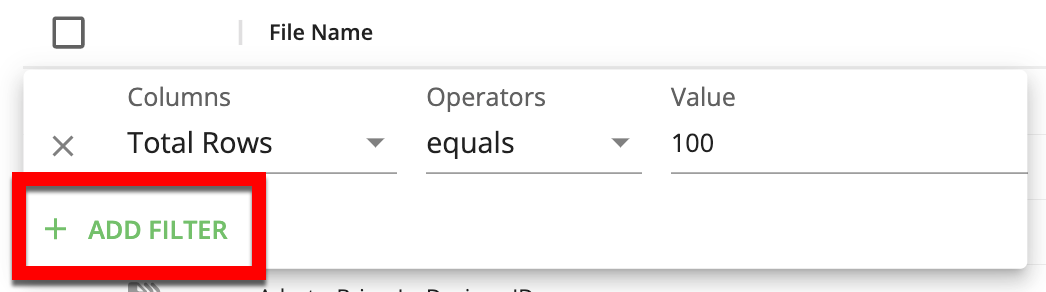
In the Value field, enter the value you want to use to filter that column.

Note
If you have selected "is empty" or "is not empty" for the filter operator, the Value field will not appear.
To apply an additional filter, click , and then choose the operator you want to use to join the two filters ("And" to include only entries that match both filters or "Or" to include any entries that match one of the filters).
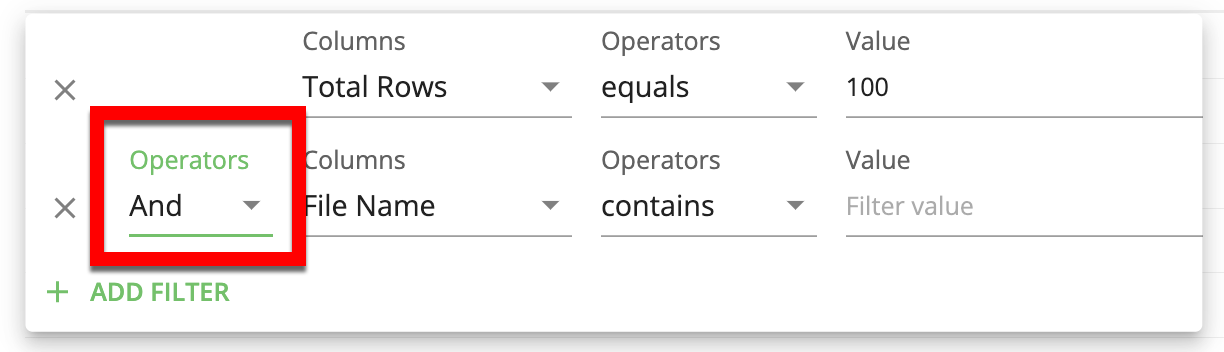
Repeat steps 2-4 for the additional filter.
To continue adding filters, repeat steps 5 and 6.
Note
To delete a filter row, click the "X" that appears on the left side of that filter row.