Set Up the LiveRamp Native App in Snowflake
Translation and identity resolution capabilities are available within Snowflake through the LiveRamp Identity Resolution and Translation native app, which creates a share to your account, opening up a view to query the reference data set from within your own Snowflake environment.
Translation and identity resolution capabilities are available within Snowflake through the LiveRamp Identity Resolution and Translation native app, which creates a share to your account, opening up a view to query the reference data set from within your own Snowflake environment.
Once you've completed these steps to set up the native app, you're ready to perform the desired operation. See the articles listed below for the appropriate instructions:
Overall Steps
To set up the LiveRamp native app:
Accept the Snowflake Consumer Terms of Service in Snowflake.
Note
This must be performed by a user with an "orgadmin" role.
Install the LiveRamp Identity Resolution and Transcoding native app.
To use the native app to resolve Datavant Tokens to RampIDs, set up Datavant Token resolution.
See the sections below for detailed information on performing these steps.
Once you've run identity operations, you can then access the metrics view.
If needed, you can also share the native app to a different role.
Accept the Snowflake Consumer Terms of Service
To install the LiveRamp native app, an organizational administrator (ORGADMIN) or greater role needs to accept the Snowflake Consumer Terms of Service. Follow Snowflake's instructions listed here.
Install the LiveRamp Identity Resolution and Transcoding Native App
Note
To install the LiveRamp native app, you will need to have an organizational administrator (ORGADMIN) role or greater.
The Snowflake help topic "Installing an Application from a Snowflake Marketplace Listing" in Snowflake's native app documentation describes installation in more detail.
To install the LiveRamp Identity Resolution and Transcoding native app:
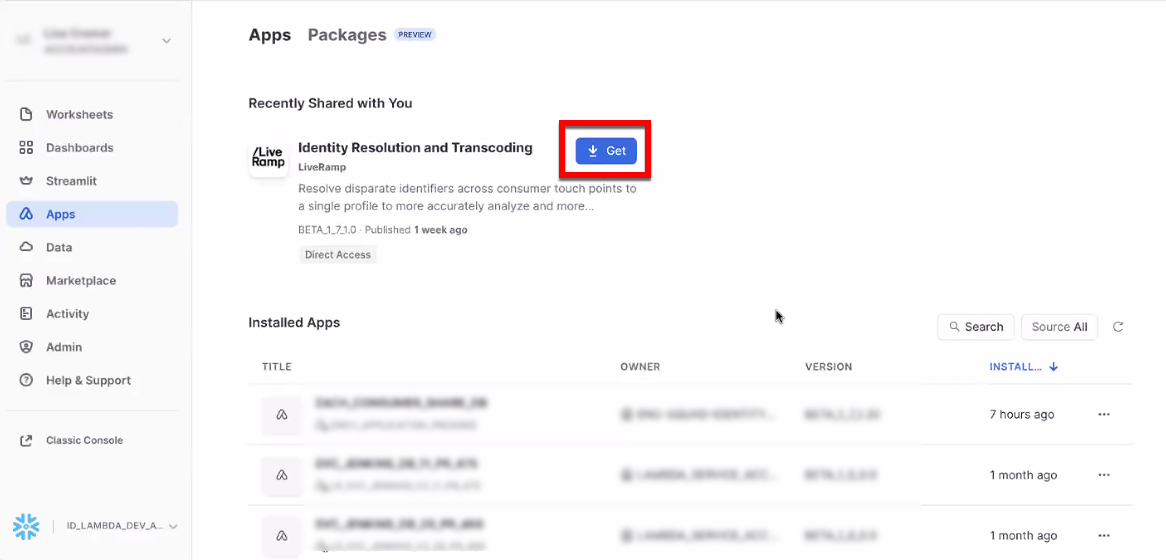
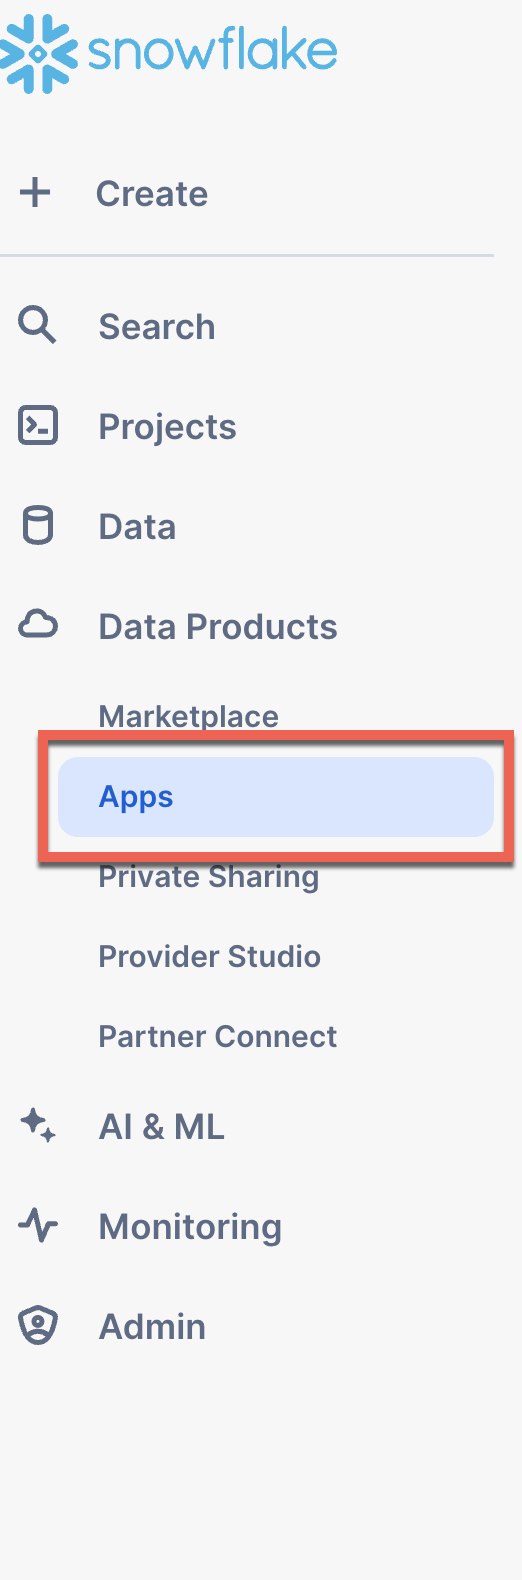
From the left navigation bar of Snowsight, select .
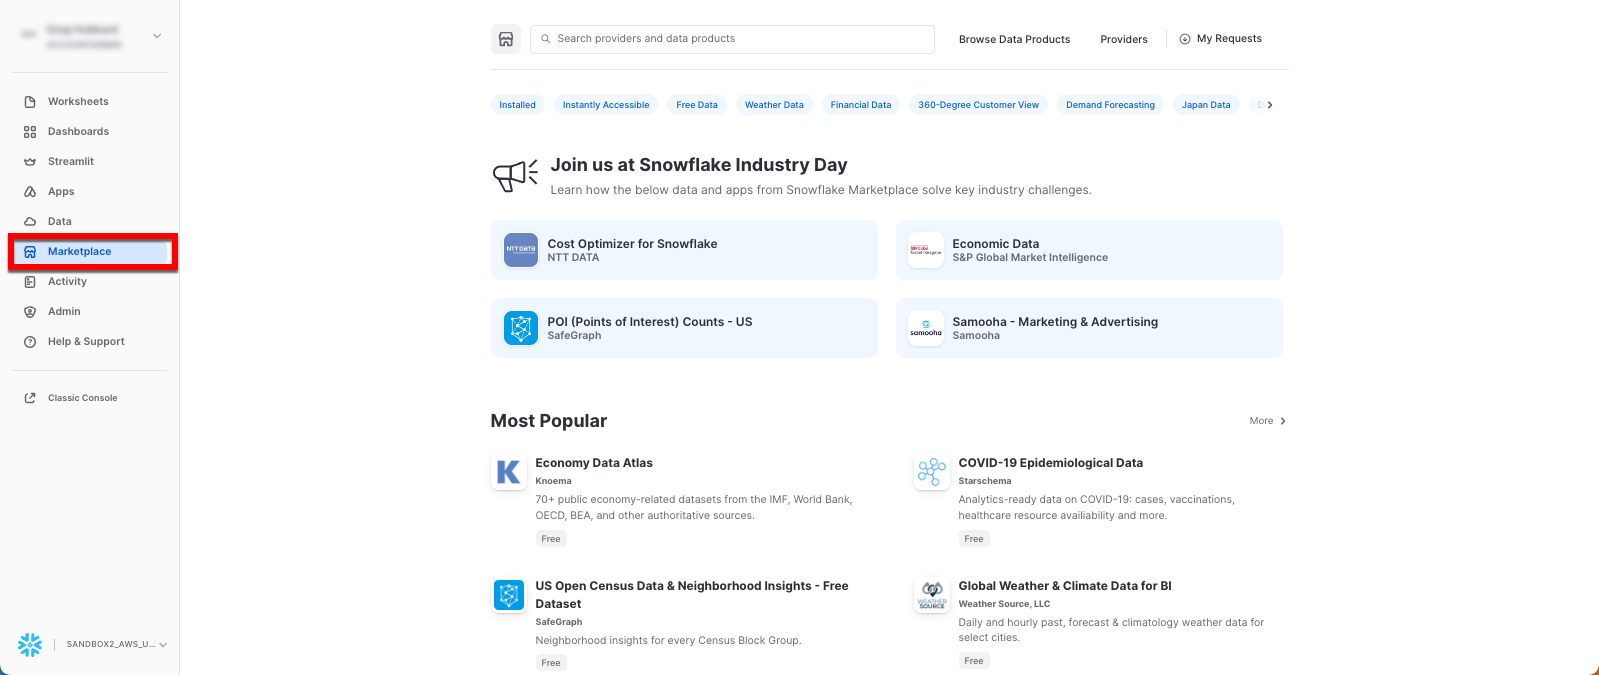
Search or browse to find the LiveRamp Identity Resolution and Transcoding native app and then click .
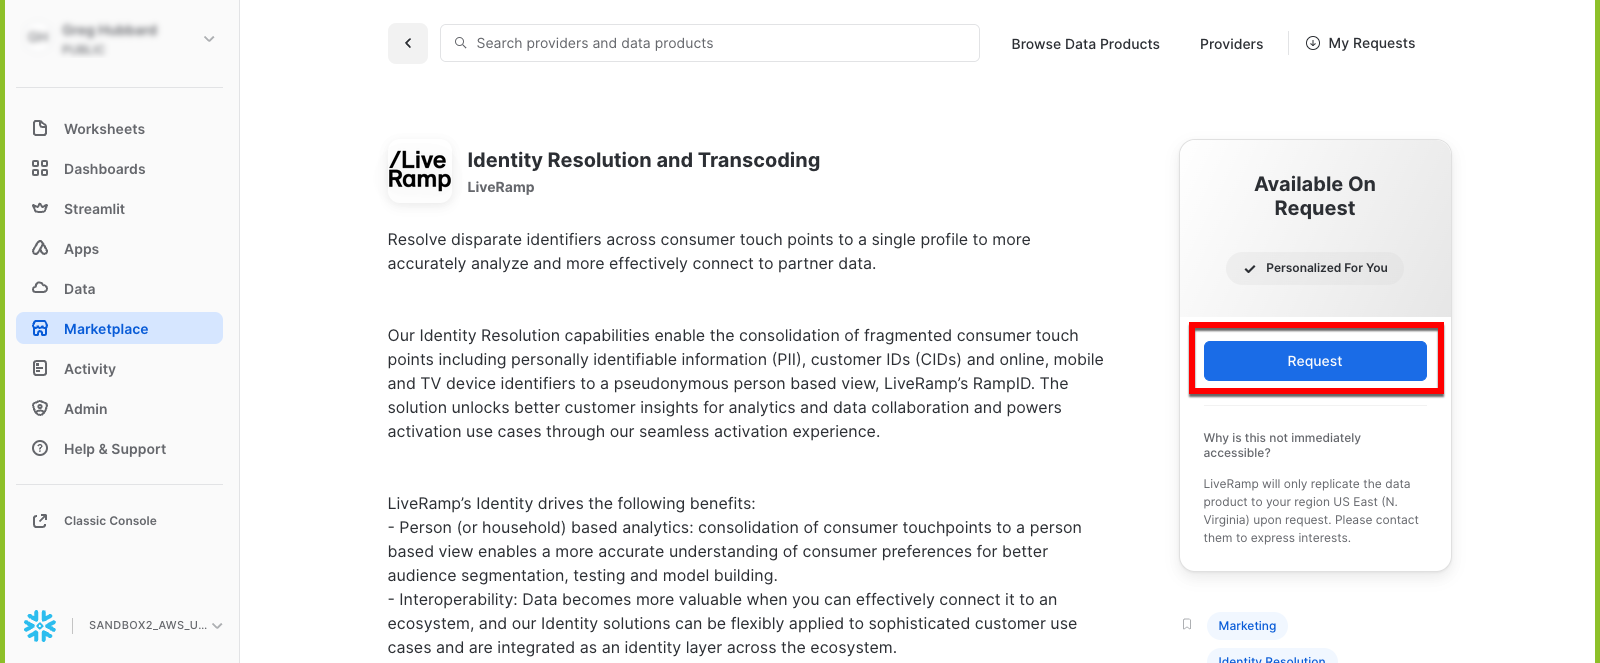
If your email address has not been previously verified with Snowflake, you’ll receive an email to allow you to verify your email address.
Fill in the fields on the form and then click .
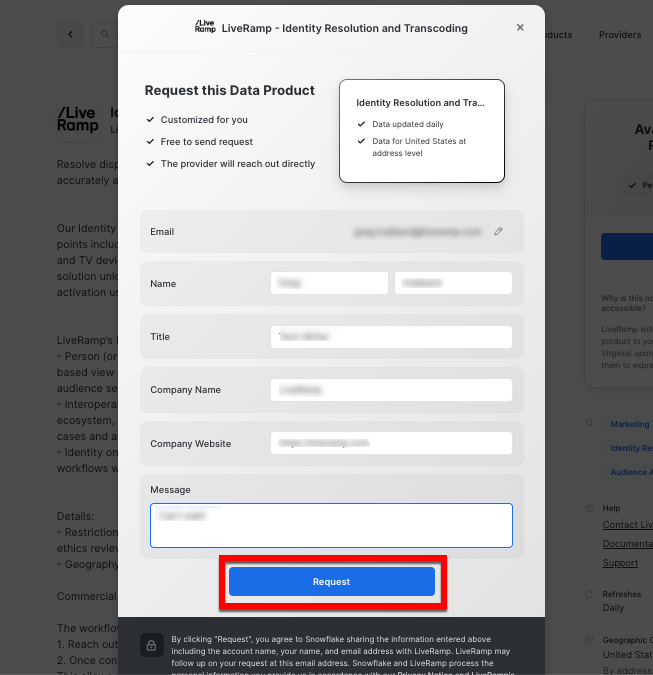
LiveRamp will then reach out to you to begin the contracting process and other required steps. Once these steps have been completed, LiveRamp shares the native app to your account.
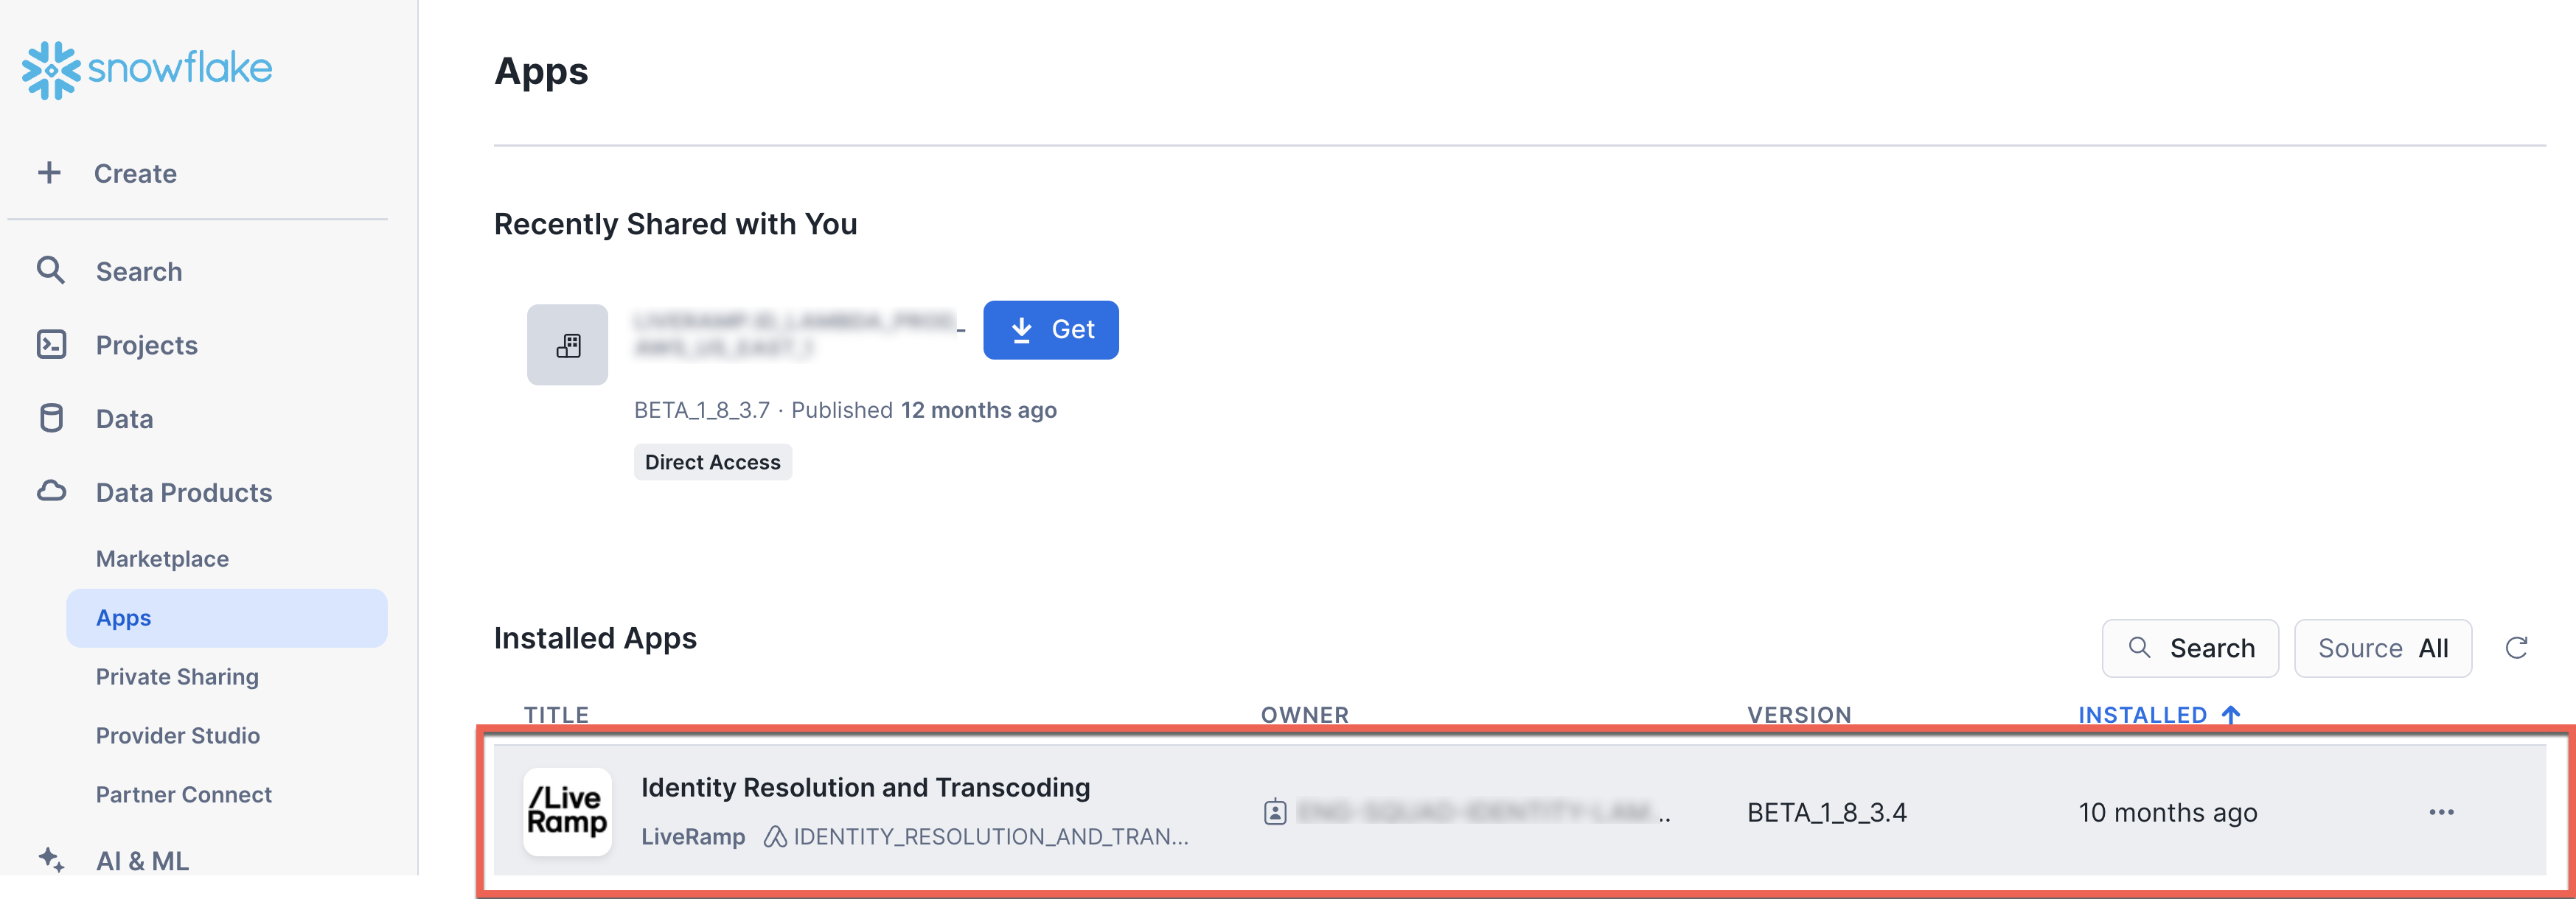
Once the native app has been shared to your account, select .
From the "Recently Shared with You" area, click for the LiveRamp Identity Resolution and Transcoding native app.
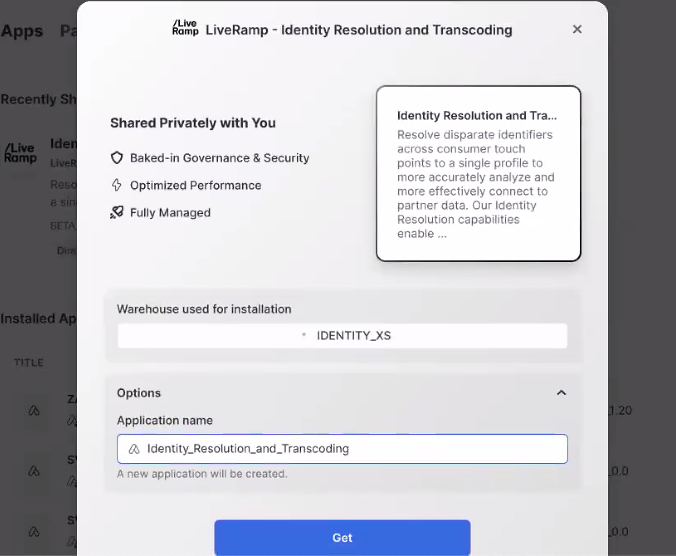
Select the appropriate warehouse.
Note
See Snowflake’s warehouse documentation for more information on the creation and use of warehouses. A warehouse is a specification of computer resources used for operations and follows Snowflake’s sizing and pricing rules for pricing and availability. A Snowflake warehouse will auto-suspend after a certain period of inactivity.
If desired, change the application name.
Click .
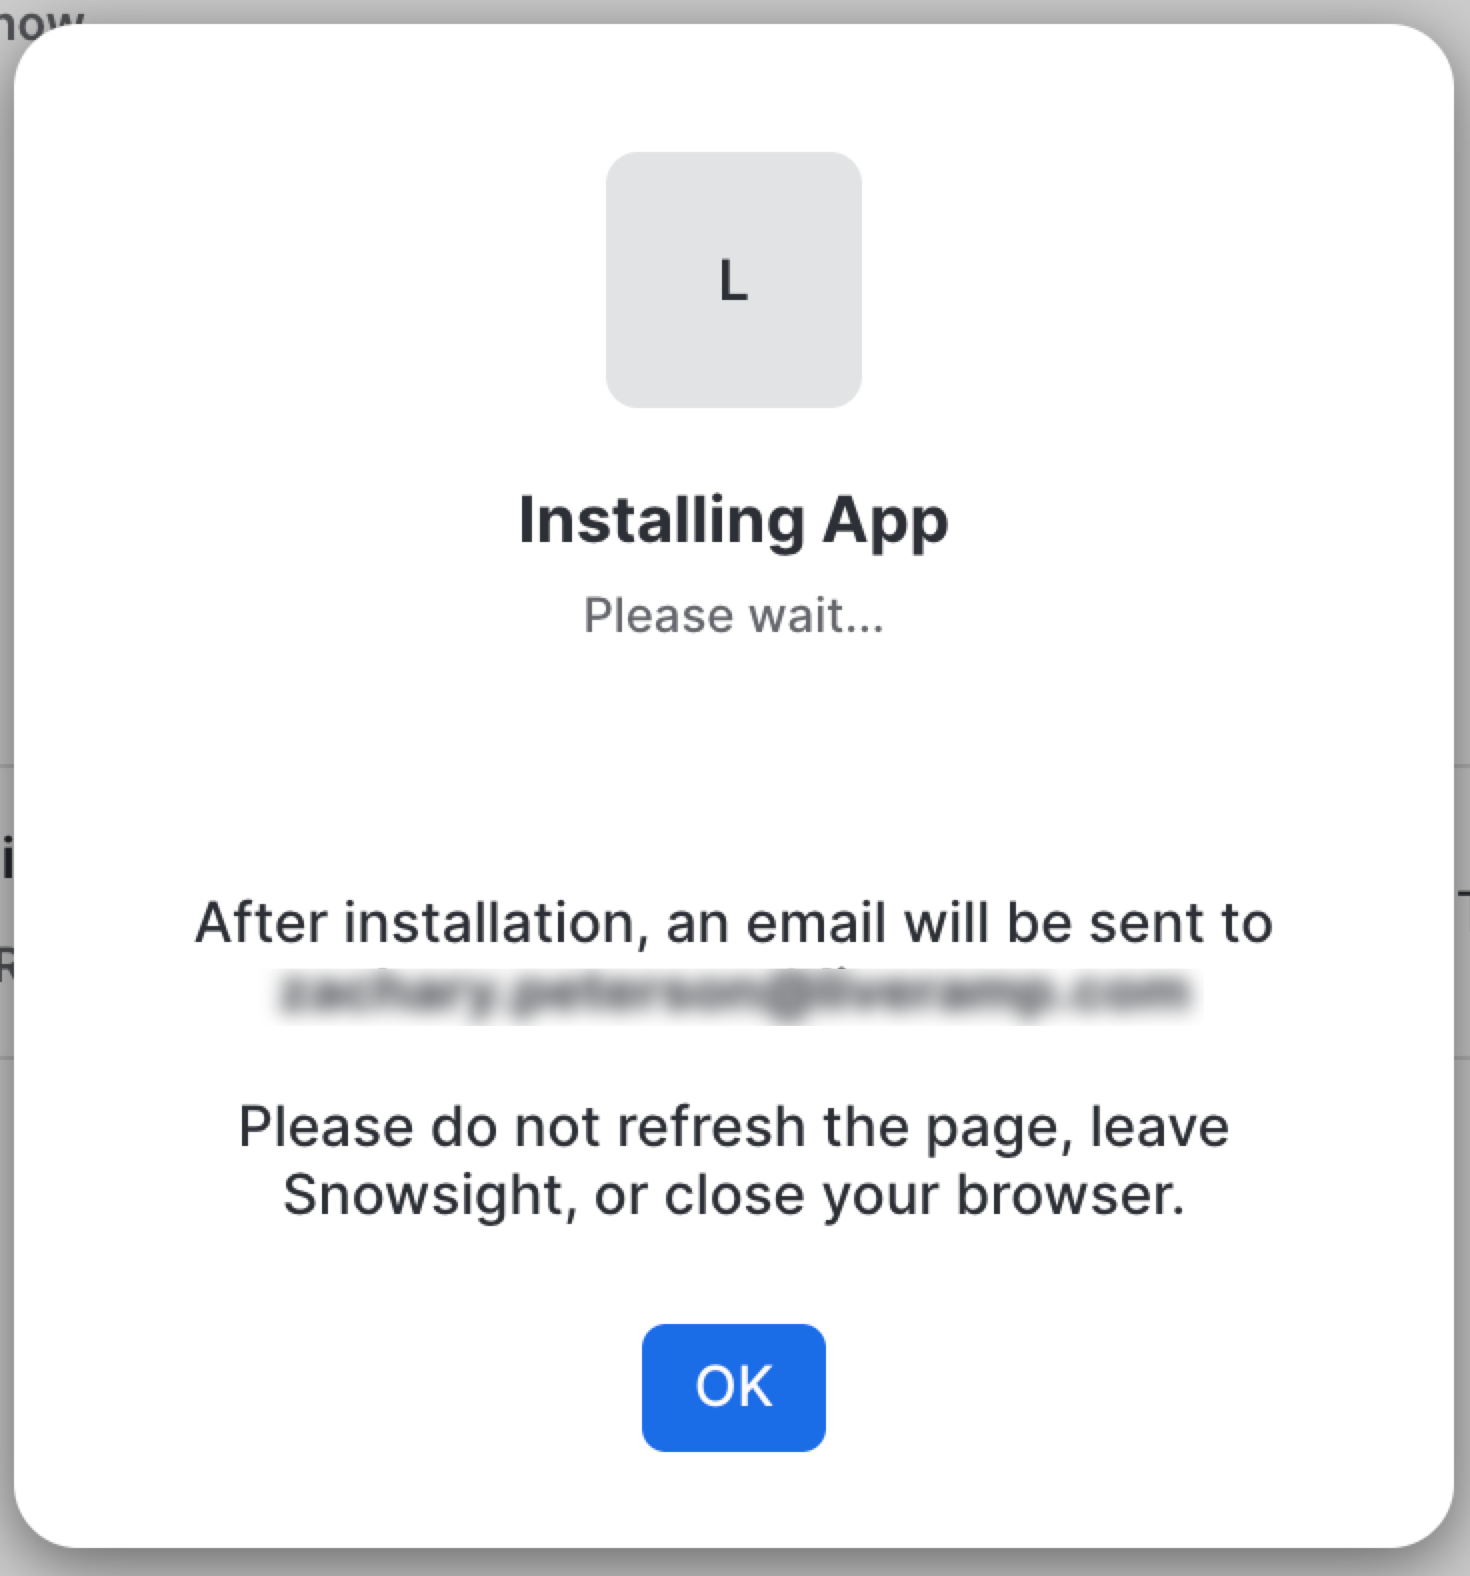
The installation process begins.
Note
Do not leave the page or refresh the browser until you receive an email confirming that the installation has finished.
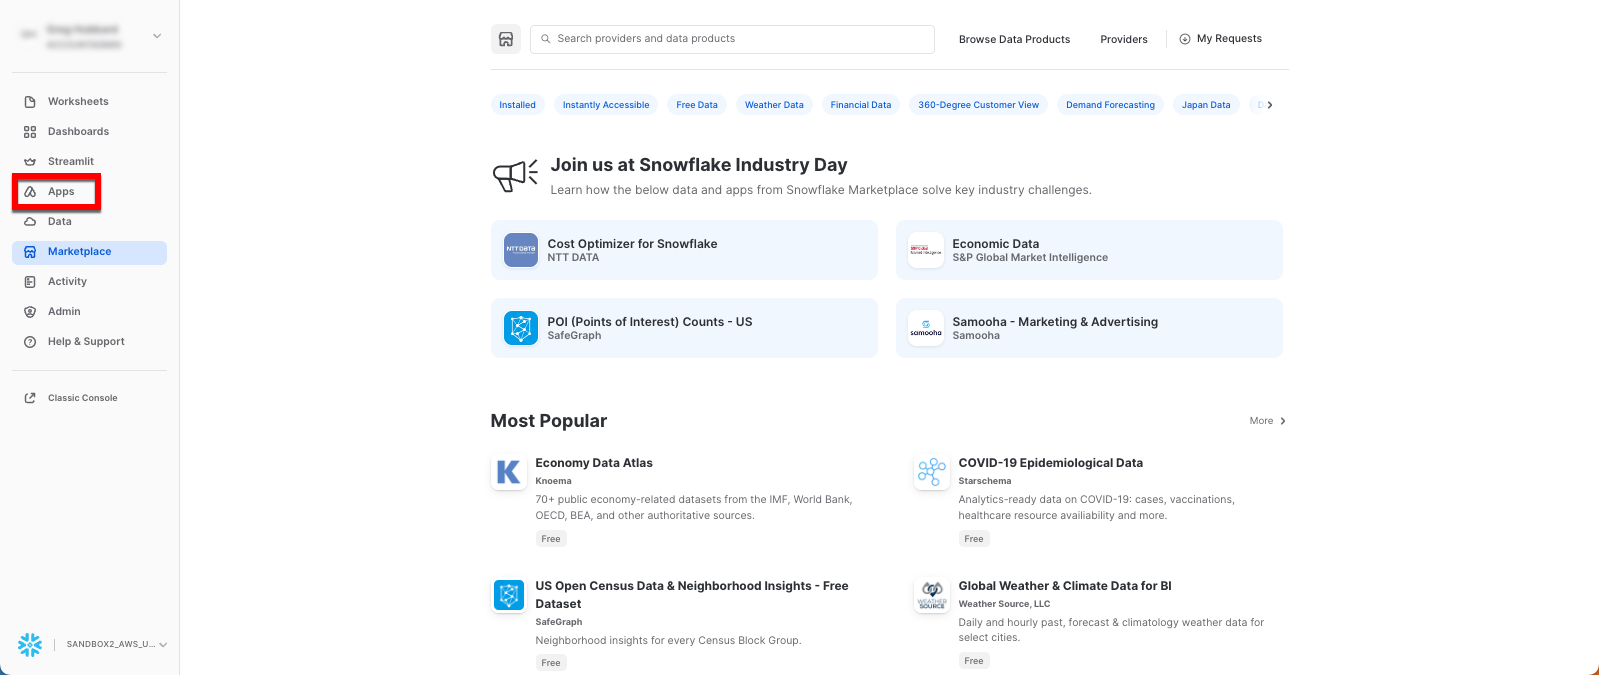
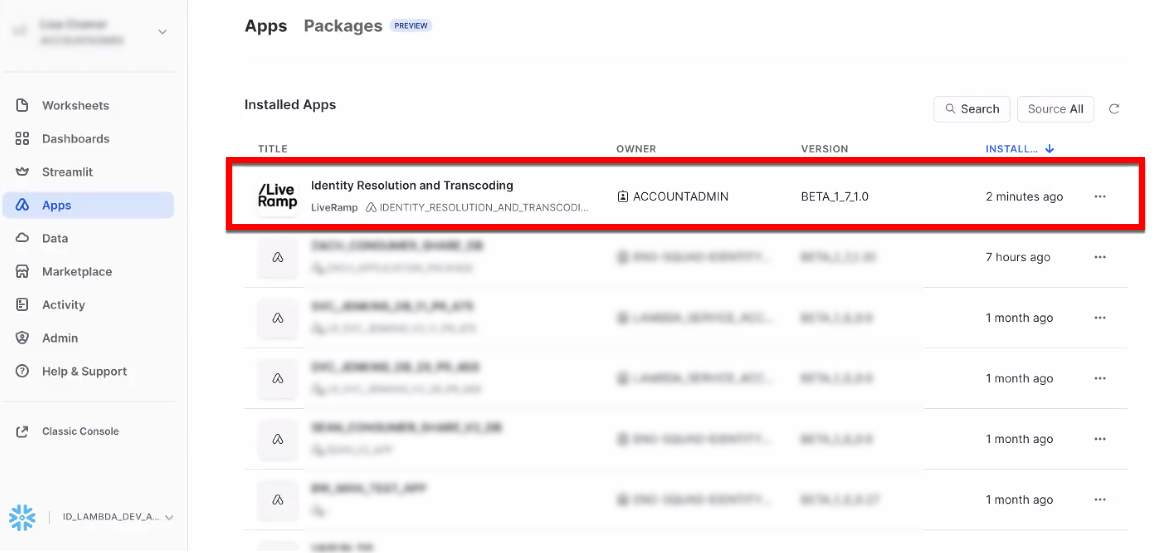
After the database is created successfully, the App will show up as an installed Application within the Apps section.
Open the LiveRamp Native App
To open the LiveRamp native app, double-click the application name in the Apps area.
You are taken to the Readme view from the application, which provides key details on inputs allowed, data configuration, and expected application behavior.

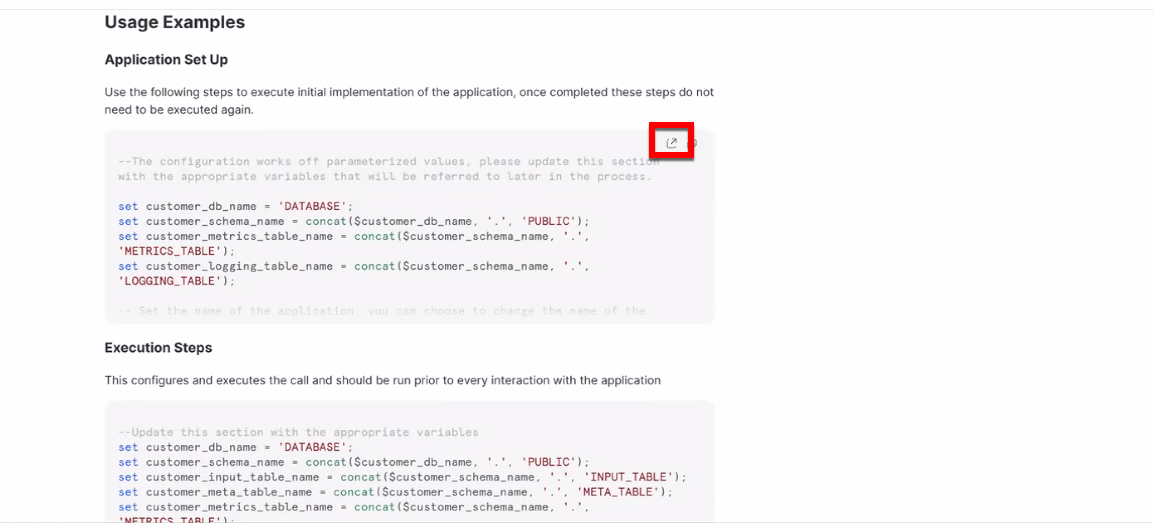
At the bottom of the screen, you'll see sample SQL for the one-time initial application setup, as well as sample SQL with execution steps for performing an operation.
At the top of each sample SQL, an "Open in Worksheets" option appears upon hover to allow you to open the sample SQL in a worksheet.
Perform Initial Application Setup
Before you perform an operation, you must perform the initial setup of the native app by running the Application Setup SQL with your updated values. This setup performs the following actions:
Sets the necessary variables that will be used in subsequent steps.
Creates an integration to LiveRamp’s auth API and enables the application to use it.
Creates an integration with LiveRamp’s billing API, ensuring usage metrics can be tracked.
Note
Once completed, these setup steps do not need to be performed again.
To perform the initial application setup:
Open the Application Setup worksheet with the sample SQL for initial application setup.
Update the following variables in the sample SQL shown below and then run the SQL:
Note
Do not change the schema name. Leave this value as
lr_app_schema.DATABASE: The name of your databasePUBLIC: The name of the schema that holds the tables for identity resolutionLIVERAMP_IDENTITY_NATIVE_APP: The name of the database the native app is loaded toLIVERAMP_AUTH_INTEGRATION: The API integration that allows the native app to reach LiveRamps authentication API
--The configuration works off parameterized values, please update this section with the appropriate variables that will be referred to later in the process.

set customer_db_name = 'DATABASE';
set customer_schema_name = concat($customer_db_name, '.', 'PUBLIC');

-- Set the name of the application, you can choose to change the name of the application or leave it as is
set application_name = 'IDENTITY_RESOLUTION_AND_TRANSCODING';

--Update usage permissions on the appropriate database, schema and table names
grant usage on database identifier($customer_db_name) to application identifier($application_name);
grant usage on schema identifier($customer_schema_name) to application identifier($application_name);

-- Our application reaches out with client ID and secret to authenticate the workflow, please create and allow the application to use the API integration
create api integration if not exists LIVERAMP_AUTH_INTEGRATION
    api_provider = aws_api_gateway
    api_aws_role_arn = 'arn:aws:iam::715724997226:role/snowflake-lambda'
    api_allowed_prefixes = ('https://9e7j3merc8.execute-api.us-east-2.amazonaws.com/Prod')
    enabled = true;

grant usage on integration LIVERAMP_AUTH_INTEGRATION to application identifier($application_name);

--Our application reaches out with job metrics for billing, please create and allow the application to use the API integration. You will be able to track what job metrics got sent in LR_METRICS_SCHEMA.METRICS_VIEW
create api integration if not exists LIVERAMP_BILLING_API_INTEGRATION
    api_provider = google_api_gateway
    google_audience = 'embeddedidentitybilling-1mv2bhu1ltcuc.apigateway.identity-lambda-us-prod.cloud.goog'
    api_allowed_prefixes = ('https://embedded-identity-billing-gateway-ajm9gcm4.uc.gateway.dev')
    enabled = true;

grant usage on integration LIVERAMP_BILLING_API_INTEGRATION to application identifier($application_name);
use database identifier($application_name);
use schema lr_app_schema;

call enable_auth_api_call('LIVERAMP_AUTH_INTEGRATION');
call enable_billing_api_call('LIVERAMP_BILLING_API_INTEGRATION');
Set Up the Logging Events Table
The native app uses Snowflake Event Sharing to log activity to your account's event table, which can help you understand performance and enables information to be shared with LiveRamp for debugging and application health.
To enable the sharing of logs to LiveRamp:
Note
This only shares event logs generated by the LiveRamp native app back to LiveRamp. Any other events in the event table do not get shared to LiveRamp.
If you have not already done so, set up an event table for your account by following Snowflake’s instructions here.
Note
If you've already set up an event table for your account, you do not need to create an additional table.
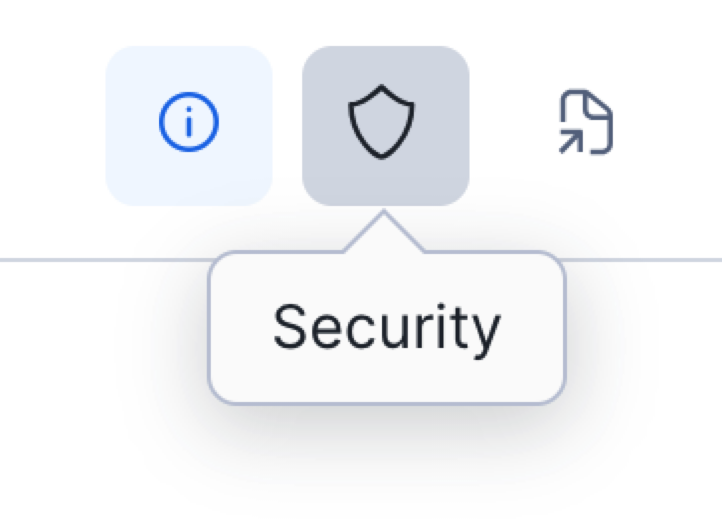
After opening the LiveRamp native app, select the Security (shield) icon on the top right.
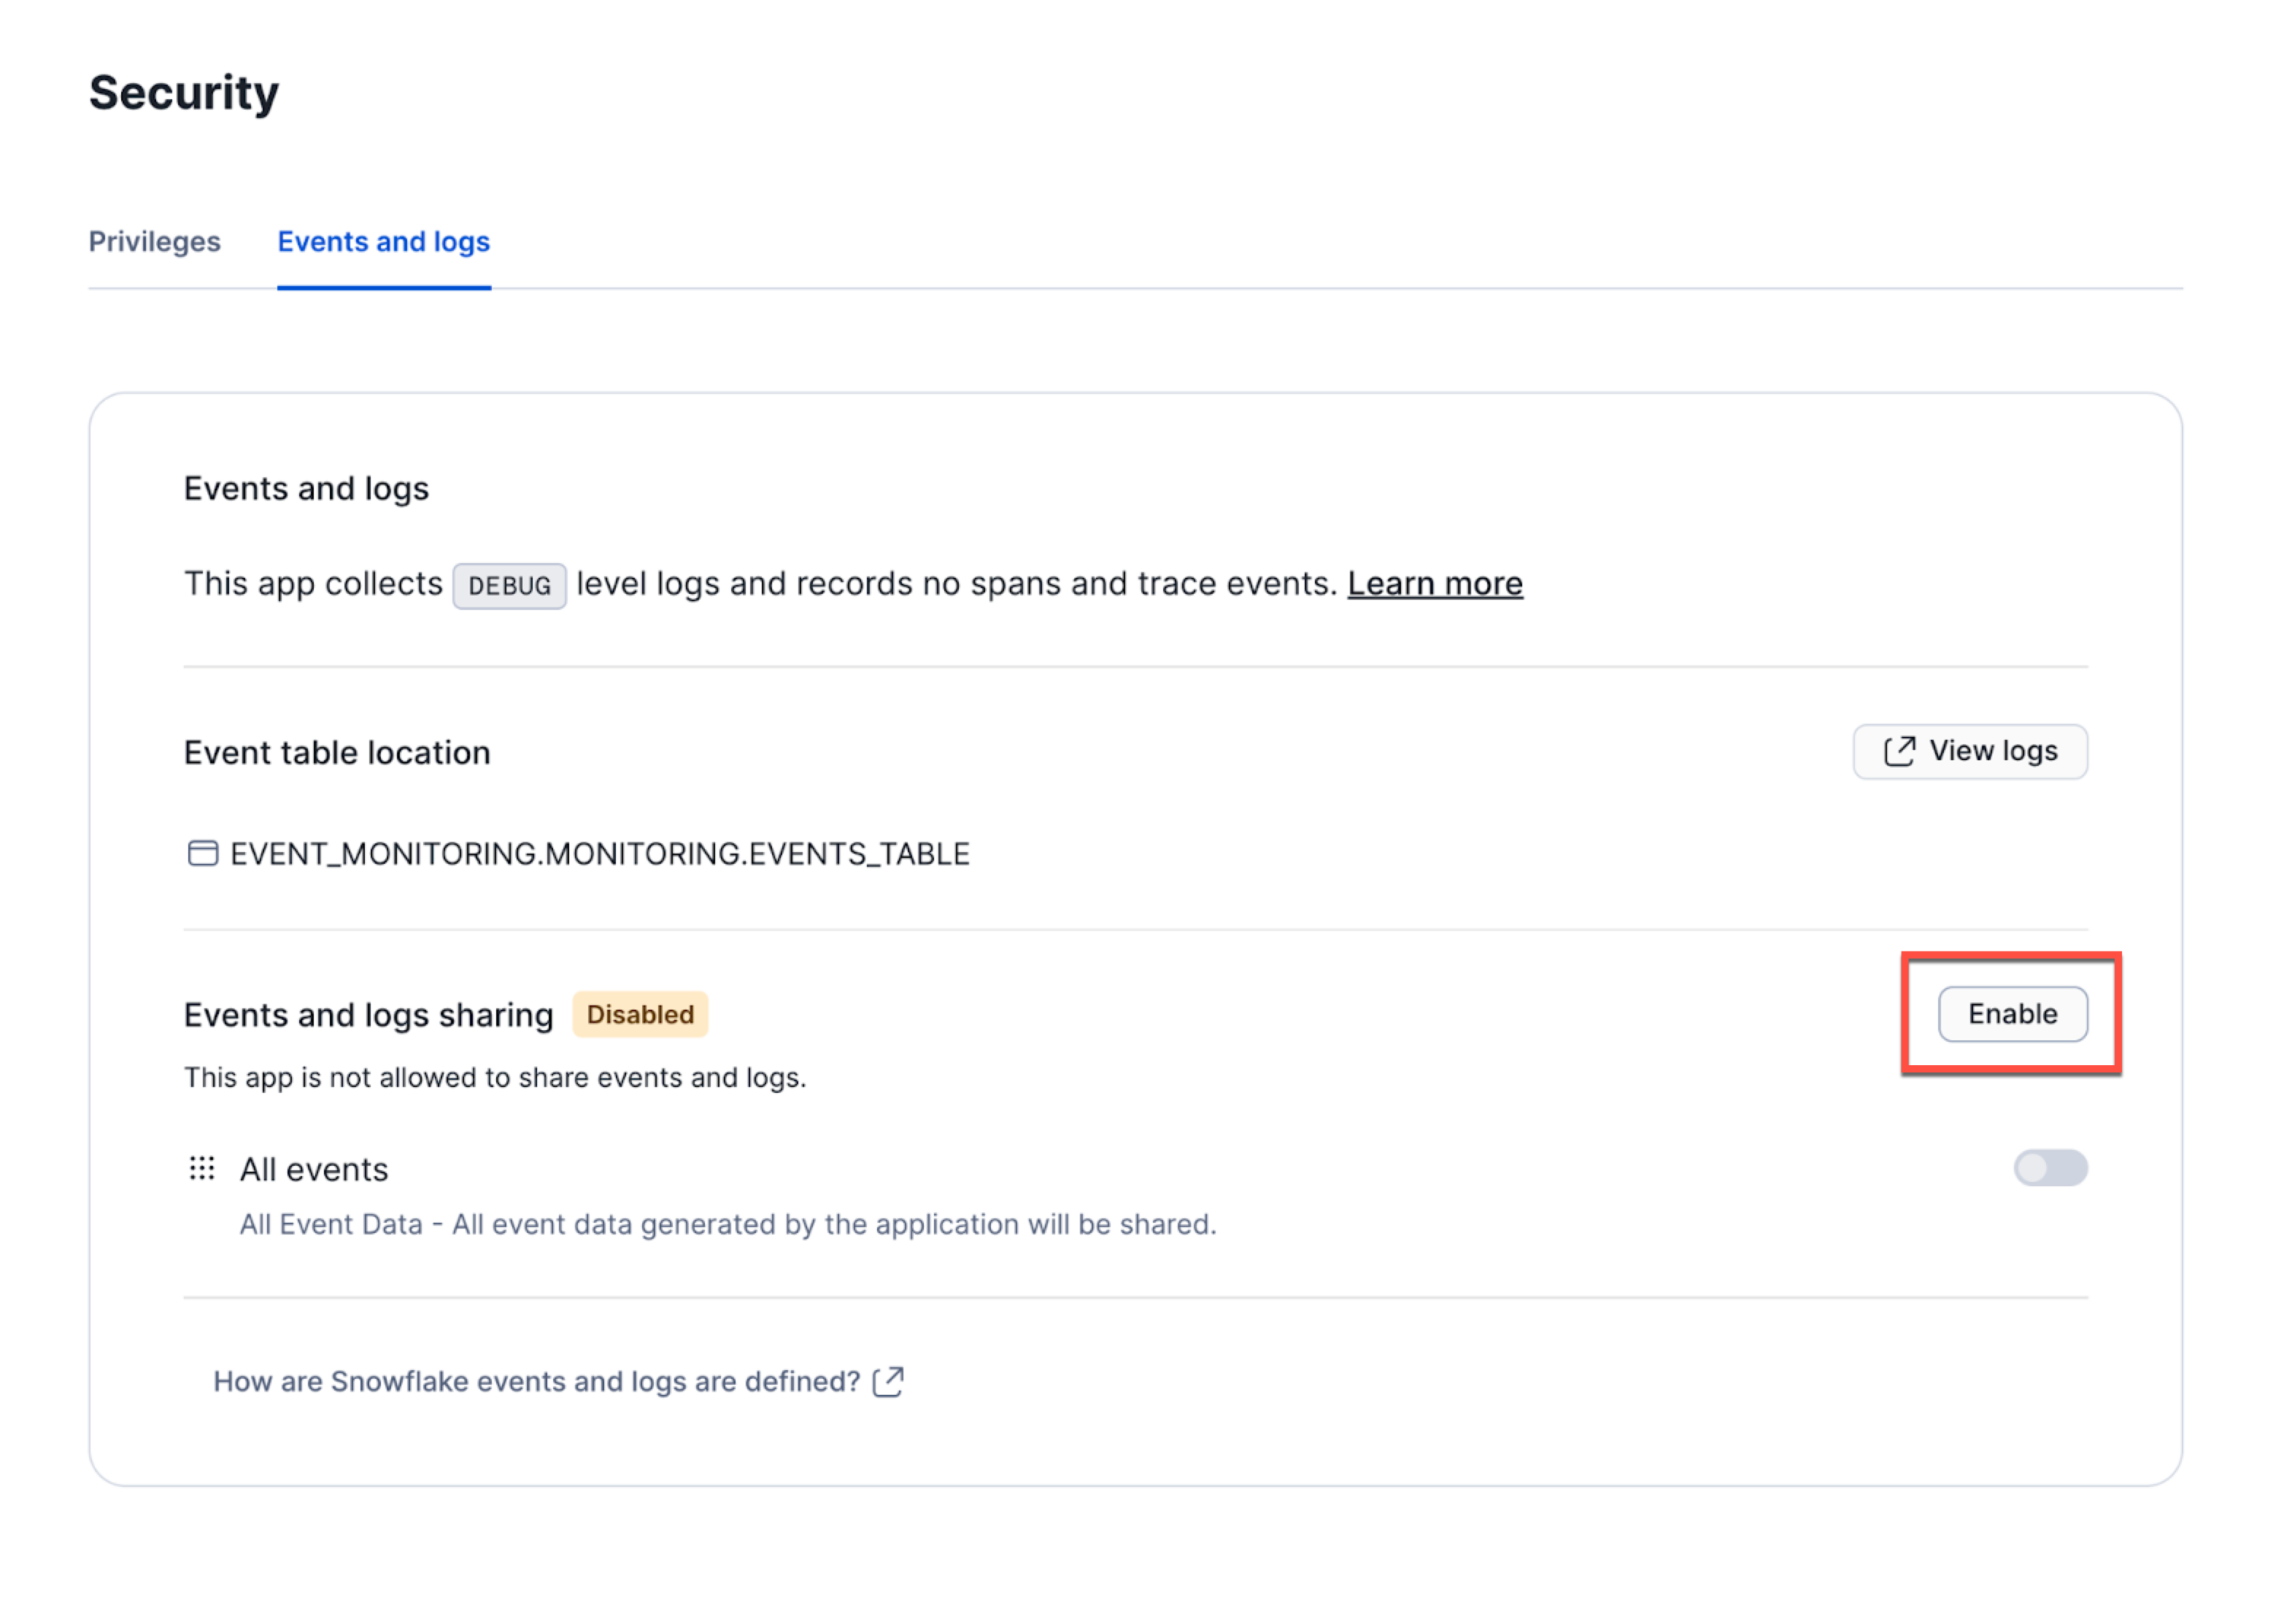
In the screen that opens, select the "Events and Logs" tab.
In the "Events and log sharing" area, click .
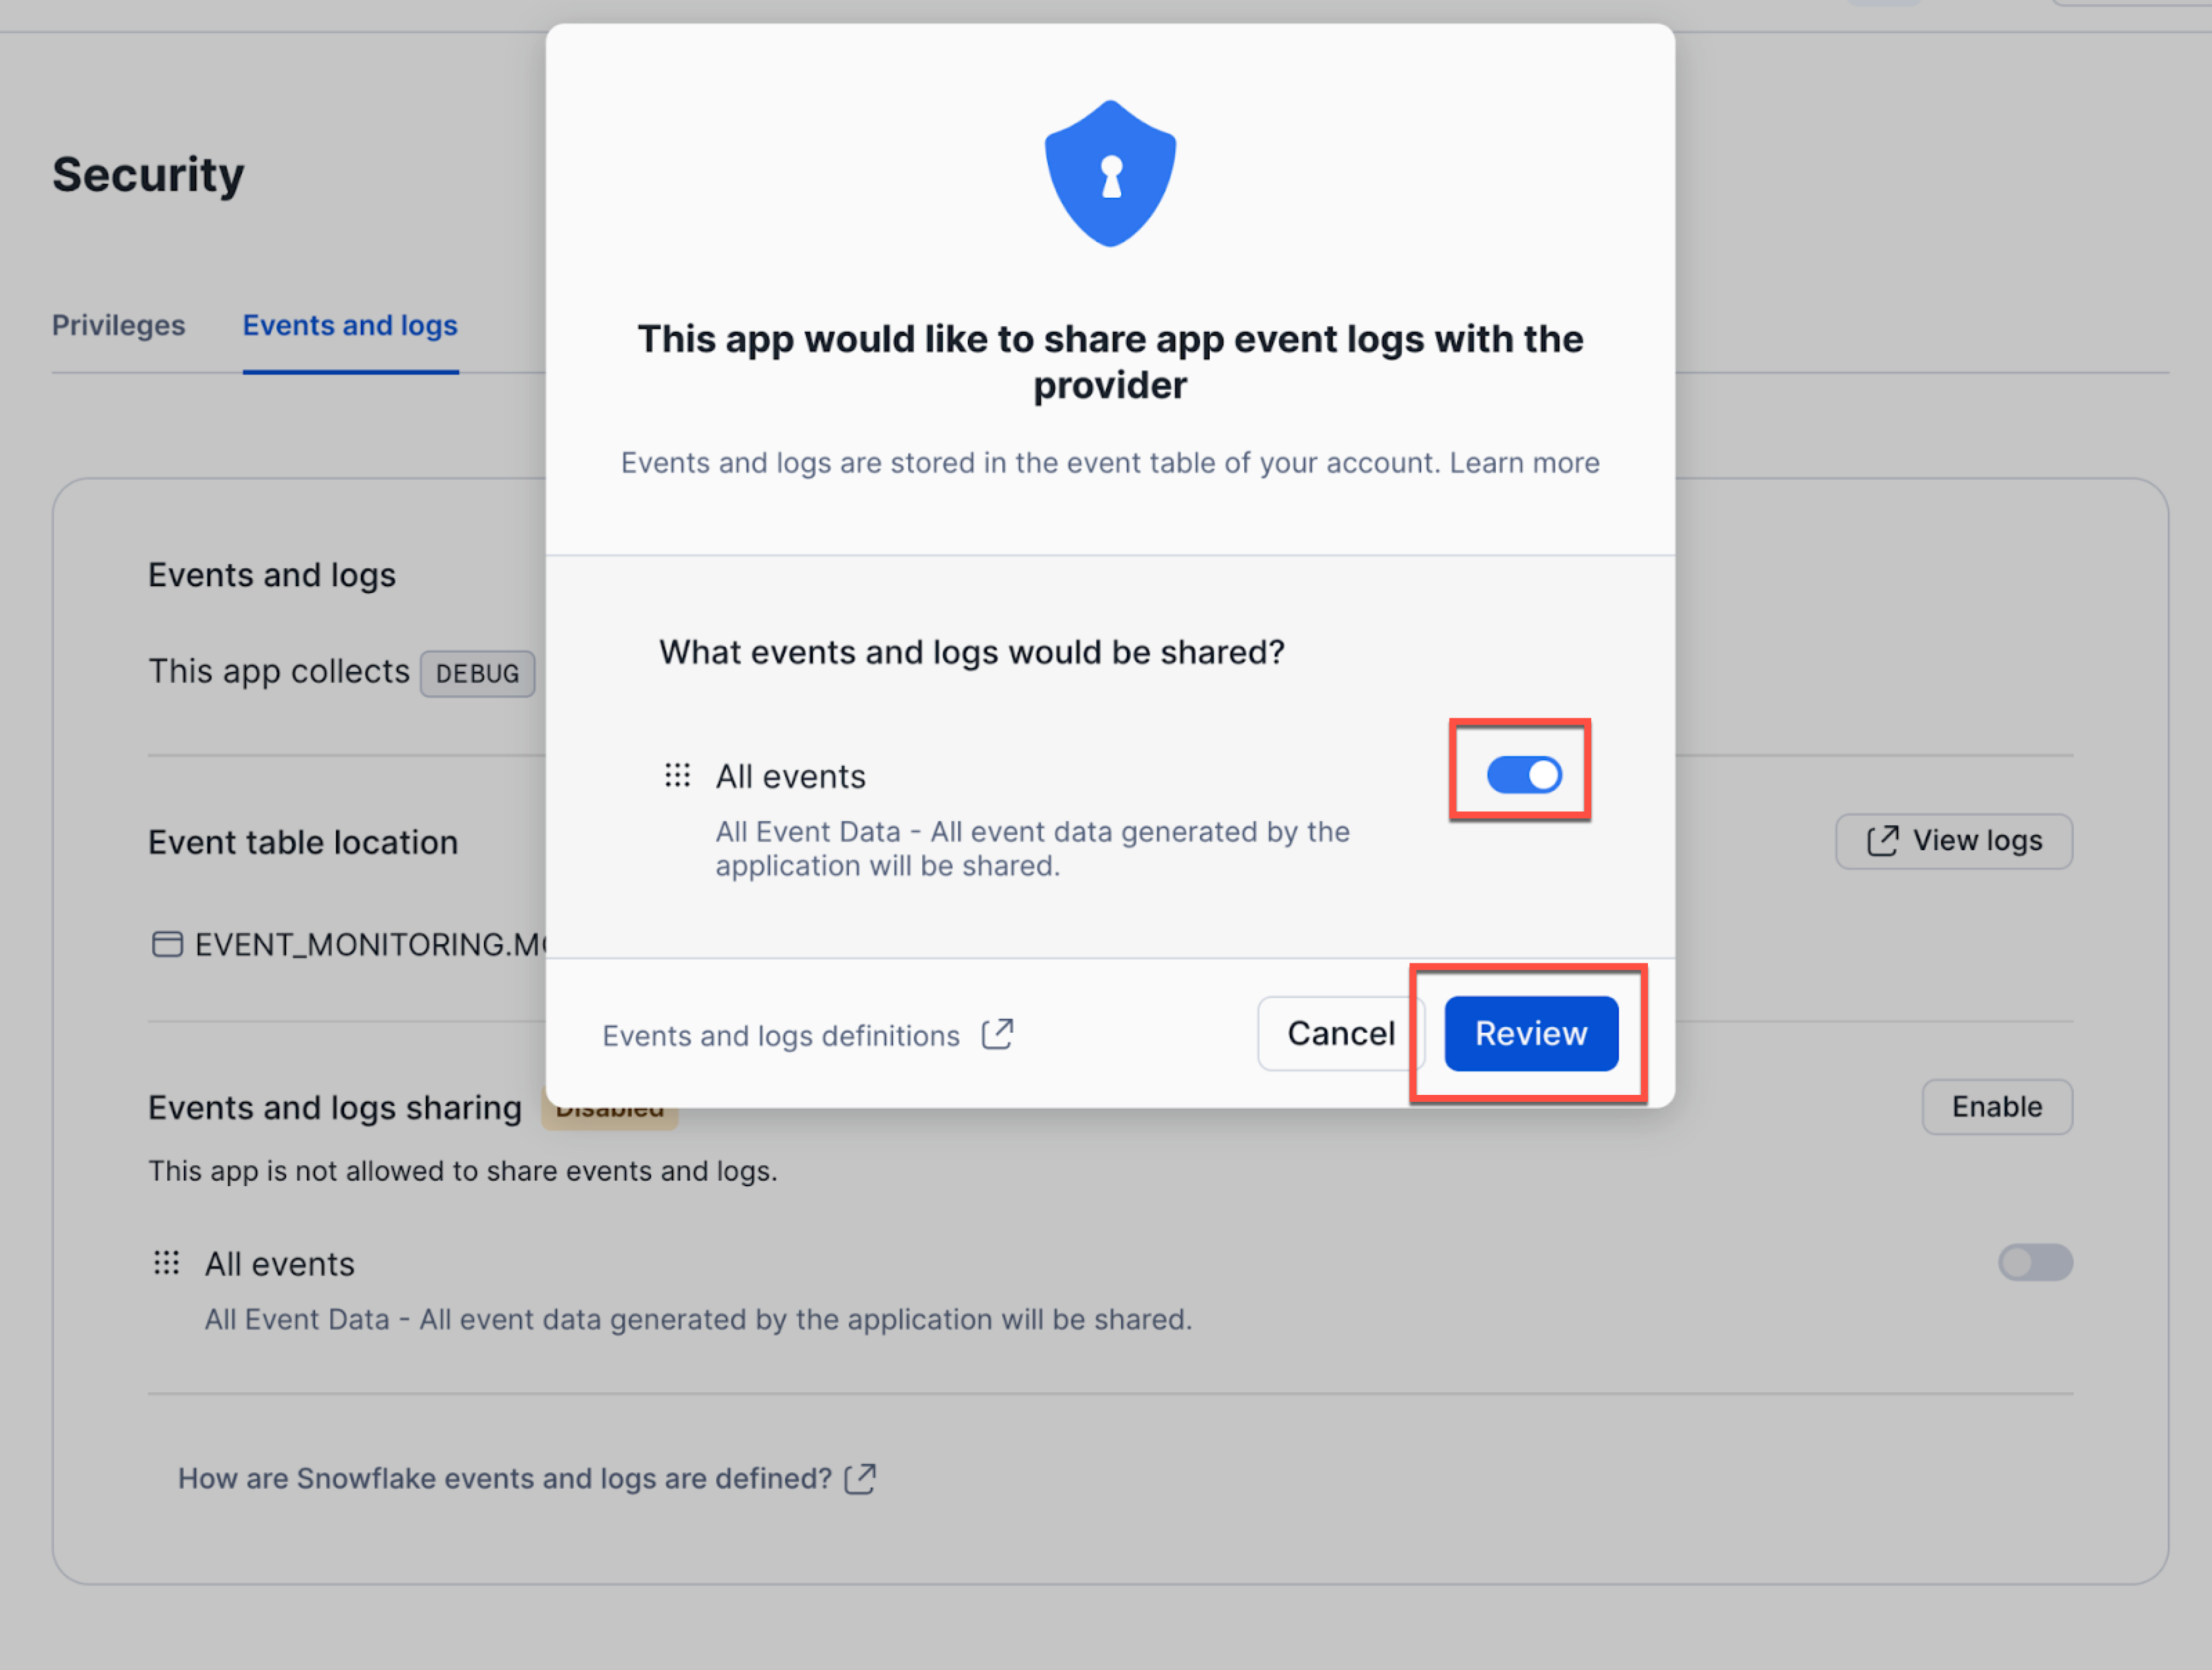
Slide the "All events" toggle to the right and then click .
Access the Metrics View
LiveRamp collects metrics for each job run through the native app. These metrics are sent to LiveRamp using an external function call. You can view the collected metrics in the native app under lr_metrics_schema.metrics_view.
Each record in the metrics view contains:
A timestamp
The UUID (transaction ID)
A billable flag
The number of records processed or not, an error count, and additional metadata
The job type
Share the Native App to a Different Role
You can share the installed native app to a different role on your account in either of the following ways:
Via the Snowflake UI
Via an SQL command
See the sections below for more information.
Share the Native App via the Snowflake UI
To use the Snowflake UI to share the installed native app to a different role on your account:
From the navigation pane, using the role of the owner of the app, select Data Products → Apps.
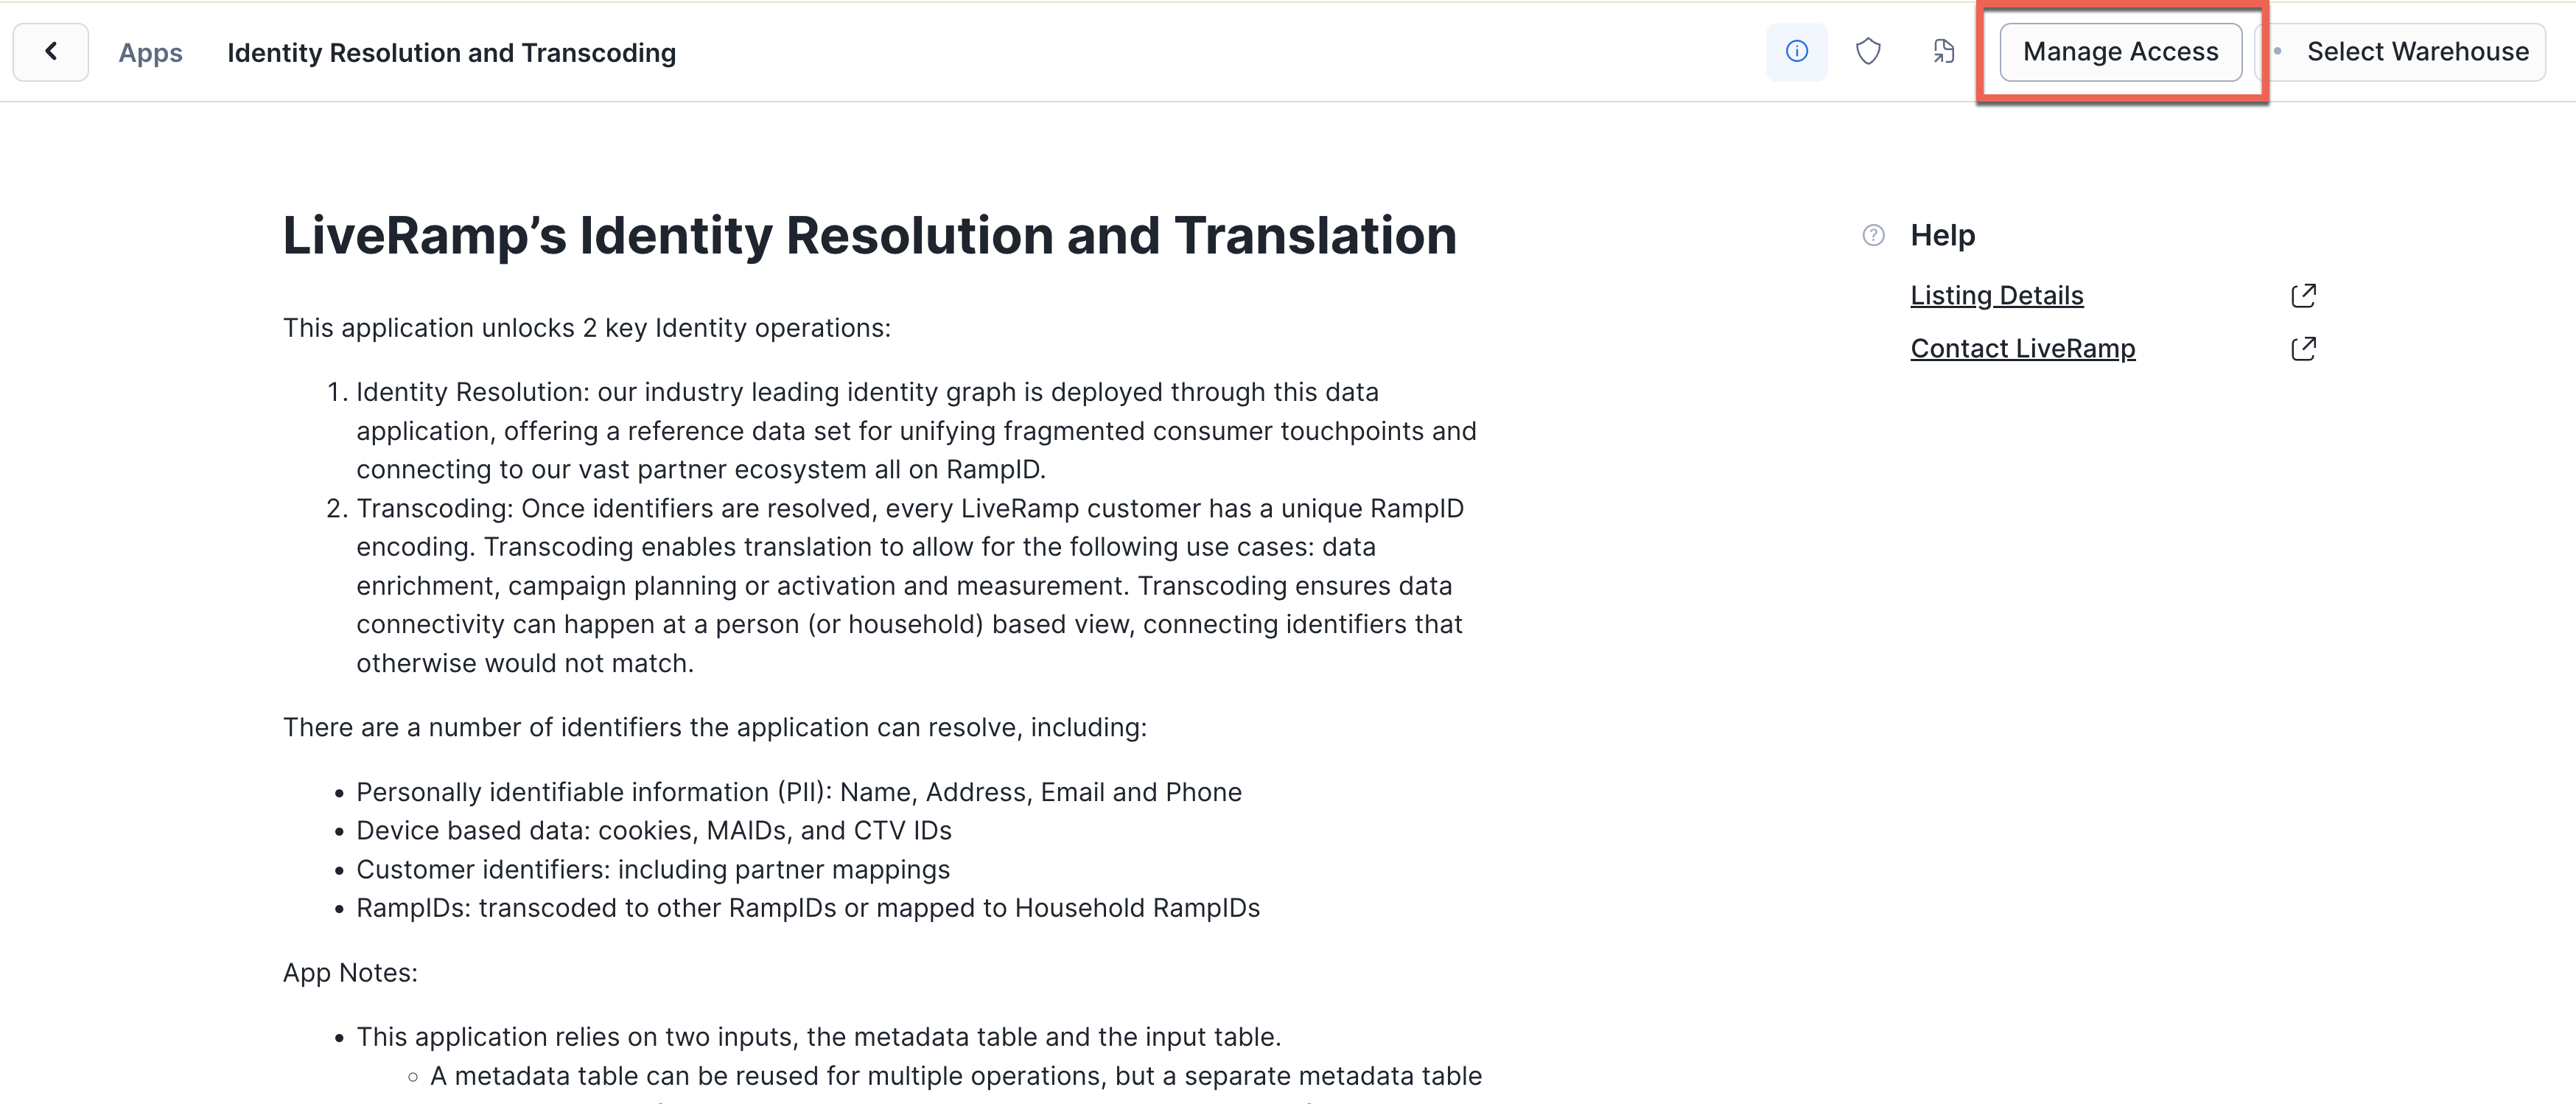
Click on the row for the LiveRamp app to open it.
Click .
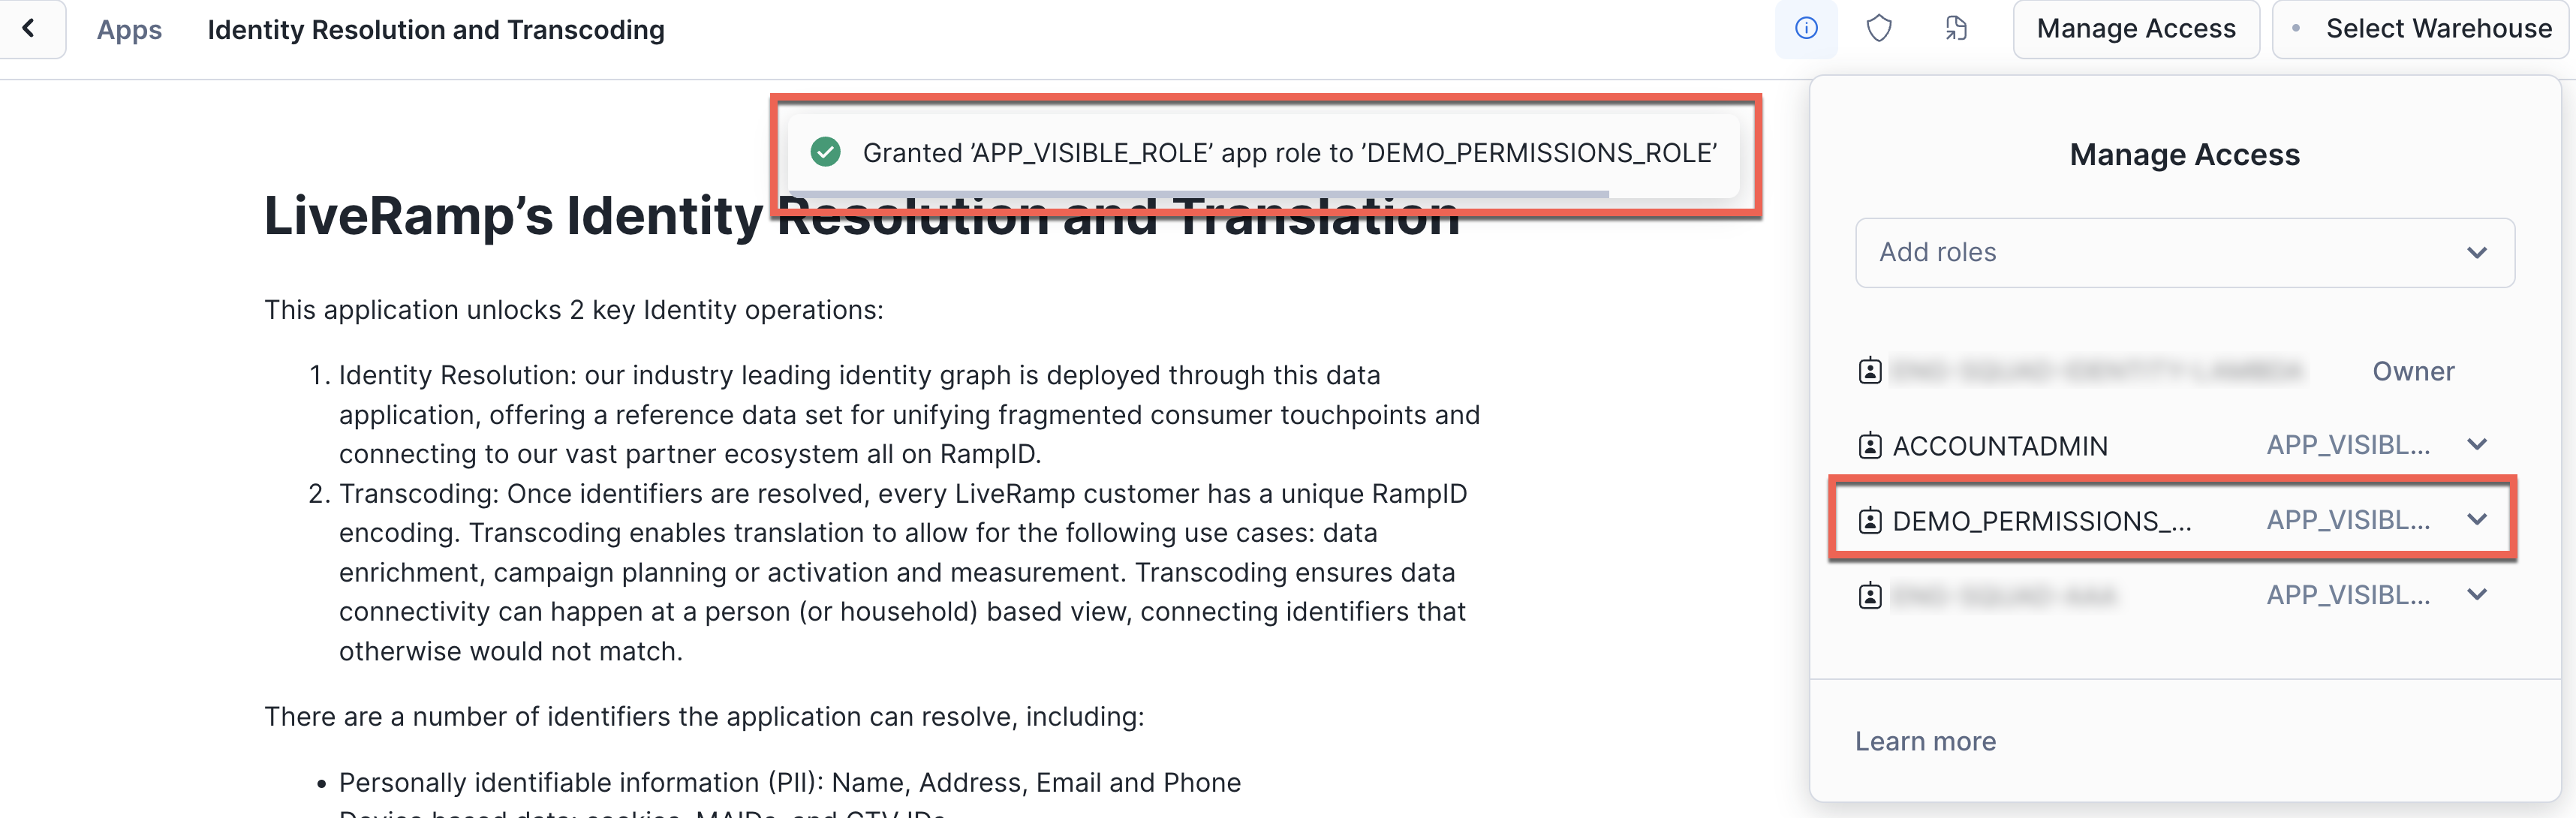
Select the additional role to grant access to the native app.
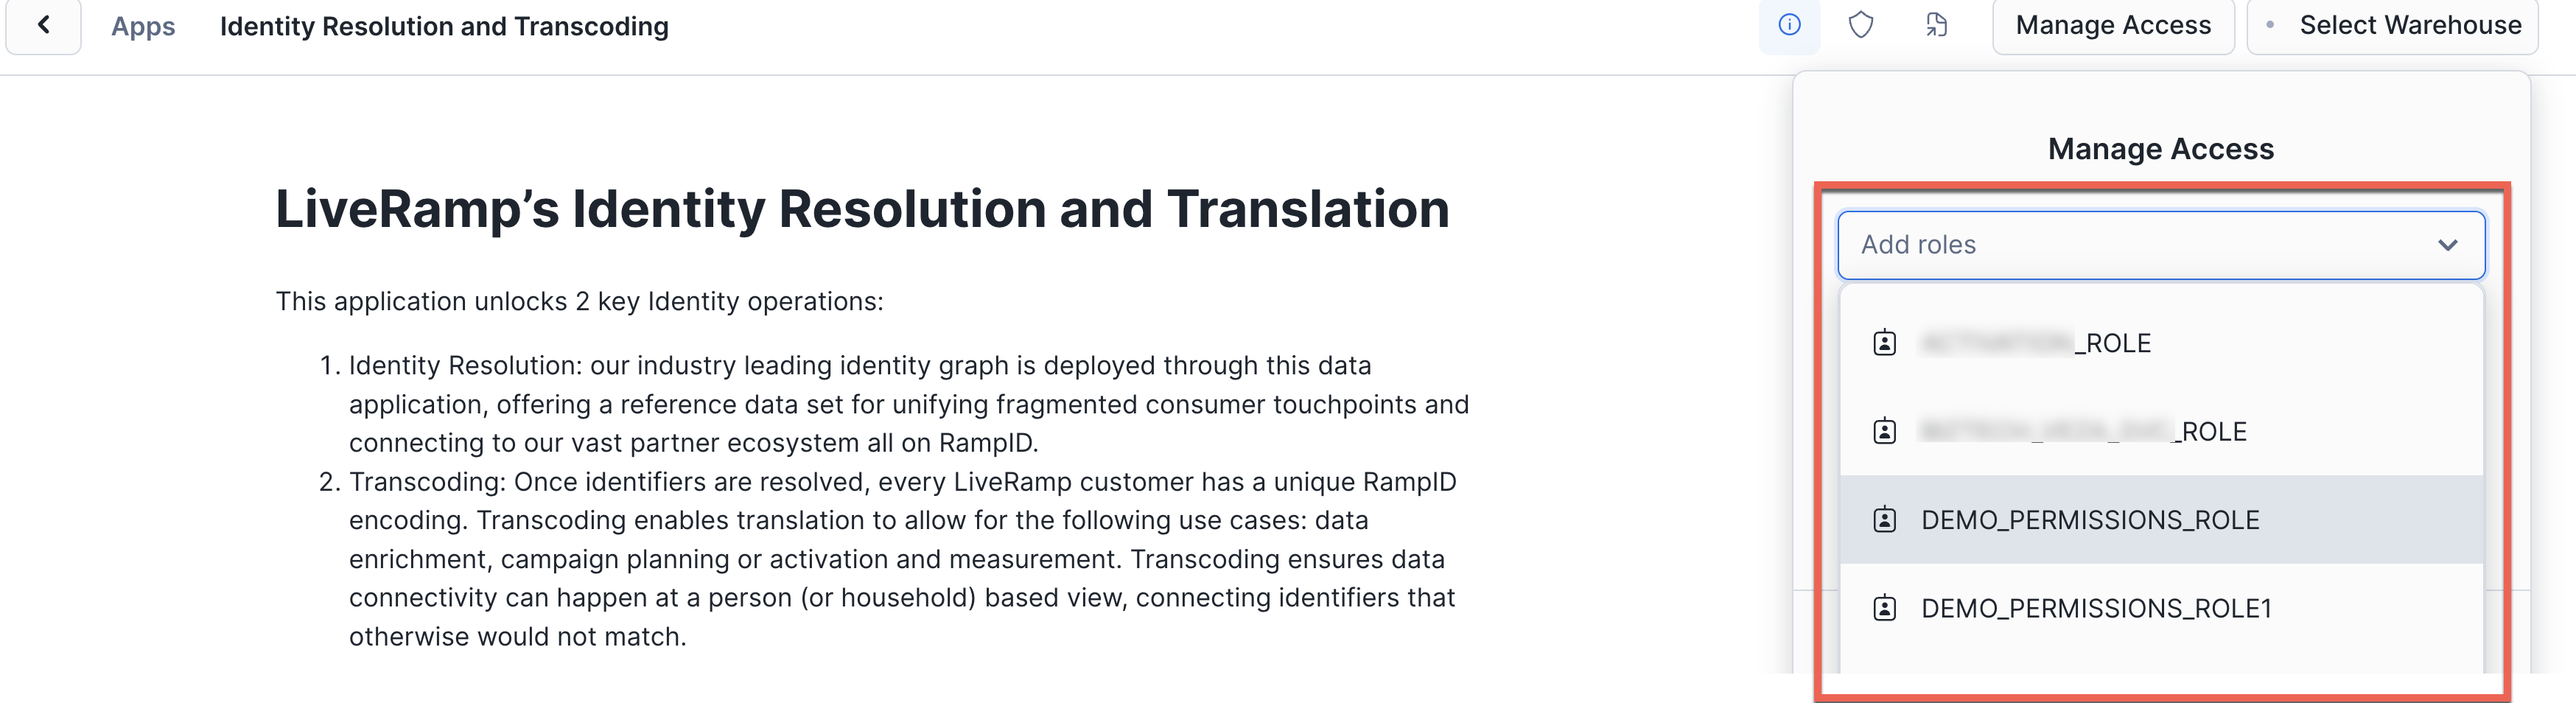
The UI indicates that the role has access to the "APP_VISIBLE_ROLE" role.
Set up Datavant Token Resolution
If you plan to use the native app to resolve Datavant Tokens to RampIDs, you must run the Datavant Setup SQL with updated values.
Note
Once completed, these setup steps do not need to be performed again.
If you do not plan to use the native app to resolve Datavant Tokens to RampIDs, you do not need to perform these steps.
This setup performs the following actions:
Sets the necessary variables that will be used in subsequent steps.
Creates a network rule to enable network calls to Datavant’s APIs.
Creates an integration to Datavant’s API.
Creates a compute pool for the containerized Datavant job to run in the native app.
Grants the application permission to use the integration and compute pool.
Saves the configurations for Datavant jobs in the native app.
To perform the initial application setup:
Open the Datavant Setup worksheet with the sample SQL for the Datavant Token Resolution setup.
Update the following variables in the sample SQL shown below and then run the SQL:
SITE_NAME: The site name that Datavant has provided for your company
-- Datavant setup requires providing your company's Datavant site name.
-- Please update this section with the appropriate variables that will be referred to later in the process.


set datavant_site_name = 'SITE_NAME';
set datavant_network_rule = concat($customer_schema_name, '.', 'DATAVANT_NETWORK_RULE');


-- Create network rule for Datavant endpoints
CREATE NETWORK RULE IF NOT EXISTS identifier($datavant_network_rule)
   MODE = EGRESS
   TYPE = HOST_PORT
   VALUE_LIST = ('sec.datavant.com:443', 'auth.datavant.com:443', 'api.datavant.com:443');


-- Create external access integration using network rule
CREATE EXTERNAL ACCESS INTEGRATION IF NOT EXISTS DATAVANT_APIS_ACCESS_INTEGRATION
 ALLOWED_NETWORK_RULES = ($datavant_network_rule)
 ENABLED = true;


-- Create a compute pool for the native app
CREATE COMPUTE POOL LIVERAMP_COMPUTE_POOL
   FOR APPLICATION identifier($application_name)
   MIN_NODES = 20
   MAX_NODES = 20
   INSTANCE_FAMILY = CPU_X64_M
   INITIALLY_SUSPENDED = TRUE
   AUTO_SUSPEND_SECS = 1;


-- Grant usage on the integration and compute pool to the application
GRANT USAGE ON NETWORK RULE identifier($datavant_network_rule) TO APPLICATION identifier($application_name);
GRANT USAGE ON INTEGRATION DATAVANT_APIS_ACCESS_INTEGRATION TO APPLICATION identifier($application_name);
GRANT USAGE ON COMPUTE POOL LIVERAMP_COMPUTE_POOL TO APPLICATION identifier($application_name);


-- Set your Datavant job configuration in the native app
call configure_datavant_transform_service('DATAVANT_APIS_ACCESS_INTEGRATION', 'LIVERAMP_COMPUTE_POOL', $datavant_site_name);