Managing Clean Room User Groups
You can create user groups to grant multiple users with the same role access to clean rooms. This helps you save time by managing clean room access in bulk rather than adding users to clean rooms individually.
User groups are useful in the following situations:
You want to add or remove multiple users from one or more clean rooms at once.
You have users in your organization who require consistent permissions across clean rooms.
You want to set up who in your organization should access clean rooms and their permissions ahead of time so they can be assigned to clean rooms faster.
How User Groups Work Within a Clean Room
All users within a user group share the same default role and permissions. Within a clean room, you can add a user group to give all its members access to the clean room. You can add a user group to multiple clean rooms and centrally manage its members and permissions across all clean rooms the group has been added to at the organization level.
If you add a user to an existing group, the user will automatically gain access to allowed clean rooms and vice versa.
The group's permissions will depend on who owns the clean room they are a member of:
As a clean room owner: All permissions included in the group's assigned role apply.
As a clean room partner: Only the permissions allowed by the clean room owner and included in the group's assigned role apply.
Note
Users who are both individually assigned and part of a group in the same clean room receive the combined permissions of both. This can happen if a user already has access to a clean room and gets added later on to a user group with access to the same clean room.
For details on clean room permissions, see "Manage Permissions Within a Clean Room".
Create a User Group
Clean room assignment isn't required when creating a user group. You can add the user group to a clean room later, either from within the clean room or by editing the user group at any time.
If you don’t have a clean room role to assign to the user group yet, see "Managing LiveRamp Clean Room User Roles" for instructions.
From the Administration section of the navigation menu, select Clean Room Configuration → Clean Room Roles.
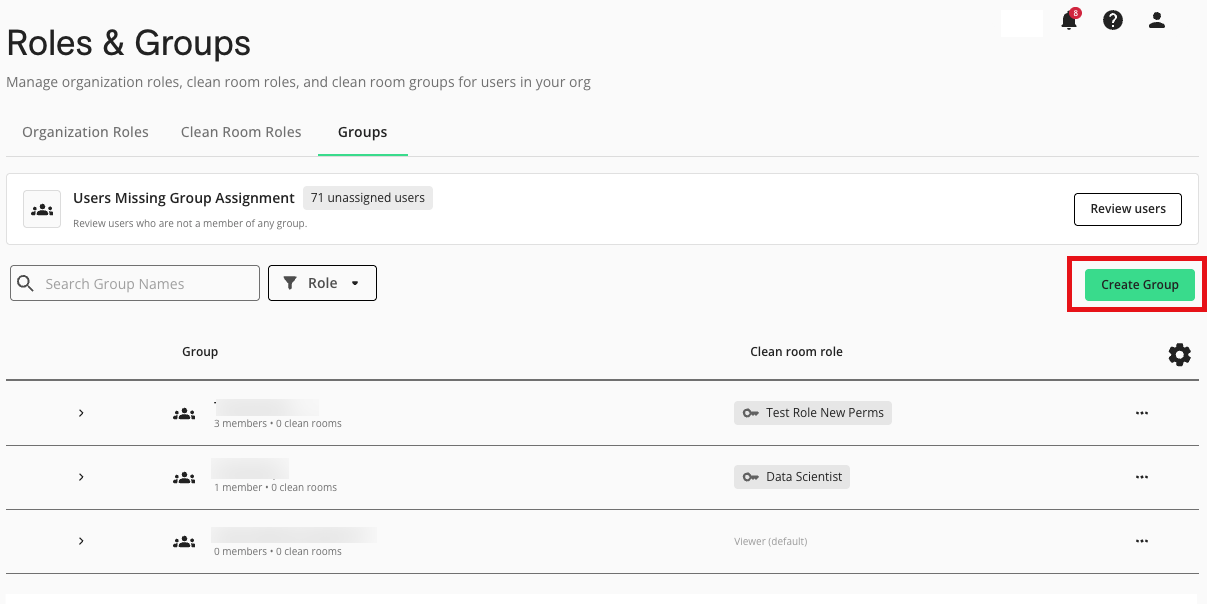
Select the Groups tab, and click .
In the Information section, enter a name and an optional description for the group.
In the Users field within the Members section, add all the users you would like to include in the group.
Select a role from the Default role dropdown that would apply to all group members and clean rooms. Once a role is selected, you can view which permissions are enabled for the role in the right-hand pane.
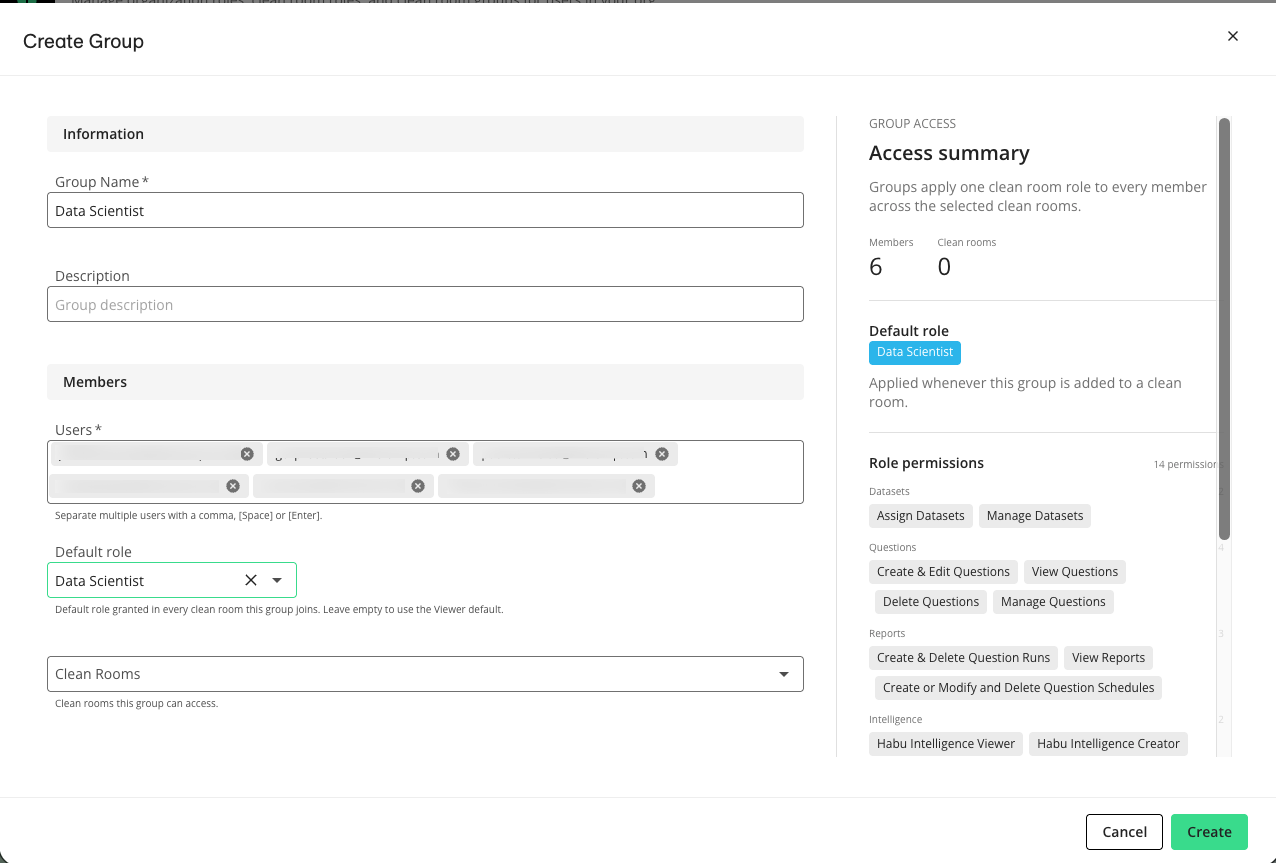
If no role is selected, all members will have the Viewer role by default.
(Optional) Select the clean rooms that the group can access.
Click .
The user group has been created. You can now add it from within a clean room to give its members access. See "Add Users to a Clean Room" for more information.
To edit a user group, click the More Options menu ( ) of a group and select "Edit Group". To edit the role's permissions, select the Clean Room Roles tab, click the More Options menu () of a role and select "Edit Clean Room Role".