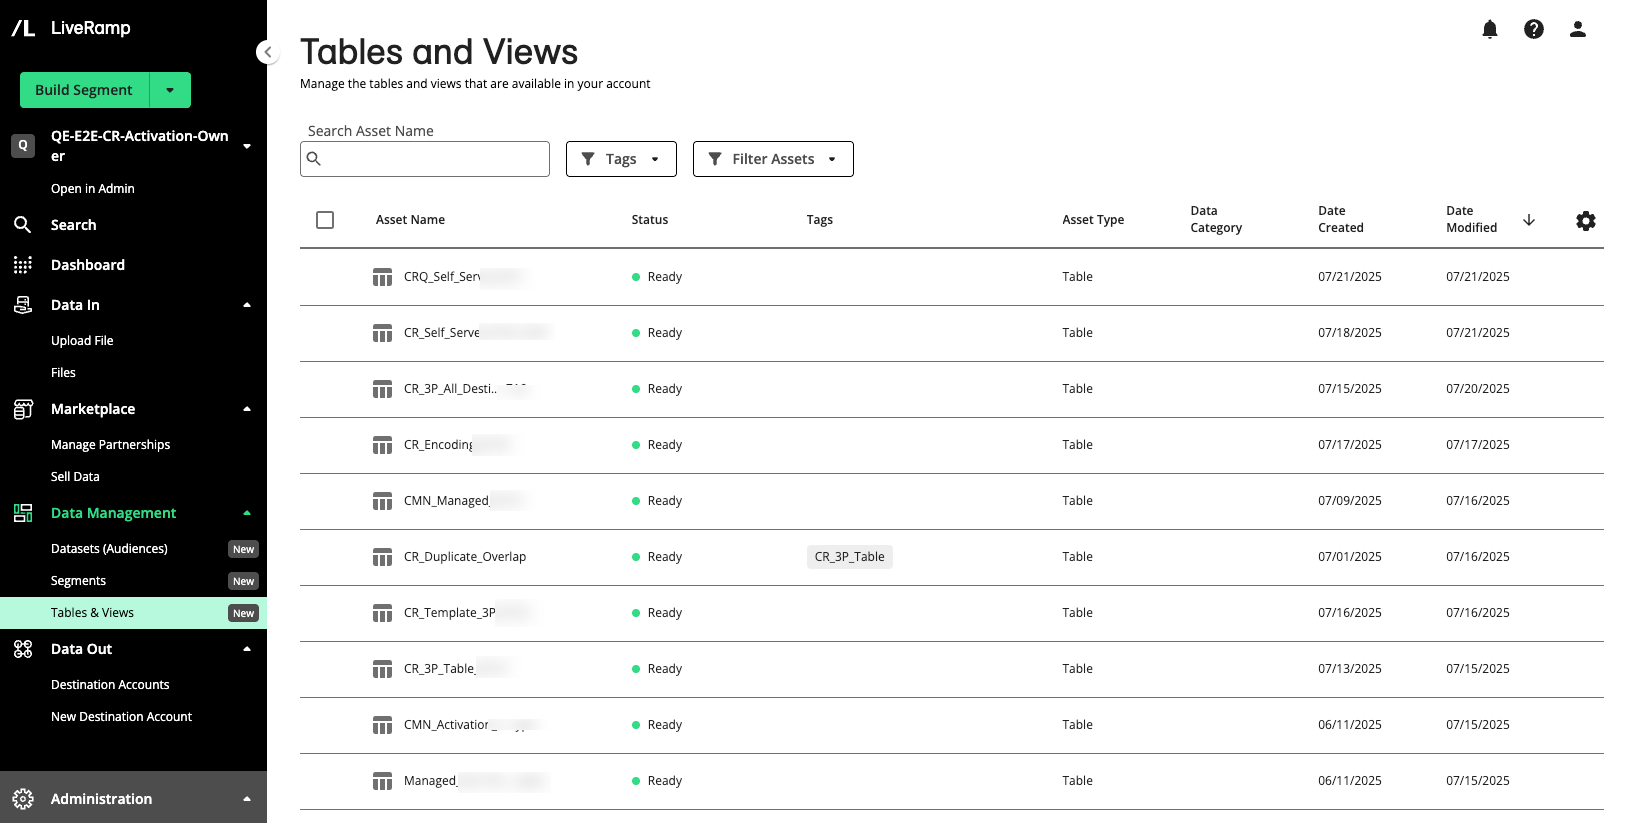
The Tables and Views Page
The Tables and Views page displays a list of the tables and views that are created by your organization or that your partners have permissioned for you to access:
Note
If you were previously using an earlier version of Connect, the asset management model in Connect 2.0 is somewhat different. For more information, see "What's Different With Asset Management 2.0".
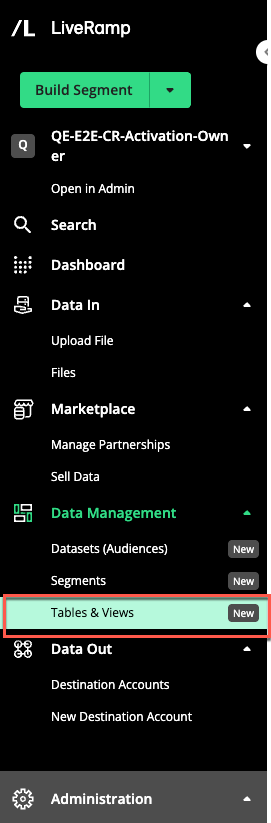
From the navigation pane, select → to navigate to the Tables and Views page.
Columns Available on the Tables and Views Page
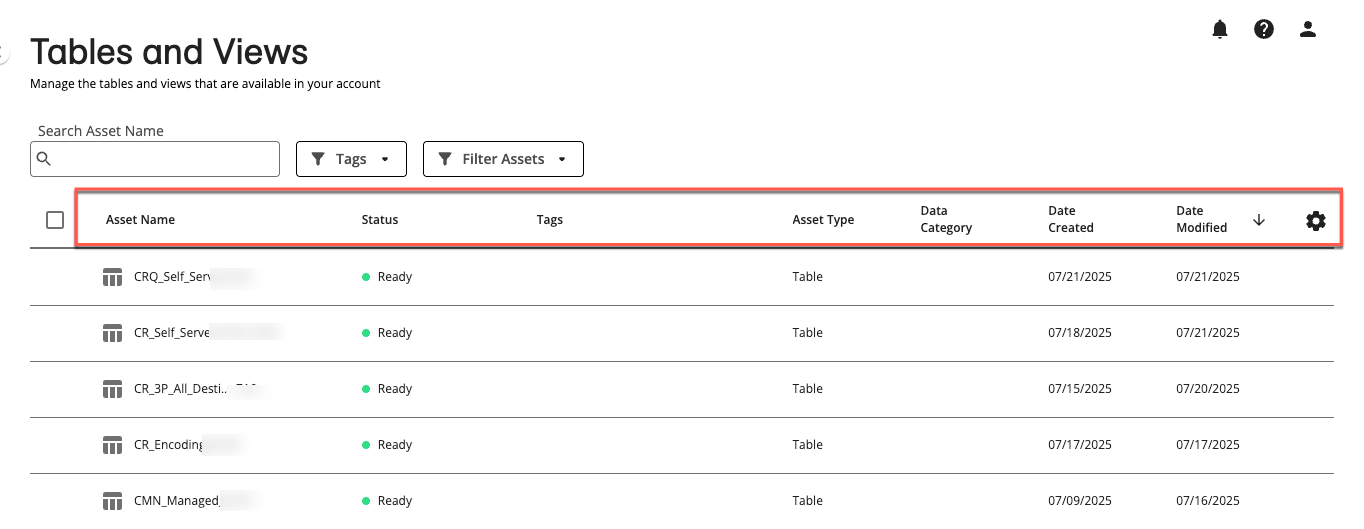
The Tables and Views page table displays the following columns:
Note
To change the columns that are displayed, column order or width, the table sort order, or the table row spacing, follow the instructions in "Changing the Table Display".
Column Name | Description |
|---|---|
Asset Name | The name of the table or view. You can use this for searching, sorting, or filtering segments. |
Status | The status of the table or view. To learn more, see “Asset Statuses” below. |
Tags | The names of any asset tags that have been added. You can use tags for searching, sorting, or filtering assets. |
Asset Type | The type of asset (table or view). |
Data Category | Categorization of assets to aid in organization and identification. You can use this for searching, sorting, and filtering assets. Categories include:
|
Date Created | The date the asset was created. |
Date Modified | The date the asset was updated. |
Owned By | The name of the organization that owns the asset (this column is not displayed by default). |
Ownership | The ownership of the asset (this column is not displayed by default).
|


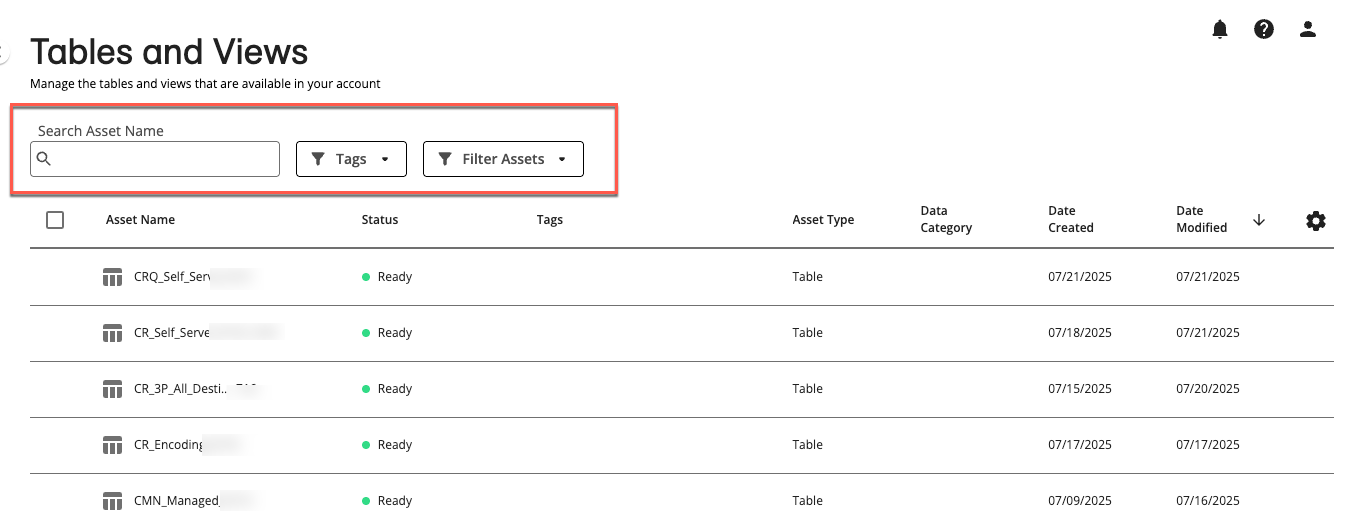
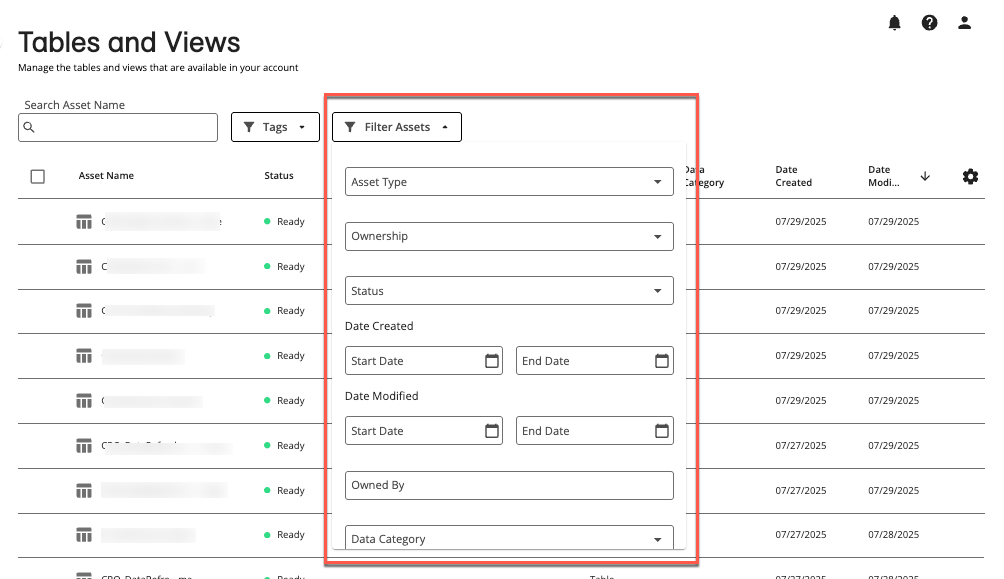
Search for and Filter Assets
You can search for assets in the following ways:
First name: Enter the full name of the asset. The search ignores underscores (_).
Partial name: Enter parts of the asset's name. You do not have to enter words in the exact sequence.
Asterisks (*): Use asterisks (*) to replace parts of the asset's name. For example, you can type "*male" if you are looking for assets whose names end with "male".
If multiple assets match your search, they will be listed based on relevance.
If you added tags to your assets, you can use the Tags filter to filter the assets by those tags.
You can use the dropdown to filter the Tables and Views table by:
Asset Type
Ownership
Status
Date Created
Date Modified
Owned
Data Category
Asset Statuses
The asset status can be one of the following:
 Creation Failed: An error occurred while creating the asset:
[error description from Ingestion]
Creation Failed: An error occurred while creating the asset:
[error description from Ingestion] Invalid:
For deleted data: The asset is invalid because the data used to create it is no longer available. Any activated segments built from this dataset will no longer deliver to destinations.
For permission revoked or expired: The asset is invalid because the permission for the partner data used to create it has expired or been revoked. Any activated segments built from this asset will no longer deliver to destinations.
- Needs Attention: Files linked to the table failed to update. You can re-process the files or skip them entirely on the Asset Details page.
 Ready: This asset is ready to be used.
 Updating: This asset is being updated or refreshed.
Not Available: The status for this asset is not available in the system. Check again later. If the problem persists, contact your LiveRamp representative.
Actions You Can Perform on the Tables and Views Page
You can perform the following actions from the Tables and Views page:
View asset side panel details: Click an asset row on the Tables and Views page to open the asset side panel, where you can view information about the asset, including asset details, schema, permissions, and activity history. For more information, see "View Details for Tables and Views".
Open details page: Double-click on an asset row to open the details page, where you can view asset details, schema, permissions, and activity history. For more information, see “View Details for Tables and Views”.
View asset clean room: If the asset originated in LiveRamp Clean Room, you can navigate to the originating clean room by selecting the More Options menu (
 ) of the desired asset row and clicking View Clean Room. For more information, see "LiveRamp Clean Room Documentation".
Manage asset tags: You can add custom tags to an asset by selecting the More Options menu (
) of the desired asset row and clicking . These tags can be used for searching, sorting, or filtering the datasets available to you.