Use Labels to Organize and Distribute Your Fields and Segments
Organize all of your fields and segments into manageable groups by using labels.
Start by creating a label, and then applying the label to the desired fields and/or segments. You can then use labels to more easily distribute fields and segments to a destination.
Create A Label
Organize all of your fields and segments into groups, and make it easier to distribute groups of fields and/or segments, by creating labels and applying them to the desired fields or segments.
To create a label:
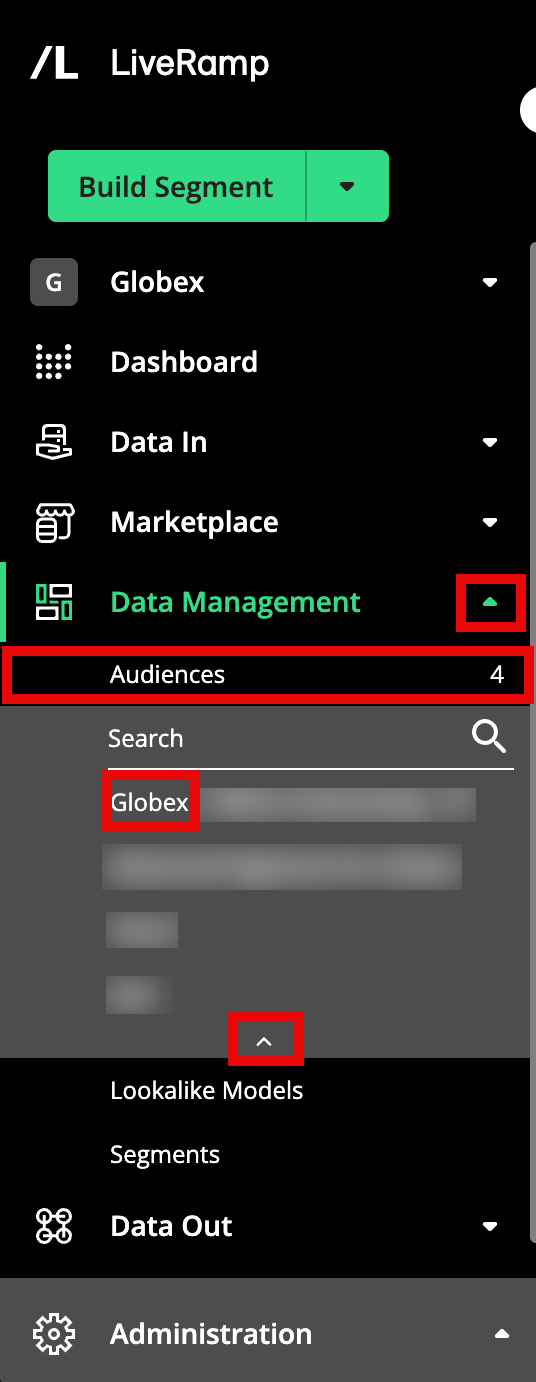
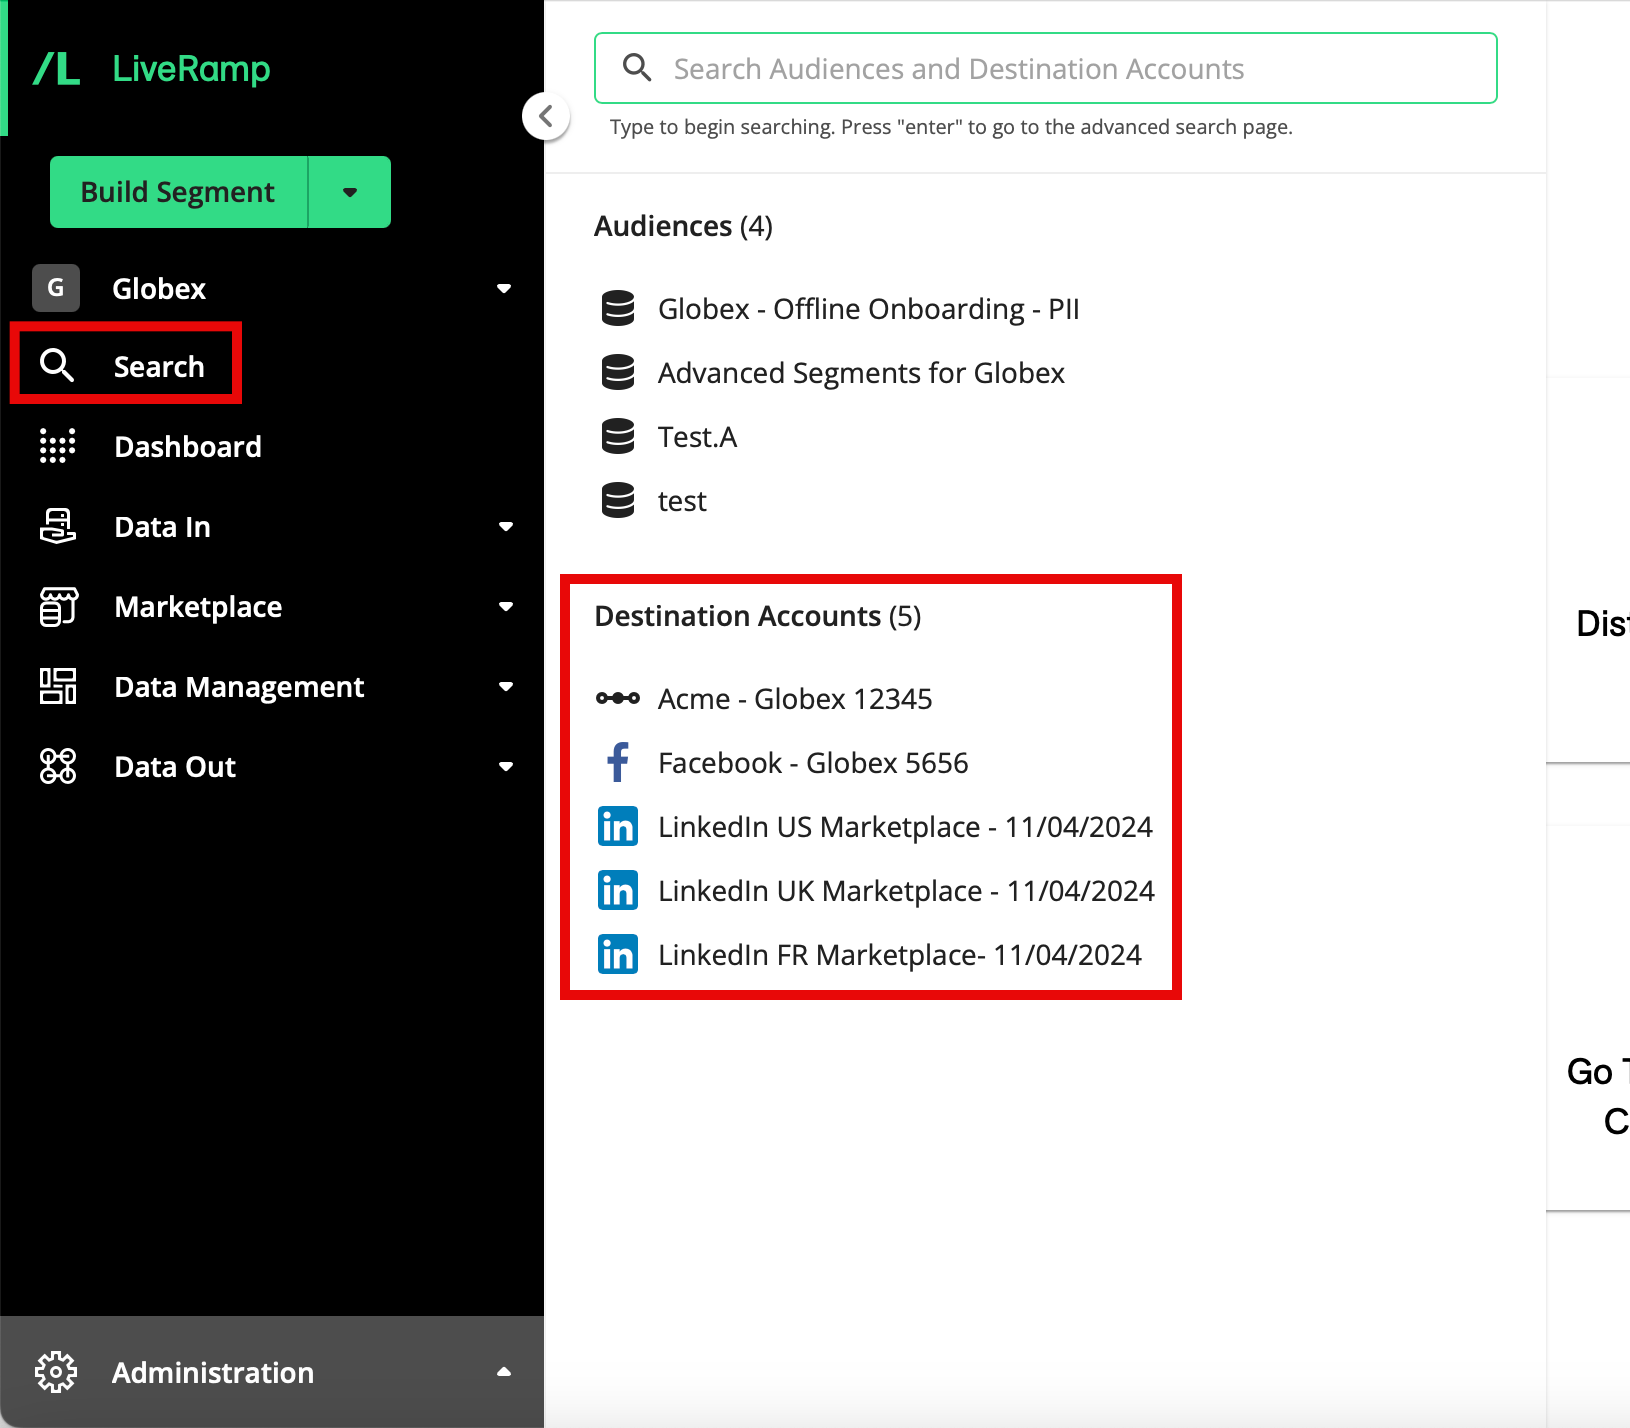
From the navigation menu, click Search to open the global search pane, and then select the desired audience to navigate to the Audience Segments page for that audience.
Tip
You can also navigate to the Audience Segments page for an audience by clicking Data Management → Audiences in the navigation menu and then clicking the audience name from the Audiences tab of the My Company Settings page.
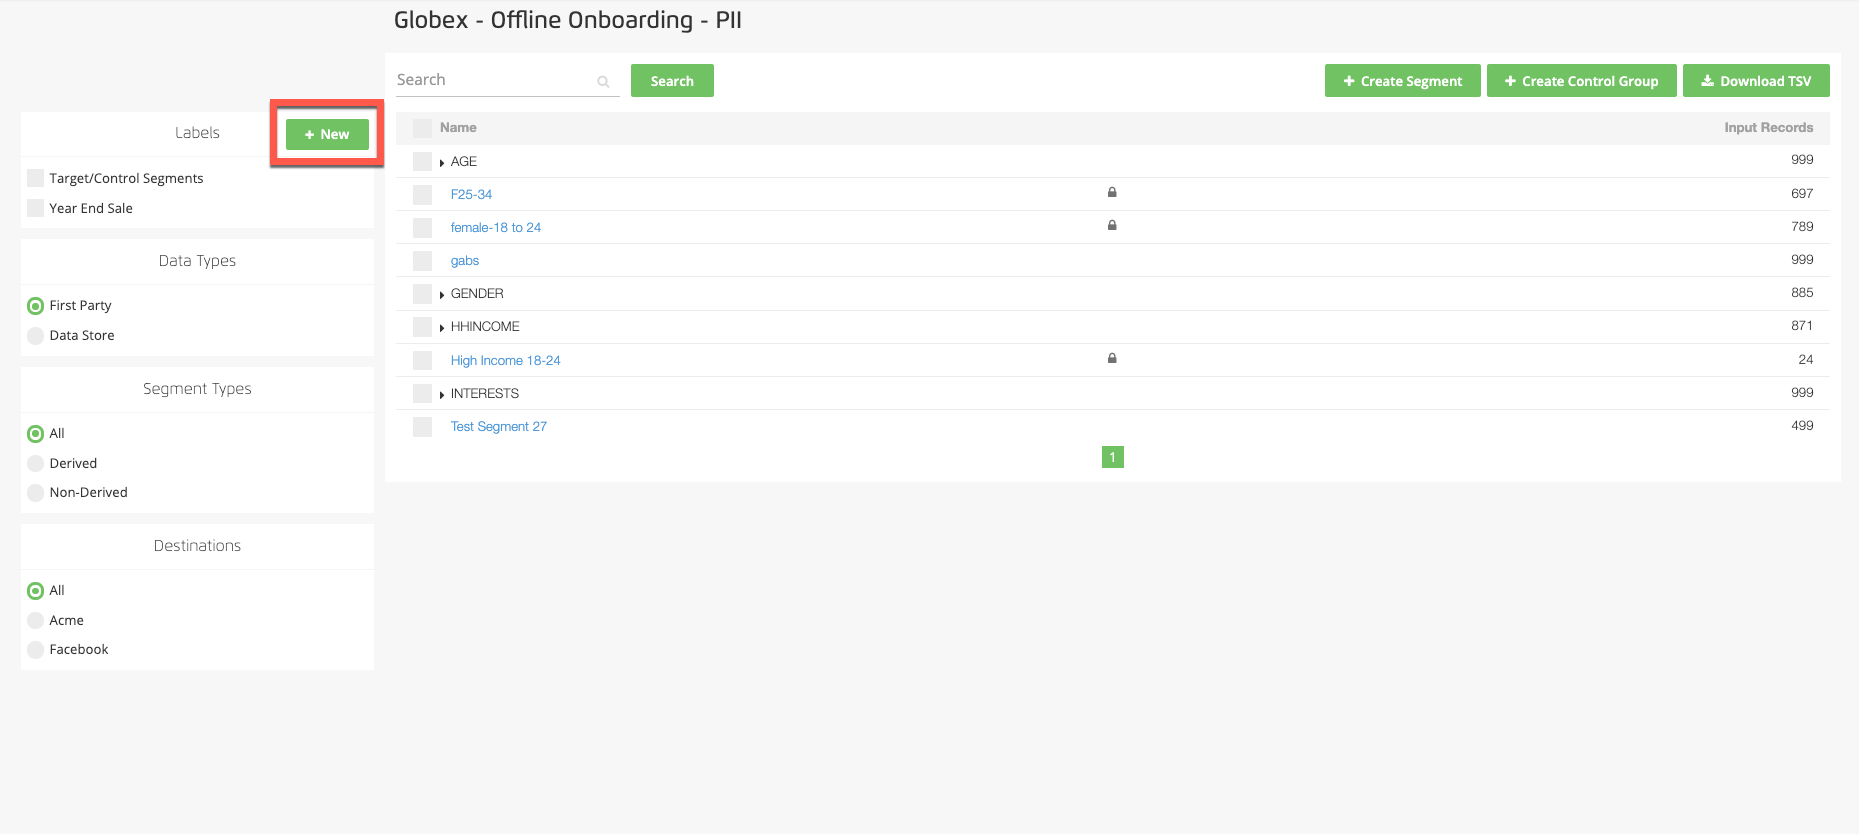
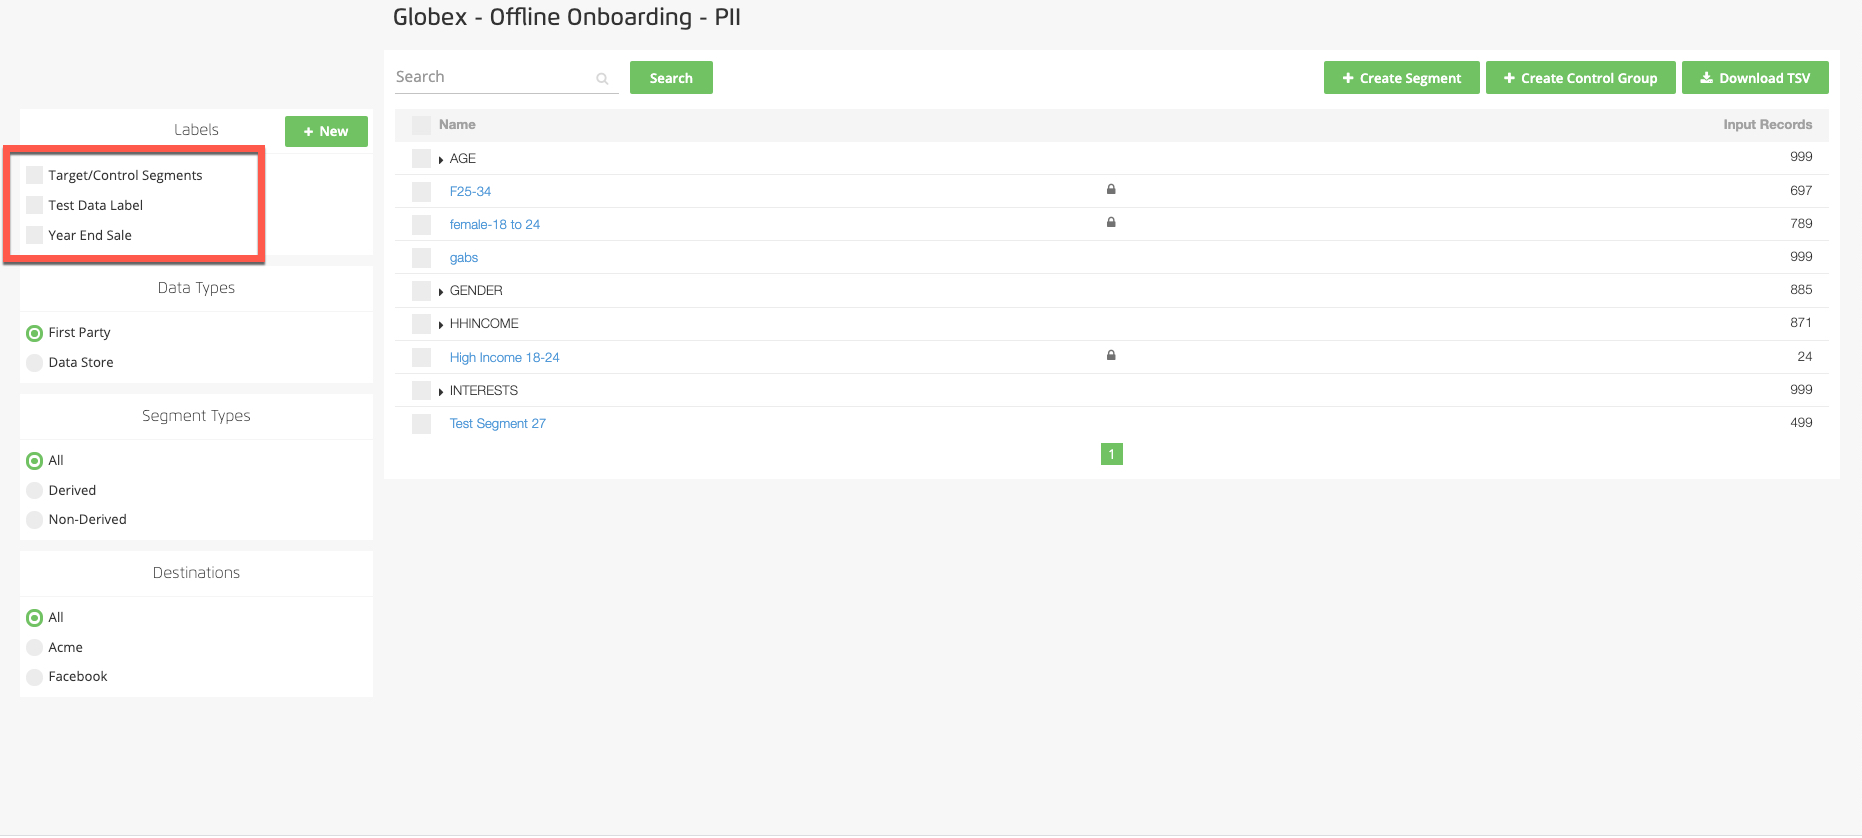
On the left side of the page, click + New and the Create New Label window opens.
Enter the new label name, and then click Save.
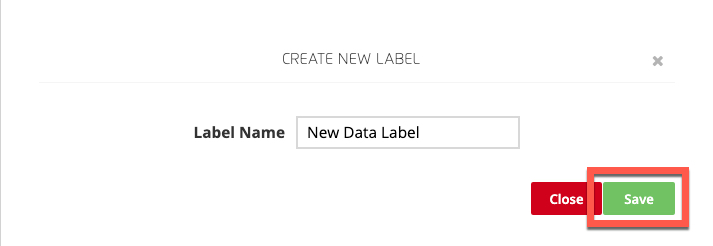
A success banner appears.
The new label appears in the Labels section on the left side of the page and is ready to be applied to any desired fields and/or segments.
Apply Labels to Your Fields or Segments
Organize all of your fields and segments into manageable groups by using labels.
Once you've created a label, apply the label to the desired fields or segments:
From the navigation menu, click Search to open the global search pane, and then select the desired audience to navigate to the Audience Segments page for that audience.
Tip
You can also navigate to the Audience Segments page for an audience by clicking Data Management → Audiences in the navigation menu and then clicking the audience name from the Audiences tab of the My Company Settings page.
Select the check box for the field or segment you want to apply your label to.

Tip
You can check multiple check boxes if you wish to apply the same label(s) to multiple selections.
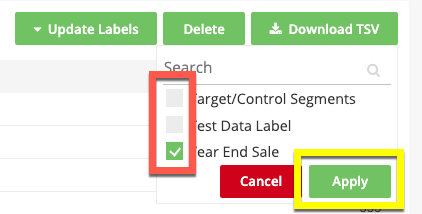
Select the Update Labels dropdown menu.

Select the check box(es) for the label(s) you'd like to apply, and then click Apply.
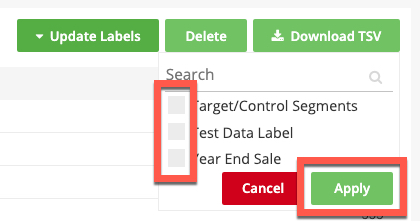
A success banner appears.
Once you've applied labels, you can use those labels to more easily distribute fields and segments to a destination.
Caution
Can't click Apply?
If the Apply button is grayed out, it probably means that your fields or segments have different sets of labels applied to them.
For instance, let's say you wanted to apply the Planes label to the SEAPLANE and AIRBUS segments, but SEAPLANE already has the Boats label attached.
If you select both SEAPLANE and AIRBUS and click Update Labels, the Boats check box will have a minus sign in it and Apply will be un-clickable. It will remain so until you either check or uncheck Boats completely.
Unfortunately, doing so will either (1) remove the Boats label from SEAPLANE, or (2) add it to AIRBUS. The way around this constraint is to apply the Planes label in two stages, first updating SEAPLANE, and then AIRBUS.
Tip
Filter segments using labels: In the Labels panel, simply select whatever label(s) you want to filter on. Your segment list in the main panel updates accordingly.
Distribute Fields and Segments with Labels
Once you've created a label, and applied the label to the desired fields or segments, you can use the label to easily distribute multiple fields and segments.
From the navigation menu, click Search to open the global search pane, and then select or search for the desired destination account to navigate to the Segment Distribution page for that destination account.
Note
For other methods to navigate to the Segment Distribution page, see "The Segment Distribution Page".
From the Label filter dropdown list, select the desired label. The display adjusts to show only those fields and segments that that label has been applied to.
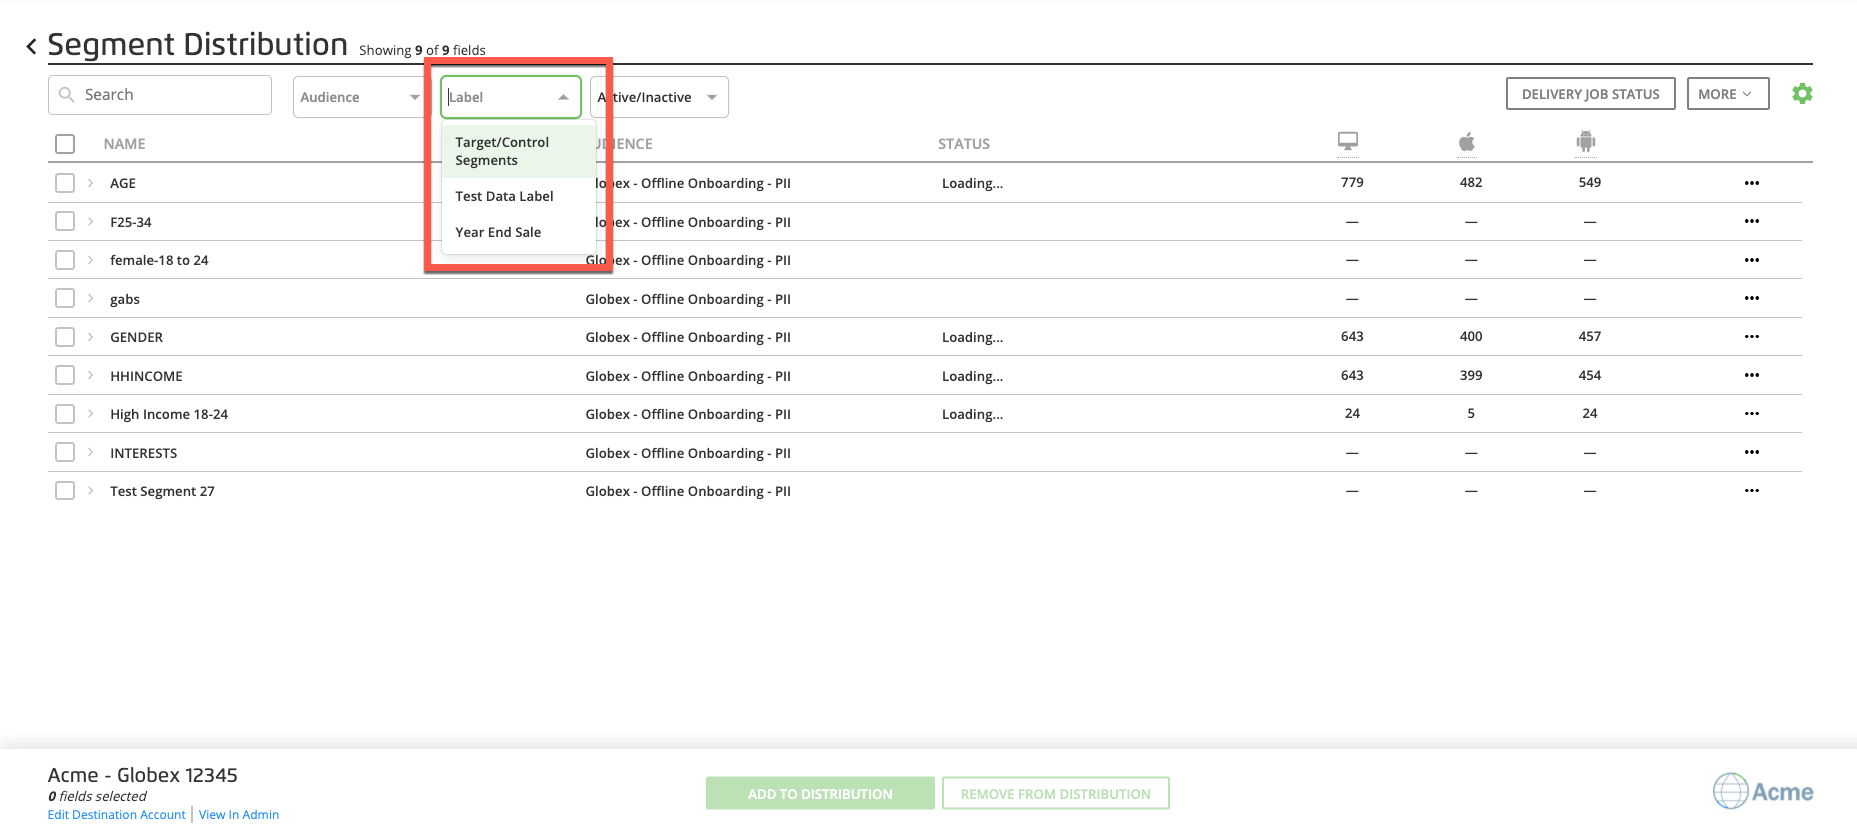
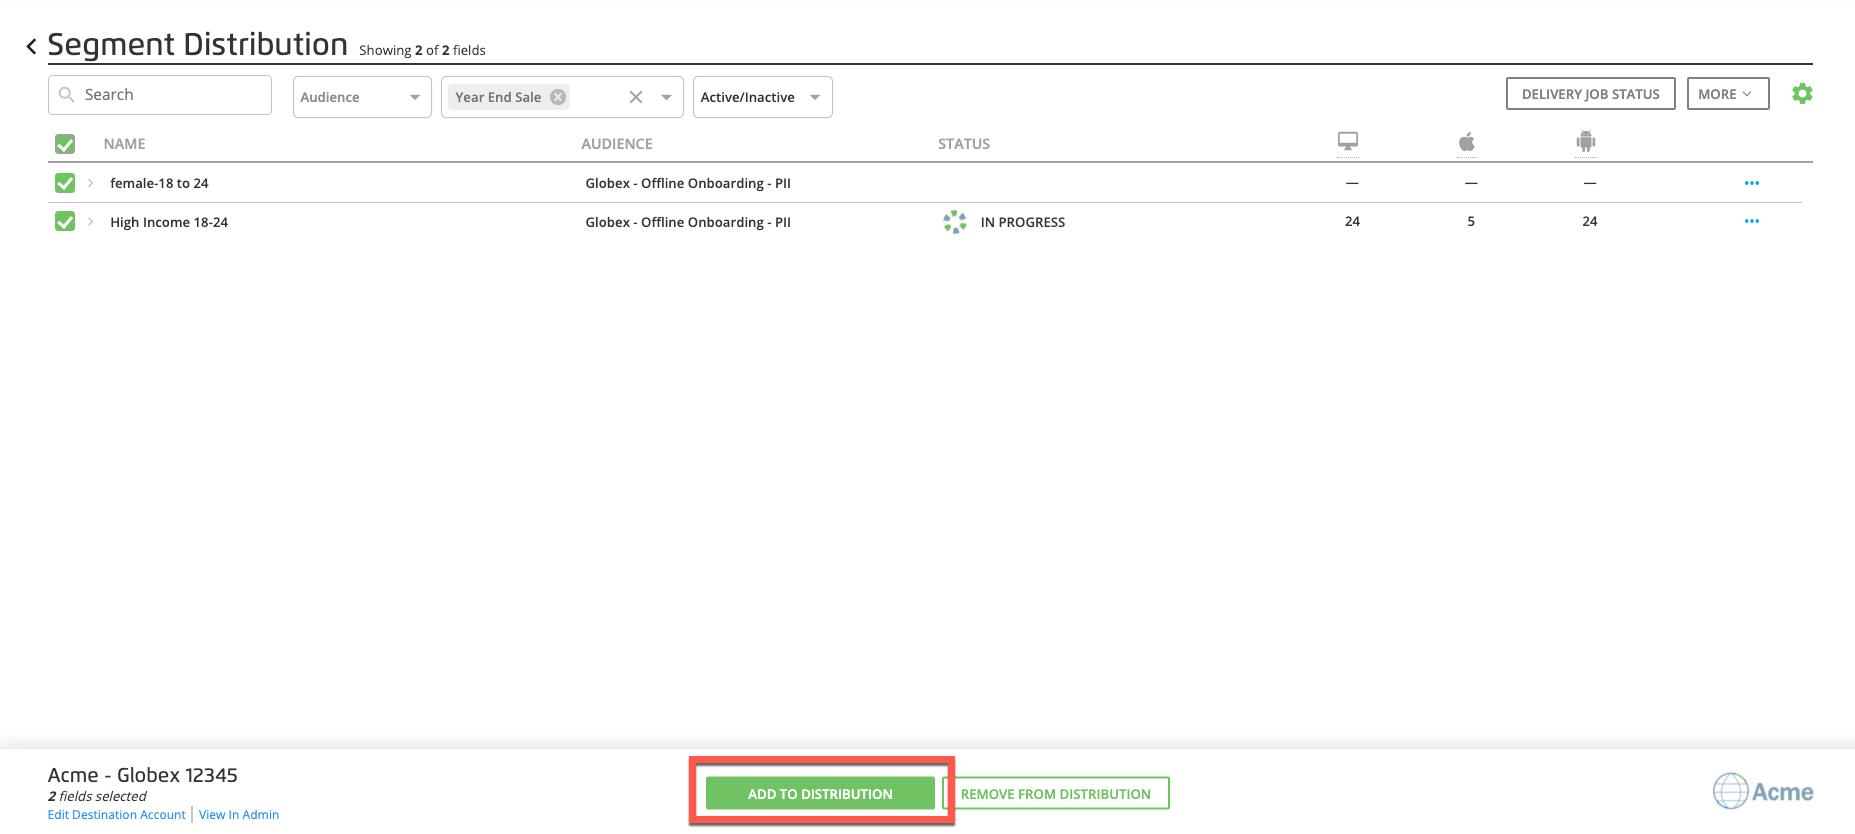
Check the individual check boxes for the fields and segments you want to distribute, or select the check box in the check box column heading to select all visible segments.
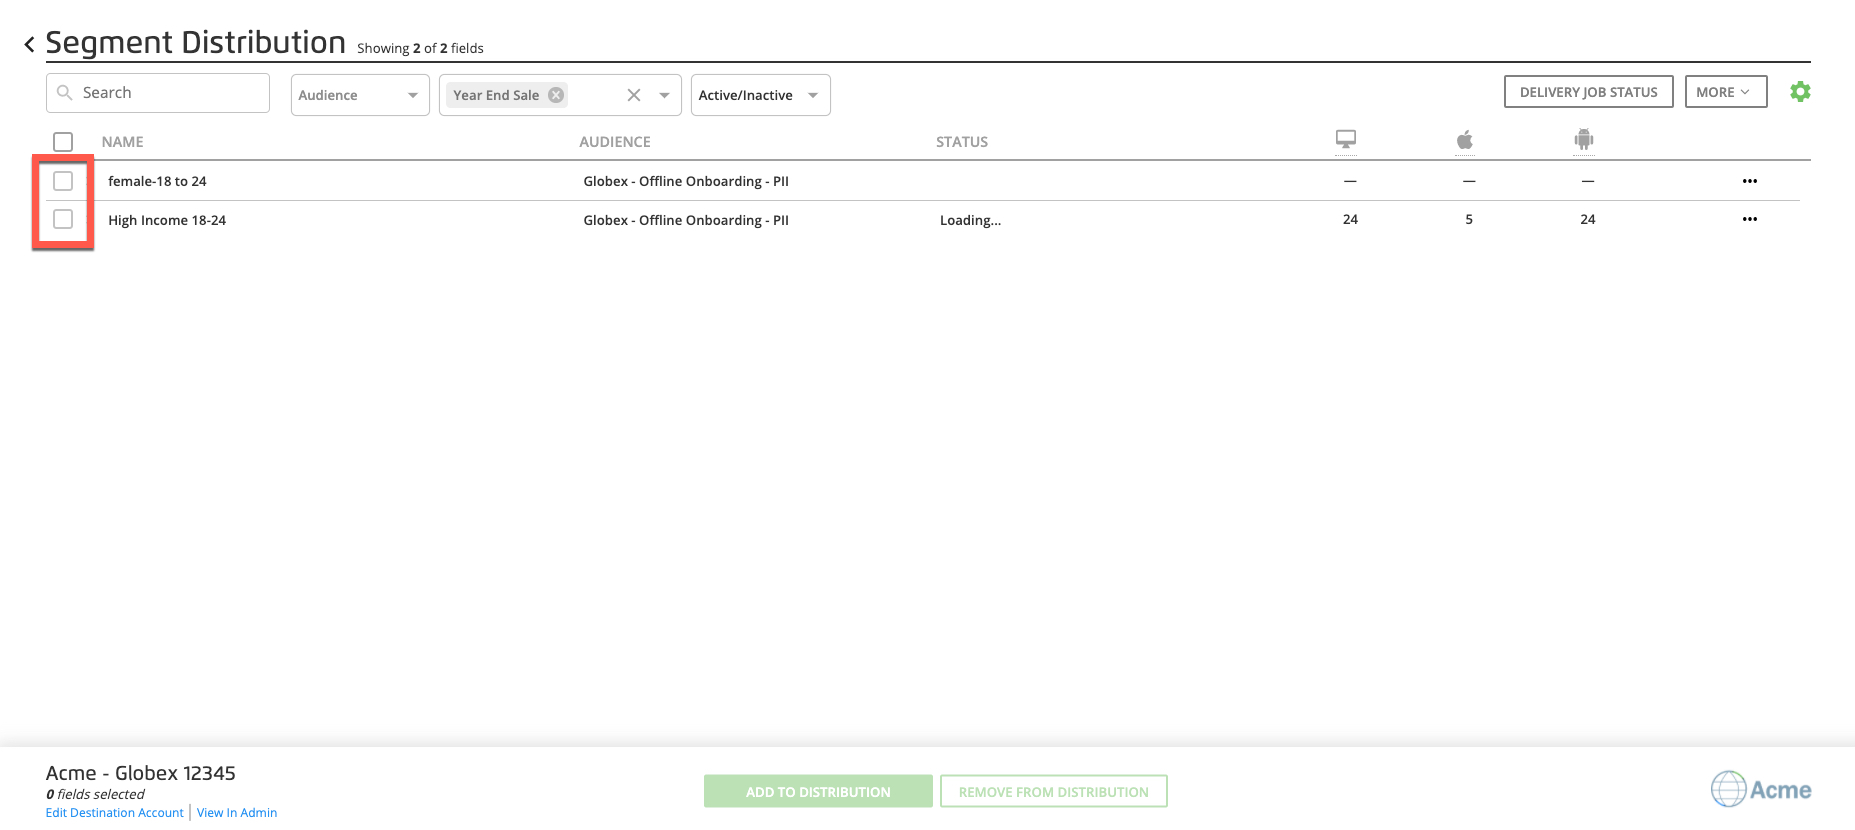
Click Add to Distribution.
Caution
Each page is distributed separately If you would like to distribute multiple pages of segments, you will need to add each page of segments separately.
Rename or Delete a Label
To rename or delete a label that you previously created:
From the navigation menu, click Search to open the global search pane, and then select the desired audience to navigate to the Audience Segments page for that audience.
Tip
You can also navigate to the Audience Segments page for an audience by clicking Data Management → Audiences in the navigation menu and then clicking the audience name from the Audiences tab of the My Company Settings page.
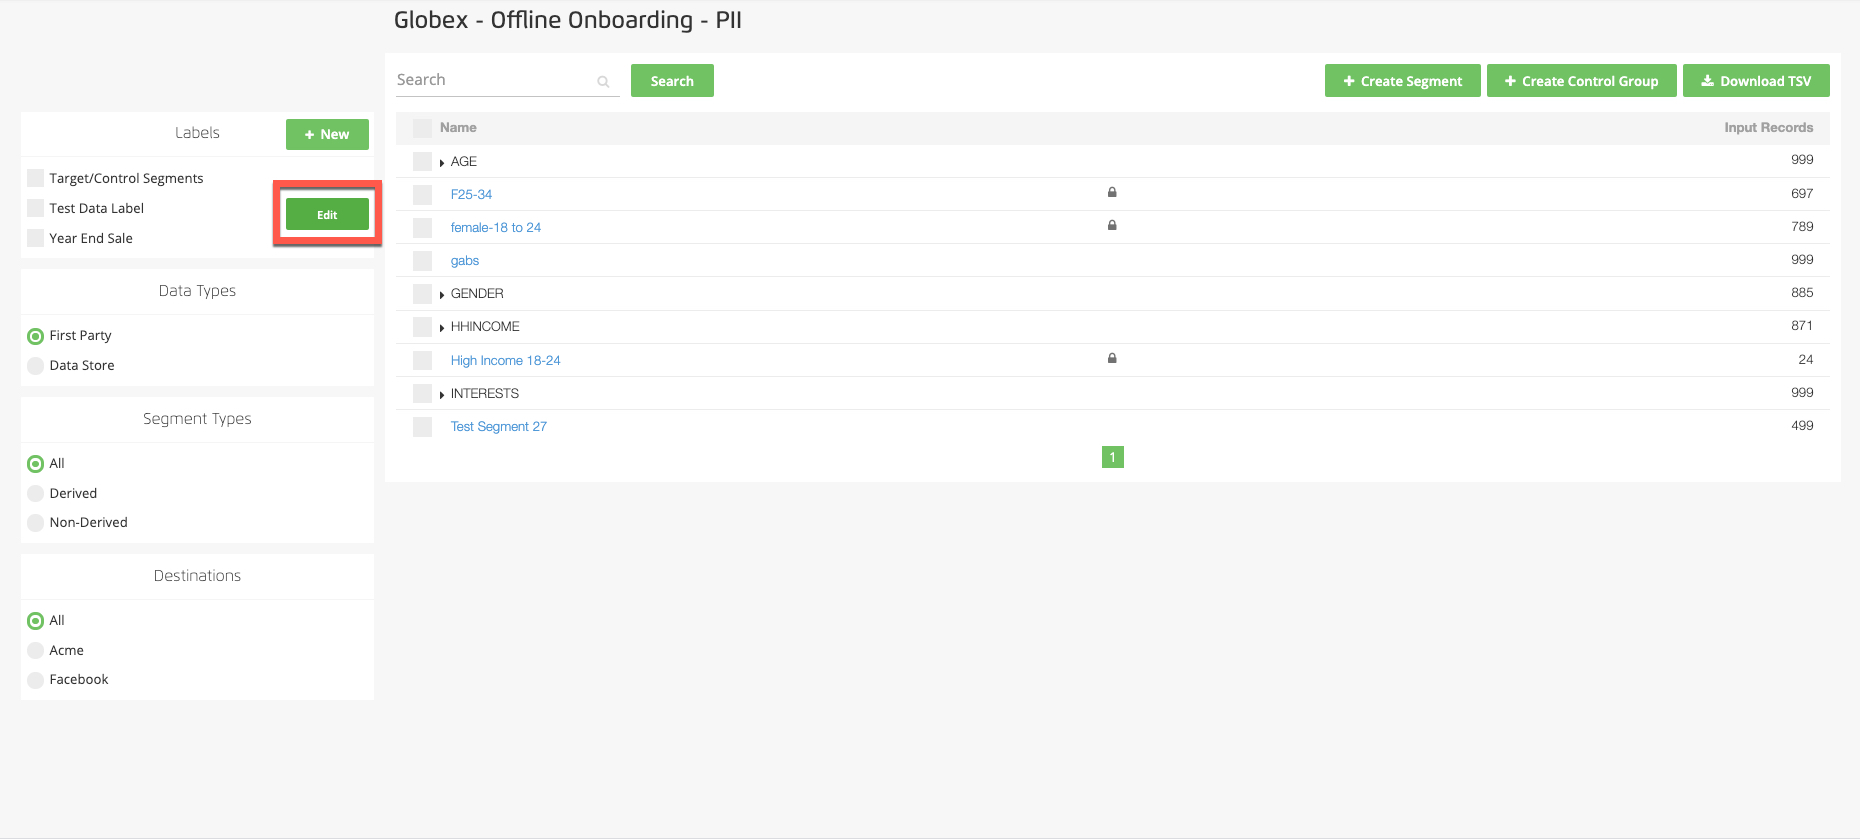
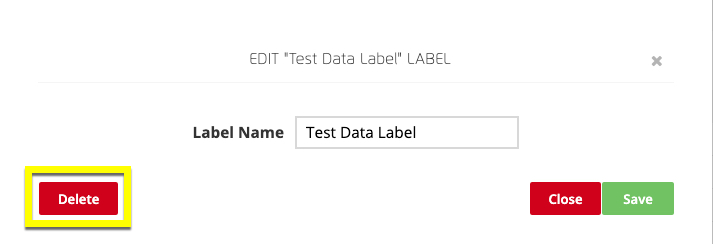
Hover over the row for the label you want to rename or delete and click Edit (the button appears once you hover over the label row).
From the dialog that appears, perform the appropriate action:
To rename the label: Enter the new label name in the Label Name field, and then click Save.
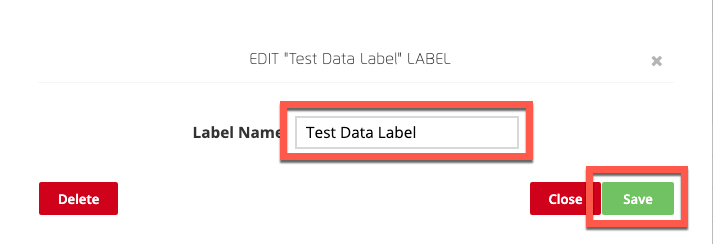
To delete the label: Click Delete, and then click Yes in the dialog confirmation window that appears.

Remove Labels From Your Fields or Segments
To remove a label that you've applied to a particular field or segments:
From the navigation menu, click Search to open the global search pane, and then select the desired audience to navigate to the Audience Segments page for that audience.
Tip
You can also navigate to the Audience Segments page for an audience by clicking Data Management → Audiences in the navigation menu and then clicking the audience name from the Audiences tab of the My Company Settings page.
Clear the check box for the field or segment you want to remove your label from.
Select the Update Labels dropdown menu.
Clear the check boxes for the labels you'd like to remove, and then click Apply.