Understanding the Connect UI Pages
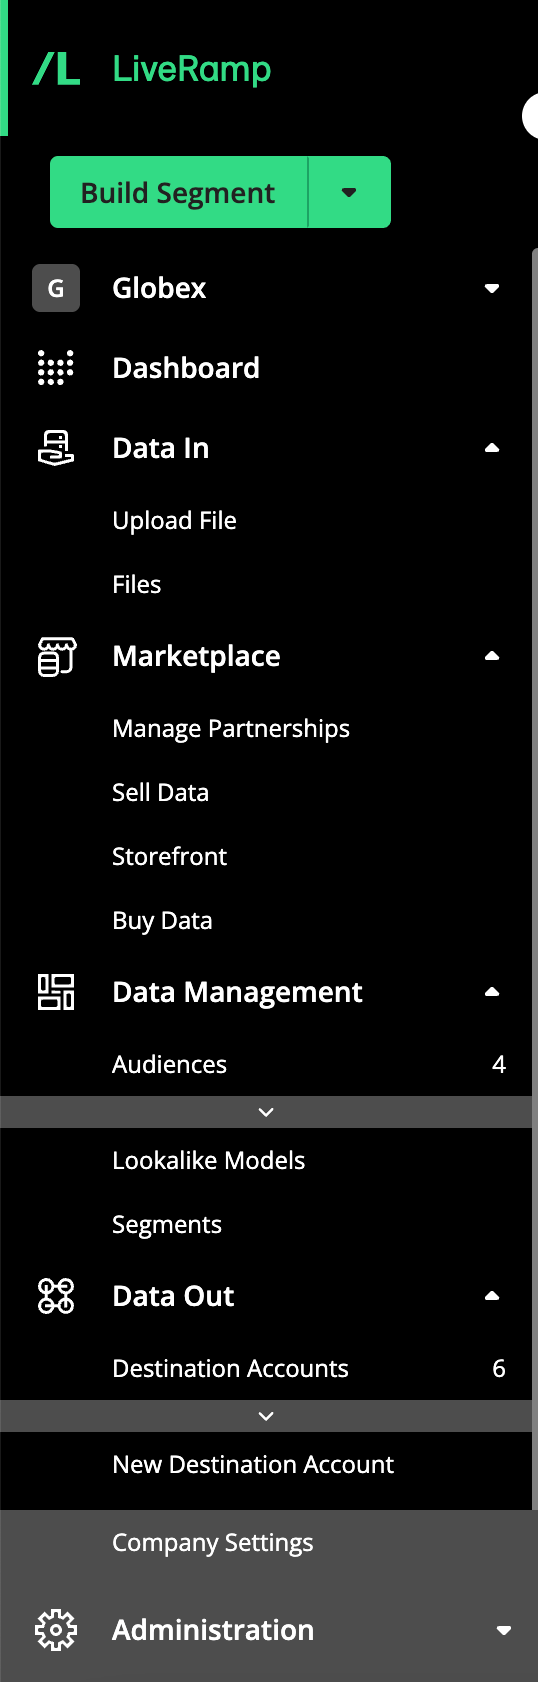
The navigation pane on the left side of the screen contains the navigation menu area that allows you to access Connect's UI pages and the quick-action menu:
Note
For many tables in Connect UI pages, you can change columns that are displayed, sort by a specific column, or change the column order. For more information, see "Changing the Table Display".
For information on the items in the navigation pane, see "Navigating Connect".
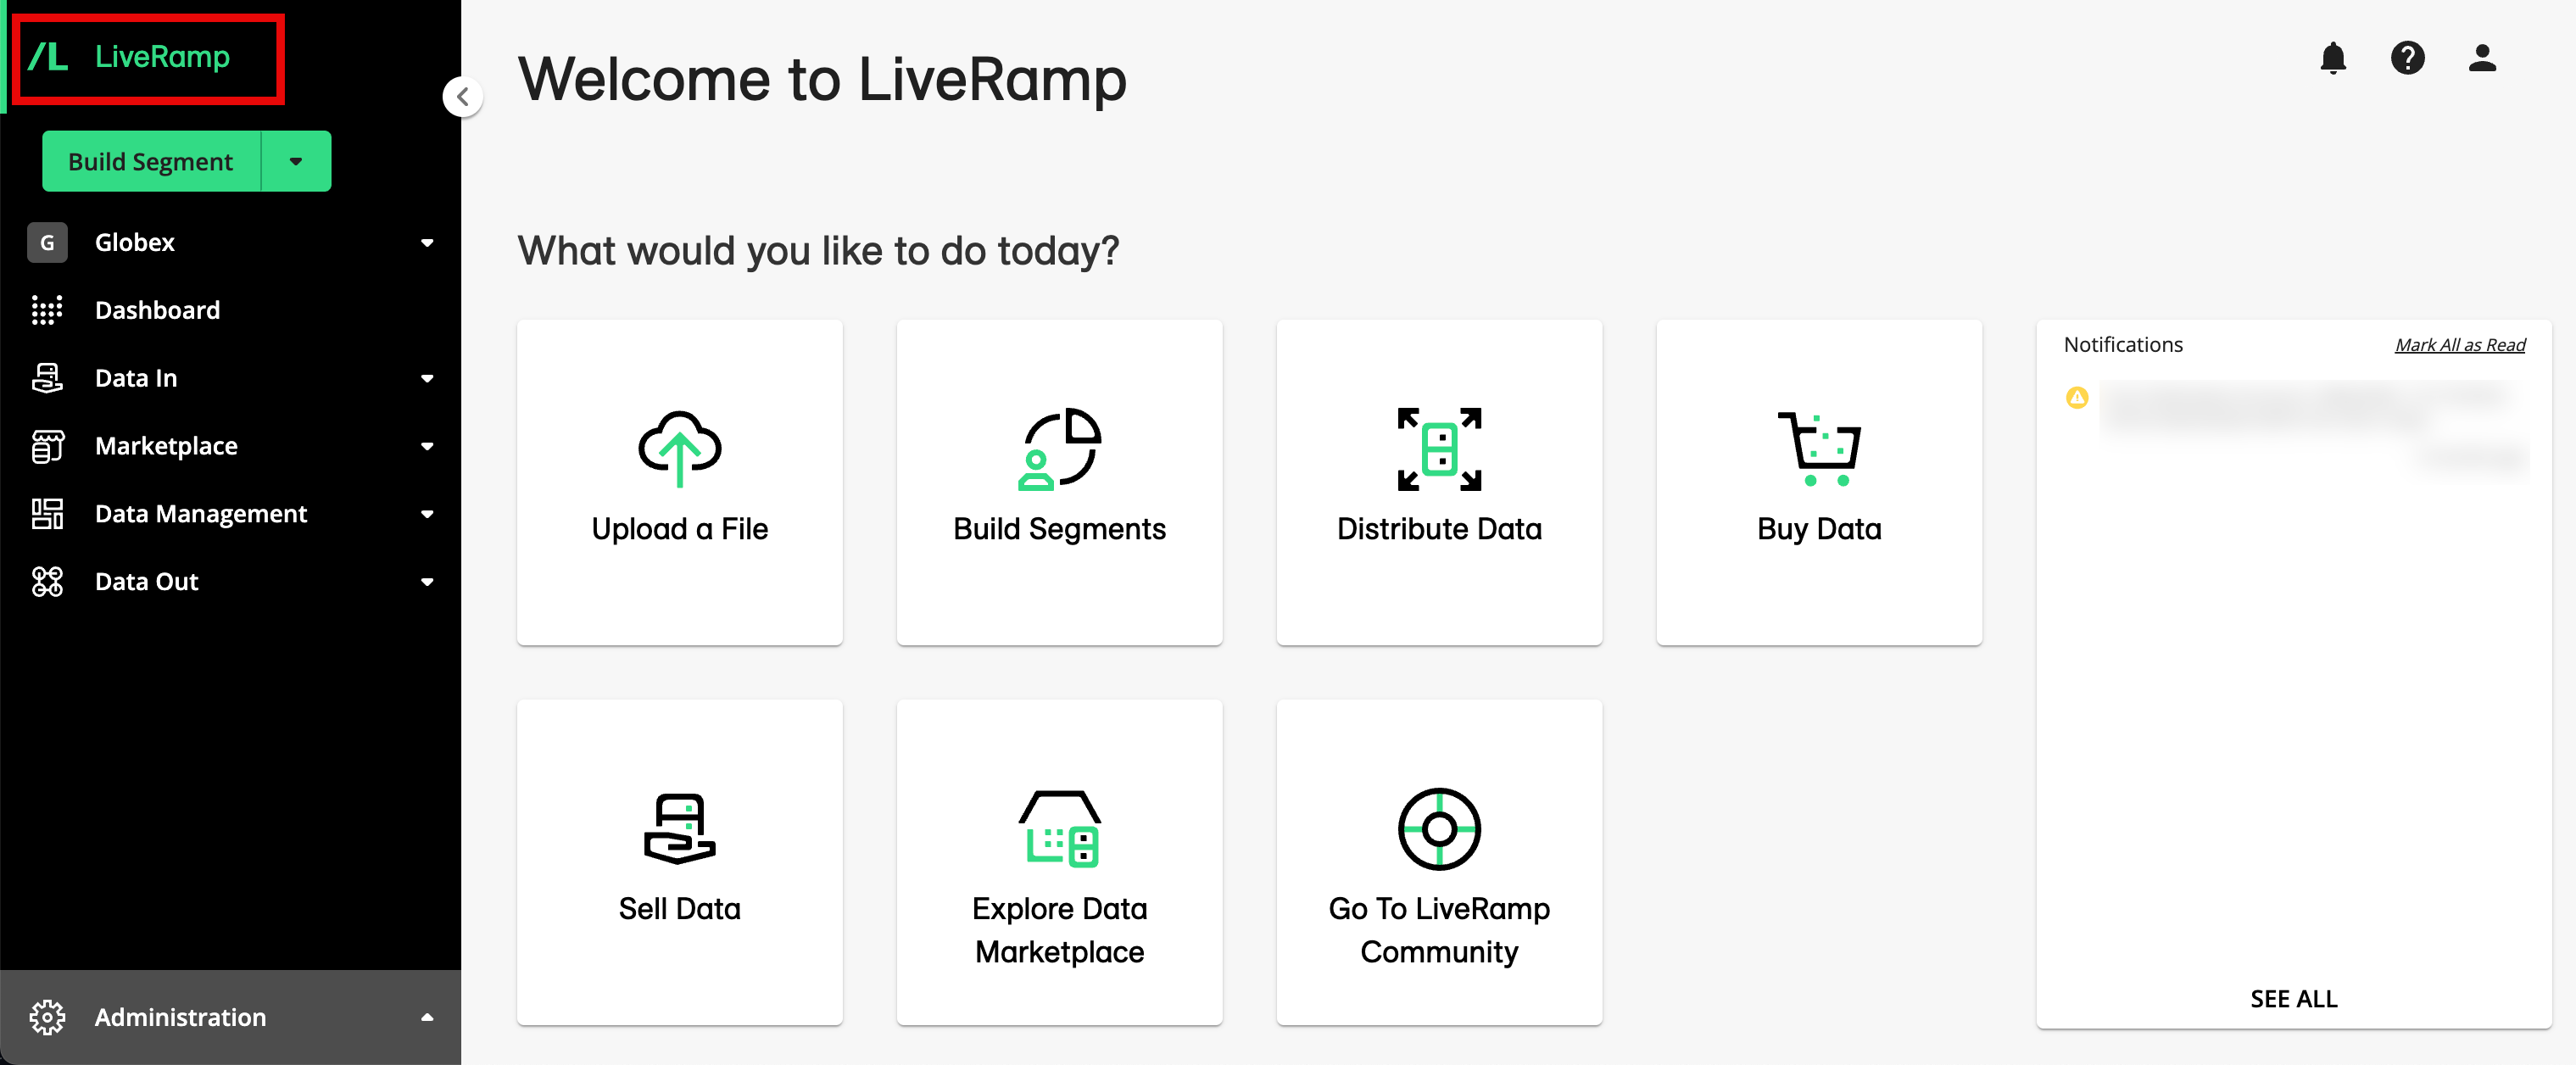
The Welcome Page
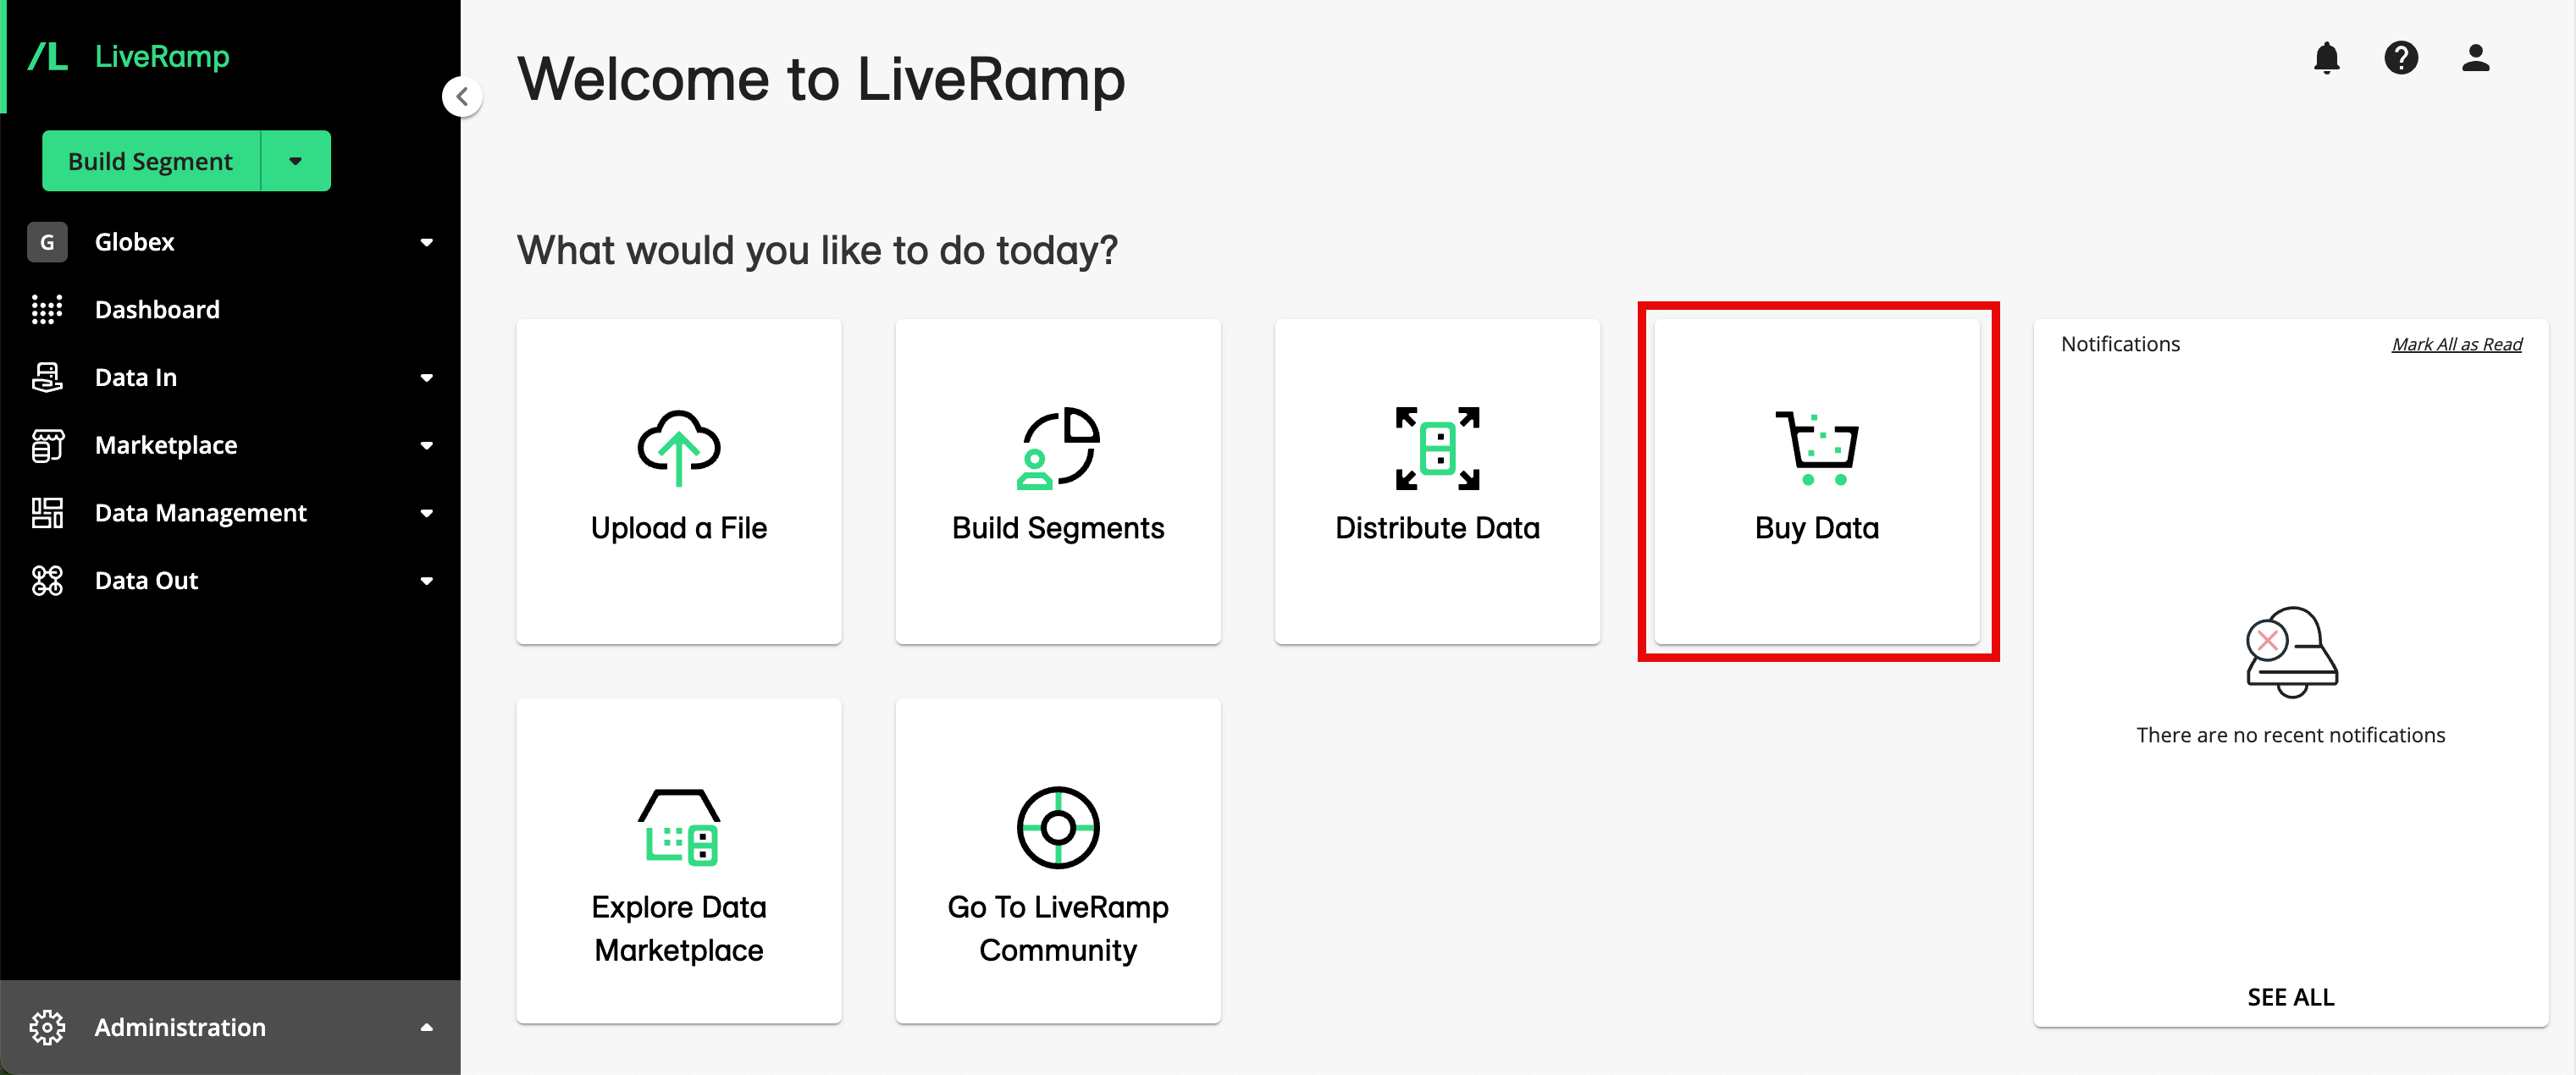
You can think of the Welcome page as your application home page, where you can utilize the quick-action menu and tiles, and see an overview of your notifications:
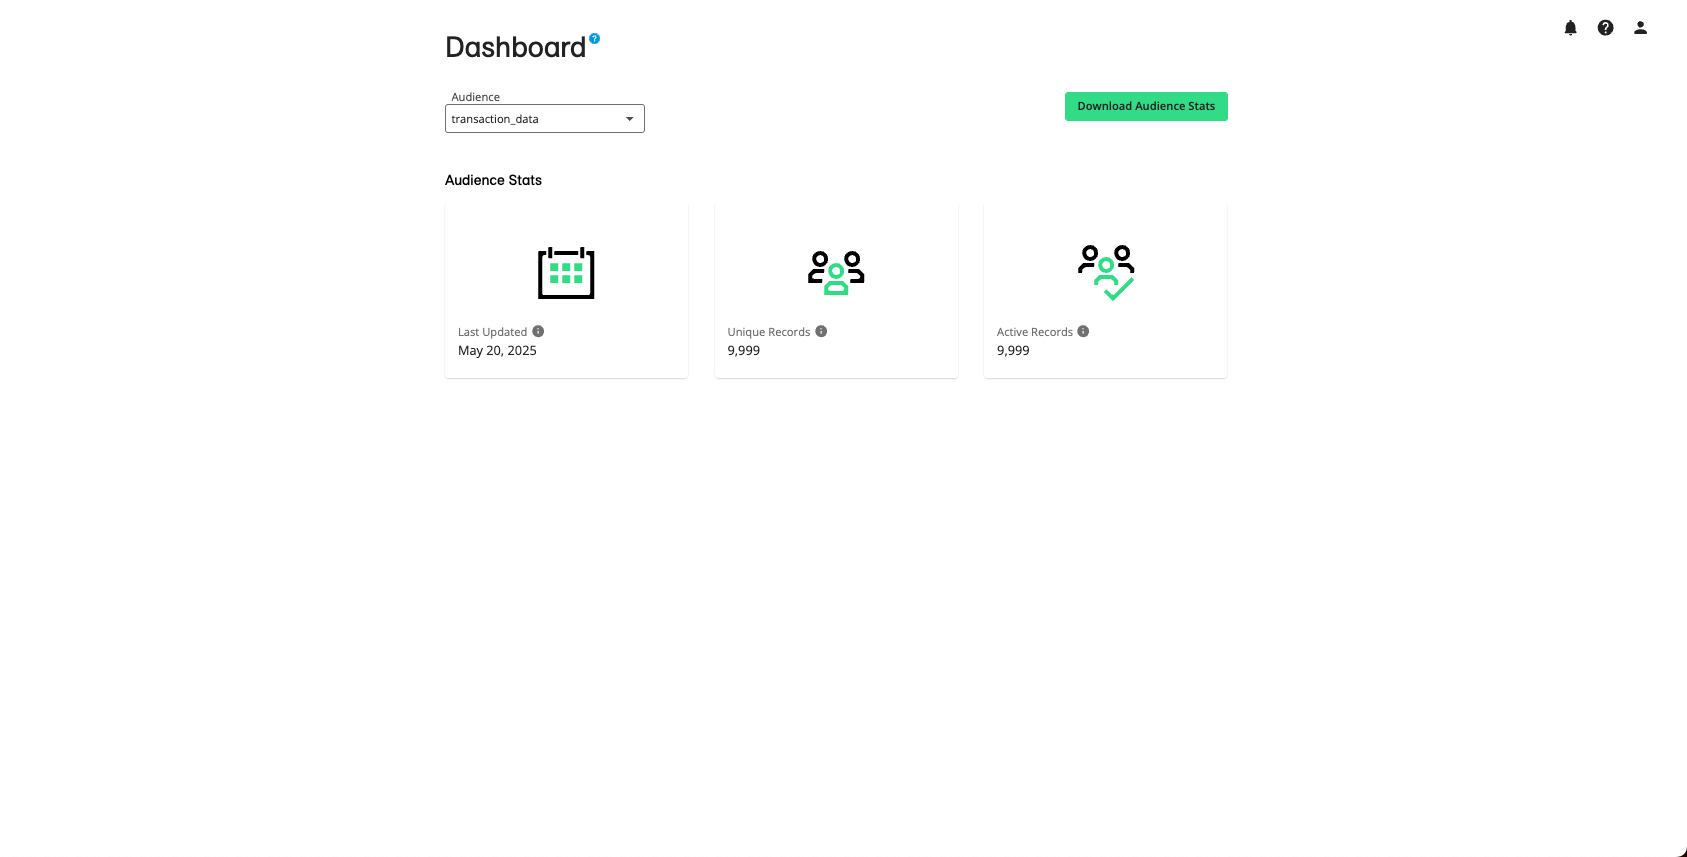
The Dashboard
Your dashboard is where you can see aggregate stats for each of your audiences, including the date the audience was last updated, the number of unique records, and the number of active records.
You can use audience stats to keep tabs on your current LiveRamp audience usage. Because audience usage often corresponds closely with your monthly LiveRamp bill, keeping your team up-to-date on audience stats can help your company stay on top of LiveRamp billing.
You can also use audience stats to help you keep within product limits if you’ve signed a usage contract with LiveRamp that prevents you from exceeding a certain number of records in a given month. So, you might check your current number of unique records in an audience before uploading new files.
These stats are displayed on the Dashboard and the Audiences tab of the Company Settings page. Audience stats typically take 1-3 days to initially populate after uploading the first file for that audience and 1-3 days to update after uploading a subsequent file.
To view audience stats in your dashboard:
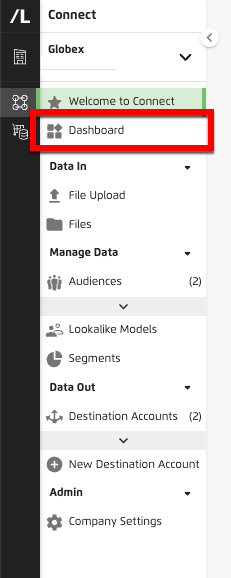
From the navigation menu, click Dashboard to navigate to the Dashboard page.
Select the desired audience from the Audience dropdown list in the upper left.
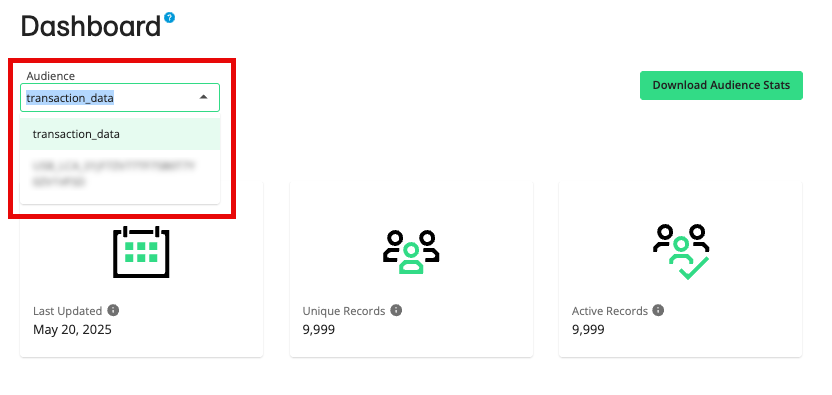
The following stats are displayed for the selected audience:
Last Updated: The date the audience was last updated. An audience update typically refers to a new file upload, or file deletion from the audience. The Last Updated stat is a good way for your company to keep tabs on any recent changes made to an active LiveRamp audience.
Note
Want to check file status? To see if a file has been fully ingested by our systems, select Data In → Files in the navigation menu to navigate to the Files page. See "Check the Status of an Uploaded File" for more information.
Unique Records: The number of records, after the consolidation of any duplicate rows through the use of the audience key (see "How Connect Counts Unique Records" for more information). The Unique Records stats help you keep track of the size of your audience at LiveRamp, which can affect your monthly billing at LiveRamp.
Active Records: The number of unique records that have at least one field being actively distributed to a destination. Keeping track of your active records helps your company keep tabs on how many records in a given audience are being “used” and are being actively distributed to destination platforms.
For more info, see "View Audience Stats in Your Dashboard".
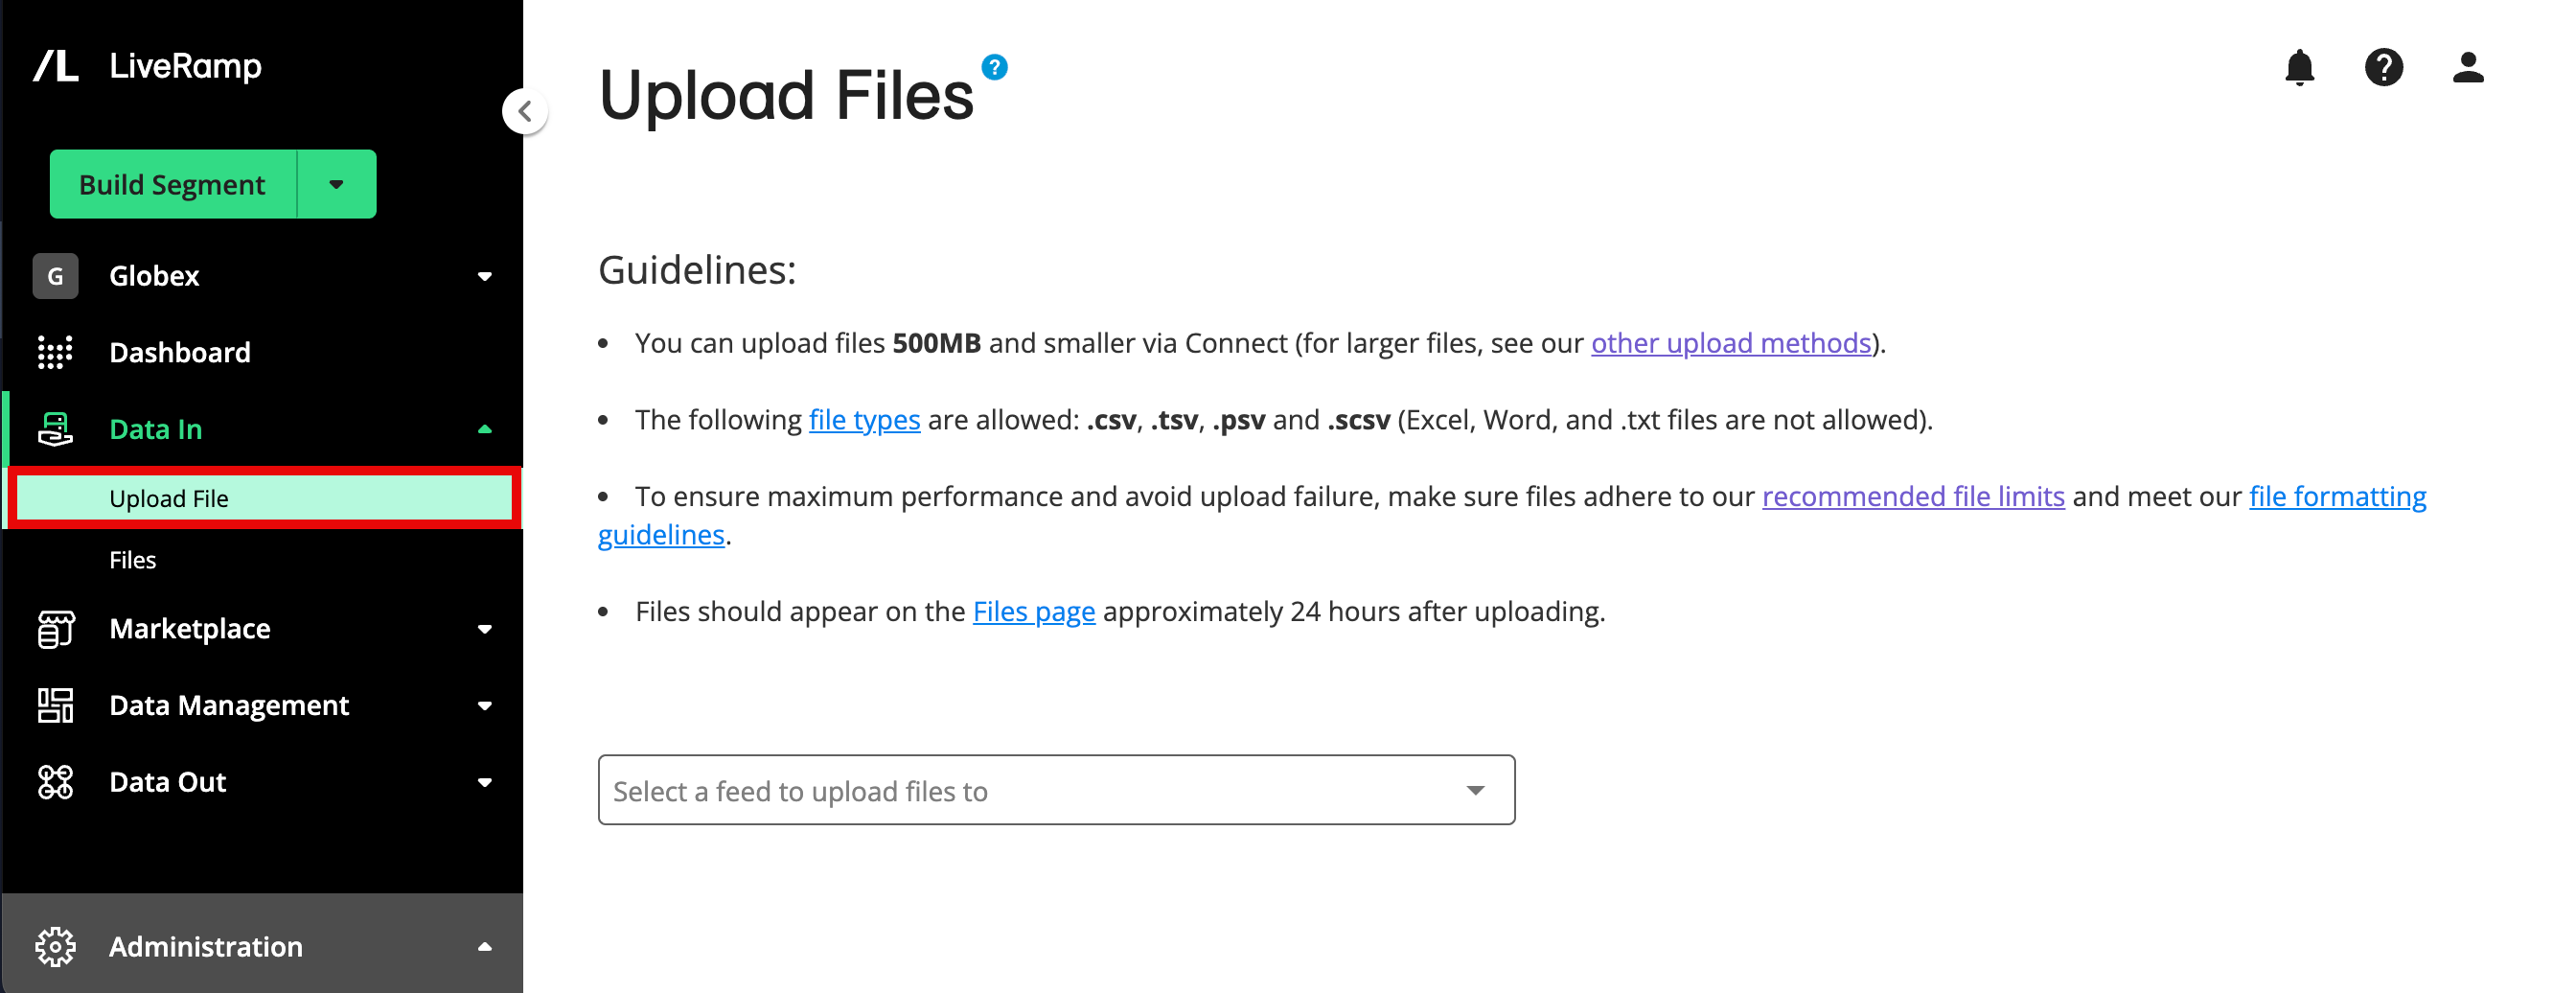
The Upload File Page
Files 500 MB and smaller can be uploaded via Connect on the Upload File page.
Note
Files larger than 500MB and files for Measurement Enablement workflows cannot be uploaded through Connect. See "Getting Your Data Into LiveRamp" for more information on other methods for these types of files.
If the audience you're uploading to has more than one auto import configuration ("AIC"), uploading via Connect might result in your file not being associated with the correct audience. In this situation, uploading via one of our other methods is recommended. If you do upload a file via Connect to an audience that has more than one AIC, you might need to create a support case to have the file associated with the correct AIC and audience.
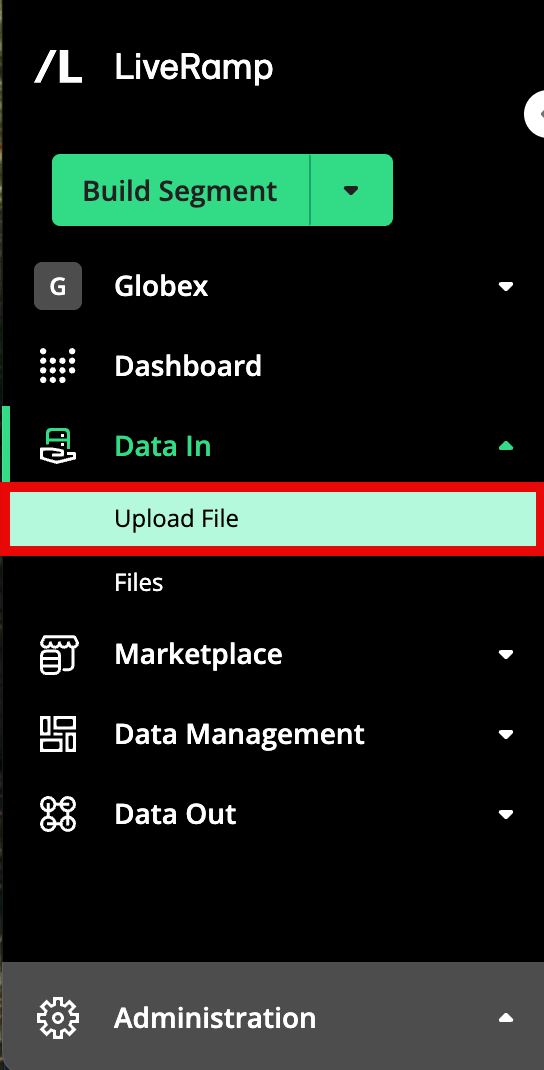
From the Quick Actions menu, select Upload File to navigate to the Upload Files page.
For instructions on uploading files via Connect, see "Upload a File via Connect".
The Files Page
You can view information on the files you've uploaded, including information on ingestion status, by checking the Files page.
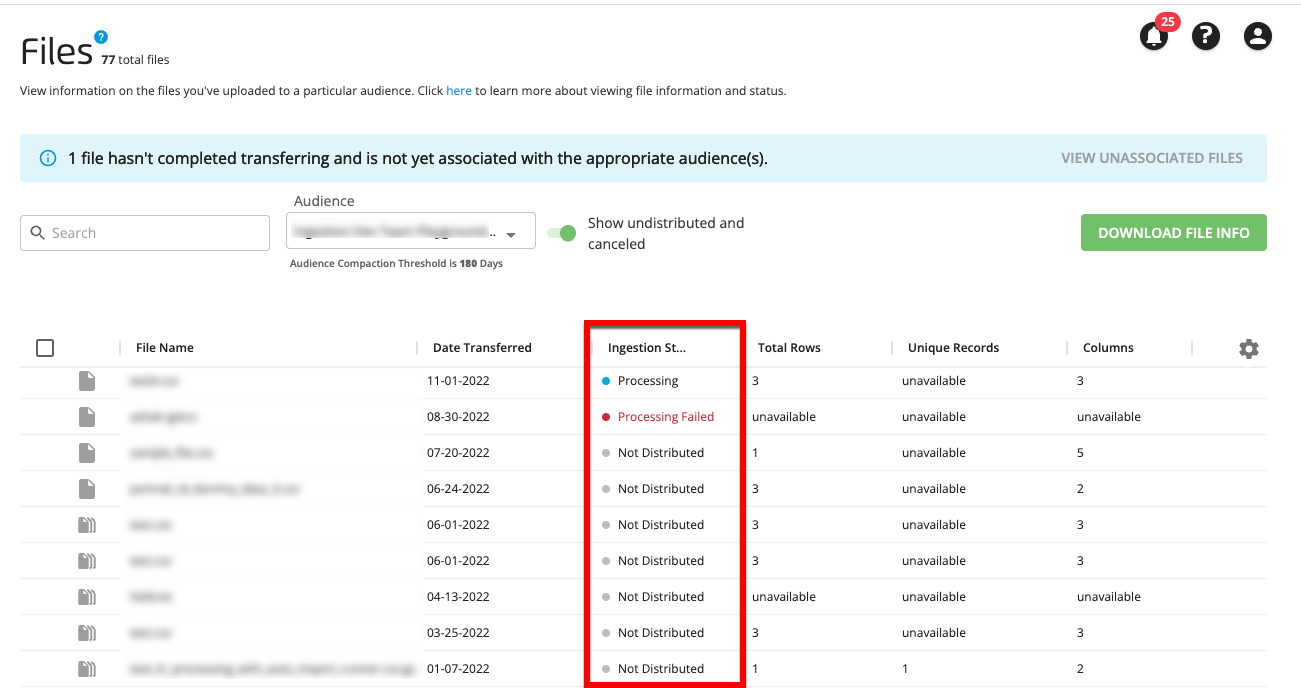
From the navigation menu, select Data In → Files to navigate to the Files page.
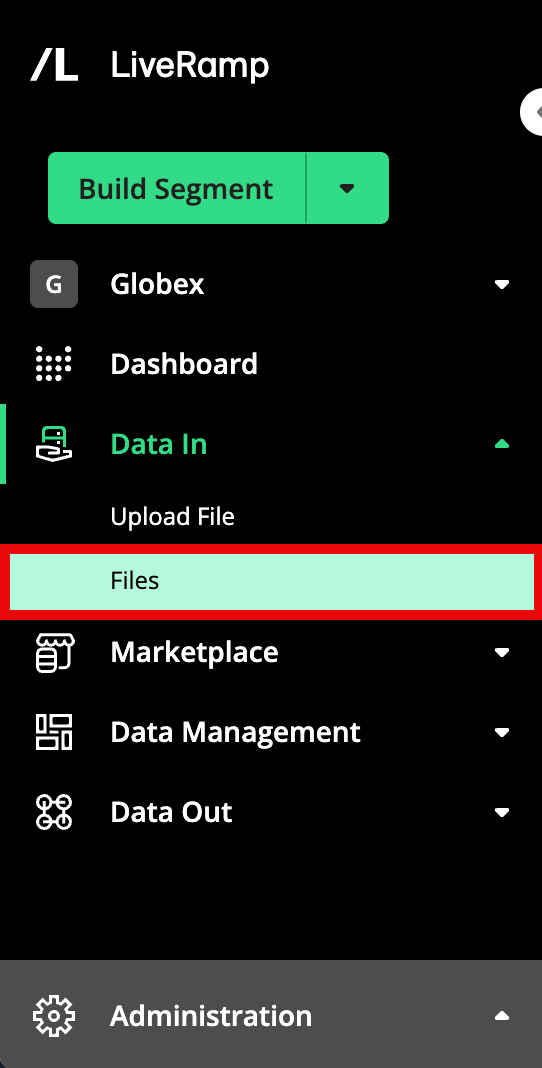
If needed, use the Audience dropdown to change the audience that's displayed.
The Files page varies depending on whether the audience selected is an Activation workflow audience or a Measurement Enablement workflow audience. For complete information on using the Files page, see "The Files Page".
You can download a CSV file with file info on all of the files for the selected audience by clicking . For more information, see "Download File Info".
You can also cancel the ingestion for a particular file that is in the process of transferring or processing by clicking the ellipsis that appears when you hover over that file's row and then selecting Cancel Import. For more information, see "Cancel a File Import".
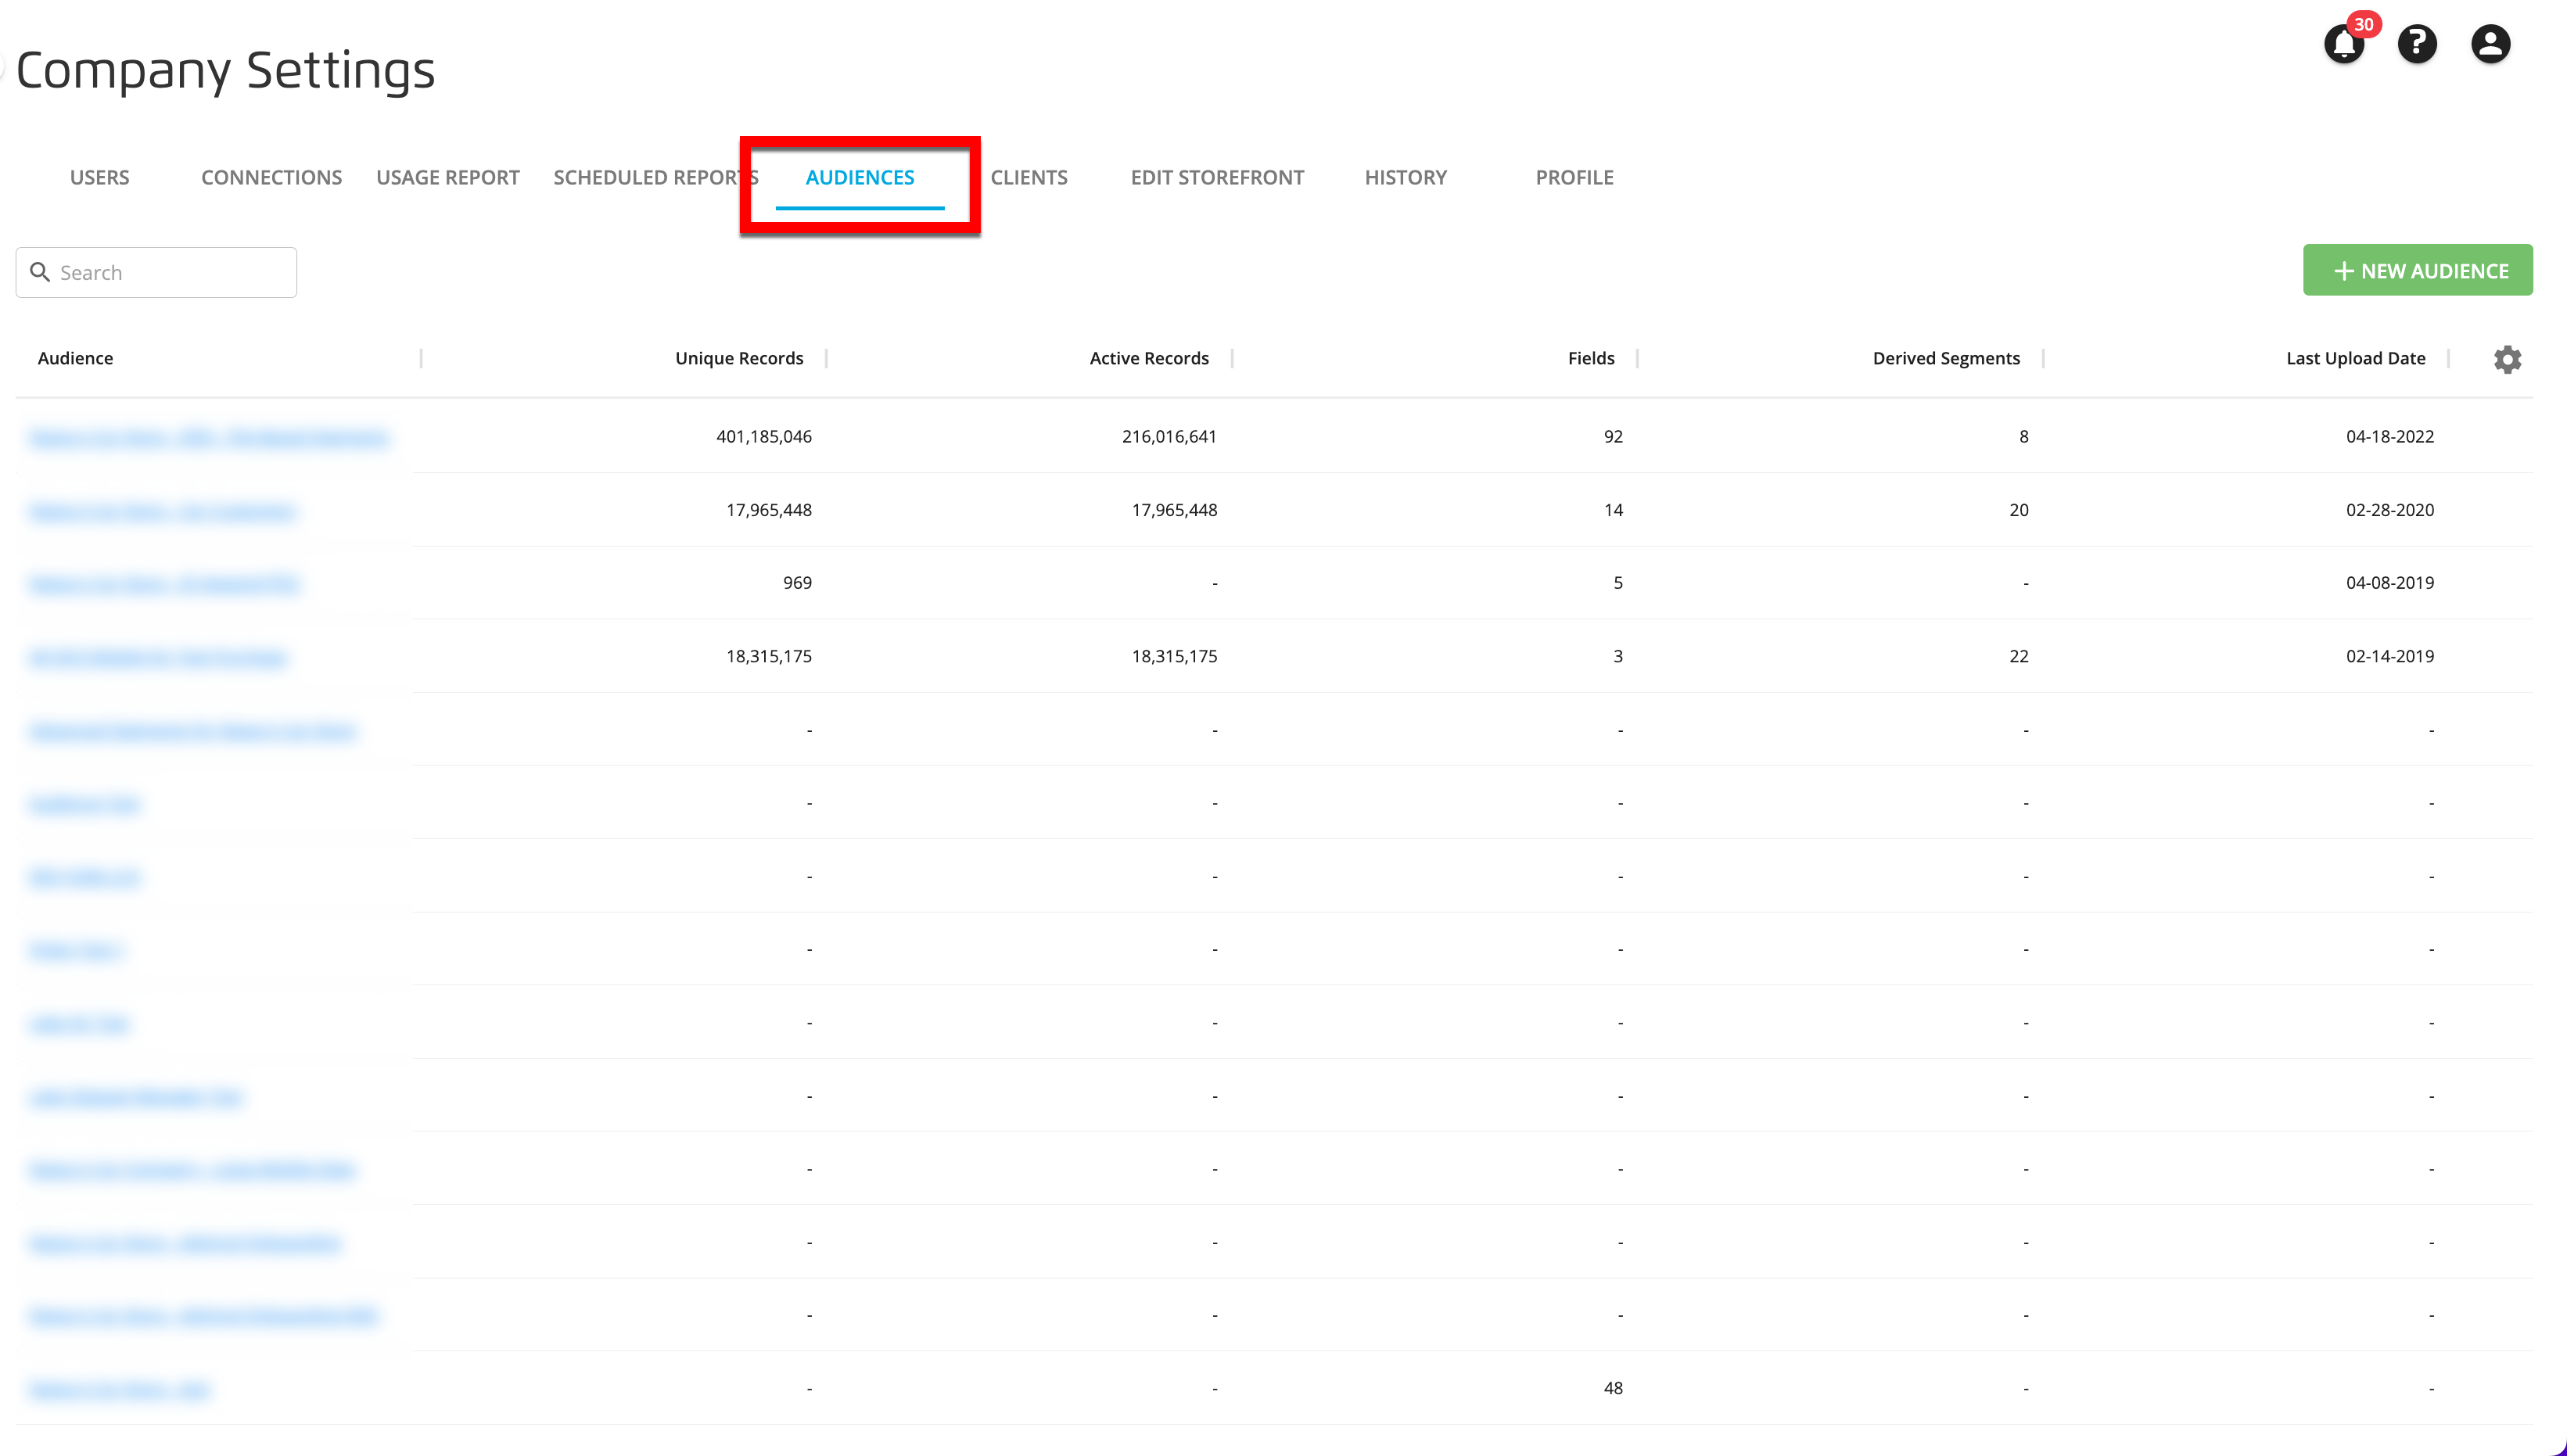
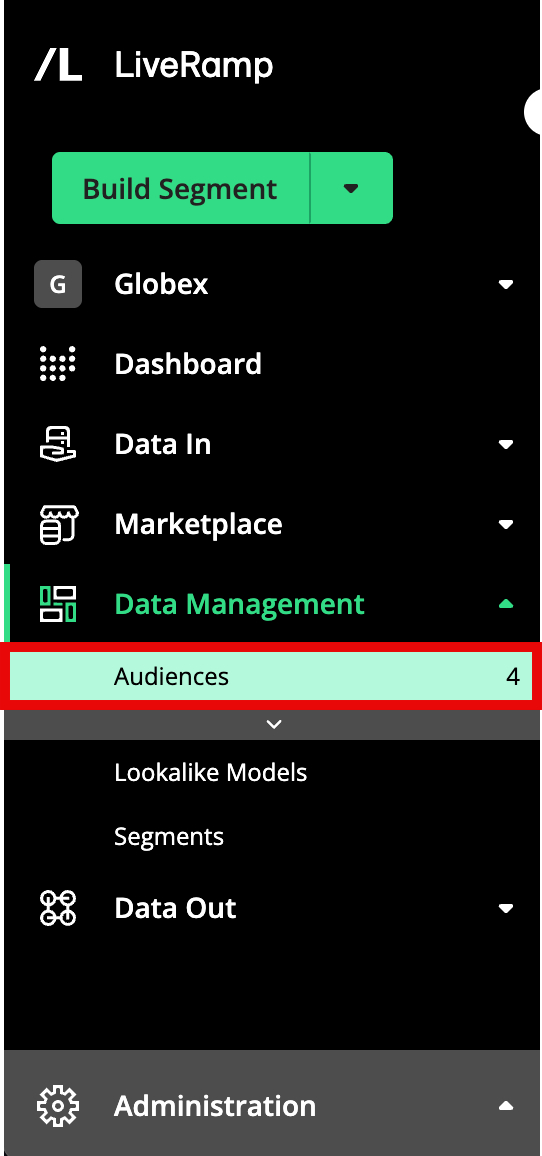
The Audiences Page
You can view a list of your Activation workflow audiences, along with key audience metrics, on the Audiences tab of the My Company Settings page.
Note
The Audiences table only displays Activation workflow audiences. It does not display Measurement Enablement workflow audiences.
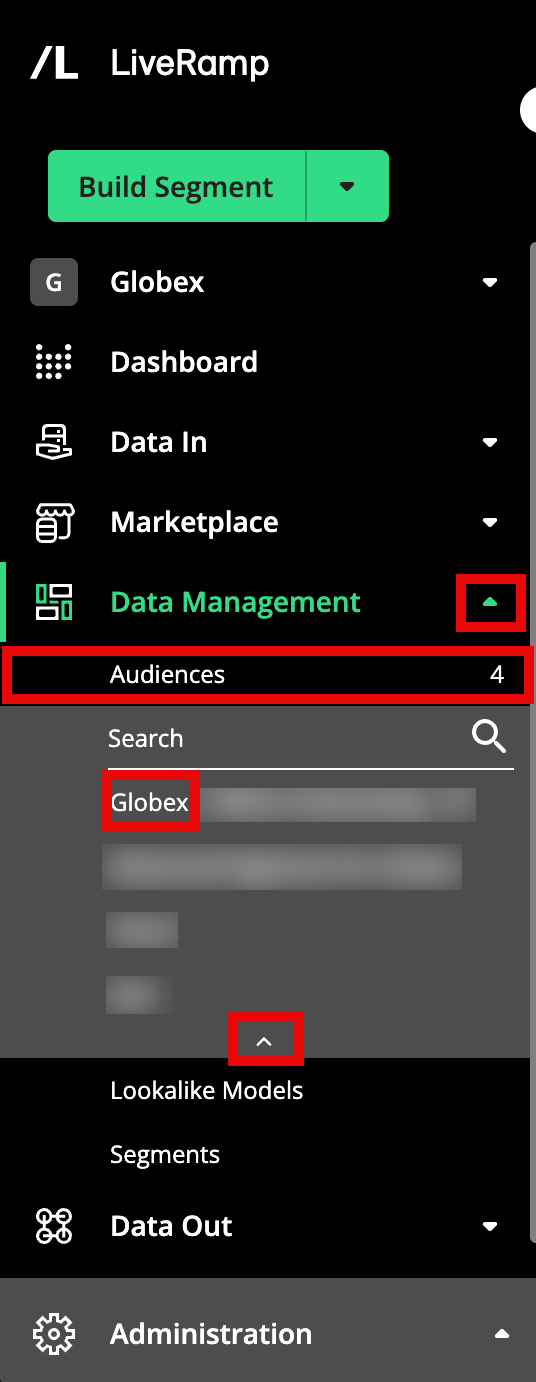
From the navigation menu, select Data Management → Audiences to navigate to the Audiences tab of the Company Settings page.
Note
If you're an admin user, you can also create a new audience or delete an existing audience from this tab.
Click on an audience name to go to the Audience Segments page for that audience, where you can view additional stats, create derived segments, or organize your segments with labels.
For more information, see "View Your Audiences".
The Audience Segments Page
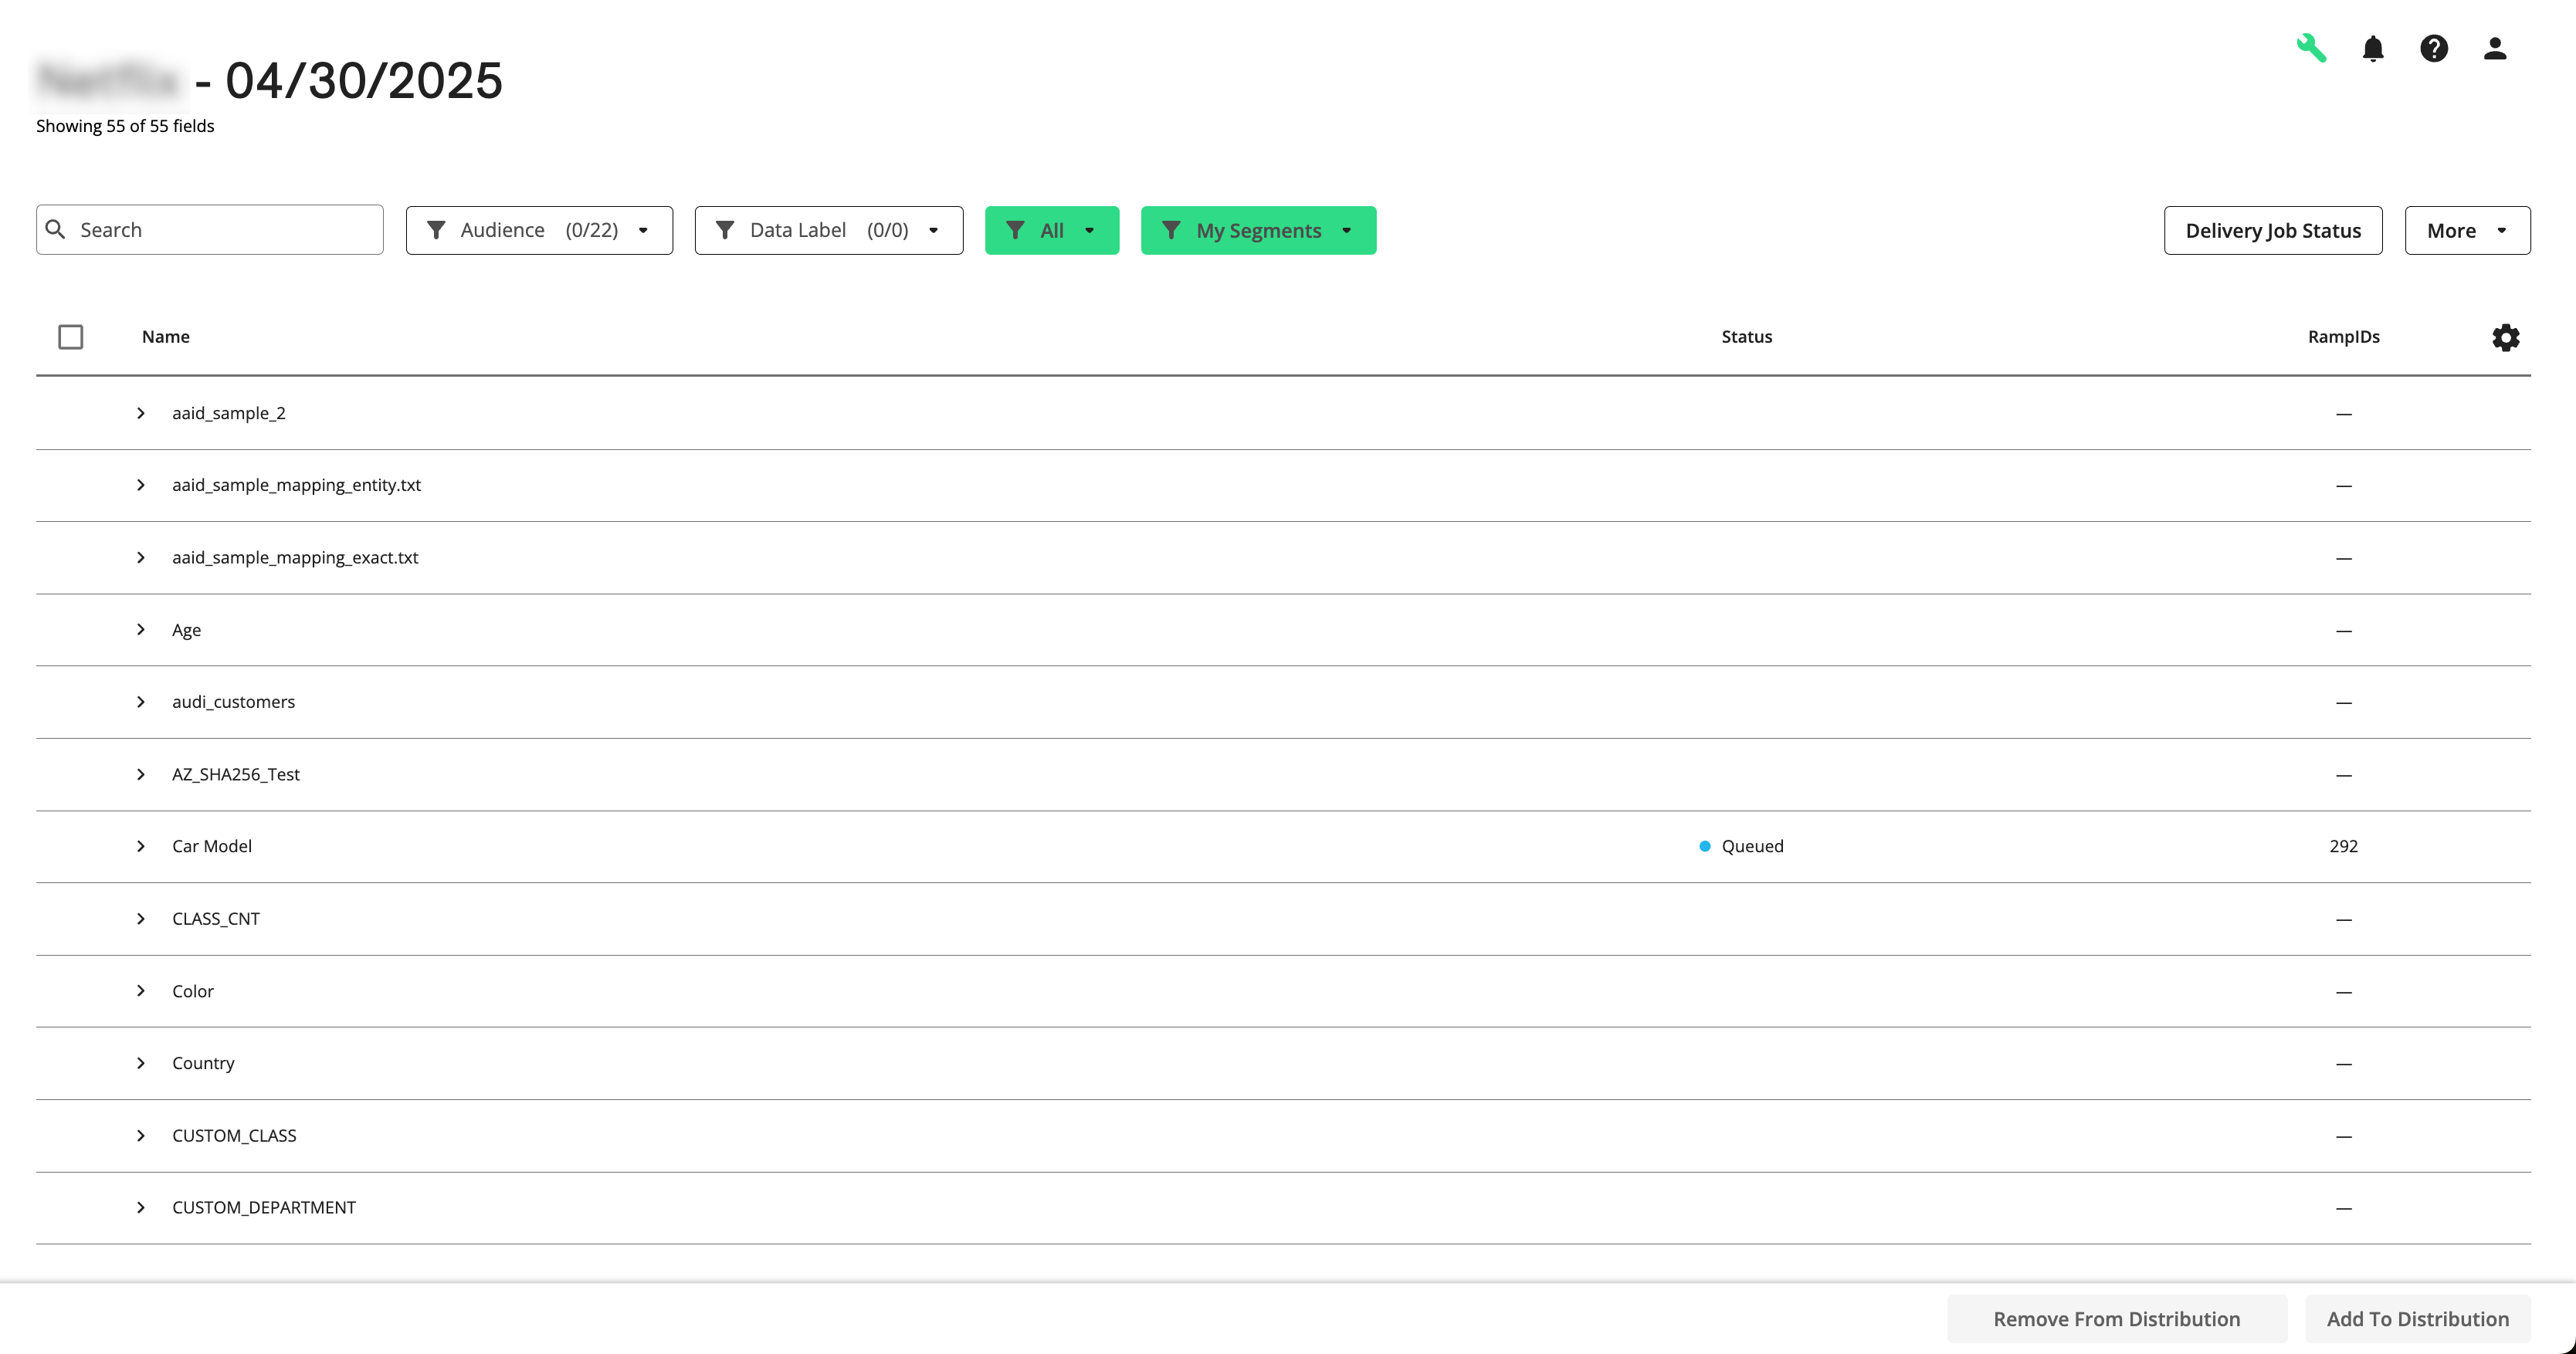
You can view all of the fields and segments within a particular LiveRamp audience on the Audience Segments page for that audience.
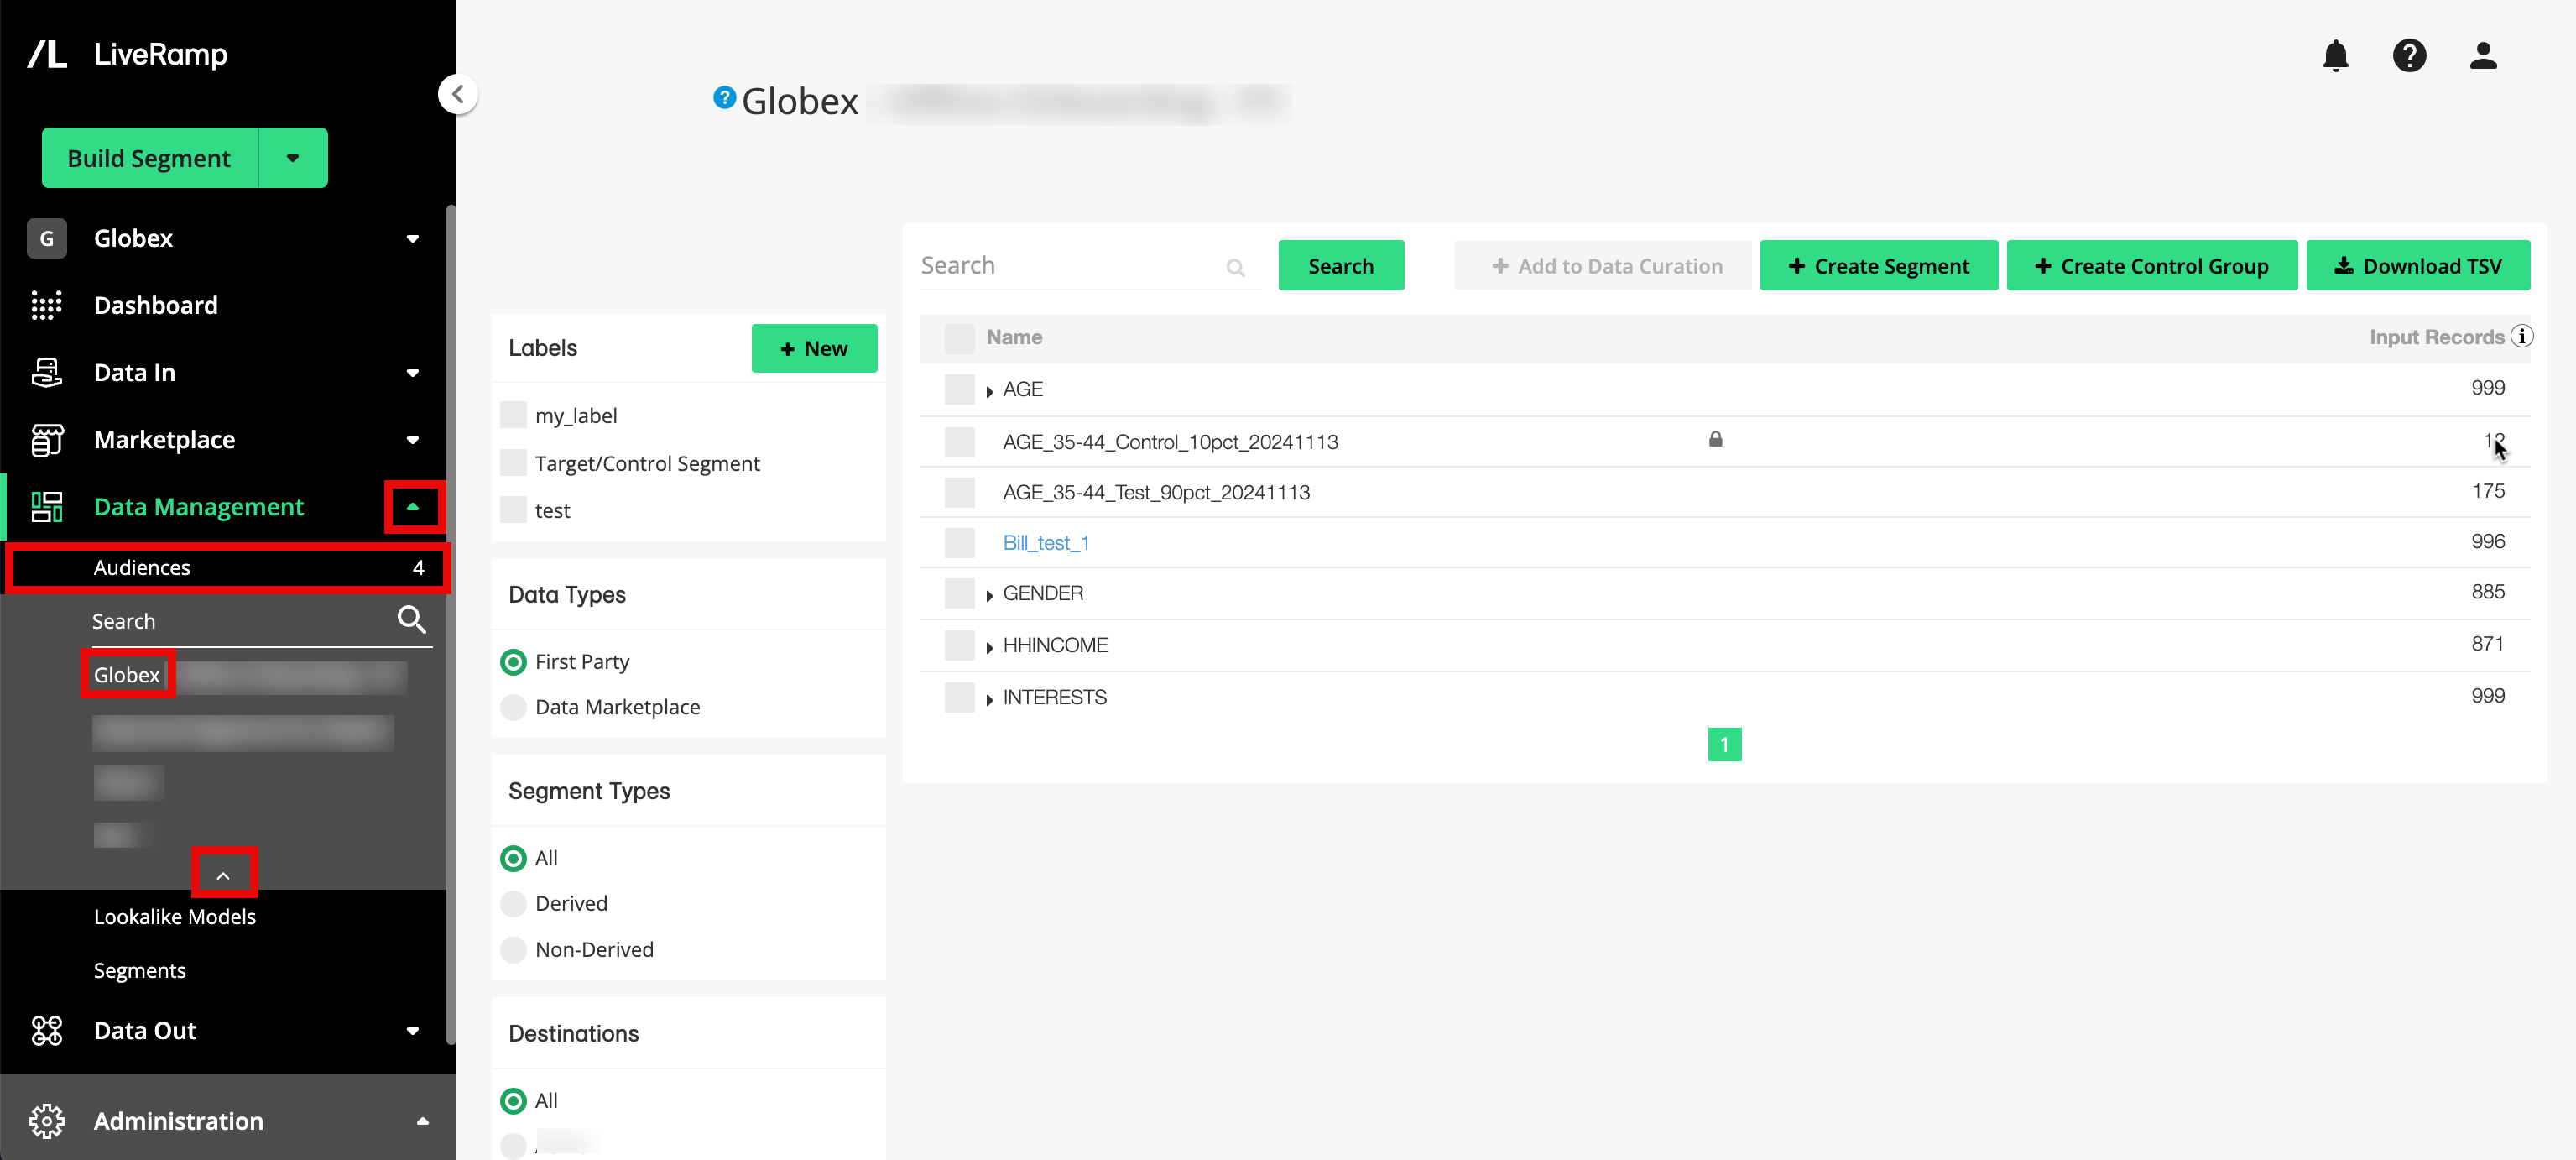
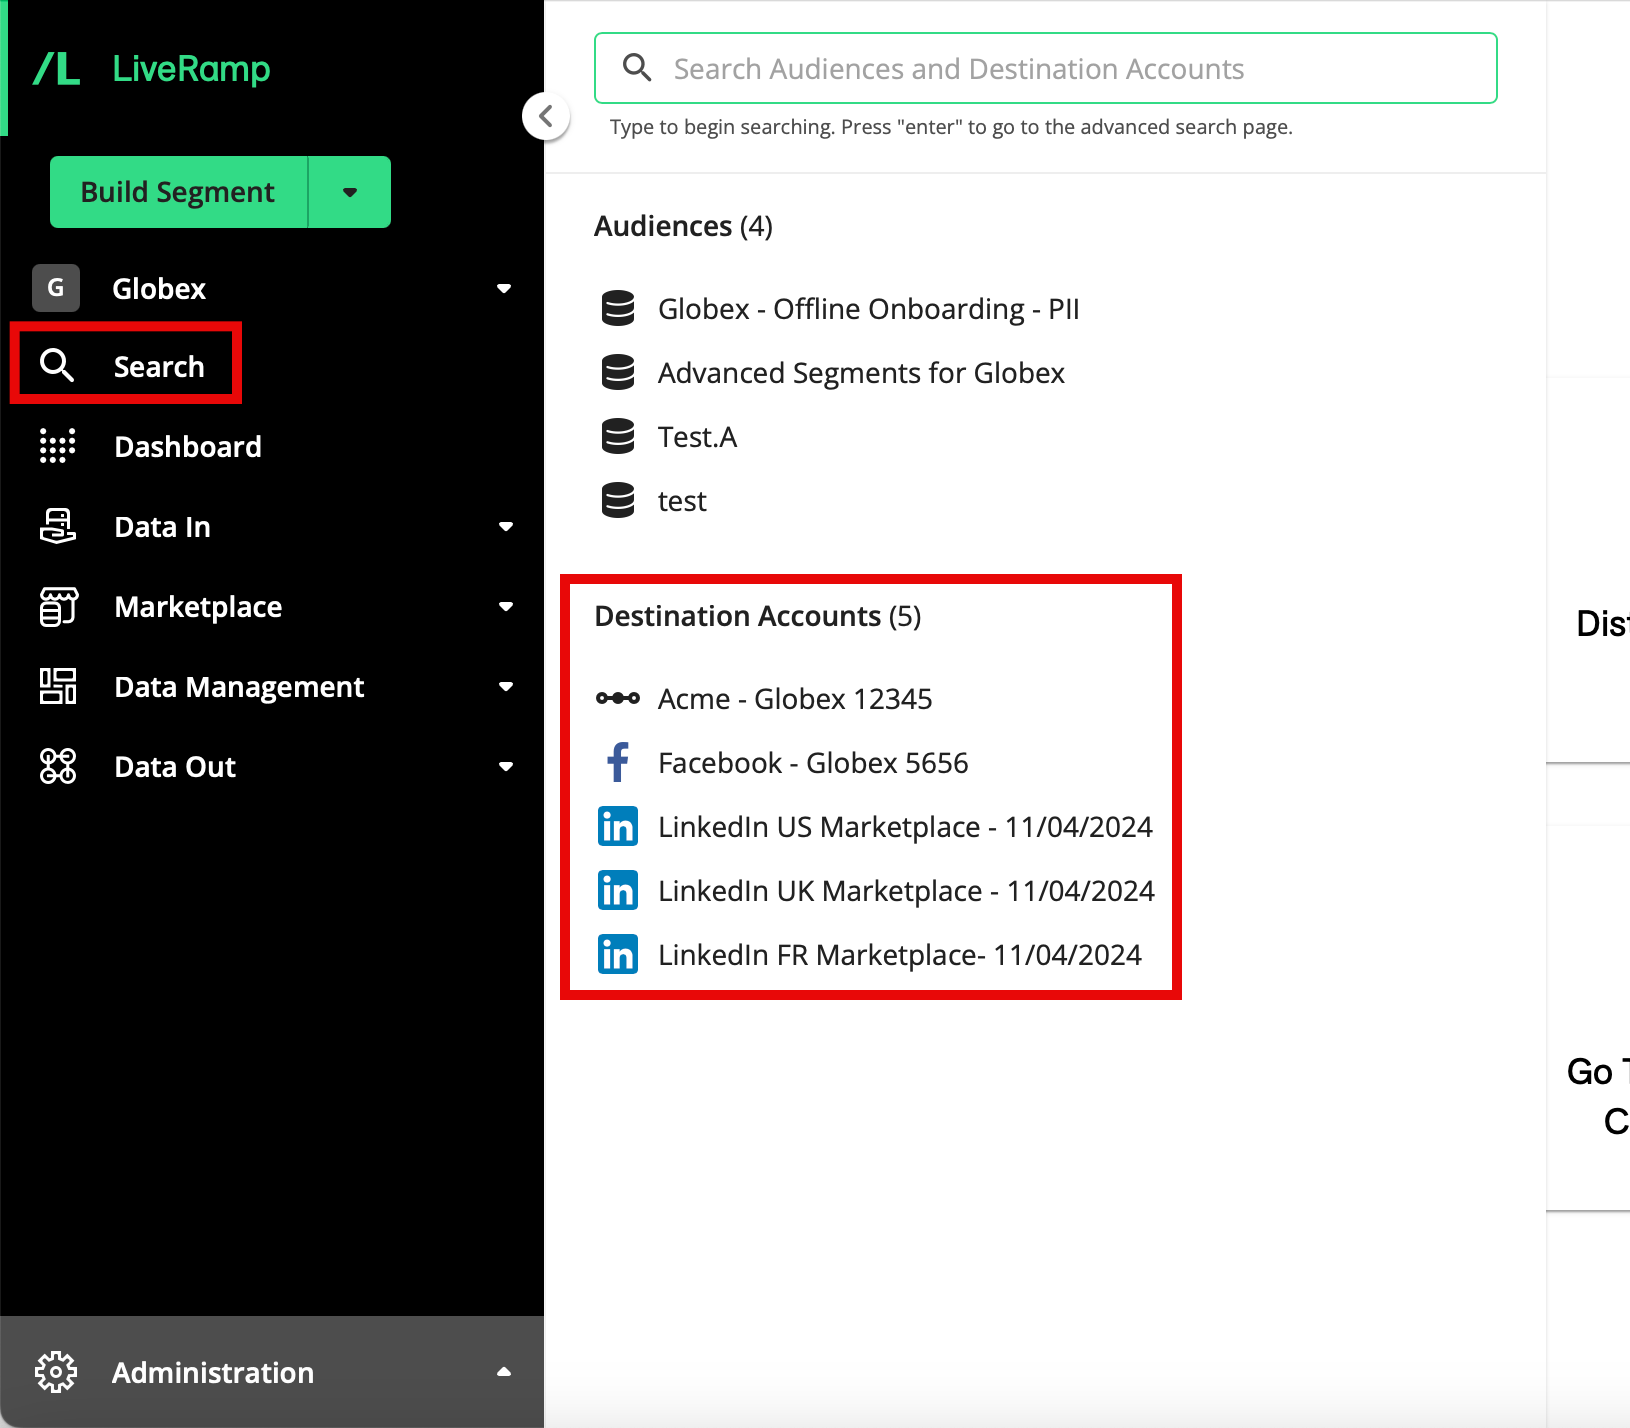
From the navigation menu, click Search to open the global search pane, and then select the desired audience to navigate to the Audience Segments page for that audience.
Tip
You can also navigate to the Audience Segments page for an audience by clicking Data Management → Audiences in the navigation menu and then clicking the audience name from the Audiences tab of the My Company Settings page.
You can perform the following actions from the Audience Segments page:
Use labels to organize and distribute your Fields and Segments
Delete a field or derived segment (if you have an admin role)
The Segment Distribution Page
A destination is a LiveRamp partner that can receive your data from LiveRamp. Data are distributed to these destinations by means of destination accounts. A destination account is a set of configurations that allow you to distribute data to a particular seat at a destination.
Once you've activated a destination account for a destination, you can distribute segments through that destination account on the Segments Distribution page for that destination account (for instructions, see"Distribute Data to a Destination").
Note
The page name that is displayed is the name of the destination account.
From navigate to the Segment Distribution page for a particular destination account using any of these methods:
From the navigation menu, click Search to open the global search pane, and then select or search for the desired destination account to navigate to the Segment Distribution page for that destination account.
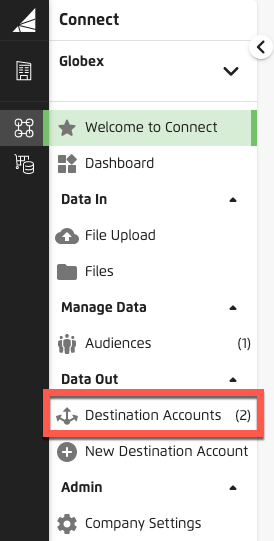
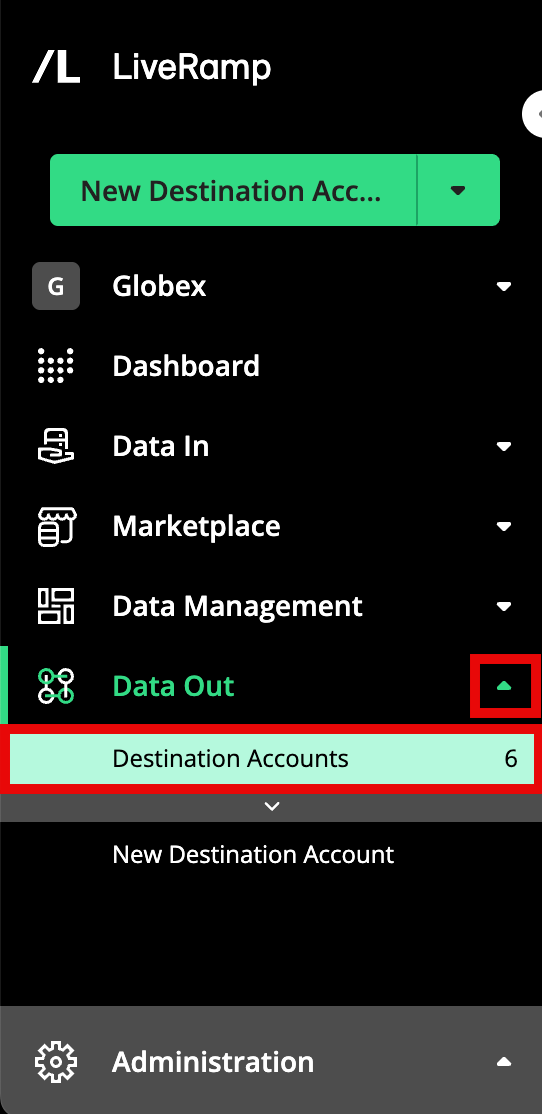
From the navigation menu, select Data Out → Destination Accounts to navigate to the Destination Accounts page and then click Manage on the desired destination account tile to navigate to the Segment Distribution page for that destination account.
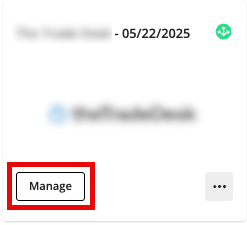
From the Welcome Page, click the "Distribute Data" shortcut tile to navigate to the Destination Accounts page and then click MANAGE on the desired destination account tile to navigate to the Segment Distribution page for that destination account.
In addition to distributing segments, you can also perform the following actions:
Download a destination taxonomy to see a mapping of segment IDs to fields and values for the segments that are being actively distributed through that destination account
View the delivery job status for the actively distributing segments
Resend all active segments (if this has been enabled for your account)
The Destination Accounts Page
You can view your destination accounts and their status on the Destination Accounts page:
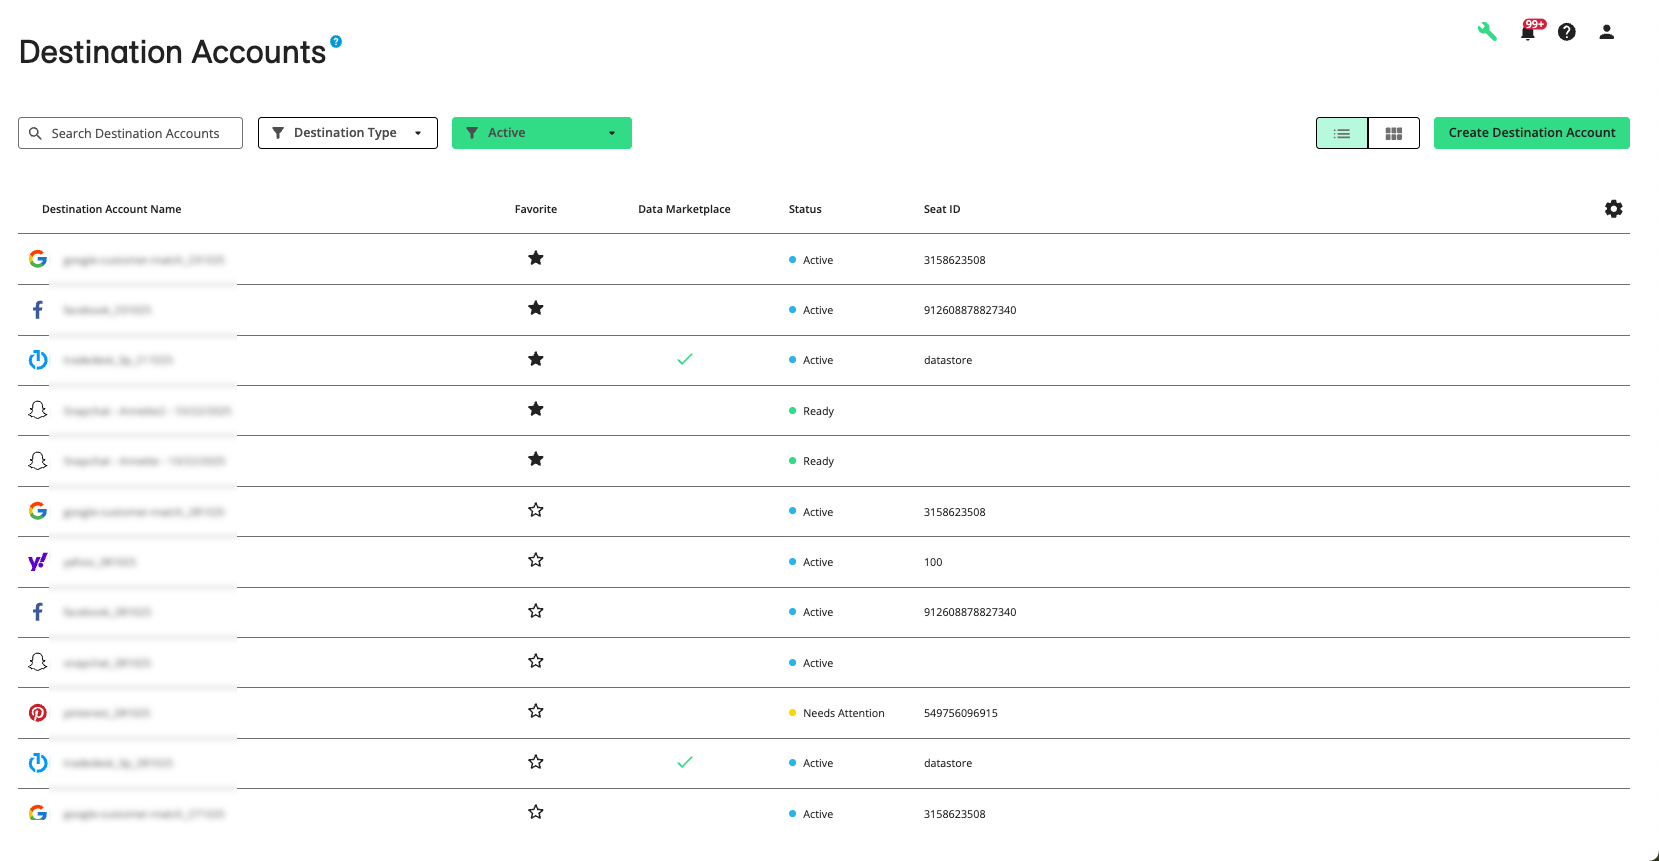
From the navigation menu, select Data Out → Destination Accounts or click the Distribute Data tile from the Welcome page.to navigate to the Destination Accounts page.
For more information, see "View Destination Accounts".
You can also perform the following actions:
Reactivate an existing destination account that you previously made inactive or that has expired
The Company Settings Page
The Company Settings page contains tabs that give you access to additional pages (depending on what has been enabled for your account):
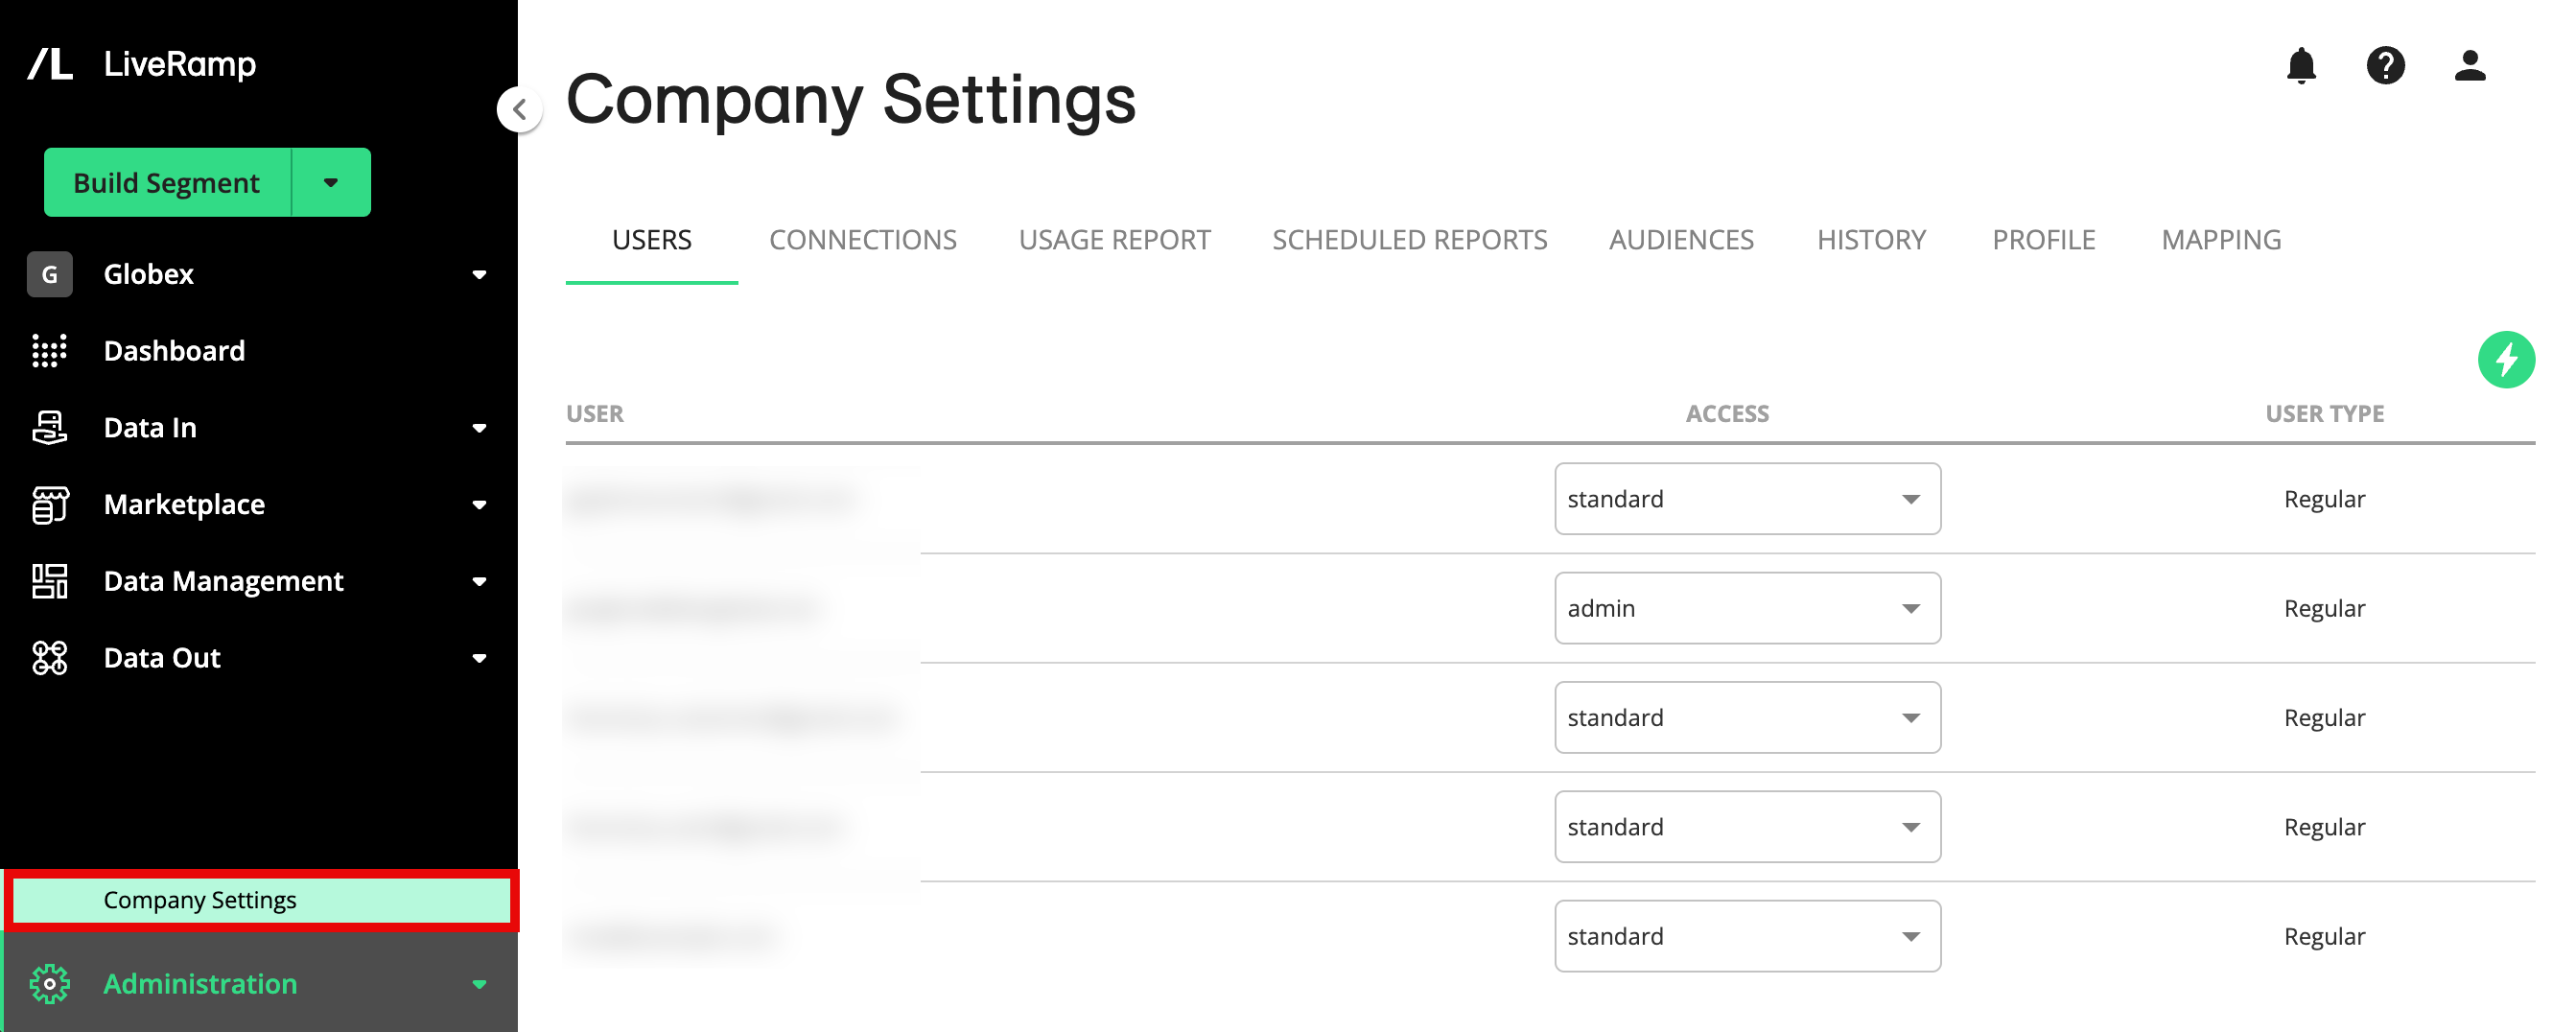
USERS: The USERS page displays information on the users who have access to your Connect account. From this tab, you can change a user's access level and delete a user.
Caution
The method of adding users via Company Settings will be deprecated. All user management activities will take place on the new Accounts page, which is currently being rolled out to all users in waves.
See our announcement to learn more.
CONNECTIONS: The CONNECTIONS page displays information on the OAuth connections that have been created in your account. For information on creating, reauthenticating, and deleting OAuth connections, see "Managing OAuth Connections".
USAGE REPORT: The USAGE REPORT page displays information about your LiveRamp usage for the current month and past months. For more information, see "Viewing Usage".
SCHEDULED REPORTS: The SCHEDULED REPORTS page displays all of the usage report deliveries that have been scheduled, and allows you to create, edit, and delete scheduled reports. For more information, see "Schedule Usage Report Deliveries".
AUDIENCES: The AUDIENCES page allows you to view a list of your Activation workflow audiences, along with key audience metrics. From this page, you can also create a new audience.
Note
You can also access the AUDIENCES page more directly by selecting Administration → Company Settings in the navigation menu.
CLIENTS: If you're a reseller or agency with Connect clients, you can view those clients and key information on the CLIENTS page.
HISTORY: The HISTORY page displays information on user activity in your account.
PROFILE: The PROFILE page allows you to view and edit the profile for the Connect account.
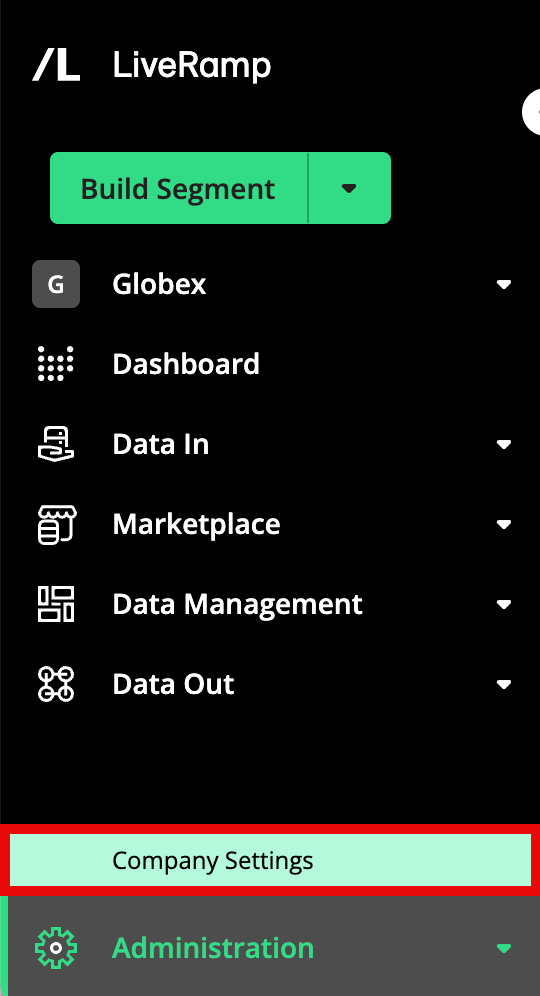
From the navigation menu, select Administration → Company Settings to navigate to the Company Settings page.
The Accounts Page
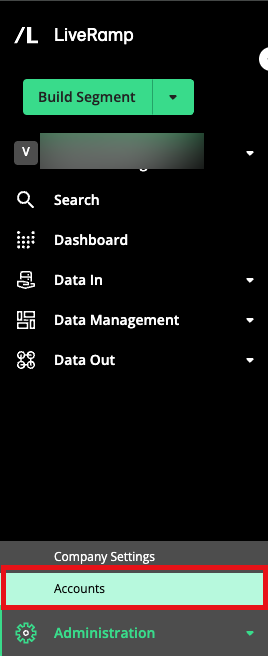
If you have an admin role, you can access the Accounts page by selecting Administration → Accounts. The Accounts page displays all the users who have access to your Connect account. From the Accounts page, you can:
If you have access to LiveRamp Clean Room, add or remove Clean Room users
View details regarding a user by clicking the row for the user
Note
The Accounts page is currently being rolled out to all users in phases. If you have an admin-level role and do not see the Accounts page in your Connect UI, you can add users through the Users tab on the Company Settings page. For instructions, see "Add Users to Your Company Account via Company Settings".
My Profile
You can view your user account details, including your roles and the organizations you can access in My Profile.
To go to My Profile, click the user icon on the top right-hand side of any screen (1) and select My Profile (2).
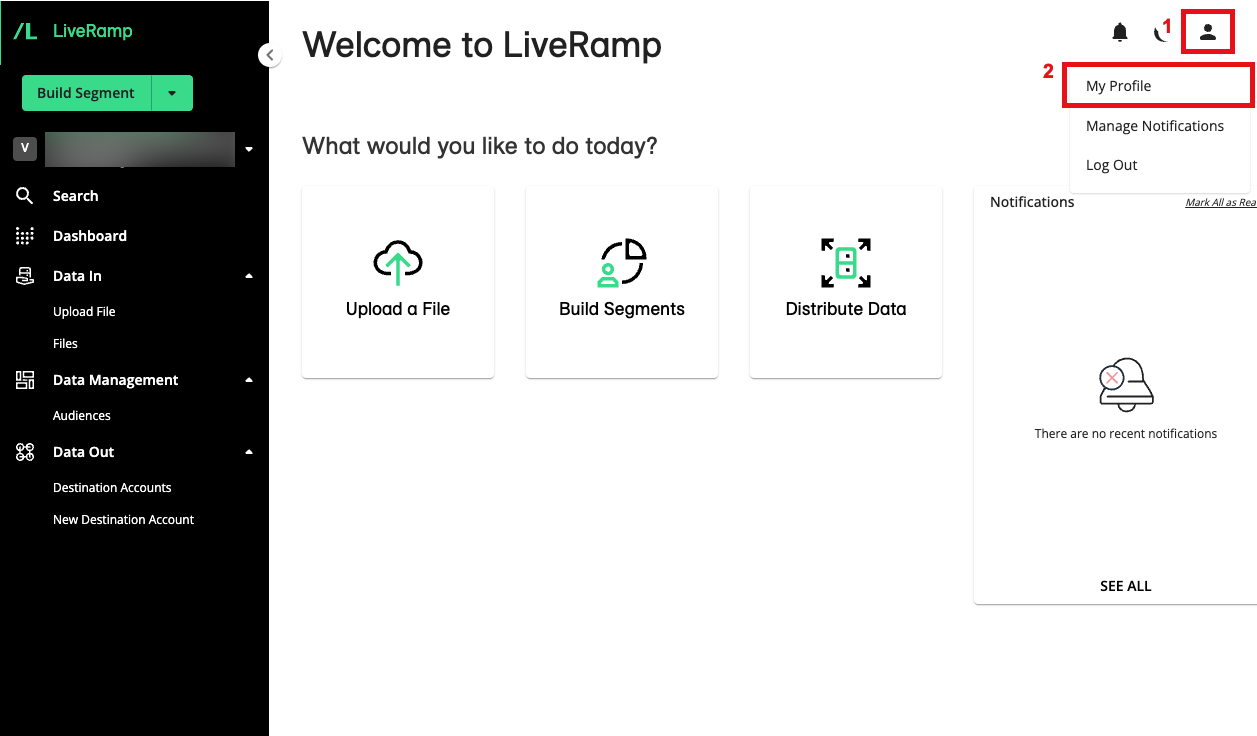
The My Profile pop-up displays the following information:
User Email: The email associated with the LiveRamp user account.
User ID: The LiveRamp user identifier associated with the LiveRamp user account.
Access: Organizations you have access to in Connect.
Tip
Type the name of an organization in the search bar to quickly search for it.
Clean Room Access: Organizations you have access to in LiveRamp Clean Room.
Roles: The roles or access you have for the related organization. To learn more, see "Roles and Restrictions for Connect Users".
Data Marketplace Pages
See the sections below for information on the pages in the "Data Marketplace" section.
The Data Marketplace - My Segments Page
If you're a data seller in the Data Marketplace, you can use the Data Marketplace - My Segments page to view and manage your segments, including enabling them in the Data Marketplace and several other actions (My Segments tab shown below).
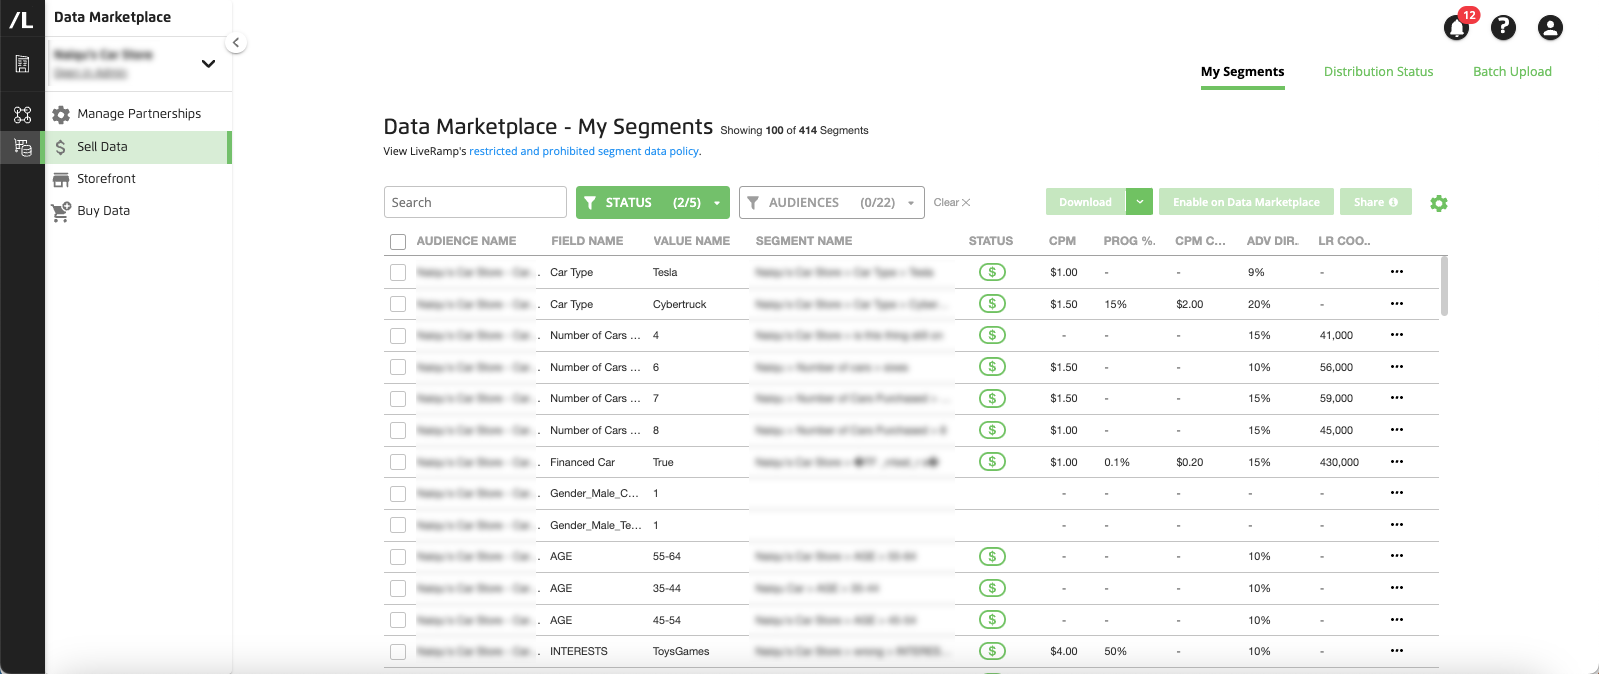
From the navigation menu, select Marketplace → Sell Data to navigate to the Data Marketplace - My Segments page, or click the Sell Data tile from the Welcome page.
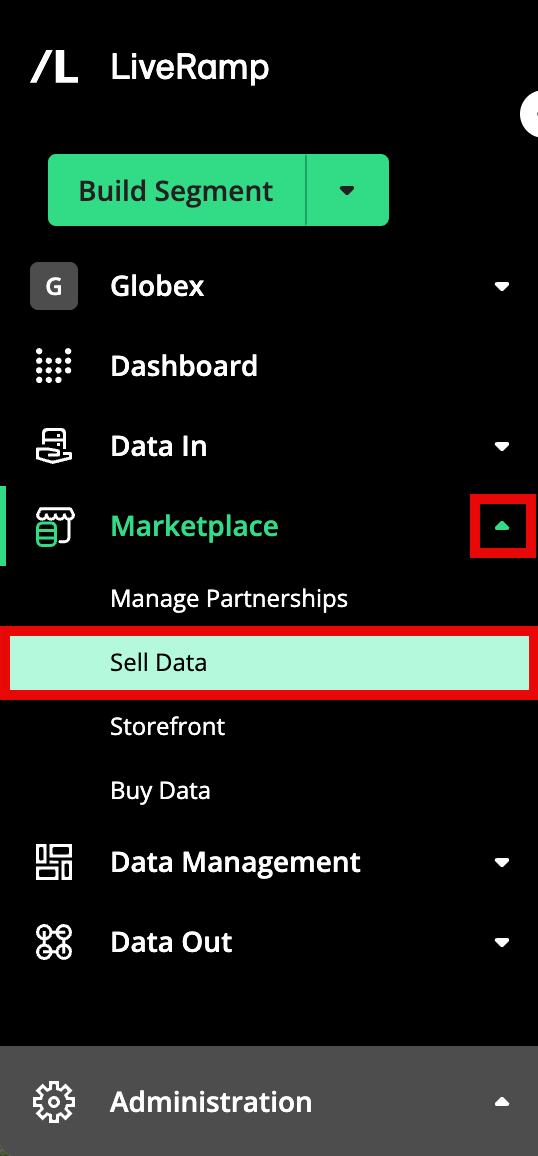
The page has three tabs in the upper right:
My Segments: This tab displays the segments table and allows you to perform a number of actions (this is the default view when you first open the page)
Distribution Status: This tab displays a table that shows your Data Marketplace segments that have been requested
Batch Upload: This tab allows you to upload an updated segment metadata file
The My Segments Tab
The My Segments tab displays a table showing all of your segments, sorted by the name of the audience the segments are in. You can use the search bar and the filters to adjust the list of segments that are displayed.
Note
A number of columns are hidden by default, such as FIELD ID, VALUE ID, and DATA MARKETPLACE SEGMENT ID, as well as some reach columns. To display these columns adjust the table display by clicking on the gear icon. For more information, see "Changing the Table Display".
You can also perform the following actions from this tab:
Enable an individual segment in the Data Marketplace
Download the Data Marketplace reference sheet, which contains a list of the platforms that can receive custom segments and their IDs, as well as a list of advertisers that can be blocked from accessing Data Marketplace segments
The Distribution Status Tab
See the sections below for information on the pages in the "Clean Room" section.
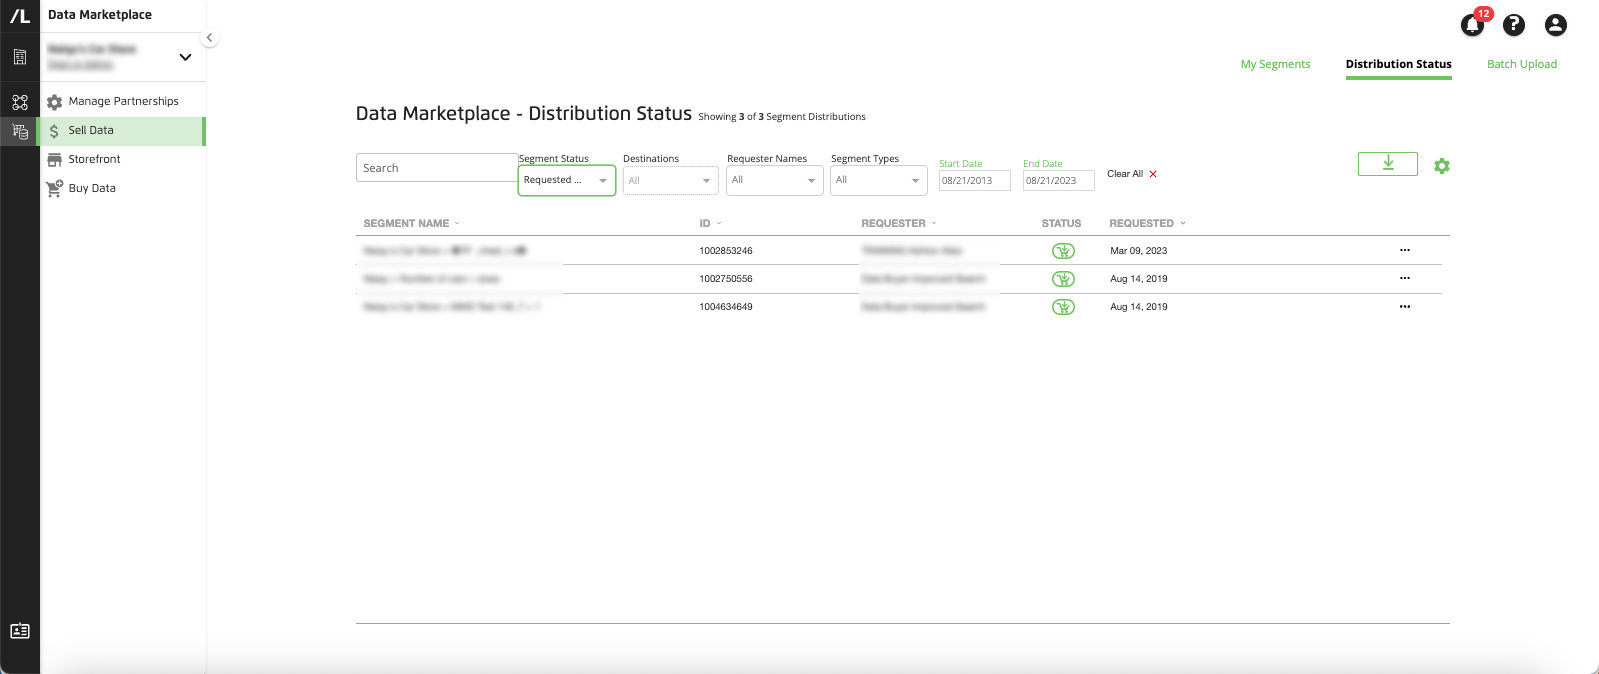
You can use the search bar and the filters to adjust the list of segments that are displayed. You can also set a start date and end date to filter by initial distribution date.
In addition to viewing the segments, you can also download an Excel file showing all displayed segments.
The Batch Upload Tab
The Batch Upload tab allows you to upload a Data Marketplace segment metadata file to provide additional information on the segments you'd like to sell (such as segment name, permitted use cases, and price) to enable them as Data Marketplace segments.
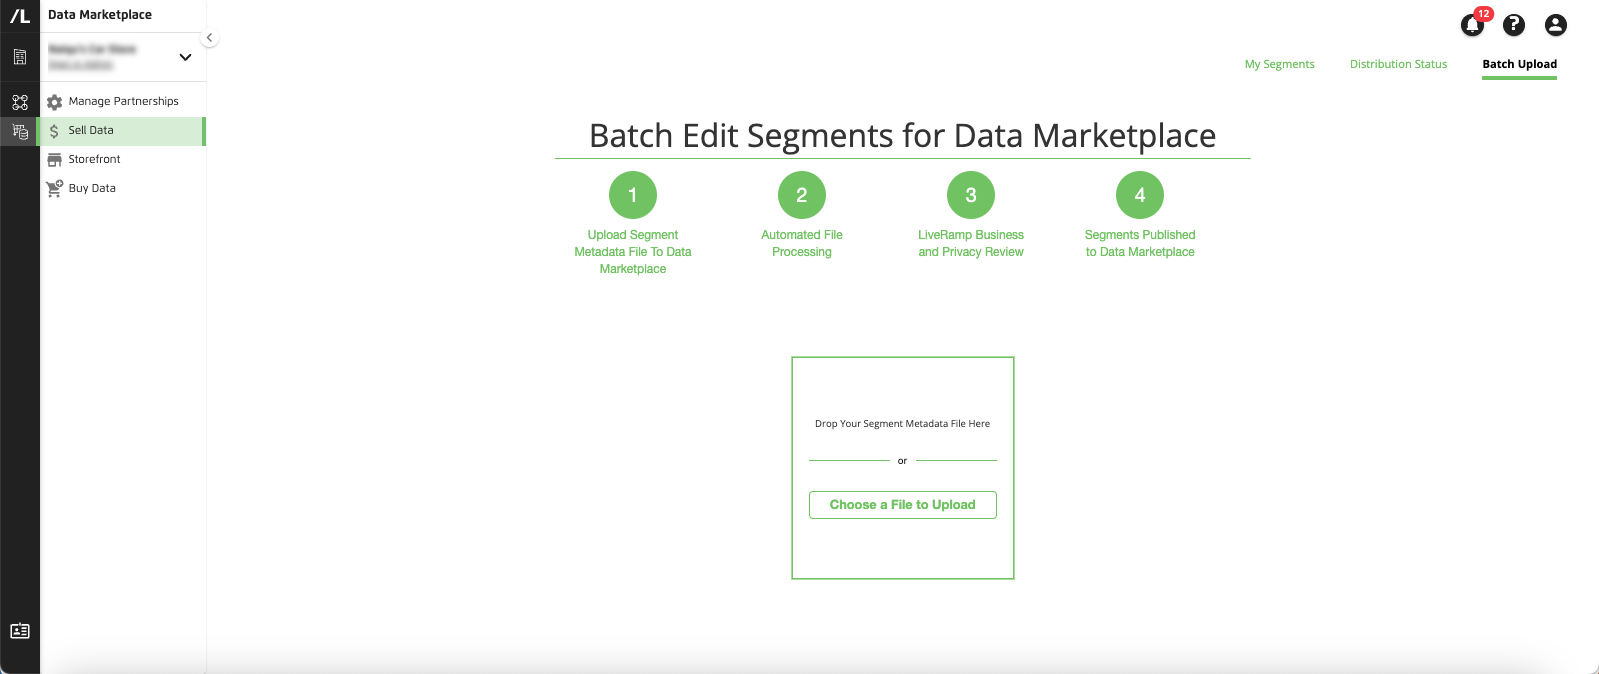
Before uploading a file, download a segment metadata file for the segments you want to provide information on and then update the file to provide the additional information. For instructions on updating the file, see "Update a Data Marketplace Segment Metadata File".
Once you've updated the file, drop and drag the file into the upload box, or click Choose a File to Upload and navigate to the file you wish to upload. For complete instructions, see "Upload a Data Marketplace Segment Metadata File".
The Data Marketplace Storefront Page
See the sections below for information on the pages in the "Clean Room" section.
From the navigation menu, select Marketplace → Storefront to navigate to the Data Marketplace Storefront.
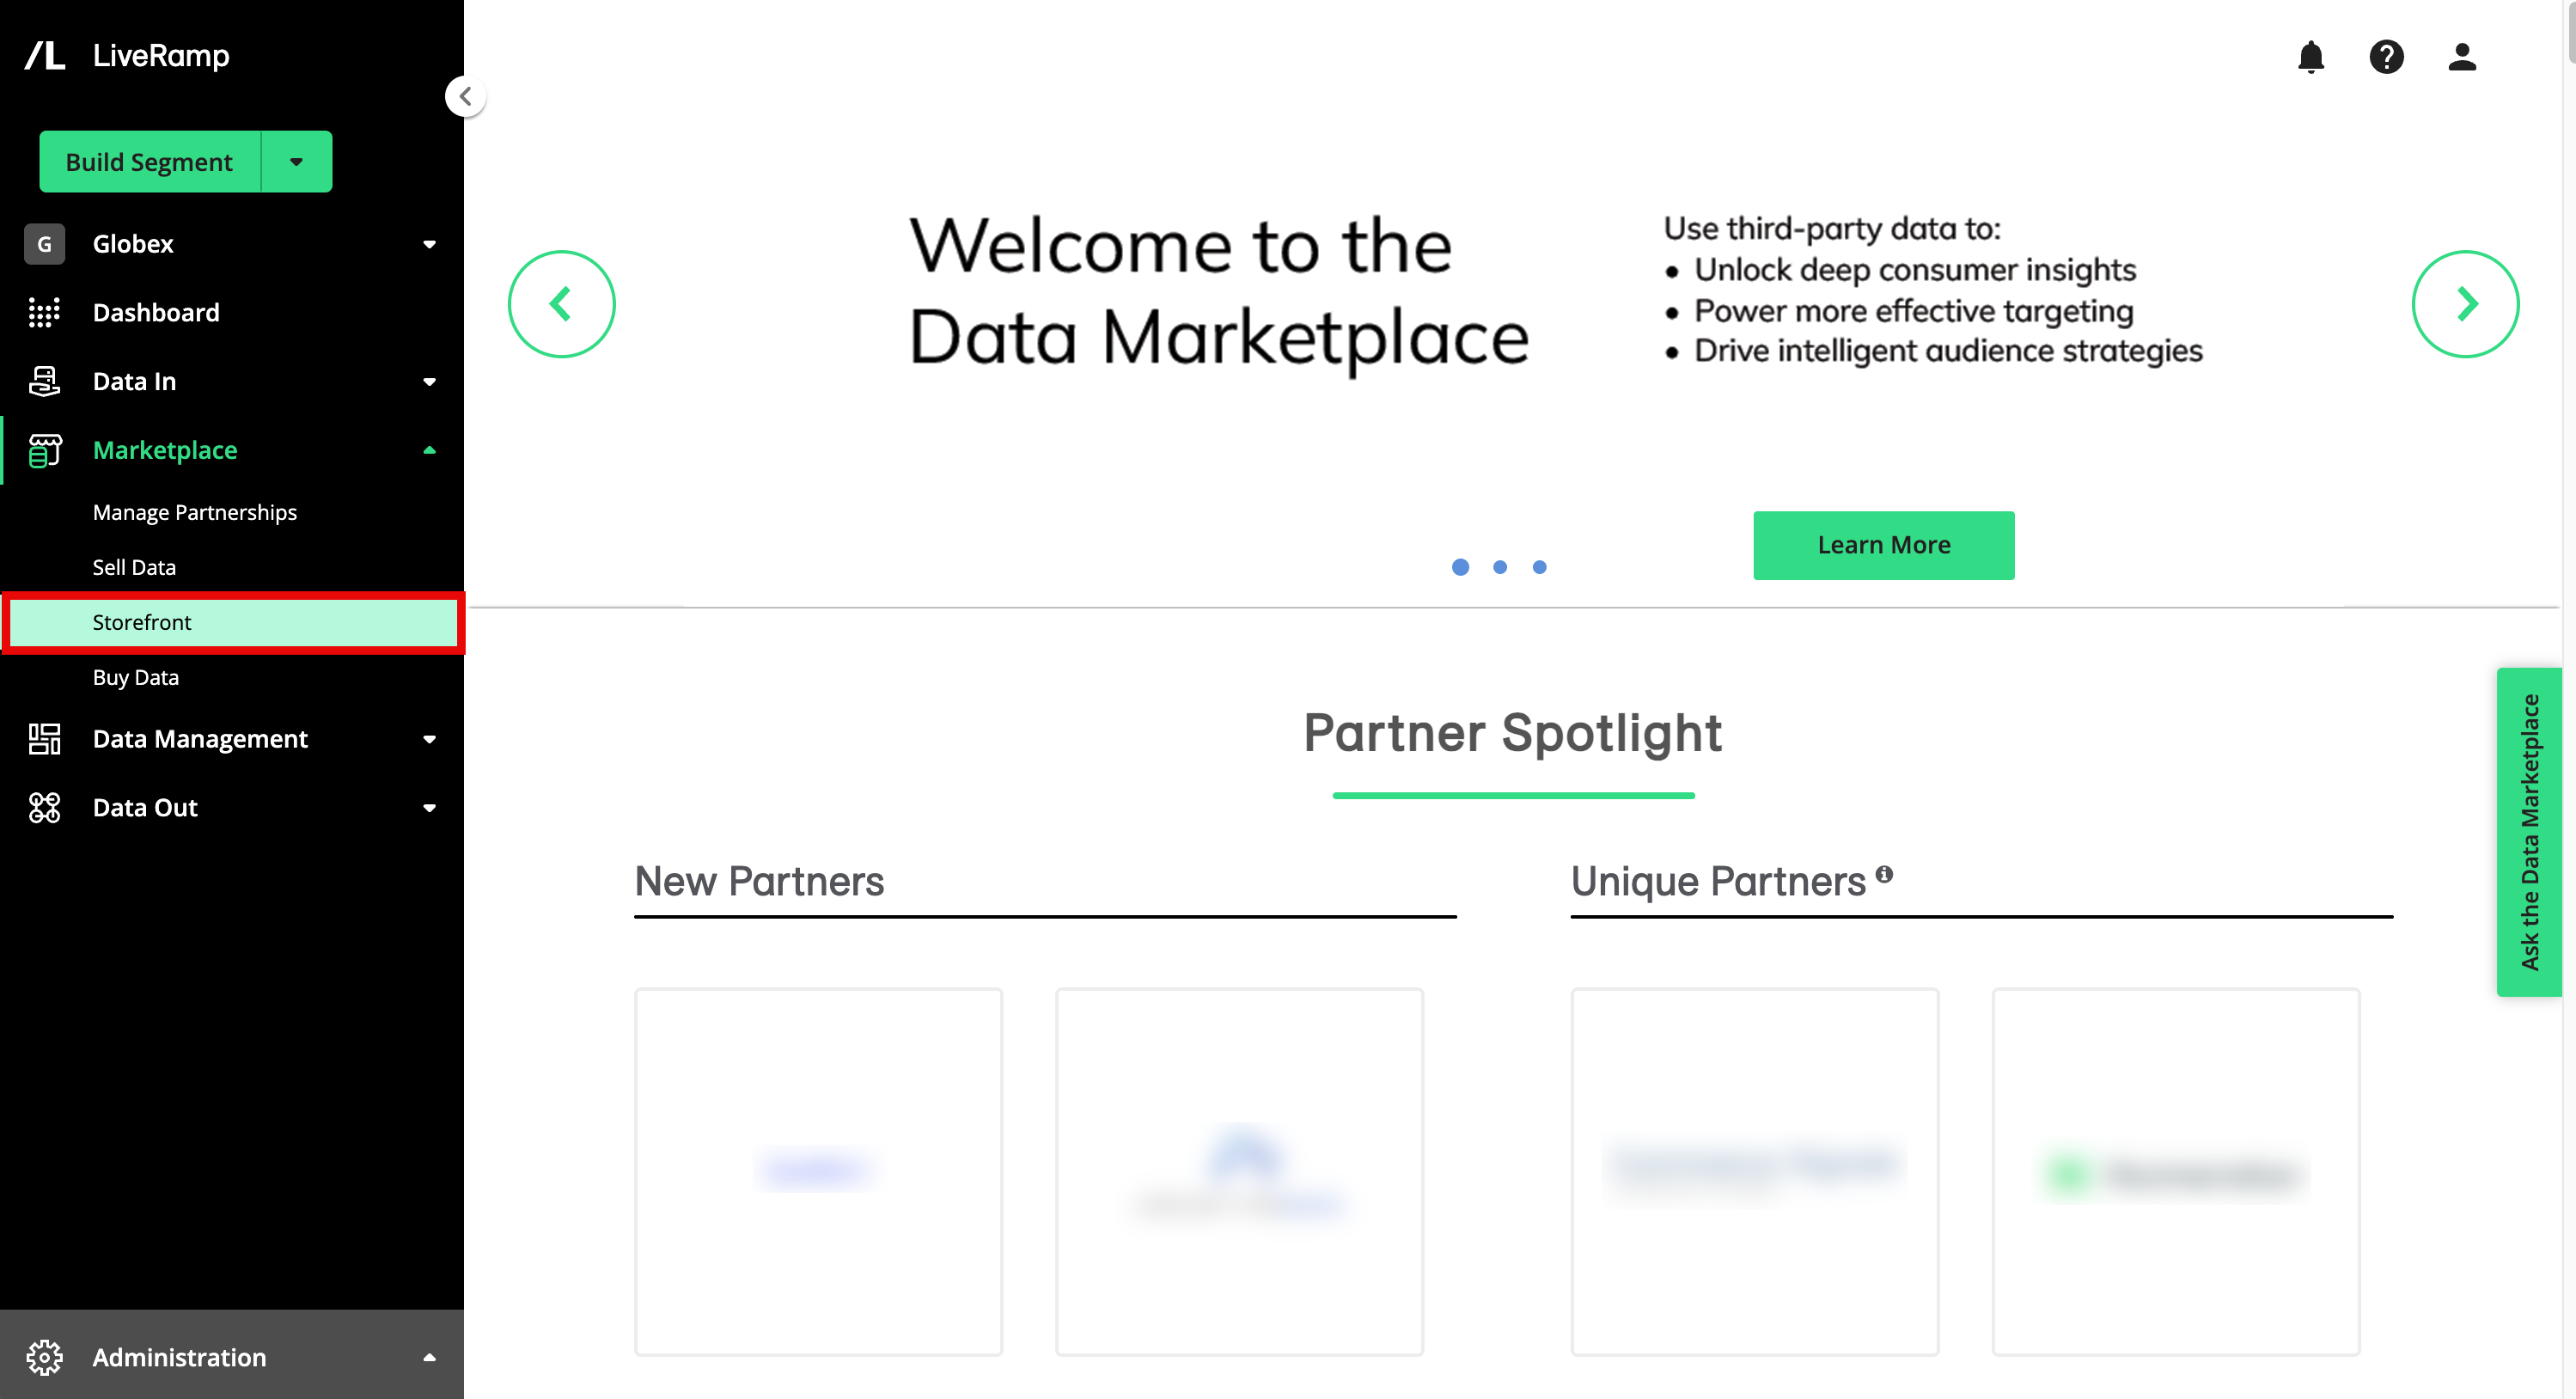
Tip
Alternatively, you can click the Explore Data Marketplace tile from the Welcome page.
The Data Marketplace Segments Page
If you're a data buyer you can use the Data Marketplace Segments page to buy ("request") Data Marketplace segments for your account.
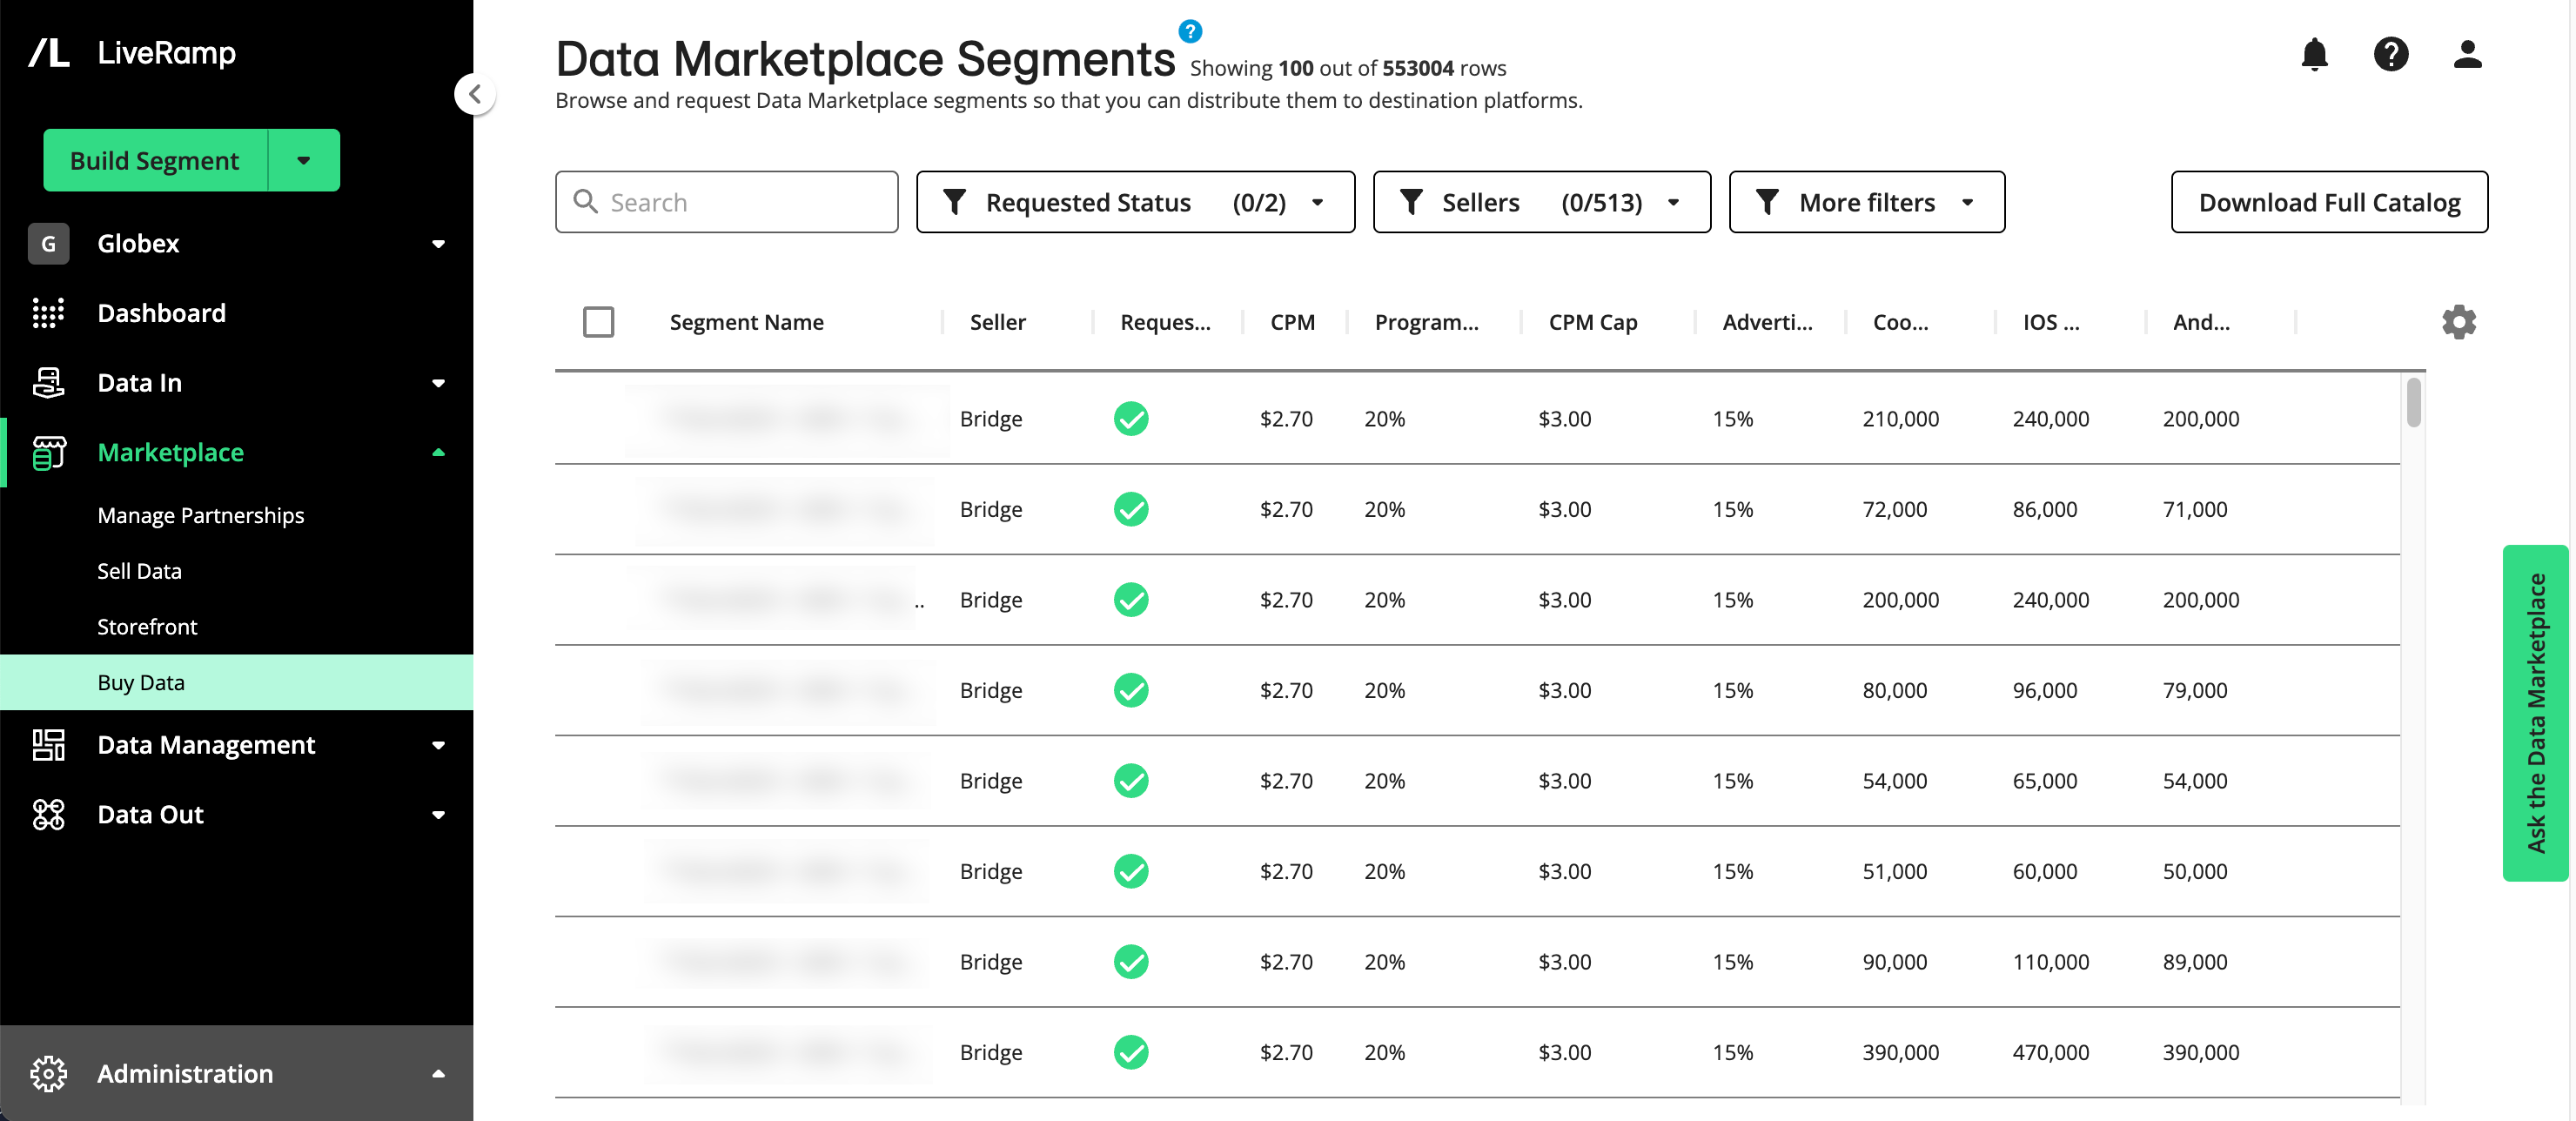
To access the Data Marketplace Segments page, click from the Marketplace navigation menu.
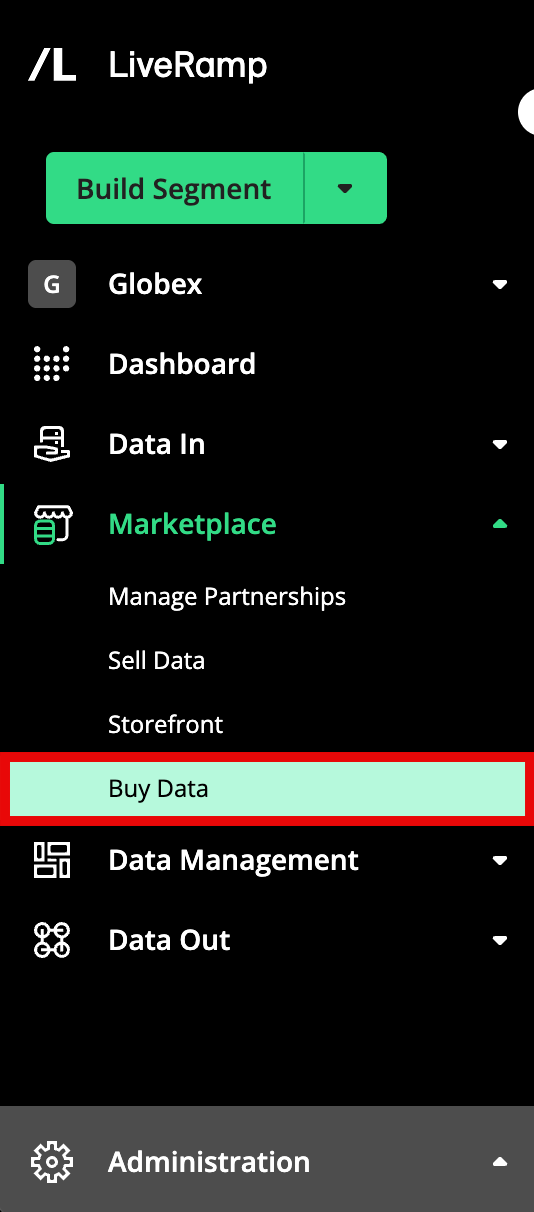
From the navigation menu, select Marketplace → Buy Data to navigate to the Data Marketplace Segments page, or click the Buy Data tile from the Welcome page.
For complete instructions on using this page to buy data, see "Buying Segment Data from the Data Marketplace".