Connect to Data in Salesforce
If you have data in Salesforce and want to be able to use that data in questions in LiveRamp Clean Room, you can create a Salesforce data connection.
Note
This solution is designed for Salesforce solutions that use Salesforce's "traditional" infrastructure, like Salesforce Sales Cloud. As a company, Salesforce has built and acquired a wide and diverse range of products. But that diversity means that everything labeled "Salesforce" may not fit the instructions below. As a result, Salesforce-owned solutions that do not use the features mentioned below (e.g., Objects) will require further development and discussions.
A Salesforce data connection can be used in the following clean room types:
Hybrid
Confidential Computing
Note
For Confidential Computing clean rooms, clean room partners should use these instructions for this data connection type. Clean room owners of Confidential Computing clean rooms need to use the CSV Catalog data connection type (contact your LiveRamp account team for more information).
Note
For more information on clean room types, see "Configure Clean Rooms".
To view an interactive walkthrough demo of the process of connecting to your cloud-based data by creating a data connection, click here.
After you’ve created the data connection and Clean Room has validated the connection by connecting to the data in your cloud account, you will then need to map the fields before the data connection is ready to use. This is where you specify which fields can be queryable across any clean rooms, which fields contain identifiers to be used in matching, and any columns by which you wish to partition the dataset for questions.
After fields have been mapped, you’re ready to provision the resulting dataset to your desired clean rooms. Within each clean room, you’ll be able to set dataset analysis rules, exclude or include columns, filter for specific values, and set permission levels.
To configure a Salesforce data connection, see the instructions below.
Overall Steps
Perform the following overall steps in Salesforce to configure a Salesforce Hybrid data connection:
Note
For additional information, see these Salesforce resources
For Salesforce instructions for Connected Apps, see the Salesforce article "Help and Training Community".
For a Salesforce Trailhead tutorial on accessing data with API integration, see "Access Data with API Integration".
Once you've performed the procedures above in Salesforce, perform the following overall steps in LiveRamp Clean Room:
For information on performing these steps, see the sections below.
After you've performed all of the overall steps, the data will be ready to be provisioned into a clean room and a query. For instructions, see "Clean Room Owner Implementation Guide".
Perform Steps in Salesforce
Perform the steps in the sections below in Salesforce to configure a Salesforce data connection.
Create a Salesforce Connected App
In Salesforce, log in with your developer account.
In the upper-right corner, hover over the gear icon and then select .

In the left-hand pane, search for "App Manager" and open it.
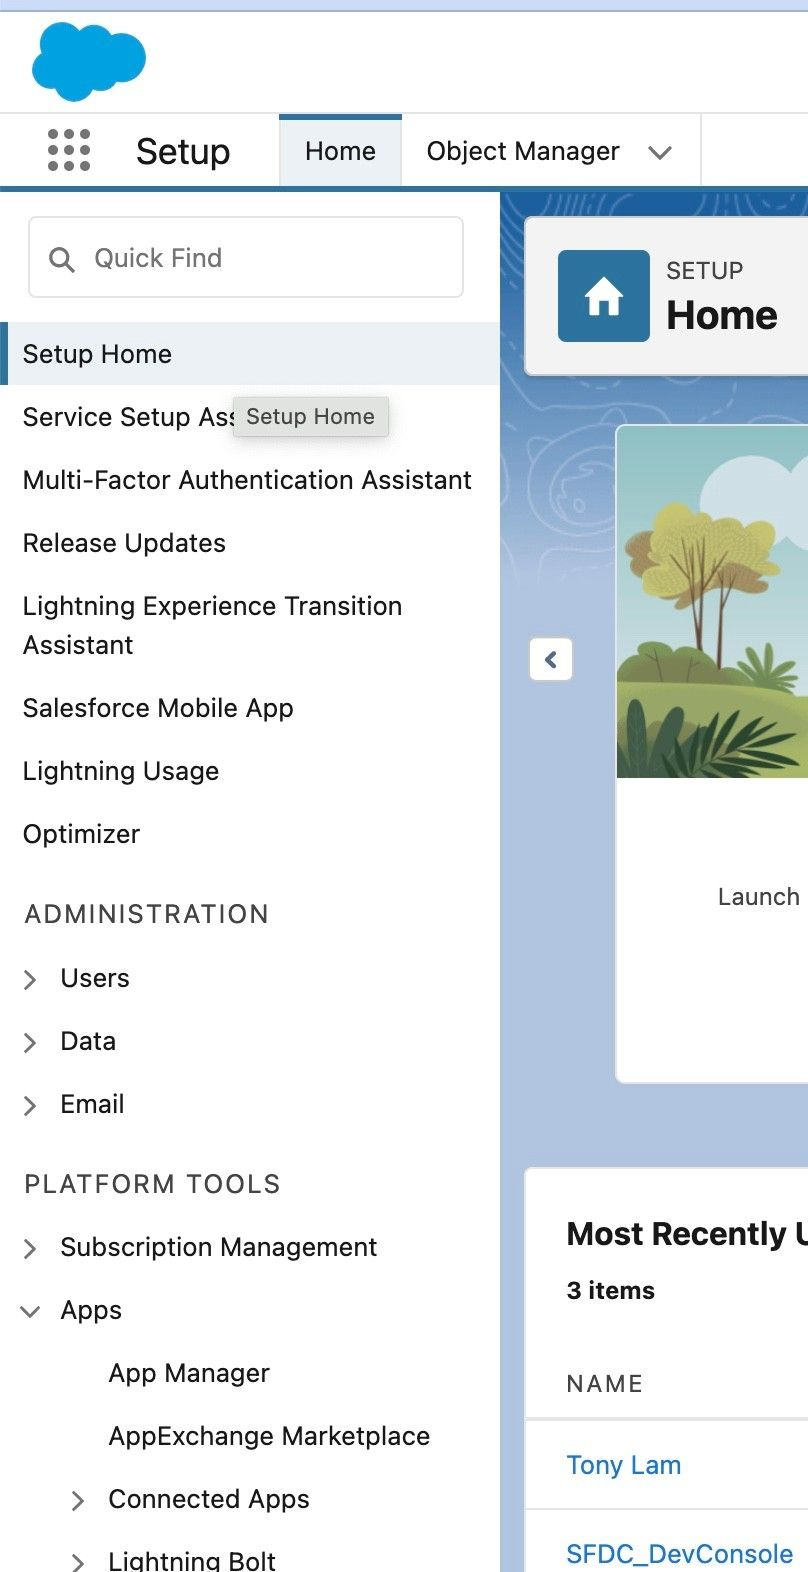
Click .

On the New Connected App page, enter the Connected App name, API name, and contact email.
Note
A client would enter the email address of someone who is creating the Connected app or a generic email.
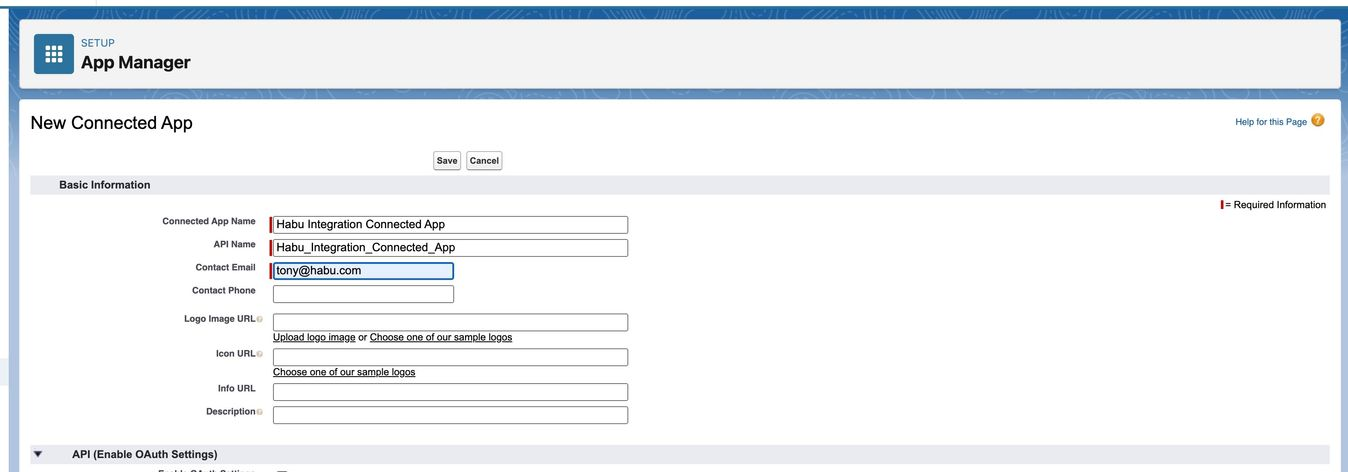
Scroll down to "API (Enable OAuth Settings)" and select the check box for "Enable OAuth Settings".

For the Callback URL, provide a Callback (for example, "https://www.liveramp.com").
For the Selected OAuth Scopes, select one of the following options:
Manage user data via APIs (api)
Perform requests at any time (refresh_token, offline_access)
Click
The New Connected App can take up to 10 minutes to take effect.

Configure the Connected App
From the Manage Connected Apps page in Salesforce, click for the app you created in the previous procedure.

From the page that opens, click .
Make the following settings:
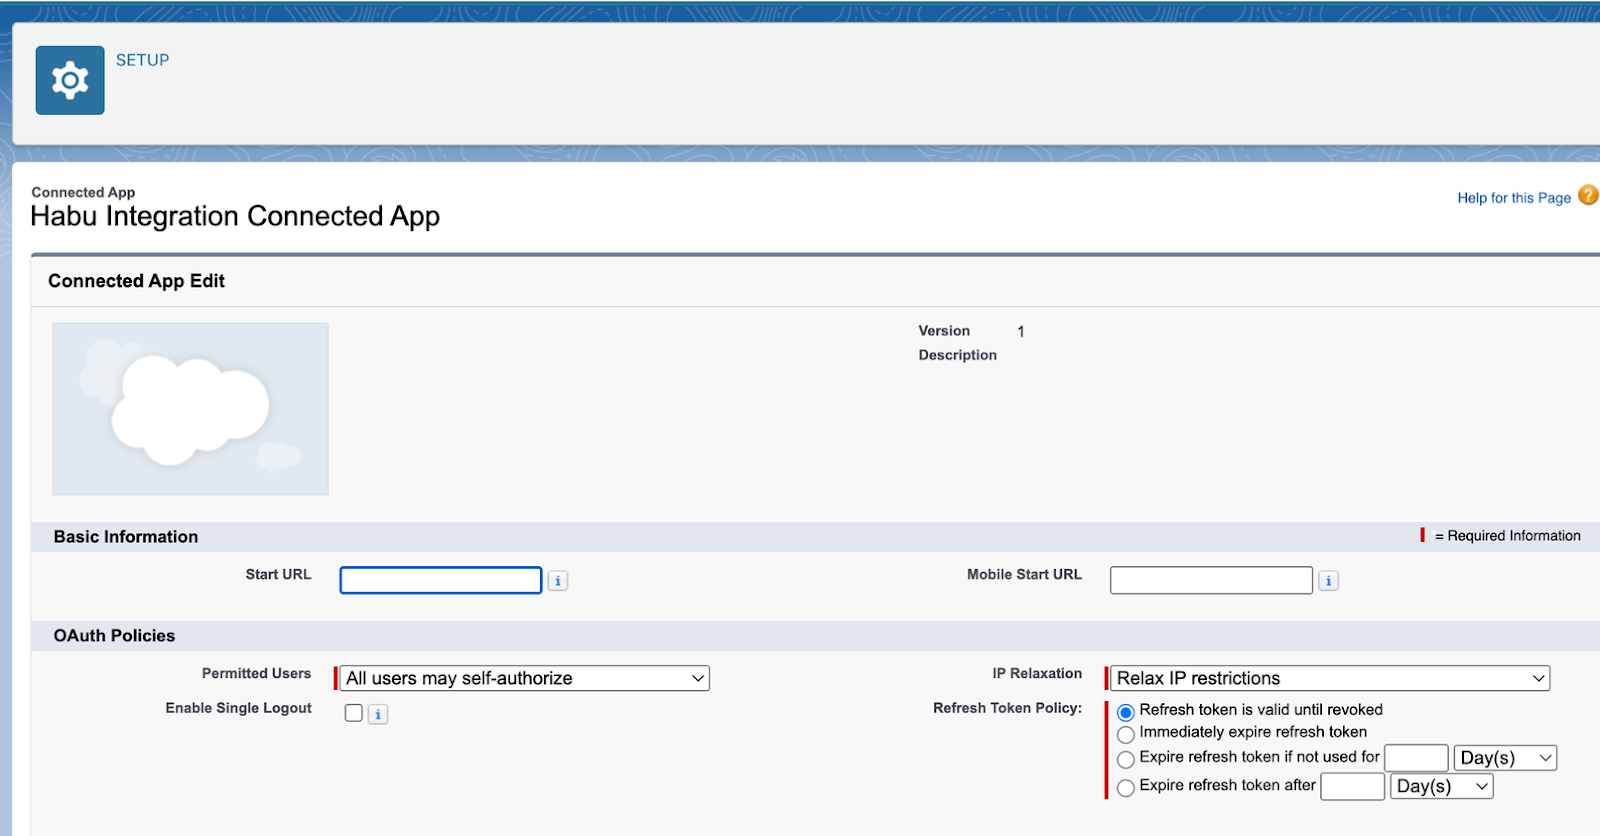
Permitted Users: All users may self-authorize.
IP Relaxation: Relax IP restrictions.
Refresh Token Policy: The refresh token is valid until revoked.
Click .
Generate an Initial Access Token
In Salesforce, navigate back to the Connected App list and select Manage.
From the row for the Connected App, select "Manage" from the dropdown on the far right of the row.

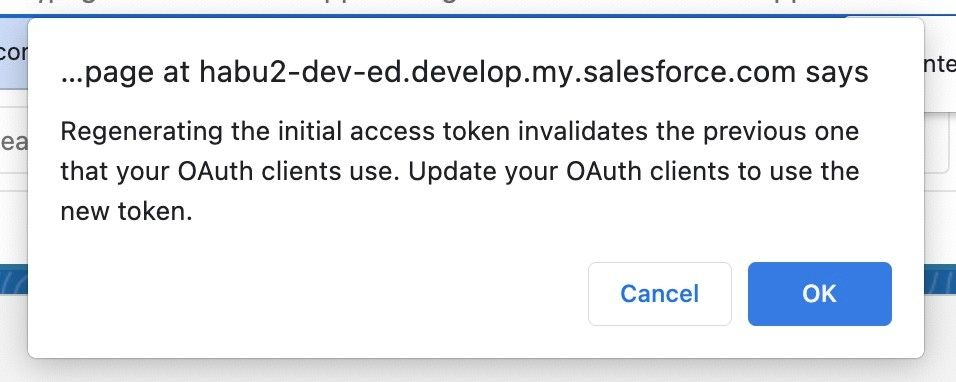
Scroll to "Initial Access Token for Dynamic Client Registration" and click .

Click to confirm.
Get the Consumer Key and Consumer Secret
Note
Disable any pop-up blockers before performing these steps.
In Salesforce, navigate to the Connected App list.
From the row for the Connected App, select "View" from the dropdown on the far right of the row.
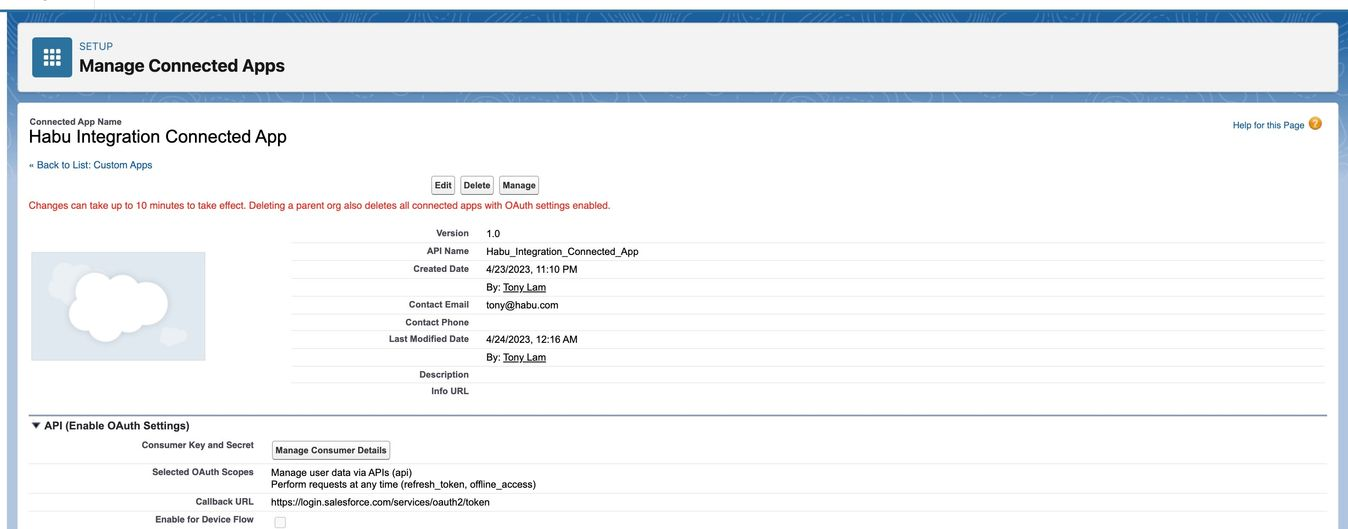
Go to the API (Enable OAuth Settings) section, and click Manage Consumer Details.
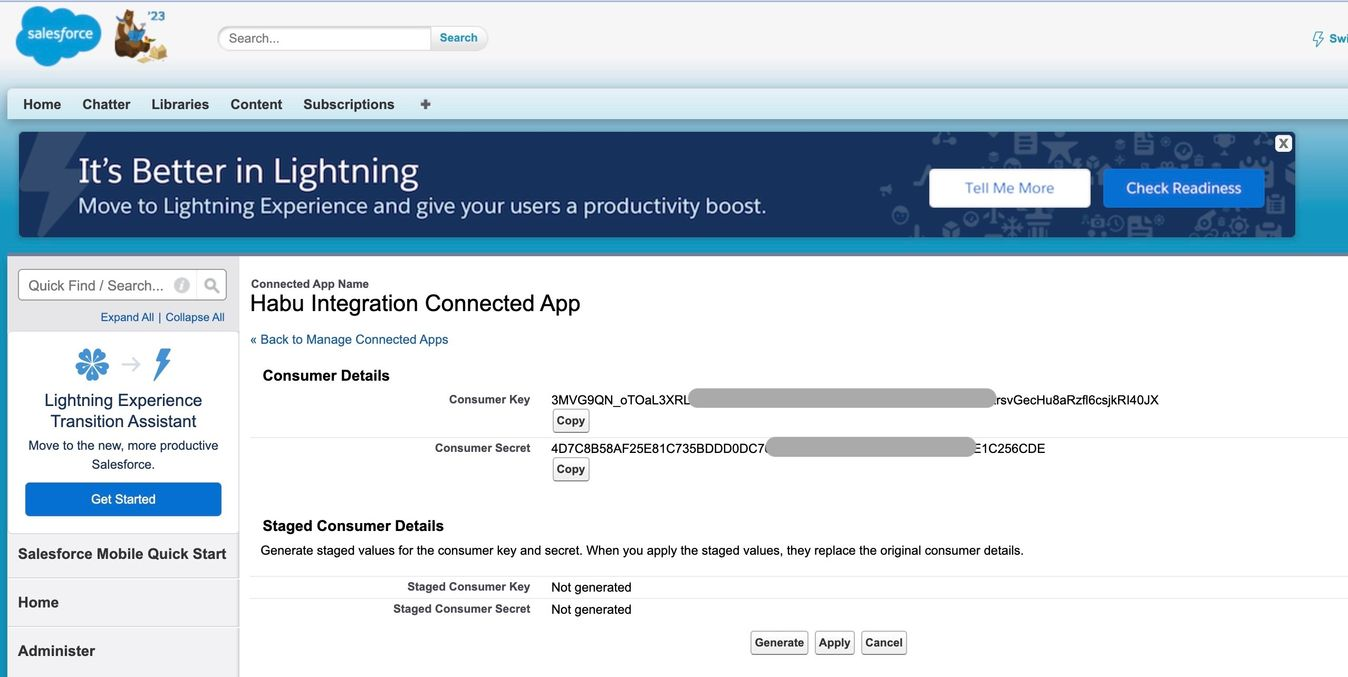
Take note of the Consumer Key and Consumer Secret.
Create or Clone an Existing Profile
In Salesforce, navigate to Profiles under → .
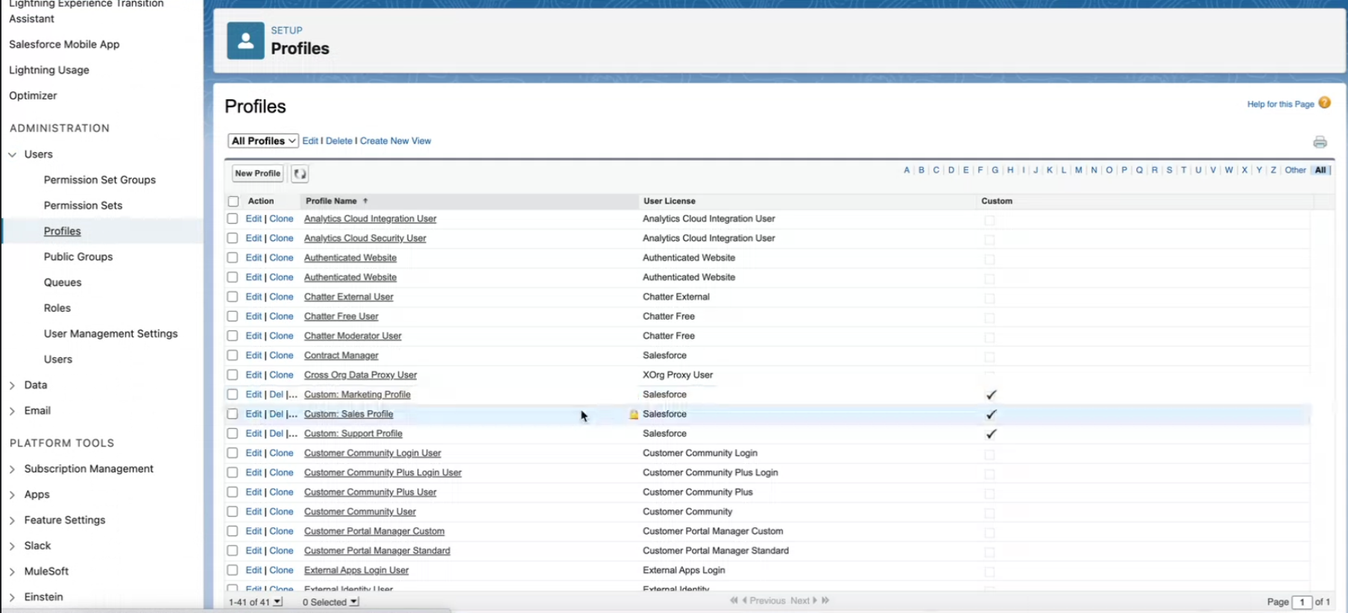
Clone a profile and give it a name (such as "LiveRamp API Profile").
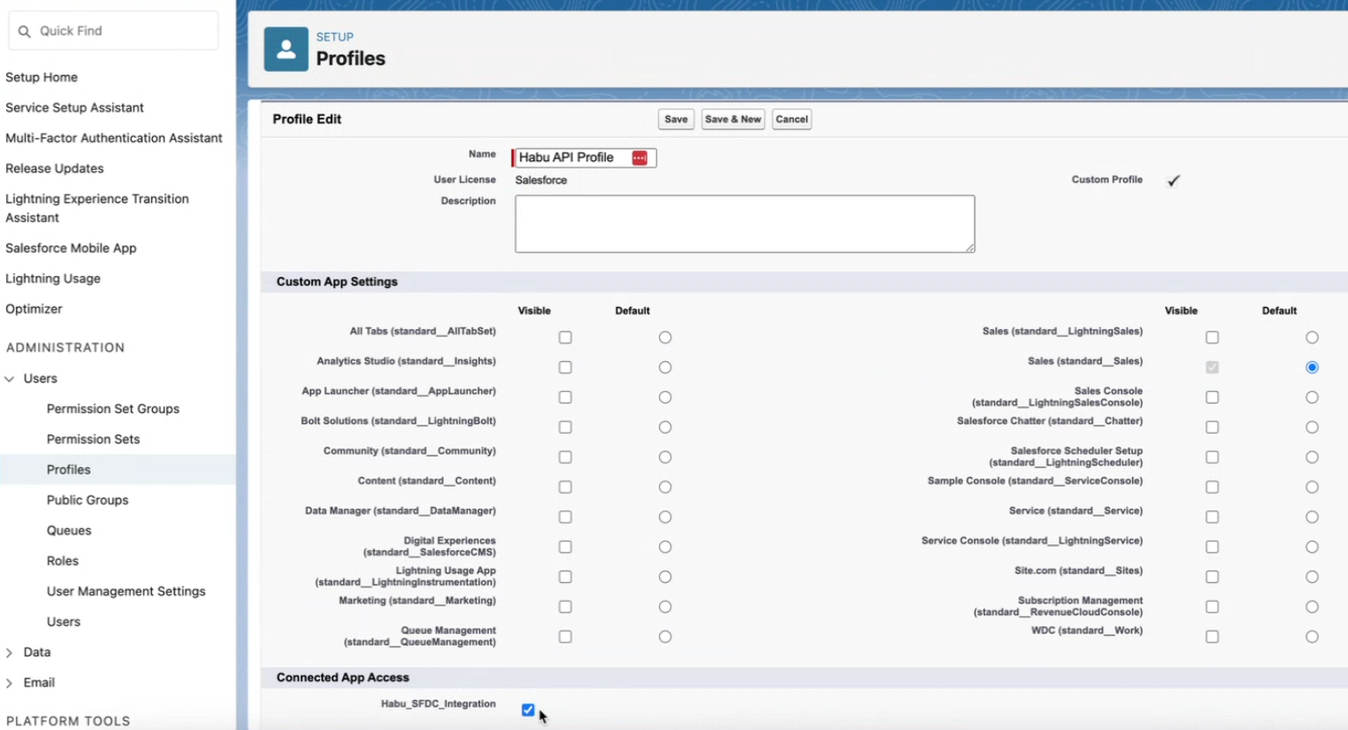
After the profile has been successfully created, select the new profile and click .
Under "Custom App Settings", uncheck any check boxes that are checked.
Under "Connected App Access", check the check box for the newly created connected app.
Under "Administrative Permissions", check the check boxes for "API Enabled" and "Api Only".
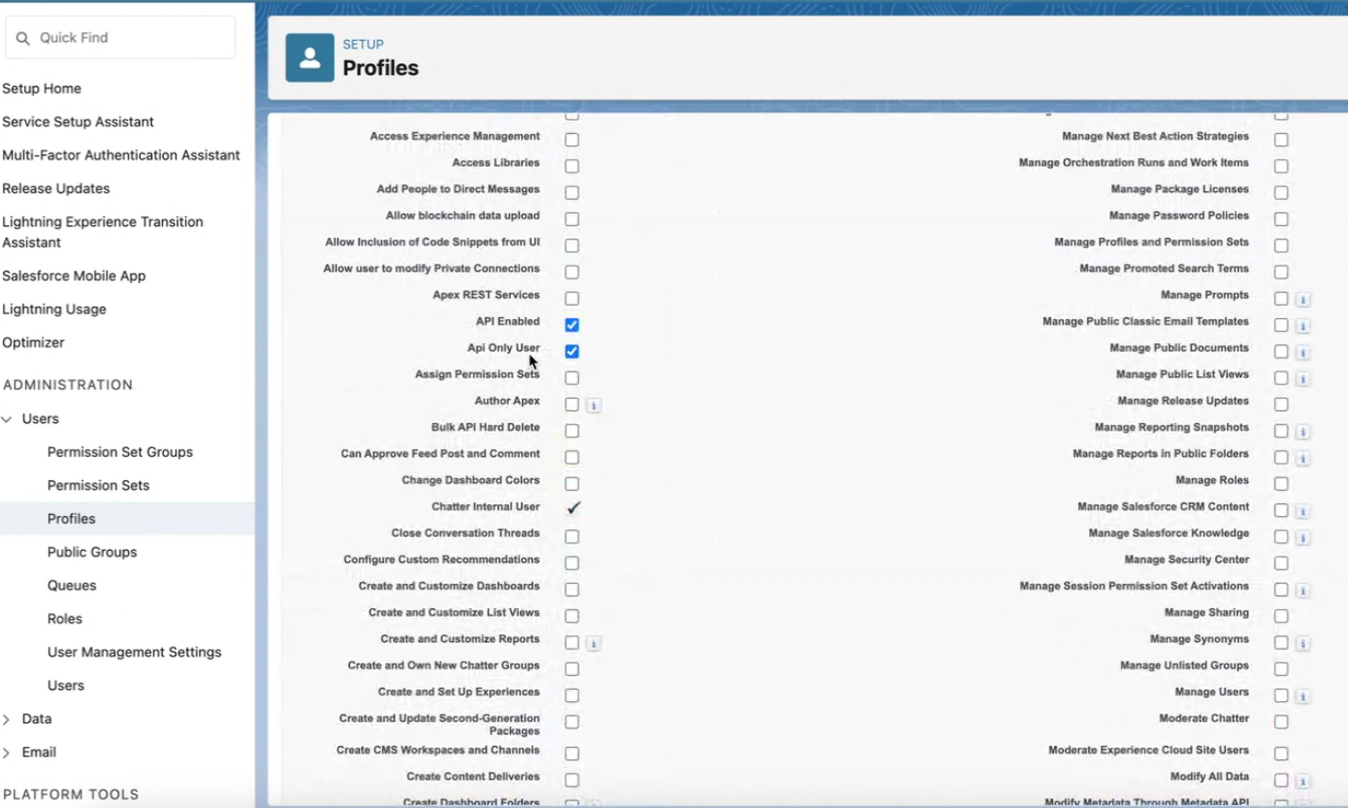
Under "General User Permissions", clear any check boxes that are selected.
Under "Standard Object Permissions", select the check boxes for the objects that the profile should have access to (such as "Contacts").
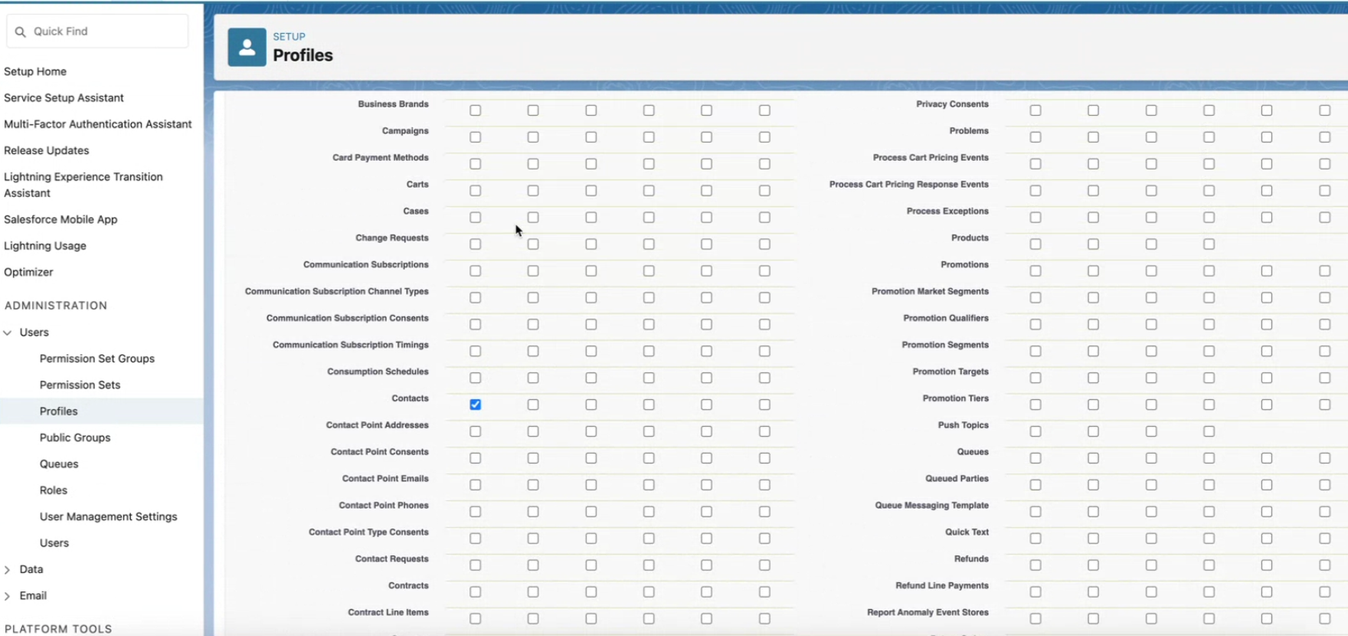
Click .
Navigate back to the Profile page.
Under "Field-level Security", select the checkbox for the object that this profile has access to (such as "Contacts").
Click and select the check boxes for the fields that this profile should have access to.
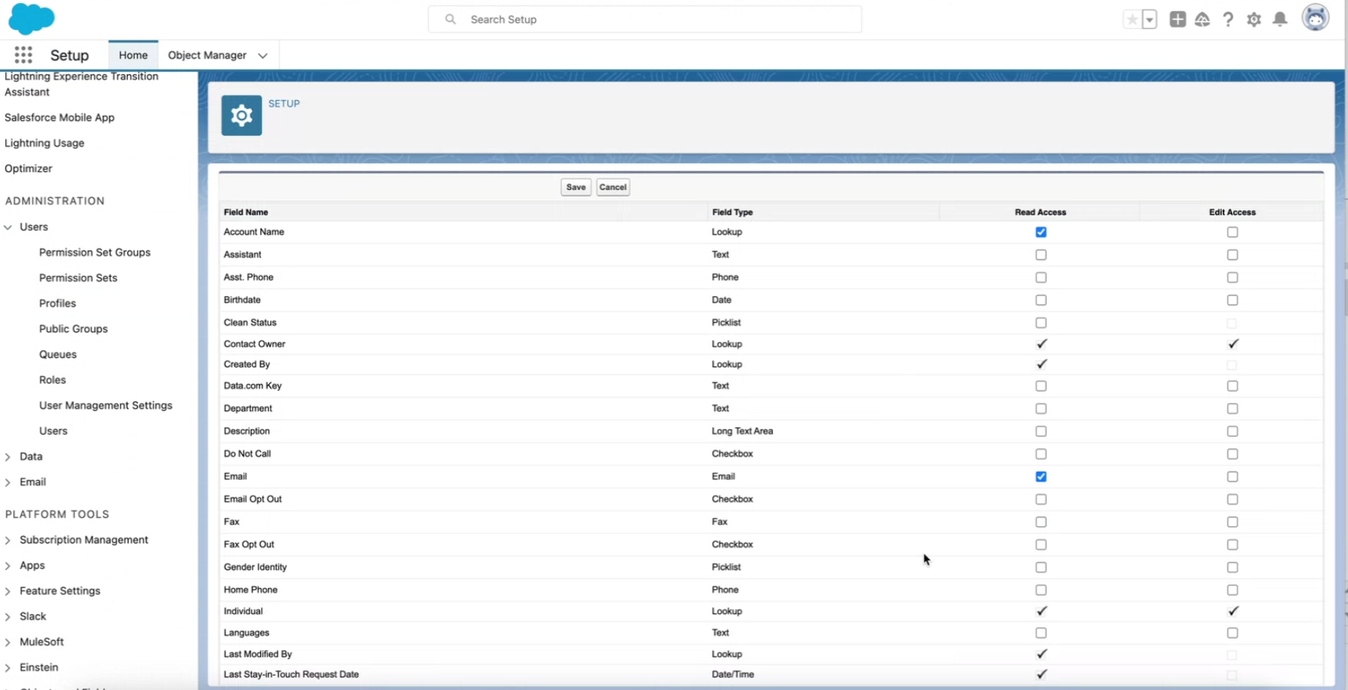
Click .
Create a New User
From the profile in Salesforce that was created above, navigate to the View Users page and click .
Create a new user (such as "Api User LiveRamp") and then click .
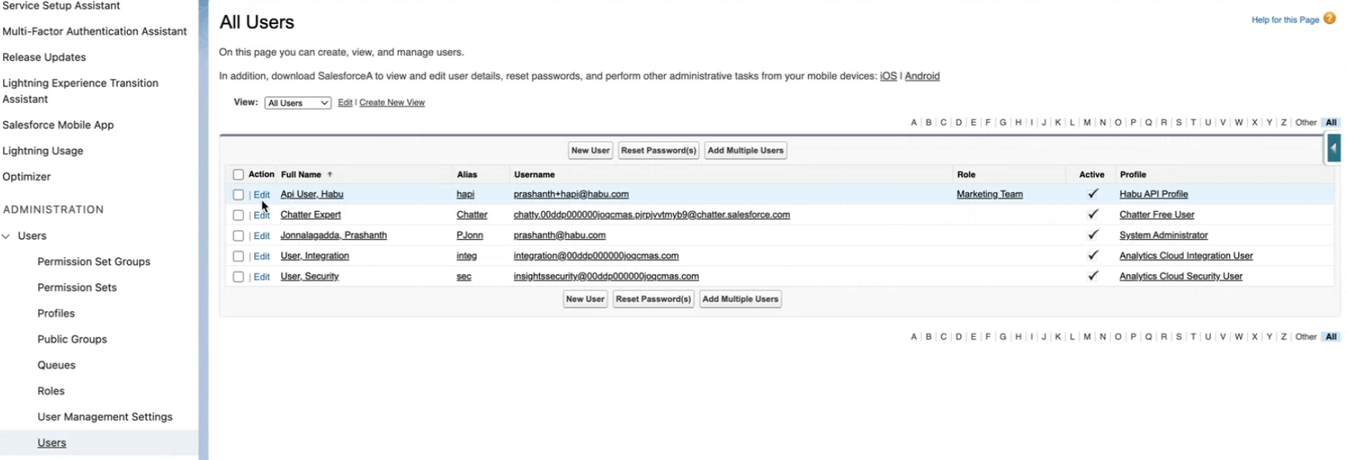
Log in to Salesforce with the new user created above. Note the UserName and Password.
Navigate to the Settings and select Reset My Security Token.
Click to have the token emailed to you.

Once the email arrives, note the token.
Perform Steps in LiveRamp Clean Room
Once the above steps have been performed in Salesforce, perform the overall steps in the sections below in LiveRamp Clean Room.
Add the Credentials
Note
Make sure you are adding to the correct organization in LiveRamp Clean Room (e.g., don't add to the "HQ" organization).
From the navigation menu, select Clean Room → Credentials to open the Credentials page.
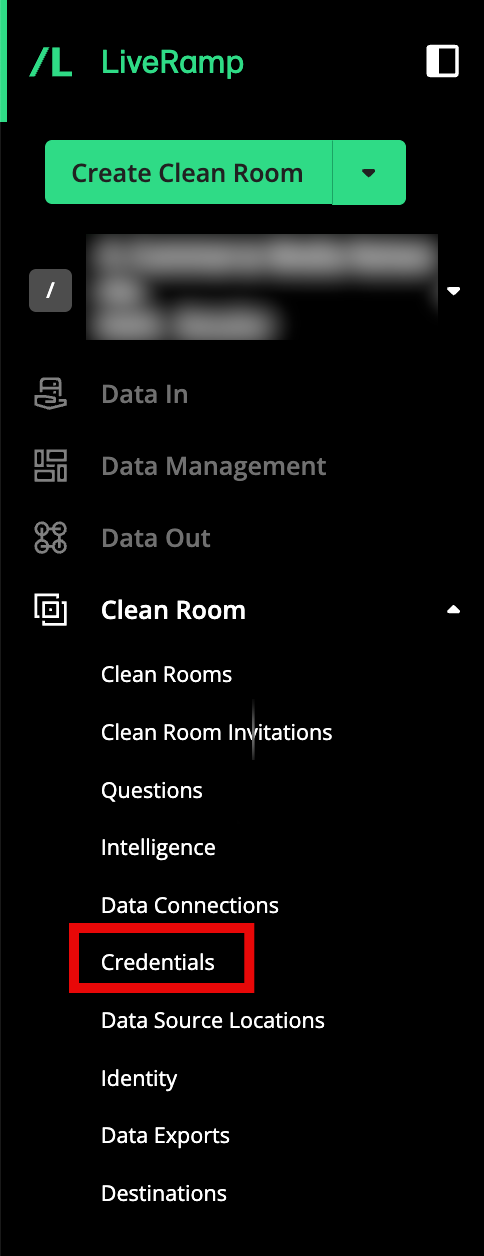
Click .
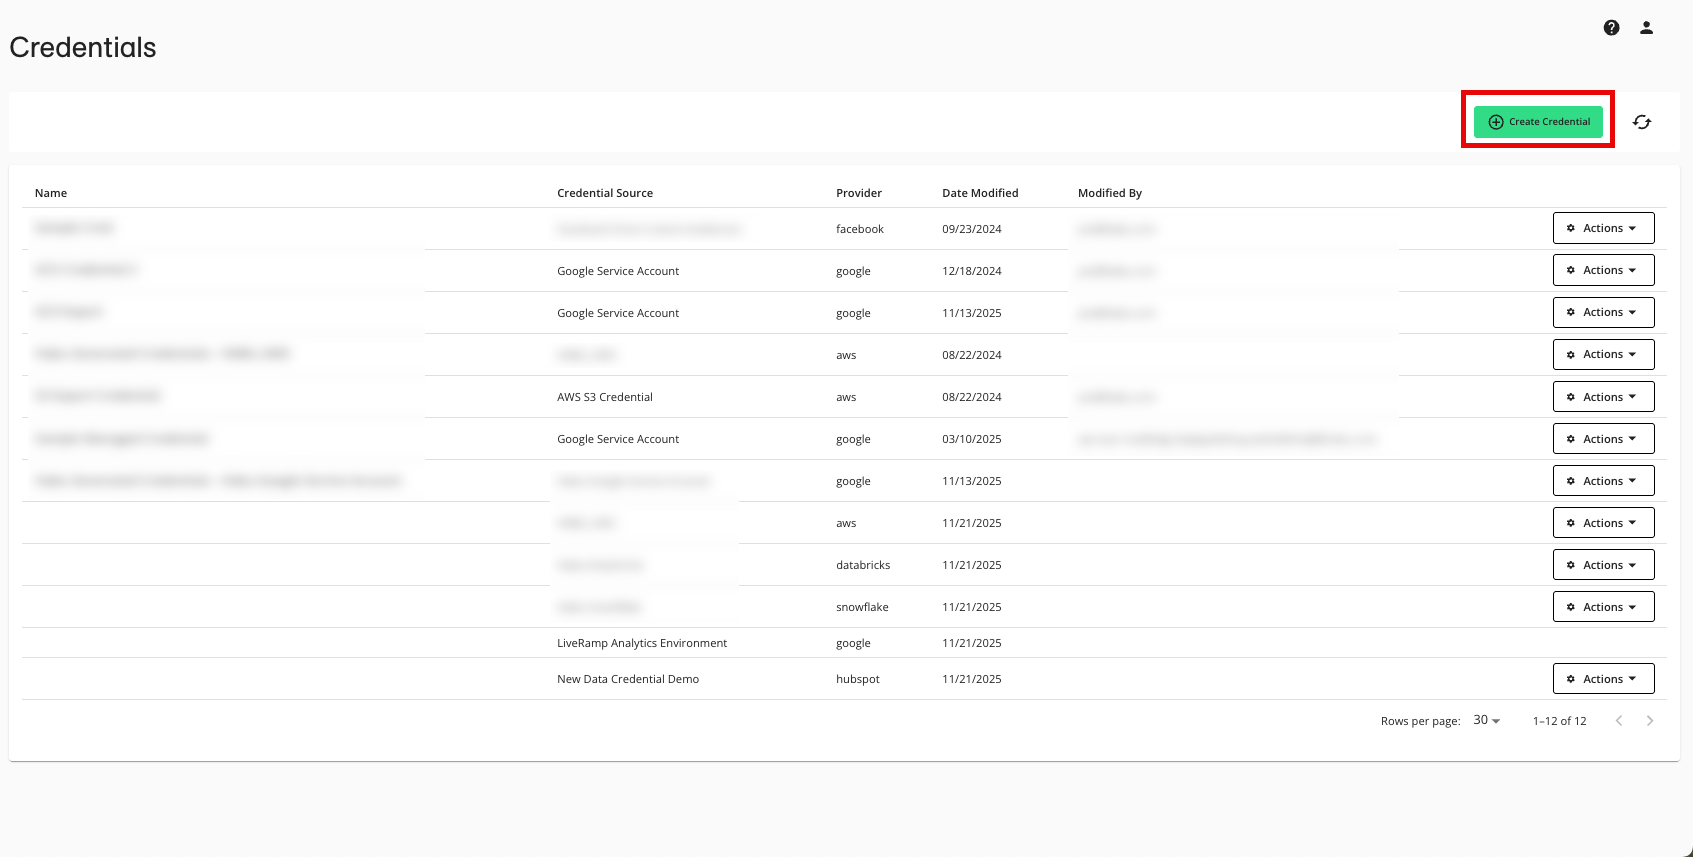
Enter a descriptive name for the credential.
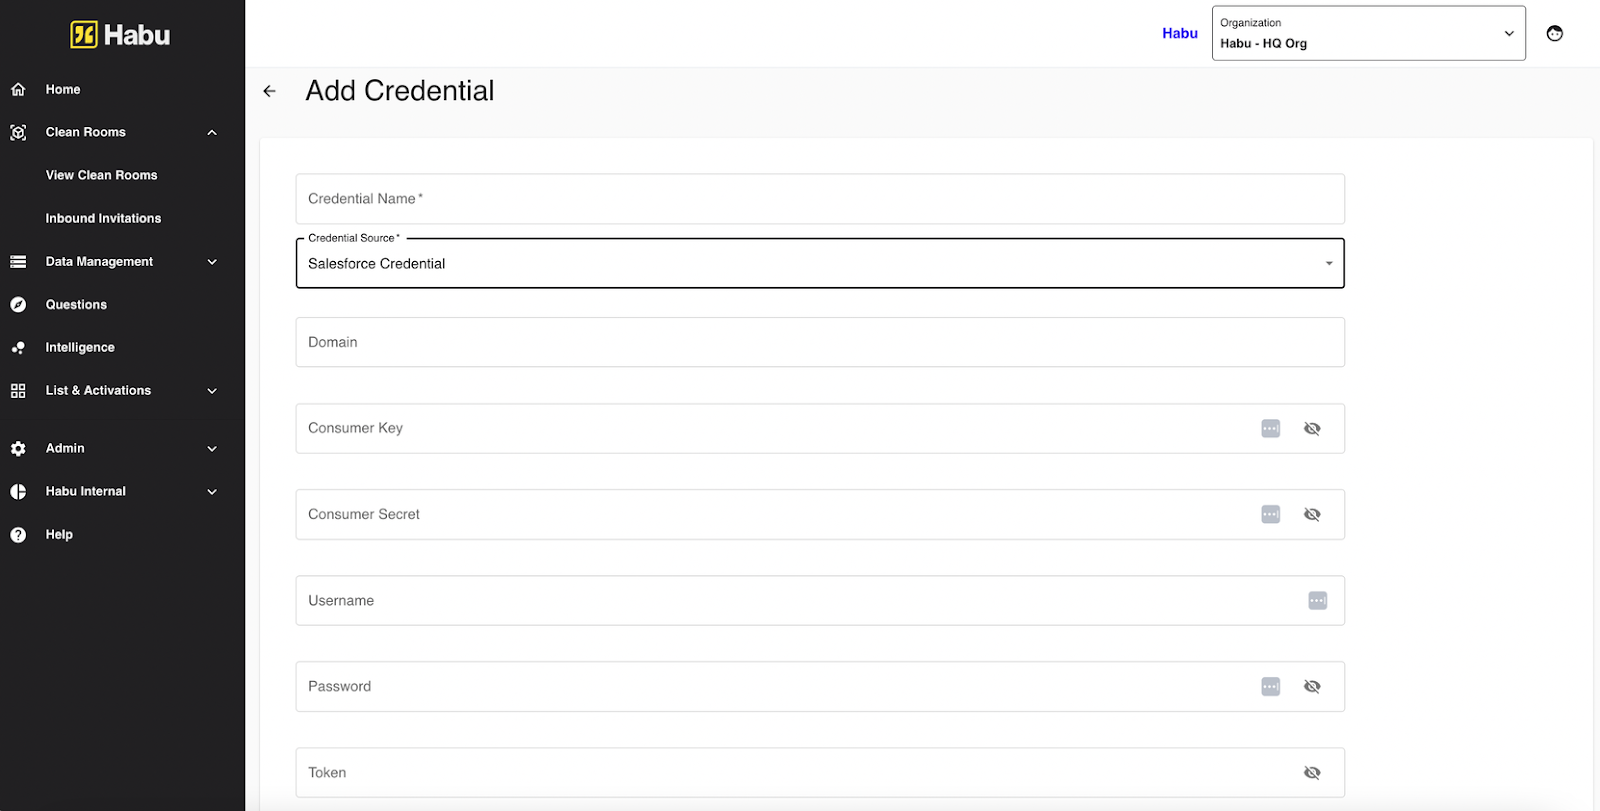
Complete the fields as follows:
Domain: Enter the domain name used as your org-specific subdomain in Salesforce login and application URLs.
Consumer Key and Consumer Secret: Enter the Consumer Key and Consumer Secret.
Note
These can be found from Setup, enter Apps, then select App Manager, then select View. Next to Consumer Key and Secret, click Manage Consumer Details.
Username: Enter the username generated in the "Create a New User" section above.
Password: Enter the password generated in the "Create a New User" section above.
Security Token: Enter the token generated in the "Create a New User" section above.
Click .
You can specify which object and fields (comma-separated fields) the data connection is for, restricting the data pull to those specific Salesforce objects and fields.
Create the Data Connection
After you've added the credentials to LiveRamp Clean Room, create the data connection:
Note
if your cloud security limits access to only approved IP addresses, talk to your LiveRamp representative before creating the data connection to coordinate any necessary allowlisting of LiveRamp IP addresses.
When you create the data connection, the dataset type is set to Generic by default.
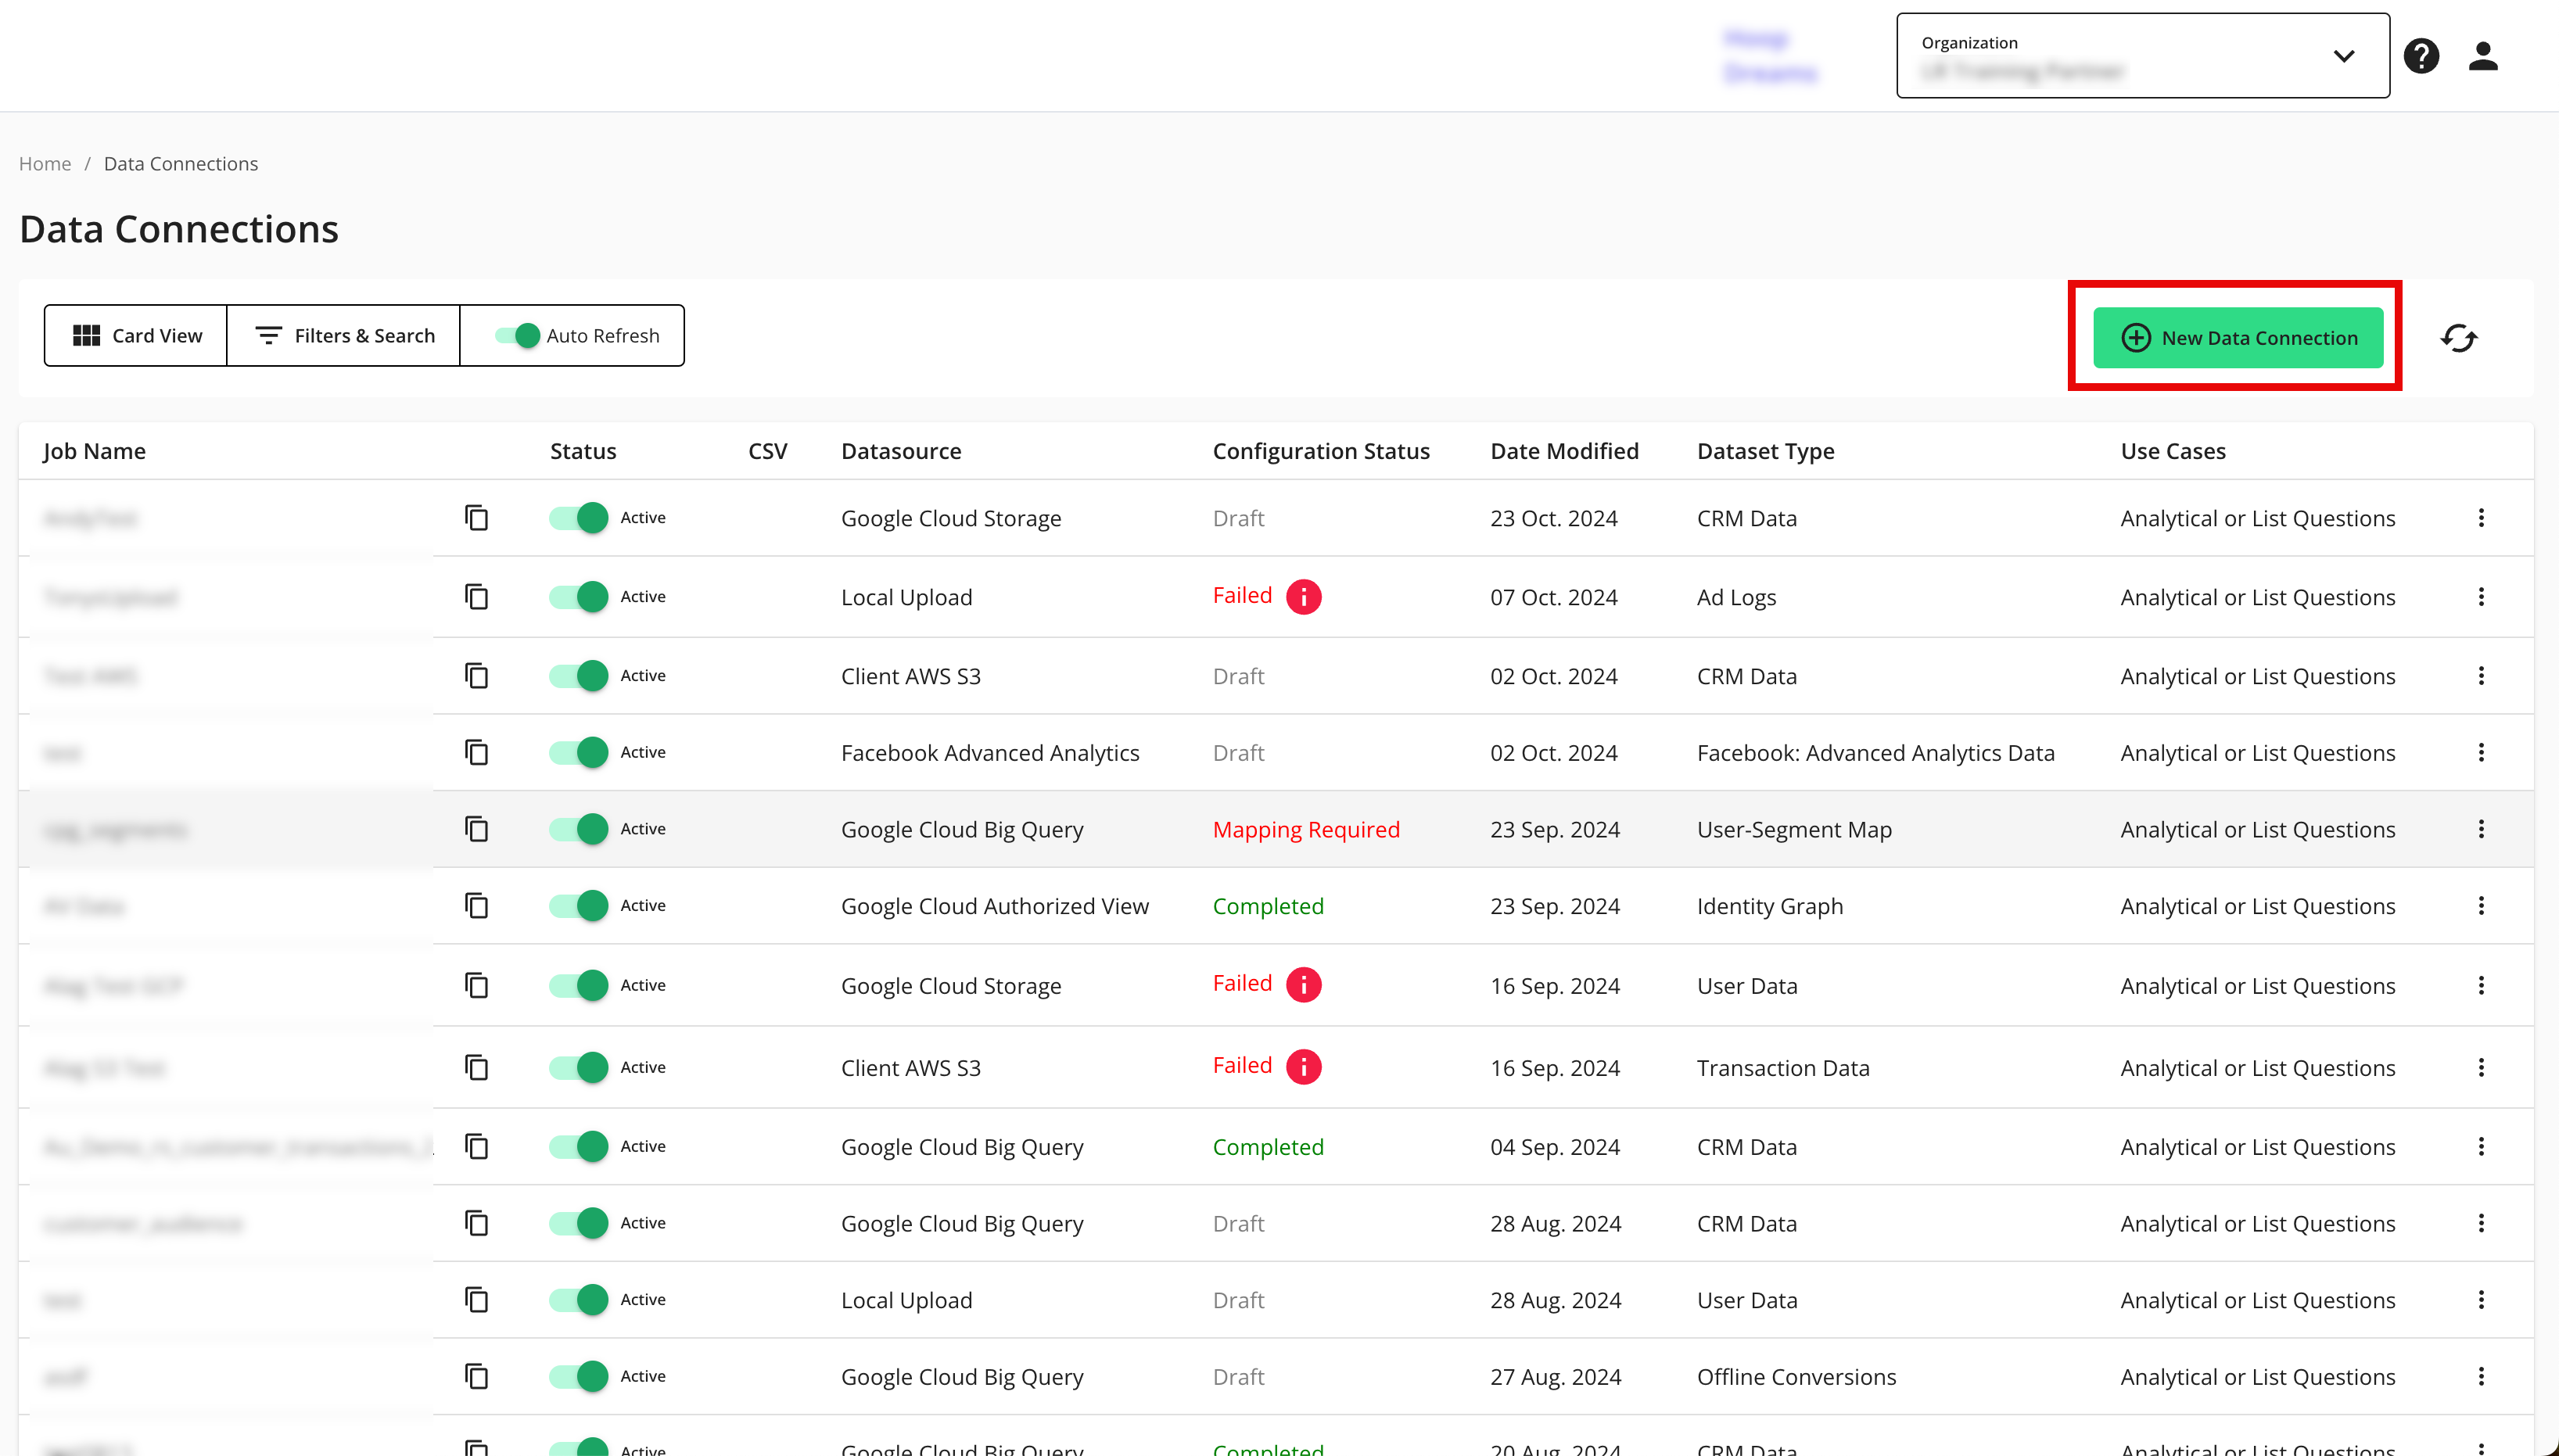
From the navigation menu, select Clean Room → Data Connections to open the Data Connections page.
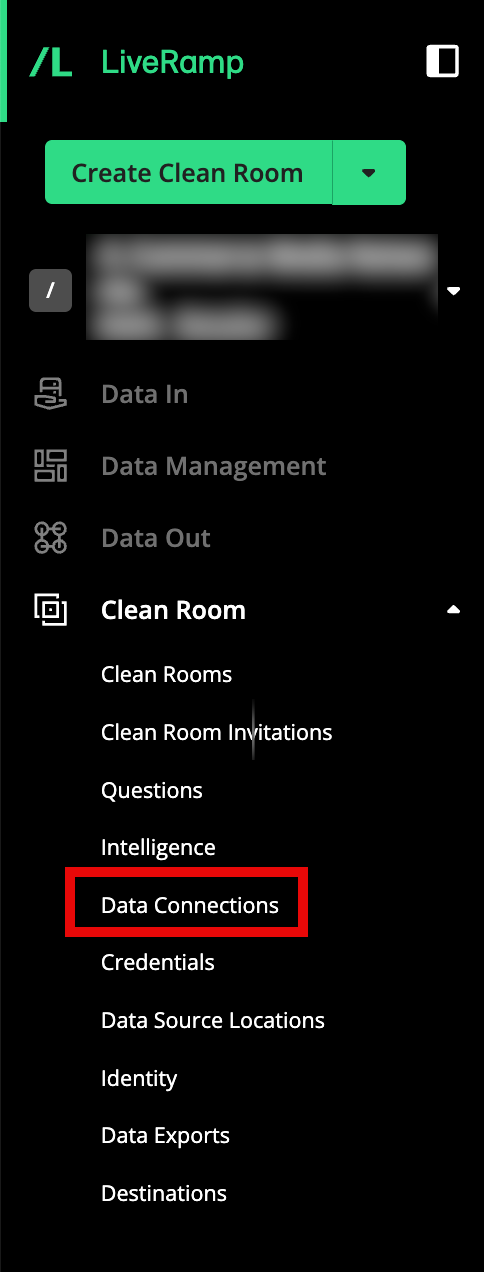
From the Data Connections page, click .
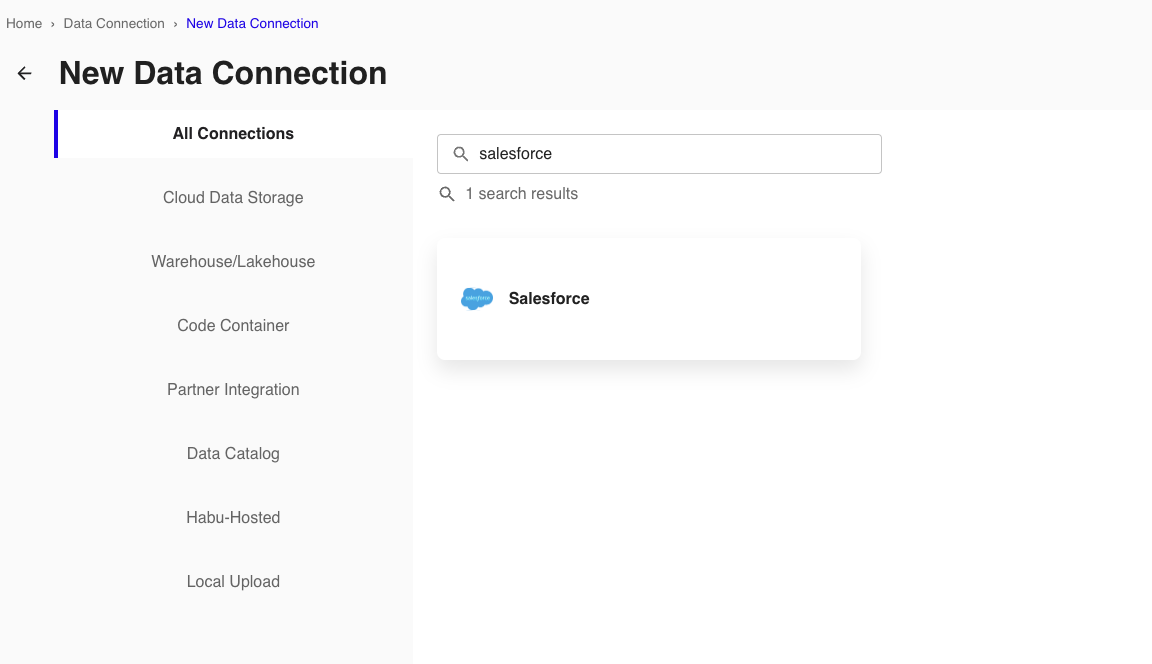
From the New Data Connection screen, select "Salesforce".
Select the credentials created in the previous procedure from the list.
Complete the following fields in the Set up Data Connection section:
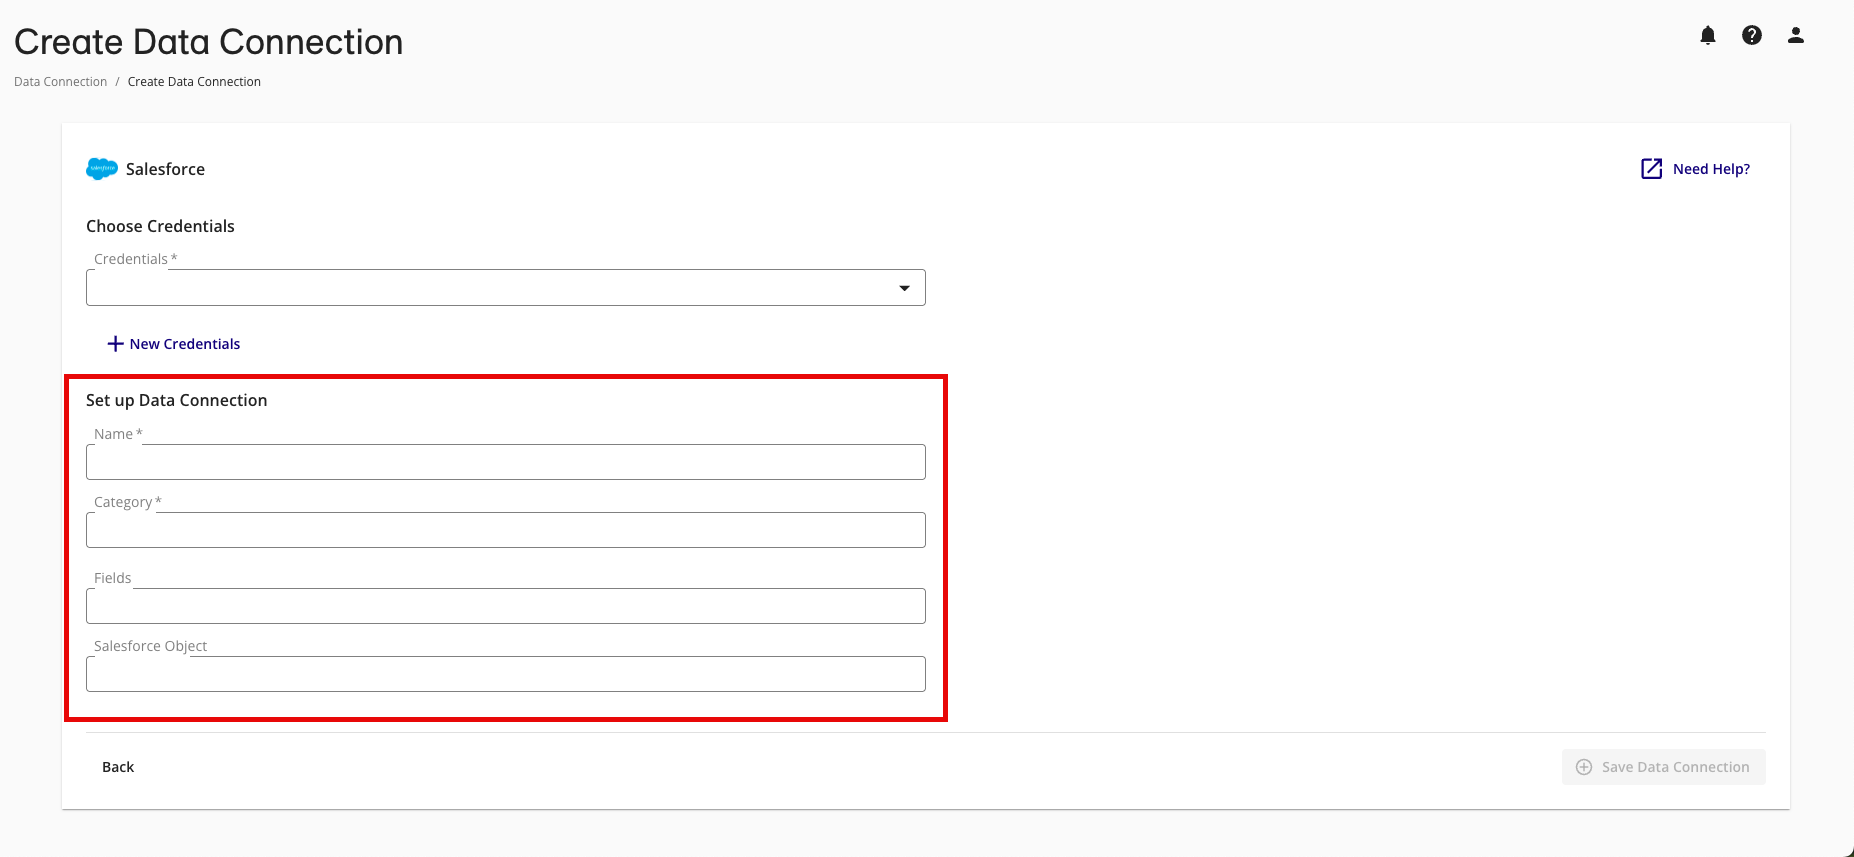
Name: Enter a name for the data connection (this will be the name for the dataset that you'll provision to clean rooms).
Category: Enter a category of your choice.
Fields: Specify which fields (comma-separated fields) the data connection is for.
Salesforce Object: Specify which Salesforce object the data connection is for.
Note
The data pull is restricted to the specified Salesforce objects and fields.
Review the data connection details and click .
All configured data connections can be seen on the Data Connections page.
Map the Fields
Once the above steps have been performed in Google Cloud Platform, perform the overall steps in the sections below in LiveRamp Clean Room.
Note
Before mapping the fields, we recommend confirming any expectations your partners might have for field types for any specific fields that will be used in questions.
From the row for the newly created data connection, click the More Options menu (the three dots) and then click .
The Map Fields screen opens, and the file column names auto-populate.
For any columns that you do not want to be queryable, slide the Include toggle to the left.
Note
Ignore the field delimiter fields because this was defined in a previous step.
Click .
The Add Metadata screen opens.
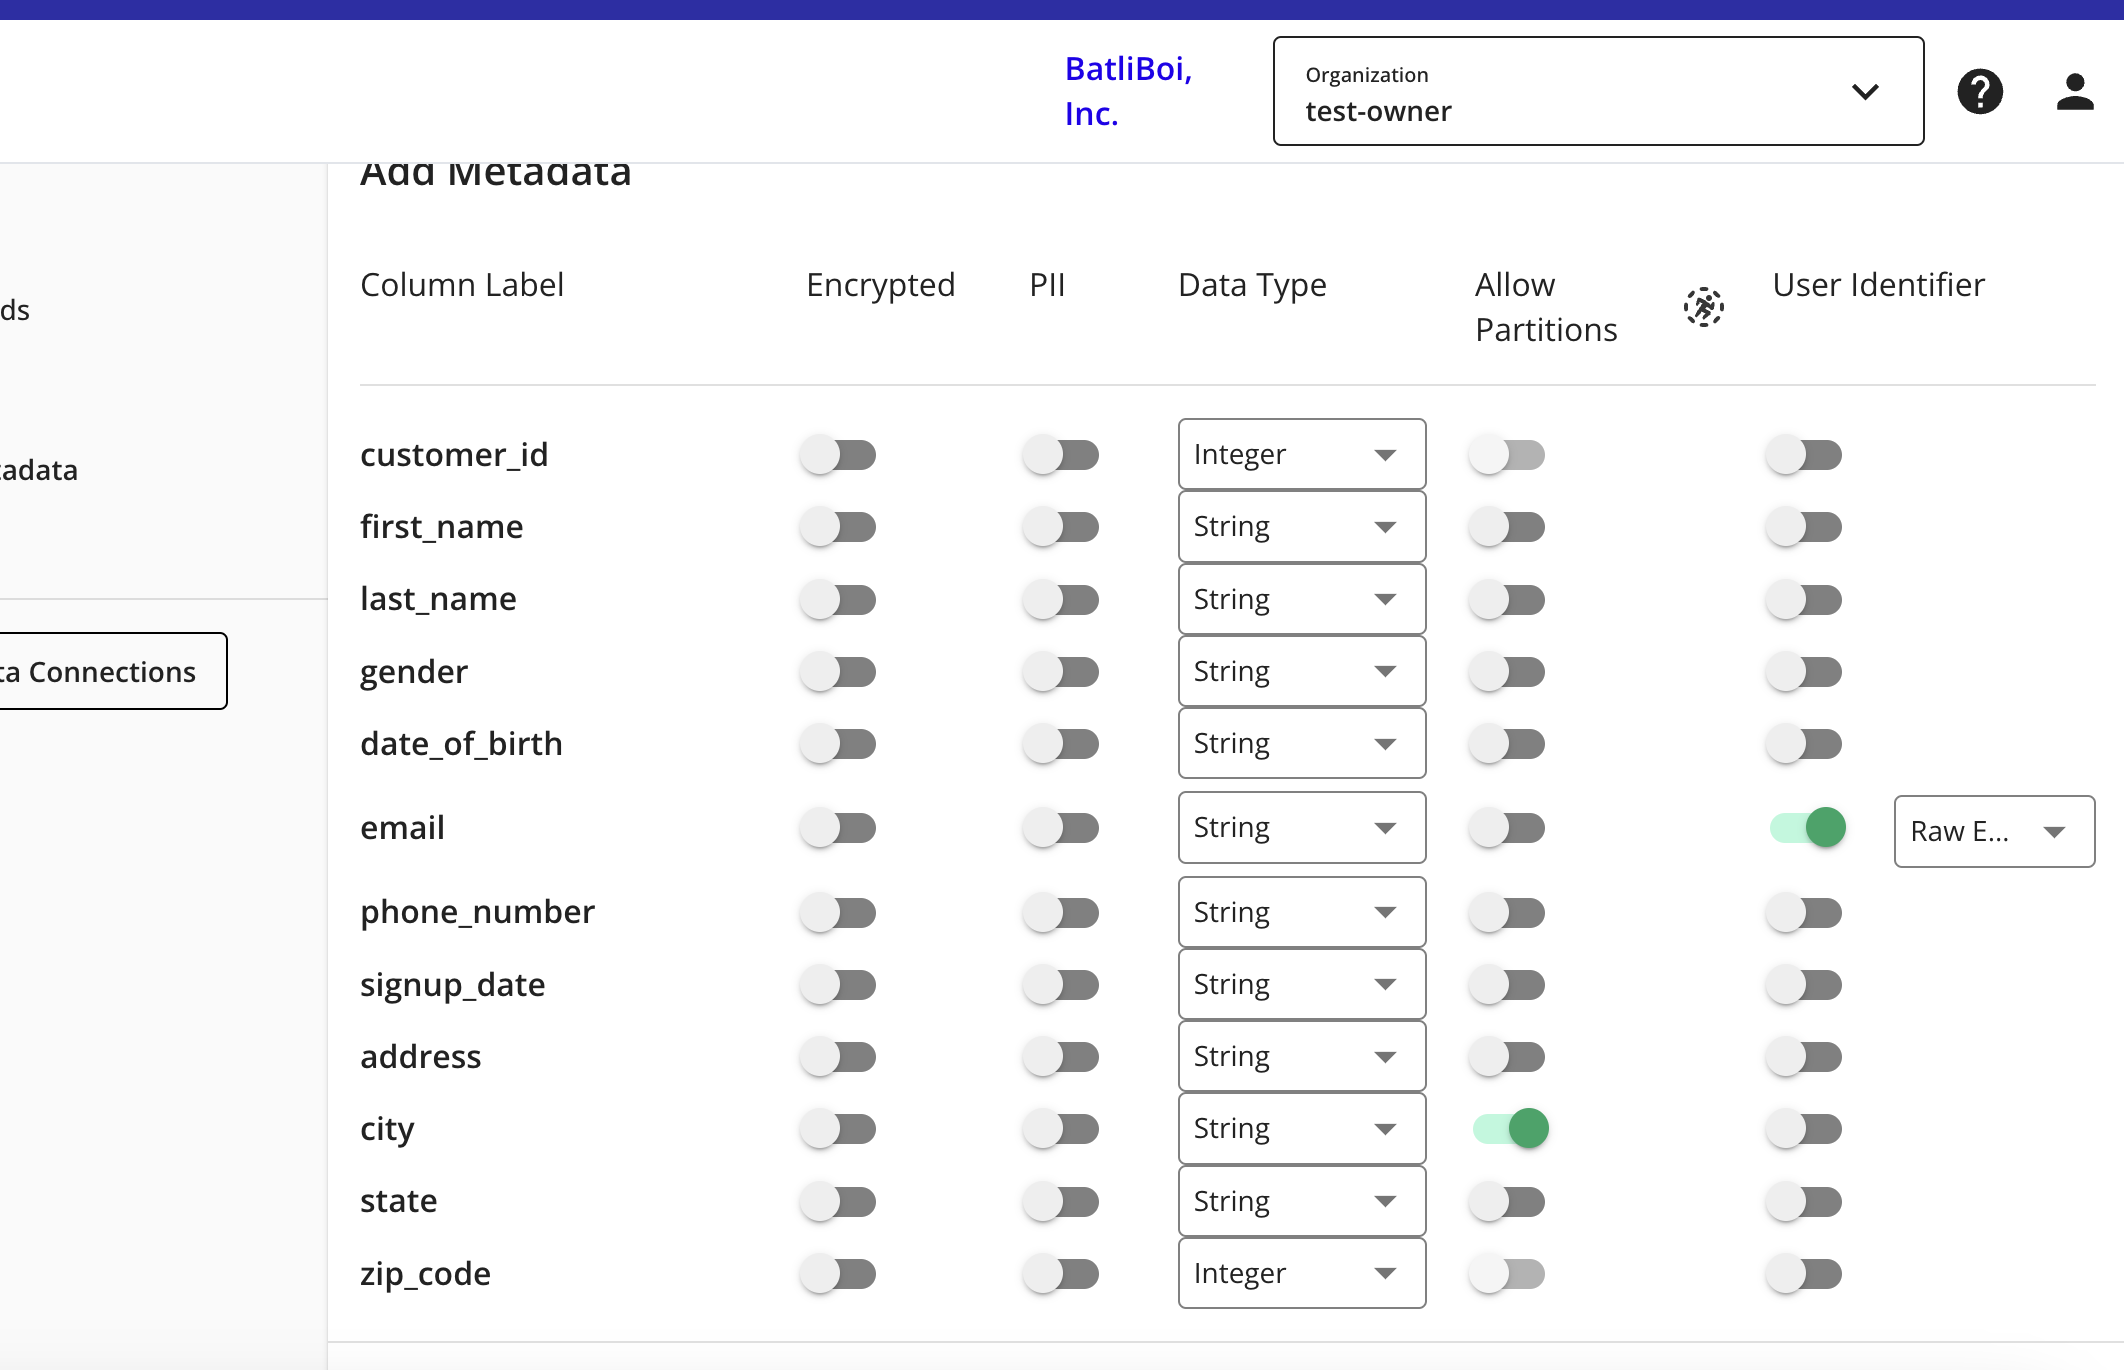
For any column that contains PII data, slide the PII toggle to the right.
Note
If your data contains a column with RampIDs, do not slide the PII toggle for that column. Mark the RampID column as a User Identifier and select "RampID" as the identifier type. If the data contains a RampID column, no other columns can be enabled as PII.
Select the data type (field type) for each column (for more information on supported field types, see "Field Types for Data Connections").
For columns that you want to partition, slide the Allow Partitions toggle to the right.
If a column contains PII, slide the User Identifiers toggle to the right and then select the user identifier that defines the PII data.
Note
When you select "Raw Email" as the user identifier for an email column, those email addresses will be automatically SHA256 hashed.
Click .
Your data connection configuration is now complete, and the status changes to "Completed".
You can now provision the resulting dataset to your desired Hybrid or Confidential Computing clean room.