Conversions API Destinations and Distribution Information
You can distribute CAPI event feed views to Conversions API program destination accounts to attribute transactions/events to online advertising on those platforms. See the sections below to learn which CAPI programs are available as destinations in Connect and the required credentials for each.
Available Destinations for Conversions API Programs
The following table lists all available CAPI destination accounts that can receive CAPI event feed views. In most cases, each CAPI program would have separate destinations for online and offline events. Make sure to find the correct destination by referring to the 'Integration Tile Name' column.
Note
For online event feeds, you only need to distribute feeds to destinations when you want to deliver brand- or SKU-specific views to platforms, such as in a retail use case. Without filtering applied (via view creation), online event data is sent directly to enabled platforms through the Online Conversions API integration in Console.
To learn more, see "Online Conversions API Connectors".
Platform | Event type | Integration Tile Name | Account Info Needed | Requires OAuth in Connect |
|---|---|---|---|---|
Amazon | Offline | Amazon CAPI - Offline - NA - LR1 |
| Yes |
Online | Amazon Online CAPI NA LR1 |
| No | |
Google Campaign Manager 360 | Offline | Campaign Manager 360 Conversions API LR1 Product Array |
| No |
Campaign Manager 360 Conversions API LR1 Product Array (Lmt Ad Trk) | No | |||
Campaign Manager 360 Conversions API LR1 Non Product Array | No | |||
The Trade Desk | Offline | TTD Conversions API 3rd Party Provider LR1 Product Array |
| No |
TTD Conversions API 3rd Party Provider LR1 Non Product Array | No | |||
Online | TTD Conversions API - Online - Brand Direct LR1 |
| No | |
Meta | Offline | Meta Conversions API Offline LR1 |
| No |
Online | Meta Conversions API Online LR1 |
| No | |
TikTok | Offline | TikTok - Events API - Offline - LR1 |
| No |
Online | TikTok - Events API - Online - LR1 |
| No | |
Offline | Pinterest - Conversions API - Offline LR1 |
| No | |
Online | Pinterest - Conversions API - Online LR1 |
| No | |
Snapchat | Offline | Snap - Conversions API - Offline LR1 |
| No |
Online | Snap - Conversions API - Online LR1 |
| No | |
Yahoo | Offline | Yahoo - Conversions API - Offline LR1 |
| No |
Online | Yahoo - Conversions API - Online LR1 |
| No |
Activating a Conversion API Program Destination Account
To activate a Conversions API destination account, follow the general instructions in "Activate a New Destination Account”, performing these additional steps:
Remove the end date to leave the end date open-ended.
Under Destination-Specific Settings, enter the required account IDs.
Note
For retailers activating online CAPI destinations, enter the same platform credentials provided in Console for your Online CAPI integration. See "Create an Online Conversions API Integration" for more information.
If your destination requires an OAuth authentication, select an existing one from the OAuth Connection dropdown list and click Validate OAuth Connection.
To create a new OAuth connection and validate that connection:
From the OAuth Connection dropdown list, select Create New OAuth Connection.
From the new window that opens with the platform's sign-in or login screen, enter your credentials and then click Sign in.
Click Validate OAuth Connection.
In the Destination Account Name field, pick a unique and memorable name for this account. We'll suggest one for you but you can use any name you wish as long as it is less than 50 characters in length.
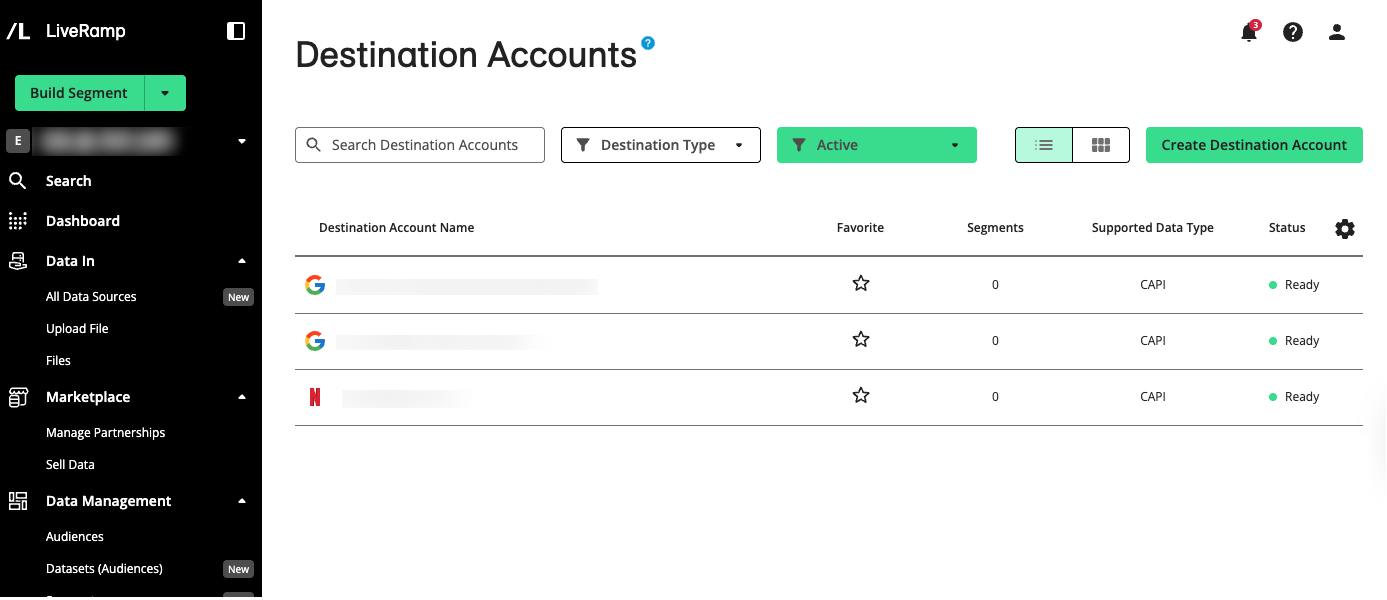
Once created, the destination account displays on the Destination Accounts page with the status 'Ready' and 'CAPI' as its supported data type.
Distributing CAPI Event Feeds
You can distribute event feeds as tables or as views. When you distribute a table, LiveRamp automatically generates a view for that table to distribute.
Once you have created the desired CAPI destination account, you can start the distribution flow in several ways:
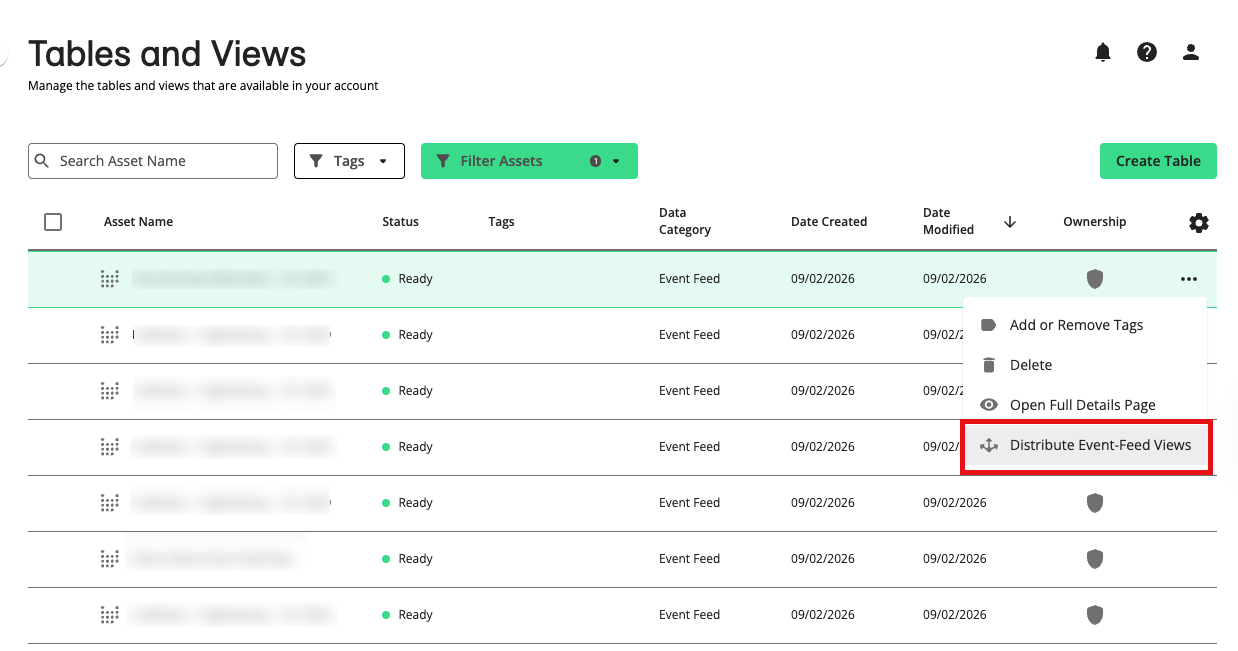
On the Tables and Views page, click the More Options (the three dots) menu of a CAPI event feed asset and select 'Distribute Event Feed Views'.
On the Tables and Views page, check the box of the CAPI event feed asset that appears to the left side of the row for the table, and click Distribute Event Feed Views.

Right after creating a CAPI event feed view, click on the pop-up that displays.
On the asset’s details page, which can be accessed by double clicking on the asset’s row, click Action and select 'Distribute Event Feed Views'.
From the Select Event Feed Views step, select any additional view you want to distribute. Click .
From the Select Destinations step, select one or more CAPI destination accounts you want to distribute the views to.
Click .
Once you've distributed your data, it typically takes 1-3 days for the data to arrive at the destination platform. Once delivered, your platform partner can then create an attribution report that can be viewed on their ad manager platforms or send the report to you directly.
Additional Information for Google Campaign Manager 360 CAPI Destination Account
Activating a Google Campaign Manager 360 CAPI destination account requires you to provide a new, or existing Floodlight activity ID. You must also provide LiveRamp’s access profile ID by granting LiveRamp users access in your Campaign Manager 360.
See the sections below for complete instructions.
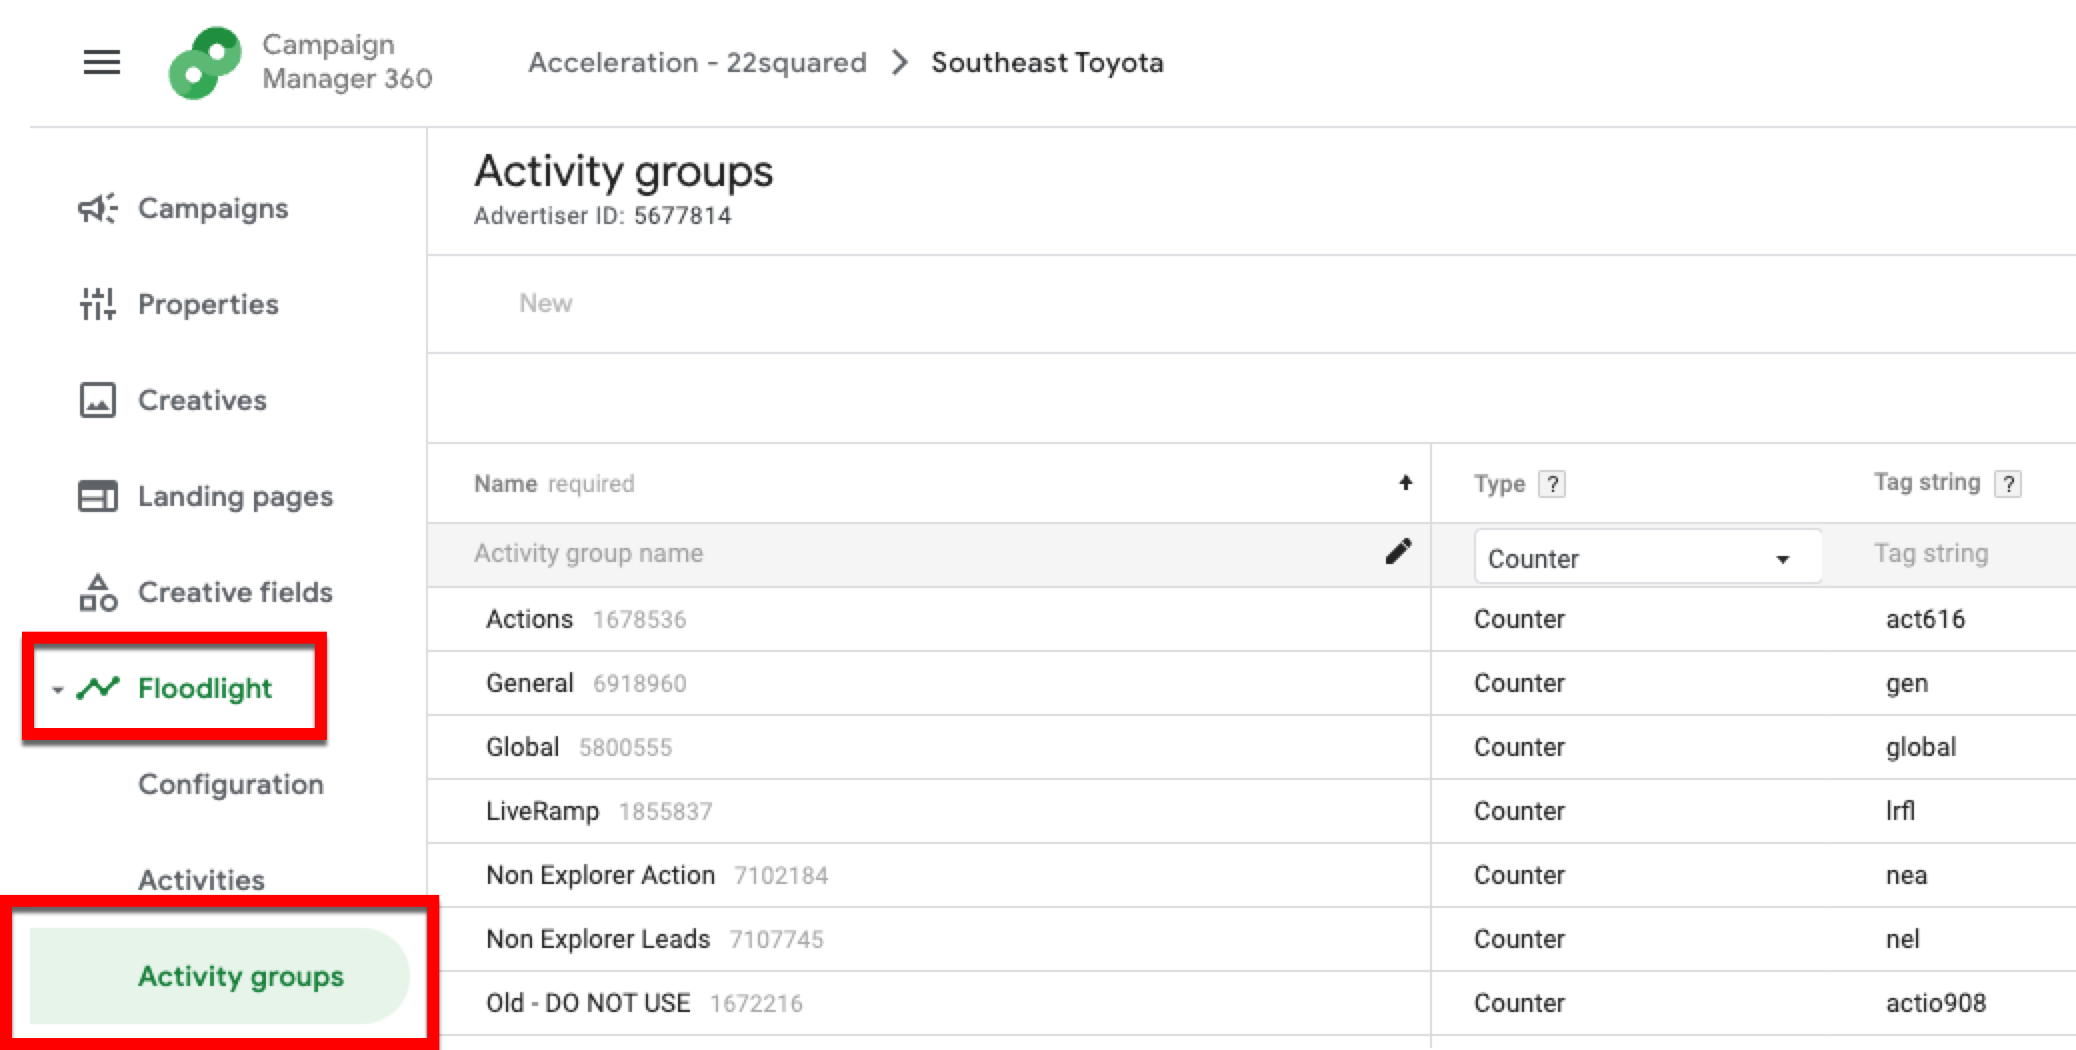
To create a Floodlight activity in Campaign Manager 360:
From the navigation menu, select and click on the desired advertiser name.
Create a new Floodlight activity group:
From the navigation menu, select and then select .
Click .
Fill out the required fields.
Click .
Create a new Floodlight activity:
From the navigation menu, select and then select .
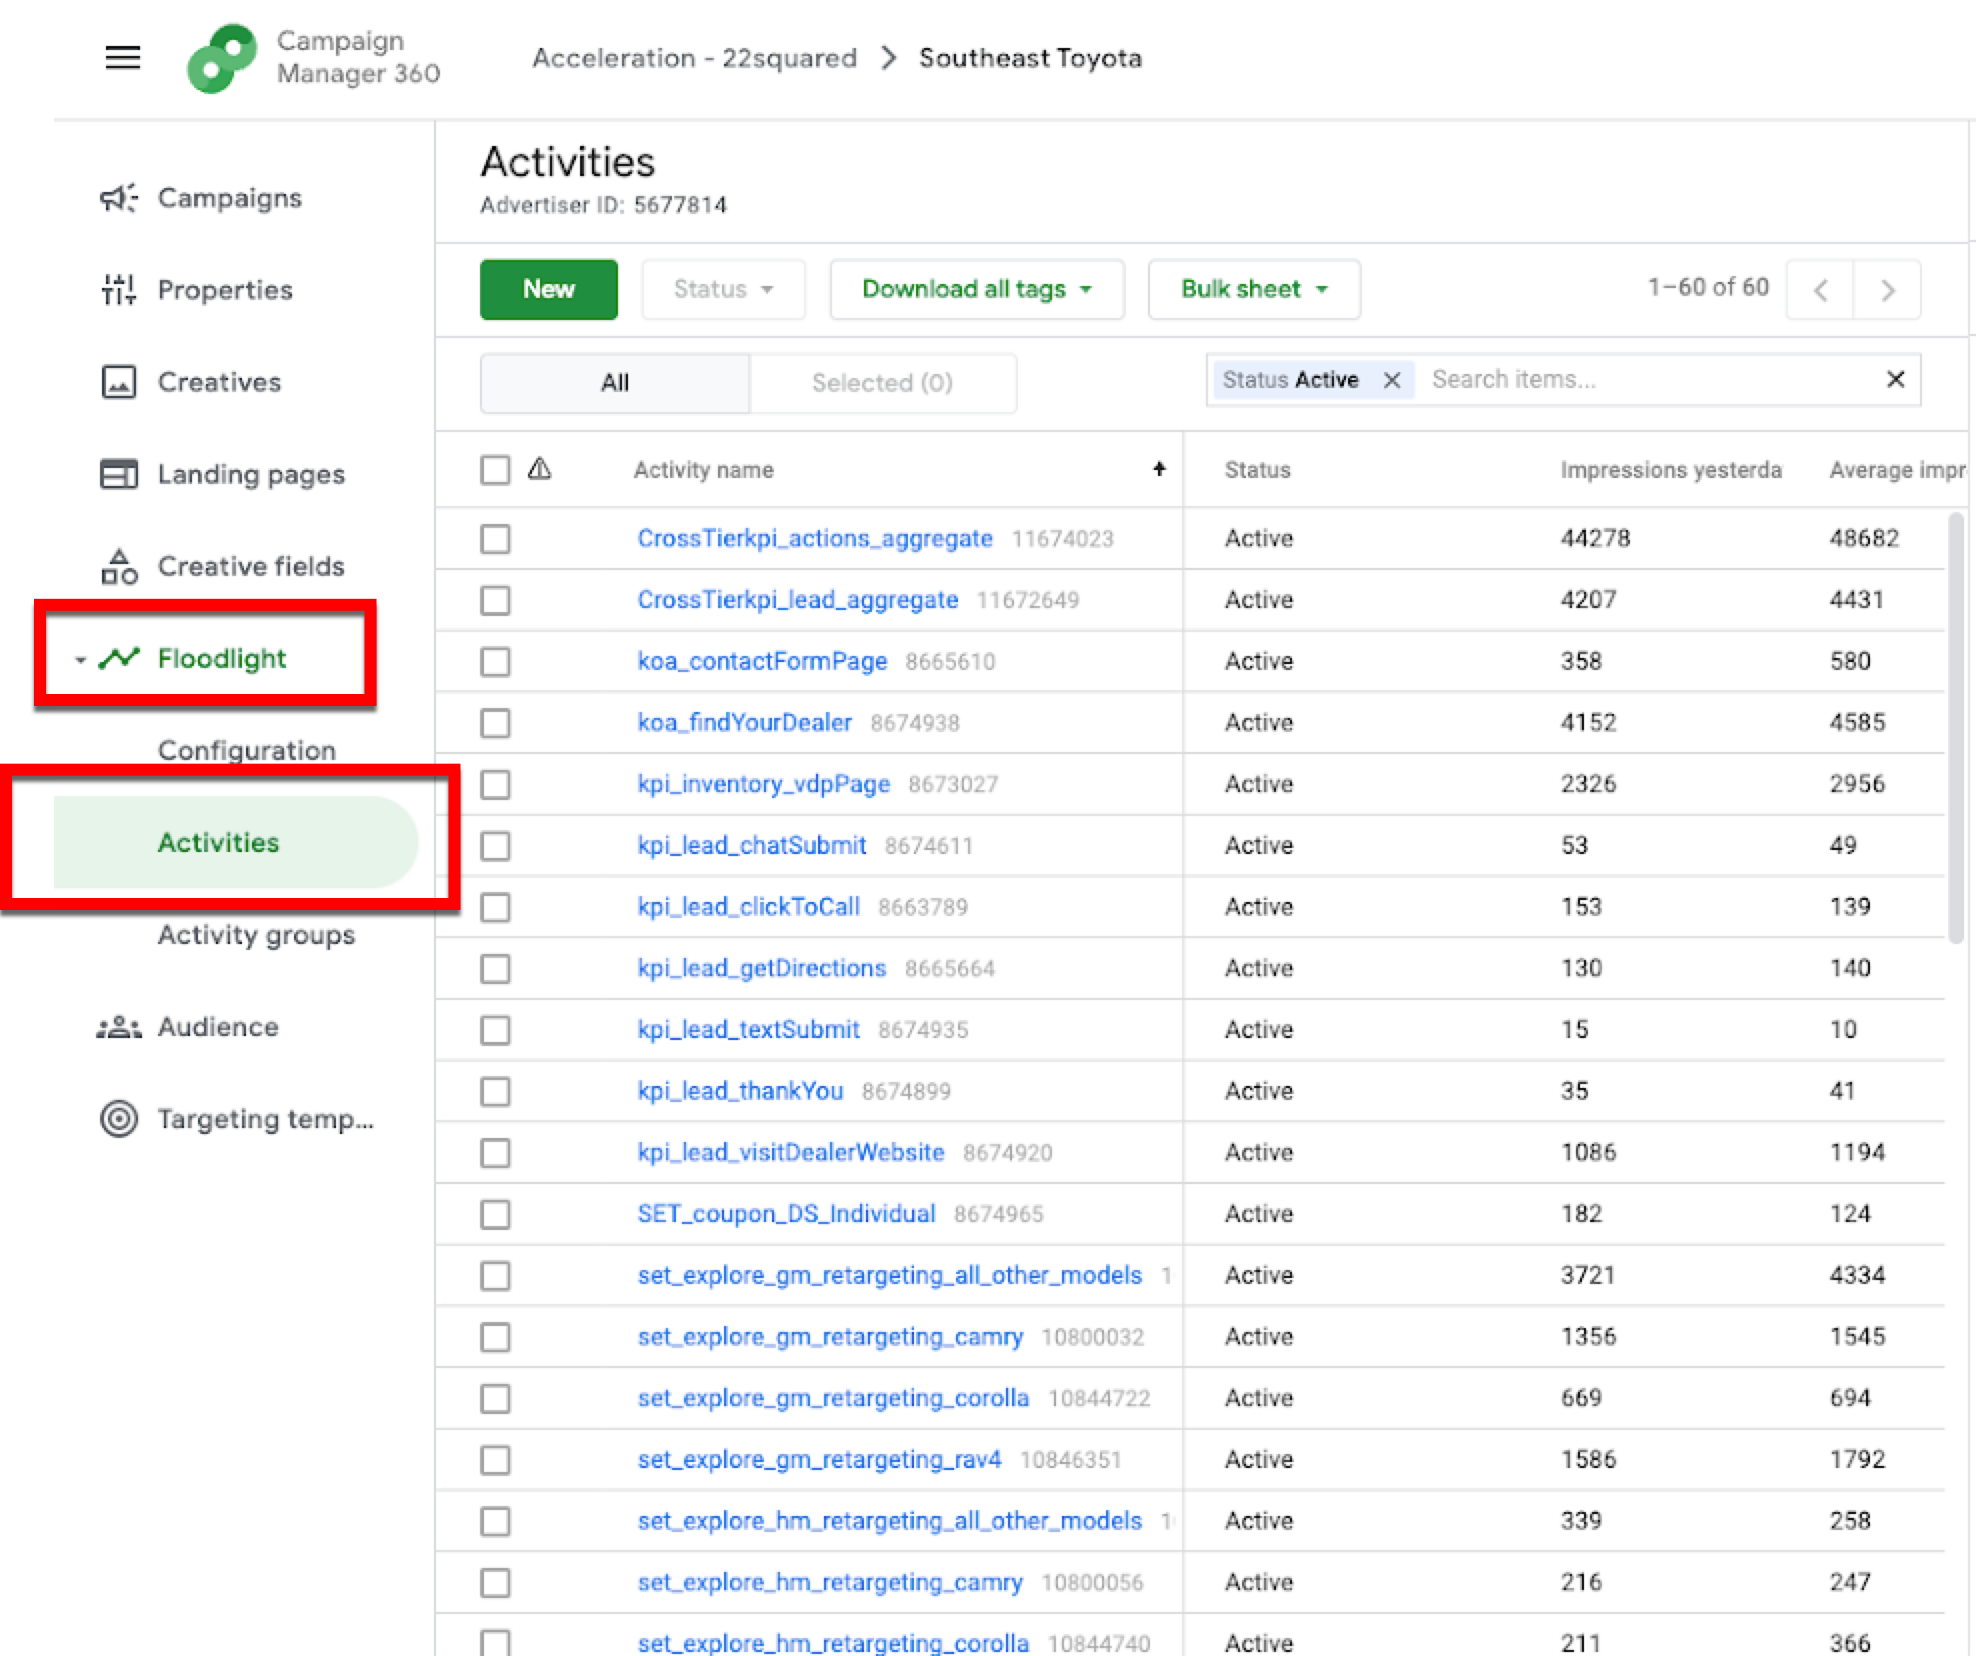
Click .
Fill out the required fields and then click .

Note
To match transactions to impressions or clicks, make sure the Counting method of your Floodlight activity is set to "Counter activities".
Follow the same process (apart from selecting the advertiser name) to create additional Floodlight activities.
Note
Typically, a maximum of five Floodlight activities can be used with the LiveRamp integration. Contact LiveRamp to create additional audiences if you use more than one Floodlight activity. Talk to your LiveRamp representative if more than five Floodlight activities are needed for your situation.
This step will grant LiveRamp access to insert offline conversion data into your Campaign Manager 360 account. The permission given will only allow LiveRamp to insert offline conversions via the API.
Tip
Save the ID: Once you’ve created a new user profile for LiveRamp, record the LiveRamp Access Profile ID so you can send it to us in a later step.
To grant access in Campaign Manager 360:
Create a new user role:
From the navigation menu in Campaign Manager 360, select and then select .
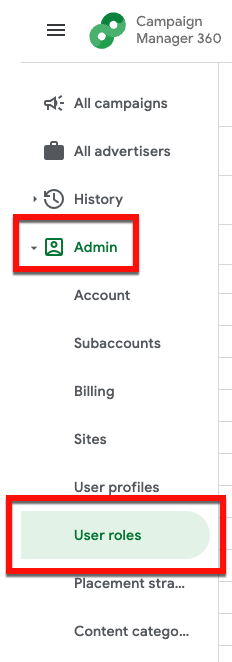
From the User Roles page, click .

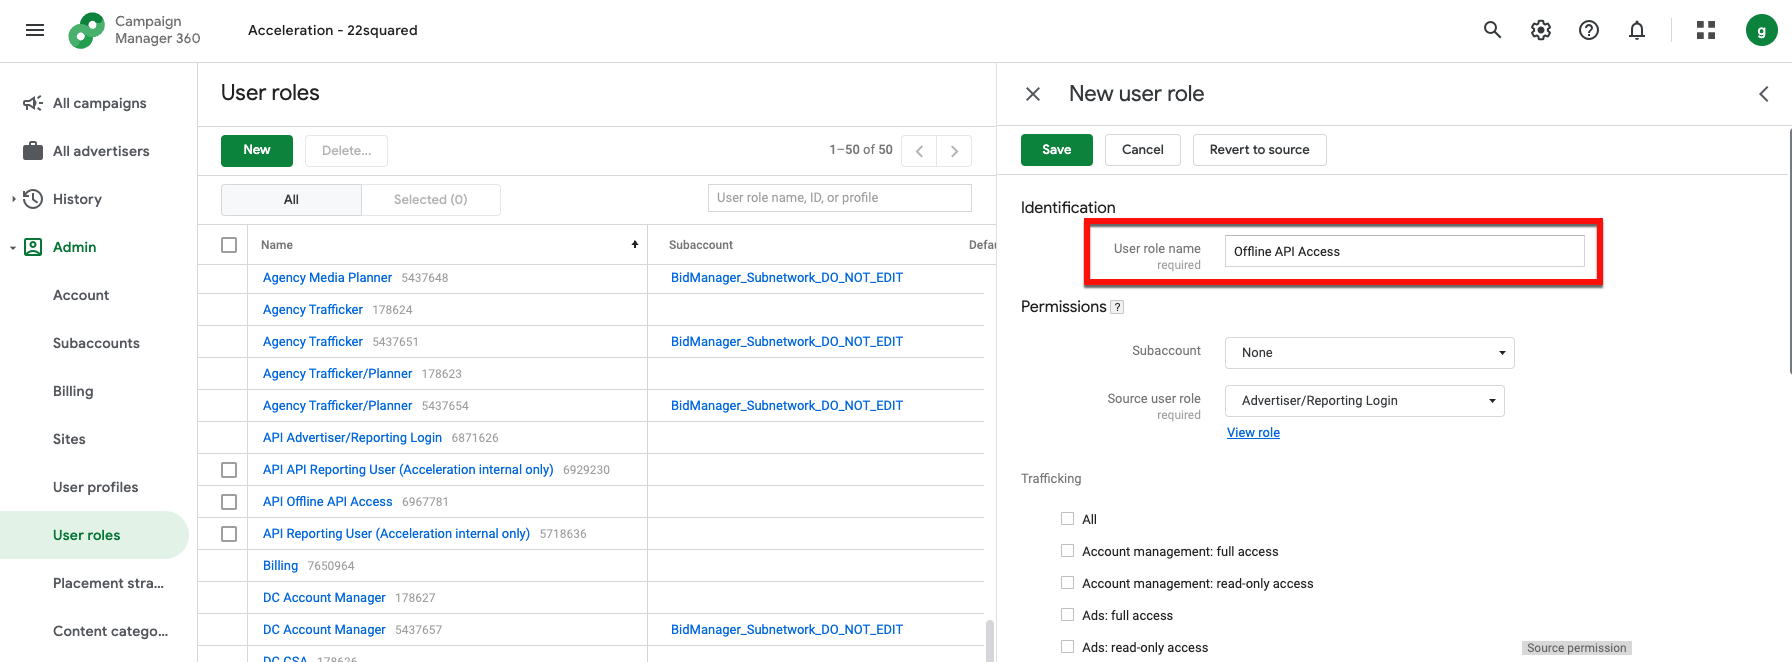
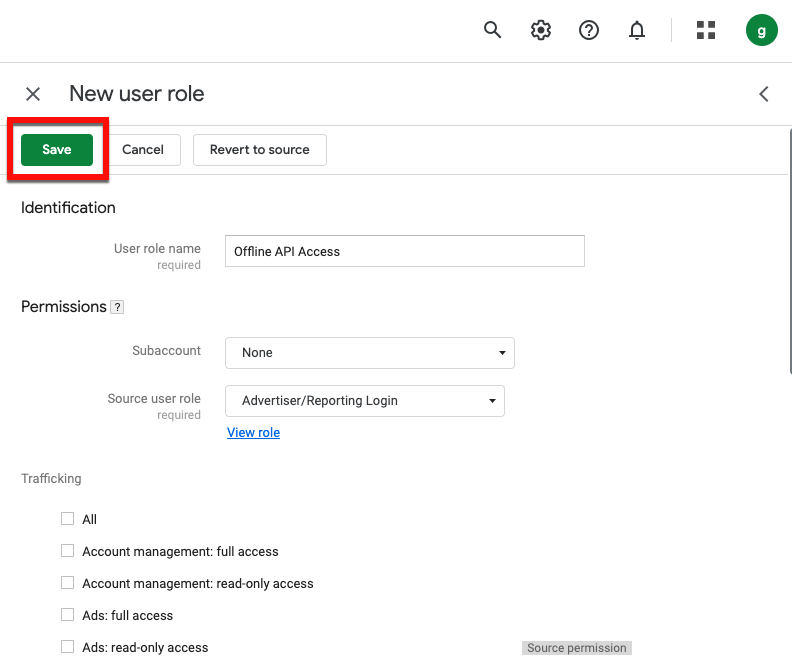
In the “User role name” field, enter “Offline API Access”.
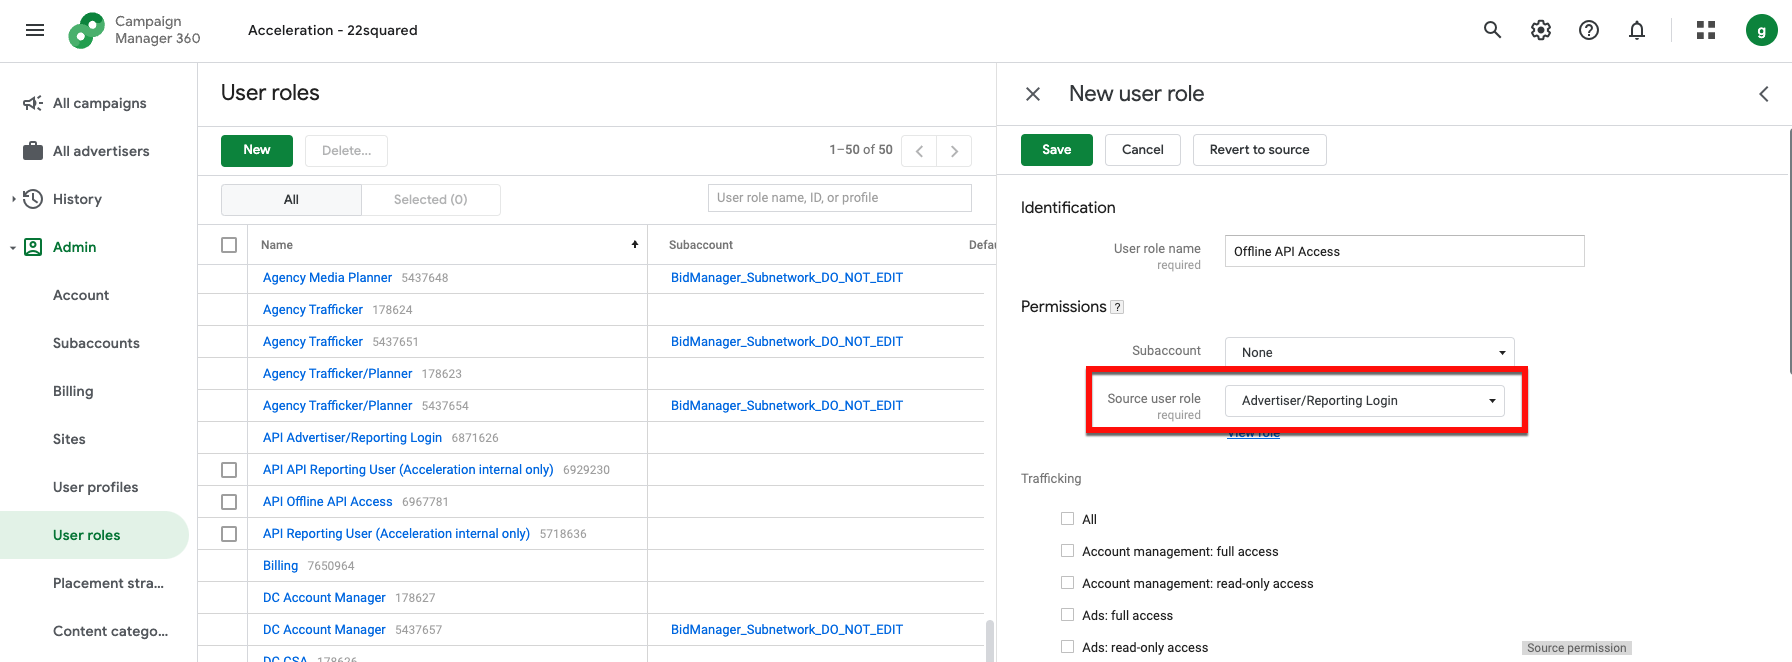
In the “Source user role” field, select “Advertiser/Reporting Login”.
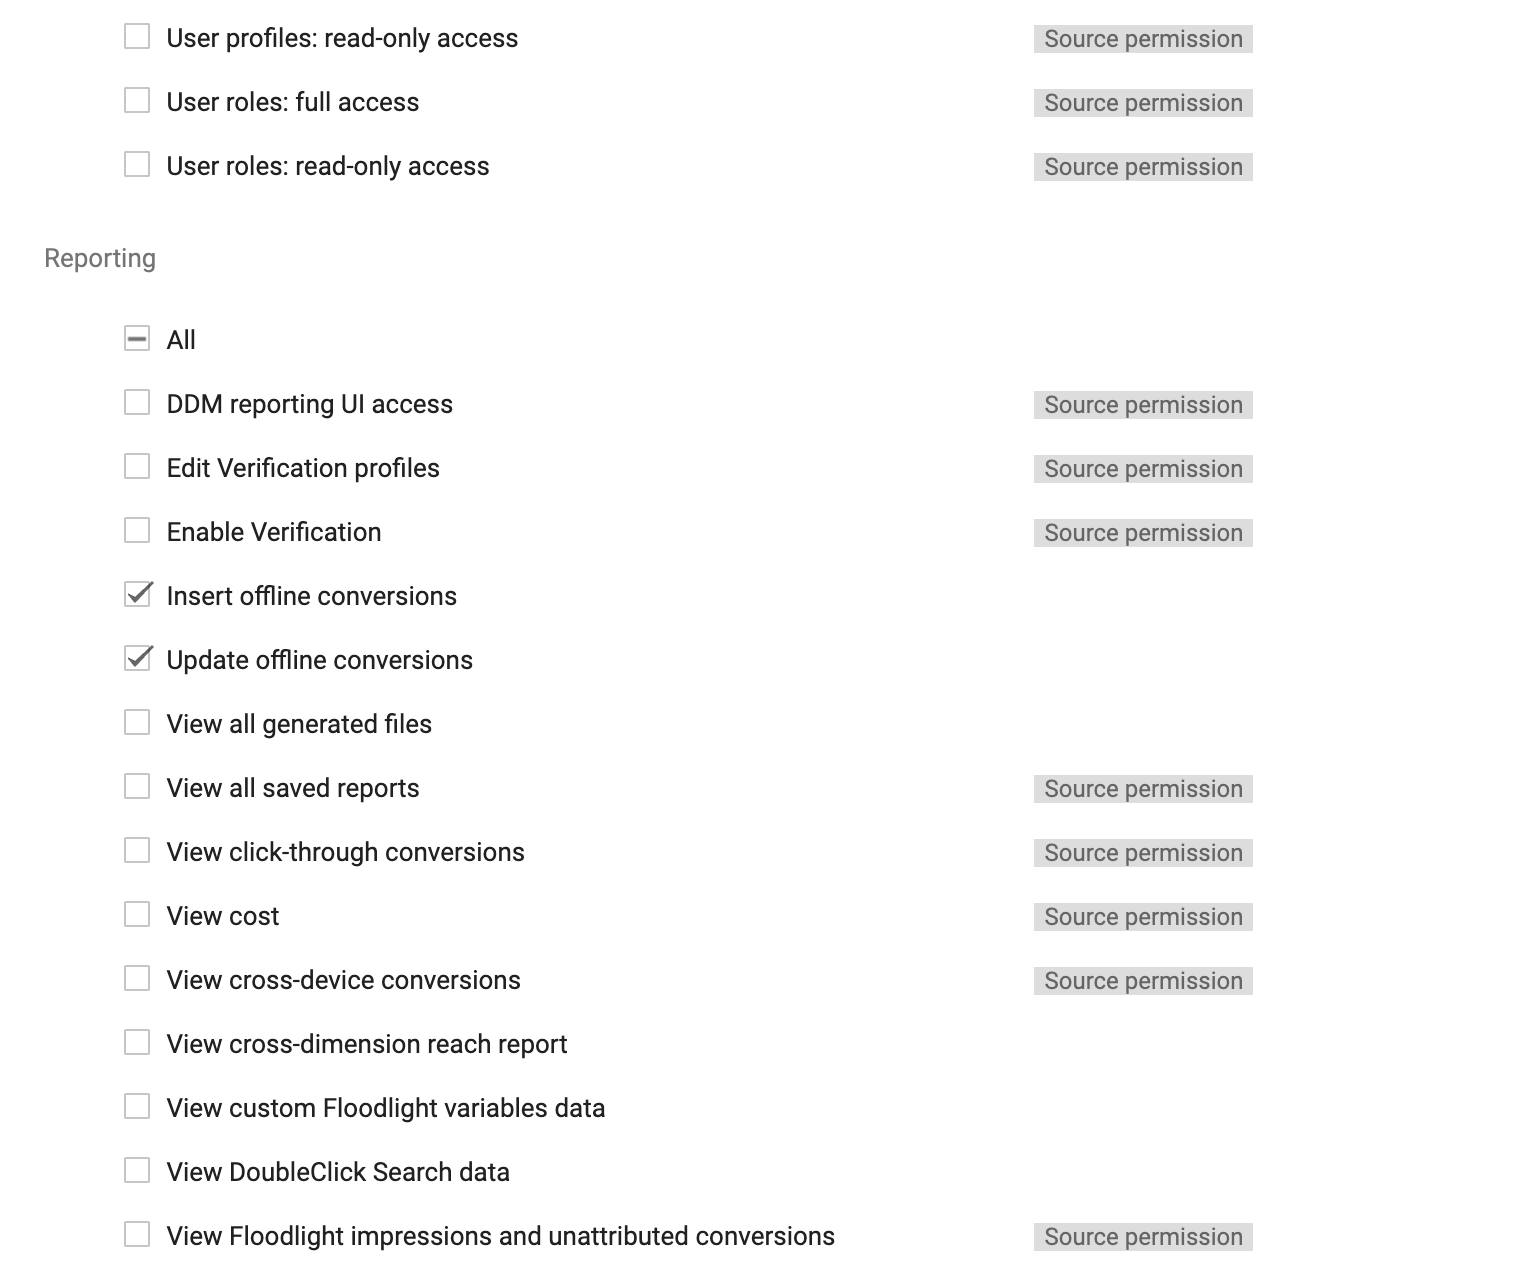
In the Reporting section, uncheck all check boxes and check the check boxes for “Insert offline conversions” and "Update offline conversions".
Click .
Create a new user profile:
From the navigation menu, select and then select .
From the User Profiles page, click .
Enter the following information:
Email: googleauth@liveramp.com
Profile name: LiveRampAPIAccess
Note
Google might add a number at the end of this name– this is okay.
User role: Offline API Access
Click .
CAPI Feed Monetization on DV360 via Google for Commerce Media Networks Integration
Retailers who are data sellers can monetize their offline transaction data to select brands on DV360 through LiveRamp’s Google Data Marketplace integration for Commerce Media Networks. To allow Google to associate your CAPI feed with the relevant pricing metadata, you must create a shell (dummy) segment and distribute it to the “Google - Commerce Media” destination tile.
For more information, see “Distribute Data Marketplace Data to Google”.