Implement LiveRamp Online Conversions API Program with ATS for Web
With ATS for Web (ATS.js), you can capture and send web conversion data to subscribed CAPI programs in a single workflow via LiveRamp's Conversions API connector. In this article, you will learn how to integrate your ATS configuration with the CAPI programs and define the events you want to send to your partner platforms.
LiveRamp’s Online Conversions API connector supports sending online web events to the following platforms:
Meta
Pinterest
Snapchat
TikTok
Amazon
Yahoo
The Trade Desk
Caution
The Trade Desk Online Conversions API connector is currently in limited availability. If you're interested in being considered to participate, contact your LiveRamp representative.
Tip
LiveRamp is continuously expanding its partnership with more platforms. Check the "Release Notes and System Information" page periodically to stay updated when a new CAPI program becomes available.
Note
The method in this article leverages the Console UI to configure event types, parameters, and the triggers. If you prefer to send conversion events through direct API calls to the universal CAPI connector, see "The Online Conversions API Connector for API Implementation".
LiveRamp also supports sending offline events through the Offline Conversions API programs. To learn more about the supported platforms and how to implement them, see “Conversions API Programs”.
View the Universal Events and Parameters
LiveRamp’s Online Conversion Program utilizes unified schema parameters with a mapping system that translates our parameters to each platform’s specific parameters.
To view the list of supported event types, their parameters, and how they are mapped, see "Events and Parameters".
Requirements
Most CAPI platforms will require you to provide the following platform-specific details to receive the event data:
Authentication/Access token
Account ID
For details on the required credentials, see "Platform-Specific Requirements".
Additional Requirements for Connect Users
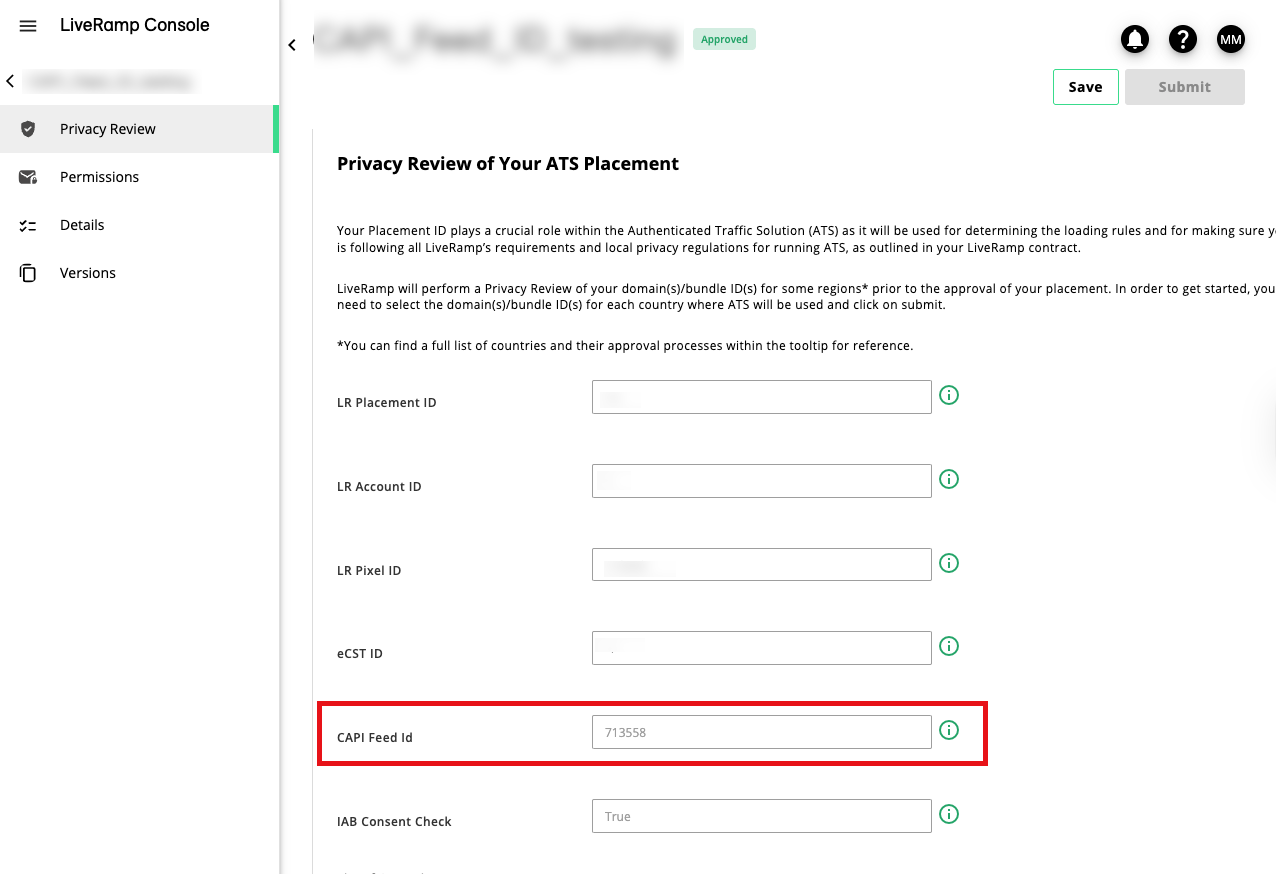
Users integrating the Online CAPI connectors to enable CAPI feed distribution in Connect must have a CAPI Feed ID assigned to an approved ATS placement.
Before proceeding, check whether your ATS placement already has a CAPI feed ID assigned. From the navigation pane, select and click on an approved placement. On the "Privacy Review" tab, check if the CAPI Feed ID is populated.
Note
If you don't have an ATS placement with a CAPI feed ID, talk to a LiveRamp representative to get one assigned.
Create an Online Conversions API Integration
Once you have obtained the platform-specific requirements, you can create the integration in Console's CAPI Hub.
Create a new ATS configuration.
Note
For Connect users: Your ATS configuration must be linked to an ATS placement with a CAPI Feed ID assigned. See the "Additional Requirements for Connect Users" section for more information.
From the navigation pane, select ATS → Web and click the ATS configuration you've created.
Select the Integration tab and click New.
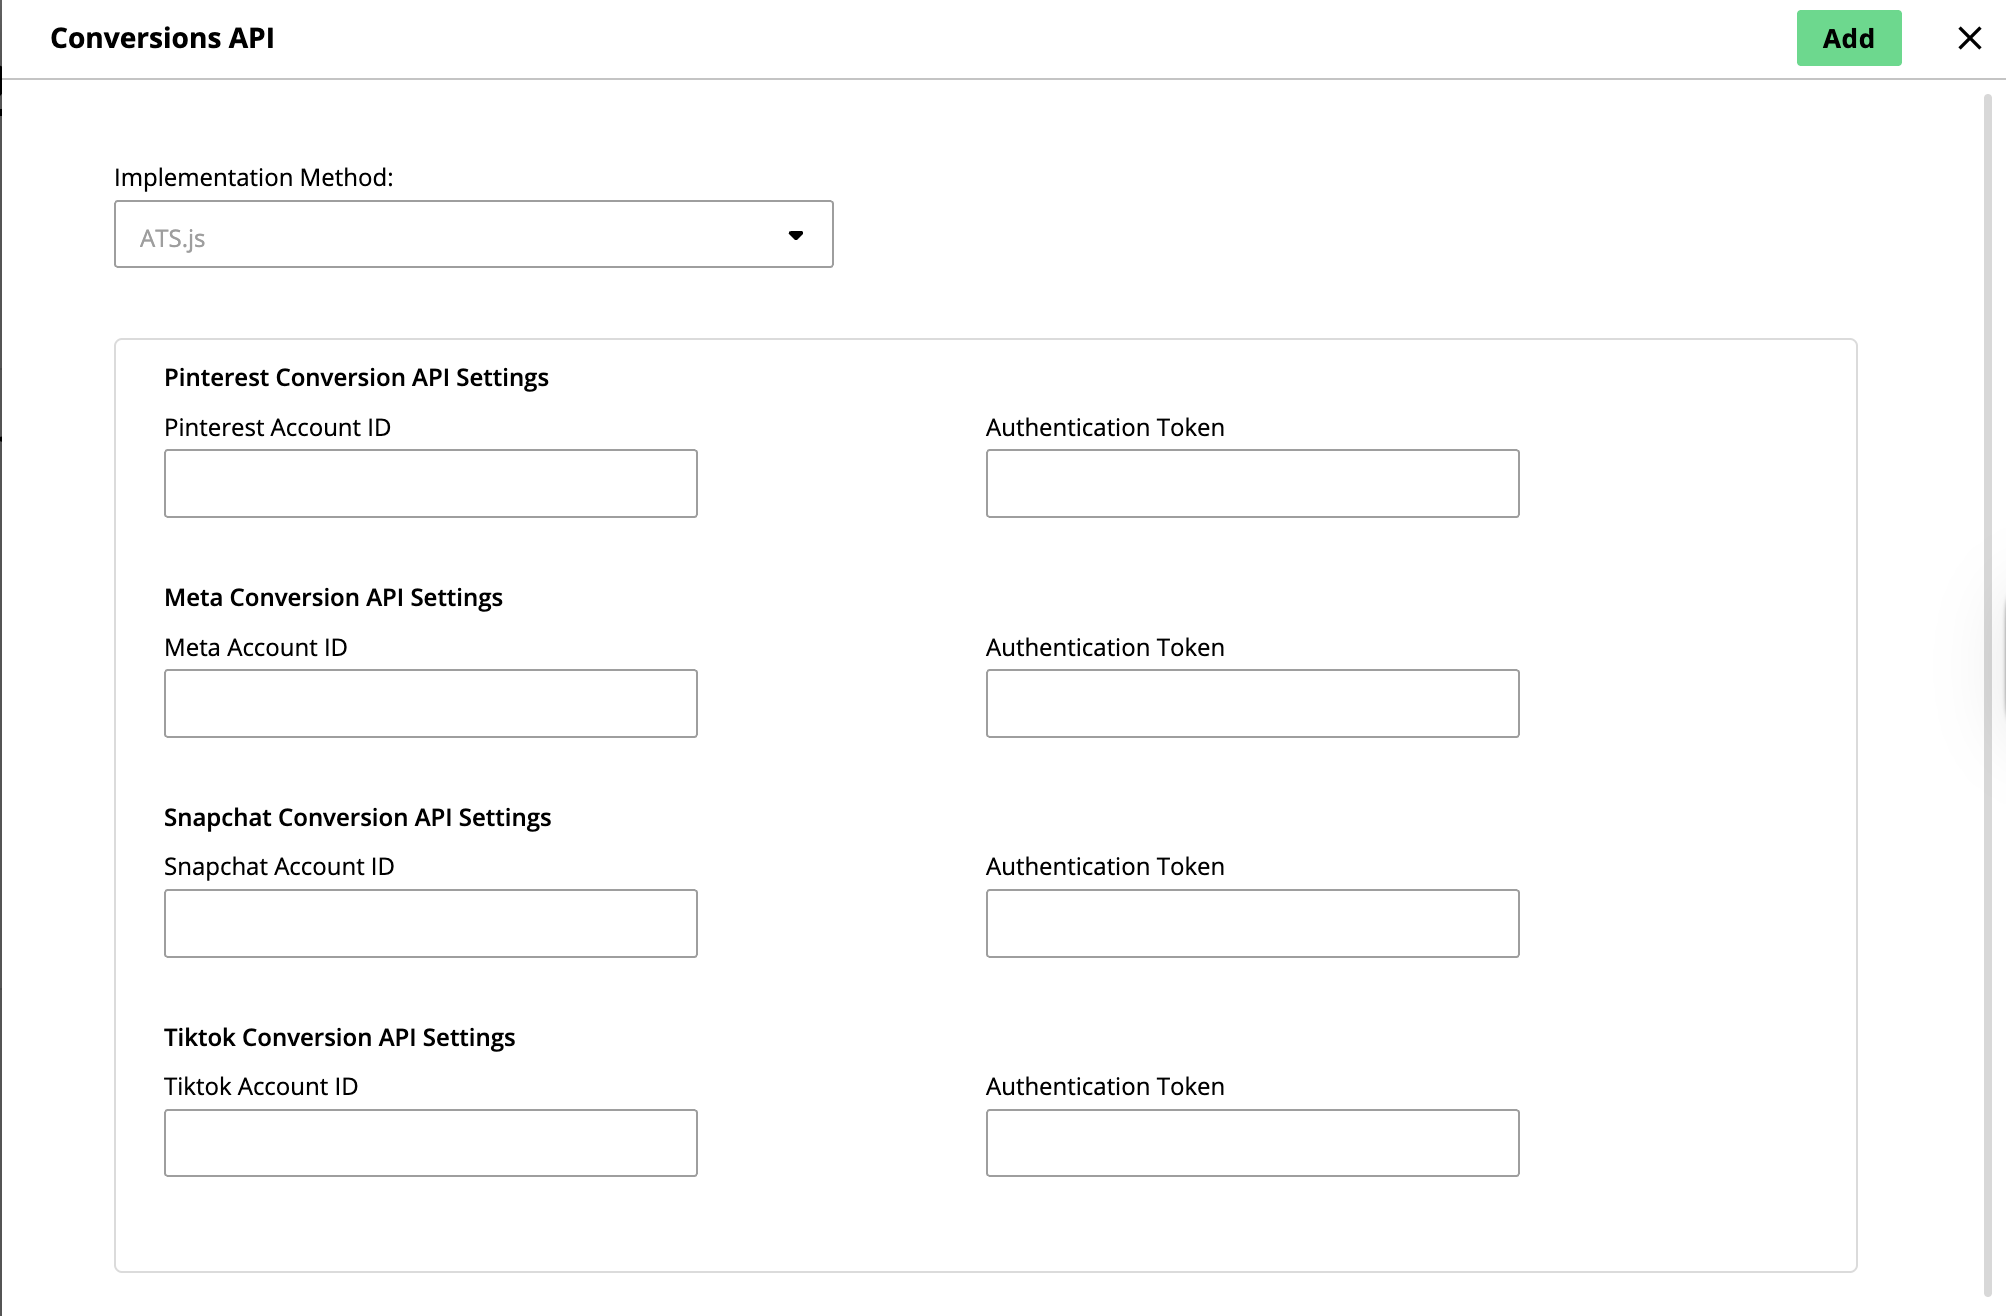
Select "Conversions API".
Select your ATS implementation method.
For each CAPI platform that will receive the event data, enter the required credentials and the corresponding access tokens.
(Optional) To connect the event data to your Connect account, click the check box under Import to Connect.
If you are implementing CAPI via ATS API, click and then Publish. Proceed to "LiveRamp Online Conversions API Connectors" on our developers' portal for instructions on sending the requests.
Set Up an Event for Online Conversions API
Once you have completed the steps to create a CAPI Integration, you can proceed to configure the events you want to send to your platform partners in the Conversions API Hub. This includes the event type, any additional parameters, and how the data should be collected.
The event data can be collected via CSS selectors, URL, or through data layer detection. LiveRamp's data layer detection is able to collect conversion and event data already stored in any existing website data layers, including those outside of Google or Adobe.
Note
This method leverages the Console UI to configure event types, parameters, and triggers. To send events via direct API calls to the universal CAPI connector, see our developers' documentation.
Under "Events List", click .
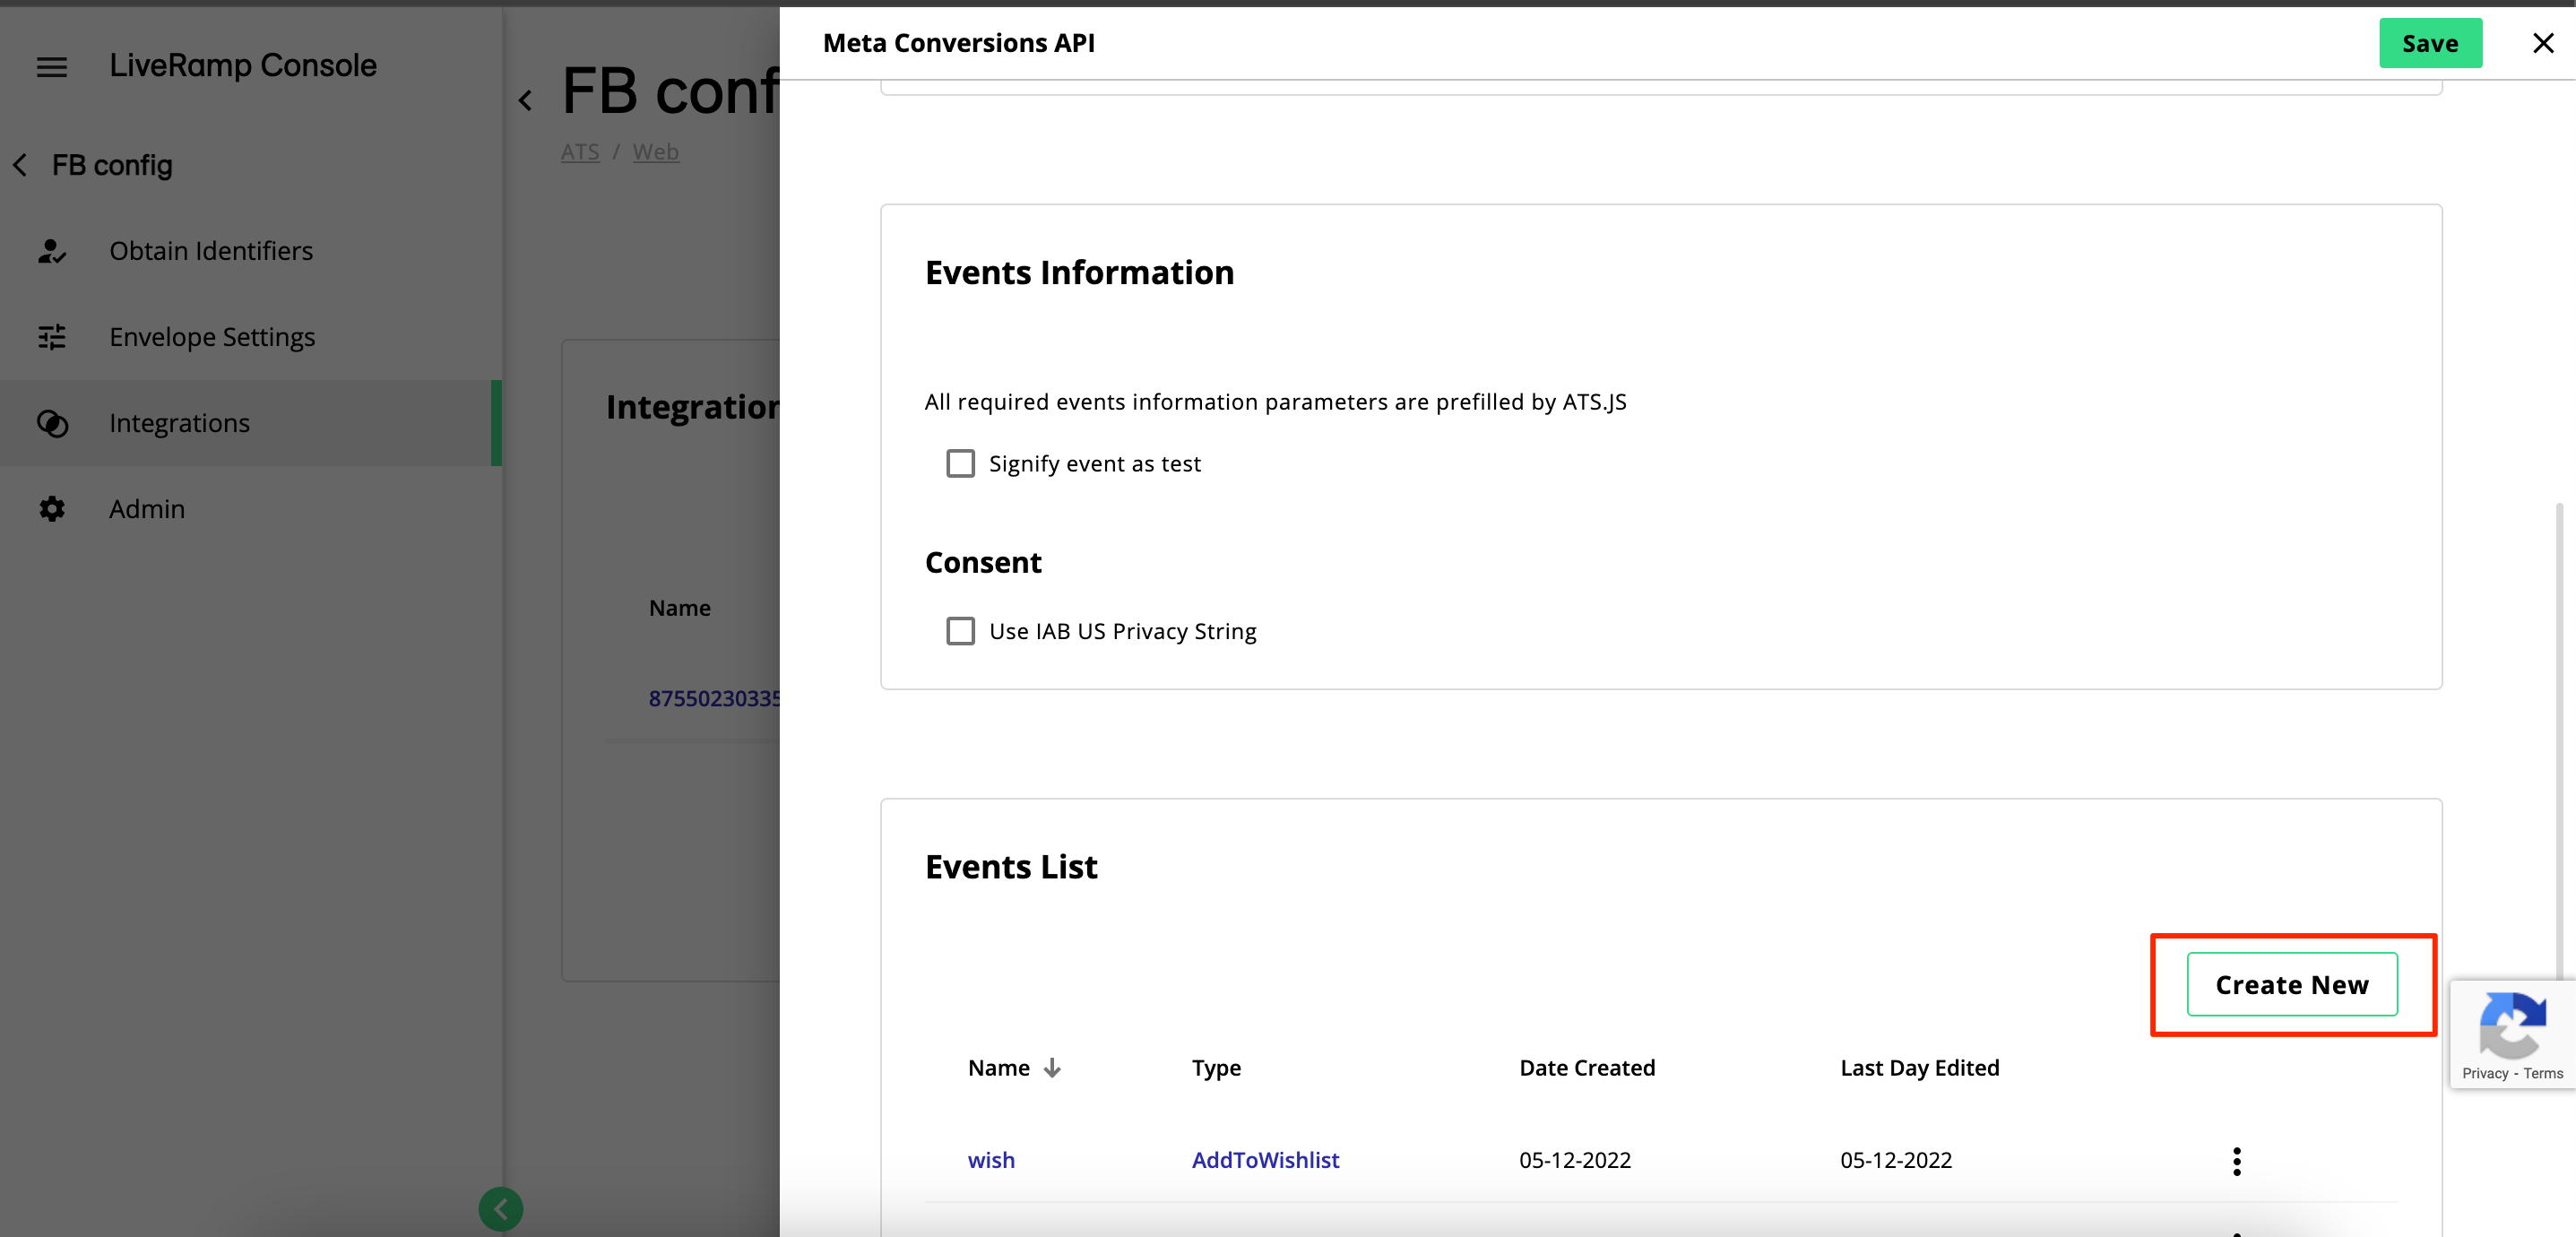
Enter an Event Name and select the Event Type.
From the Event Detection Method dropdown list. select how you want the event data to be detected. The following options are available:
Data Layer: The recommended method where event data are obtained from the data layer using parameters from an HTML tag. If this option is selected, a code snippet will be provided with all possible parameters included by default, which you can then modify to your preference.
To detect and send events with Data Layer:
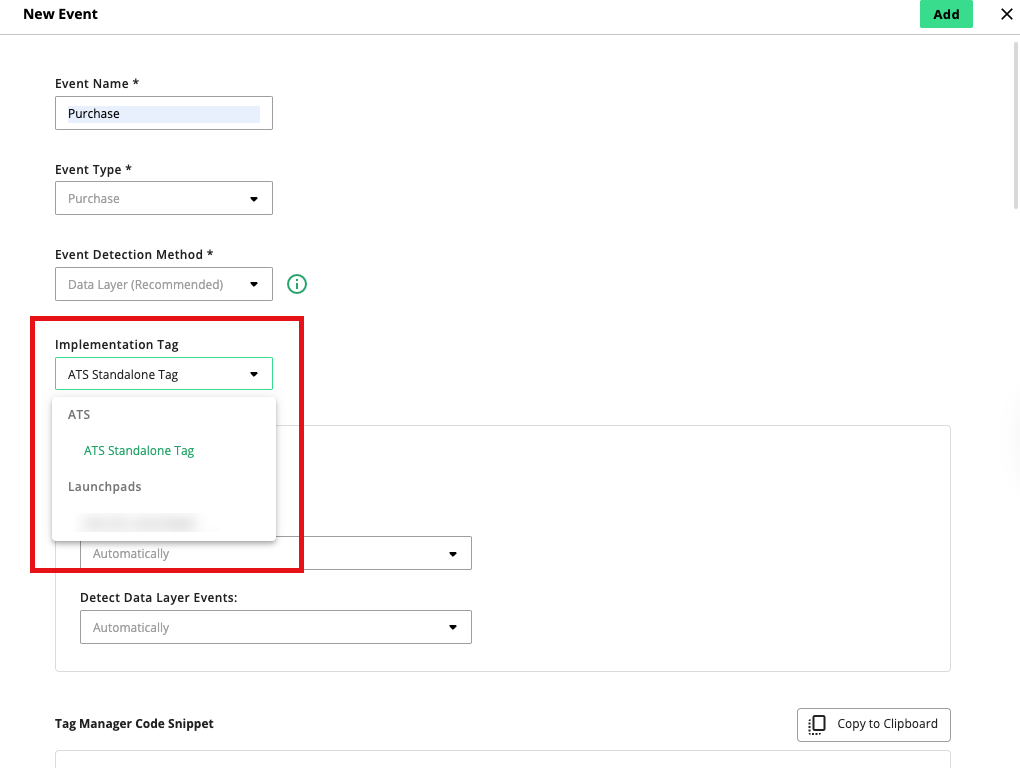
Select the preferred implementation tag to run the ATS CAPI integration. You can select one of the following:
Via an ATS standalone tag: Implement the CAPI as a standalone tag. This option is the default method if your ATS configuration is not integrated with LaunchPad.
Via a LaunchPad tag: Implement the CAPI using a tag that is linked to a LaunchPad configuration. This option will only be displayed if you install your ATS configuration with LaunchPad.
Under "Trigger", select how to initiate the sending of events:
Automatically (recommended): Events are automatically sent at the end of each user session. This can be either when the user closes the page or switches tabs.
Manually: You trigger the JavaScript function when you know all the information is obtained. This can be done by calling
ats.sendConversionApiEvents().
Then, select how to initiate the detection of data layer events:
Automatically: Data layer events are automatically detected.
Note
If you select "Automatically" as the data layer detection method, you can still trigger the detection manually (i.e. for debugging purposes) by calling the
ats.detectDataLayerEvents()function.Manually: You trigger the detection manually by calling
ats.detectDataLayerEvents()function when you know the event data have been stored on data layer. Make sure to call the function on every single page where you want ATS.js to detect the event.
Copy the displayed code by clicking . You can modify the code to your preference by removing the parameters you want to exclude for this event before adding it to your web pages.
Click . You can skip the remaining steps in this procedure.
Page Elements: Event data are obtained from visible HTML elements using parameters you manually add and configure in the CAPI Hub in Console. The following detection methods are available:
CSS selectors: Allow you to obtain a parameter by targeting a specific HTML element on your page. We recommend using only ID selector to limit errors. For example; #product-value, #ItemValue, #OrderNumber.
URL query parameters: You provide a URL parameter which is added at the end of a URL after the ‘?’ symbol. For example;
currencyorproduct-currency.Hardcoded values: You enter a value you want to pass for the parameter. For example, if the transactions on your website are always in US dollars, you may want to set the value to "USD" for the Currency parameter.
In the "Parameters" section, select how the event ID should be obtained and for which identifier. The event ID is used to eliminate duplicate events by assigning a unique identifier to each event. In the example below, we are using the Order Number as the Event ID.
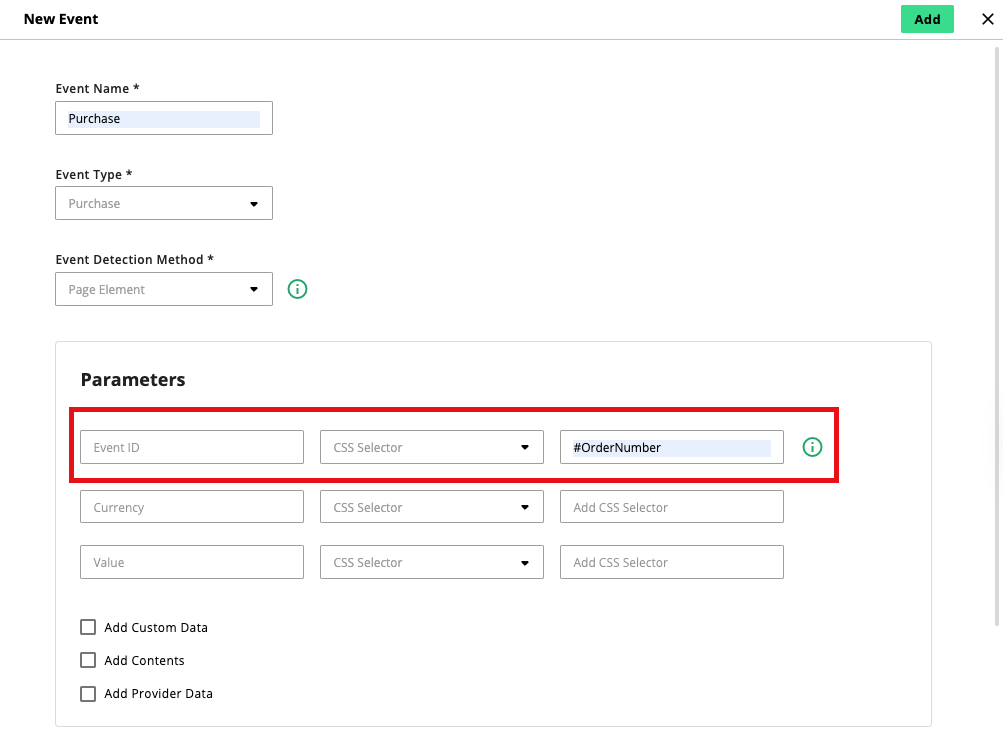
Warning
You cannot set hardcoded values for event ID.
If you are creating a purchase event and set Page Elements as the event detection method, you must provide additional parameters to detect currency and value. Select URL or CSS Selector for each parameter and provide the required data.
Note
If you want to pass predefined values, you can also select Hardcoded Value and enter a value you want to pass for the parameter. For example, if the transactions on your website are always in US dollars, you may want to set the value to "USD" for the Currency parameter.
You cannot set hardcoded values for Event ID.
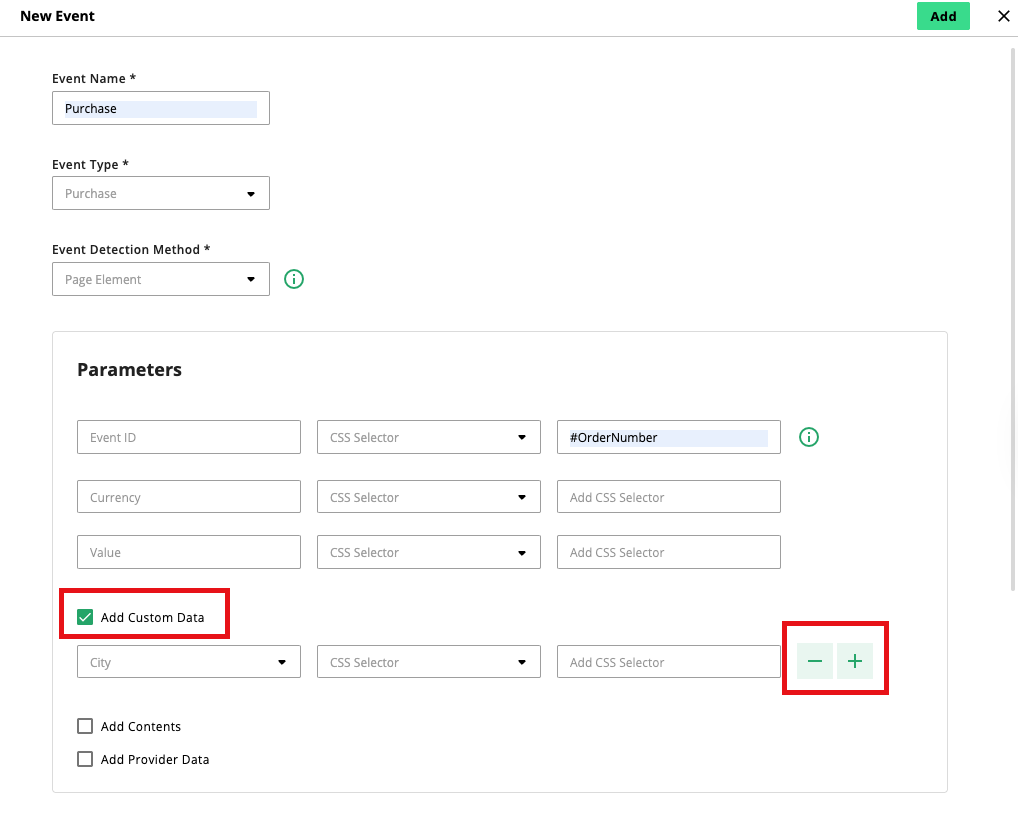
Select Add Custom Data to include additional parameters such as first and last name, country, order ID, and others. Click the plus button to add another parameter or select the minus button to remove. To learn more about custom data parameters, see "Custom Data".
Tip
To fully enrich your event data and support user matching across the funnel, we recommend including the following parameters:
First name
Last name
City
State
Zip code
Country
Select Add Contents to include the following parameters about a particular item:
Item ID
Item price
Item quantity
Item name
Item brand
Item category
Select Add Provider Data to instruct ATS.js to detect provider data, such as click IDs and view IDs, from the configured sources.
If this option is not enabled, ATS.js will attempt to search for provider data in cookies or local storage. To learn more, see "Provider Data".
Under "Trigger", select how to initiate the sending of events:
Automatically (recommended): Events are automatically sent at the end of each user session. This can be either when the user closes the page or switches tabs.
Note
You can still call the function
ats.sendConversionApiEvents()to send the event manually, even if you set the trigger option to "Automatically".Manually: You trigger the JavaScript function when you know all the information is obtained.
To trigger the sending of all events, call the function
ats.sendConversionApiEvents().To send a specific event, call the function by specifying the event type. For example,
ats.sendConversionApiEvents("Purchase").To send multiple events, call the function by specifying all the event types. For example,
ats.sendConversionApiEvents(["Purchase", "Page View"]).
Note
For non-purchase events, we recommend setting up a trigger event only on some pages to make sure they are not fired on every page load.
If you selected Page Elements as the event detection method (see step 5), you can specify to have the trigger added to all pages by selecting "Always", or in specific pages by selecting "On Some Pages". If you choose the latter, you must provide the page URL and a domain identifier to specify when the module should start detection to obtain all conversion data from the page. Click the plus button to add multiple pages.

Click .
Once you've set up all the necessary events, publish the ATS configuration to push the changes to live. You can verify if your setup is working correctly by going to your platform partner's events manager. After the specified events occur on your websites, in some cases, you should be able to see them within 20 minutes.