Flow Exports and Segmentation
The Flow Exports and Segmentation feature allows users to configure exports and segmentations directly on Flow nodes (CRQs), enabling every flow run to automatically send node results to external destinations, a destination account in Connect for activation, or a combination of both.
Note
Data export and segmentation were previously only available for individual Clean Room Questions (CRQs). The Flow Exports and Segmentation feature expands this ability to Flow nodes (CRQs).
Prerequisites
Before you configure a flow export or segmentation job, make sure the following prerequisites are met:
You have access and proper permissions to a LiveRamp Clean Room environment where the Flows feature is enabled.
The clean room is enabled for exports, and at least one export destination connection (e.g., a supported cloud destination or a LiveRamp Activation destination account) has been created and provisioned to the clean room.
For flow segmentation jobs, ensure your organization is enabled for Connect Asset Management 2.0, and at least one List Question has been enabled for segmentation with the required activation permissions.
Note
Not all clean room types support exports and whether exports are supported depends on the export location. For those clean room types that support exports, some support both analytical results and list results, while others only support analytical results. For detailed information, see "Supported Clean Room Types".
Overall Steps
Once all prerequisites are in place, exporting data from a list or analytical flow node (CRQ) involves the following overall steps in LiveRamp Clean Room:
Create a flow export and/or segmentation job for a flow node (CRQ)
Ensure that all configured flow export and segmentation jobs execute automatically with a successful flow run
Create a Flow Export Job
On the Flows page, click the flow’s More Options (
 ) menu and select Edit.
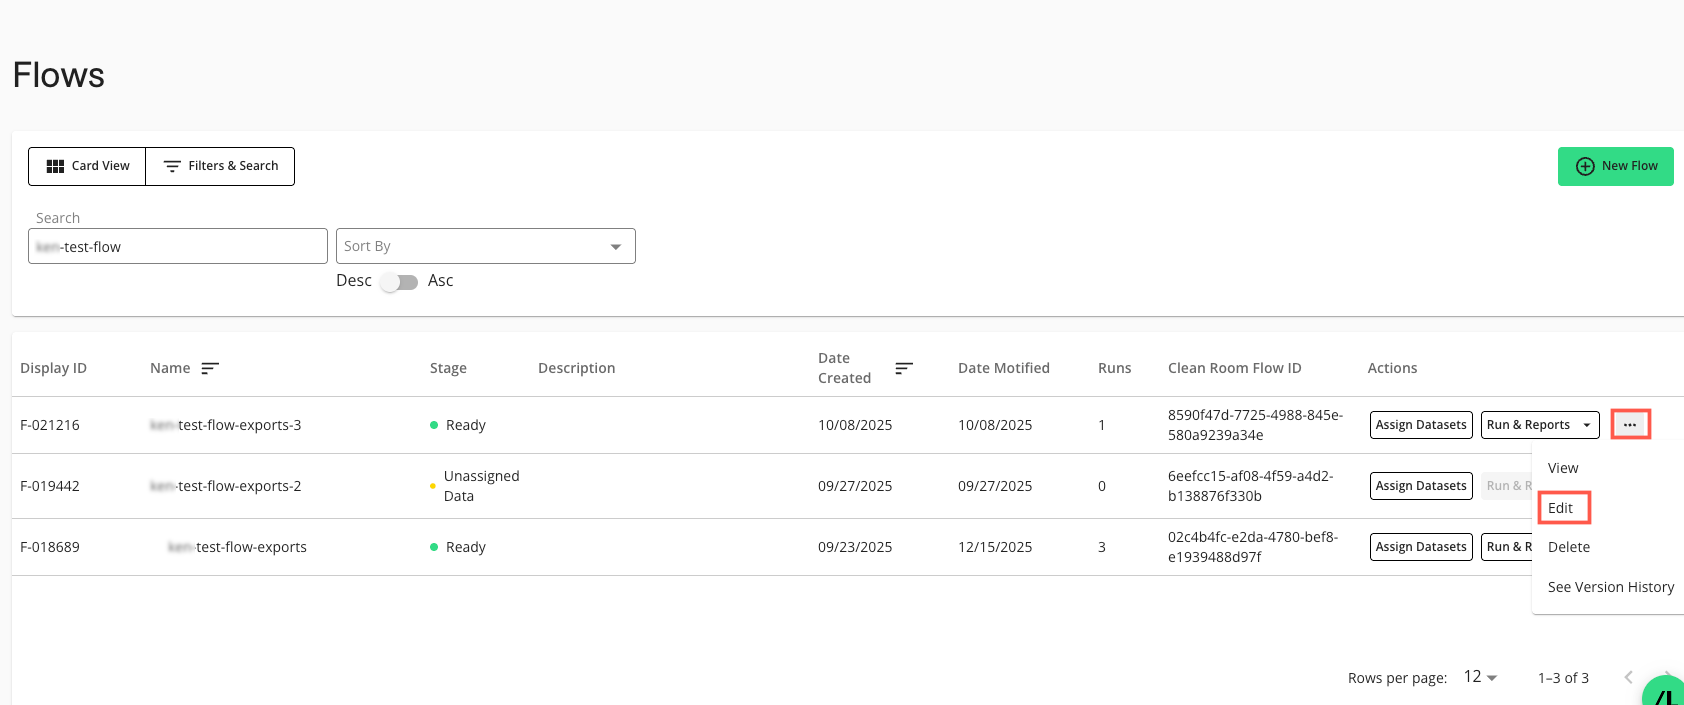
The Flow Builder page in edit mode displays:
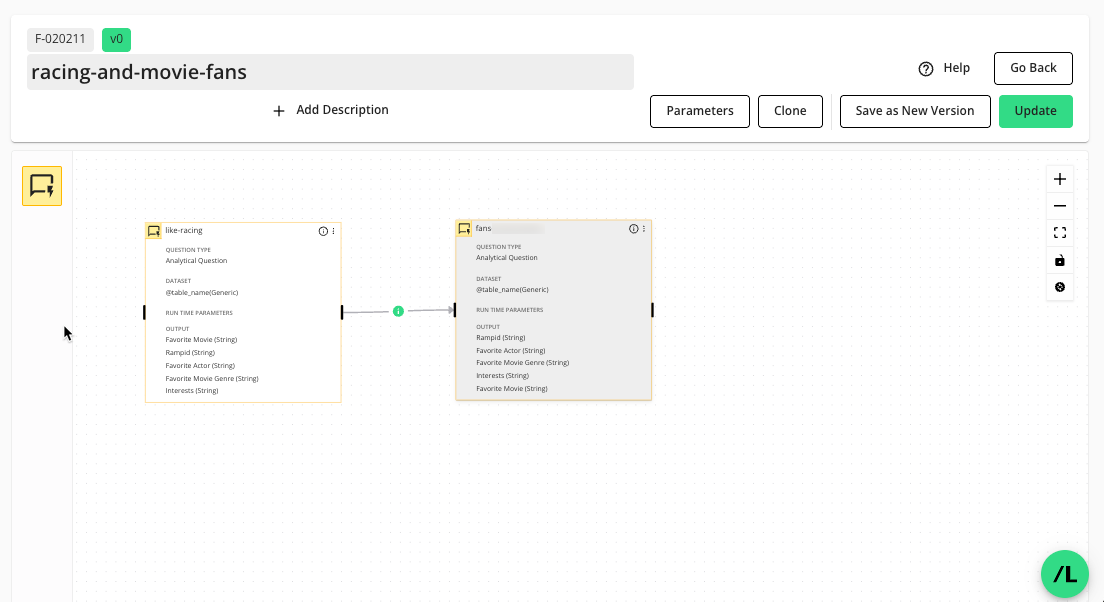
On the node you want to configure for export, select the “i” icon to open the node’s side panel.
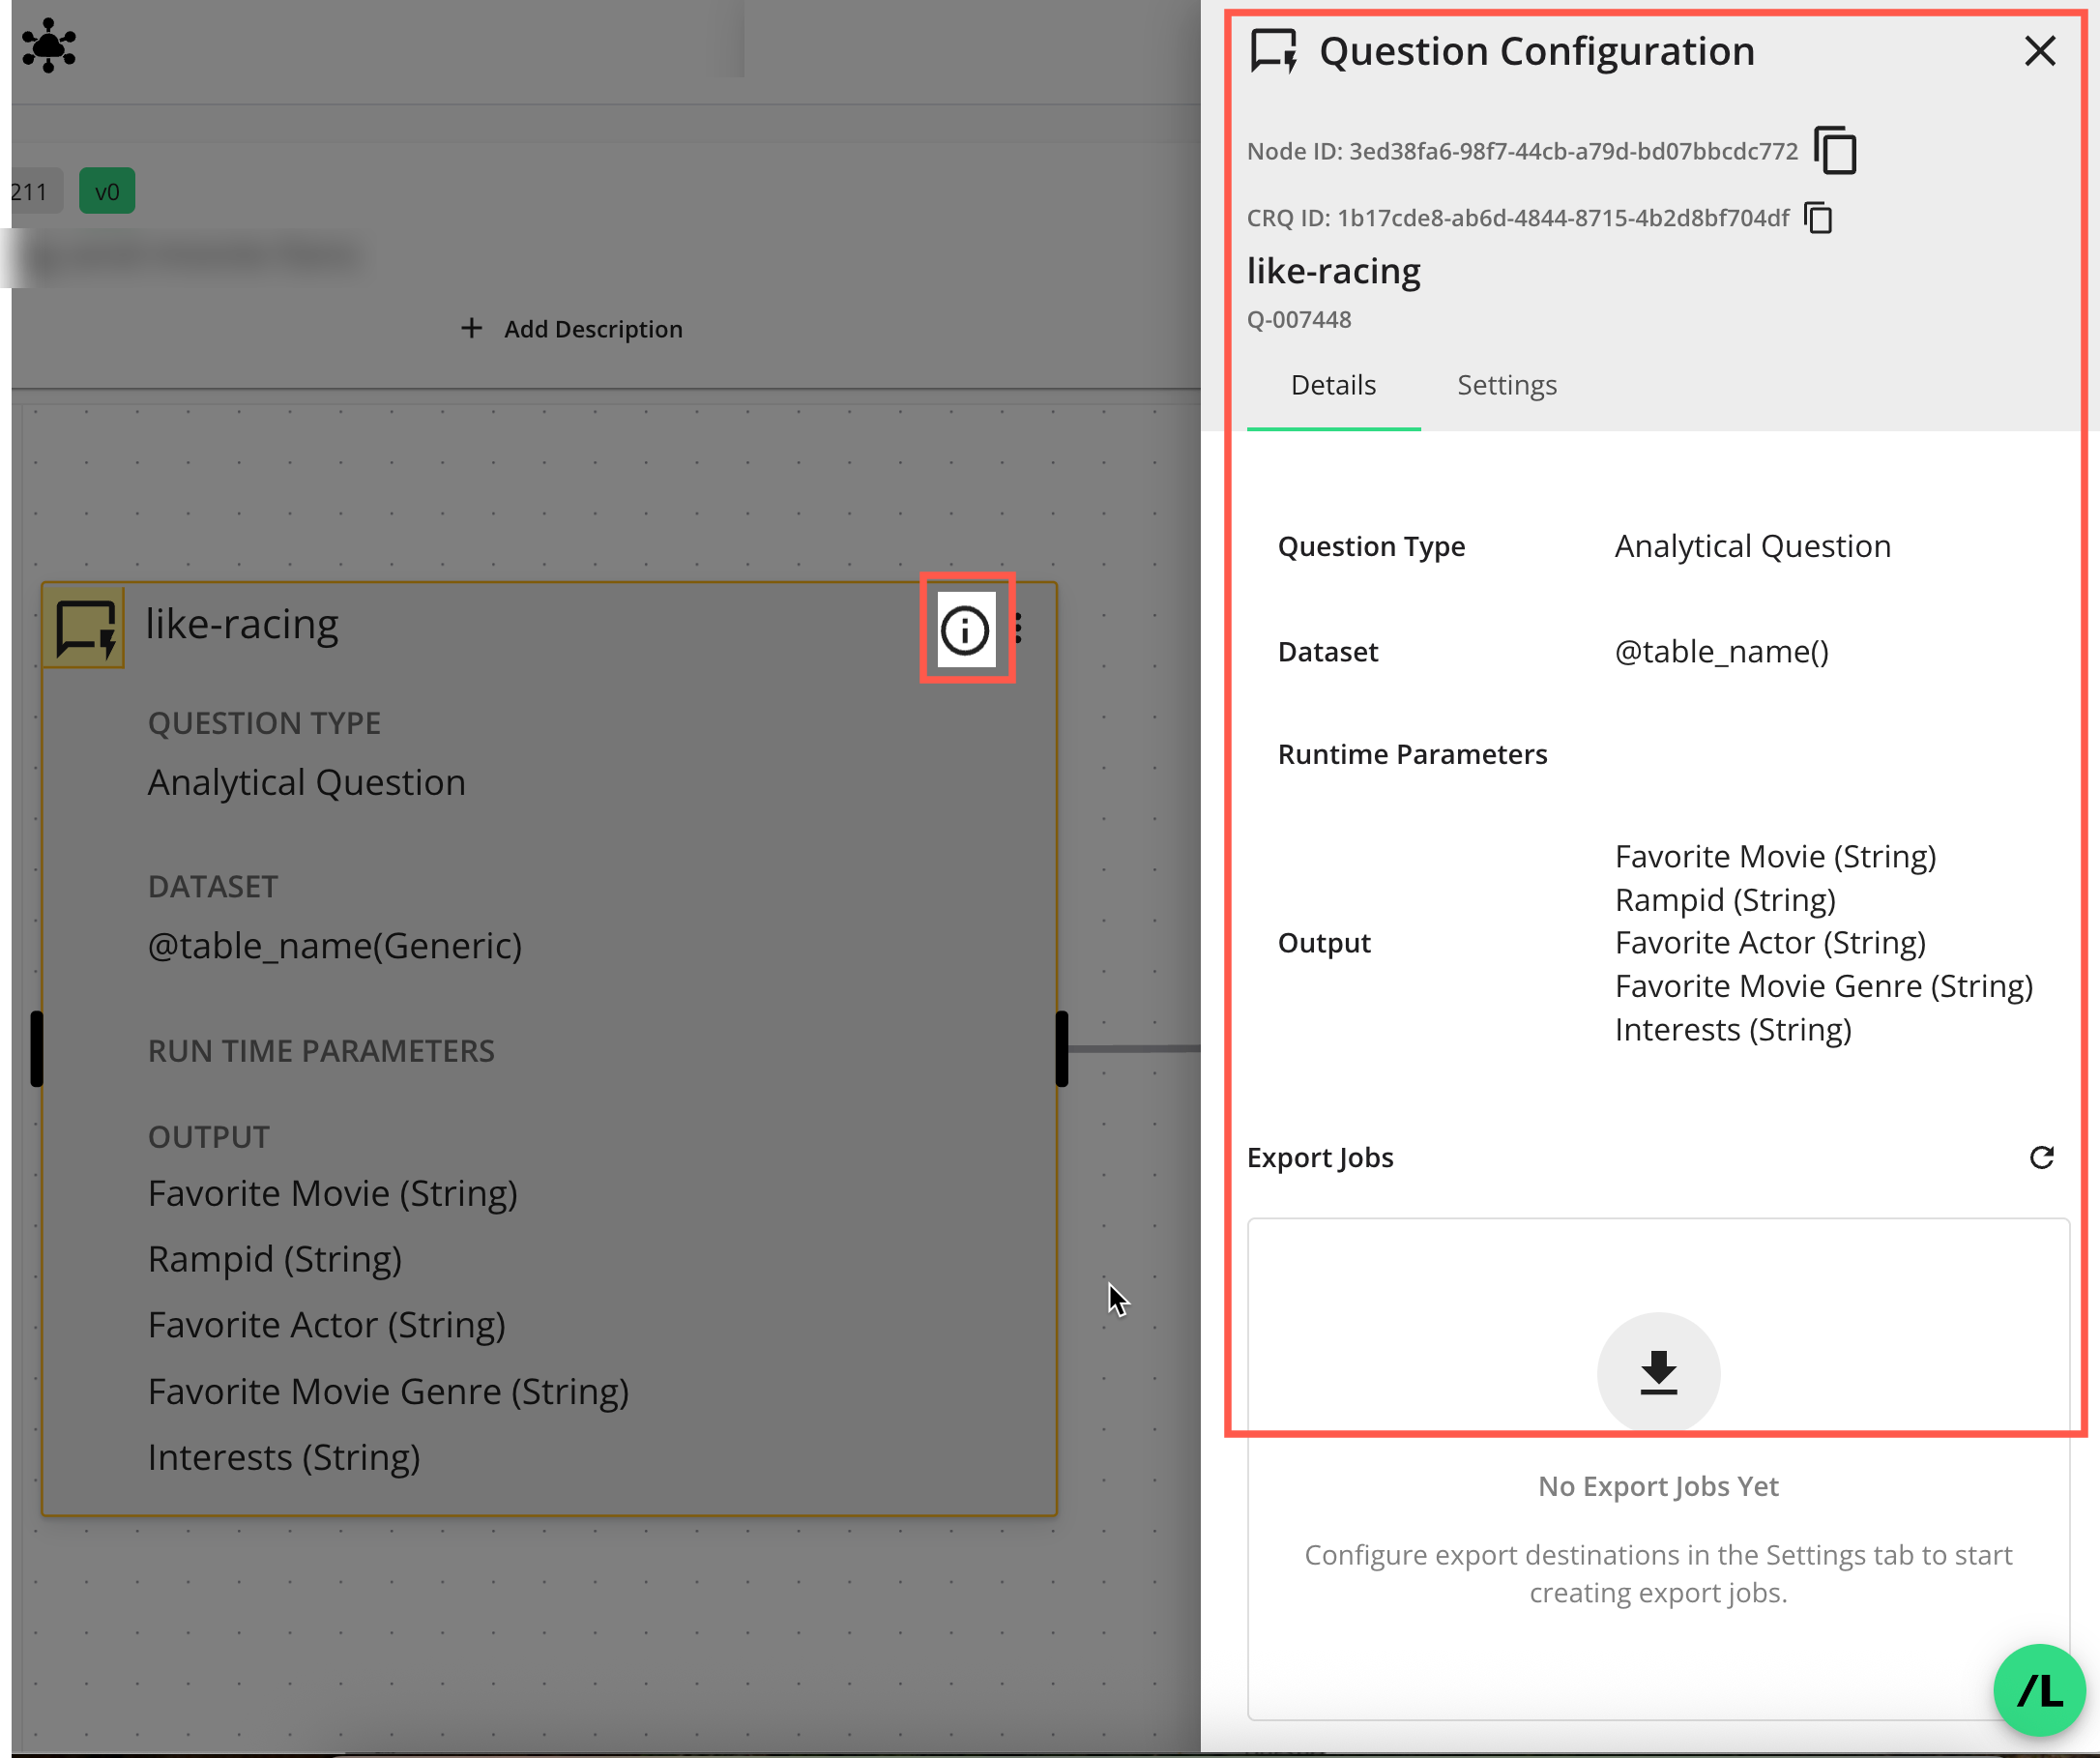
Select the Settings tab.
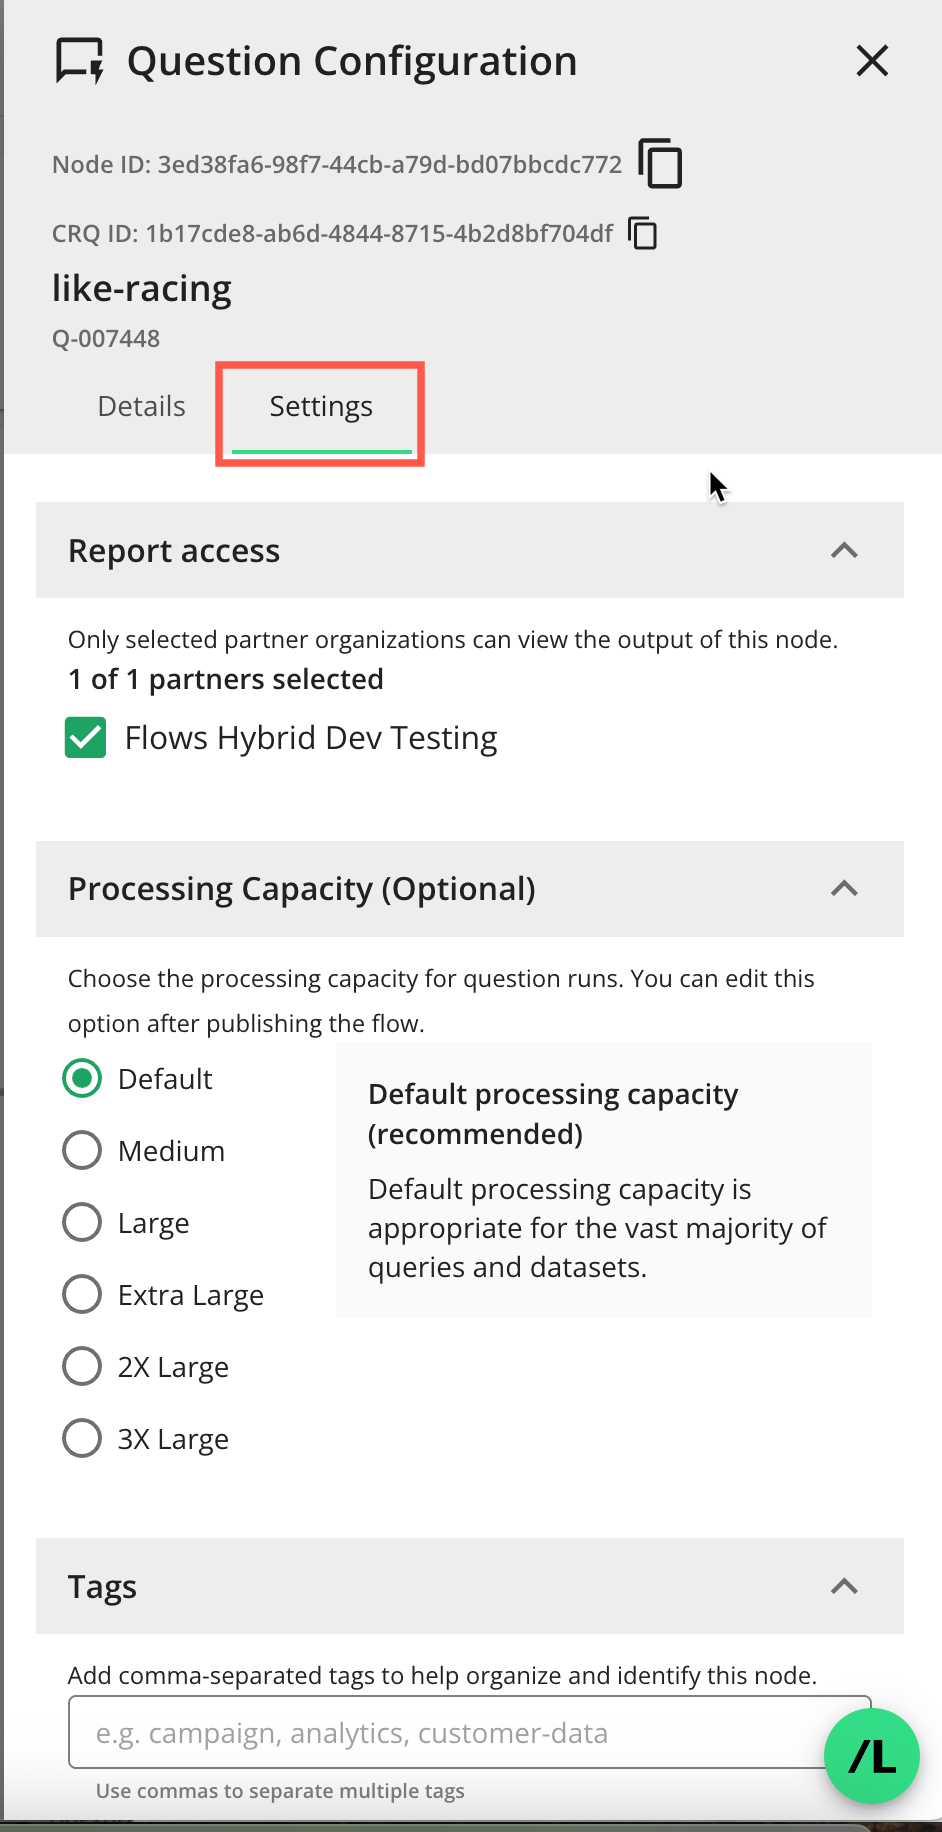
Scroll down to the “Export Configuration” section.
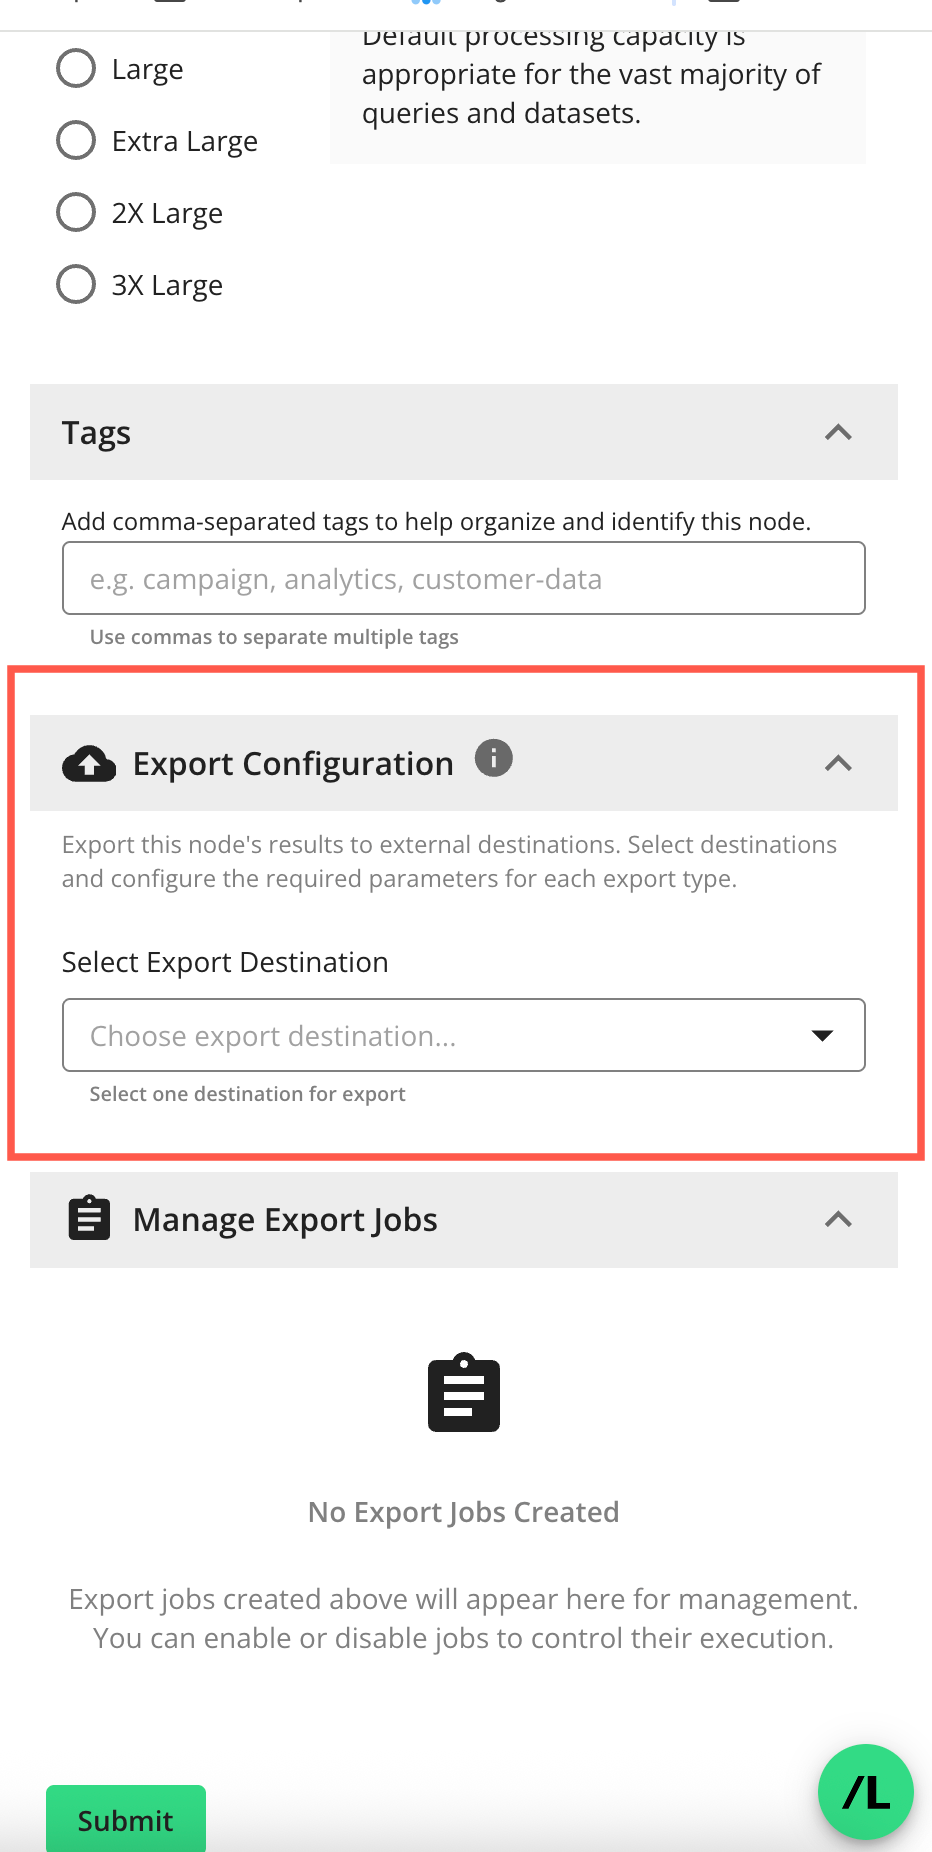
Select an export destination in the Select Export Destination drop-down list.
Note
Only export destinations that have been configured and made available to you will display. For more information, see “Create a Destination Connection”.
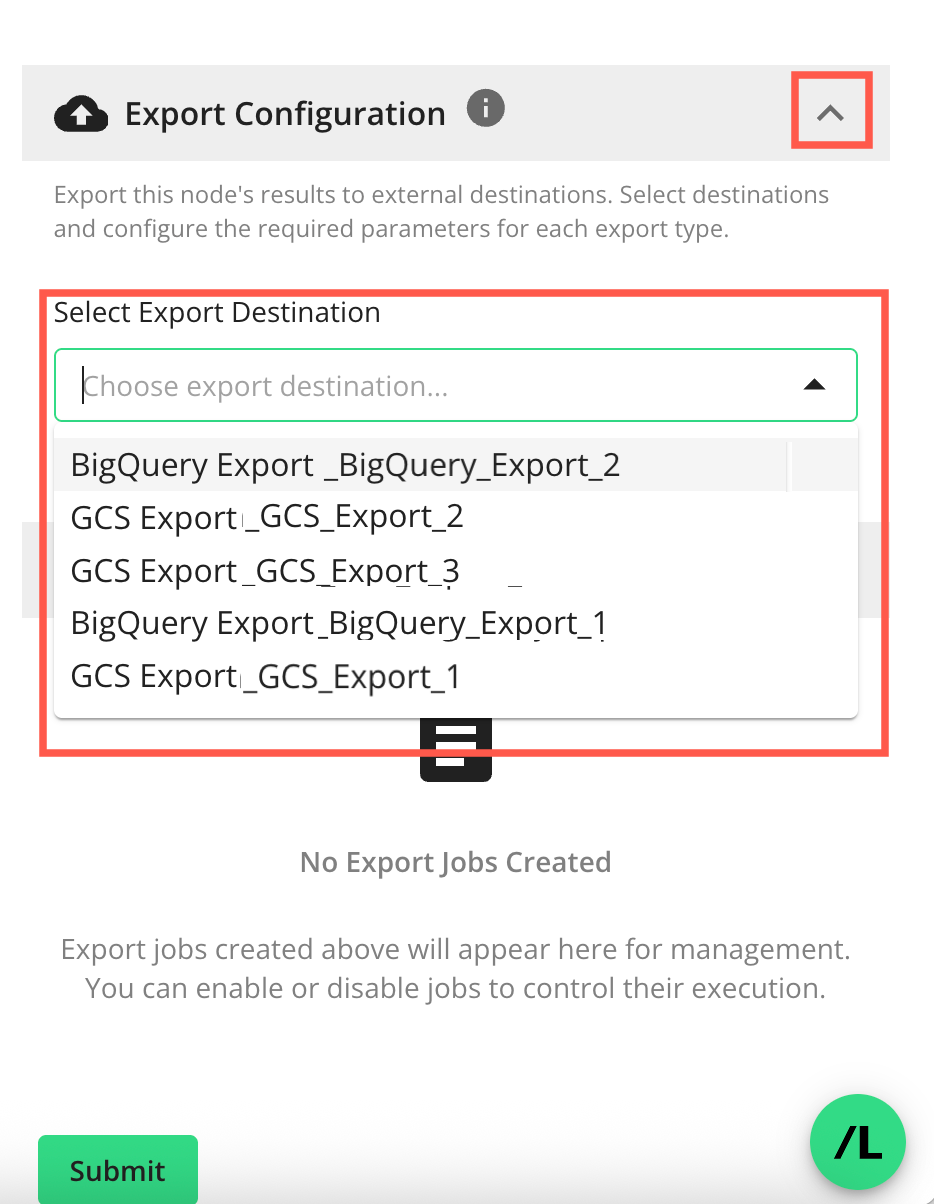
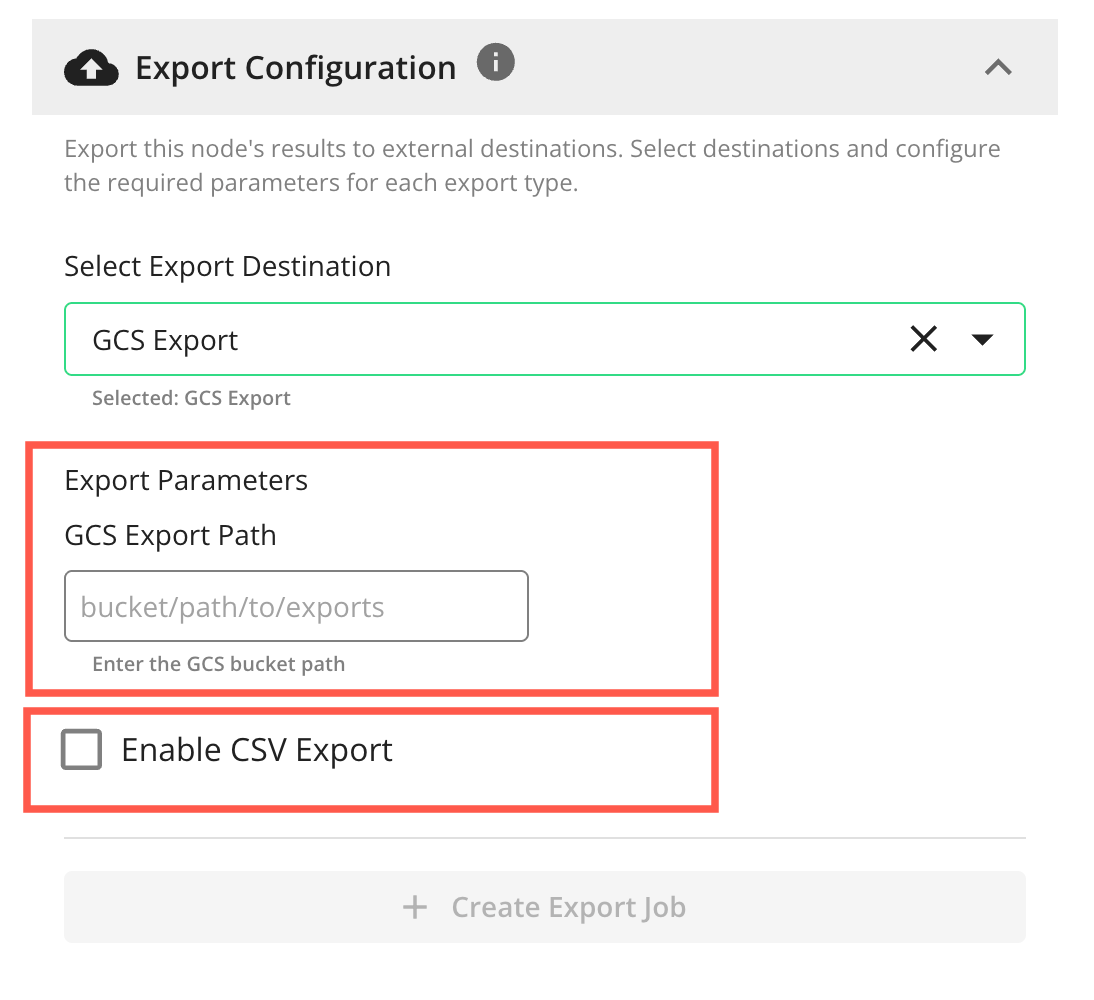
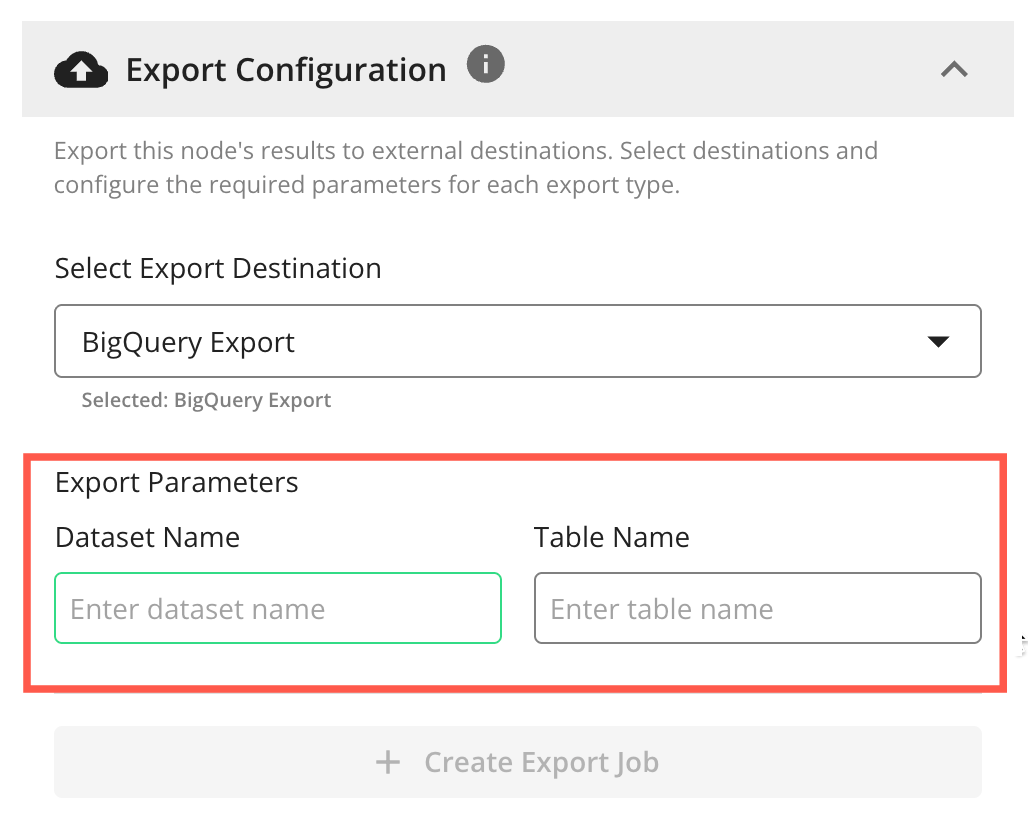
When you select an export destination, the following configurations are available:
For GCS or S3 destinations (screenshot shows GCS example):
GCS Export Path or S3 Export Path: Enter the GCS or S3 bucket path
Enable CSV Export: Select this to export in CSV format. Leave unselected to export in the default Parquet file format.
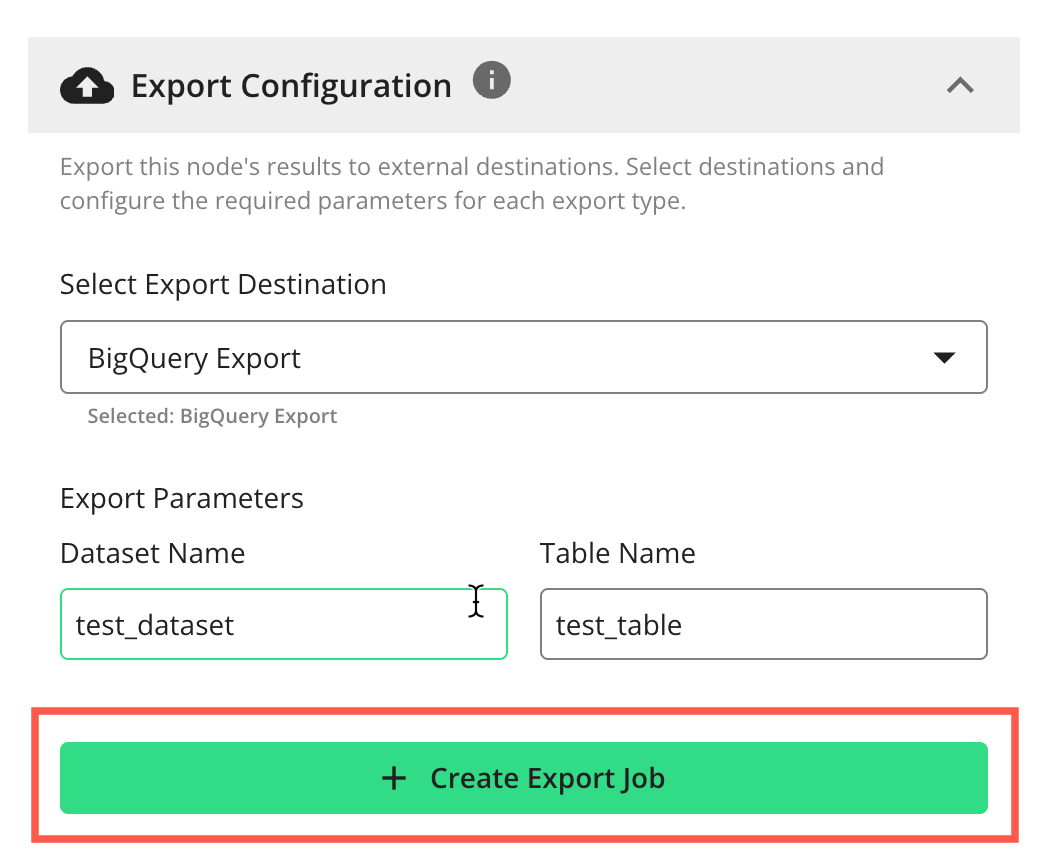
For BigQuery destinations:
Dataset Name: Enter the name of the dataset
Table Name: Enter the name of the table
Click Create Export Job to create the flow export job.
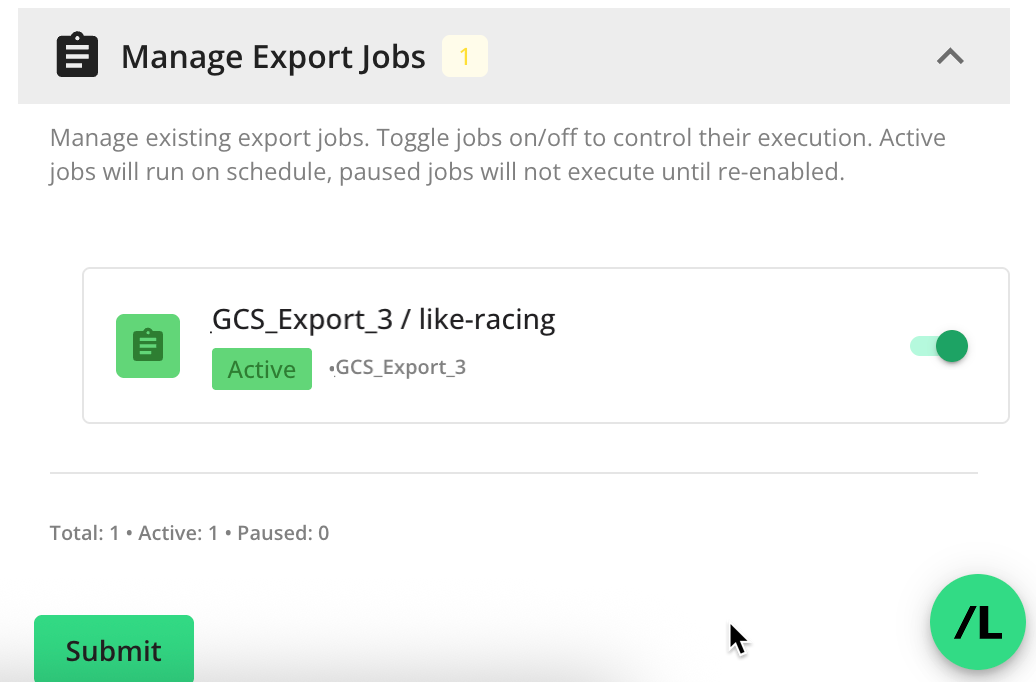
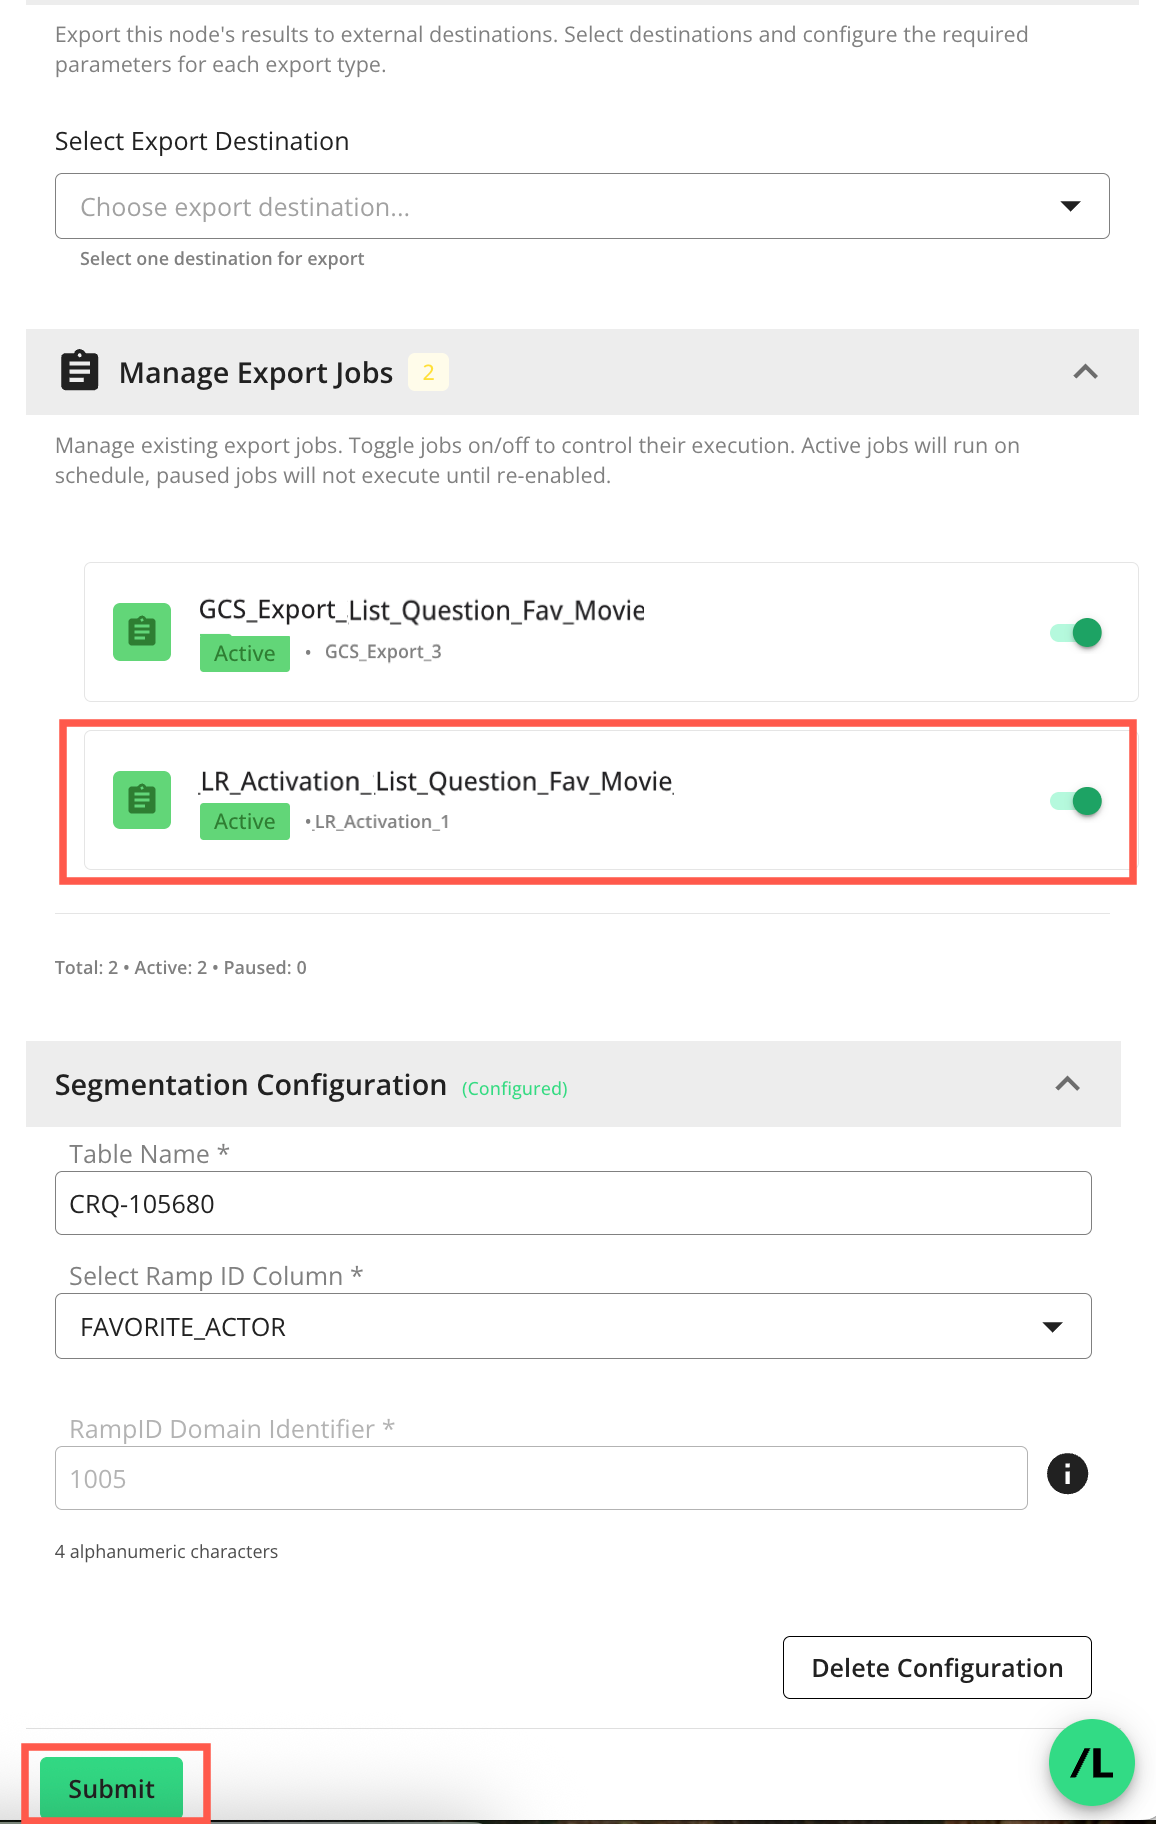
The flow export job will appear in the “Manage Export Jobs” section and be “Active”.
Note
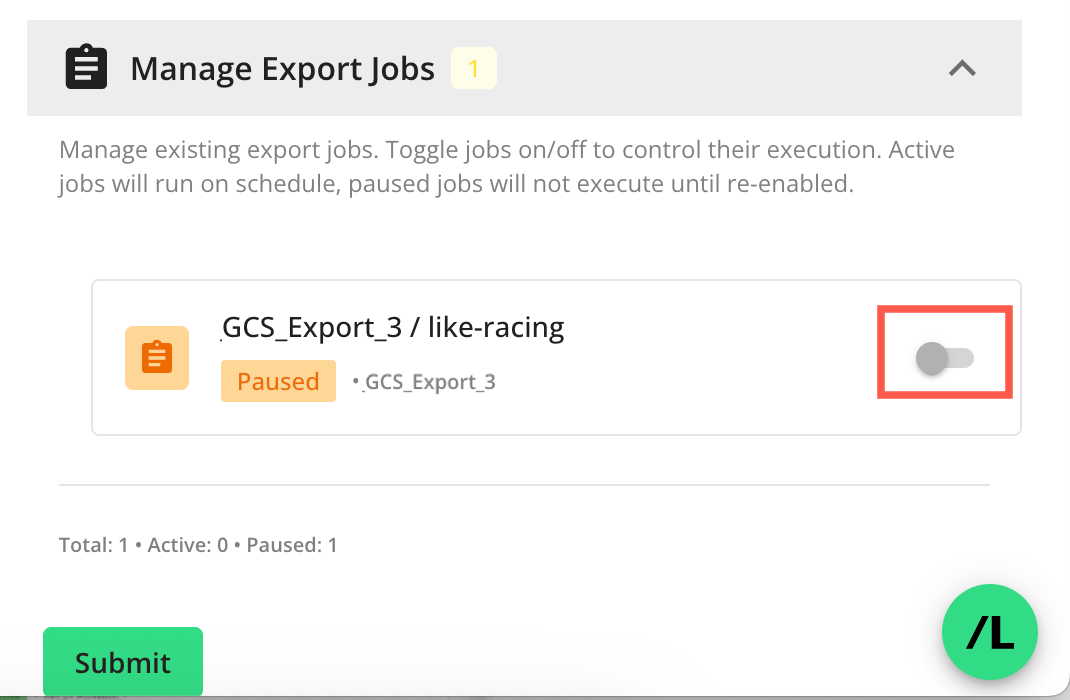
Exports cannot be edited or deleted. Changes should be made by pausing the export and creating a new export.
To pause a flow export job, click the “Active” toggle to the off position:
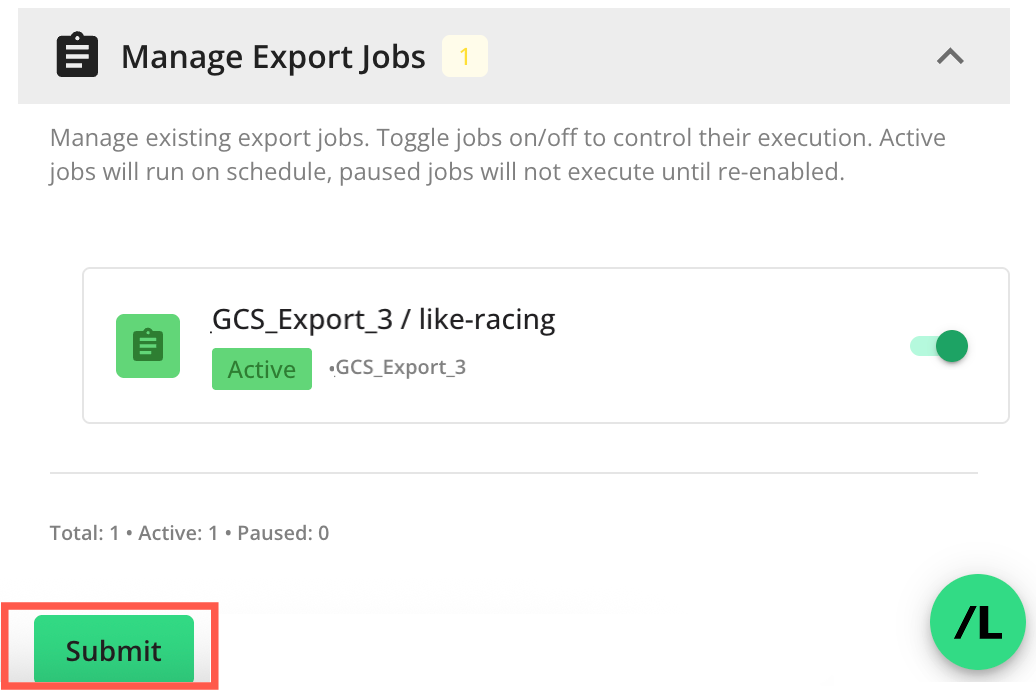
(Optional) To add another flow export job, repeat steps 5–7 above.
Click Submit to save the node settings.
Note
Clicking Submit automatically creates both an export job and a segmentation job (by default). If you want to create only the export job, close the side panel by clicking the side panel's exit (X) instead of Submit once your export configuration is complete.
Run the flow (or create a scheduled flow run) to ensure that all configured flow export jobs execute automatically with a successful flow run. You can monitor job status from the node’s “Manage Export Jobs” section, the flow’s run reports, and the clean room Exports page.
Create a Flow Segmentation Job
Note
Flow segmentation jobs can only be created for flow nodes associated with List Questions.
On the Flows page, click the flow’s More Options (
) menu and select Edit.The Flow Builder page in edit mode displays:
On the node you want to configure for export, select the “i” icon to open the node’s side panel.
Select the Settings tab.
Scroll down to the “Segmentation Configuration” section.
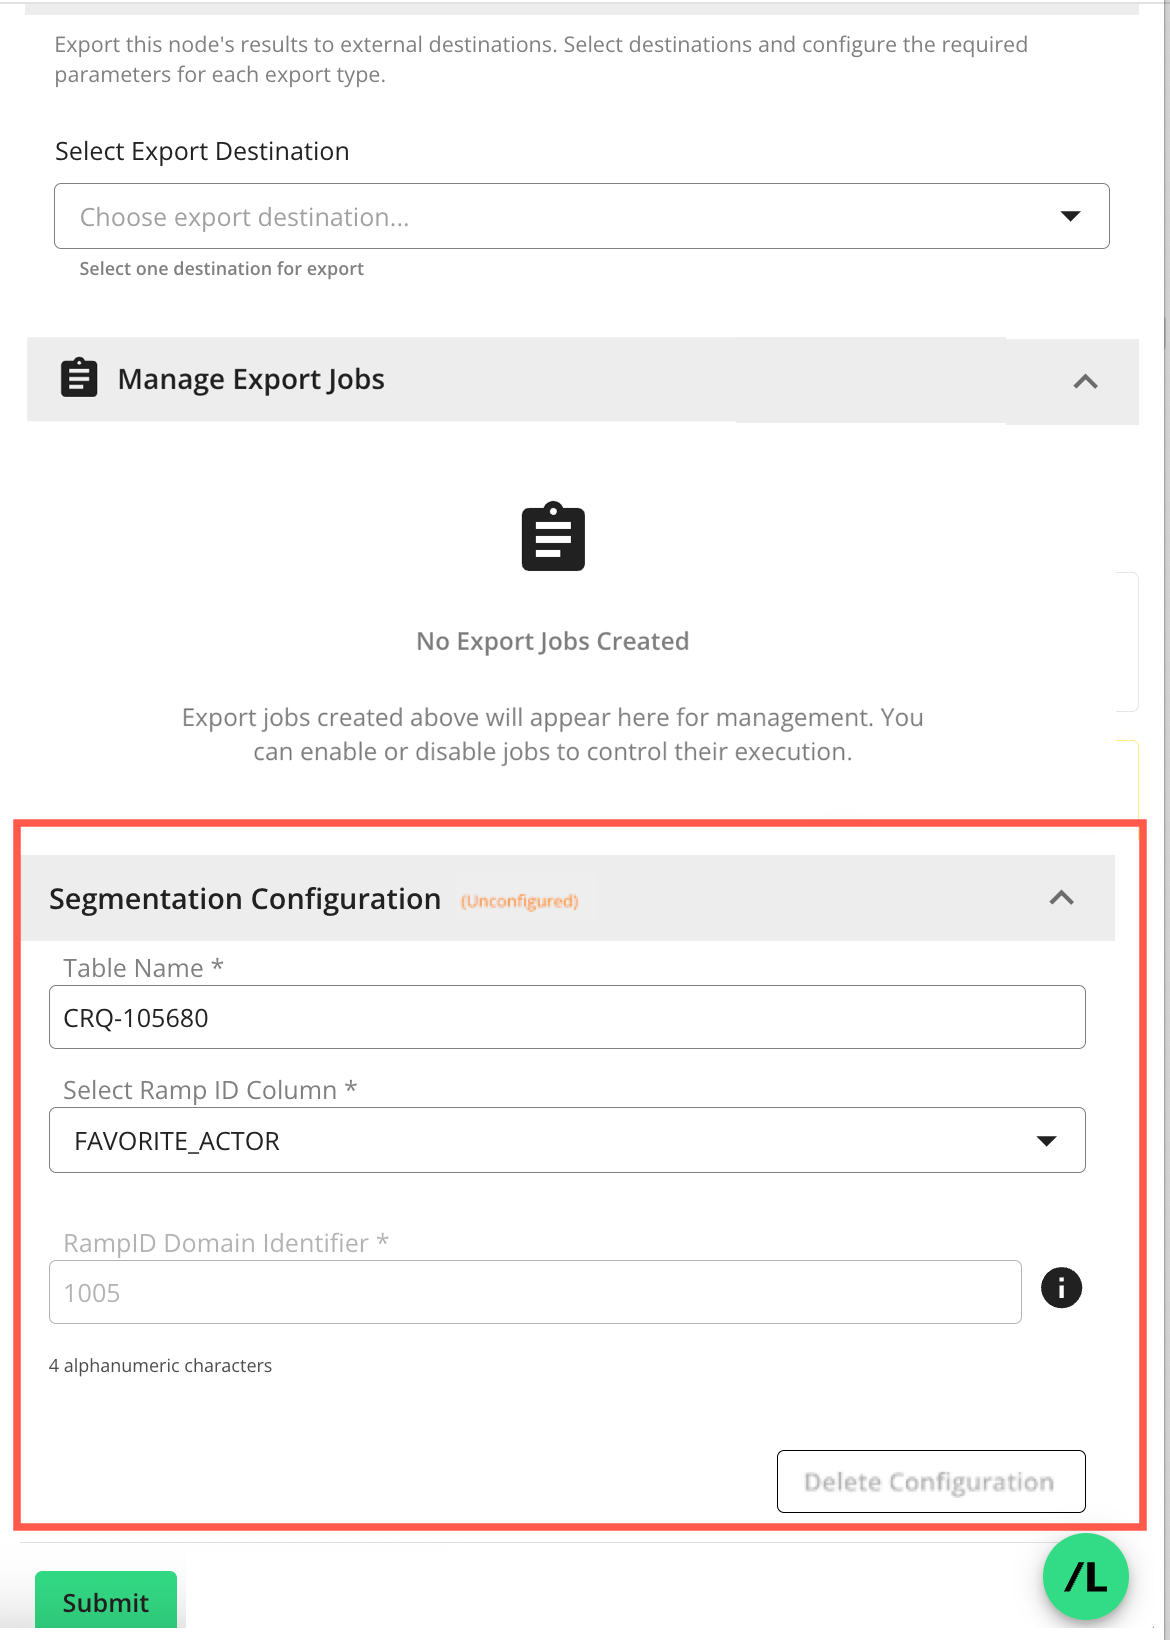
Enter the following information:
Table Name: The name of the table that will be created for the list-output from this node in the Tables and Views page in Connect.
Select Ramp ID Column: Select which column in the node’s output contains the RampID identifiers to use for segmentation. The column you choose is treated as the RampID key for the segmentation table that gets registered in Connect, together with the “RampID Domain Identifier” you set in the next field.
RampID Domain Identifier: The RampID domain identifier used to encode the RampIDs for the associated data connection. For more information, see “Configure the Data Connection”.
Click Submit to create the flow segmentation job. The job will display in the “Manage Export Jobs” section.
Note
Click Delete Configuration to delete the flow segmentation job.
Run the flow (or create a scheduled flow run) to ensure that the configured flow segmentation job executes automatically with a successful flow run. You can monitor job status from the node’s “Manage Export Jobs” section and the flow’s run reports.