Getting Started with Conversions API Feed Distribution for Retail Media Networks
If you’re a retail media network, you may implement Conversions API (CAPI) programs to measure how ad campaigns result in real customer actions for the different brands you’re working with. LiveRamp’s Conversions API integration allows you to connect conversion data to create per-brand feeds and distribute them to destination platforms directly in Connect.
By connecting your conversion data, you can filter your conversion feed based on SKUs and other defined attributes, or split them into brand-specific views, ensuring only data that’s needed for each brand advertiser is sent for measurement to platform partners such as Google or The Trade Desk.
Brand advertisers can then ensure their campaigns optimize only for SKUs relevant to their objectives.
Caution
This program is currently in limited availability. If you don't have access, you can still leverage other LiveRamp Conversions API integrations. For more information, see "Conversions API Programs".
Overall Steps
Connecting and distributing CAPI event feed data involves the following high-level steps:
Prepare the source files for your product mapping and conversion event feed.
If you track online events, contact LiveRamp to enable the Online CAPI connectors in Console.
Create the destination accounts for the CAPI platforms that will receive your data.
Create tables to connect your product mapping and event feed data.
Create a filtered event feed view by aggregating the product mapping and event feed tables.
Dstribute the CAPI event feed view to configured destination accounts.
Prepare Source Files for Ingestion
You must prepare the following source files to send to LiveRamp:
Product Mapping File
A product mapping, or a product taxonomy file, maps product-level data to ad campaign attributes. You can use the table attribute columns to define the rules that determine which products (SKUs), brands, or other attributes are included in each conversion feed.
Your source file must contain the following columns:
Product category
Product brand
Product SKU/ID
If available, we recommend including the additional columns below to easily enable per-campaign filtering and reporting in your conversion feeds:
Campaign ID
Campaign start date
Campaign end date
To download a file template with example values, click here.
Conversion Feed File (for Offline Events)
Your conversion feed data should be formatted based on the guidelines of the universal file for multiple conversions API programs. In most cases, you will only need to use one universal file for all of your conversion programs. See "Situations That Require Additional Files" for more info.
Download the file template by clicking here.
If desired, you can remove any non-required columns that aren't utilized by one of your conversion programs, but you can also leave those columns in the file and not populate them with values.
Transfer your data into the template.
After transferring your data into the file template, delete the second row with the formatting instructions.
Save the file as one of our allowed file types (.csv, .tsv, .psv, or .txt).
See “Using a Universal File for Multiple Conversions API Programs” for more information.
Upload the Files to LiveRamp
Upload conversion data files using LiveRamp’s SFTP server or your SFTP server.
You can also have us pull files from an AWS S3 bucket or GCS bucket. See “Getting Your Data Into LiveRamp” for more information.
Caution
Files for this program cannot be uploaded via Connect. We recommend either uploading via our SFTP server or having us pull files from an S3 bucket.
To upload files using LiveRamp's SFTP: Use the credentials provided by your technical contact once the agreement has been signed and follow the instructions in “Upload a File via LiveRamp's SFTP”.
To upload files using your SFTP: Follow the instructions in “Upload a File via Your SFTP”.
To learn more about the Online Conversions API connectors, see "Online Conversions API Connectors".
Note
For future uploads, you do not have to email LiveRamp to confirm that you have uploaded data assuming headers have not changed or additional columns have not been added.
Enable Online Conversions API Connectors in Console
To connect online conversion data, contact a LiveRamp representative to set up the Online CAPI connectors in Console and link them to your Connect account.
Once configured, LiveRamp will generate an 'Online Event Feed' table on the Tables and Views page. You can then continue with the CAPI feed distribution workflow while the Online CAPI connectors run in the background to supply the online event feed.
To learn more about the Online Conversions API connectors, see "Online Conversions API Connectors".
Create a Conversions API Destination Account
To distribute your conversion data, you must first activate the platform's destination account in Connect. Some of our destinations require that an authorization using OAuth be performed by a user with the appropriate permission level before any distributions can be made to that destination.
All activated CAPI destination accounts will display on the Destination Accounts page with 'CAPI' as the supported data type.
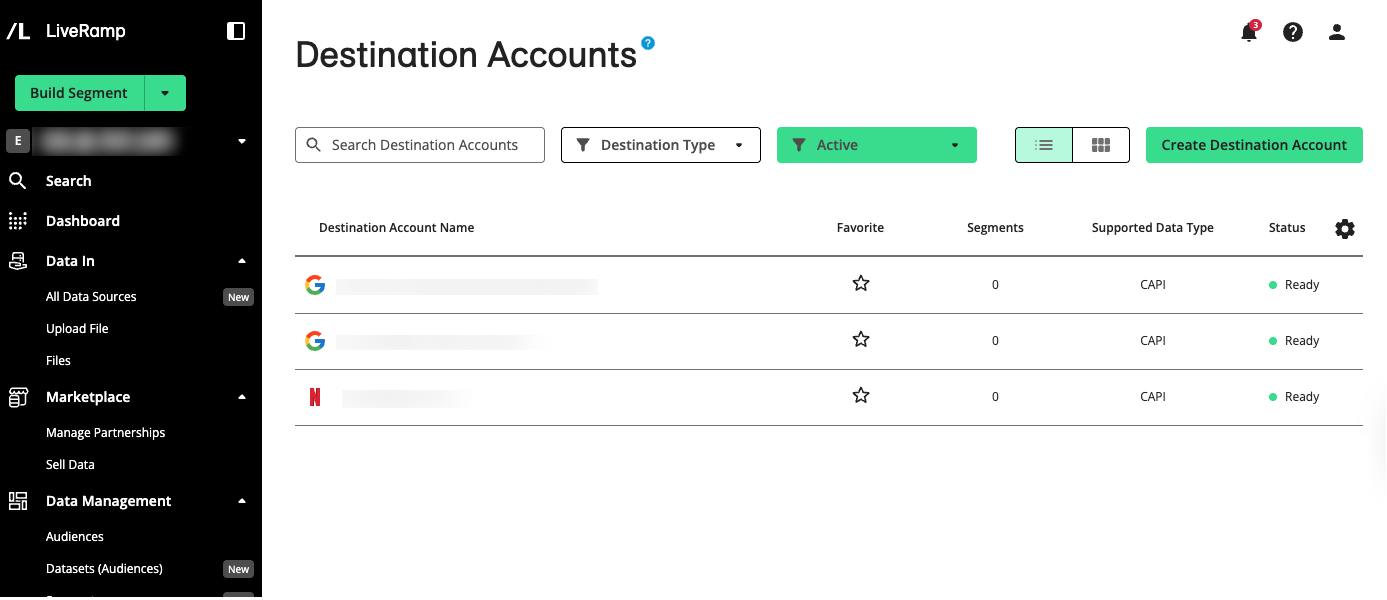
For information on the available CAPI destination accounts and their destination names, see "Conversions API Destinations and Distribution Information".
To activate a CAPI destination account, follow the general instructions in "Activate a New Destination Account”, performing these additional steps:
Remove the end date to leave the end date open-ended.
Under Destination-Specific Settings, enter the required account IDs. For online CAPI destinations, enter the same platform credentials provided in Console for your online CAPI configuration.
If your destination requires an OAuth authentication, select an existing one from the OAuth Connection dropdown list and click Validate OAuth Connection.
To create a new OAuth connection and validate that connection:
From the OAuth Connection dropdown list, select Create New OAuth Connection.
From the new window that opens with the platform's sign-in or login screen, enter your credentials and then click Sign in.
Click Validate OAuth Connection.
In the Destination Account Name field, pick a unique and memorable name for this account. We'll suggest one for you but you can use any name you wish as long as it is less than 50 characters in length.
Tip
Provide Clear Destination Account Names
At times, you may need to create multiple destination accounts for a given destination (i.e. you have multiple ad accounts under Facebook for each brand and so might need multiple destination accounts). Make sure to give each account destination a clear, memorable name so it’s easy to identify and refer to during distribution.
Create a CAPI Product Mapping Table
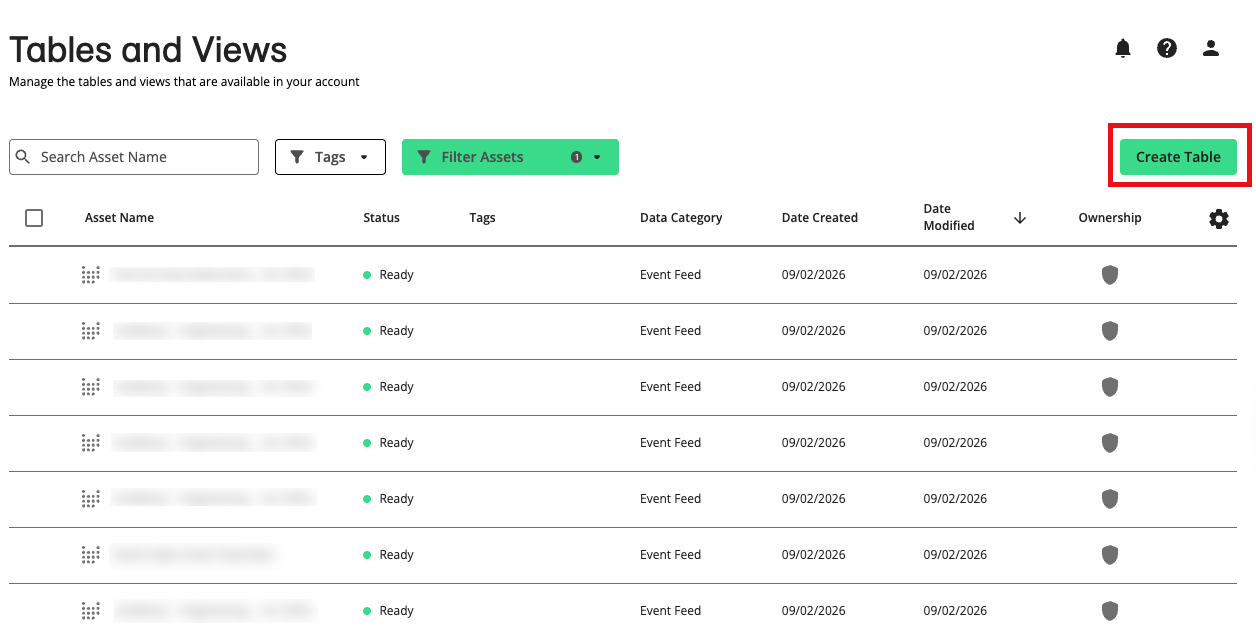
Once your product mapping files have been uploaded, you can connect the data to create a product mapping table in Connect and manage it as a data asset.
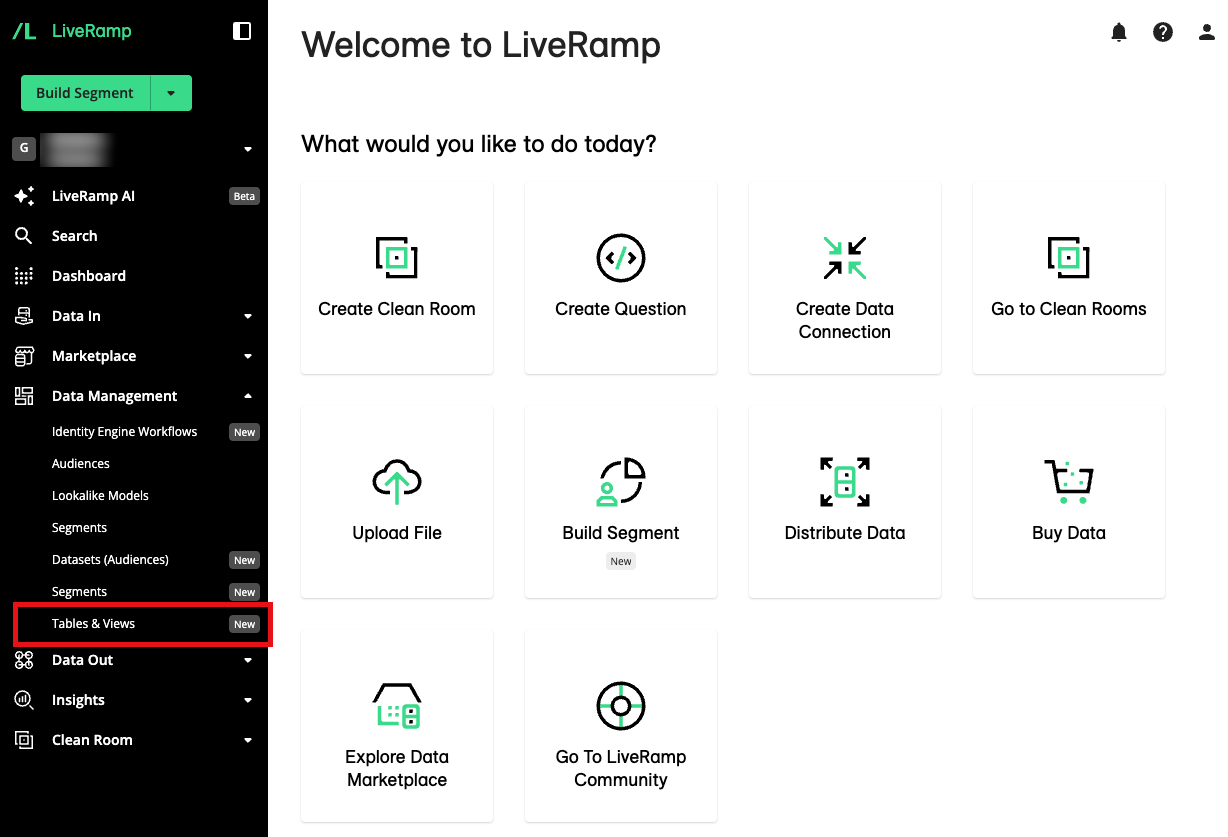
From the navigation pane, select Data Management → Tables and Views.
Click .
From the Select Intended Use step, select Use to Create a CAPI Product Mapping, and then click .
From the Configure Table step, fill out the following required fields:
Configuration name: The name for the specific configuration. This name will display in the Details pane of the asset.
Table name: The name of the asset that will display on the Tables & Views page.
Note
The update method is set to Batch Refresh by default. This method refreshes and upserts data when key columns are found in new files. You will define the key columns on the next step.
GCS Bucket Data Source: The Google Cloud Storage (GCS) bucket where the data source is located.
Source File Path: The file path within the above-specified GCS bucket (for example, “/input/liveramp-test-file.csv”).
The format of the data, which can be CSV or Parquet.
Files to Process: Select which files you want to scan and process from the source location. See the options below:
All Files: Current and future files. Files that have already been processed will be reprocessed.
New Files: Only the newest files. Current files, even if they have not been processed, will be skipped.
None: Only process remaining unprocessed files. New files and files which have already been processed will be skipped.
Click .
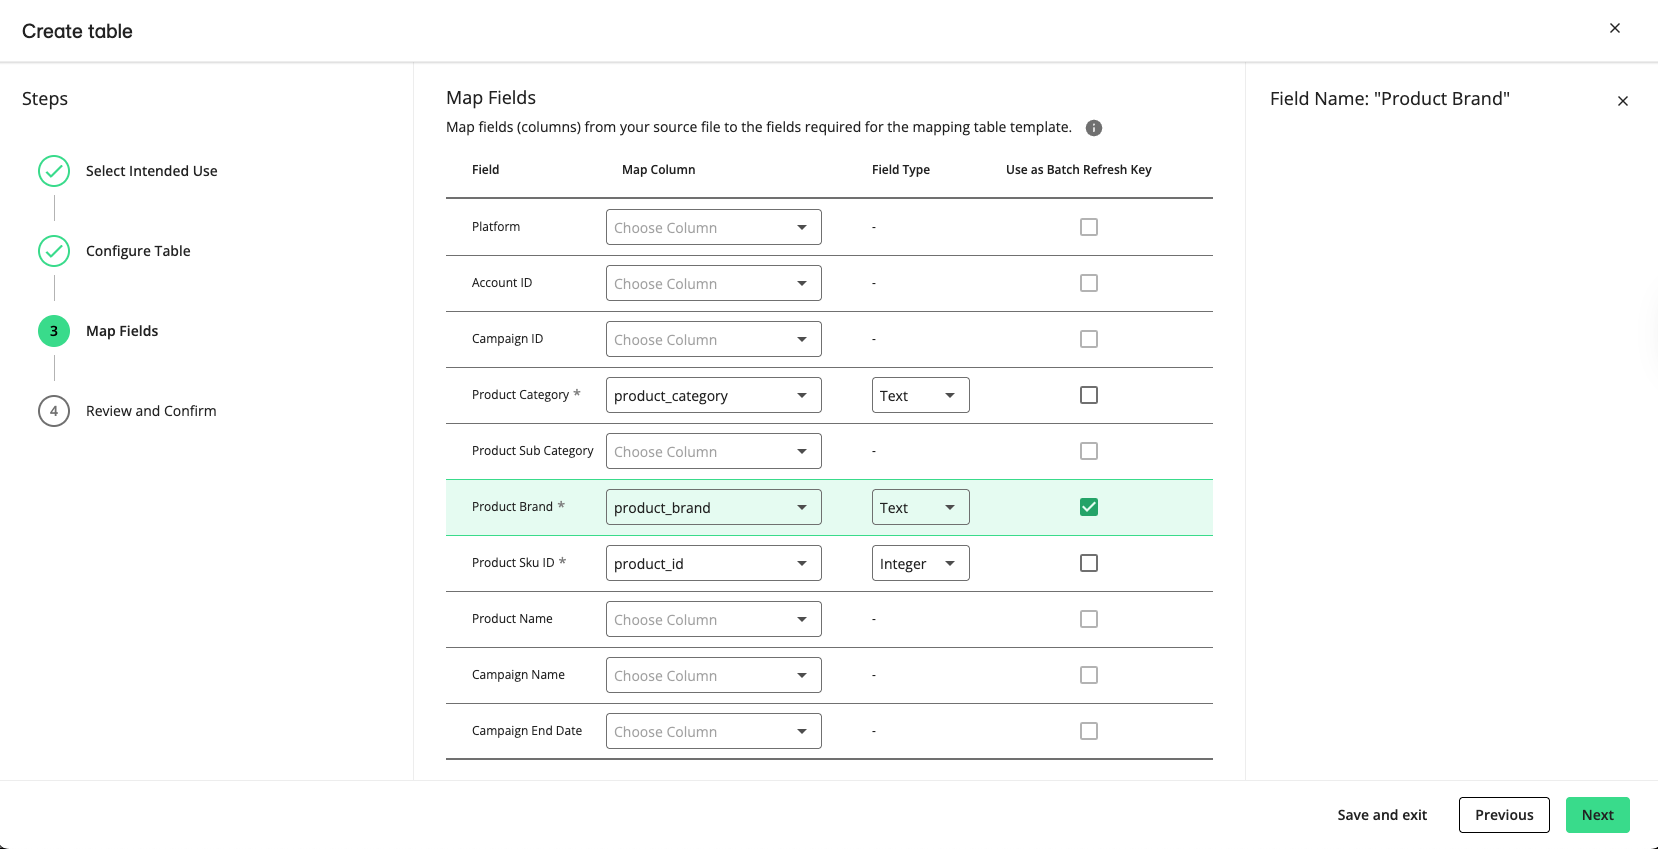
From the Map Fields step, map the columns found in your source file by using the dropdown options under Map Column for each field. You’re required to map the Product Category, Product Brand, and Product SKU ID to the relevant columns in your file before you continue.
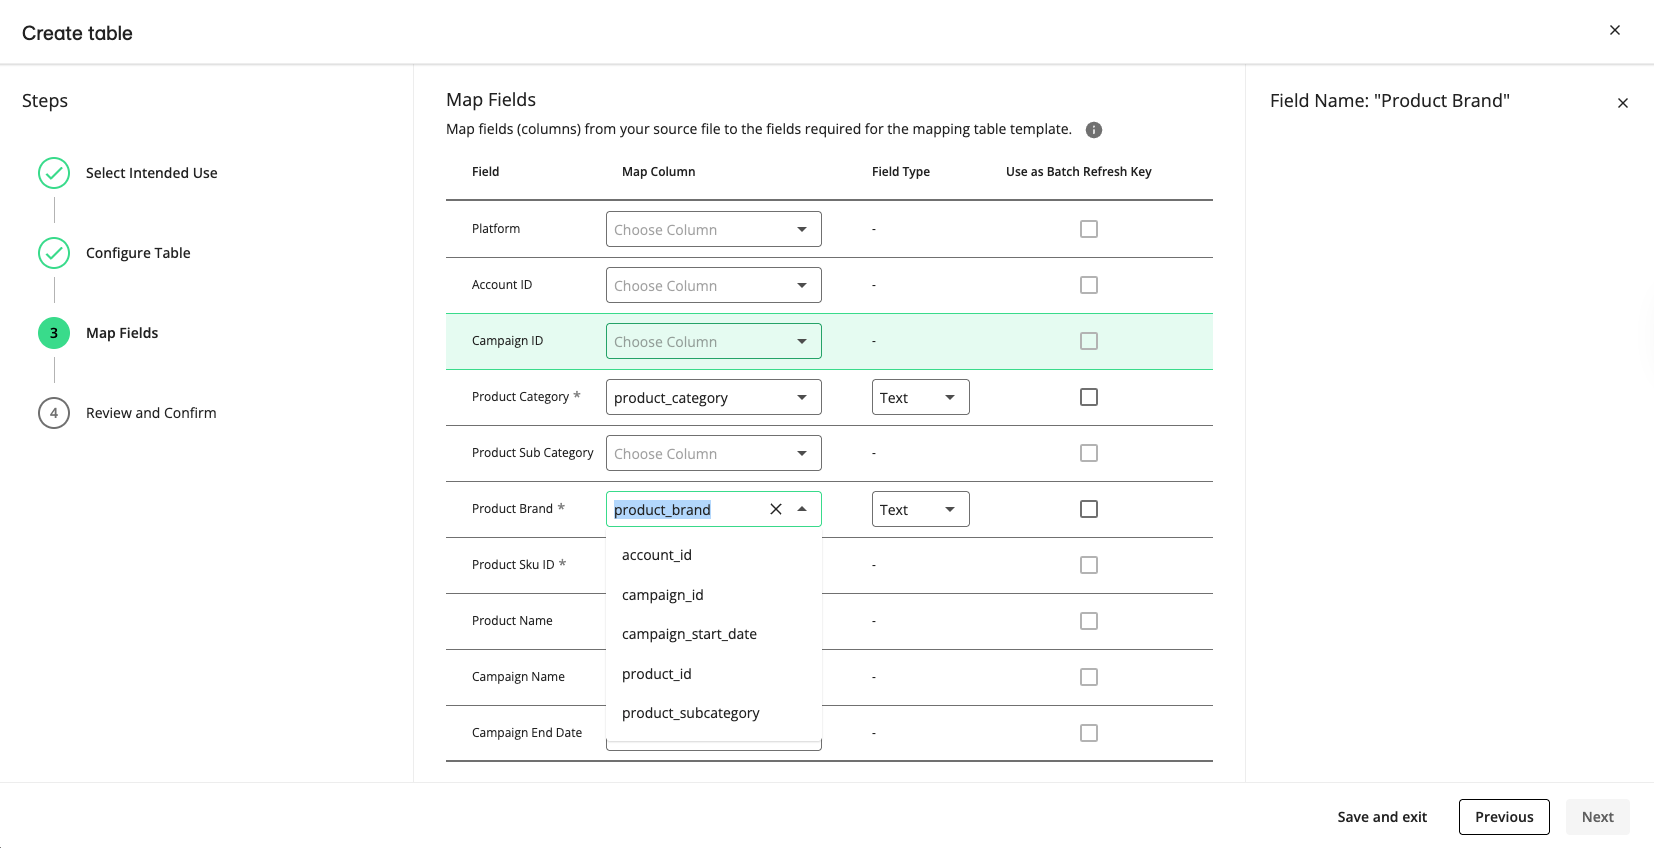
Once the fields have been mapped, select which ones to use as a batch refresh key by checking the "Use as Batch Refresh Key" box. LiveRamp will search for columns marked as keys in new ingested files to determine whether the data should be refreshed.
Click .
Review your table configuration, and then click .
The product mapping table you’ve created displays on the Tables and Views page at the top of the list.
Create an Offline CAPI Event Feed Table
Connect your conversion event data by configuring identity resolution and mapping the included fields to create a CAPI event feed table in Connect.
Warning
Online CAPI event feed tables are automatically generated; you only need to follow these instructions for offline event feed.
From the Tables and Views page, click .
On the Select Intended Use step, select Use to Create a CAPI Event Feed, and click .
From the Configure Table step, fill out the following required fields:
Template: Select the appropriate template for your use case, which will determine the remaining steps in the process:
Matching: Select this template to resolve online or offline identifiers to a RampID.
Transcoding: Select this template to transcode online identifiers to a different partner encoding, in addition to resolving identifiers to RampID.
Configuration name: The name for the configuration.
Table name: The name of the asset that will display on the Tables and Views page.
GCS Bucket Data Source: The Google Cloud Storage (GCS) bucket where the data source is located.
Source File Path: The file path within the above-specified GCS bucket (for example, “/input/liveramp-test-file.csv”).
The format of the data, which can be CSV or Parquet.
Files to Process: Select which files you want to scan and process from the source location.
All Files: Current and future files. Files which have already been processed will be reprocessed
New Files: Only the newest files added since the time of the latest process. Current files, even if they have not been processed, will be skipped.
None: Only process remaining unprocessed files. New files and files which have already been processed will be skipped.
Click .
From the Configure Identity Resolution step, define the identifiers in your input file that you’d like to match or transcode on. The configuration in this step differs based on the template you selected in the previous step.
Note
If you are working with Identity Engine, you must select one identifier type to create Enterprise IDs from.
If you selected the “Matching” template:
Identifier Type 1: Select the type of identifier available in your input file.
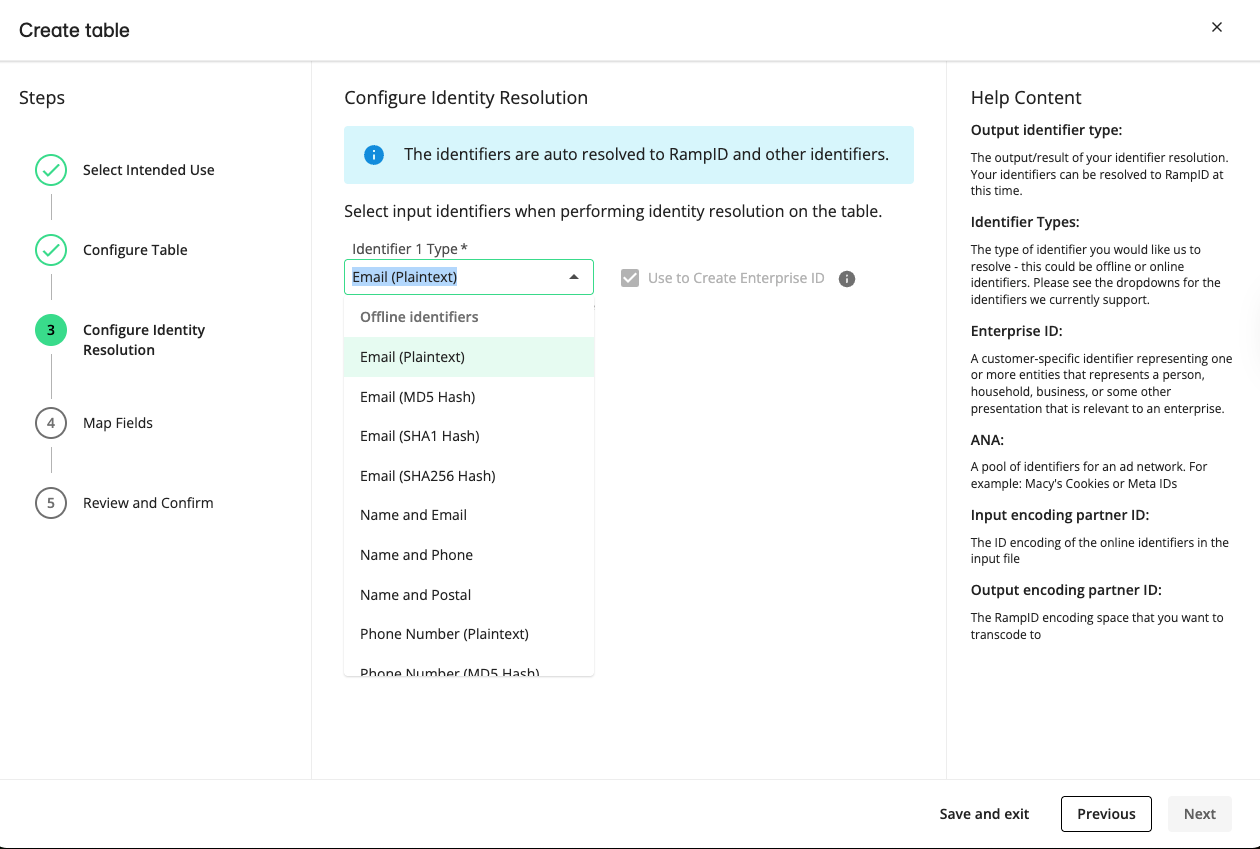
Identifier 1 Field: Select the column in your file that contains the selected identifier type.

To resolve multiple identifier types, click and repeat the steps above.
If you selected the “Transcoding” template:
Identifier Type 1: Select the type of online identifier in your input file you want to transcode.
Identifier 1 Field: Select the column in your file that contains the selected identifier type.
Ad Network Account ID (ANA): Select the identity space you want to map to these identifiers to from the list of the identity spaces associated with your account.
Input Encoding Partner ID: The 4-digit encoding ID of your organization that appears after the first two letters of your RampIDs.
Output Encoding Partner ID: The 4-digit encoding ID of the LiveRamp partner that you want to transcode to.
Tip
Encoding id is a 4-digit number unique to the partner using them that appears as part of each RampID’s value after the two-character prefix.
For example, in the RampID "XY1005wXyWPB1SgpMUKIpzA0I3UaLEz-2lg0wFAr1PWK7FMhs", the partner encoding is “1005”.
To resolve multiple identifier types, click and repeat the steps above.
Click .
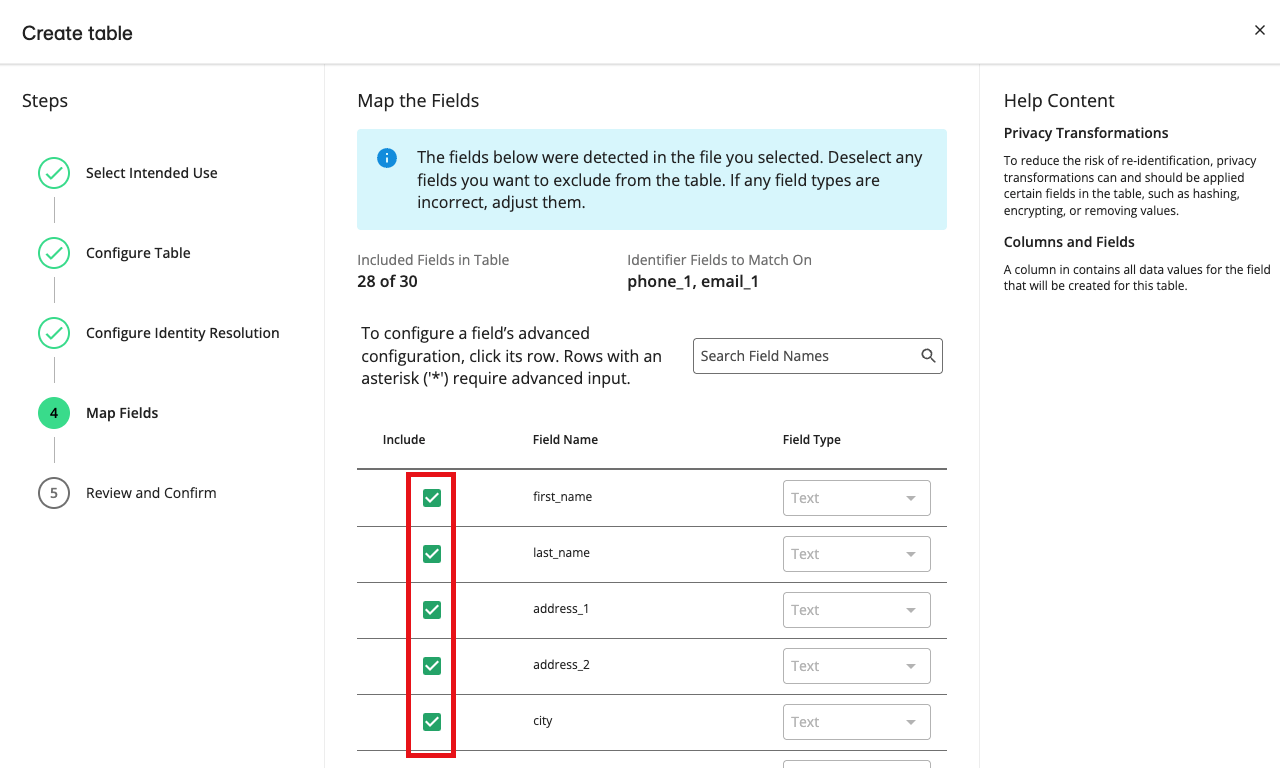
In the Map Fields step, perform the following actions:
Note
If you specified one or more identifier fields in the Configure Identity Resolution step, those fields will be excluded by default and cannot be included unless you apply a privacy transformation to those fields.
If a field has an asterisk at the beginning of its row, you must configure certain advanced settings by clicking on the row and then completing the applicable steps below. Once the required configurations have been completed, the asterisk will no longer display.
Include the field: To include a field in the table, make sure the “Include” check box is checked for that field. If needed, you can use the search bar to find the desired field.
Adjust the field type: For each field, confirm or adjust the field type that was detected from the file.
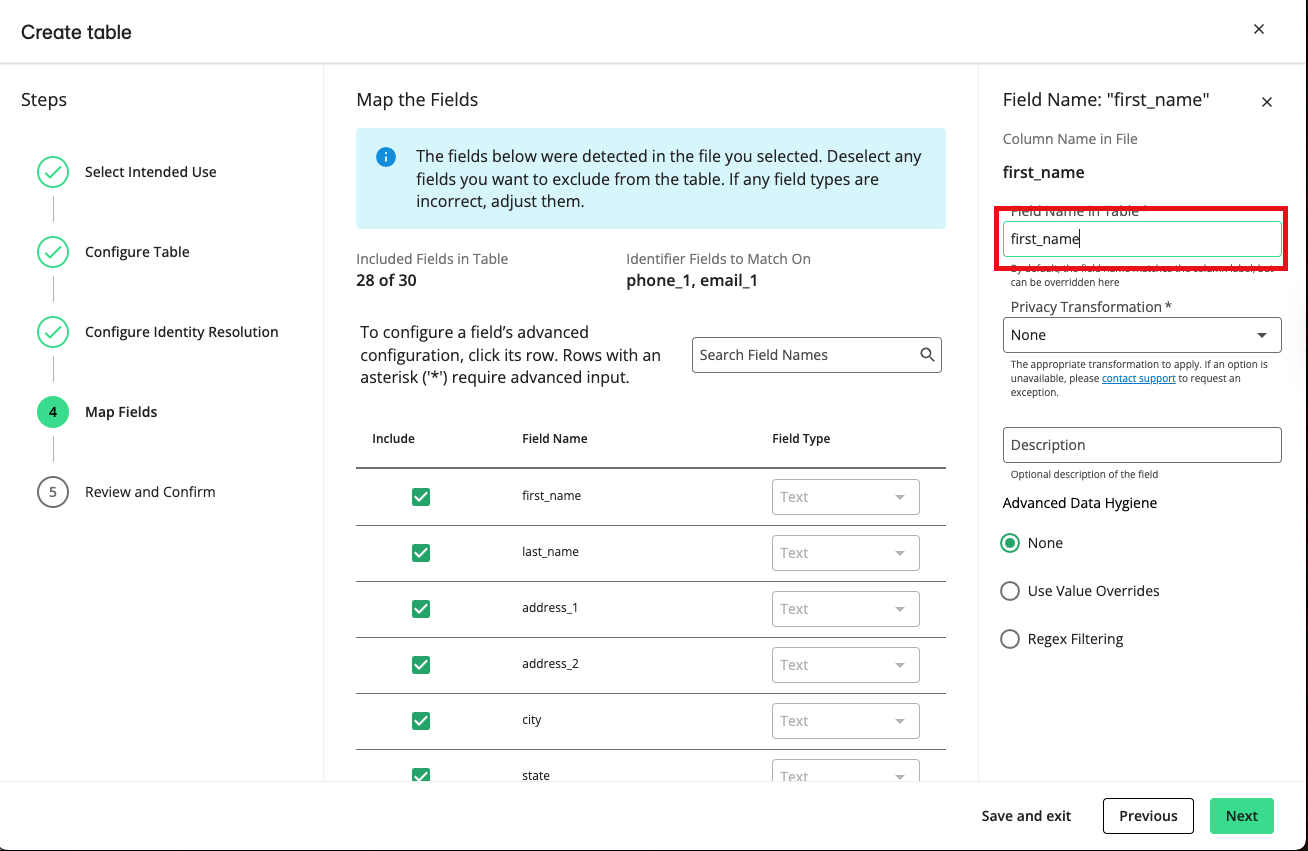
Rename the field: If necessary, click the field’s row and then enter a new field name in the FIeld Name in Table field.
Specify the timestamp format: For any date or time-related fields in your file, you must click the field’s row and then specify the timestamp format to use.
Apply privacy transformations: For any identifier fields that you’re including in the table, click the field’s row and then select a privacy transformation from the Privacy Transformation dropdown (MD5 Hash - No Salt, MD5 Hash - LiveRamp Default Salt, or MD5 Hash - Custom Salt).
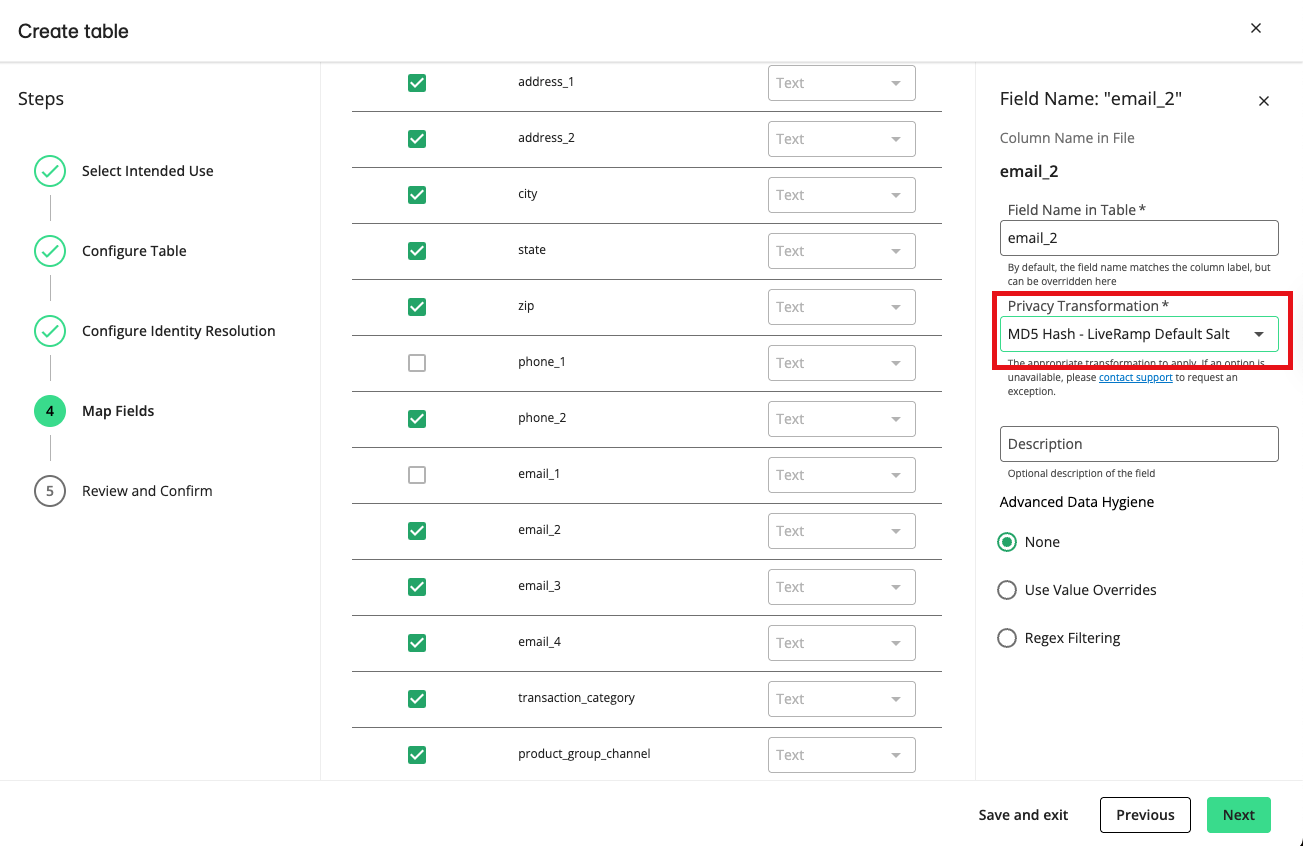
Add a field description: To add a field description, click the field’s row and enter a description in the Description field.
Click .
Review your table configuration, and click .
The table you’ve created displays on the Tables and Views page at the top of the list. You can view its details by double-clicking on the row to open the full detail page. To learn more, see "View Details for Tables and Views".
You can immediately distribute CAPI event feed tables to your platform partners as is, without attribution filtering applied. If you want to do this, skip the next section.
Note
When you distribute a CAPI event feed table, LiveRamp automatically creates an unfiltered CAPI event feed view based on that table.
Create a Filtered CAPI Event Feed View
You can create multiple views, each with different filtering rules applied, to determine how events are routed based on the specified attributes such as SKU, brands, product category, and others.
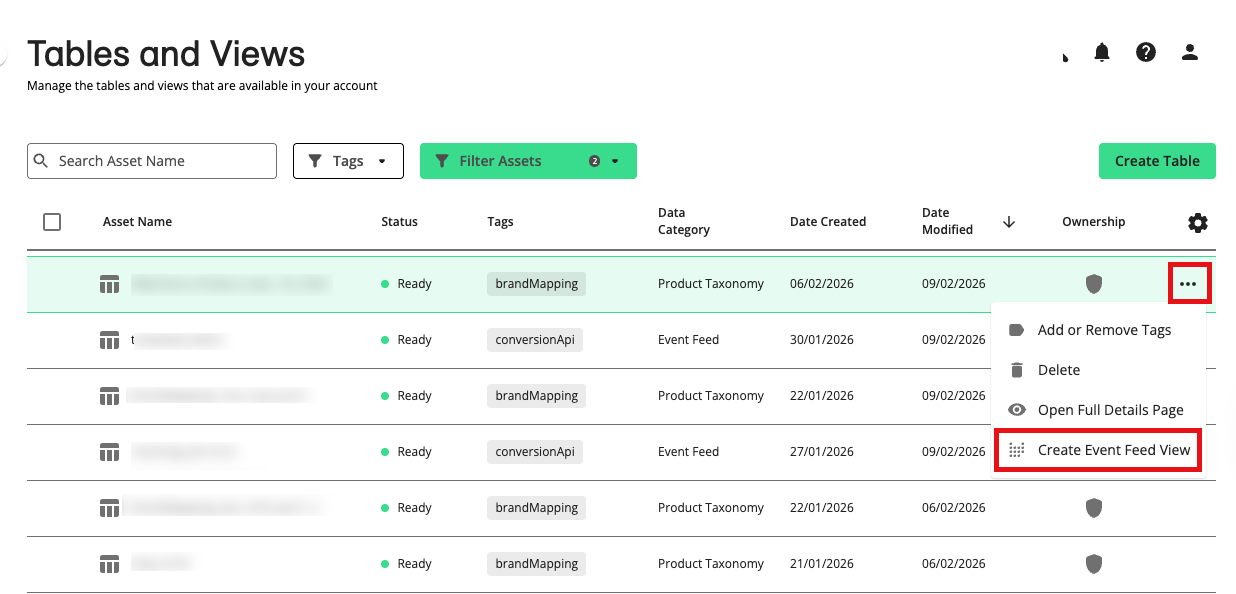
On the Tables and Views page, click the More Options menu (the three dots) of a CAPI product mapping table or a CAPI event feed table, and select ‘Create Event Feed View’.
Select a product mapping table or event feed view you want to aggregate against.
If you selected an event feed table in the previous step, only product mapping tables will display, and vice versa.
Click .
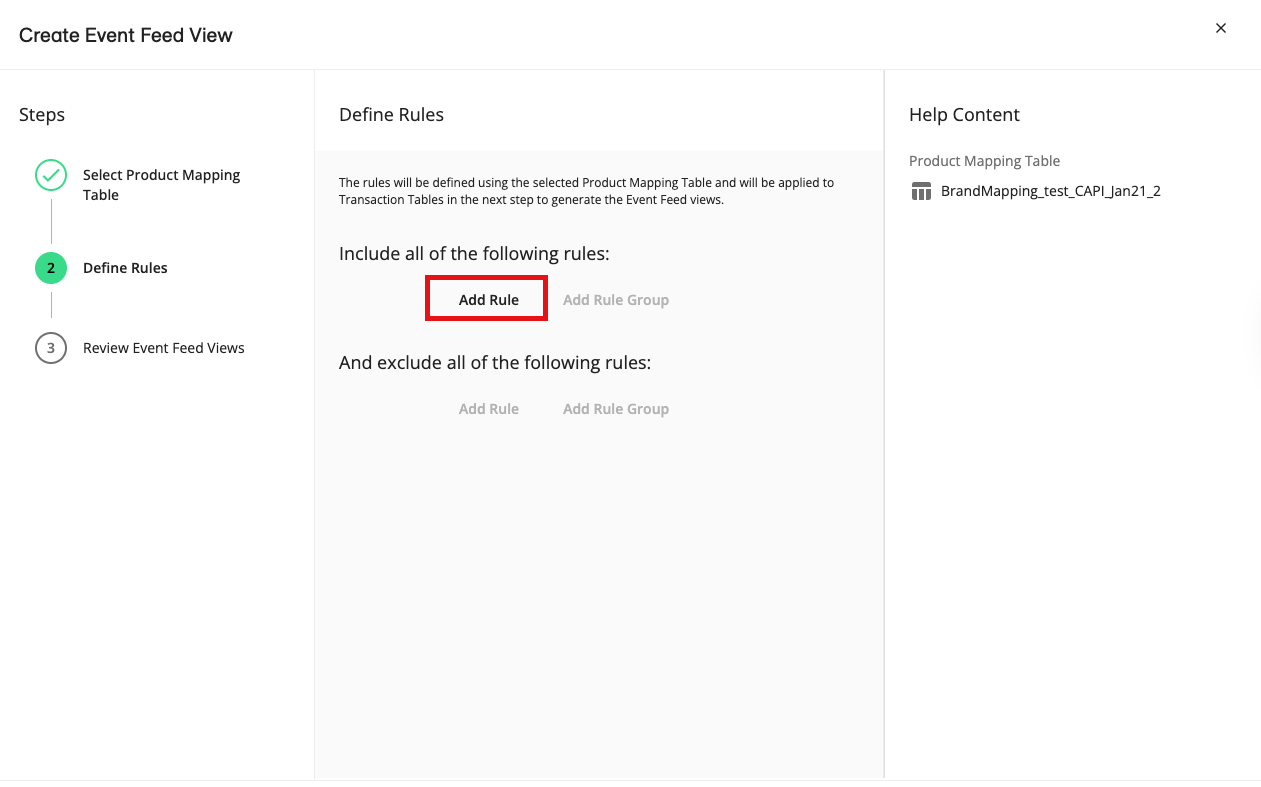
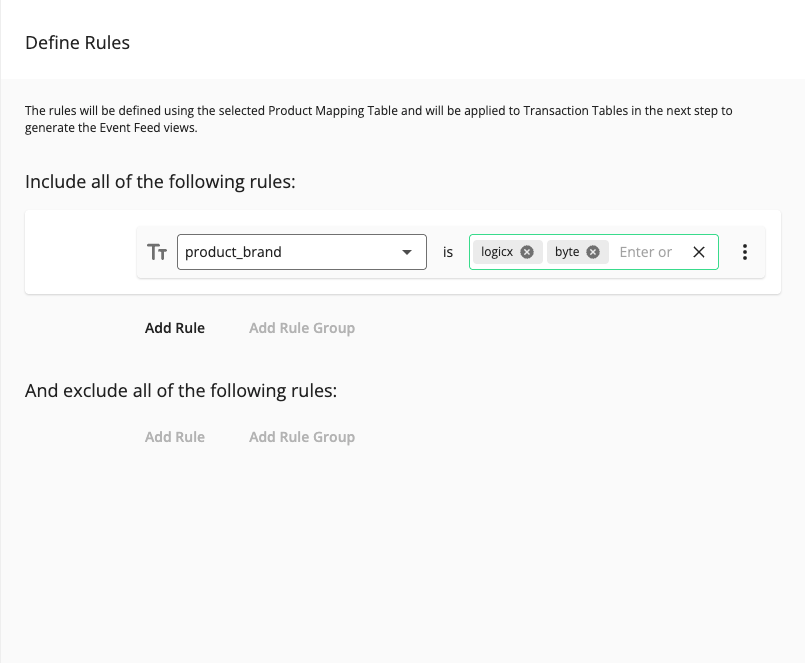
From the Define Rules step, apply filtering based on the attributes (columns) of the selected CAPI product mapping table.
Caution
You are required to set a date range for online event feeds.
Only the ‘IS’ operator is supported for the filters. This means you can only create rules where the columns’ values exactly match what you set.
From the “Include all of the following rules” area:
Click .
From the column dropdown, select the column you want to set a filter to.
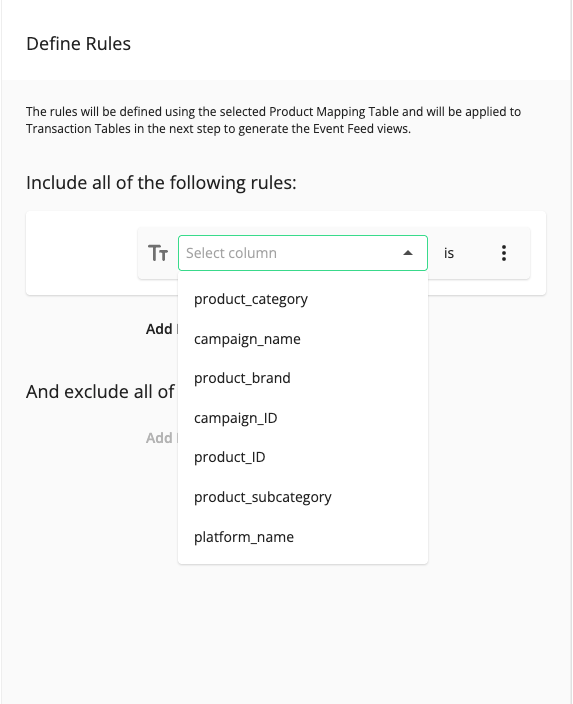
In the value field, enter or select the values to filter on (entered values can contain spaces).
Note
To create views split by brand, you must include a rule against the ‘brand’ column and specify the brands you want to create individual views for.
You will have the option to split the views per brand in the next step.
To add multiple rules joined by the 'And' conjunction, click and repeat the steps above until you have added all the rules you need.
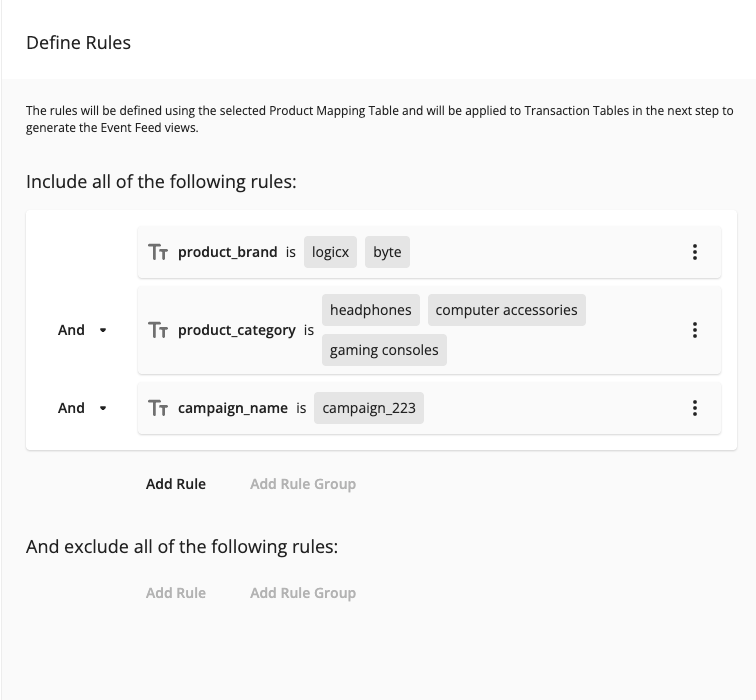
Click .
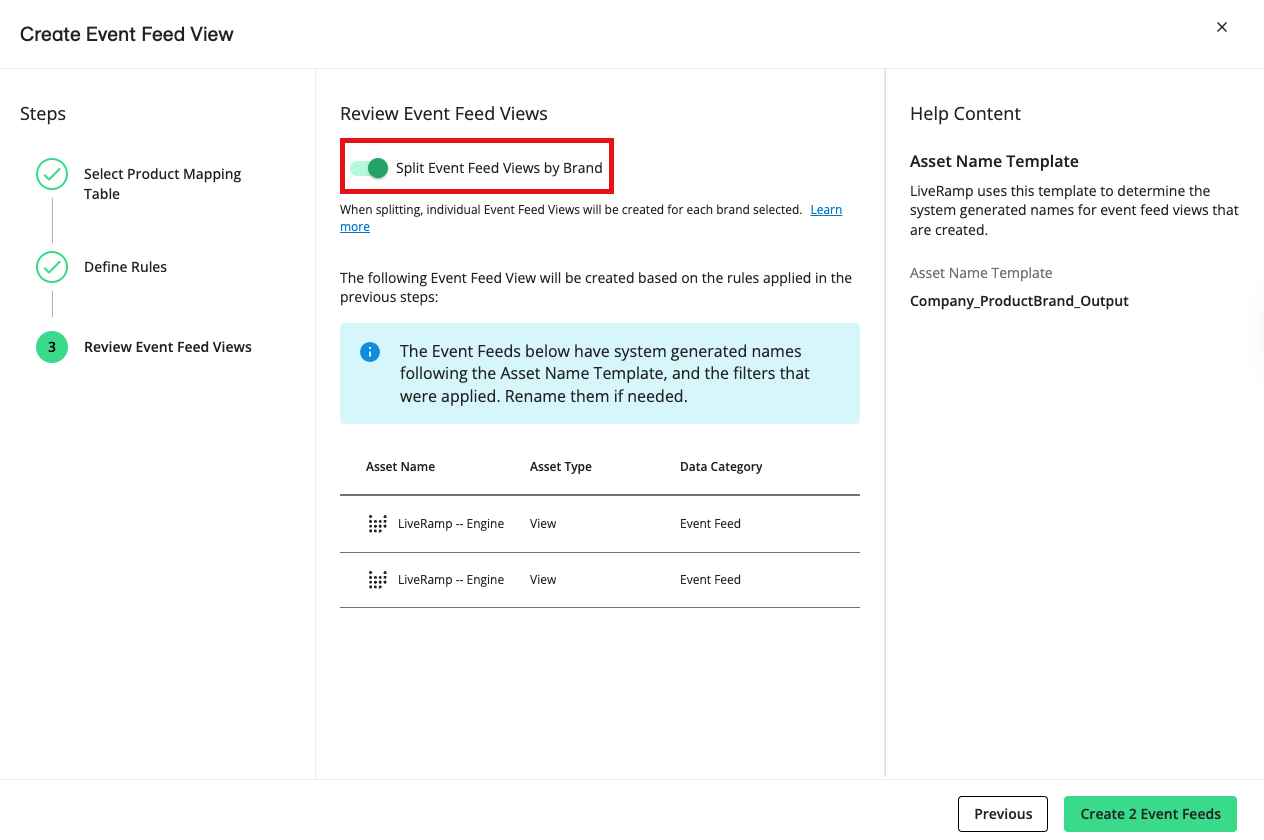
From the Review Event Feed Views step, you can perform the following actions:
If you have included a rule for the brand column, toggle ‘Split Event Feed Views by Brand’ to create an individual view for each brand. If not enabled, one consolidated view will be generated.
Change the view’s auto-generated name by clicking its More Options menu and selecting ‘Rename’.
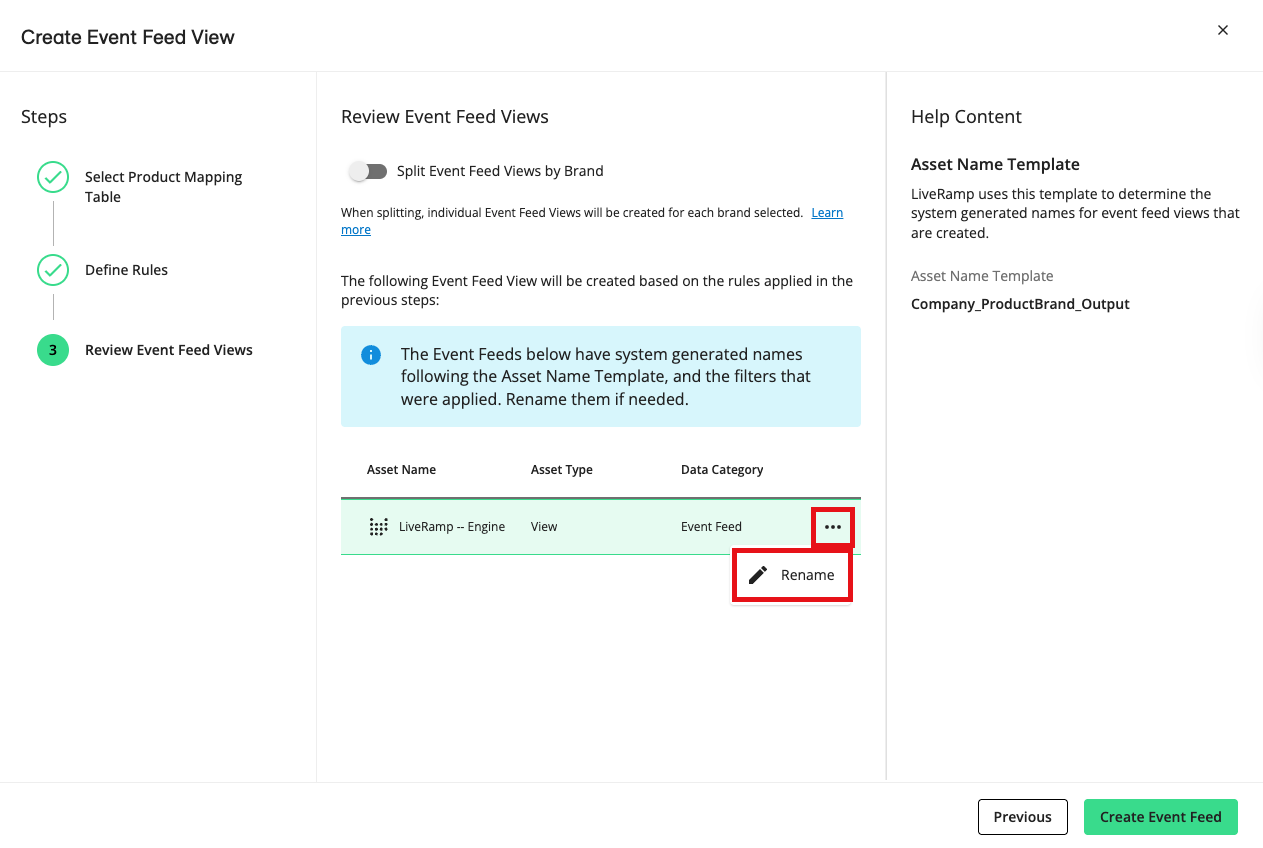
Click .
Once the CAPI event feed view is created successfully, a pop-up displays that gives you options to create another event feed or distribute the event feed you’ve just created. To learn more about distributing event feed views, see the next section.
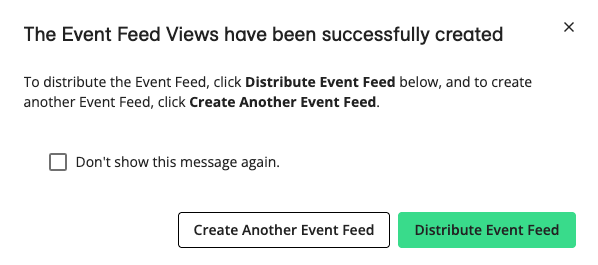
To return to the Tables and Views page, click the X button on the pop-up.
Distribute CAPI Event Feeds
Once you have created the desired CAPI destination account, you can start the distribution flow in several ways:
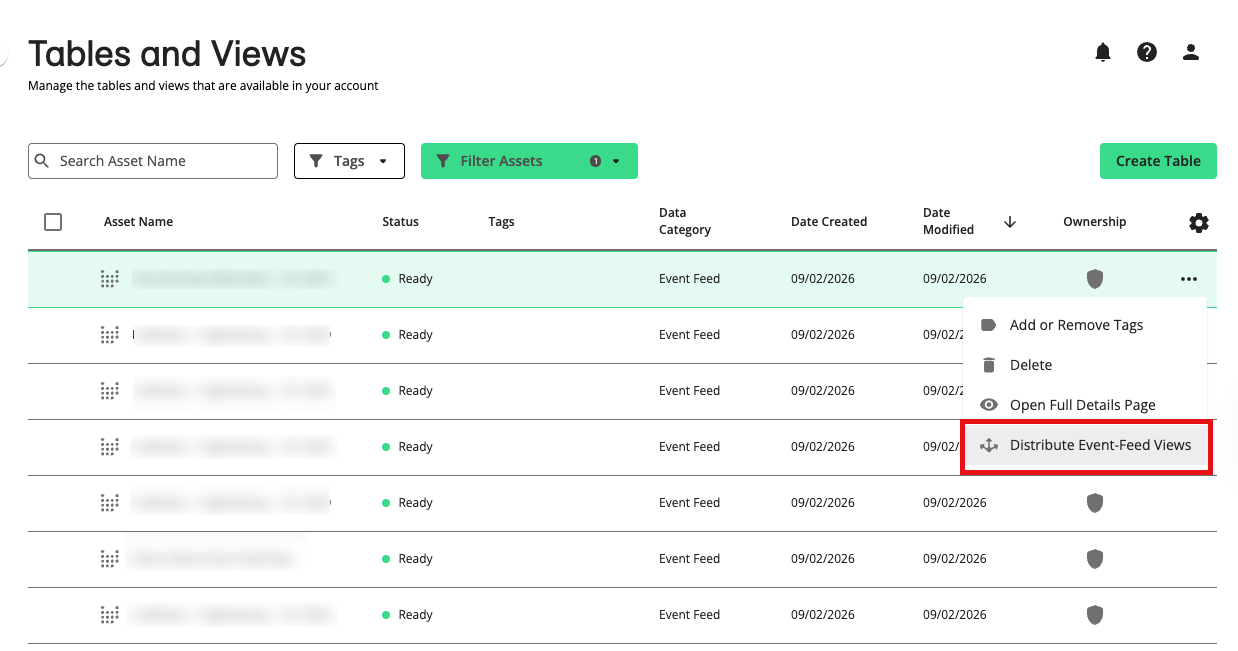
On the Tables and Views page, click the More Options (the three dots) menu of a CAPI event feed asset and select 'Distribute Event Feed Views'.
On the Tables and Views page, check the box of the CAPI event feed asset that appears to the left side of the row for the table, and click Distribute Event Feed Views.

Right after creating a CAPI event feed view, click on the pop-up that displays.
From the Select Event Feed Views step, select any additional view you want to distribute. Click .
From the Select Destinations step, select one or more CAPI destination accounts you want to distribute the views to.
Click .
Once you've distributed your data, it typically takes 1-3 days for the data to arrive at the destination platform. Once delivered, your platform partner can then create an attribution report that can be viewed on their ad manager platforms or send the report to you directly.
For online event feeds, all distributed views and their routing rules will display on the linked CAPI configuration settings page in Console.