Navigating Connect
The Connect application contains a number of different features that allow you to navigate to different areas of the application. For information on these features, see the sections below.
The Navigation Pane
The left side of the Connect interface contains the navigation menu with selections that appear in every part of the application. Some of these menu selections appear under headings (such as "Data In") that can be collapsed or expanded by clicking on the expand/collapse next to the heading (you can also use the keyboard shortcut "[" to expand and collapse the menu.
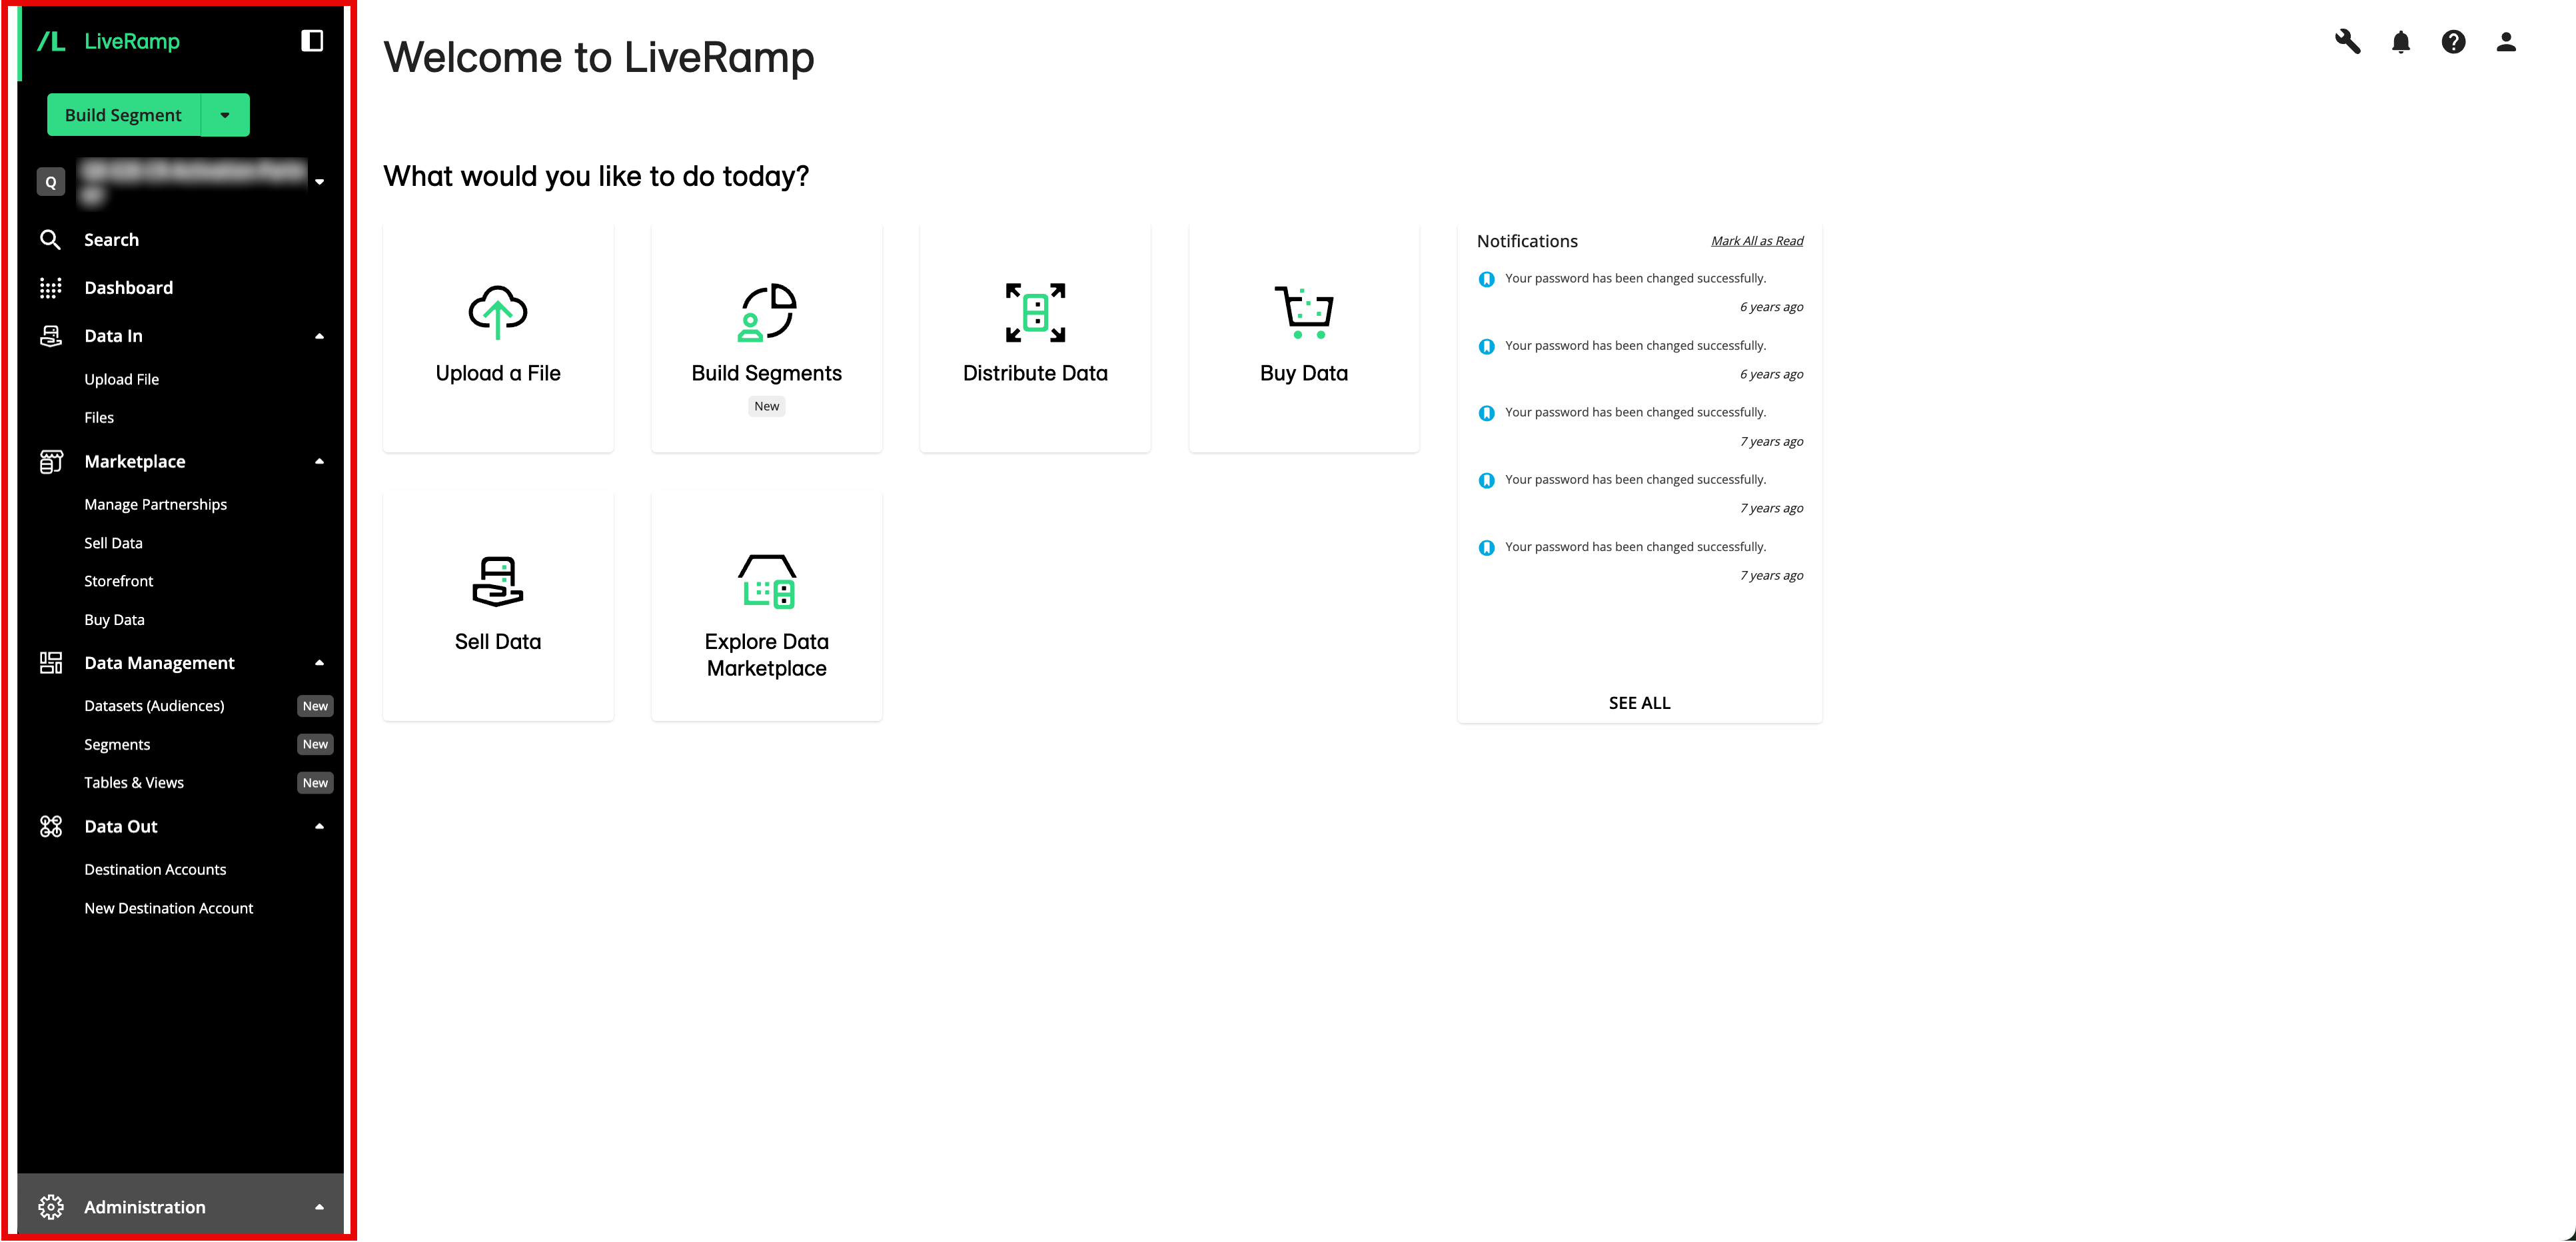
The navigation pane also includes a quick-actions menu, an account switcher, and a global search (for more information, see the sections below).
To navigate to the UI page associated with a menu selection, click the menu selection (for more information on the Connect UI pages, see "Understanding the Connect UI Pages").
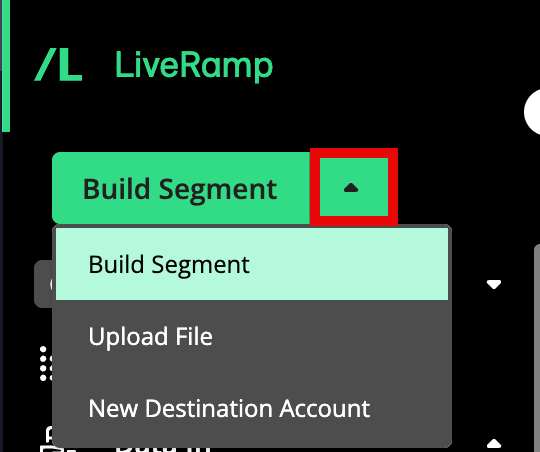
Quick Actions Menu
The Quick Actions dropdown at the top of the navigation menu lets you quickly perform common actions (such as building a segment, uploading a file, or creating a new destination account). The menu also remembers the last action you used.
Account Switcher
If you have multiple Connect accounts, you can use the account switcher to switch between those accounts by clicking on the caret to the right of the current account name.
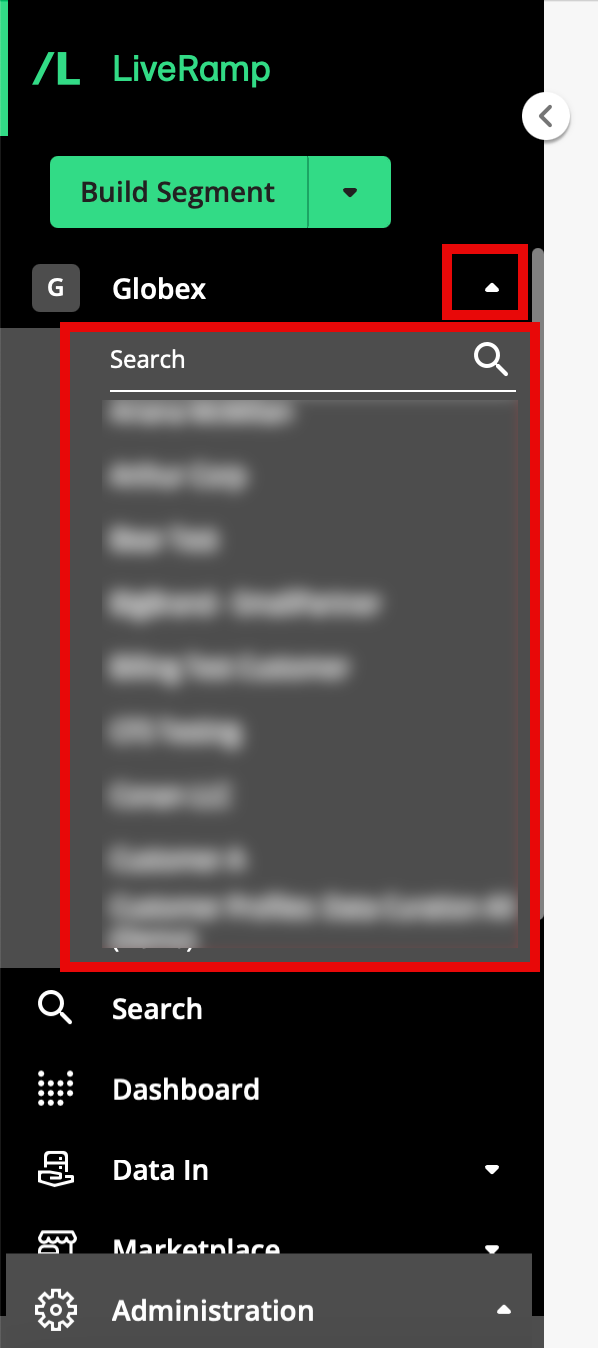
From the list of accounts that appears, you can either scroll or use the search bar to find the desired account, and then click the account name to switch to that account.
Global Search
Beneath the account switcher is a Search menu selection that opens the smart search, where you can view a list of your recently updated objects and data assets (such as Connect audiences, destination accounts, and segments) and search for those objects or data assets.
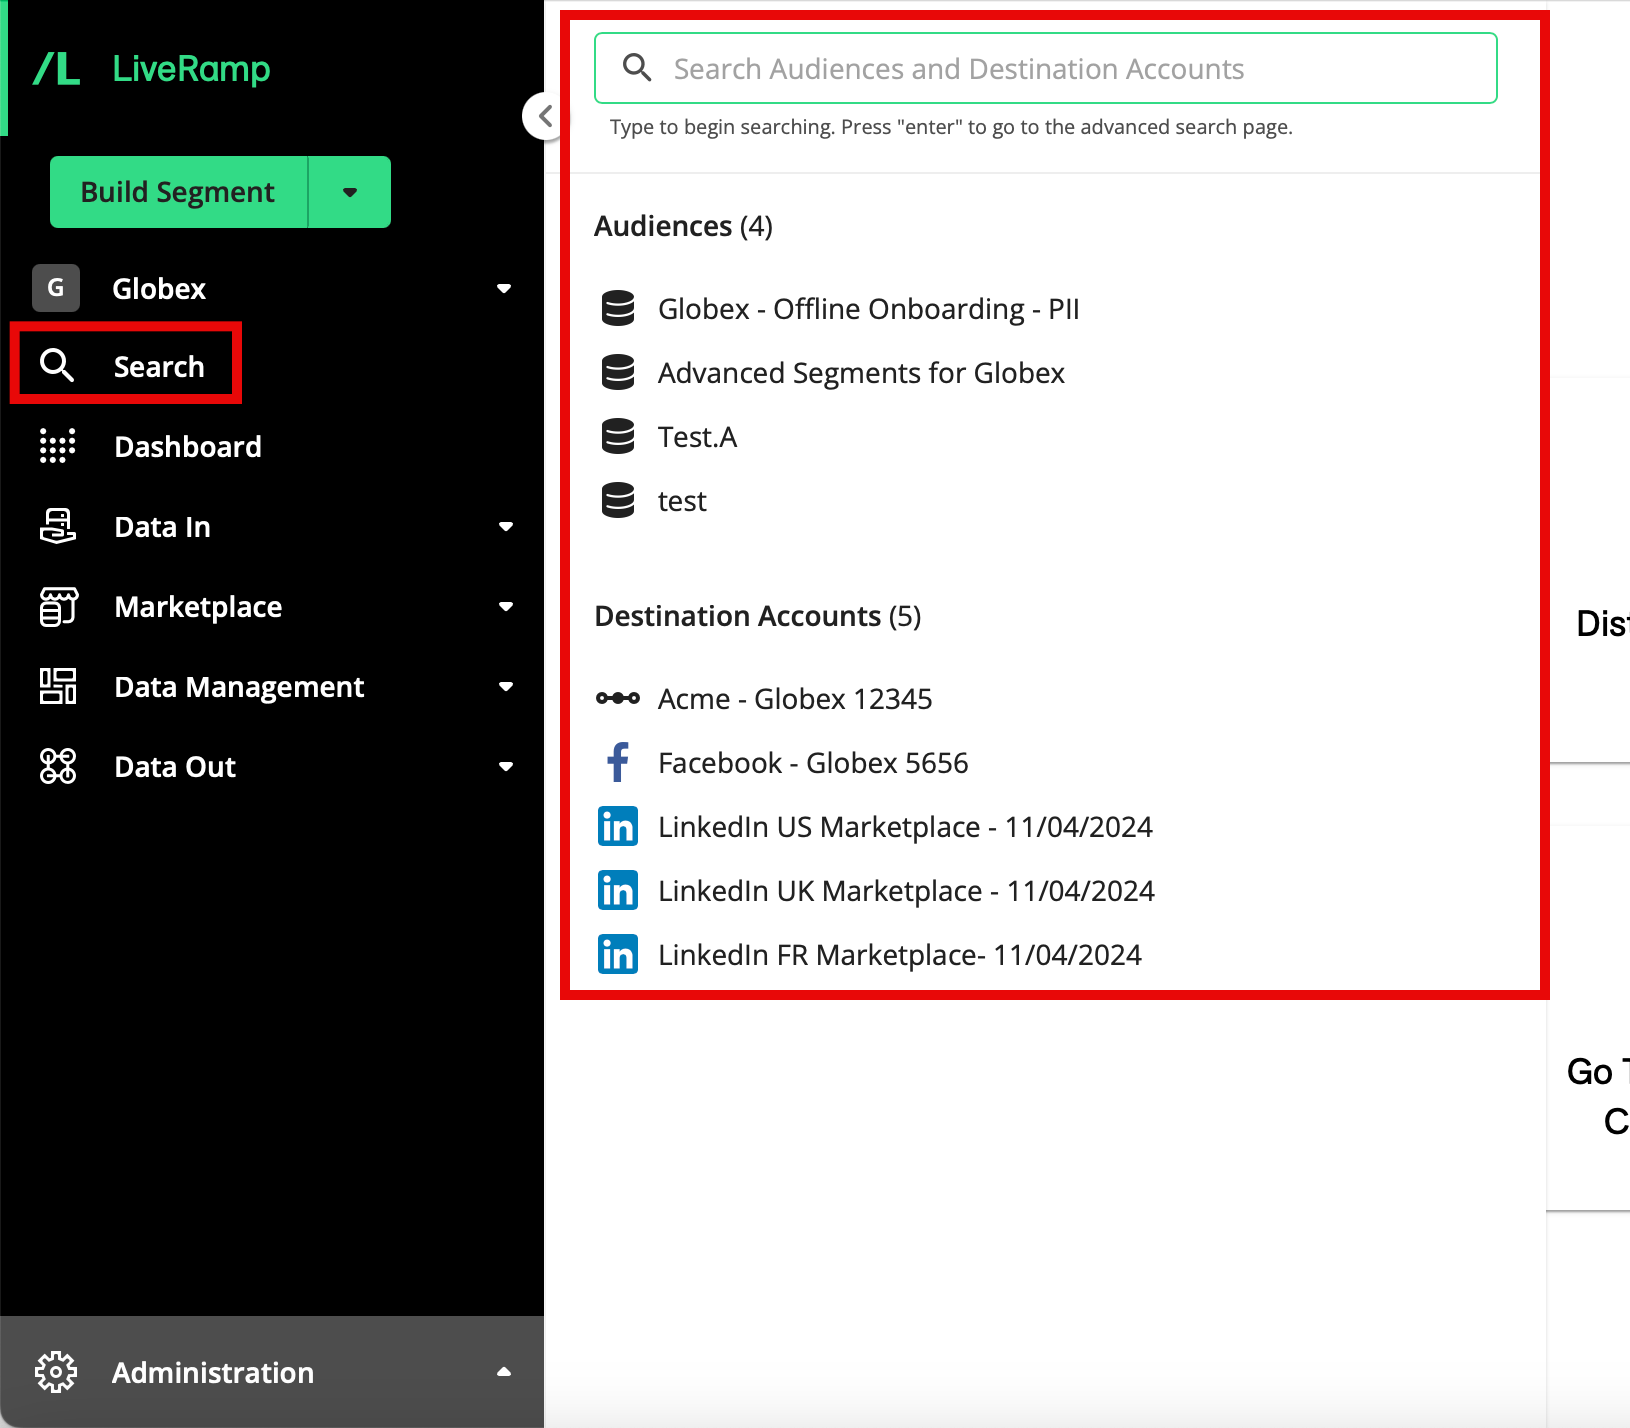
For more information on using the global search, see "Use the Global Search".
Page Header Controls
In the top right of each page, several page header controls appear:
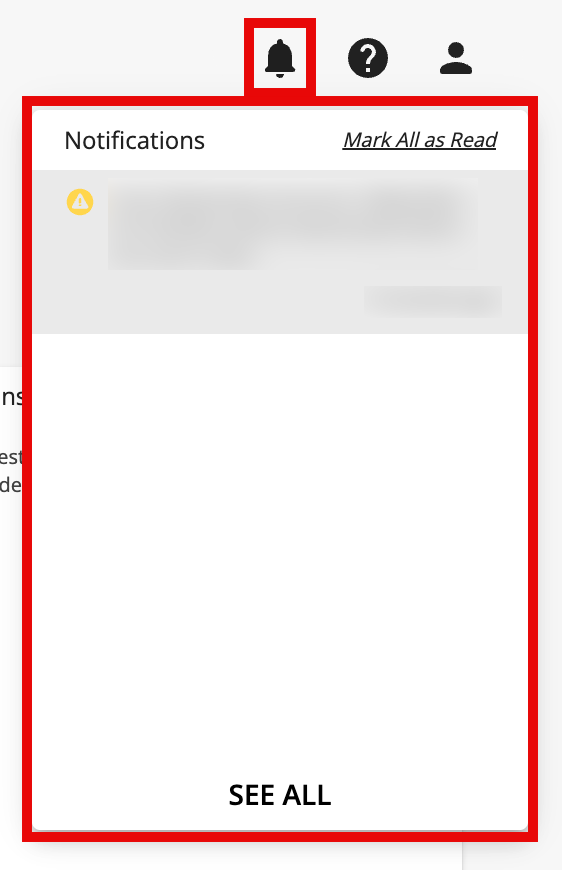
Notifications icon: Click the notification icon to open the notification pane (for more information, see “Viewing and Managing Notifications”). The number of unread notifications is displayed as a number in red next to the Notifications icon.
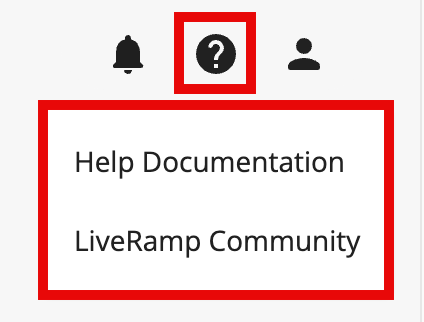
Help icon: Click the help icon to access menu selections that will take you to the Connect documentation site and the LiveRamp Community Portal (for more information on the portal, see "Using the LiveRamp Community Portal").
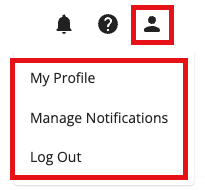
Profile icon: Click the profile icon to access menu selections that will take you to My Profile, Manage Notifications page, or log you out.
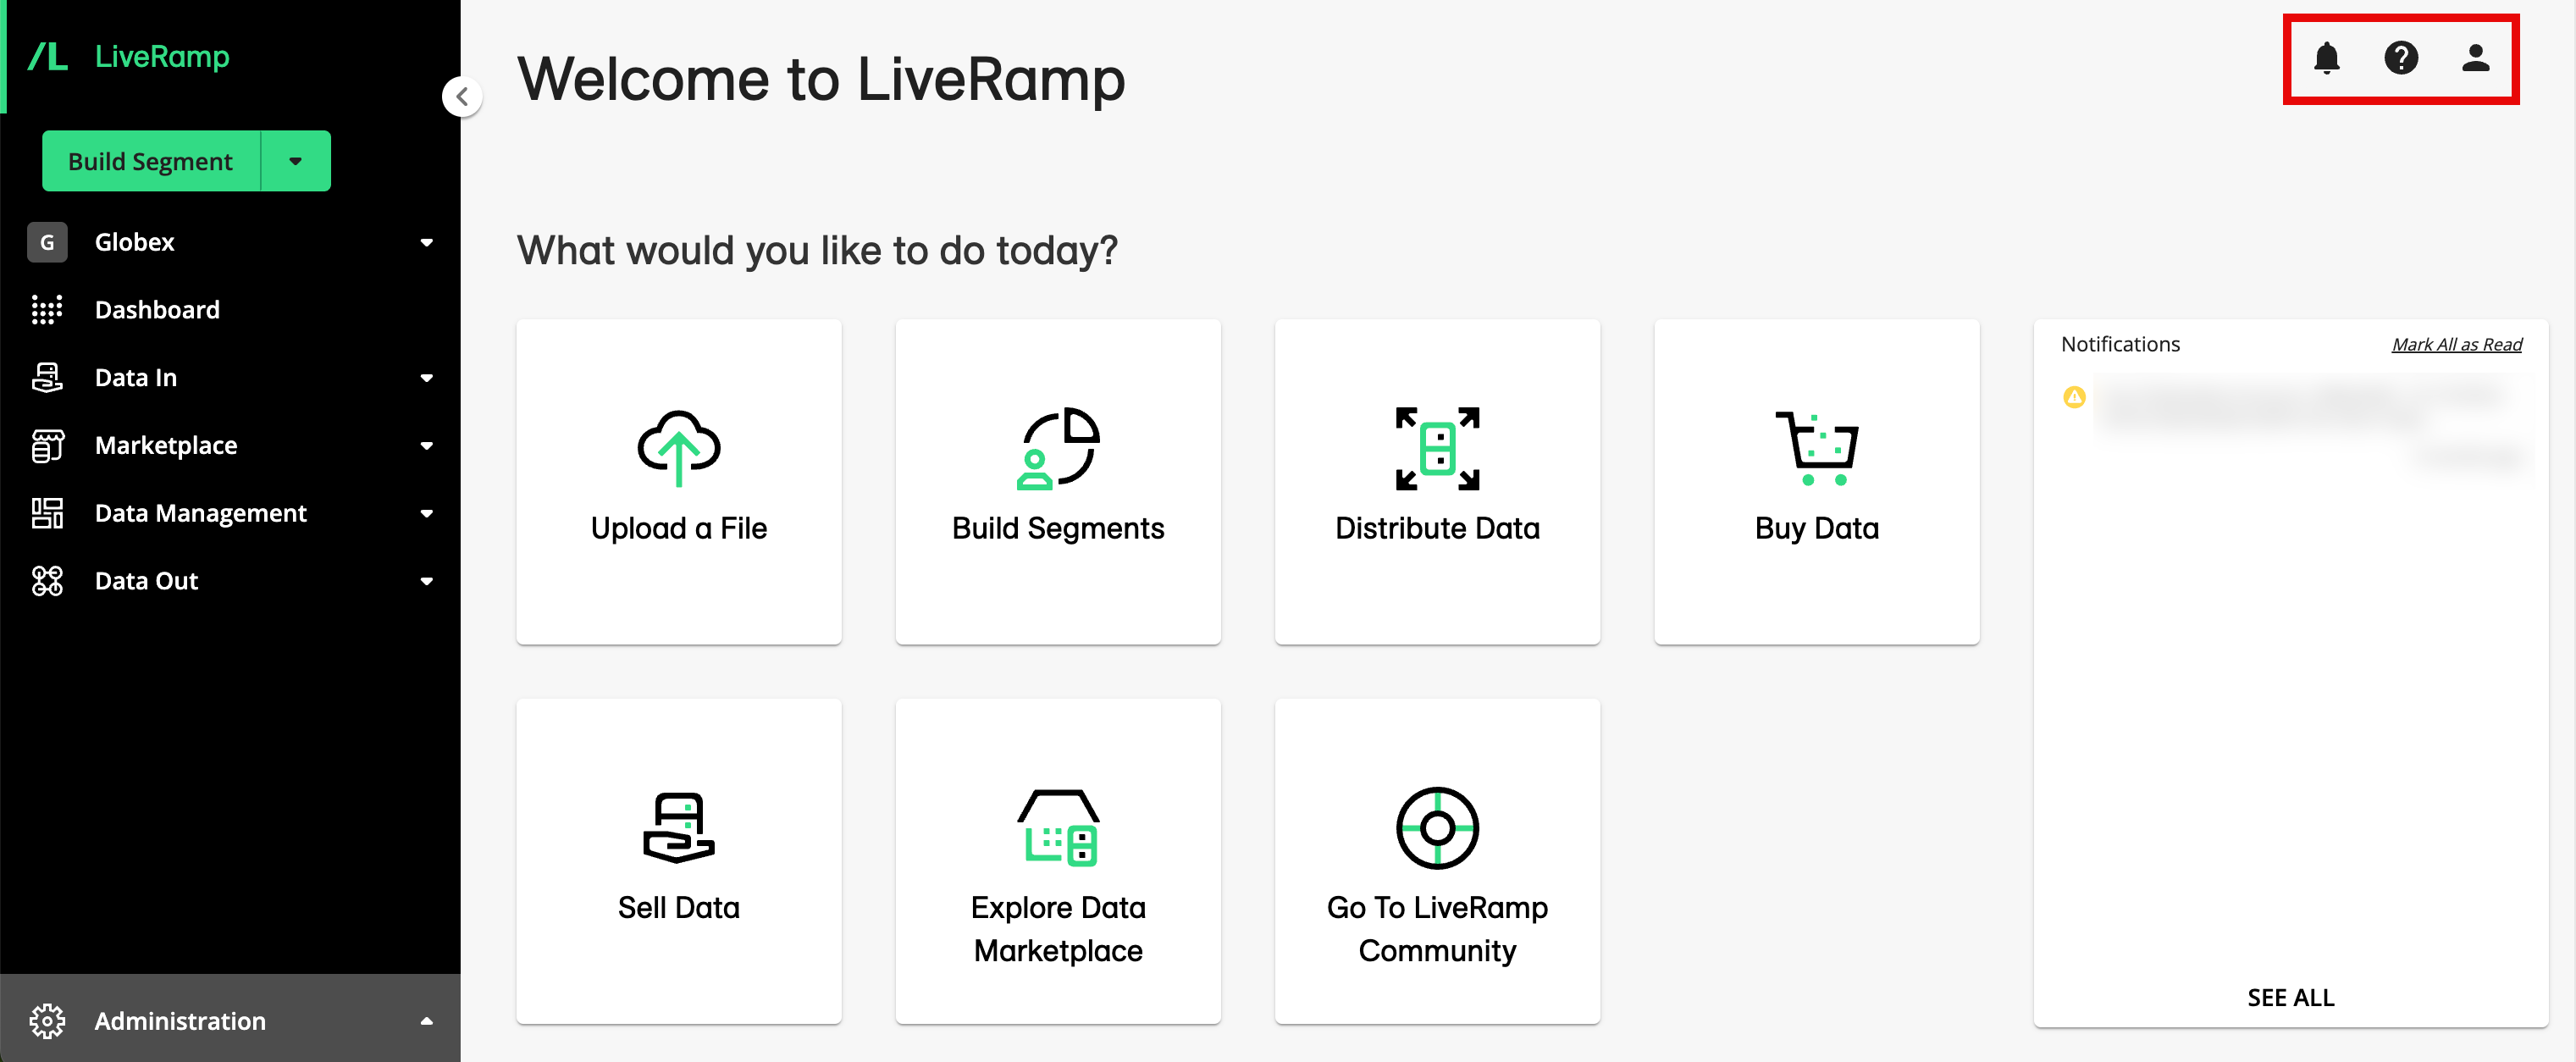
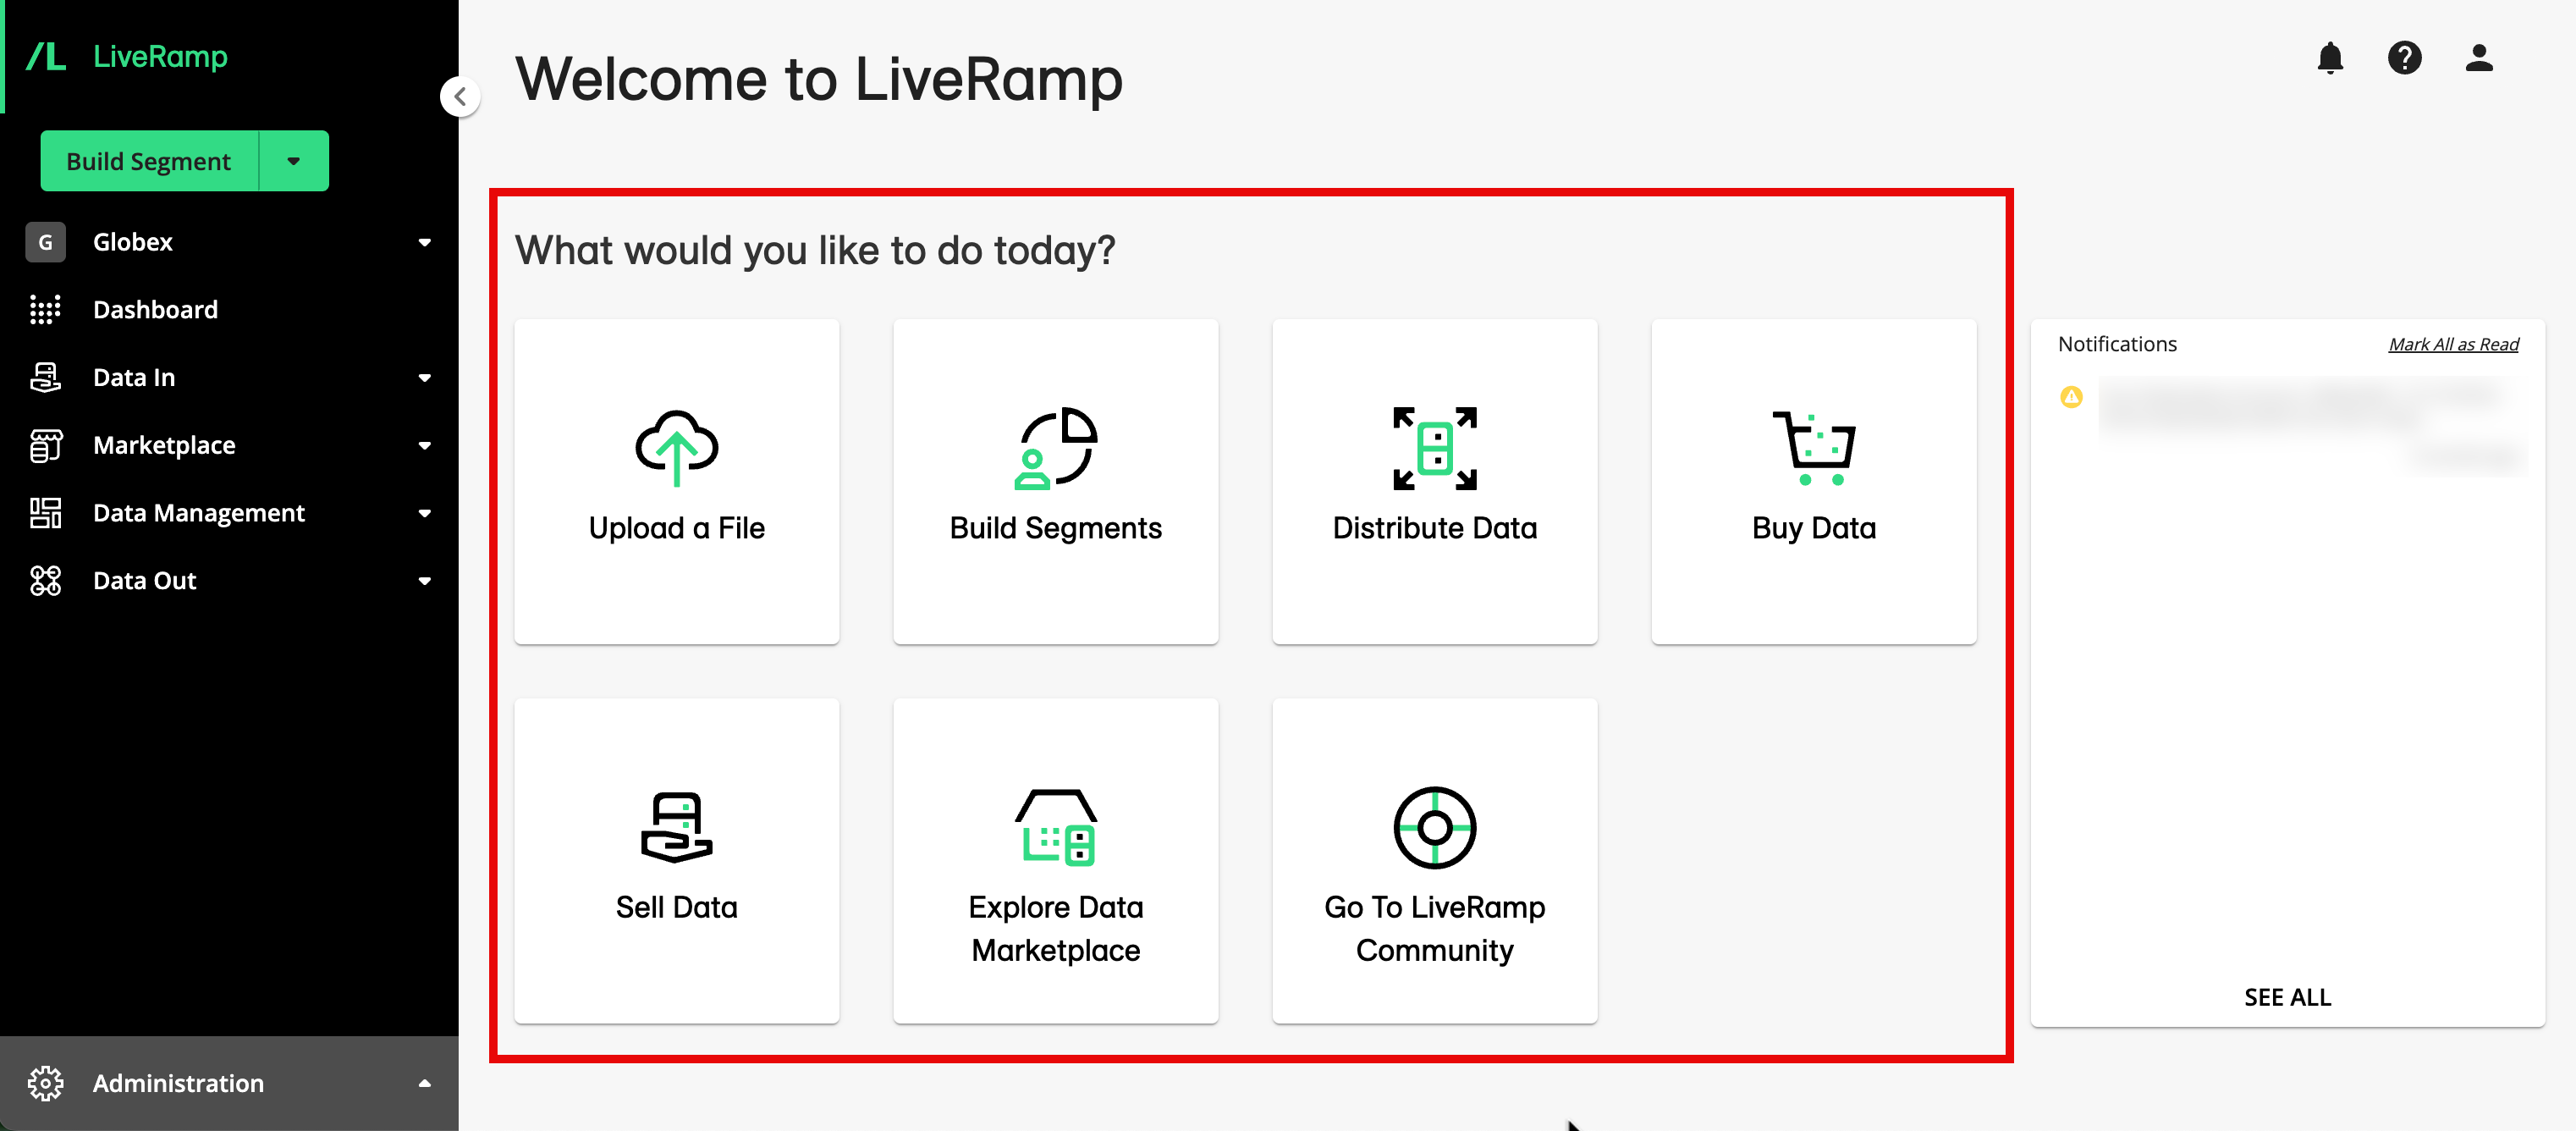
Welcome Page Shortcut Tiles
From the Welcome page, you can use the tiles that have been enabled for your account to navigate to certain Connect interface pages:
Note
Depending on what's been enabled for your account, you might not see all of these tiles.
Create Clean Room: If you have access to LiveRamp Clean Room, click this tile to create a new clean room. For instructions, see "Create a Clean Room".
Create Question: If you have access to LiveRamp Clean Room, click this tile to create a question at the organization level. For instructions, see "Create a Question".
Create Data Connection: If you have access to LiveRamp Clean Room, click this tile to create a new data connection. For instructions, see the articles in "Connect Your Data".
Upload a File: If you want to upload a file via Connect, click this tile to navigate to the Upload Files page. For more information, see “Upload a File via Connect".
Build Segments: If you want to build a segment, click this tile to be taken to the segment builder. For complete instructions, see “Build a Segment”.
Distribute Data: If you want to distribute data to a destination, click this tile to open up the Destination Accounts page. From this page, select the destination account you want to distribute data through by hovering over the tile and then clicking . For complete instructions, see “Distribute Data to a Destination”.
Buy Data: If you’ve been enabled to buy data in the Data Marketplace and you want to buy data, click this tile to navigate to the Data Marketplace Segments page. For complete instructions, see “Buying Segment Data from the Data Marketplace”.
Sell Data: If you’ve been enabled to sell data in the Data Marketplace and you want to view or manage your Data Marketplace segments, click this tile to navigate to the Data Marketplace - My Segments page. For more information, see “Selling Data with the Data Marketplace”.
Edit Marketplace Profile: If you’ve been enabled to sell data in the Data Marketplace and you want to view or edit your data seller profile, or view your contract configuration, click this tile. For more information, see “View or Edit Your Data Marketplace Storefront Profile” and “View Data Marketplace Contract Information”.
Explore Data Marketplace: If you’ve been enabled for the Data Marketplace, click this tile to navigate to the Data Marketplace Storefront. For more information, see “View the Storefront for Data Marketplace Buyers”.
Go To LiveRamp Community: If you want to go to the LiveRamp Community portal, where you can access user forums, view and create support cases, or access LiveRamp University training courses, click this tile. For more information, see “Using the LiveRamp Community Portal”.
Changing the Table Display
For many tables in Connect, you can change the way the table displays, including the columns that are displayed, the order the columns are displayed in and more. For more information, see “Changing the Table Display”.
Details Panels
Some Connect interface pages that contain tables have a details panel that you can open to see more information about a specific row in the table. In many cases, you can open the details panel by clicking on the row. For some tables, you access the details panel by clicking the More Options icon (the three dots) that appear when you hover over the row and then selecting View Details.
Details Pages
Some Connect interface pages that contain tables have a details page that you can open to see more information about a specific row in the table. In many cases, you can open the details panel by double-clicking on the row. For some tables, you access the details panel by clicking the More Options icon (the three dots) that appear when you hover over the row and then selecting Open Full Details Page.
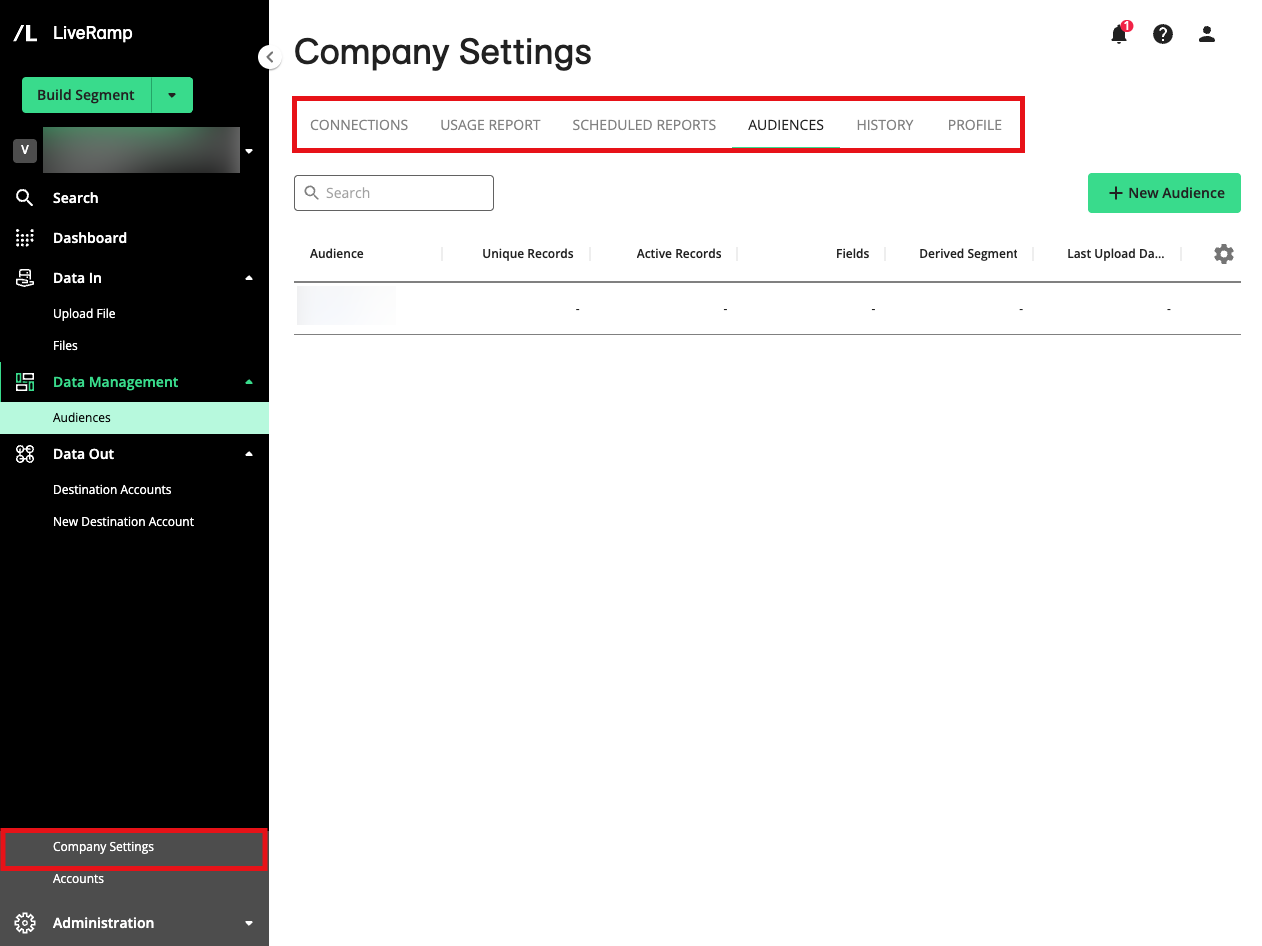
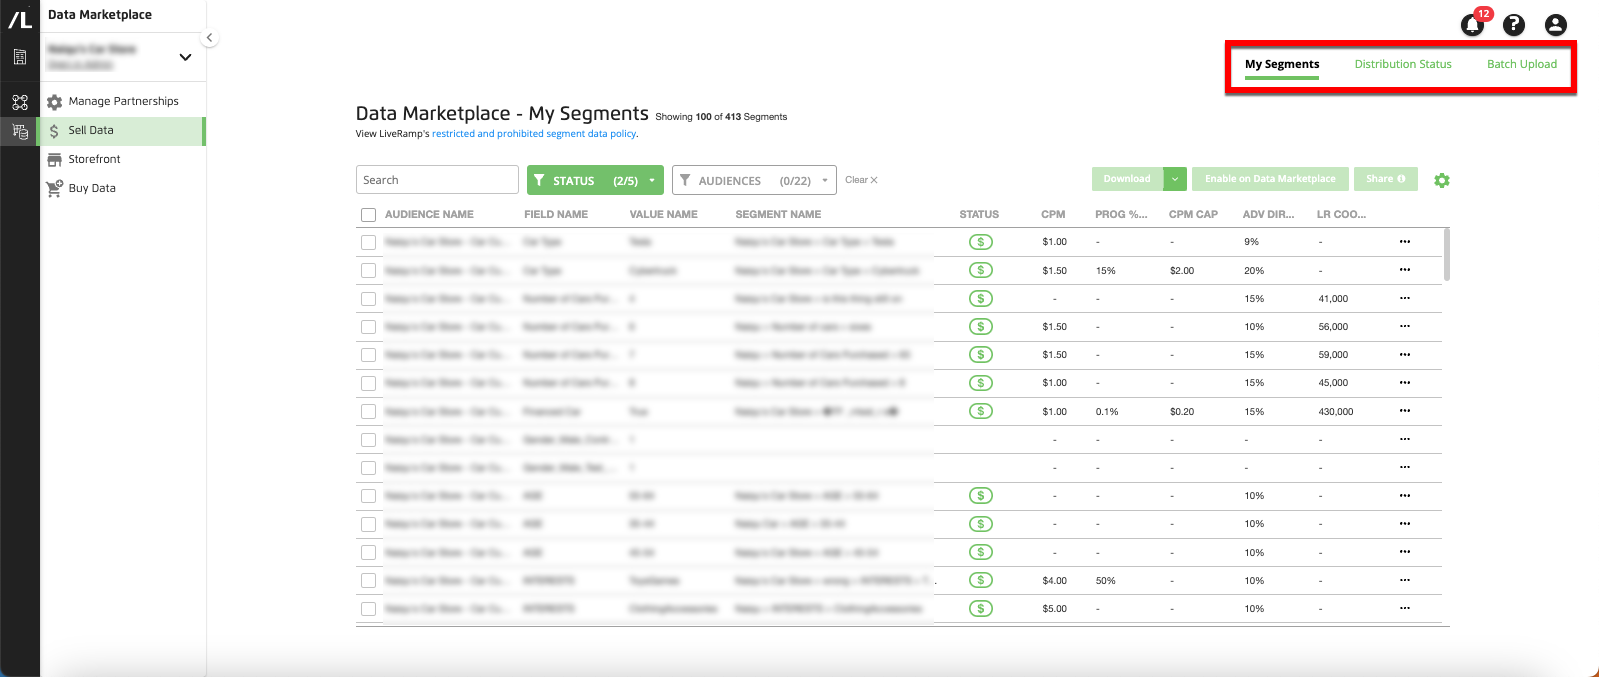
Page Tabs
Certain pages, such as the Company Settings page and the Data Marketplace - My Segments page, have tabs that allow you to access additional interface pages.
For more information, see "Understanding the Connect UI Pages".
Help Tooltips
Many pages contain help tooltips ( ) that you can click to get information on how to use the page or how to perform certain actions on the page, along with links to relevant help articles.
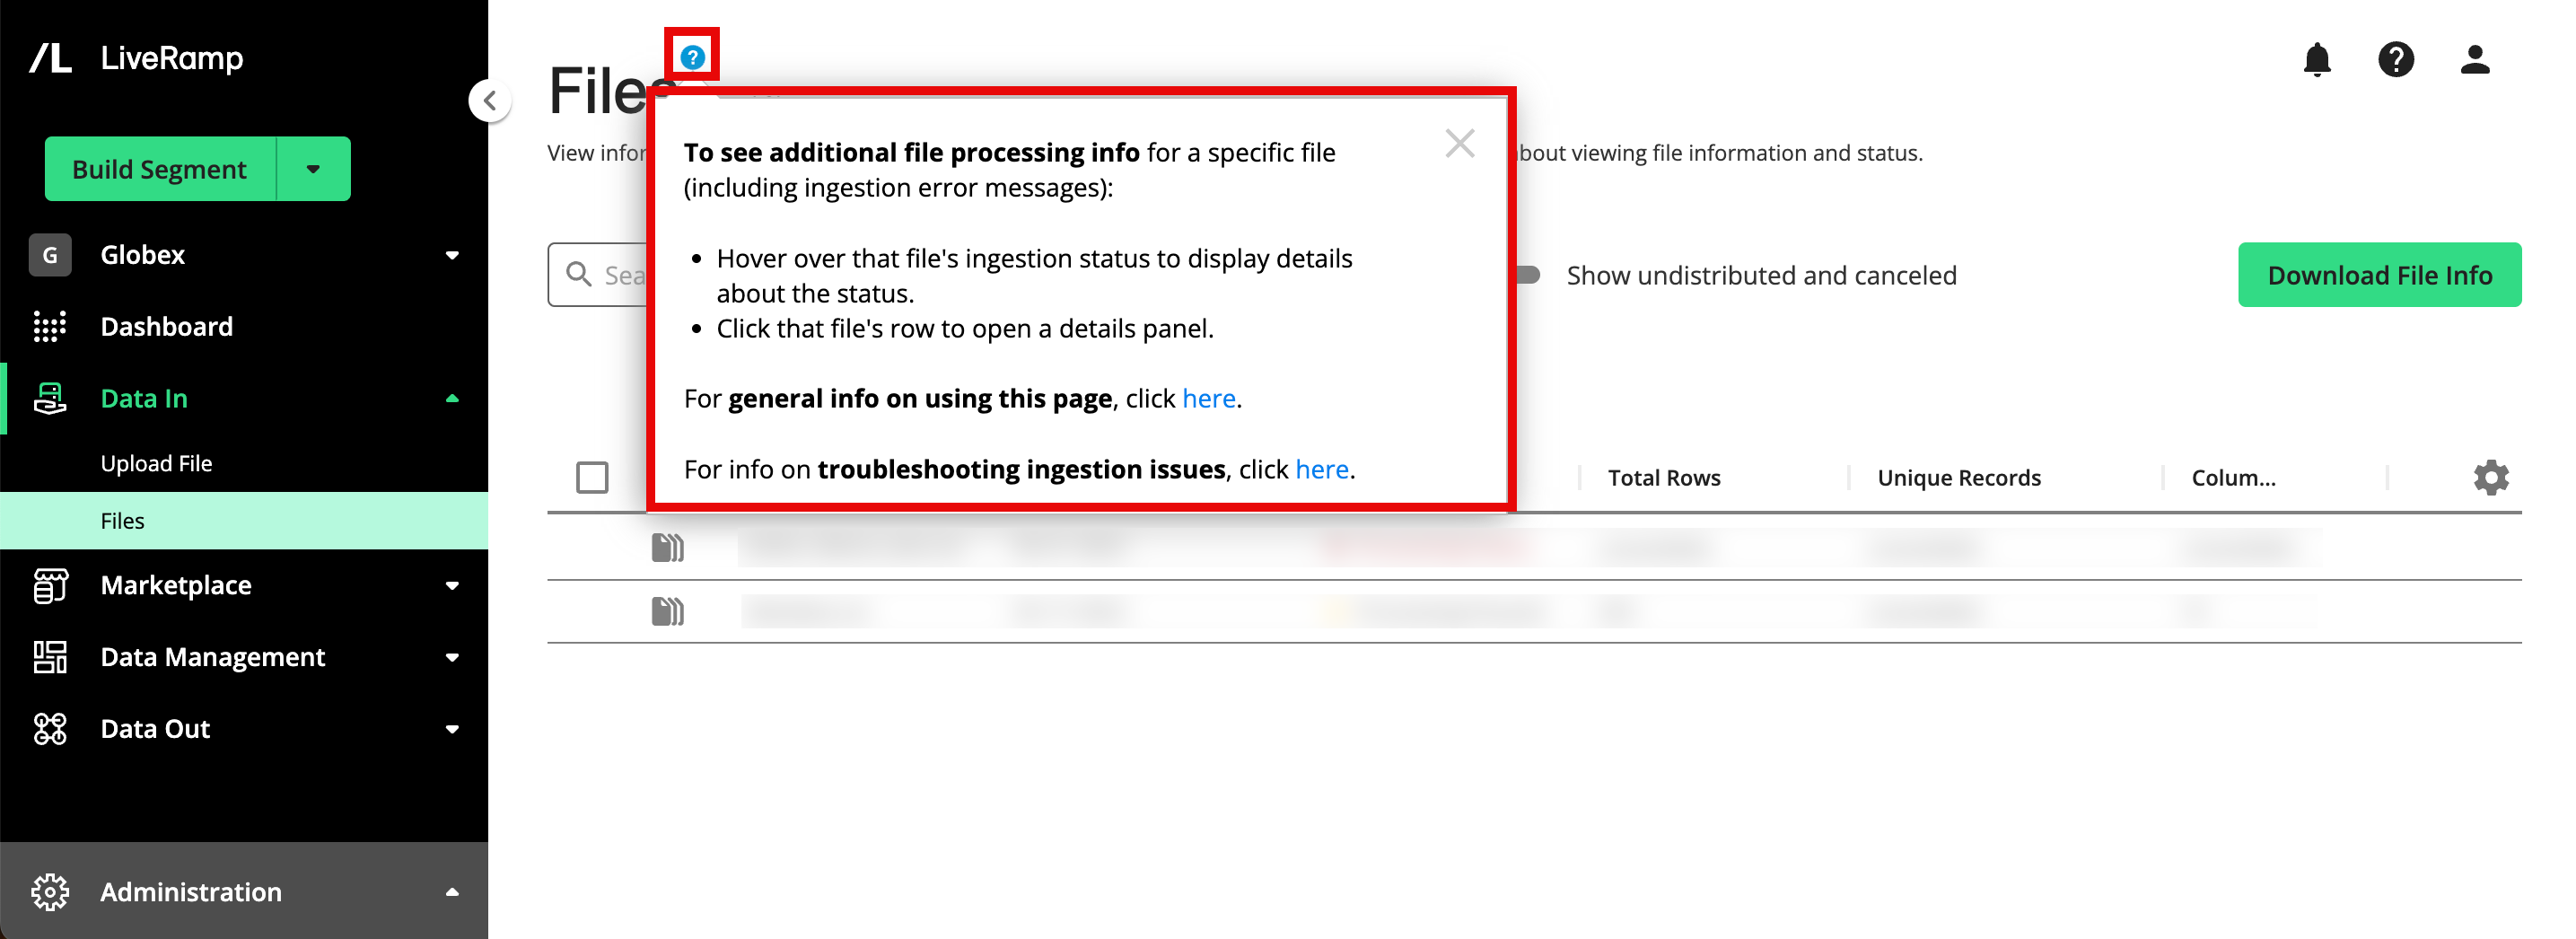
These tooltips often appear next to the page name.
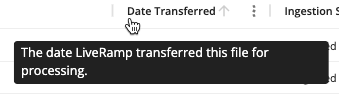
Other tooltips ( ) display information about the item they’re associated with when you hover or click on the tooltip.

Some elements, such as table headings, often have tooltip information that displays when you hover over the element.