Delete a Destination Account
In most cases, when you want to stop distributing data to a particular destination account, simply set the Account Status to “inactive” (see “Edit or View Destination Account Settings” for more information).
However, when you are absolutely sure you will not need a particular destination account in the future, you can delete the destination account so that it no longer appears in your list of destination accounts:
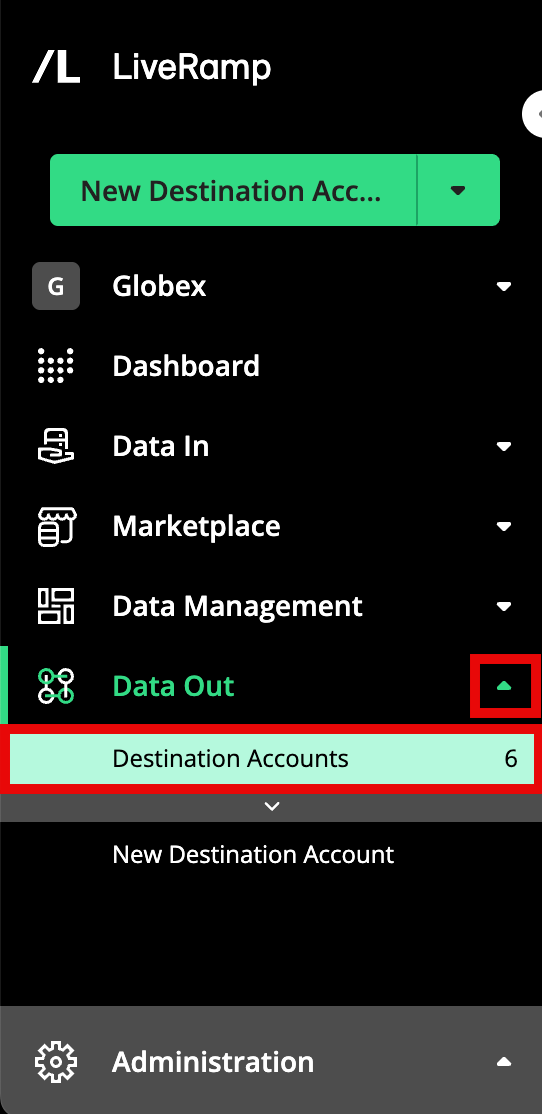
From the navigation menu, select Data Out → Destination Accounts or click the Distribute Data tile from the Welcome page.to navigate to the Destination Accounts page.
Note
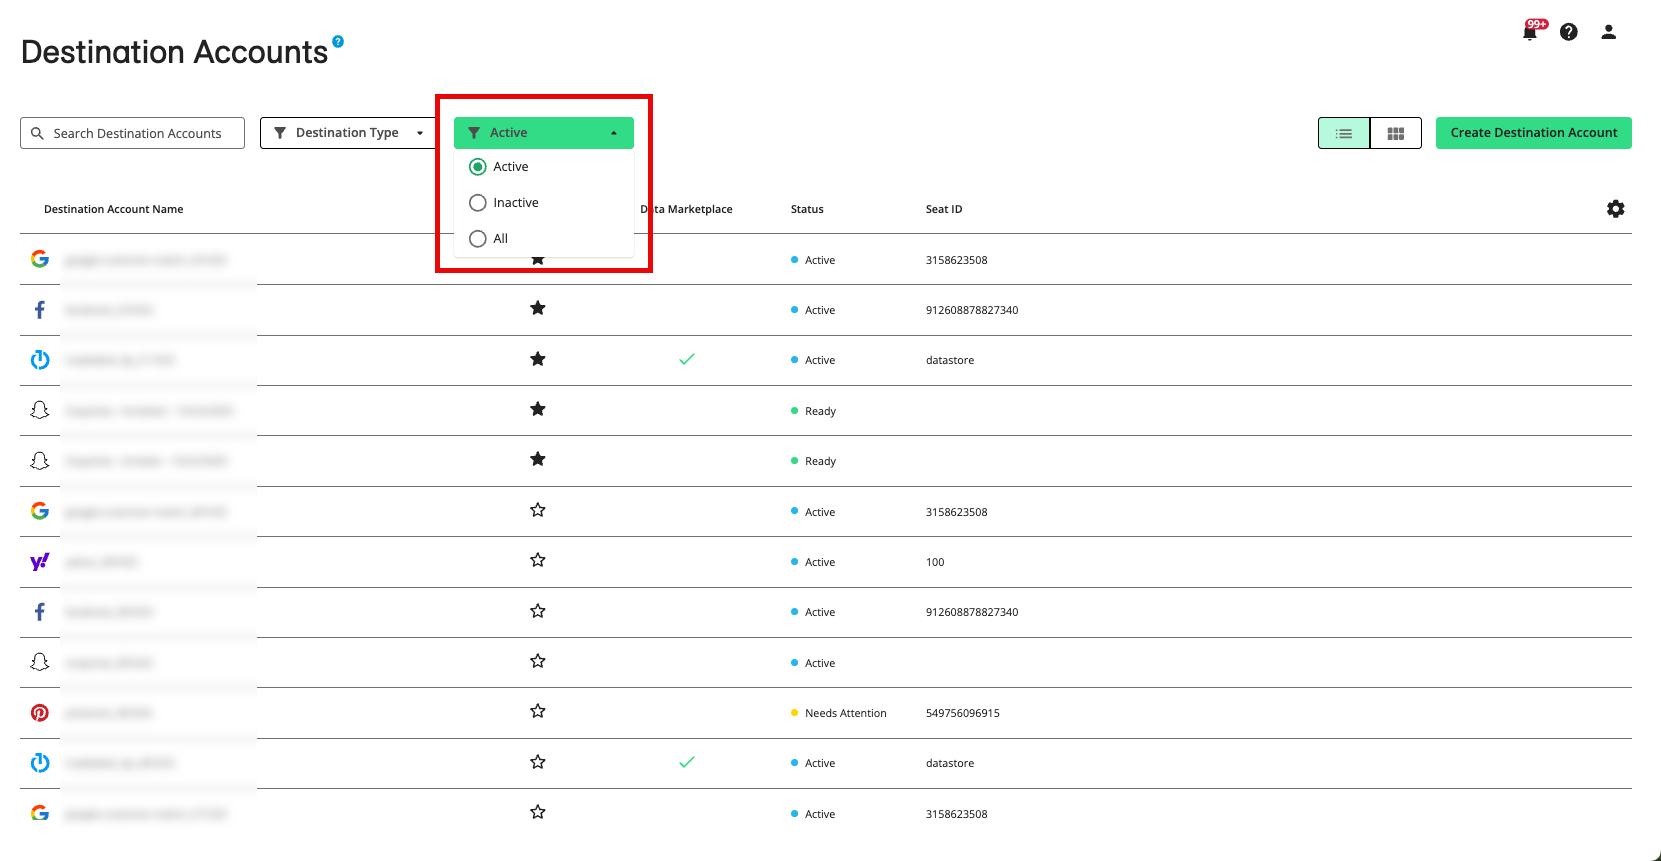
By default, the list of destination accounts is initially filtered to show only active destination accounts. To access a destination account that is not active, adjust the filter setting.
Destination accounts that you you've marked as "favorites" will appear at the top of the list, followed by destination accounts that have been recently created.
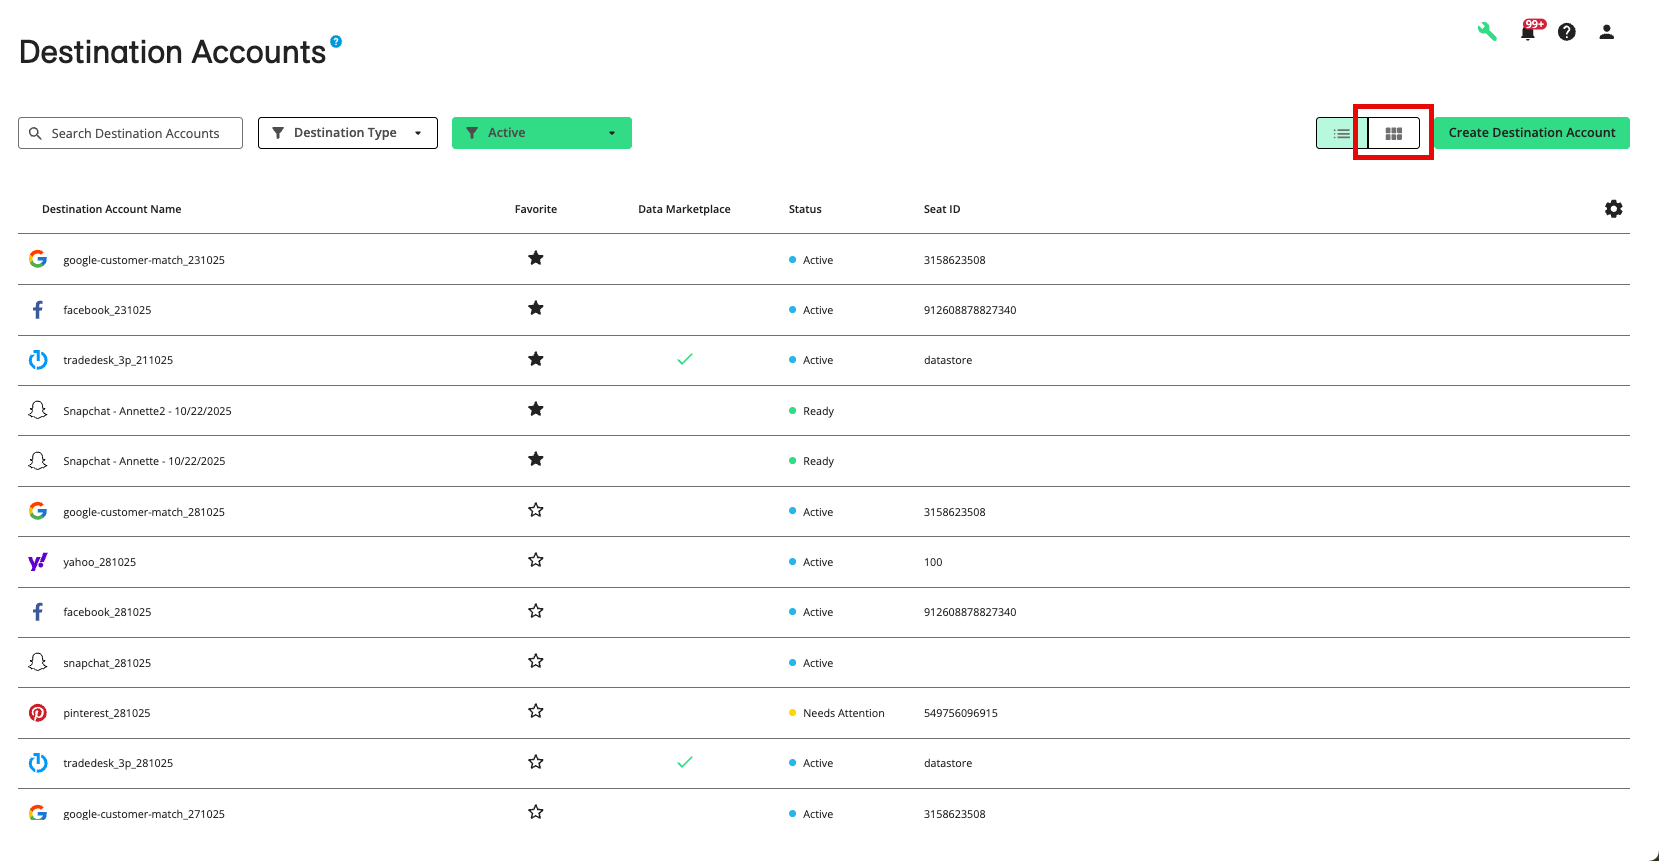
To switch from table view to tile view, click the Tile View icon.
Locate the appropriate destination account.
Use the appropriate method to delete the destination account:
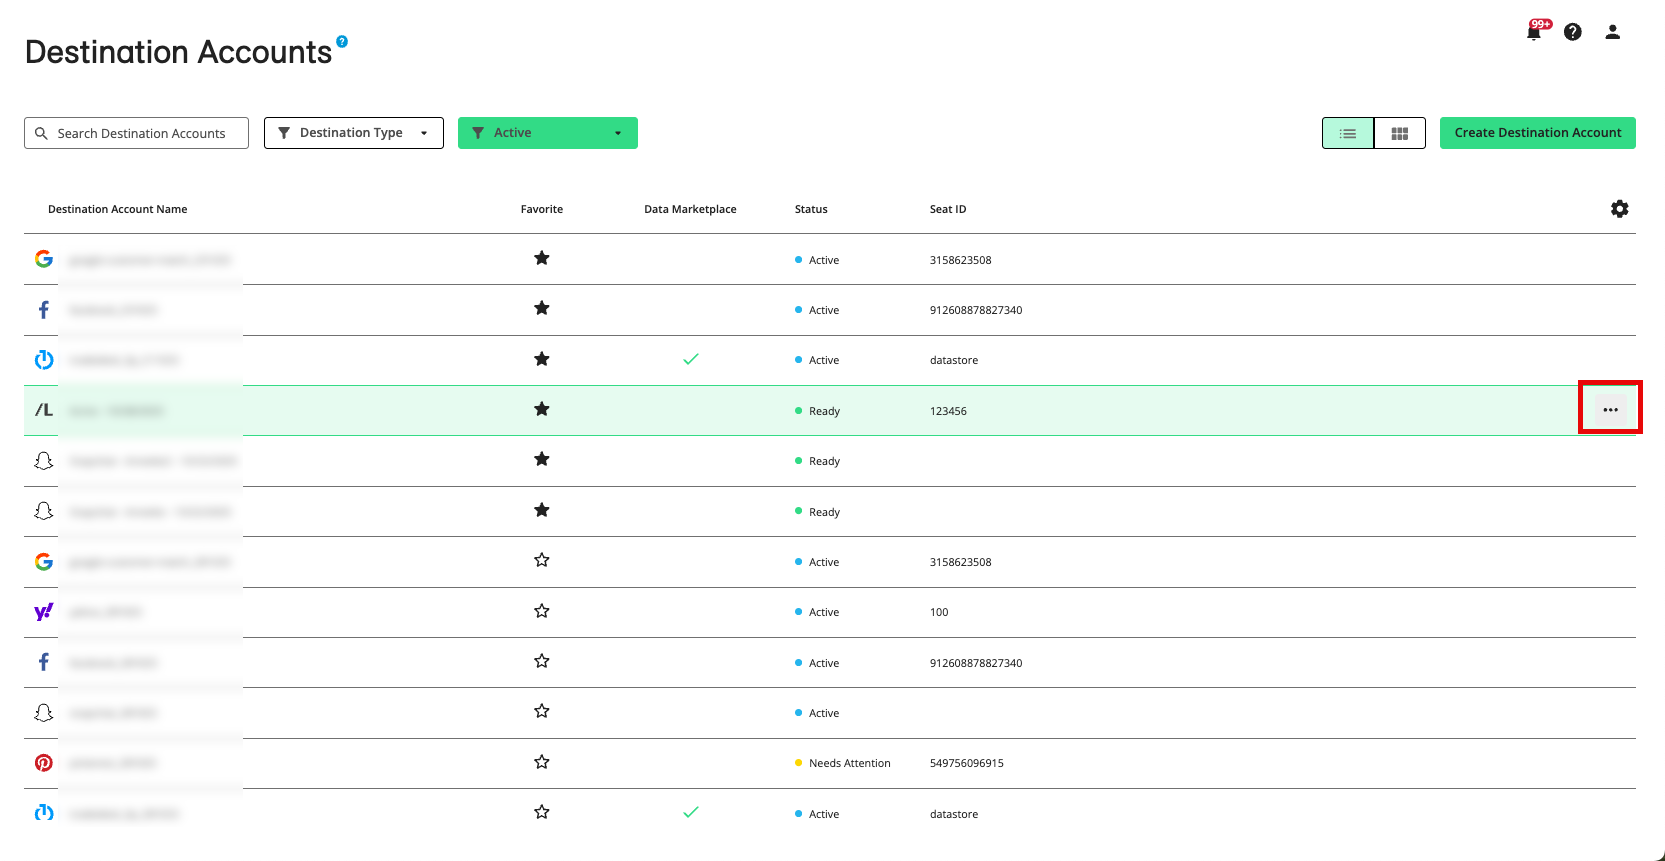
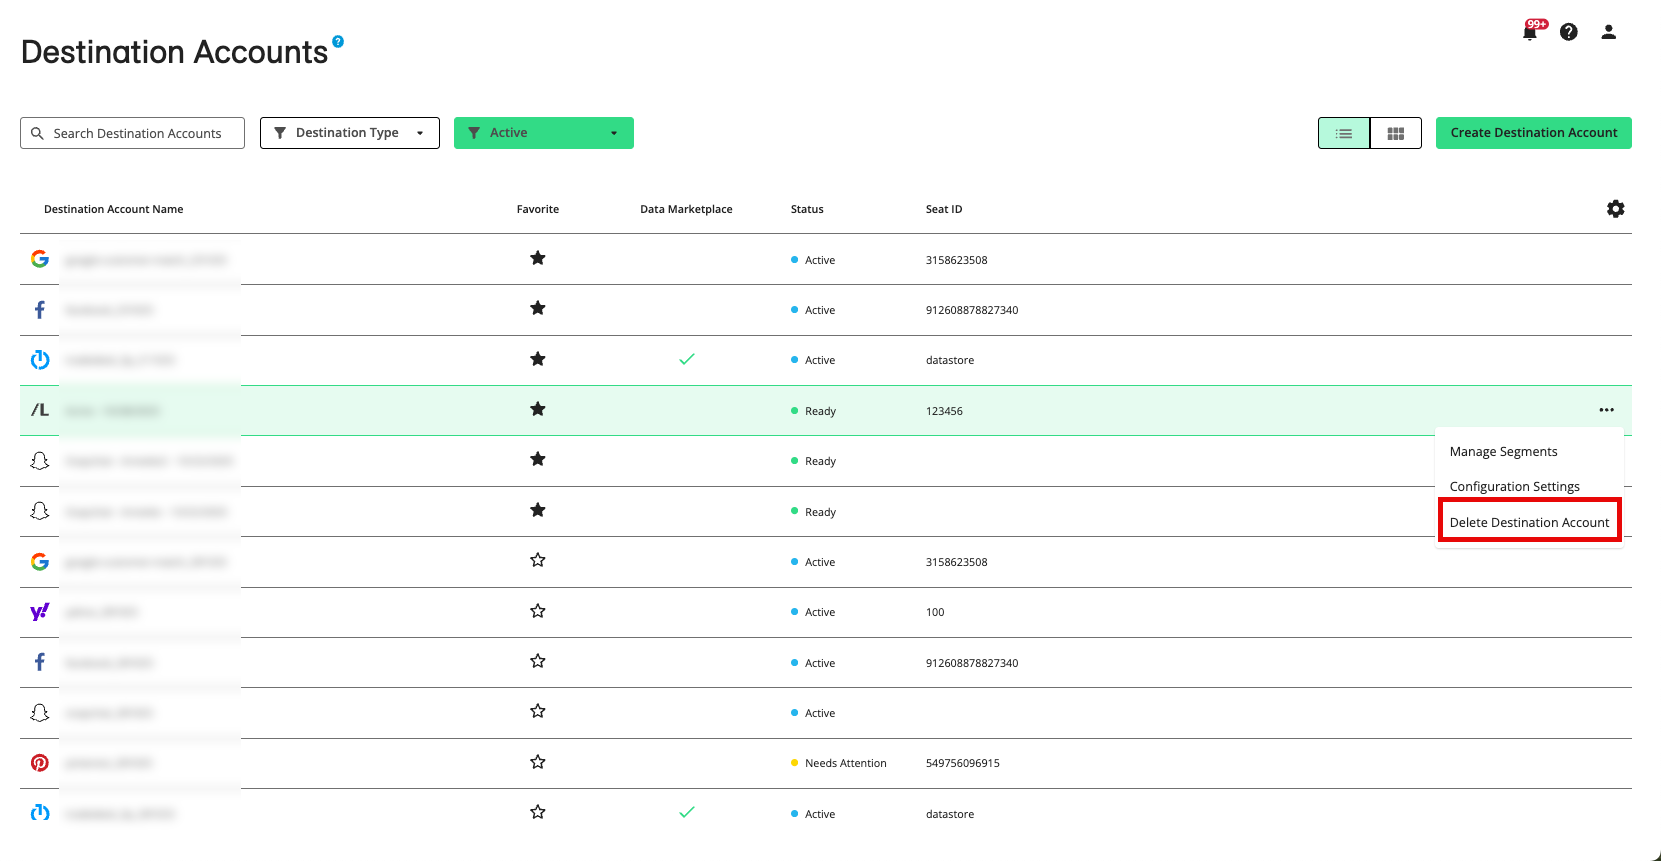
In table view: From the More Options menu that appears when you hover over the row, select Delete Destination Account.
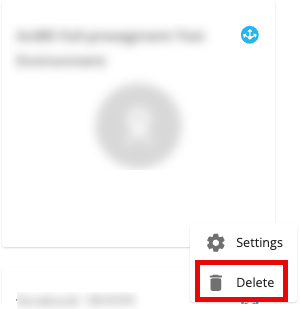
In tile view: Click the ellipses (three dots) in the lower right-hand corner of a tile and then select Delete.

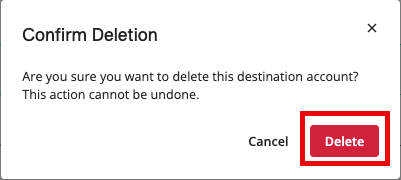
From the dialog that appears, confirm the deletion by clicking .
A confirmation banner appears:
