Edit or View Destination Account Settings
Once you’ve activated a destination account, you can edit or view the destination account settings, including the following:
Once you’ve activated a destination account, you can edit or view the destination account settings, including the following:
The distribution status
The account status (“active” or “inactive”)
The end date
The identifier types
The refresh options
The account ID
The OAuth connection (for OAuth destinations)
Note
The precision level for the destination account (which defaults to using the precision level used by a given segment's audience) is not viewable or configurable in Connect. If you wish to change the precision level for a particular destination account only, or need information on the precision level being used, create a support case (see "Using the LiveRamp Community Portal" for instructions).
Note
To edit the destination account settings for an OAuth destination, you will need to perform one of the following actions:
Re-validate your existing OAuth connection for that destination account
Switch to one of your other existing OAuth connections and validate that connection
Create a new OAuth connection and validate that connection
See the "Editing Destination Account Settings for OAuth Destinations" section of this article for more information.
To edit or view the settings for an existing destination account:
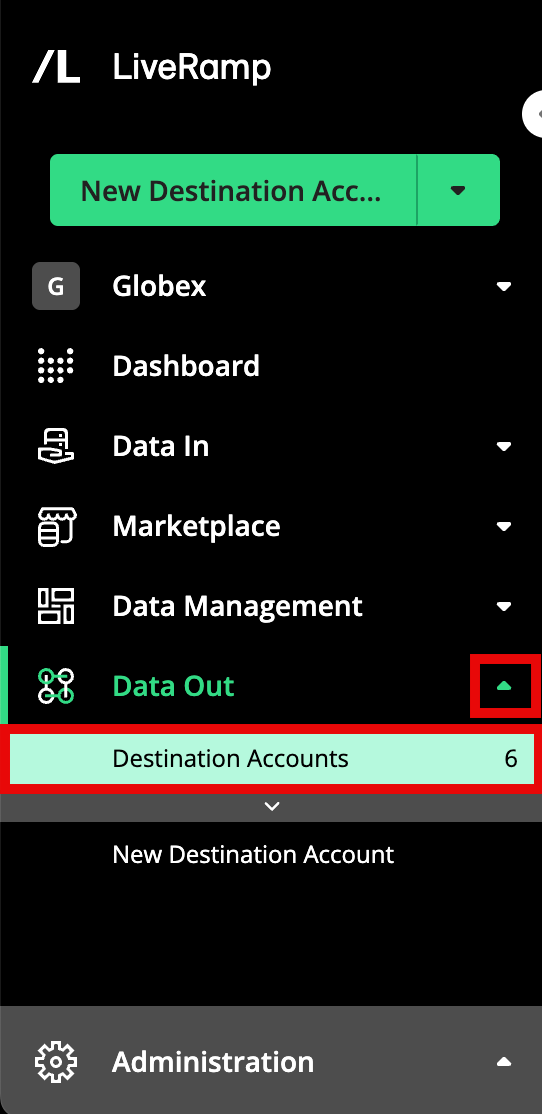
From the navigation menu, select Data Out → Destination Accounts or click the Distribute Data tile from the Welcome page.to navigate to the Destination Accounts page.
Note
By default, the list of destination accounts is initially filtered to show only active destination accounts. To access a destination account that is not active, adjust the filter setting.
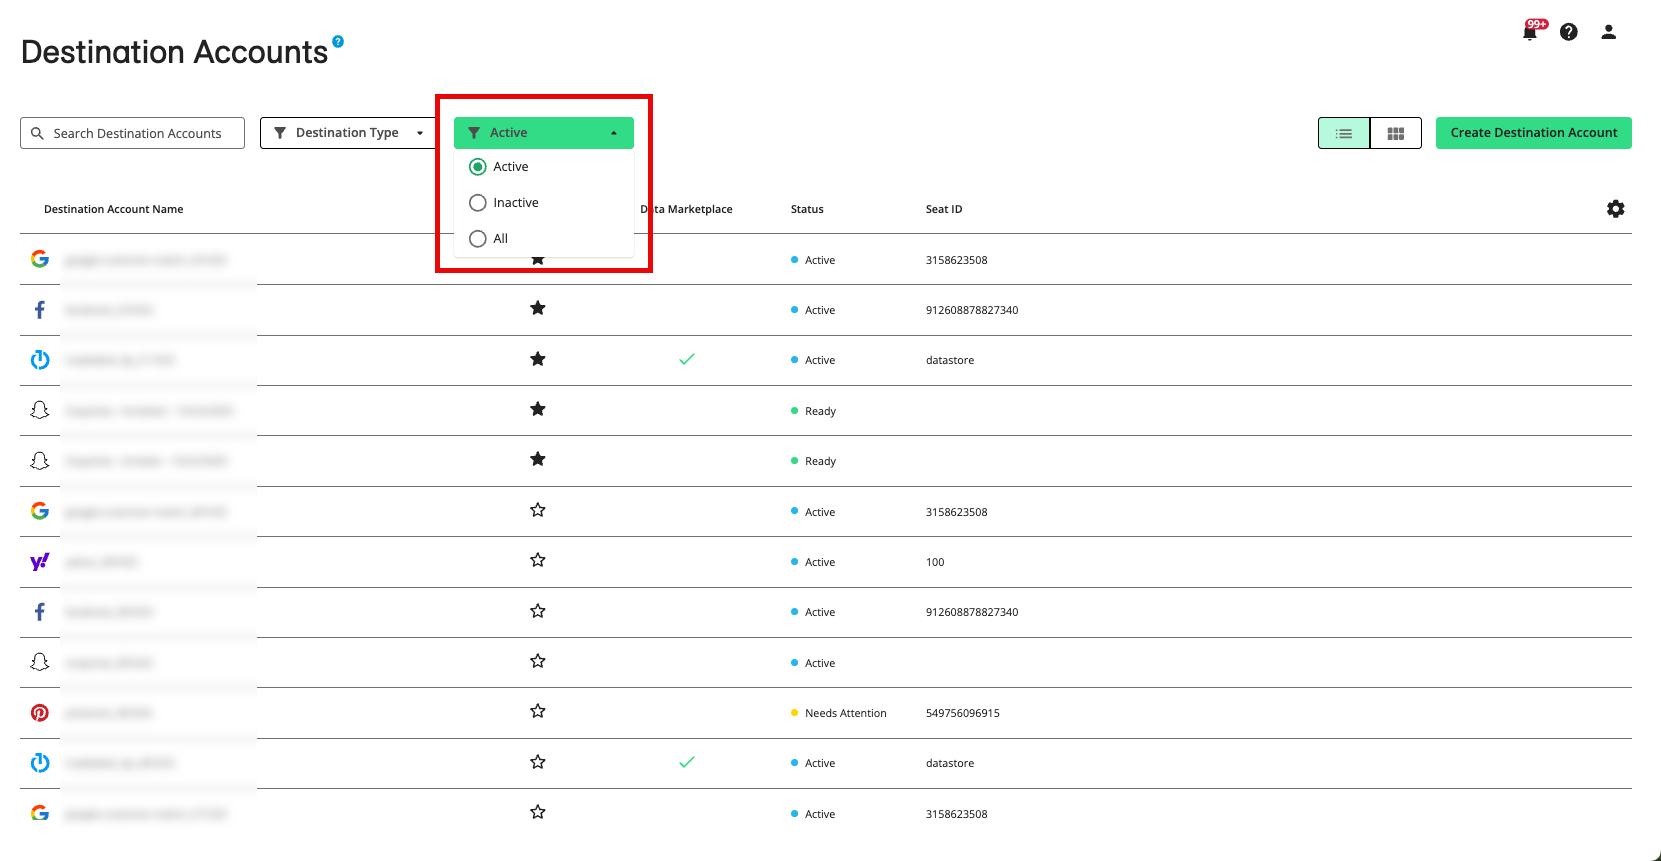
Destination accounts that you you've marked as "favorites" will appear at the top of the list, followed by destination accounts that have been recently created.
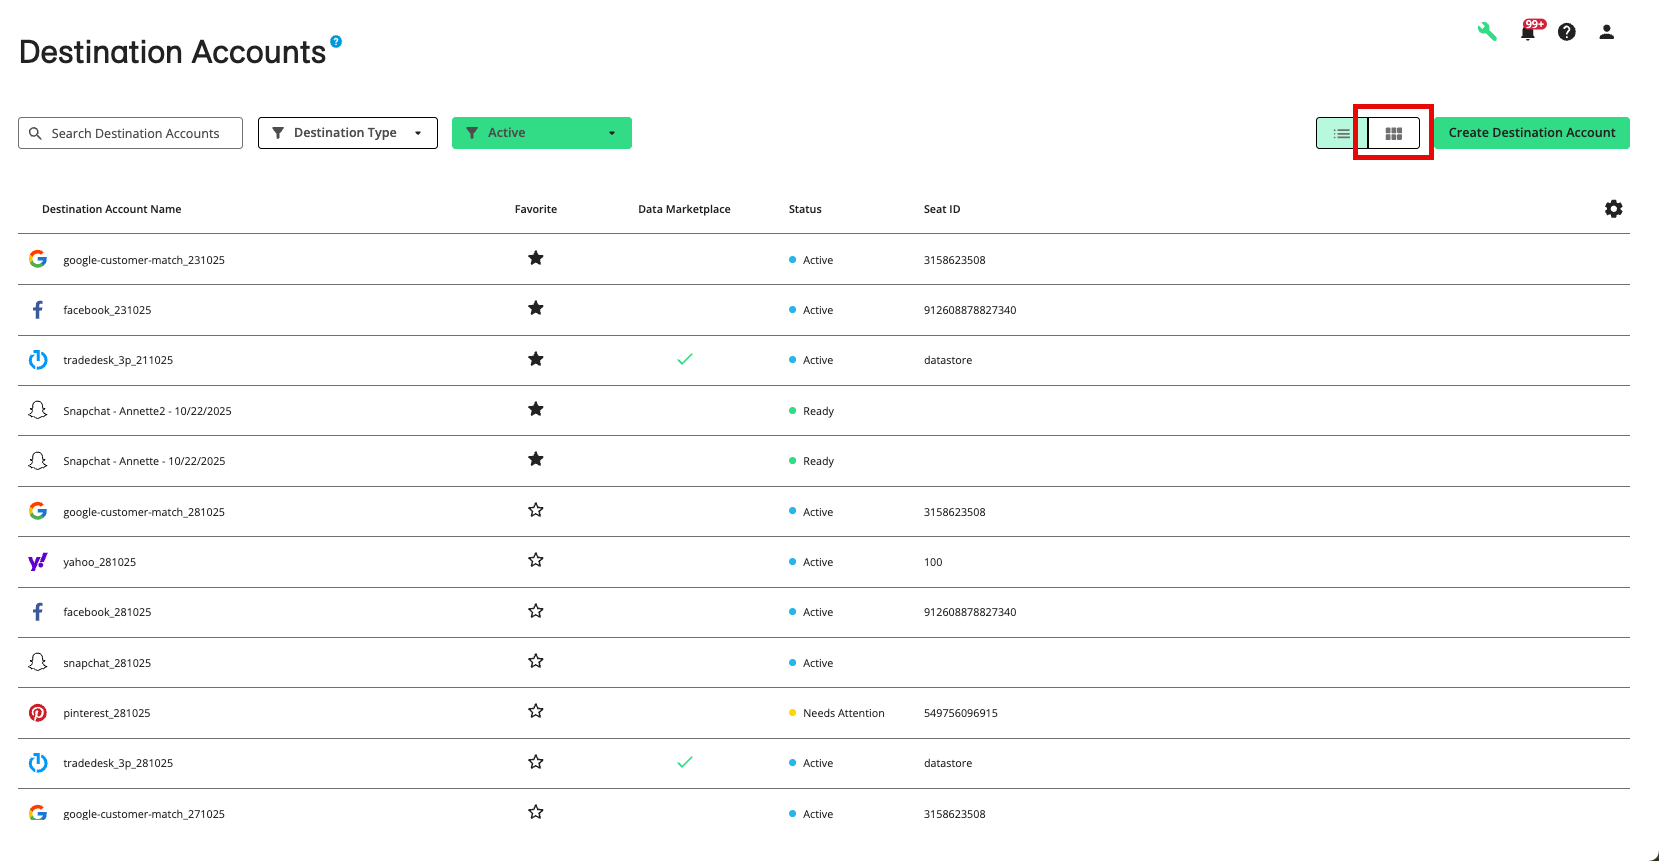
To switch from table view to tile view, click the Tile View icon.
Locate the appropriate destination account. The row or tile for a particular destination account displays the following information about the destination account status:
Status
Status Column (Table View)
Status Icon (Tile View)
Status Name (appears upon hover in Tile View)
Description
Tile Action Button (appears upon hover in TIle View)
Active - Distributing
Active

Active Distribution
Active (with either no end date or an end date in the future) and actively distributing data
Manage
Active - Ready to Distribute
Ready

Ready for Distribution
Active (with either no end date or an end date in the future) but not distributing any data
Manage
Inactive
Inactive

Distribution is off
Inactive (end date has been reached or has been deactivated)
Reactivate
Navigate to the Edit Destination Account Configuration page for that destination account in one of the following ways:
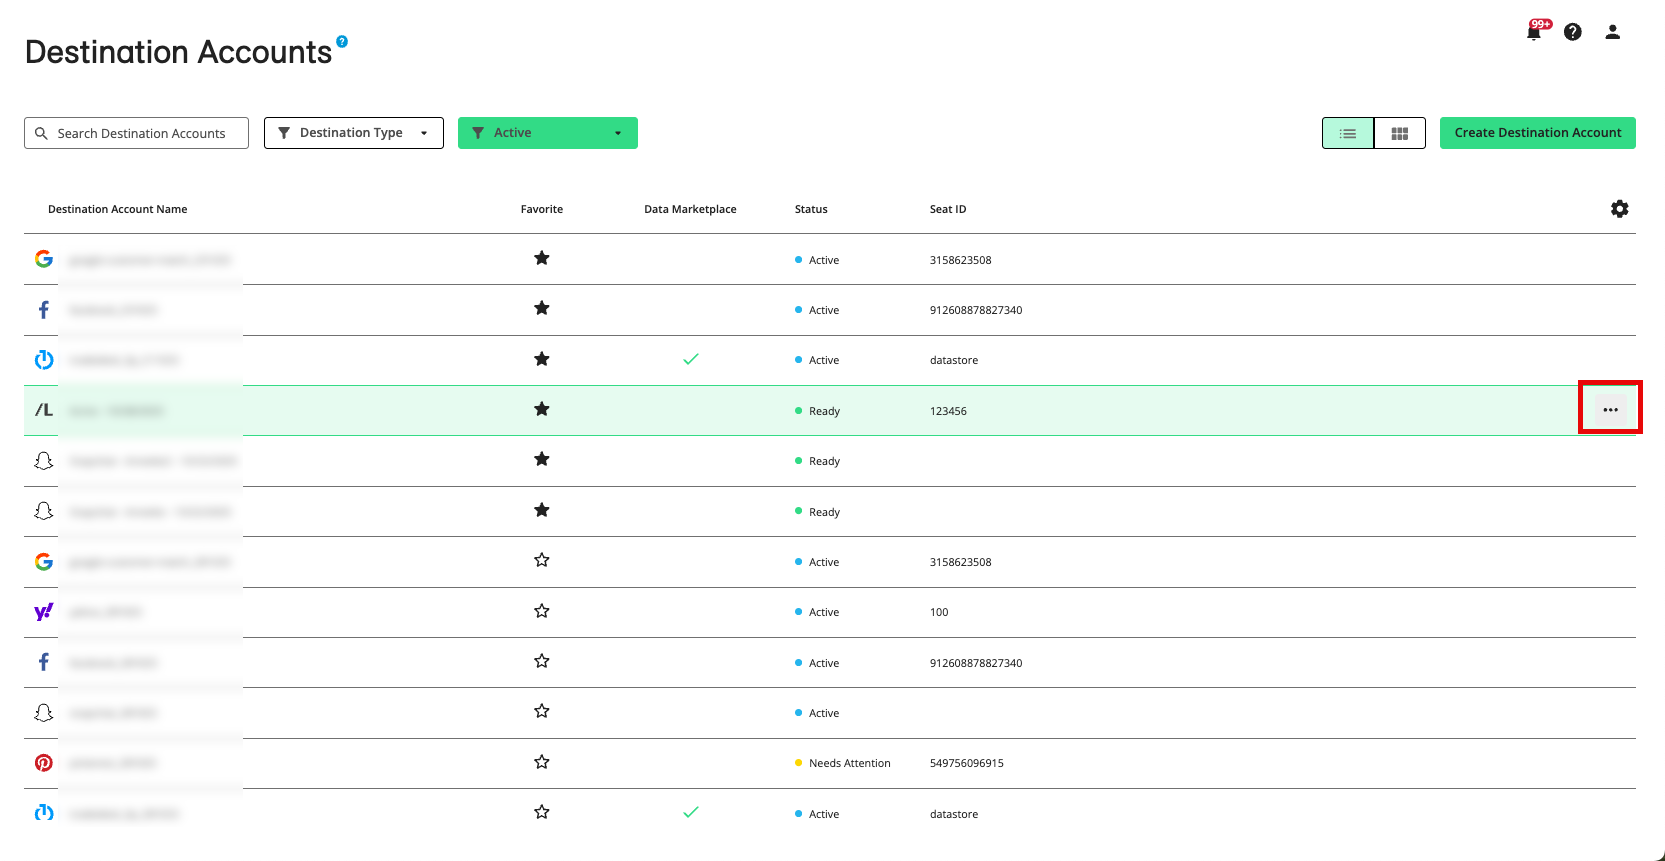
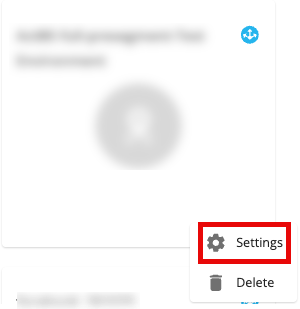
In table view: From the More Options menu that appears when you hover over the row, select Configuration Settings.

In tile view: Click the ellipses (three dots) in the lower right-hand corner of a tile and then select Settings.

To edit the destination account settings for an OAuth destination, you will need to perform one of the following actions:
Re-validate your existing OAuth connection for that destination account
Switch to one of your other existing OAuth connections and validate that connection
Create a new OAuth connection and validate that connection
See the "Editing Destination Account Settings for OAuth Destinations" section of this article for complete information.
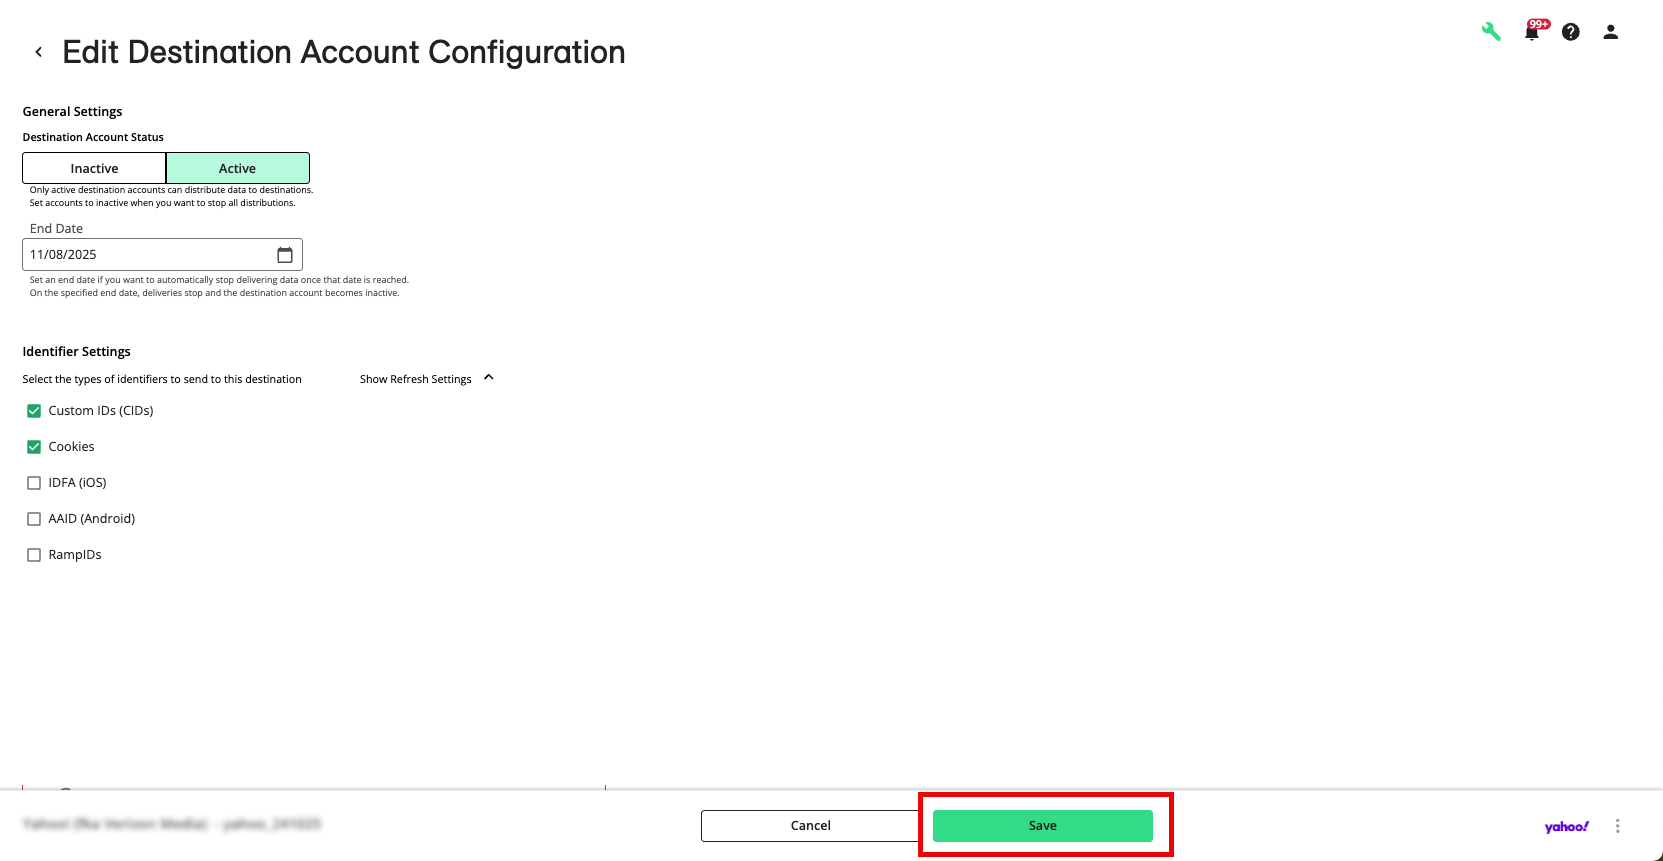
Make any desired changes:

Set the destination account to “active” or “inactive”.
Note
Only active Destination Accounts can distribute data to destinations. Set accounts to inactive when you want to stop all distributions.
Set, modify, or eliminate the existing end date.
Note
Set an end date if you want to automatically stop delivering data once that date is reached. On the specified end date, deliveries stop and the destination account becomes inactive. Make sure that the appropriate end date selection has been made to avoid being charged for distributions that occur after the end of a campaign or to avoid having distributions stop when you want them to continue.
Modify the list of identifiers that will be sent to the destination. If a destination supports multiple identifier types—for example, a mobile ad platform that supports both Android and iOS devices—you can choose which identifiers you'd like to send data to. The default identifiers for that destination will be used unless you change the selections.
Tip
For those destinations that accept RampID as an identifier, we recommend that you keep RampID selected in order to maximize your reach and match rates.
View or edit the refresh options. The default refresh options that are suitable for the majority of the workflows for that destination are enabled (see “How LiveRamp Refreshes Distributed Data” for more information).To view or change the default refresh options for the selected identifier types, click the “Show Refresh Settings” link text. To change the options, select or deselect the appropriate check boxes.
Caution
Only admin-level users can change these options, but the default options for each destination account should only be changed for custom or unique workflows, and only if you have a thorough knowledge of the impact of these settings. Changing the default options might result in your data not being refreshed appropriately.
Note
If you want to be able to resend all active segments for a particular destination account on your own, LiveRamp can enable this ability for you. Create a support case in the LiveRamp Community portal to have this enabled. See "Resend Active Segments" for more information.
Edit destination specific settings.
Edit the destination account name.
Click Save.
Editing Destination Accounts That Use a Specific OAuth Connection
At times, you might want to edit some or all destination accounts that use a specific OAuth connection:
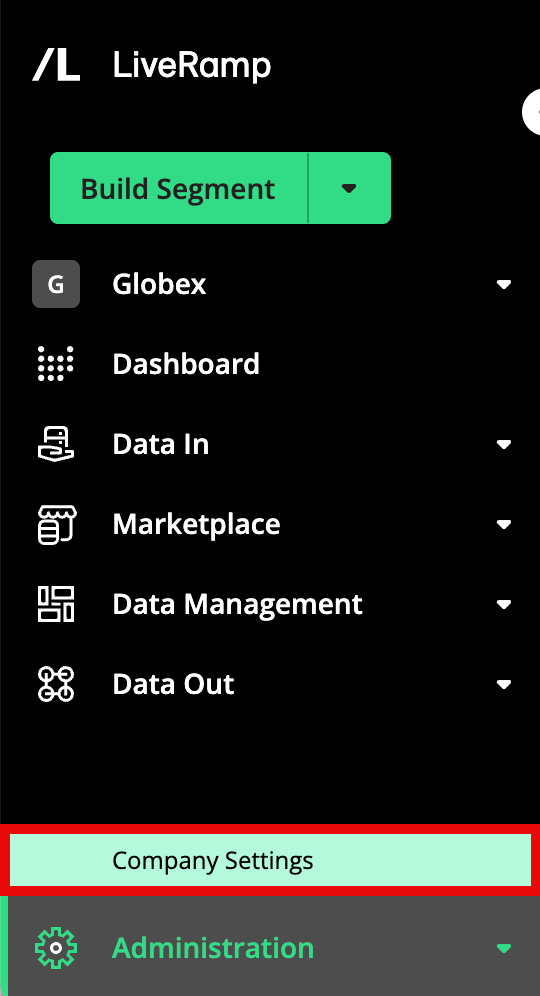
From the navigation menu, click Company Settings to navigate to the Company Settings page.
Select the Connections tab.

Click the connection's row to open the details panel.
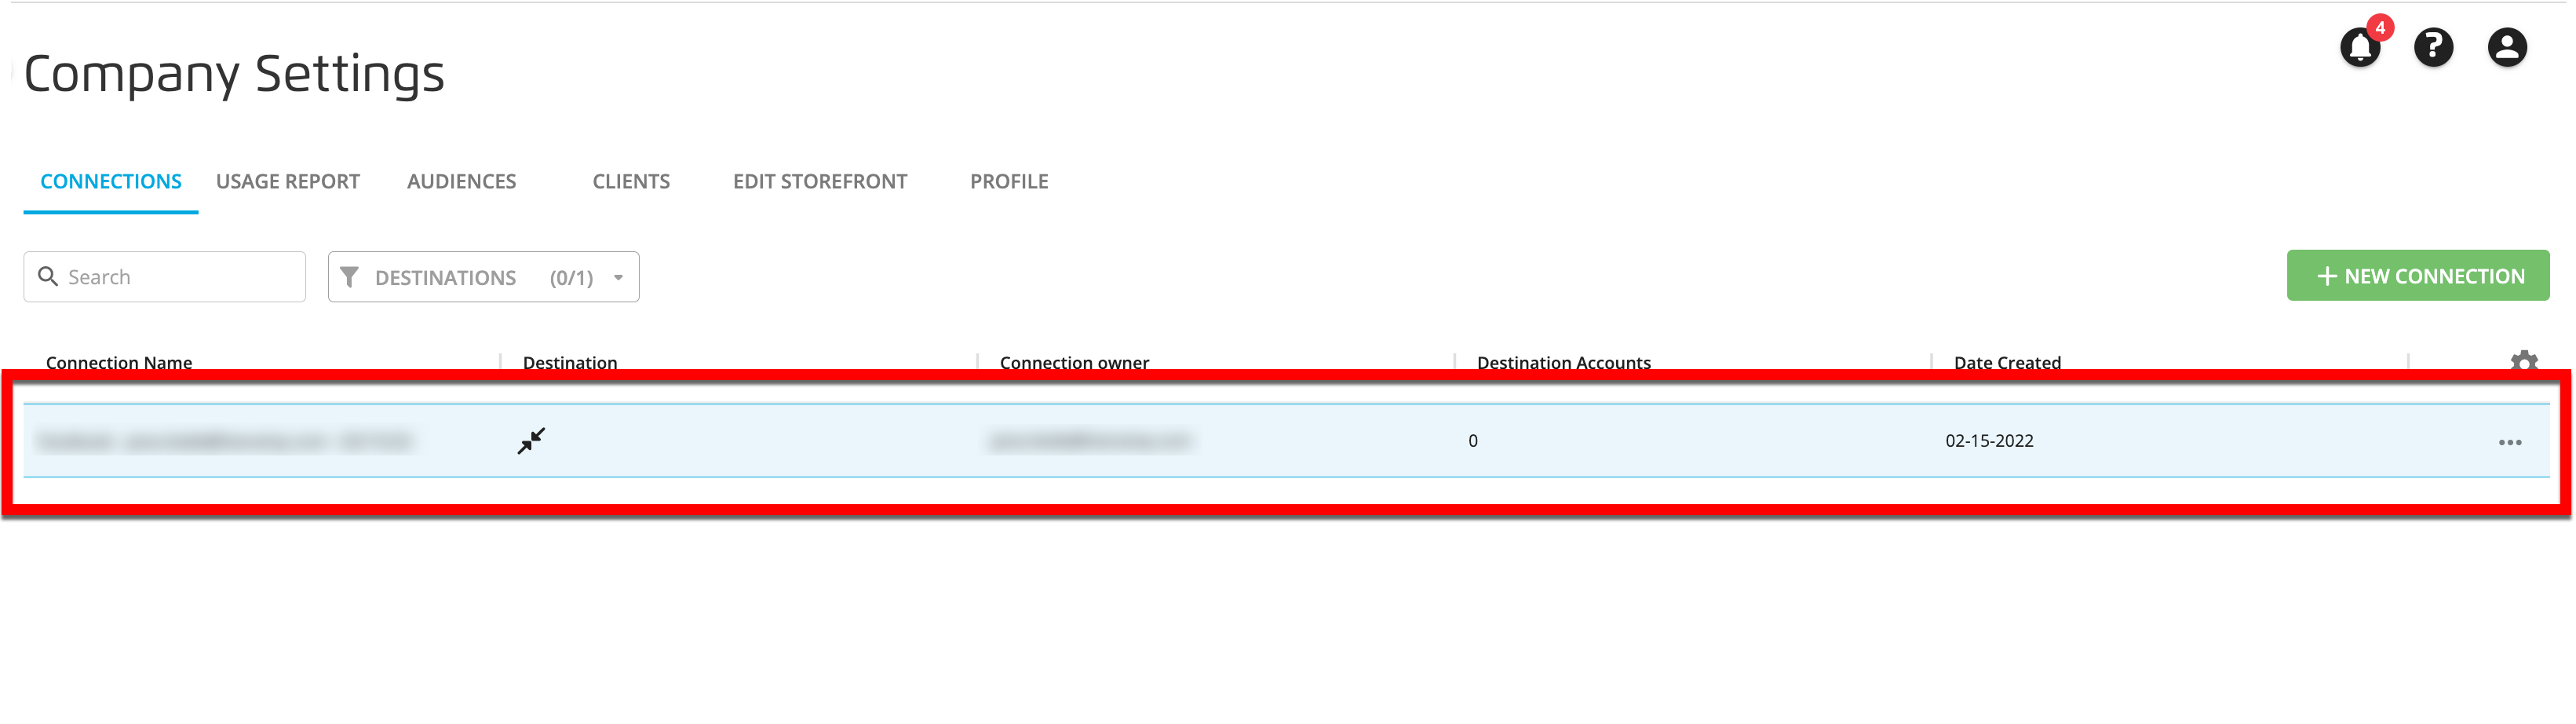
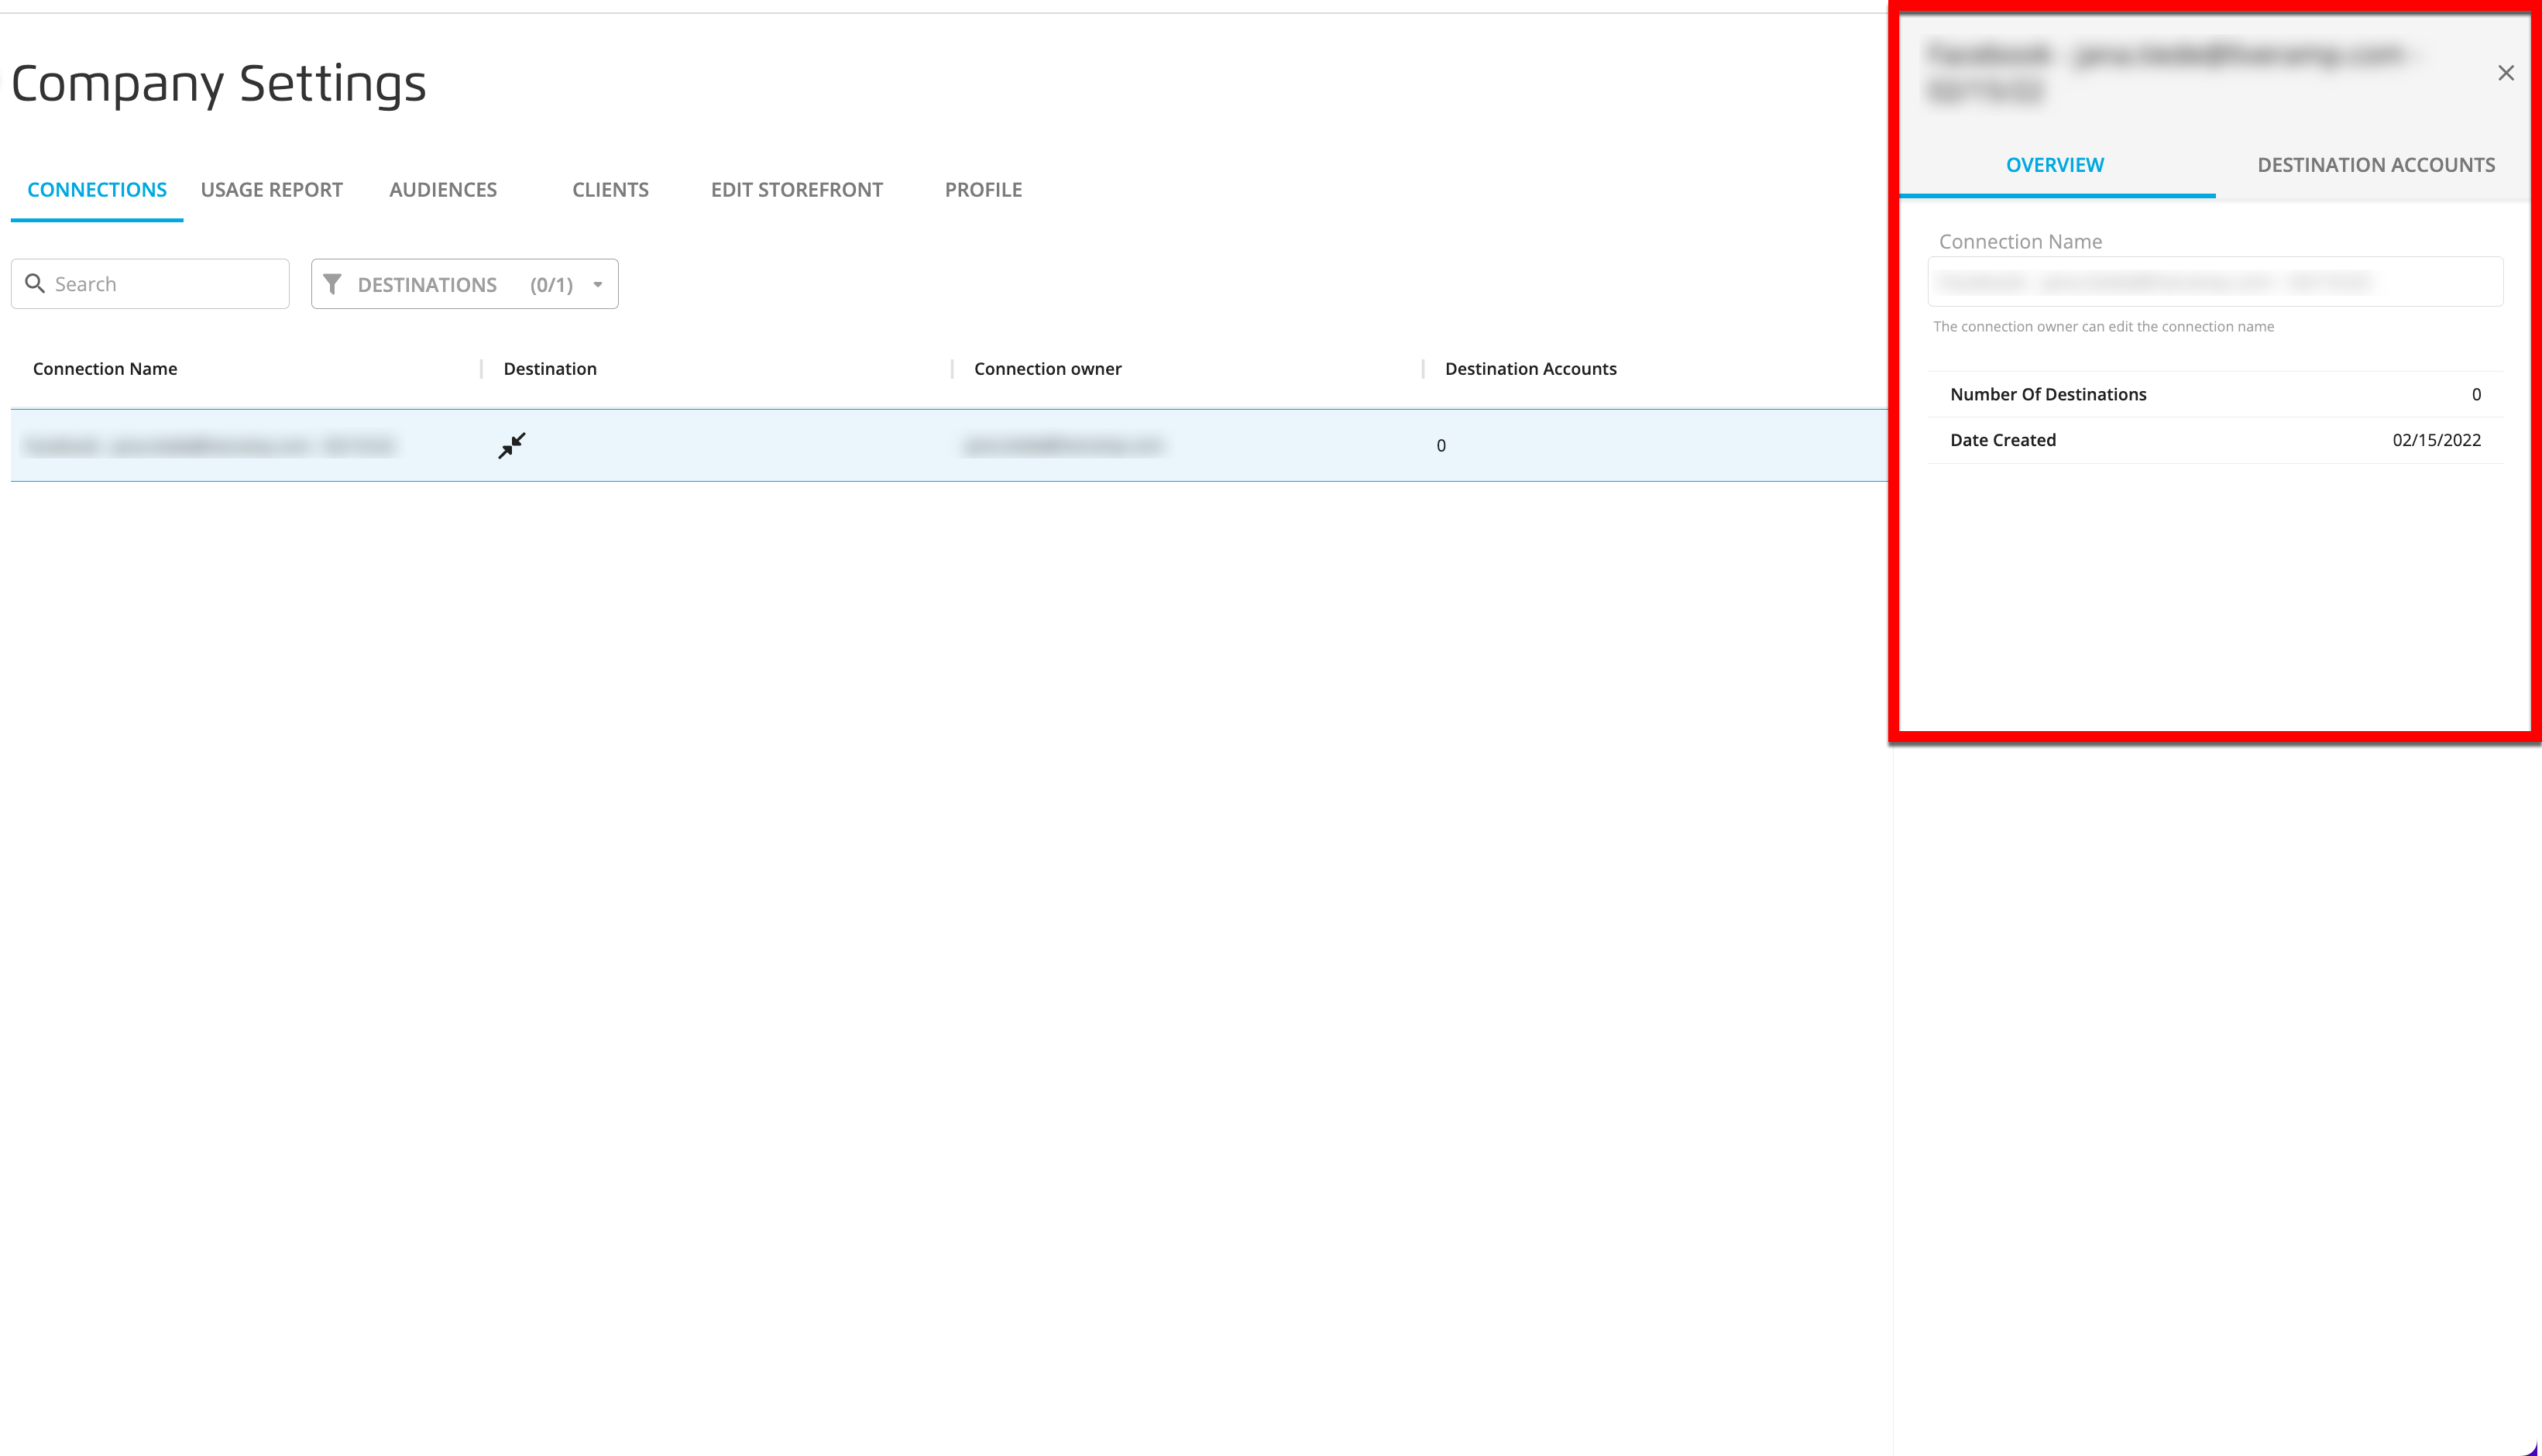
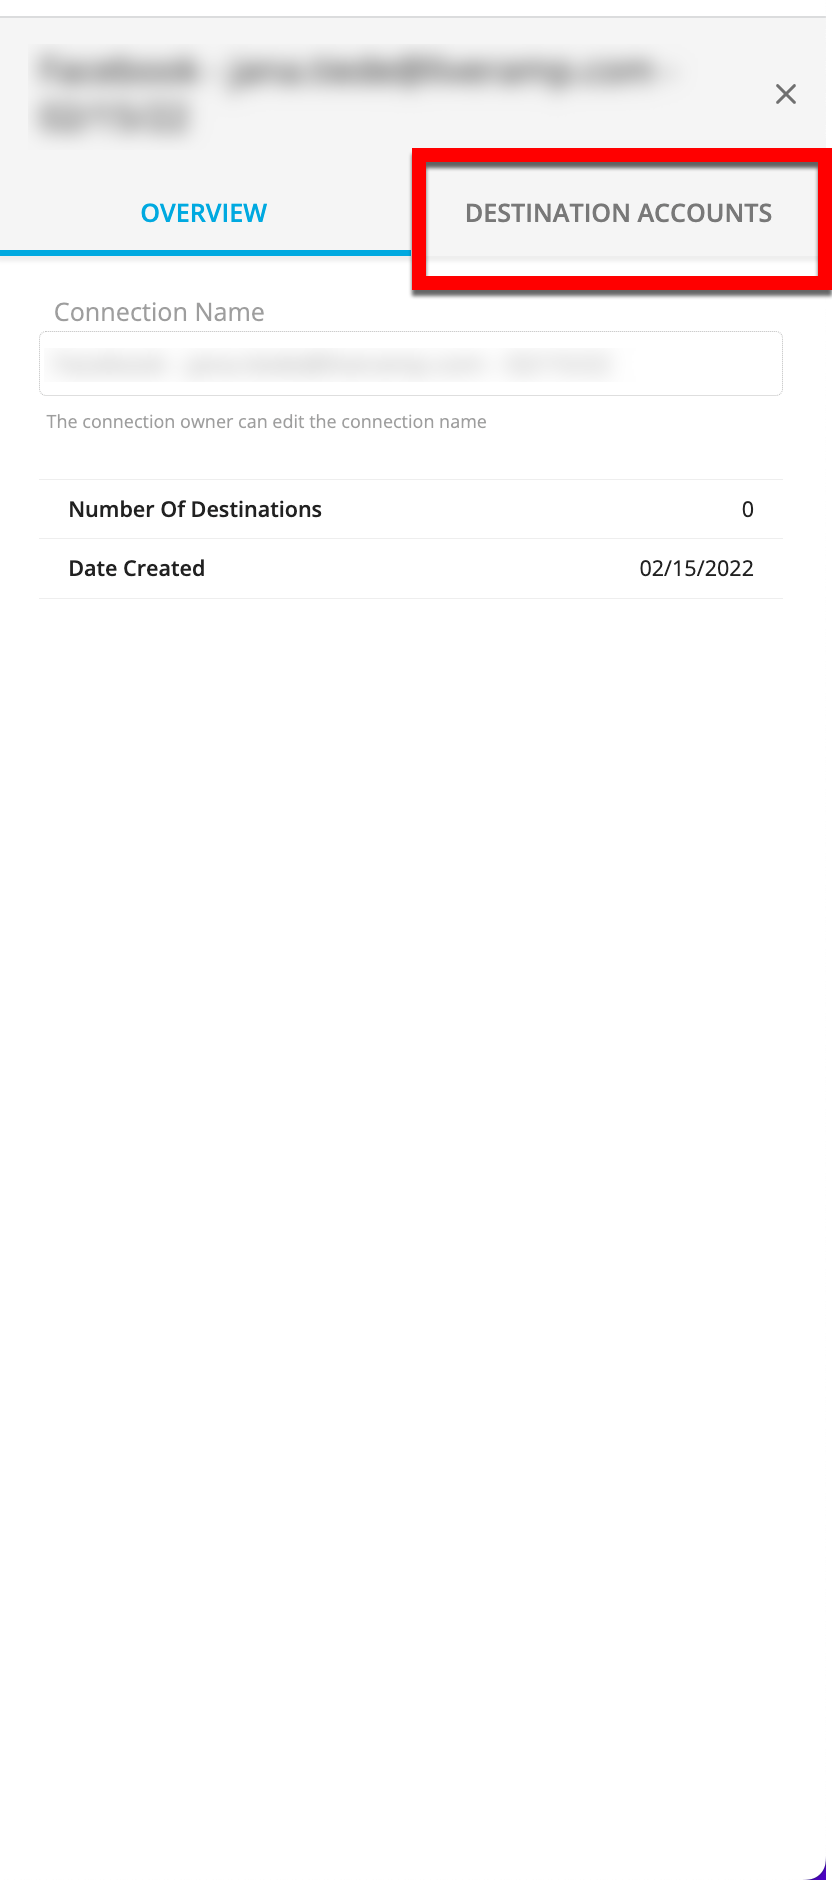
Select the Destination Accounts tab to view the list of destination accounts that use this connection.
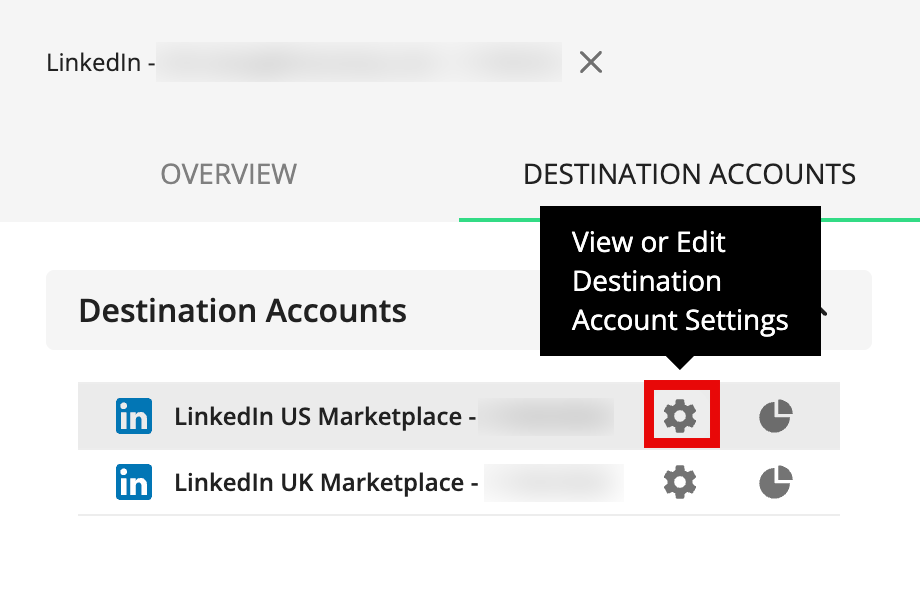
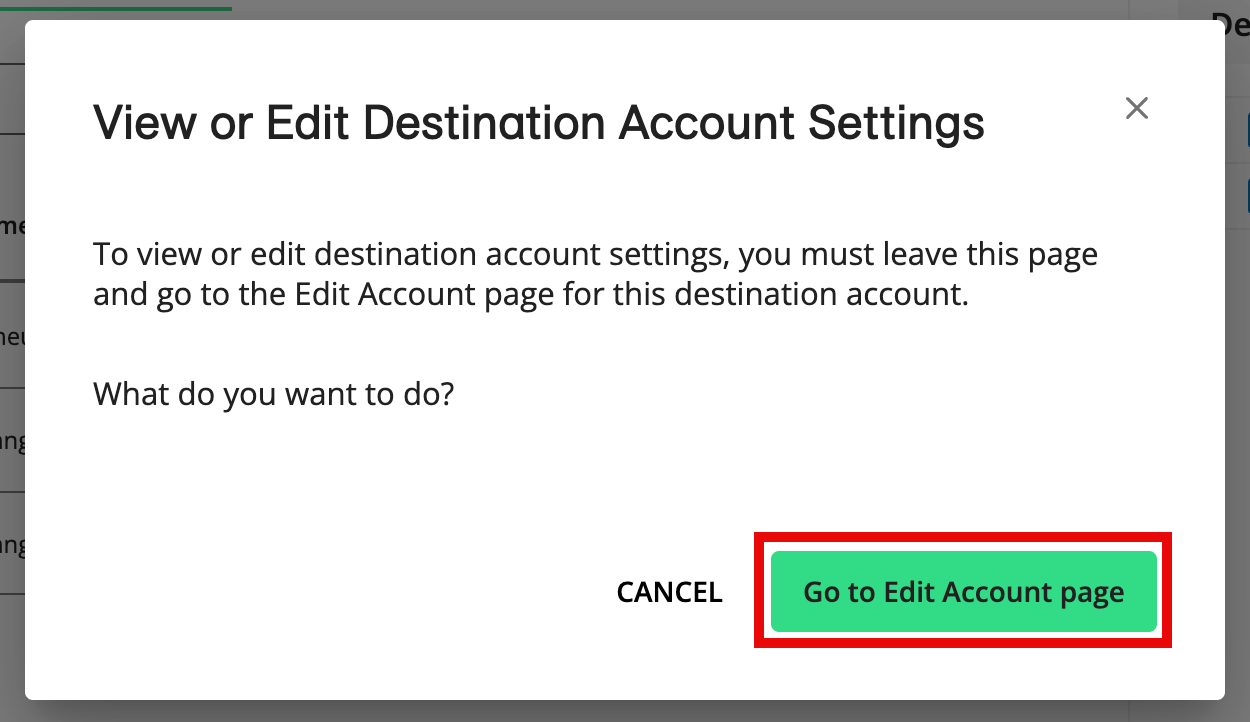
To edit the settings for a particular destination account, click the "Settings" icon (the gear icon) that appears when you hover over that destination account and then click from the confirmation dialog that appears.
Once you've finished the editing process and saved your changes, click the back button on your browser to take you back into the Destination Accounts tab.
Repeat steps 5 and 6 for any additional destination accounts for that OAuth connection that you need to edit.
Editing Destination Account Settings for OAuth Destinations
Before editing the settings for a destination account for an OAuth destination, you must confirm a valid OAuth connection using one of the following methods:
Re-validate your existing OAuth connection for that destination account by clicking .
Select one of your other existing OAuth connections from the OAuth Connection dropdown list and click .
Create a new OAuth connection and validate that connection:
From the OAuth Connection dropdown list, select .
From the new window that opens with that destination's sign in or login screen, enter your credentials and follow the destination's process to give access (for OAuth instructions, see the appropriate section in "Activate a Destination Account for OAuth Destinations").
Make sure all of the required account details are correct.
Click .
Note
The OAuth account and seat ID must be compatible and pass the validation test for the connection to be created.
Once you've confirmed a valid OAuth connection with one of these methods, you can edit the destination account settings.