Upload a File via LiveRamp's SFTP
Follow the steps below to upload a file via LiveRamp's SFTP, either with an SFTP client or from the command line.
Note
You can perform most functions as with other SFTP connections, such as creating or moving directories. Be sure not to delete the "/uploads" directory, however. Once a file has been processed in LiveRamp, you cannot delete it from your account without LiveRamp assistance.
When using LiveRamp's SFTP, keep your file uploads under 1TB/day across all datasets in your account. If you need to exceed this limit, consider using an S3 bucket or your SFTP.
Want to improve security? LiveRamp supports SSH key pair authentication, and requires SSH key pair authentication for EMEA data files. To use this option, send your SSH public key file to LiveRamp by creating a case in the LiveRamp Community portal (or contact your LiveRamp representative if you don't have access to the portal).
The LiveRamp SFTP does not require an allowlist in order to receive files from your servers
If you're uploading with WinSCP:
Make sure not to send files with an extension of ."filepart", as our system will not process these files (and you will see the error "Cannot create remote file 'uploads/filename.csv.filepart.' Permission denied.", or something similar). To disable the feature in WinSCP that might be giving your files a ."filepart" extension, see these instructions.
You must set the SFTP protocol in your WinSCP session settings to version 4. Other SFTP protocol versions are not supported.
Tip
Next Steps
For offline (PII-based) data, if this is the first file you're uploading to this dataset, create a support case so the support team can make sure everything ingests correctly. See 'Considerations When Uploading the First File to a Dataset" for more information.
Upload with an SFTP Client
Follow the steps below to upload a file via LiveRamp's SFTP with an SFTP client.
Make sure that the file is formatted correctly and not password-protected.
If using a firewall, enable outgoing port 8442 or 22, and make sure to allowlist the LiveRamp SFTP IP address (35.202.130.160).
Sign in to your SFTP client.
Tip
LiveRamp recommends Cyberduck, a free client that works on Mac and PC.
In the "Host" field, enter "files.liveramp.com".
Enter the username and password given to you by your LiveRamp representative.
Note
Contact your LiveRamp representative (or your reseller representative, if appropriate) for SFTP credentials if you haven't been given them yet, or if you need to have your password reset.
If you have more than one audience, and if you haven’t yet created a subdirectory for the audience you’re uploading the file to, create a new subdirectory within “/uploads” with the exact audience name as it exists in Connect (replacing any spaces with underscores). For example, if you have an audience named "Dog Lovers", create the subdirectory "/uploads/dog_lovers/."
Upload the file to the “/uploads” directory, or to the subdirectory for the audience you’re uploading the file to (if you have more than one audience).
Tip
If you run into problems with the transfer, see Troubleshoot LiveRamp SFTP File Uploads.
Tip
Need a walkthrough? See the section below for a walkthrough to guide you through the SFTP file upload process via Cyberduck.
If the file does not appear in Connect within 3 days, contact your LiveRamp representative to confirm that the file uploaded correctly.
Cyberduck Upload Walkthrough
Follow these steps to upload files via LiveRamp's SFTP with Cyberduck:
Download the Cyberduck client.
Open Cyberduck.
Click .

Click into the connection type dropdown list and select “SFTP (SSH File Transfer Protocol)."
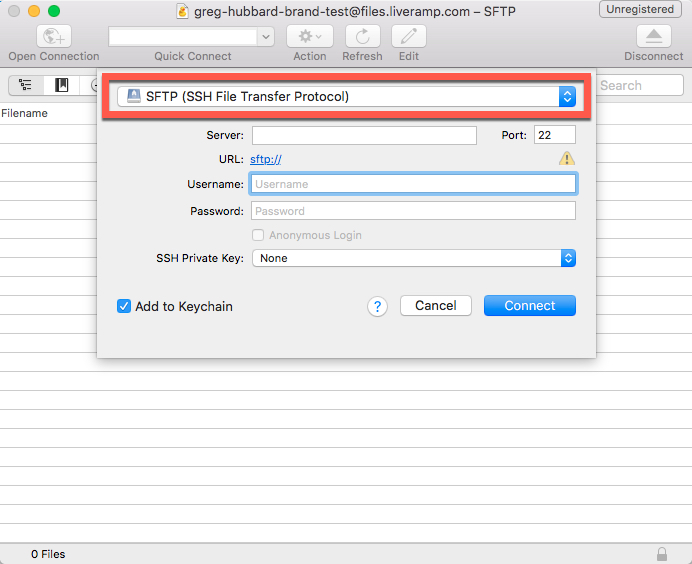
Enter the following information:
Server: files.liveramp.com
Port: 8442 or 22
Username: Your SFTP username (given to you by your LiveRamp representative)
Password: Your SFTP password (given to you by your LiveRamp representative)
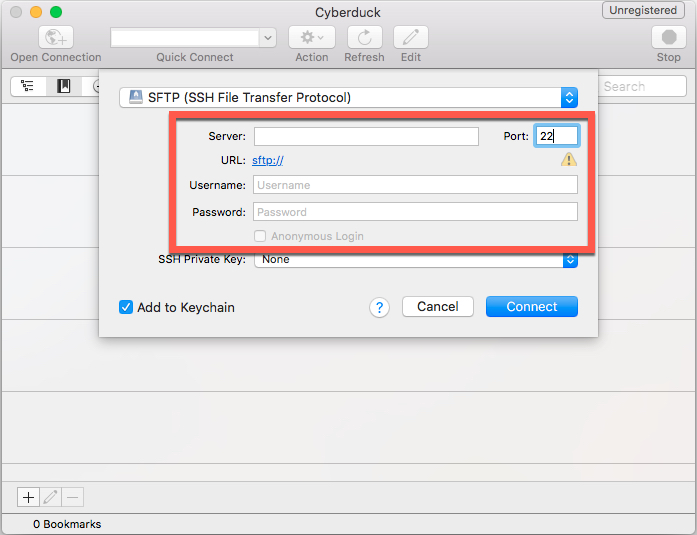
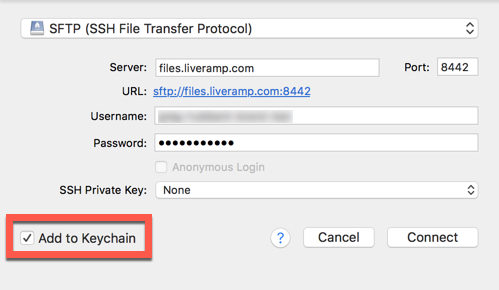
If you want Cyberduck to remember your credentials next time, check the "Add to Keychain" check box.
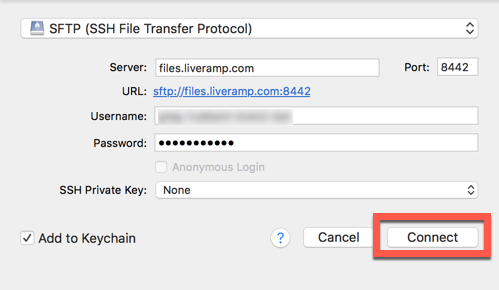
Click Connect.
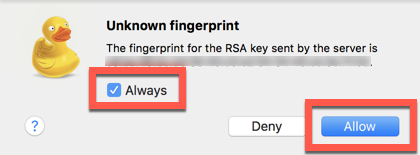
If the Unknown fingerprint dialog appears, check the Always check box and then click Allow.
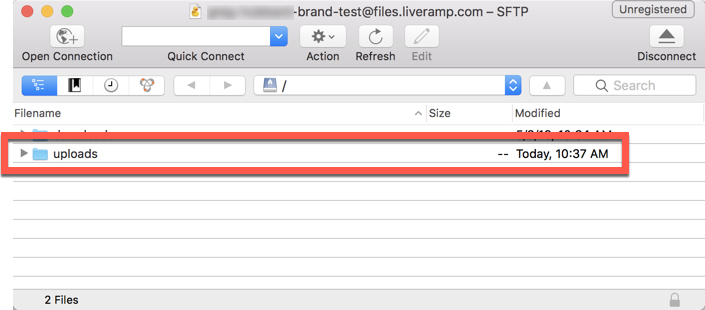
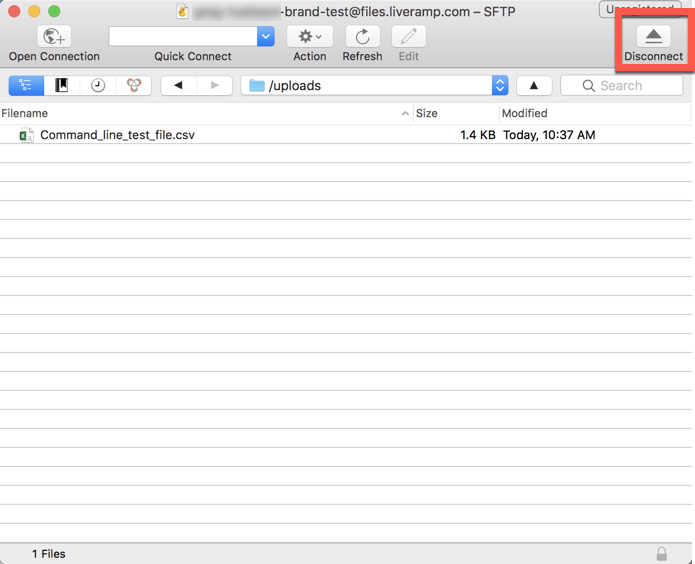
Once the connection has been made, doubleclick the "uploads" folder.
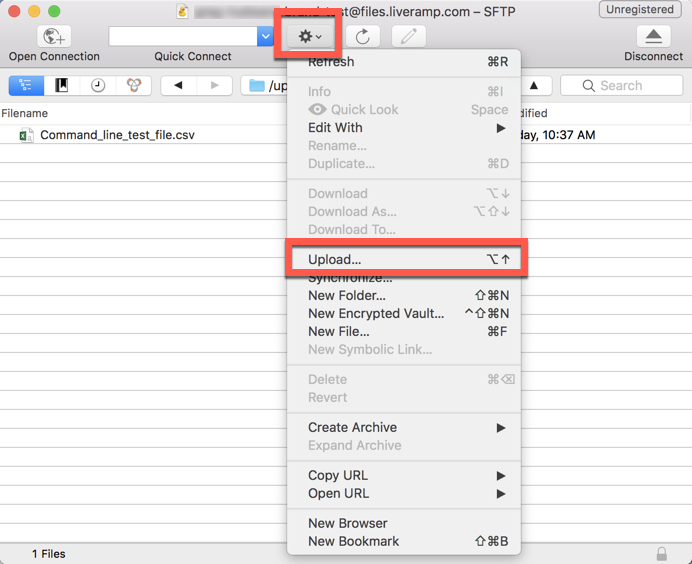
Upload your files using one of the methods listed below:
Drag and drop the files from your computer into the Cyberduck window.
From the File tab, select "Upload" and then select the desired file(s).
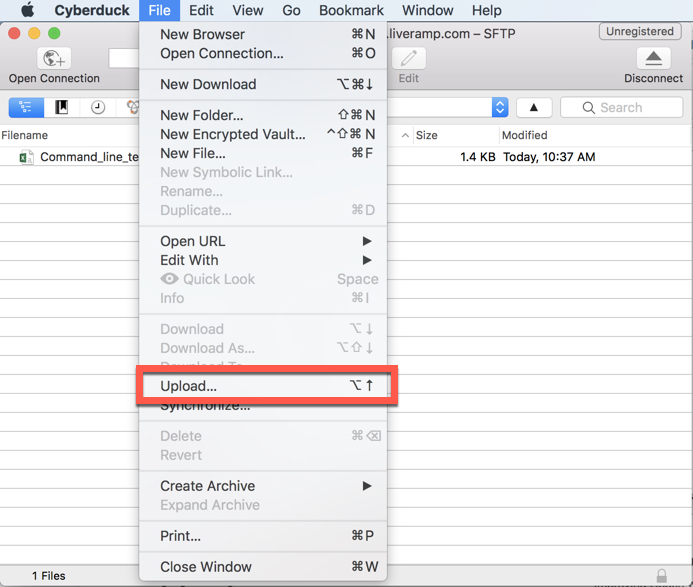
Click the "Action" button, select "Upload", and then select the desired file(s).
When you're finished uploading, click the "Disconnect" button.
Upload Files from the Command Line
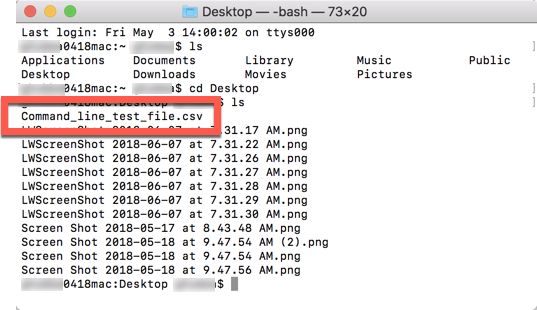
From the command line, confirm the location and file name for the file you want to upload. For example, you might perform these steps:
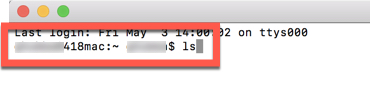
Enter "ls" to list all folders.
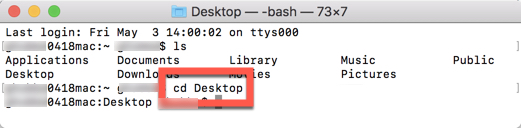
Change the directory to the desired folder (in this example, enter "cd Desktop").
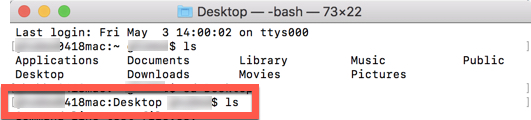
Enter "ls" to list the files in the current folder.
Locate the desired file.
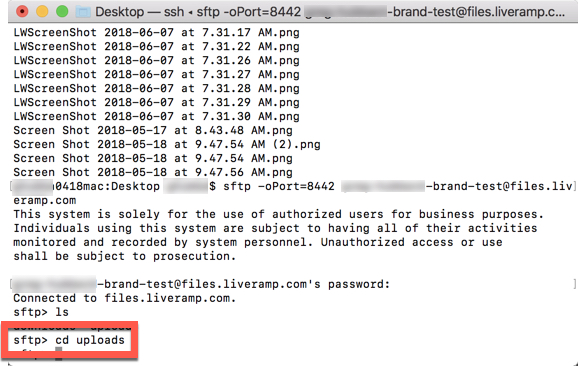
Enter "sftp -oPort=8442 [username]@files.liveramp.com" (where "[username]" is the username given to you as part of your LiveRamp SFTP credentials).
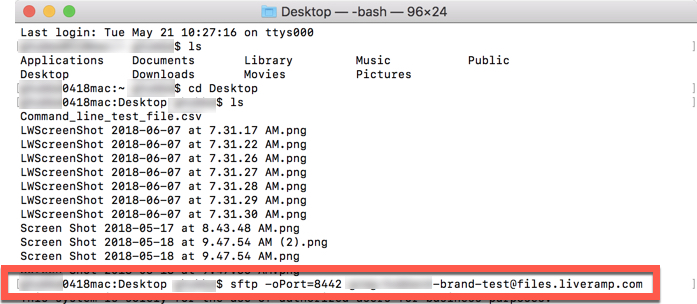
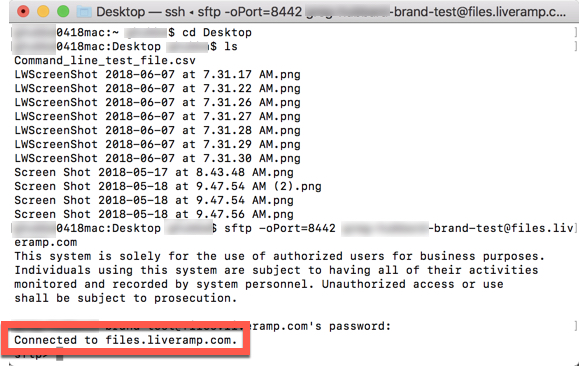
Enter your password (the password characters might not display).
If the connection is successful, the message below displays:
Navigate to the appropriate folder on the SFTP server (this is usually the "uploads" folder, as shown in this example):
Enter "ls" to list all folders.
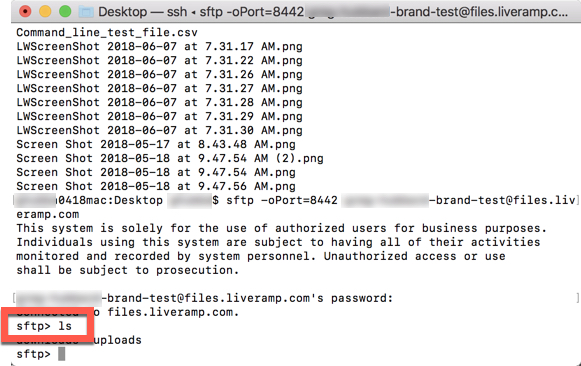
Change the directory to the desired folder (in this example, enter "cd uploads").
Note
To create a new subdirectory, use the "mkdir" command.
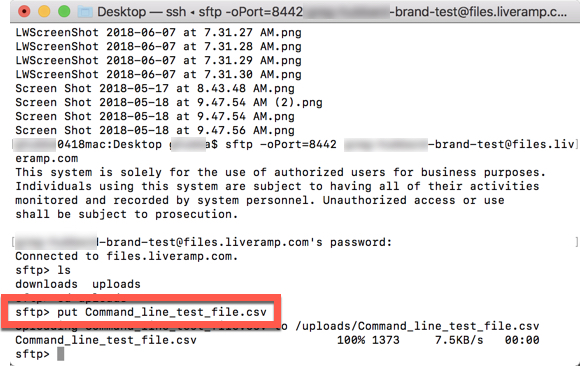
Enter "put [file name]" to upload the file.
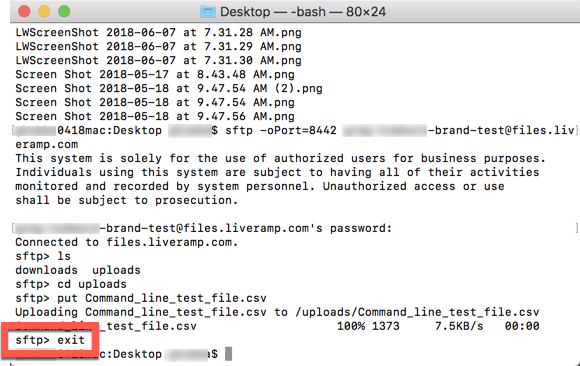
Enter "exit" to close the connection.
Troubleshoot LiveRamp SFTP File Uploads
See the sections below for help when uploading files via LiveRamp's SFTP.
IP Address Issues
If you haven't allowlisted the correct LiveRamp SFTP IP address, you'll receive a "connection refused" error message. Make sure that "35.202.130.160" has been allowlisted.
Domain Name Issues
If you try to upload to the wrong domain name, you'll receive an error message similar to the one below:
“ssh: Could not resolve hostname sftp.liveramp.com: nodename nor servname provided, or not known”
Make sure you're using "files.liveramp.com" as your domain name.
General Issues
If a SFTP file upload fails and you don't get one of the error messages listed above, check the following:
You are using SFTP (not FTP).
Your username and password are spelled correctly.
You are using port 8442 and this port is not blocked by your IT department. You can check that port 8442 isn't blocked by using this link: http://portquiz.net:8442/. If the port is unblocked, a page will load, saying, "Your network allows you to use this port."
You are uploading to the "/uploads" folder.
You are not trying to modify any files that are already on the SFTP server, and your SFTP client is not implicitly making any changes (LiveRamp does not support rename, delete, or modify operations).
If the upload fails partway through on multiple attempts and none of the above steps resolves the problem, contact your LiveRamp representative.