Upload an EMEA Data File via LiveRamp's AWS S3 Bucket
Follow the steps below to upload an EMEA data file via LiveRamp's AWS S3 bucket, either with an S3 client or by using AWS Command Line Interface (CLI). For information on formatting files for EMEA data, see "Creating Data Files for EMEA Countries".
Caution
When you're uploading the first file to a dataset, you'll need to contact your LiveRamp representative so we can make sure your file is imported correctly. Depending on the type of dataset and your situation, you might need to do this before uploading your first file or after (or both). See "Considerations When Uploading the First File to a Dataset" for more information.
Uploading with WinSCP? Make sure not to send files with an extension of ."filepart", as our system will not process these files (and you will see the error "Cannot create remote file 'uploads/filename.csv.filepart.' Permission denied.", or something similar). To disable the feature in WinSCP that might be giving your files a ."filepart" extension, see these instructions.
Upload with an S3 Client
You can use most S3 clients to upload EMEA data files to LiveRamp’s AWS S3 bucket, including the following:
Cyberduck
S3 Browser
Terminal supports upload via AWS CLI commands
CloudBerry
Other S3 Clients that enable you to upload files
Follow the steps below to upload an EMEA data file via LiveRamp's AWS S3 bucket with an S3 client.
Make sure that the file is formatted correctly and not password-protected.
If using a firewall, enable outgoing port 443.
Sign in to your S3 client.
Tip
LiveRamp recommends Cyberduck, a free client that works on Mac and PC.
In the "Host" field, enter "com-liveramp-eu-customer-uploads.s3.amazonaws.com".
Enter the username and password given to you by your LiveRamp representative.
Note
Contact your LiveRamp representative (or your reseller representative, if appropriate) for S3 credentials if you haven't been given them yet, or if you need to have your password reset.
Upload the file to the "/uploads" directory, or to the subdirectory for the dataset you’re uploading the file to (if you have more than one dataset).
Tip
Need a walkthrough? See the section below for a walkthrough to guide you through the S3 file upload process via Cyberduck.
If the file does not appear in Connect within 3 days, contact your LiveRamp representative to confirm that the file uploaded correctly.
Cyberduck Upload Walkthrough
Follow these steps to upload EMEA data files via LiveRamp's AWS S3 with Cyberduck:
Download and install the Cyberduck client if you have not already done so.
Open Cyberduck.
From the "Bookmark" tab, select New Bookmark to create a new bookmark.

Click .

From the connection type dropdown menu, select Amazon S3.
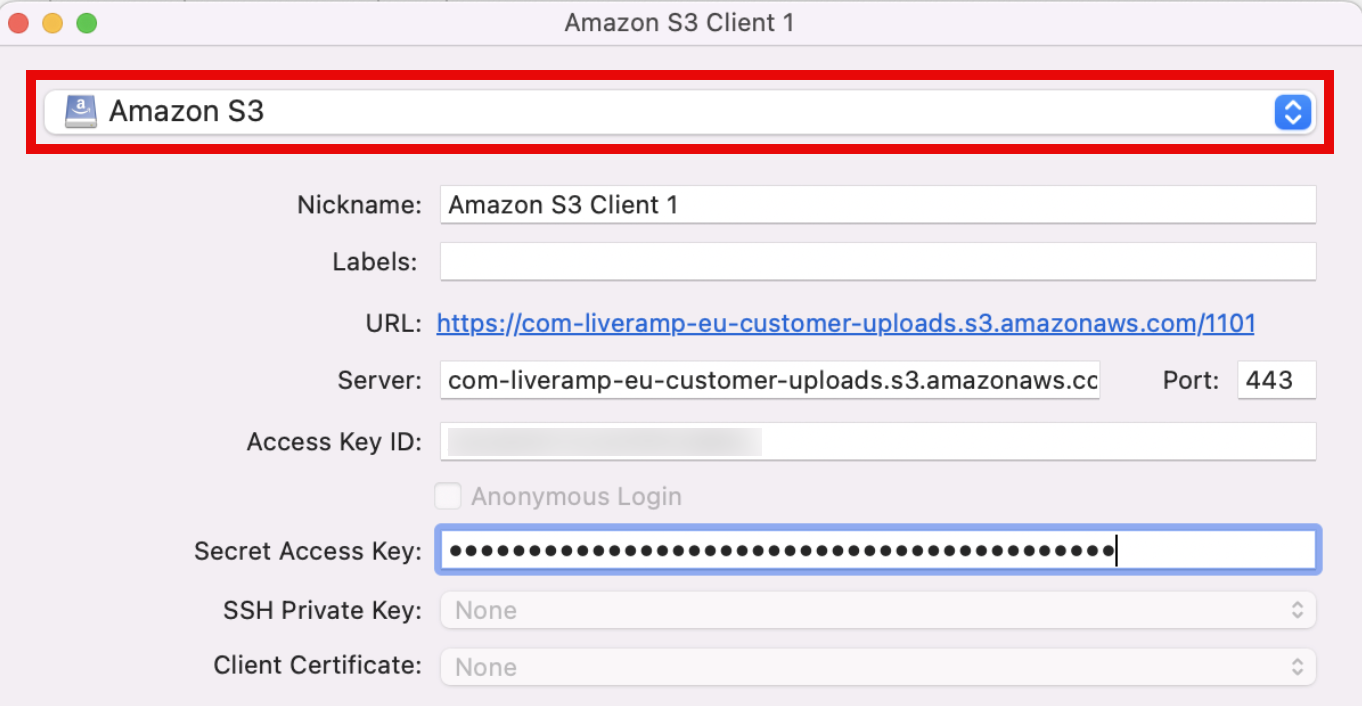
Enter the following information:
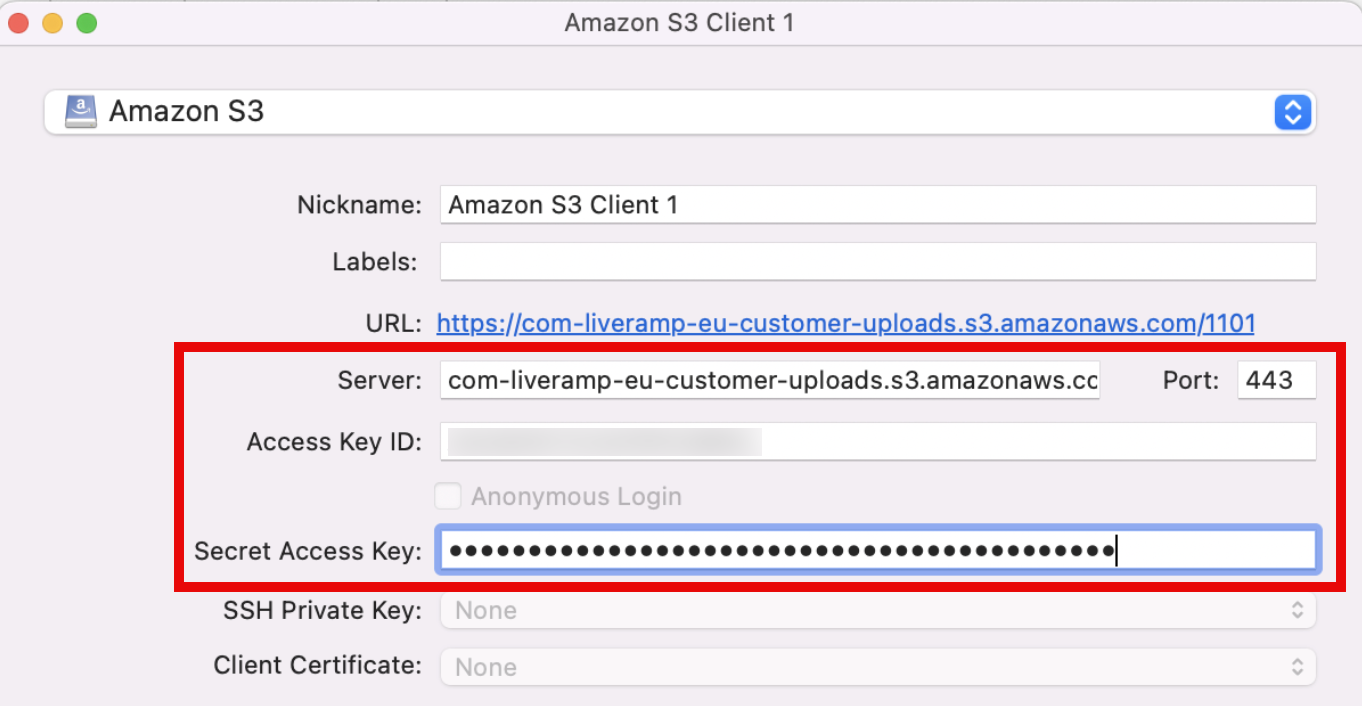
Server: com-liveramp-eu-customer-uploads.s3.amazonaws.com
Port: 443
Access Key ID: Your access key ID (given to you by your LiveRamp representative)
Secret Access Key: Your secret access key (given to you by your LiveRamp representative)
SSH Private Key: Leave this field blank.
Client Certificate: Leave this field blank.
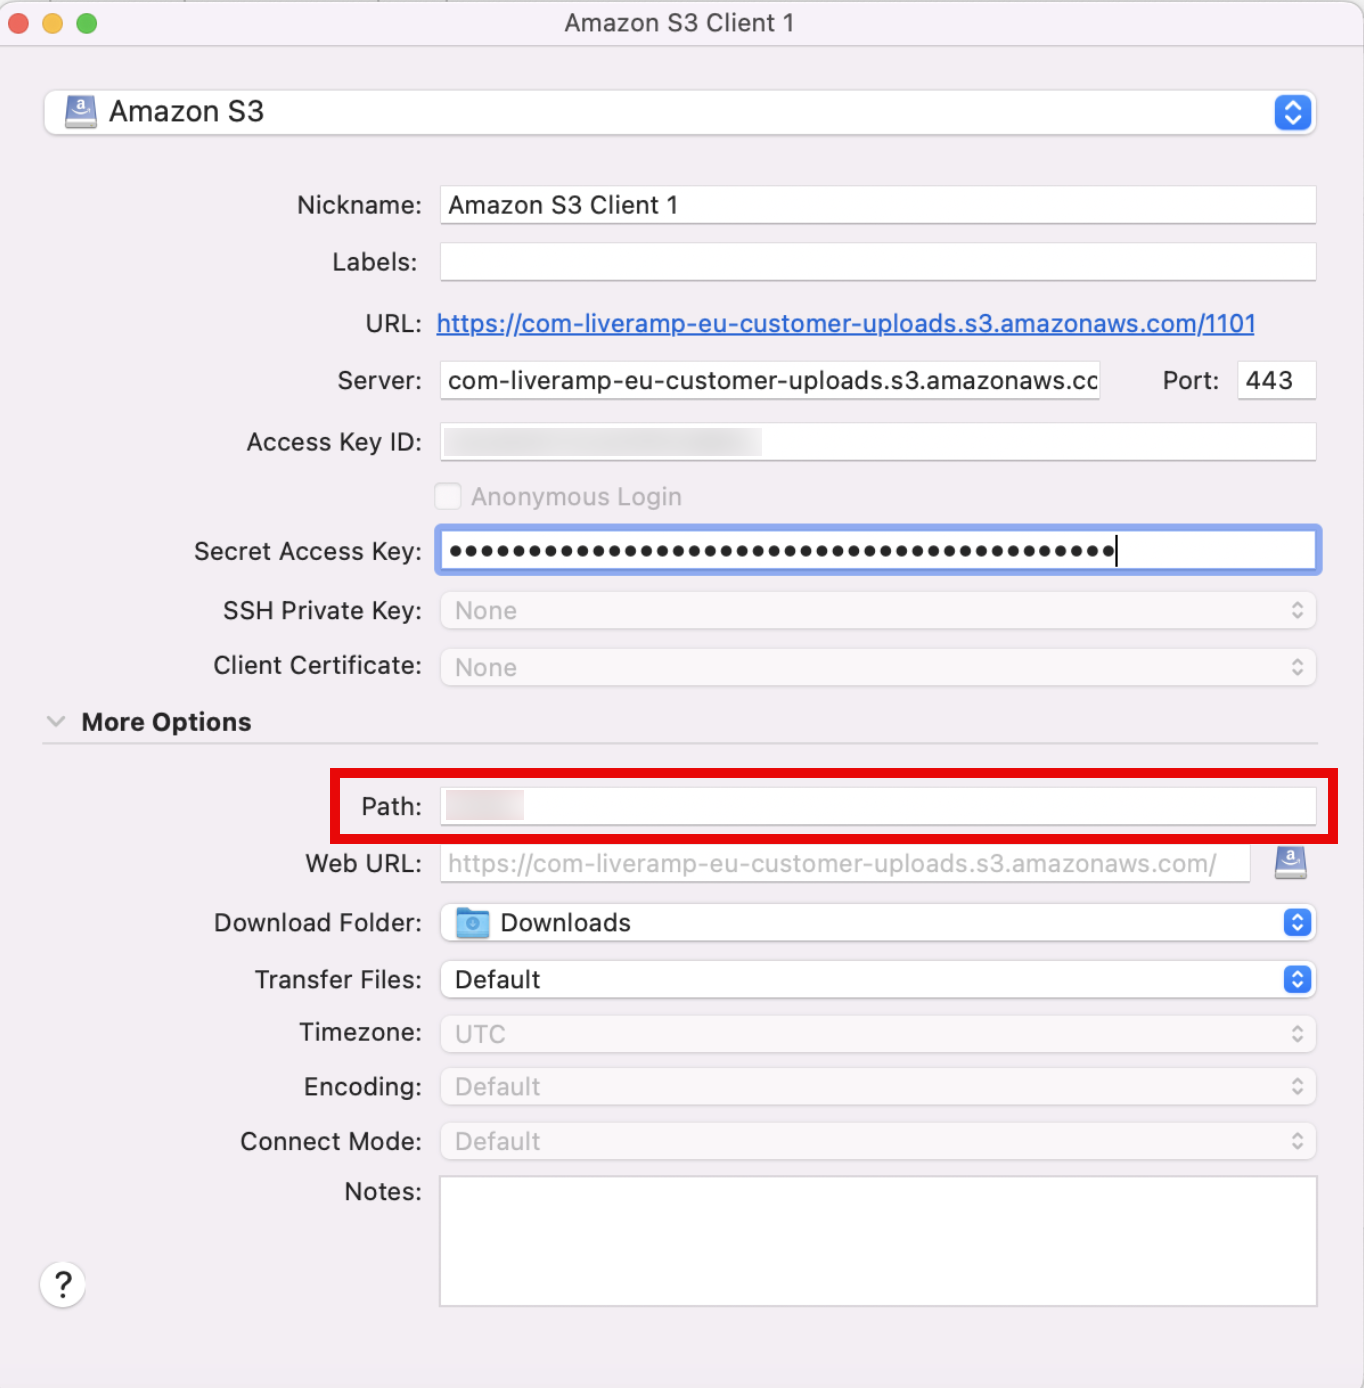
In the "Path" field under "More Options", add the four-digit ingestion ID shared by LiveRamp.
Once the connection is made, access your bookmarks to view the available AWS S3 Cyberduck client(s):
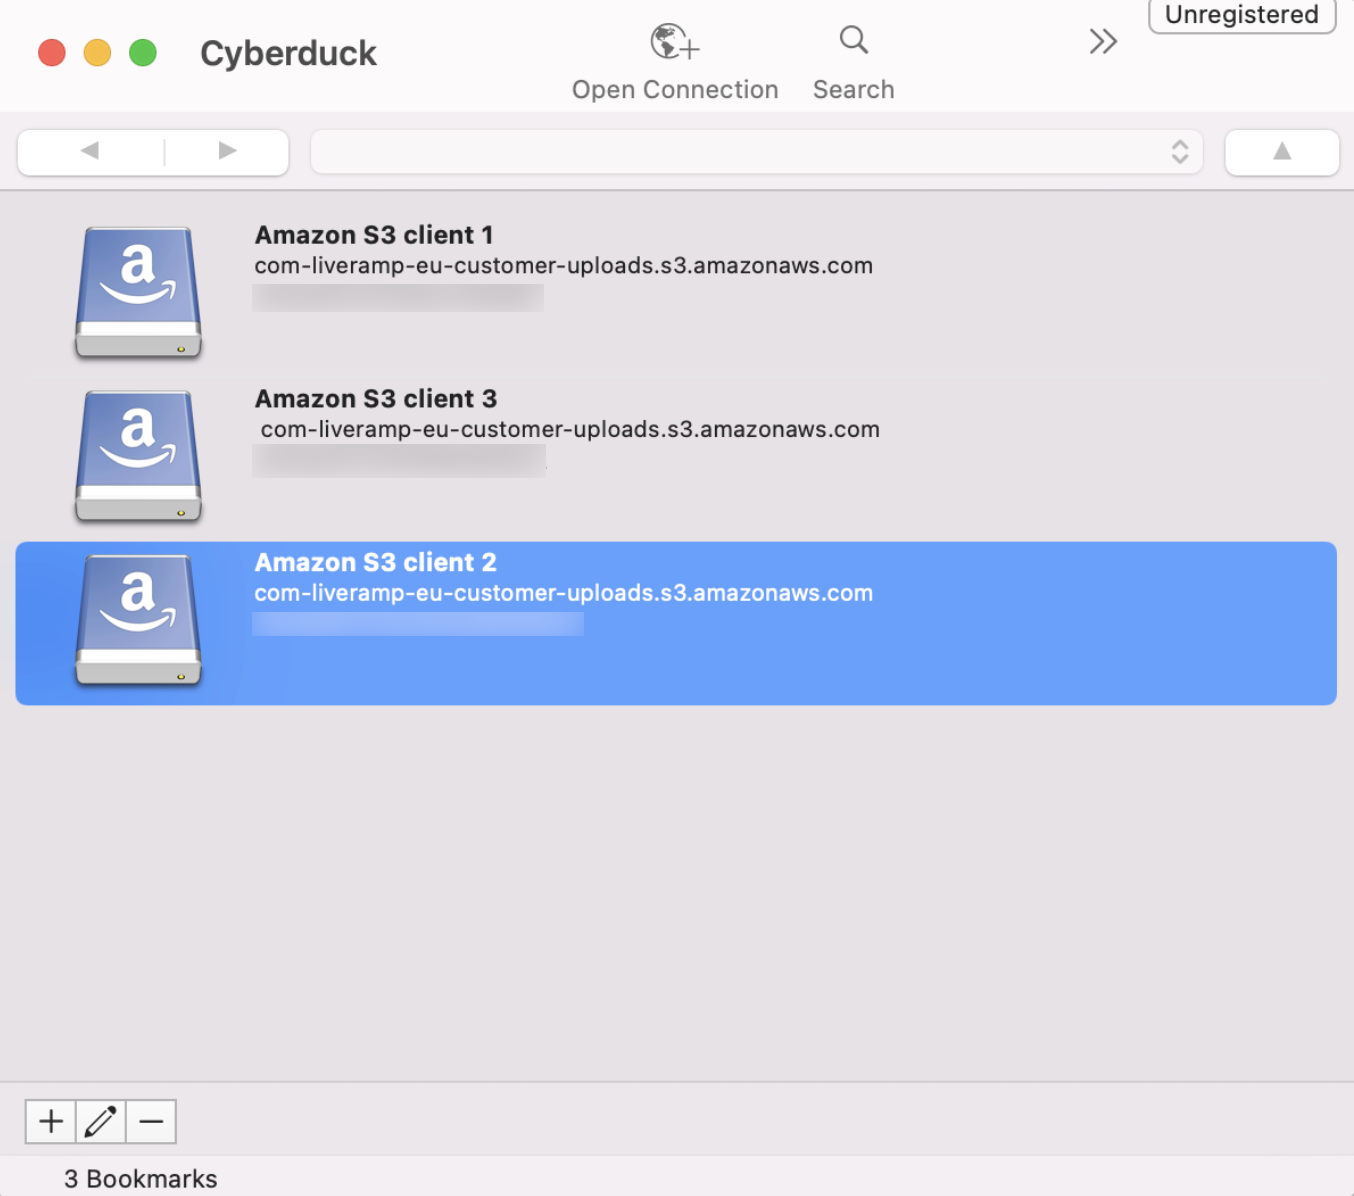
Select a client and upload your files using one of the following methods:
Drag and drop the files from your computer into the Cyberduck window.
From the "File" tab, select Upload and then select the desired file(s) to upload.
When you're finished uploading your files, click .
Automating File Upload with the AWS Command Line
Depending on your tech stack, you may wish to use commands available via the AWS Command Line Interface to generate a script that will automate file uploads to our S3. Currently, this automation must occur client-side, though it is a long-term roadmap item to enable LiveRamp to automatically pull files from client servers in the EU.
The AWS Command Line Interface is the easiest and preferred way to automate uploads.
Follow these instructions if you wish to automate your file deliveries utilizing Amazon’s Command Line Interface:
Install AWS CLI by following these official instructions to install the utility on Windows, Linux, or Mac.
Configure the AWS utility with the credentials provided by your POM to put the access key that was given to you in a file accessible by the AWS command line utility (for more information, see this AWS CLI article.
The easiest way to do that is to open a command line prompt and enter "aws configure".
Make sure to specify a profile if you don't wish to override an existing one. For example, to create a "liveramp" one, enter "aws configure --profile liveramp".
Enter the following parameters:
AWS Access Key ID [None]: Your access key ID
AWS Secret Access Key [None]: Your secret access key
Default region name [None]: eu-west-1
Default output format [None]: json
After the utility is configured, use AWS CLI to automate file uploads by entering the following command:
aws s3 cp <file> s3://com-liveramp-eu-customer-uploads/<Your customer number>/If you created a specific profile (for example, the "liveramp" one from above), you need to specify it, like this:
aws --profile liveramp s3 cp <file> s3://com-liveramp-eu-customer-uploads/<Your customer number>/This type of command can be used in a script that runs on a cron (or some other triggering mechanism) to generate and upload new files from your machine.