Activate an Audience or RFP (OTT Hub)
Caution
This article is intended for users of the OTT Hub. If you are not an OTT Hub user, see the article "Distribute an Audience" in our main Advanced TV section.
Once an audience has been built, you can activate that audience at a pre-implemented ad-serving platform on behalf of the buyer.
Once you have responded to a buyer's RFP, and the buyer has requested that audience be activated for that campaign, you can activate that RFP to the appropriate pre-implemented ad-serving platform on behalf of the buyer.
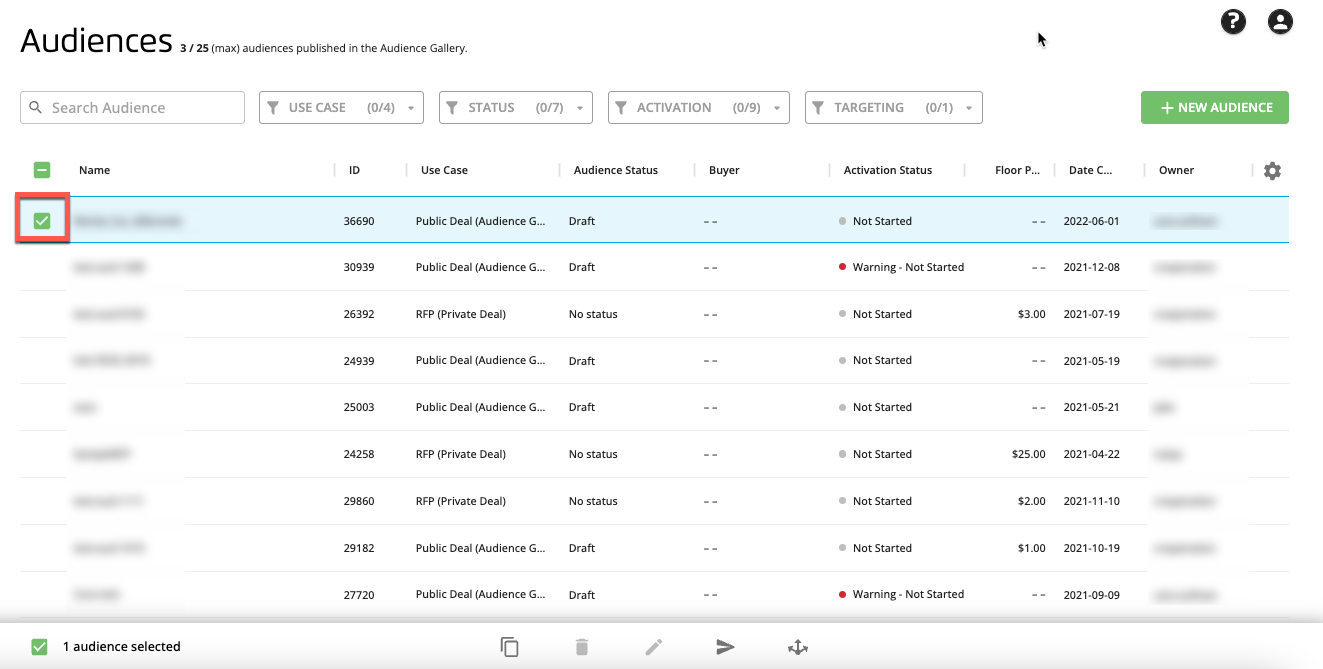
From the Advanced TV navigation menu, click Audiences in the OTT Hub section to navigate to the Audiences page for OTT Hub.

Check the check box for the audience or RFP you want to activate.
Click the Audience Activation icon (
 ) that appears at the bottom of the page.
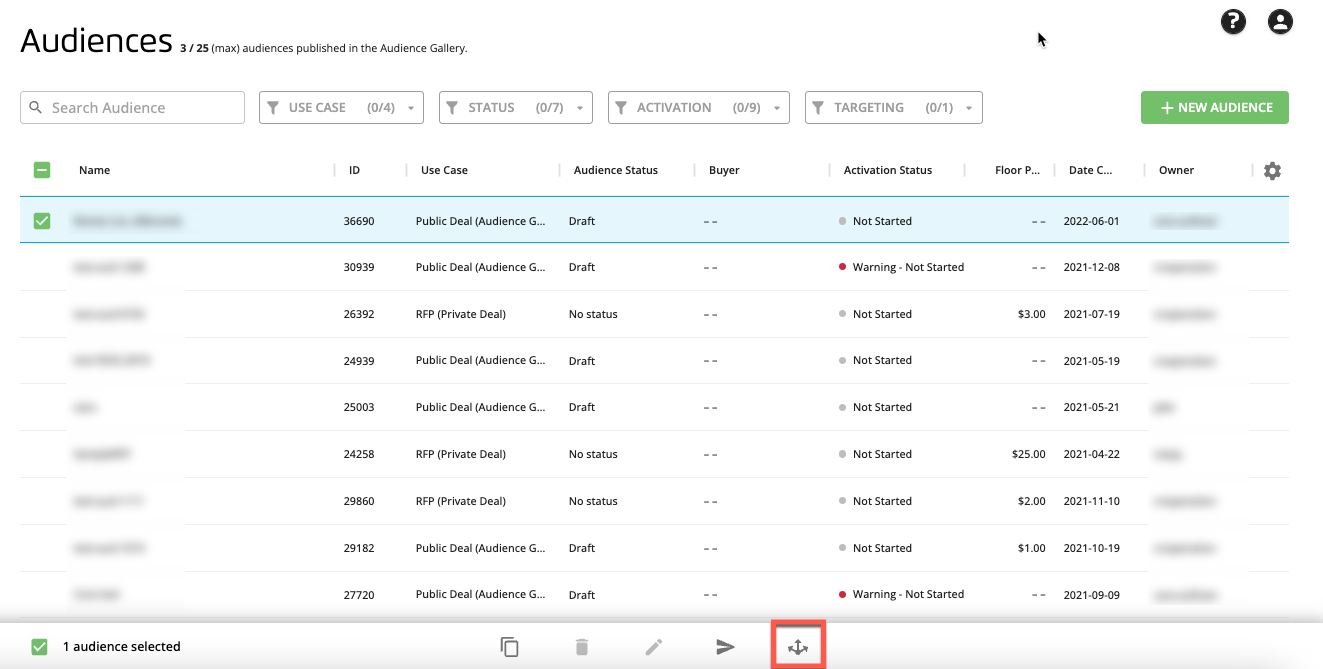
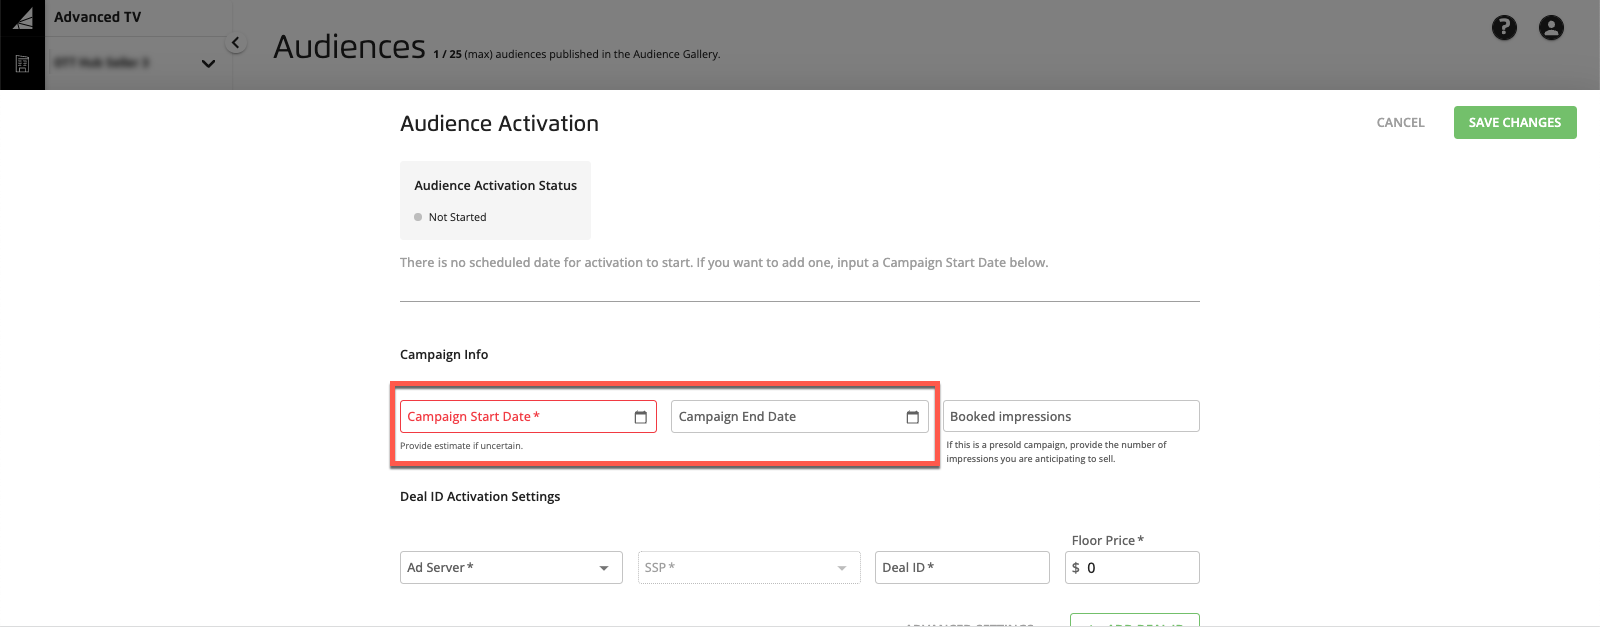
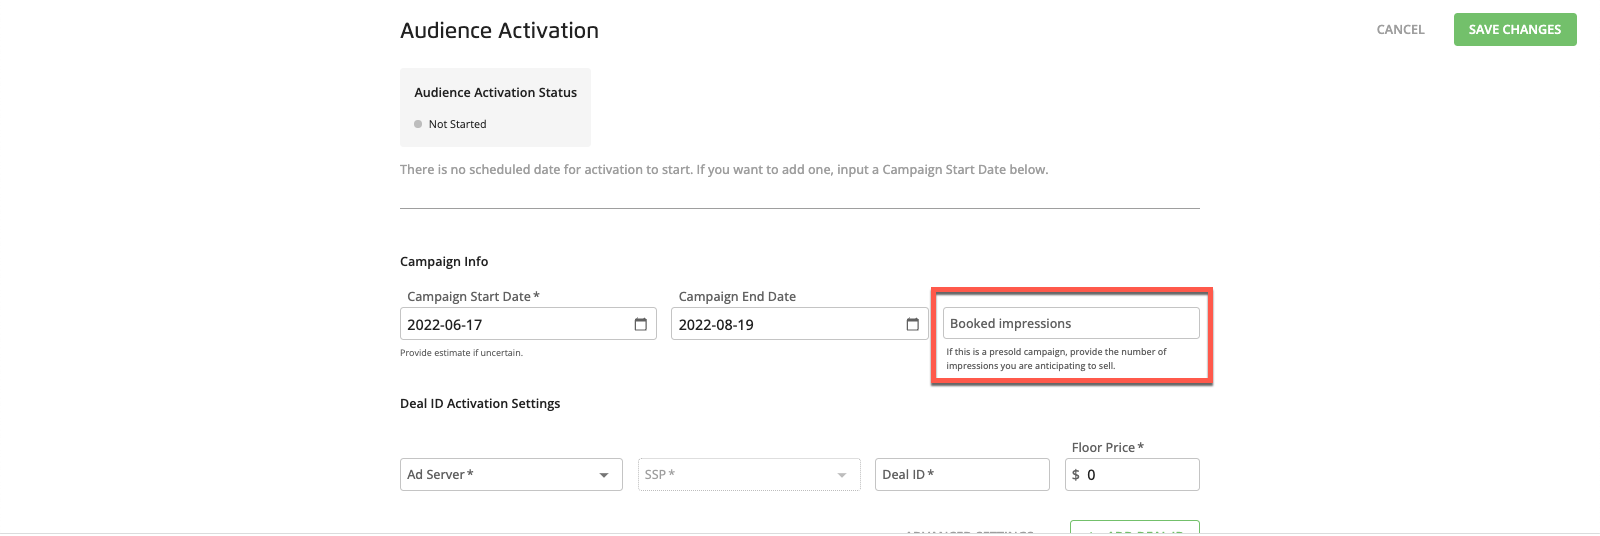
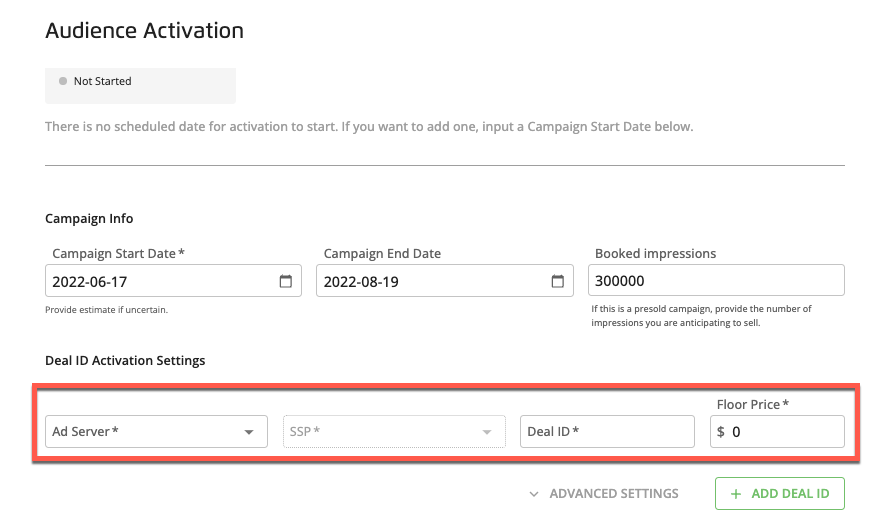
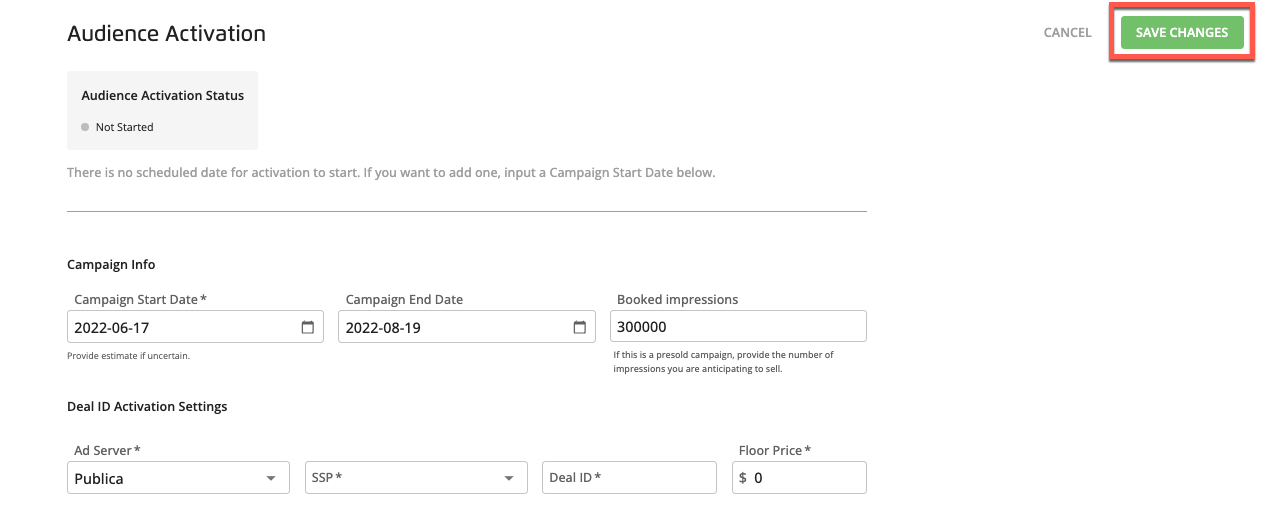
From the Audience Activation popup, enter or adjust the campaign info (if necessary).
Note
If you're uncertain about the campaign dates, you can enter estimates.
If the campaign has been presold, enter the number of impressions you're expecting to sell.
Note
This helps us build better forecasting capabilities in the future.
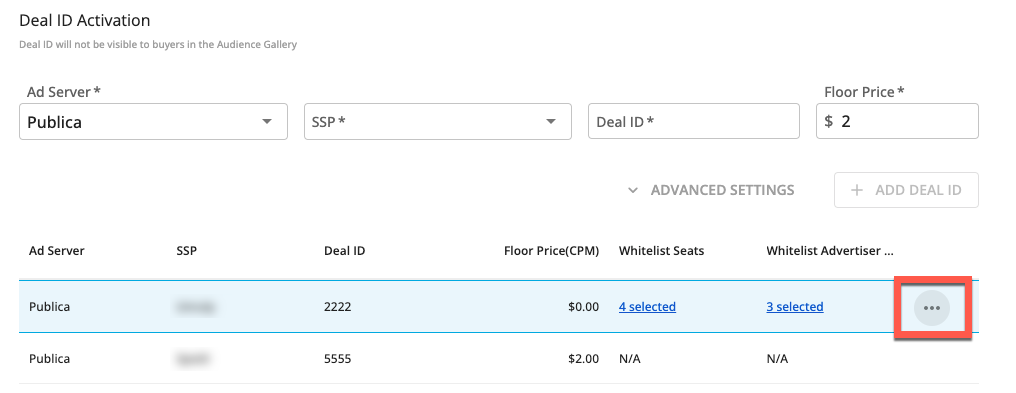
In the Deal ID Activation area, select the ad server and SSP from the drop-down lists, and enter the deal ID and floor price (if different from the default).
Select the ad server and SSP from the drop-down lists, and enter the deal ID and floor price (if different from the default).
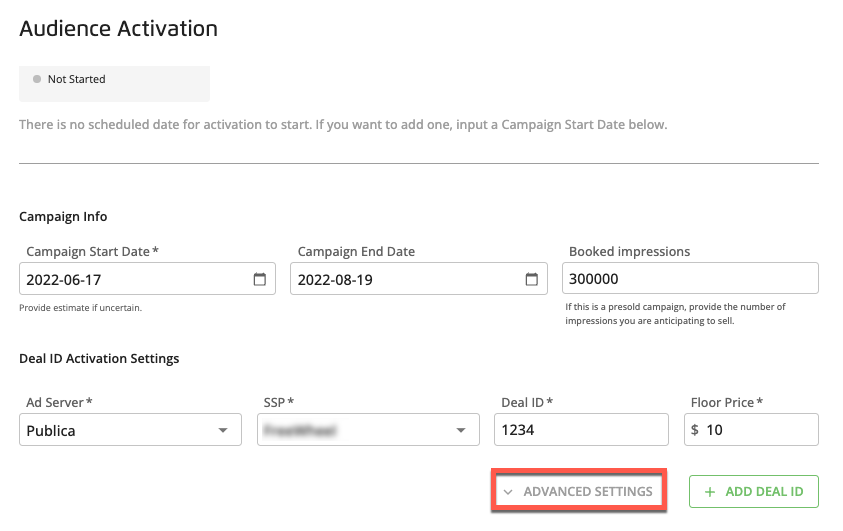
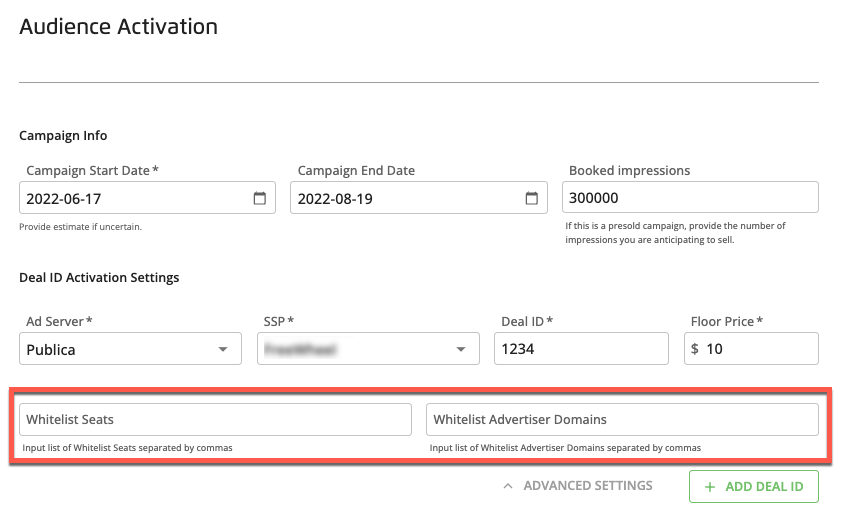
To enter whitelist seats and whitelist advertiser domains, click the ADVANCED SETTINGS text and then enter the desired values, separated by commas.
Click .
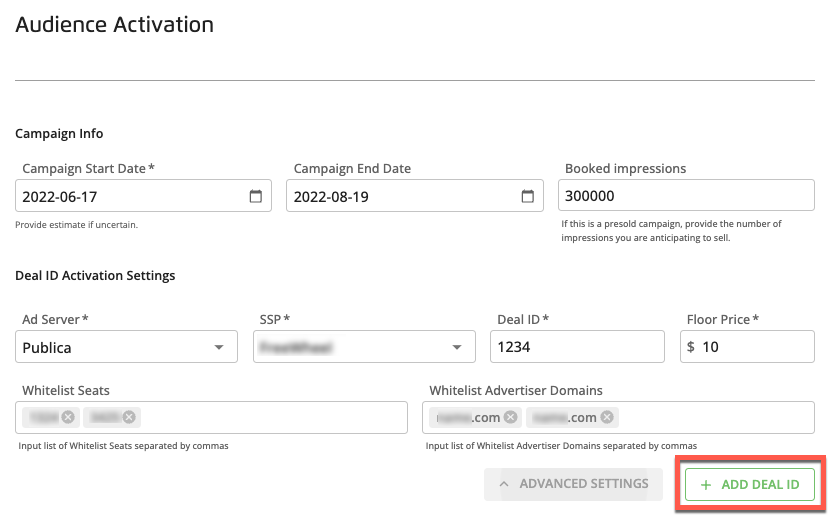
Repeat step 6 for any additional deal IDs you want to add.
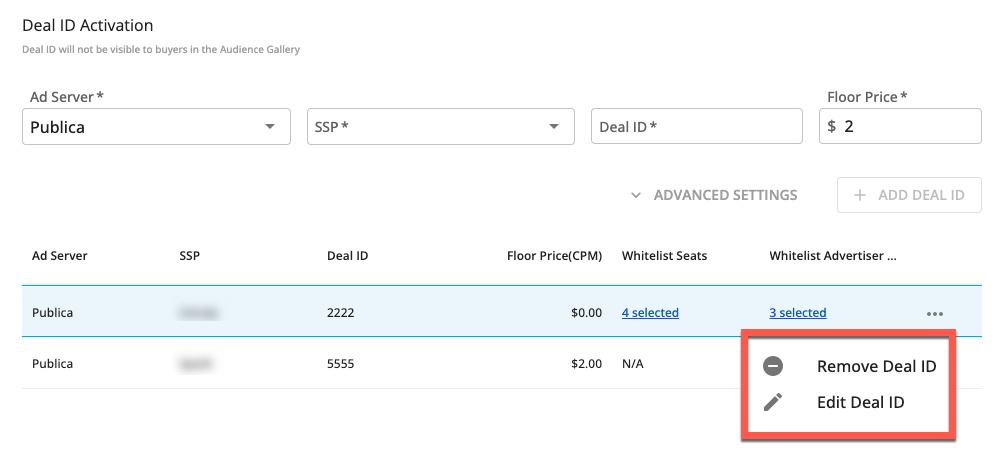
To edit or remove previously-entered deal ID info, click on the ellipsis (three dots) that appears when you hover over the row for that deal ID and select the desired option ("Remove Deal ID" or "Edit Deal ID"). If editing a deal ID, click once you've made you're desired edits.
Click .
The status column for the audience or RFP you activated updates to reflect the activation status (which depends on the fields that have been filled out and on the campaign dates, if any). See "Audiences Page Column Headings" for more information.
All activations are refreshed weekly (for Publica activations) or daily (for SpringServe activations) until the campaign end date, if any.
Caution
Once you've activated an audience, the audience is no longer editable. If you want to build a new audience that is similar to one you've already activated, copy the activated audience.