Build an Audience
Within Advanced TV, an audience is a grouping of segments that are distributed together or are used for modeling (or other uses).
Note
The audience building process is slightly different for agencies, as noted below. If an agency enters campaign and universe info for a new audience for evaluation purposes but does not finish and save the audience, the audience will still appear in the Activity Report - Drafts View for the agency’s MVPD.
Once an audience has been built, you can Distribute an Audience either to your platform (for activation) or to certain ad serving platforms (for targeting) that we have integrations with.
Building an audience involves these overall steps:
Entering campaign info.
Selecting the universes to use to build the audience.
Building the audience segments, and then naming them.
If desired (and if universe attributes are enabled), applying universe attributes to filter at a universe or segment level.
If desired, removing duplicates or capping the size of the audience or segments.
Naming and saving the audience.
See the section below for detailed audience building steps.
To build an audience:
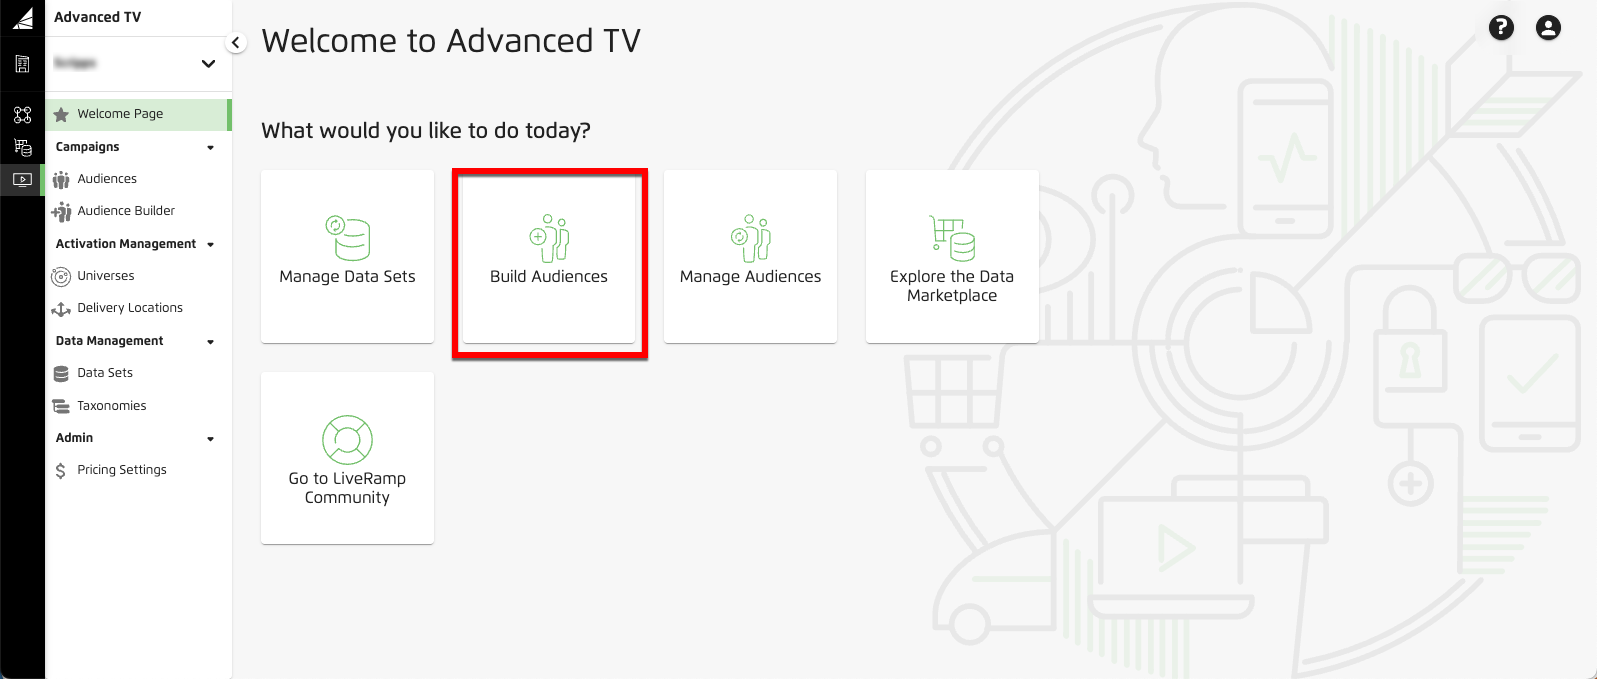
From the Advanced TV navigation menu, click Audience Builder in the Campaigns section to navigate to the Audience Builder page.

Tip
Alternatively, from the Welcome page, click the "Build Audiences" tile.
From the Campaign info tab, enter the required campaign info.

A green check mark appears in the Campaign Info tab.
Note
You can enter campaign start and end dates now, or you can add those dates later (campaign dates are required for distribution).
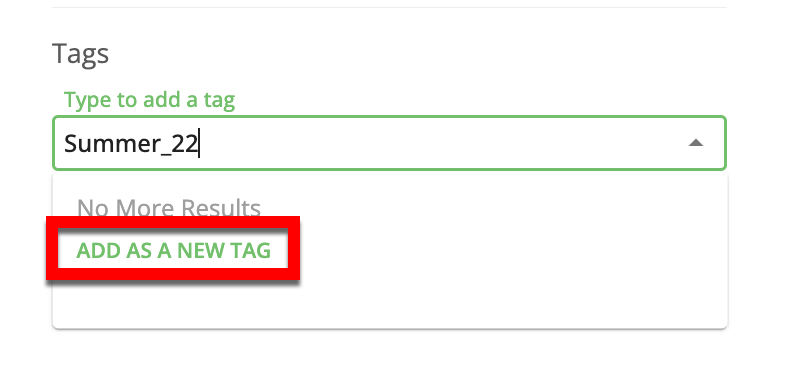
If desired, add an audience tag (which can be used later to filter audiences on the Audiences page):
To add one or more existing tags, open the Tags dropdown and select the desired tag(s).
To add one or more new tags, type the new tag name in the Tags field and then click the ADD AS A NEW TAG text.
Note
Tag names can contain alphanumeric characters, underscores (_), dashes (-), and dots (.). Do not use spaces or special characters in tag names.
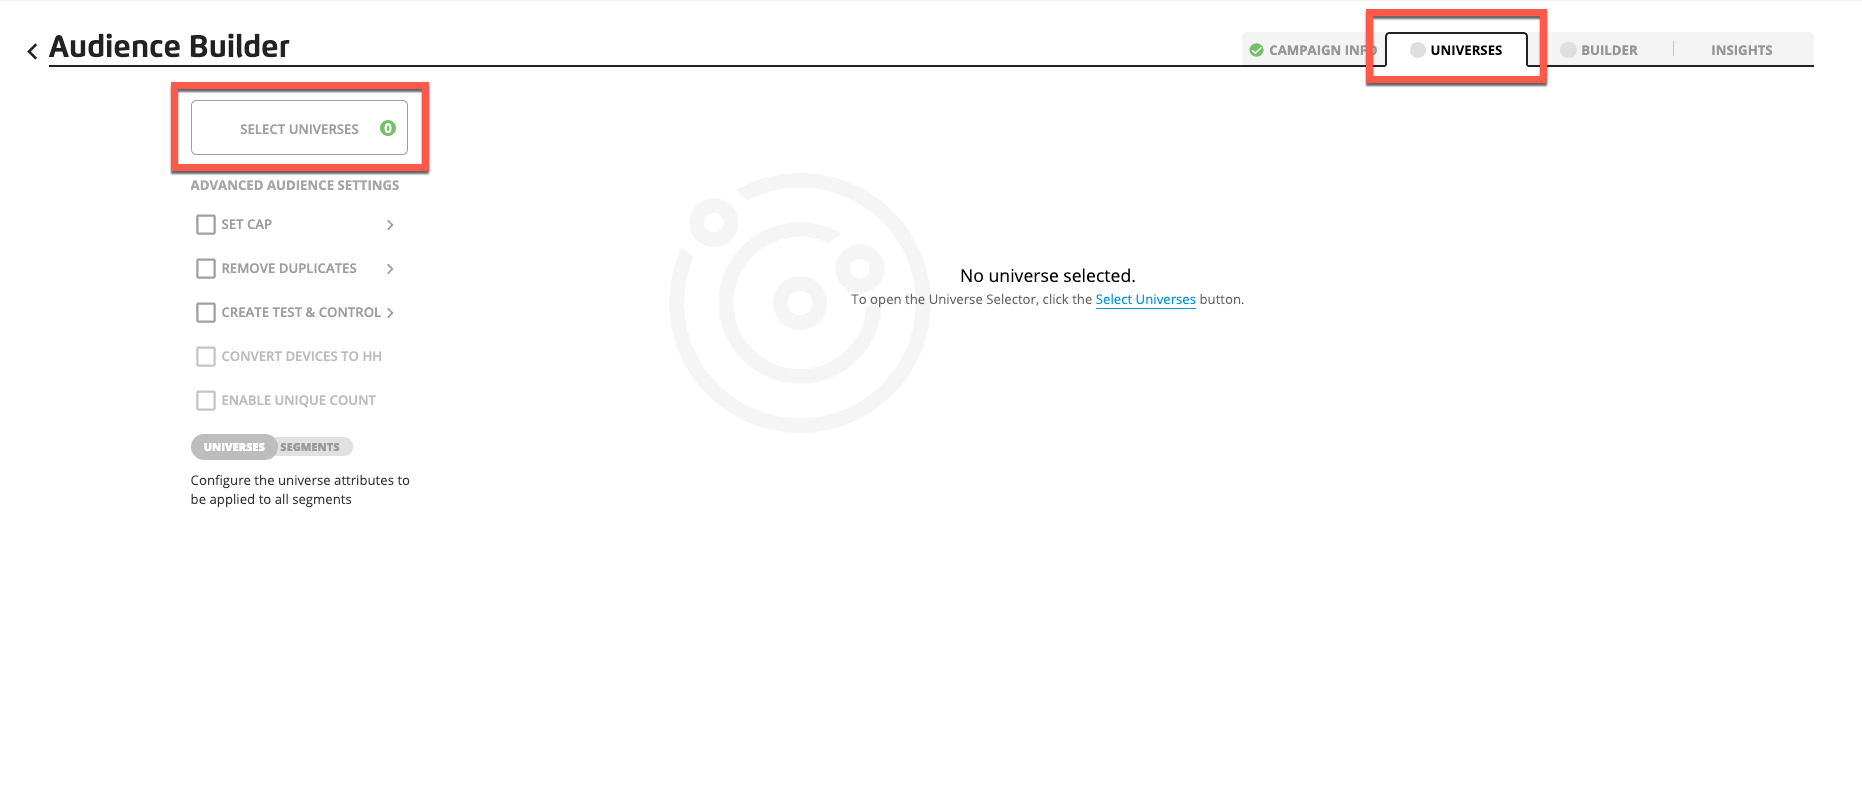
If you need to select or change the universes used for the audience from the ones that were used for a previous audience, select the Universes tab and then click the Universe Selector button.
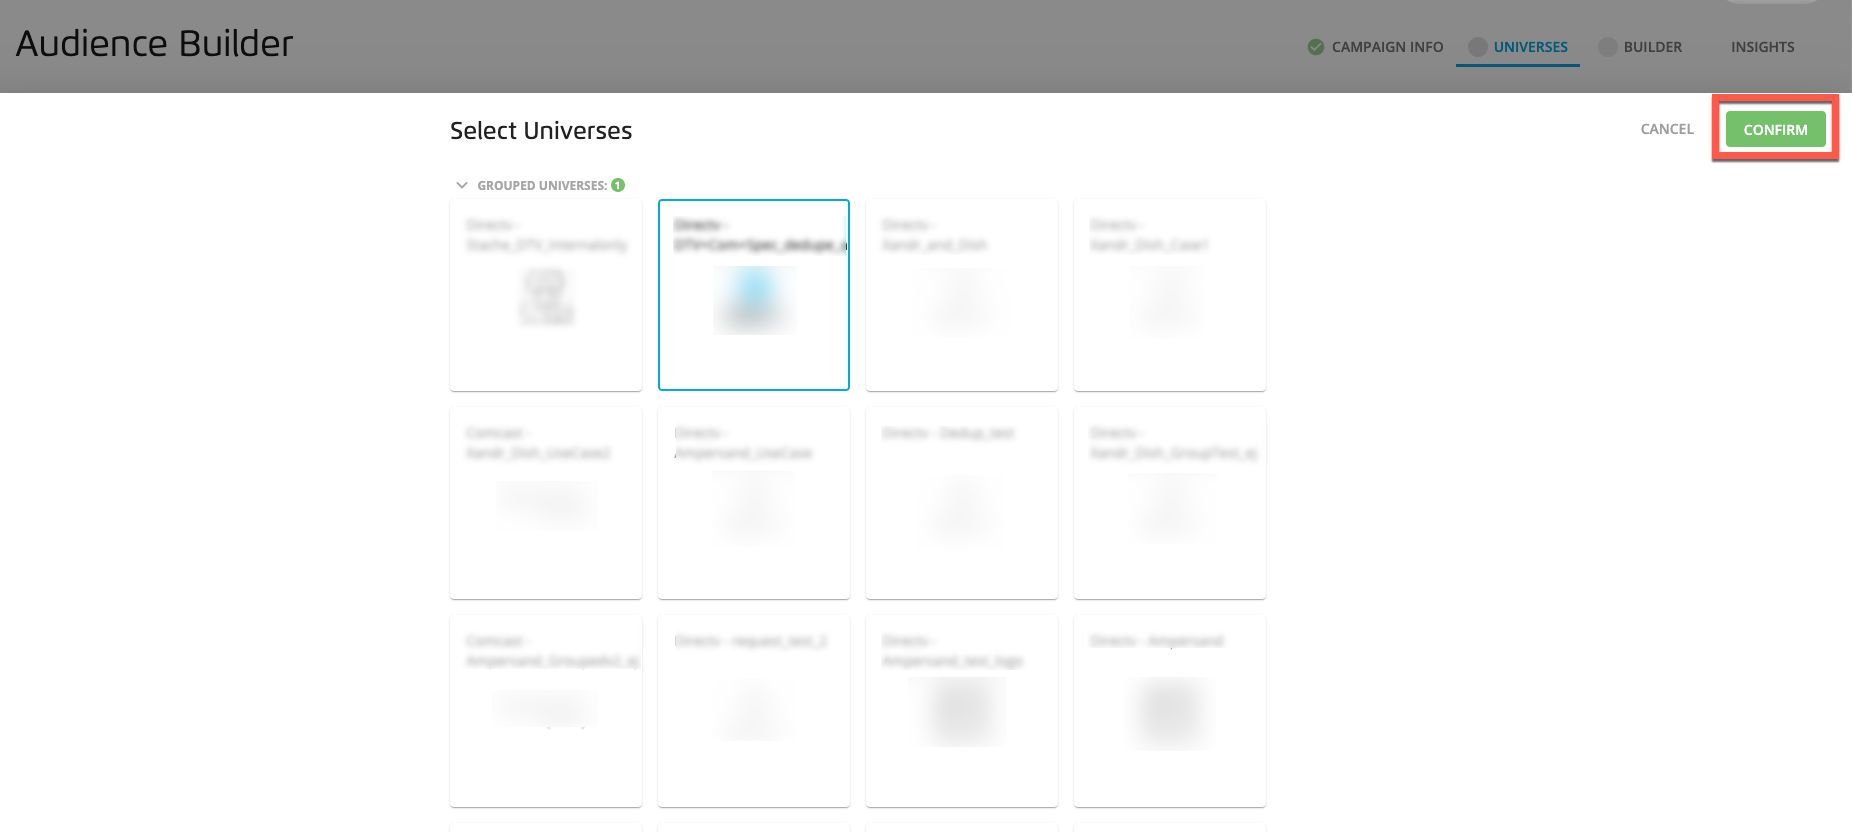
Click the appropriate universe tiles to check or uncheck the tiles, and then click Confirm.
Note
You can change the selected universes after any of the following steps (before saving the audience).
Caution
If you select a grouped universe, you cannot also select a universe that is a component of that grouped universe.
Note
For some users, when selecting a particular Verizon or Dish universe, a dialog appears that requires you to enter your Verizon MDM ID and then click to select that universe:
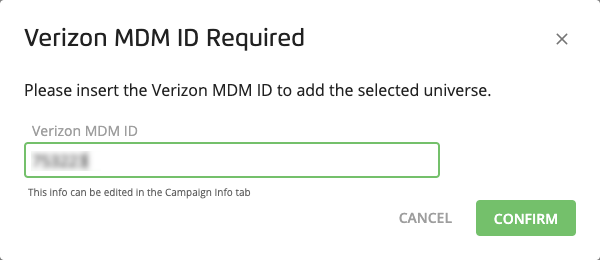
See "Announcing Verizon MDM ID Required When Selecting Certain Universes (4/24/21)" for more information.
If the selected universes are all enabled for unique household counts, you can check the "Enable Unique Count" check box to see unique household counts for this audience.
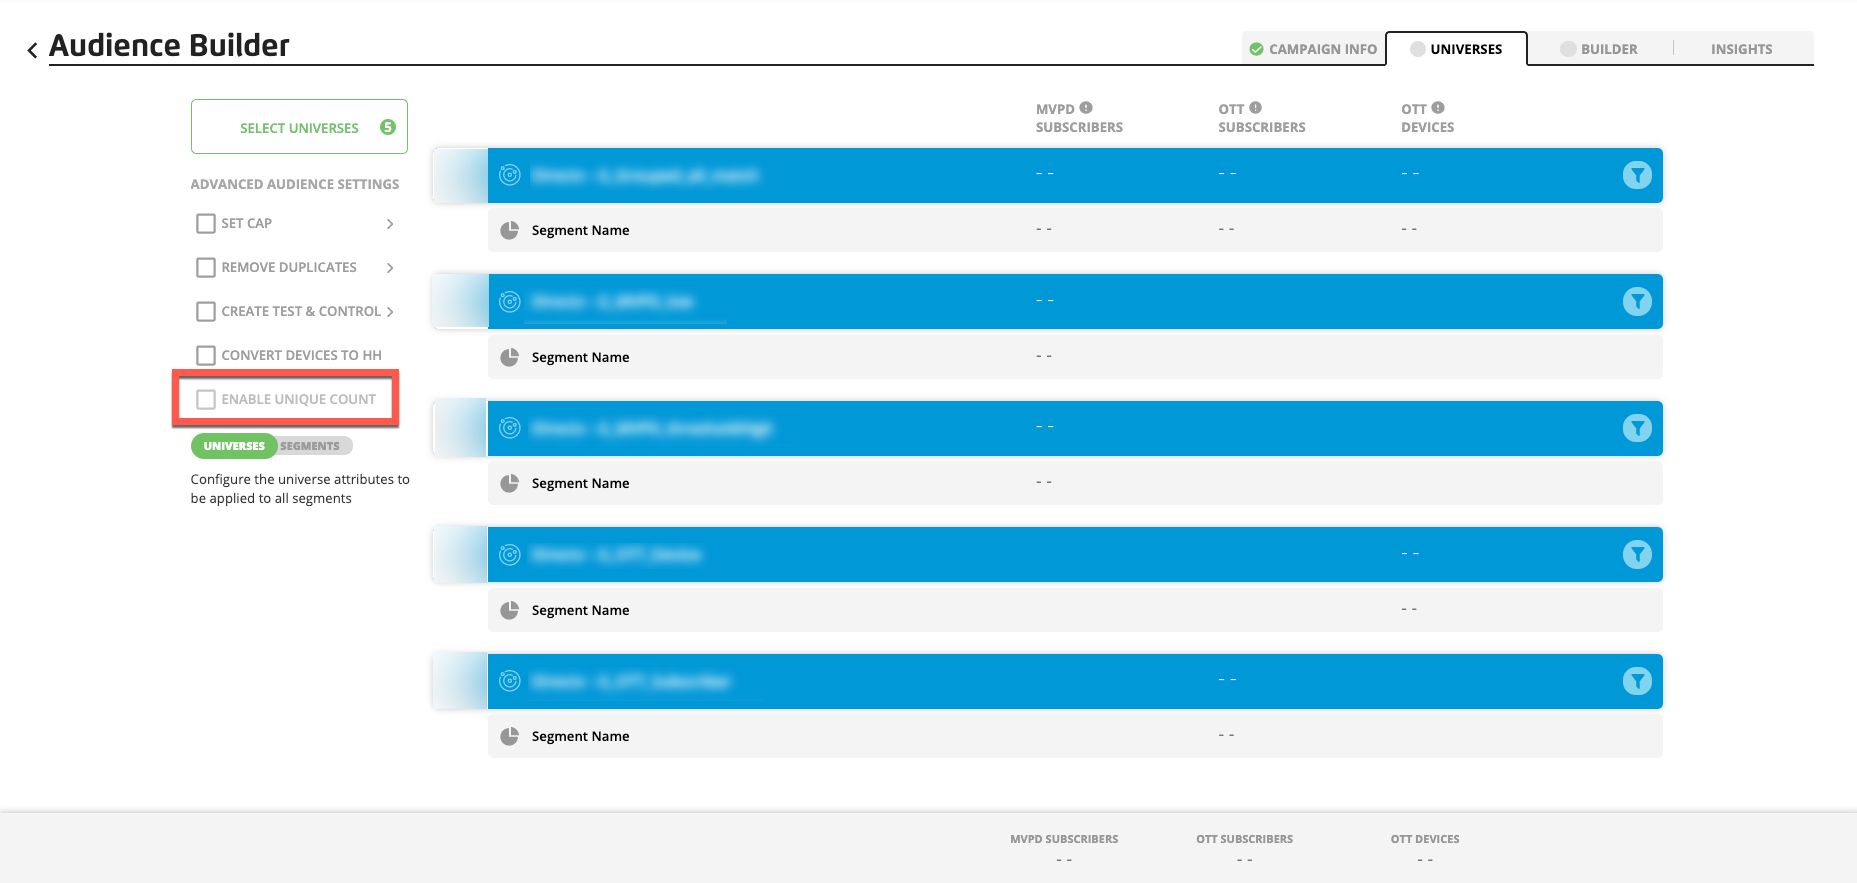
Caution
The count for unique households does not get generated until you save the audience. Count generation takes 10-15 minutes.
To convert the associated OTT devices into LiveRamp households, check the “Convert Devices to HH” check box.
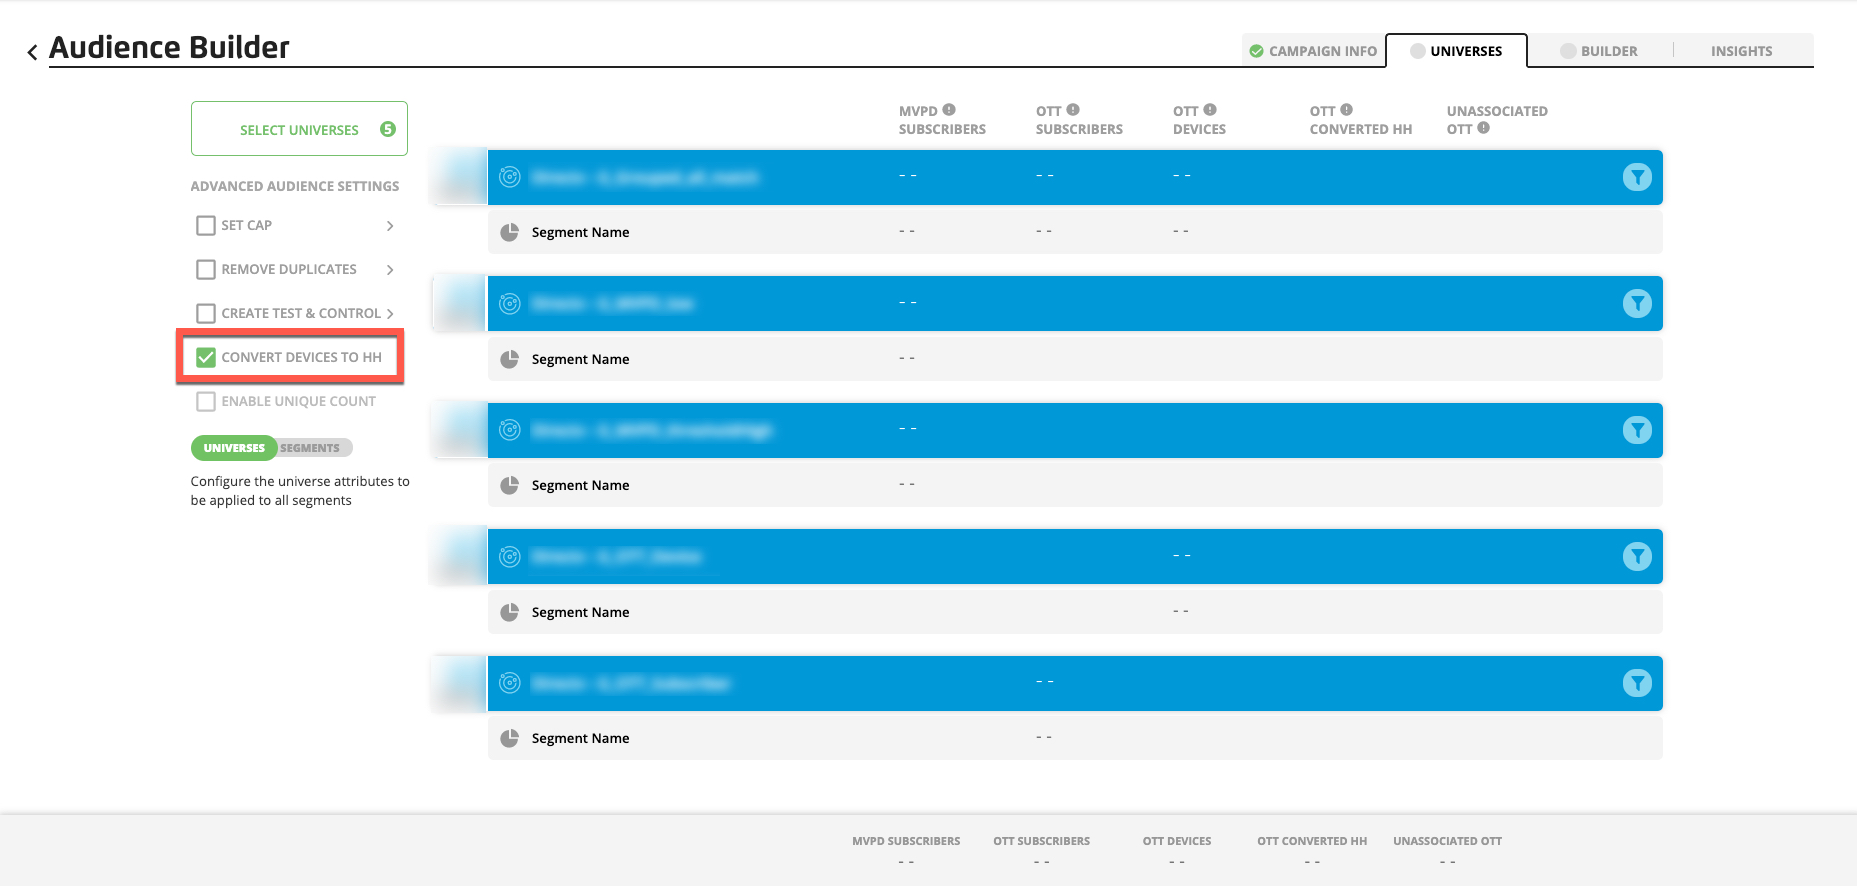
Caution
The conversion counts do not get generated until you save the audience. Count generation takes 10-15 minutes.
Note
For an explanation of the metrics displayed, see "Advanced TV Terms and Concepts."
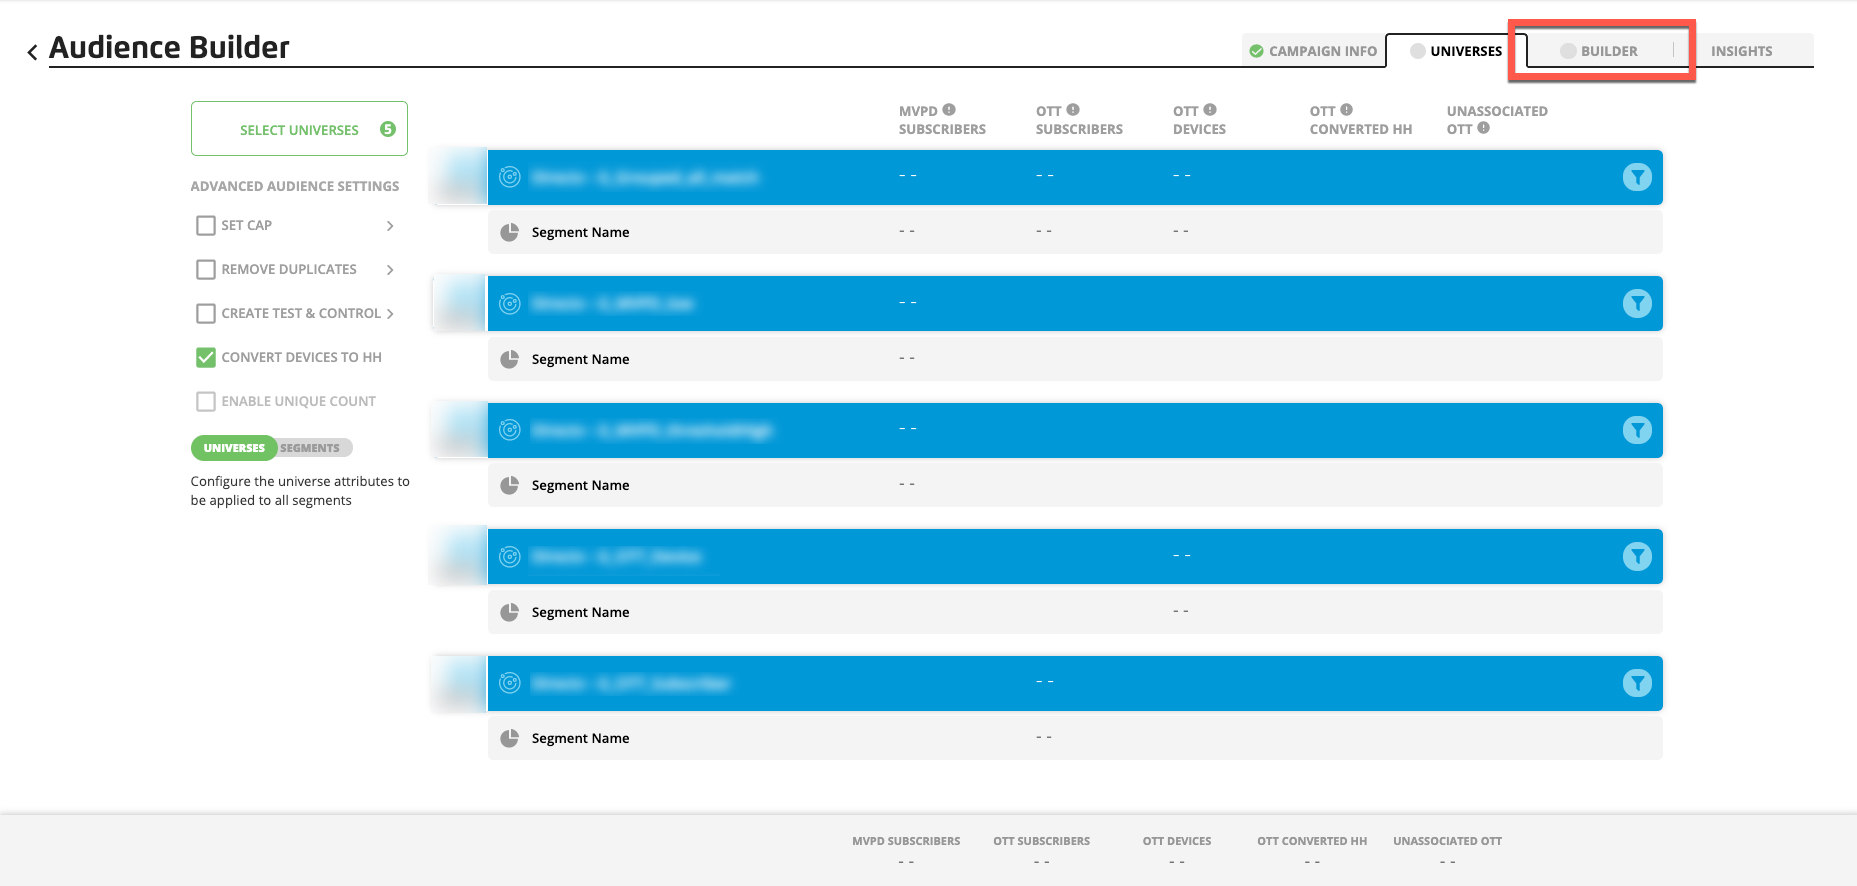
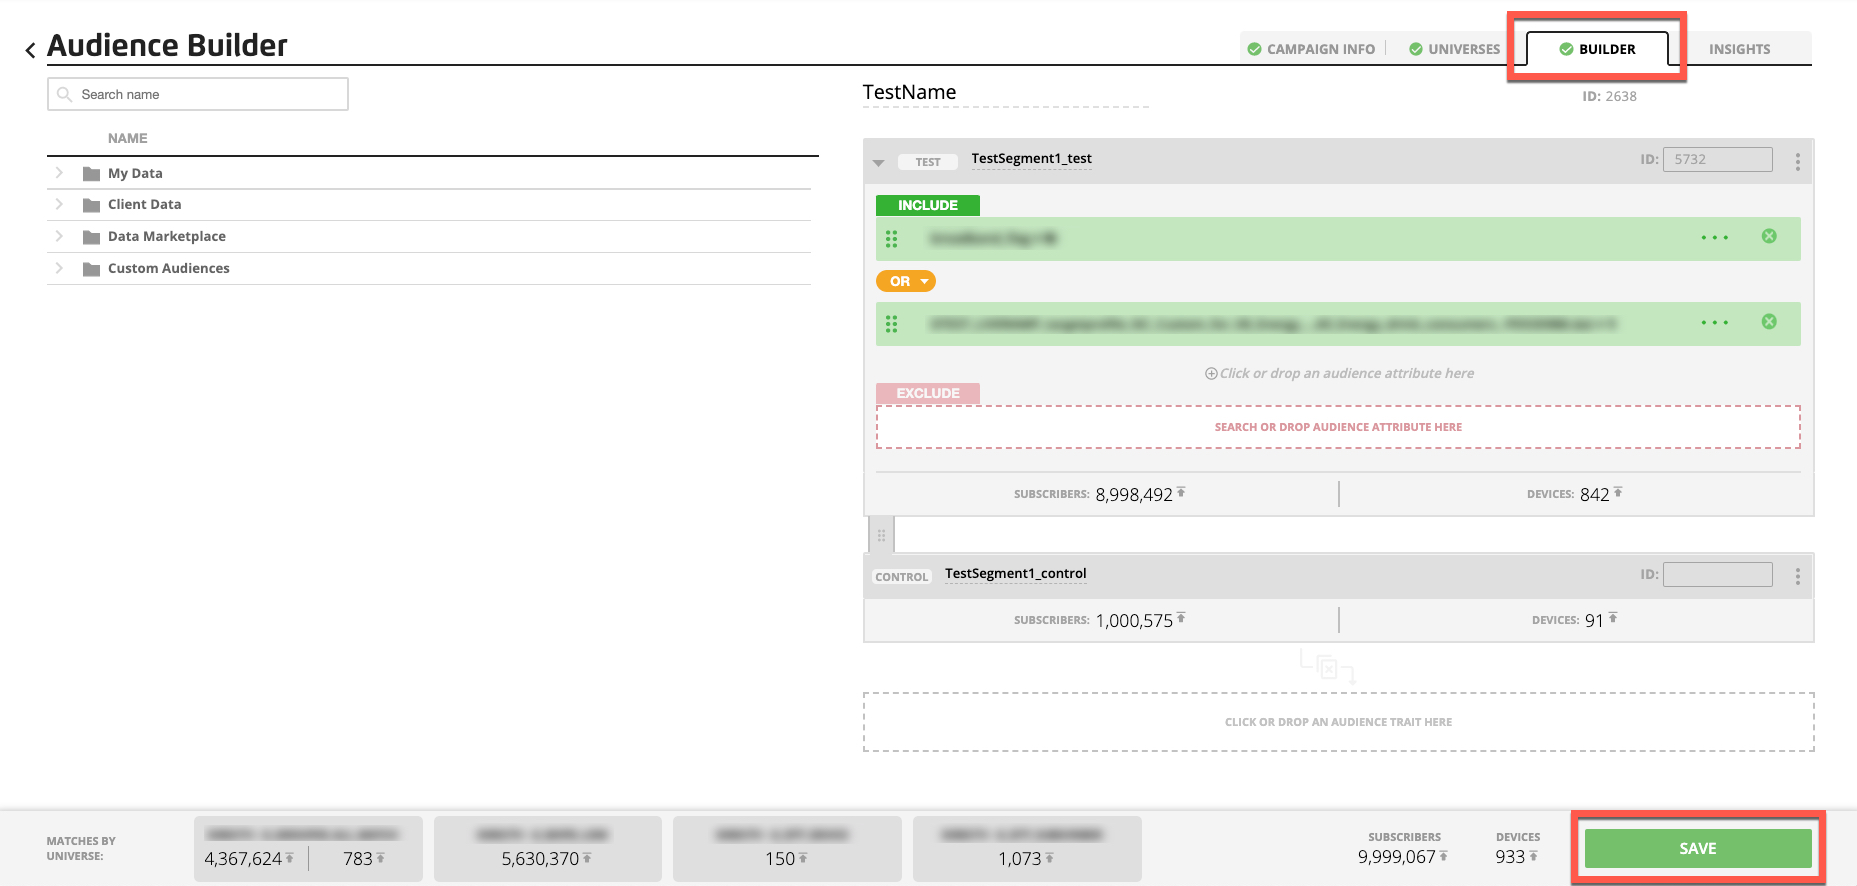
Select the Builder tab.
Note
If you do not want to automatically generate a segment ID for each segment, move the "Auto-generate segment IDs" toggle to the left.
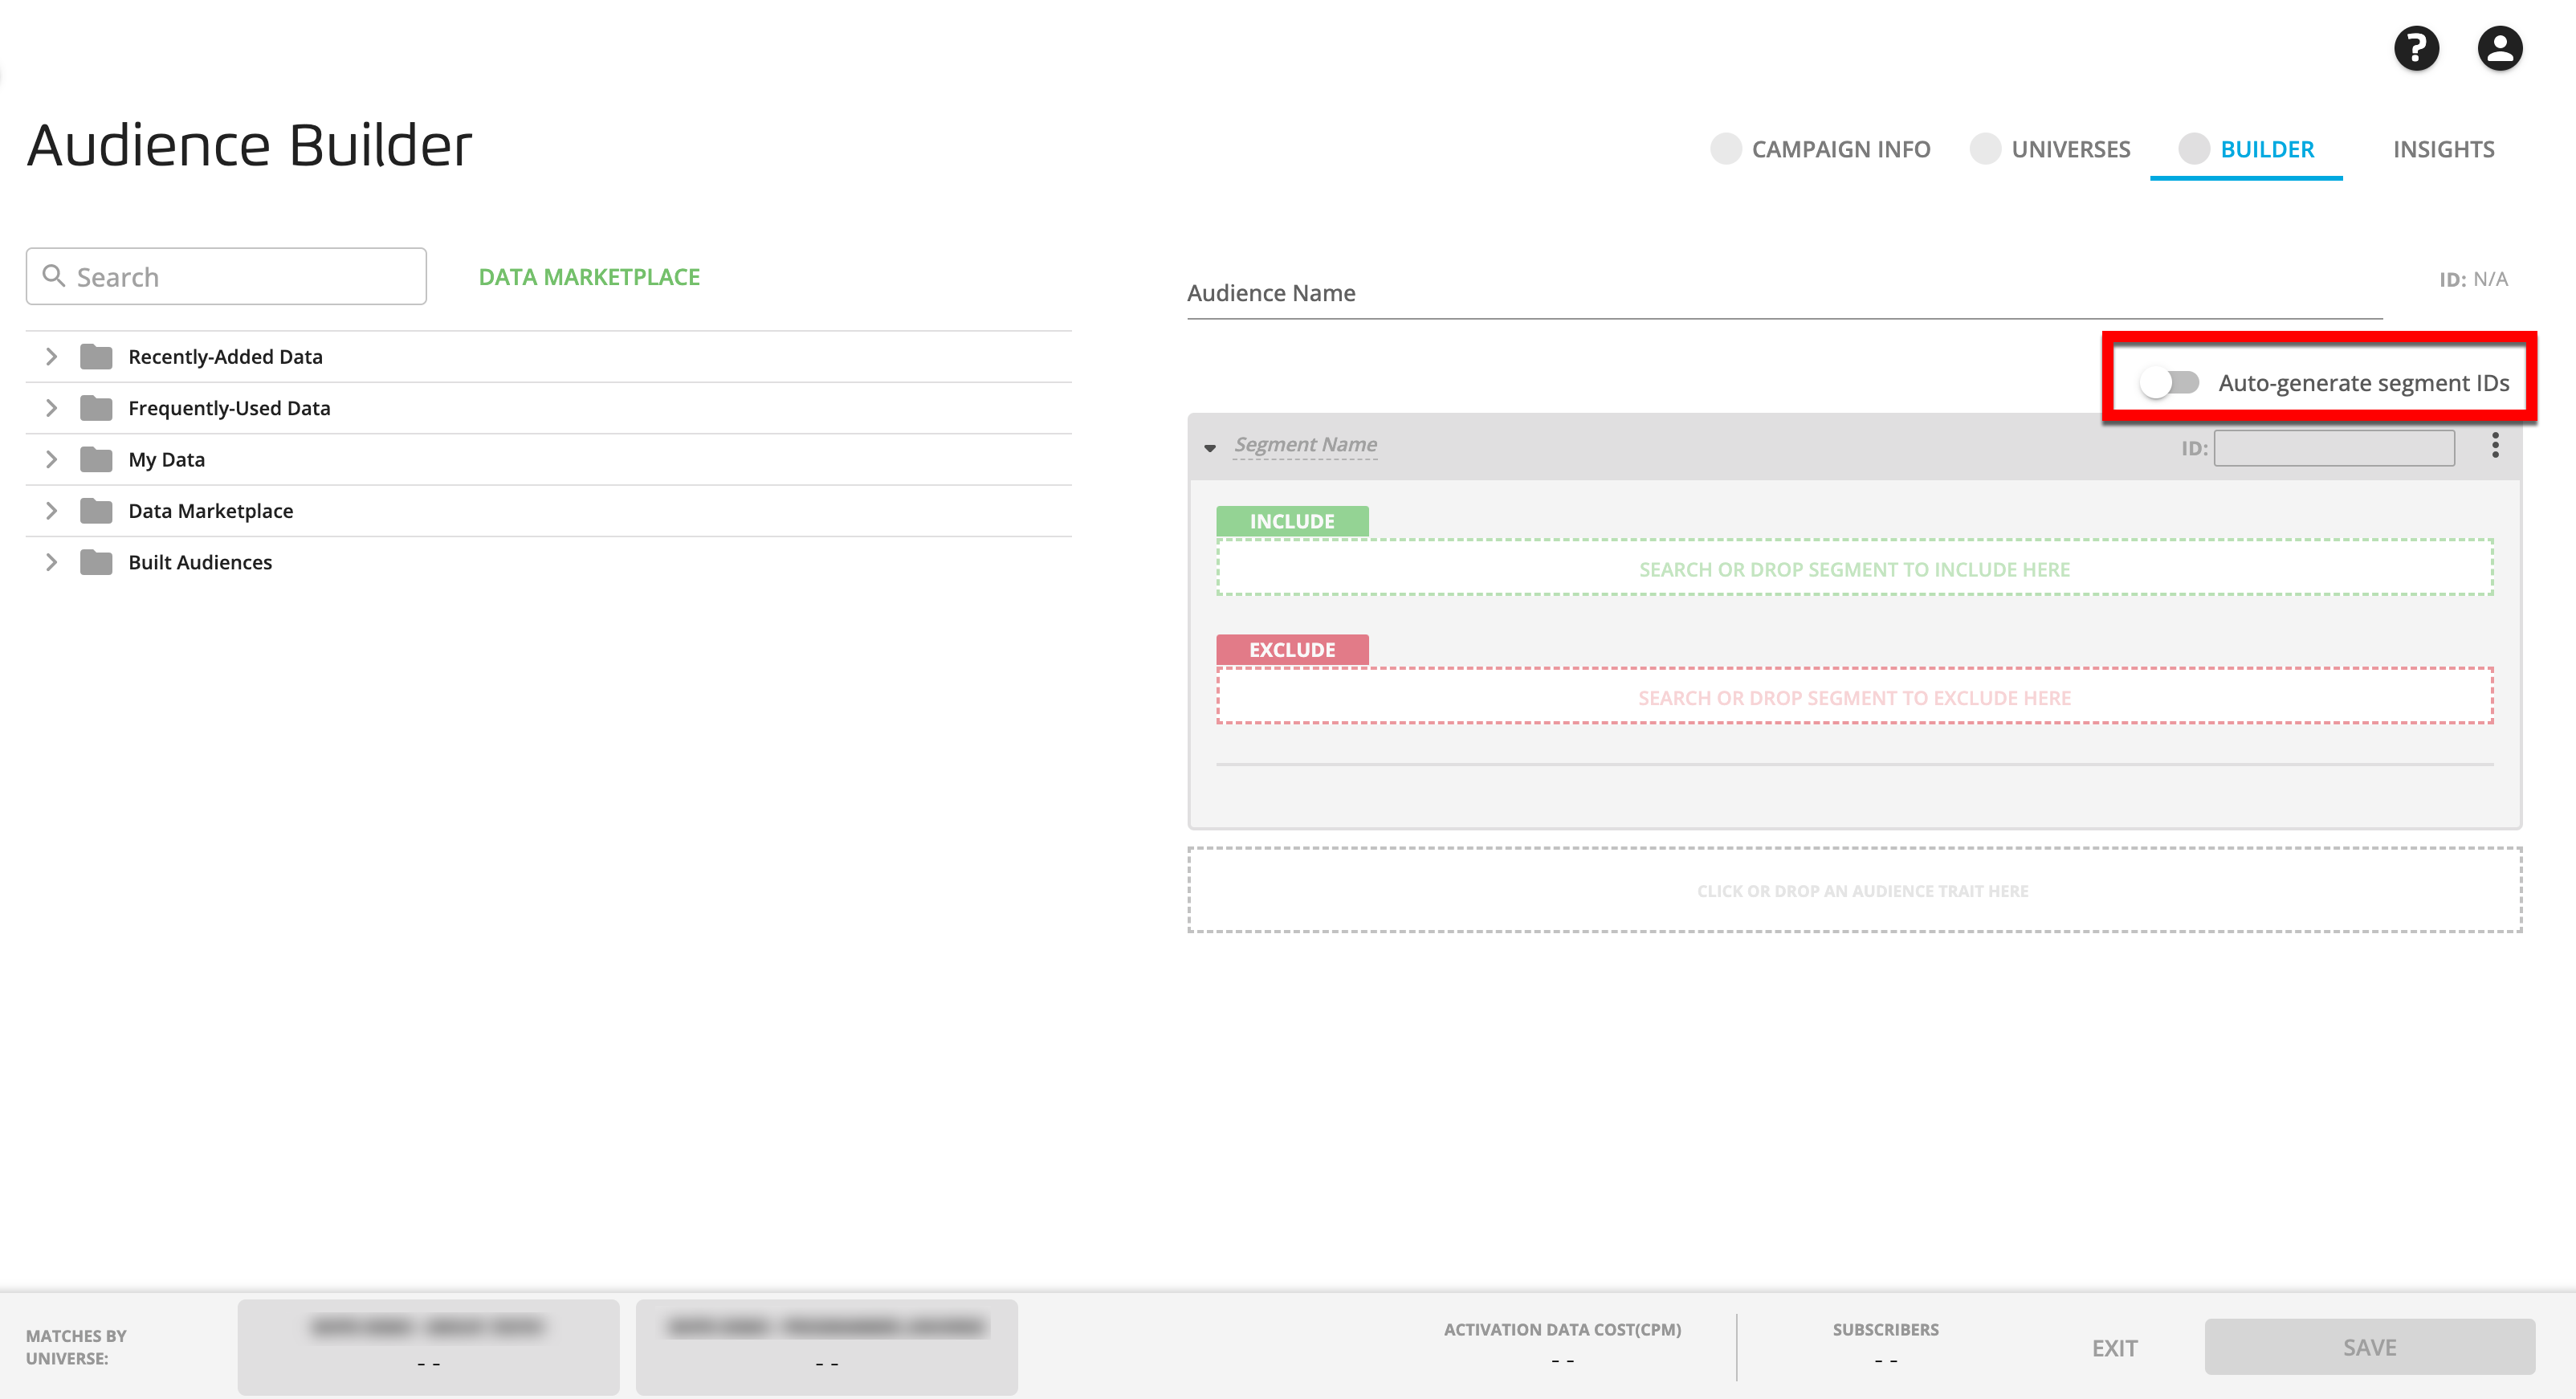
See the "Automatically Generate Unique Segment IDs" section for more information.
Click the caret next to the dataset folder that contains one of the segment categories you want to use to build the new audience and continue expanding the folders until you see the segment category you want.
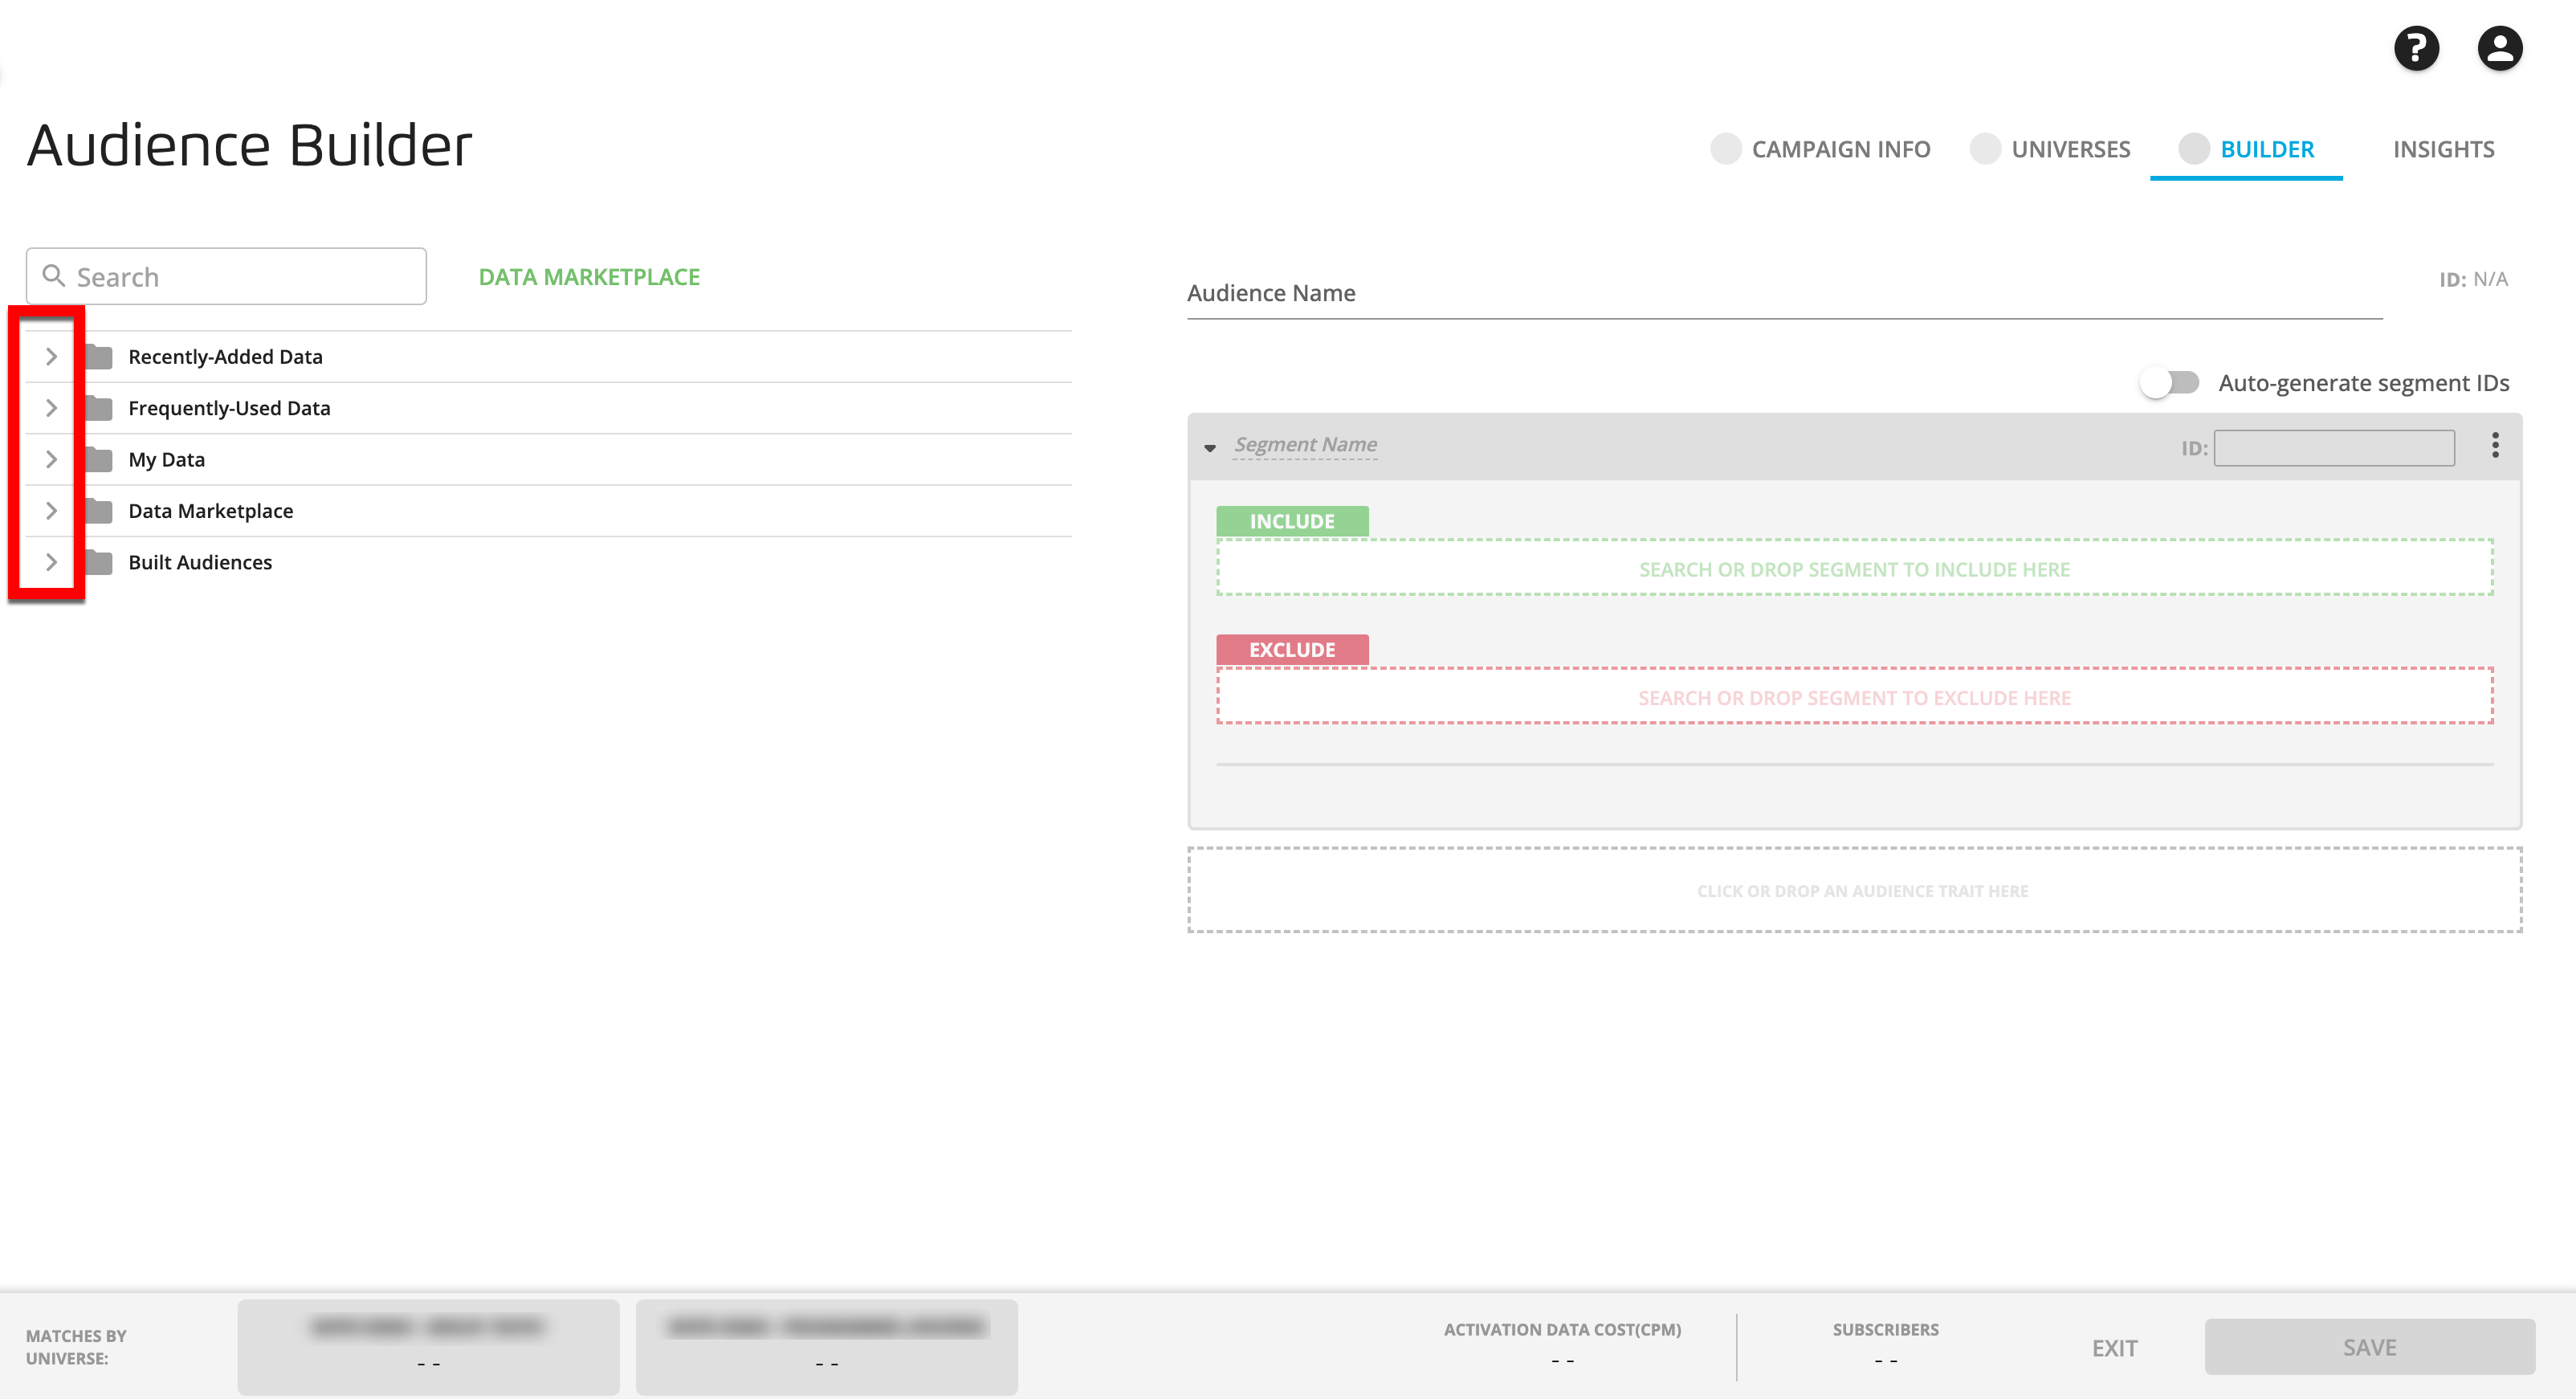
If you already know the name of the segment category or the value, you can enter the segment category name or value name in the search bar or in one of the Audience Builder boxes. You can also perform an advanced search that includes one or more search filters by clicking the advanced search icon in the search bar (see "Perform an Advanced Search in a Builder" for more information).
To see a list of the the segment values for a particular segment category, click the caret to expand the segment category or click anywhere in the segment row to open a panel below the folder tree. For Data Marketplace segments, the panel will also display a segment description and the CPM for each segment value.
You can find copies of your most recently-added segment categories (and their segment values) in the "Recently-Added Data" folder (up to 30 segment categories are displayed).
You can find copies of your 30 most frequently-used segment categories (and their segment values) in the "Frequently-Used Data" folder (this is based on the usage in the last 3 months).
You can also use a segment from a previously-created audience as a component of your new audience by opening the "Built Audiences" folder and then expanding the audience to display the individual segments (but no segment values will appear when you drag the segment into one of the boxes).
Note
Don't see the type of Data Marketplace data that you need? Click DATA MARKETPLACE to navigate to the Data Marketplace in your Connect account.
Drag a segment category or segment value into the INCLUDE box.
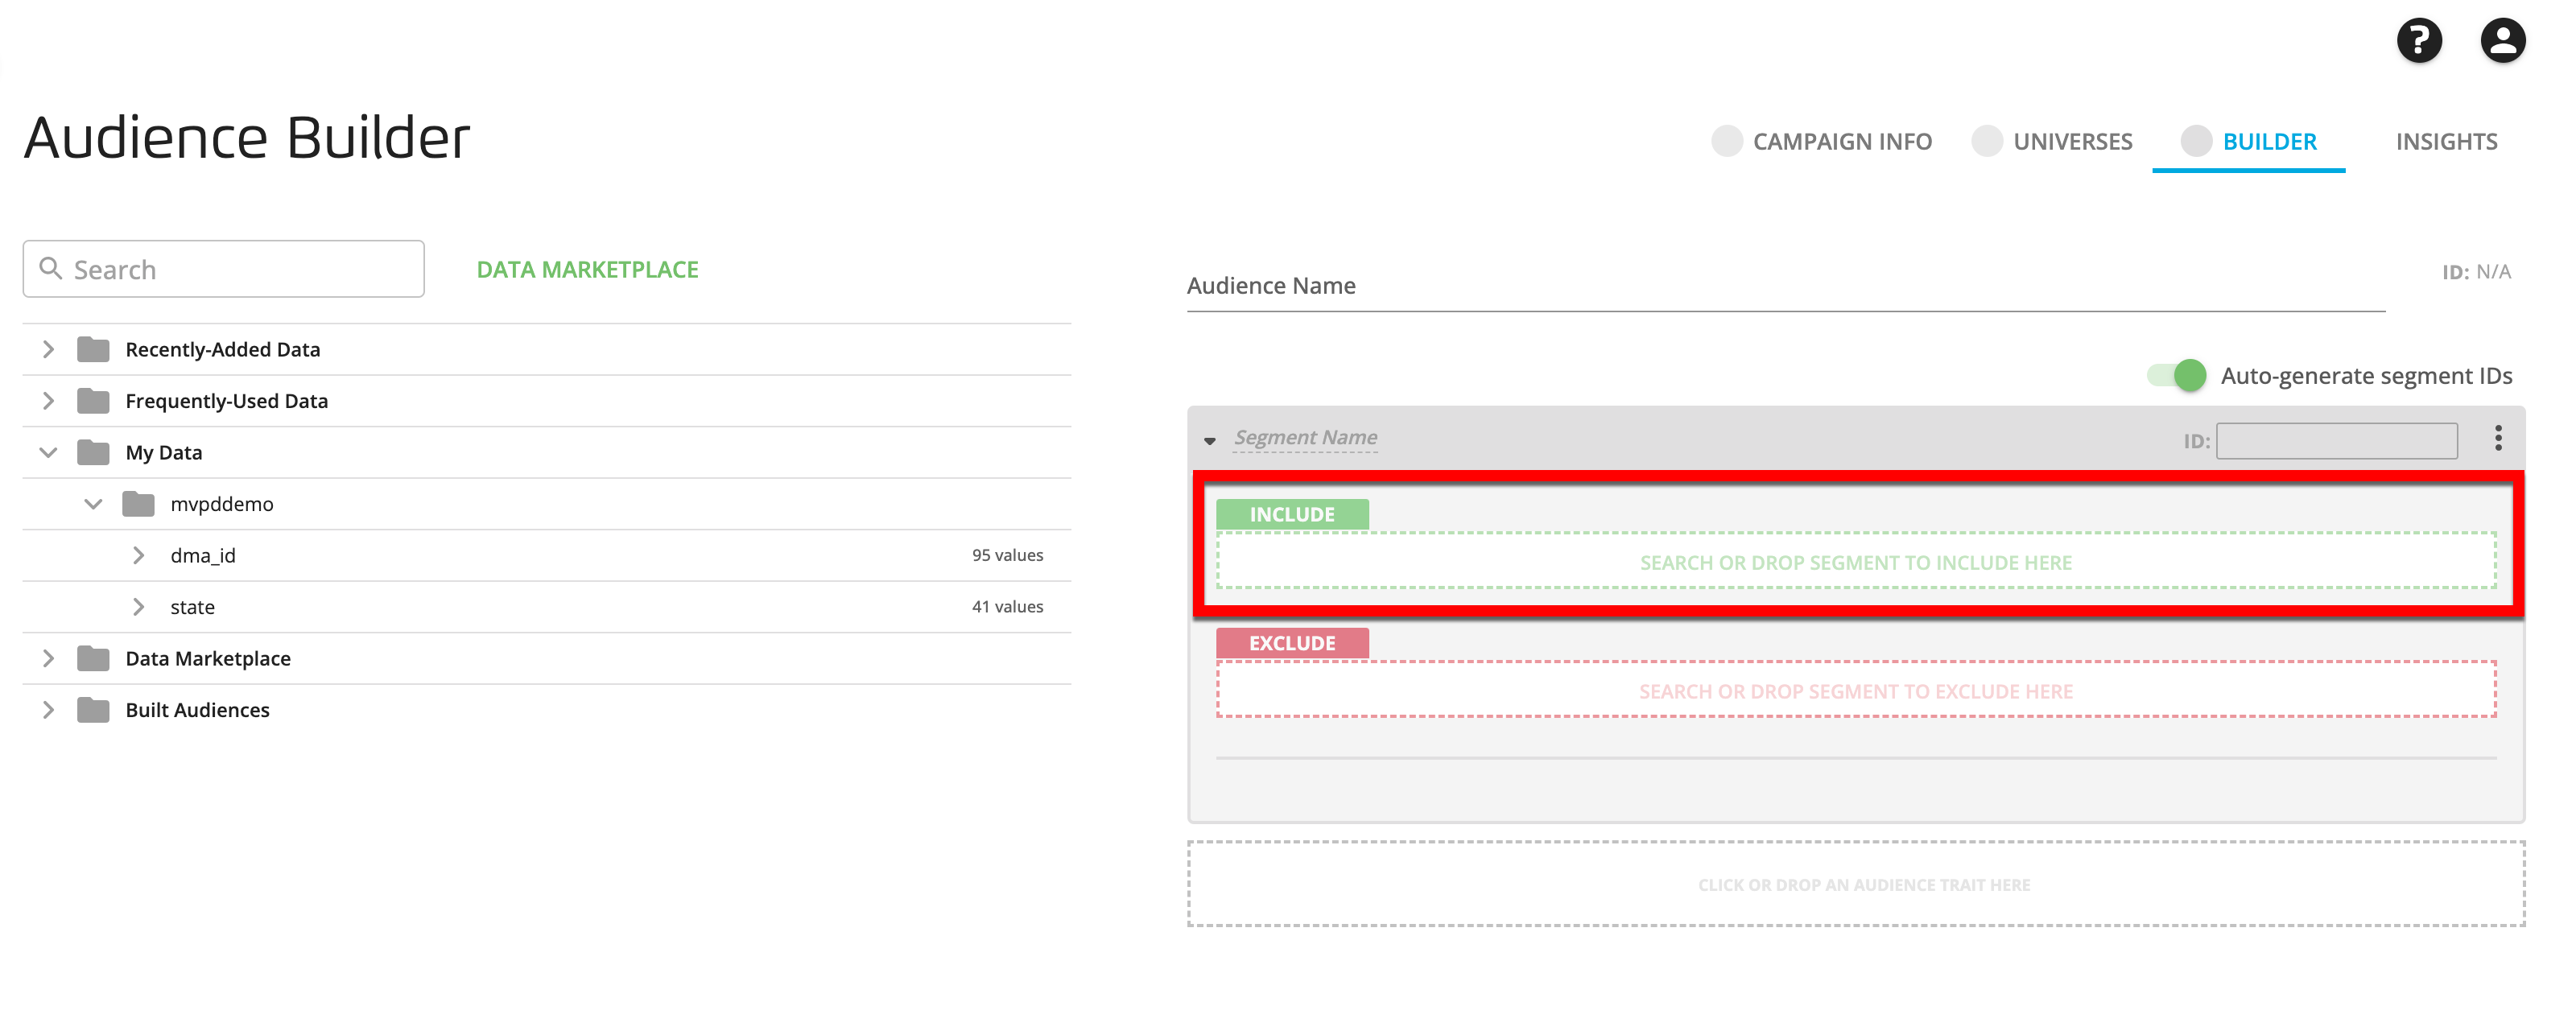
Note
You can select multiple segment categories and/or segment values and then drag them into the box as a group.
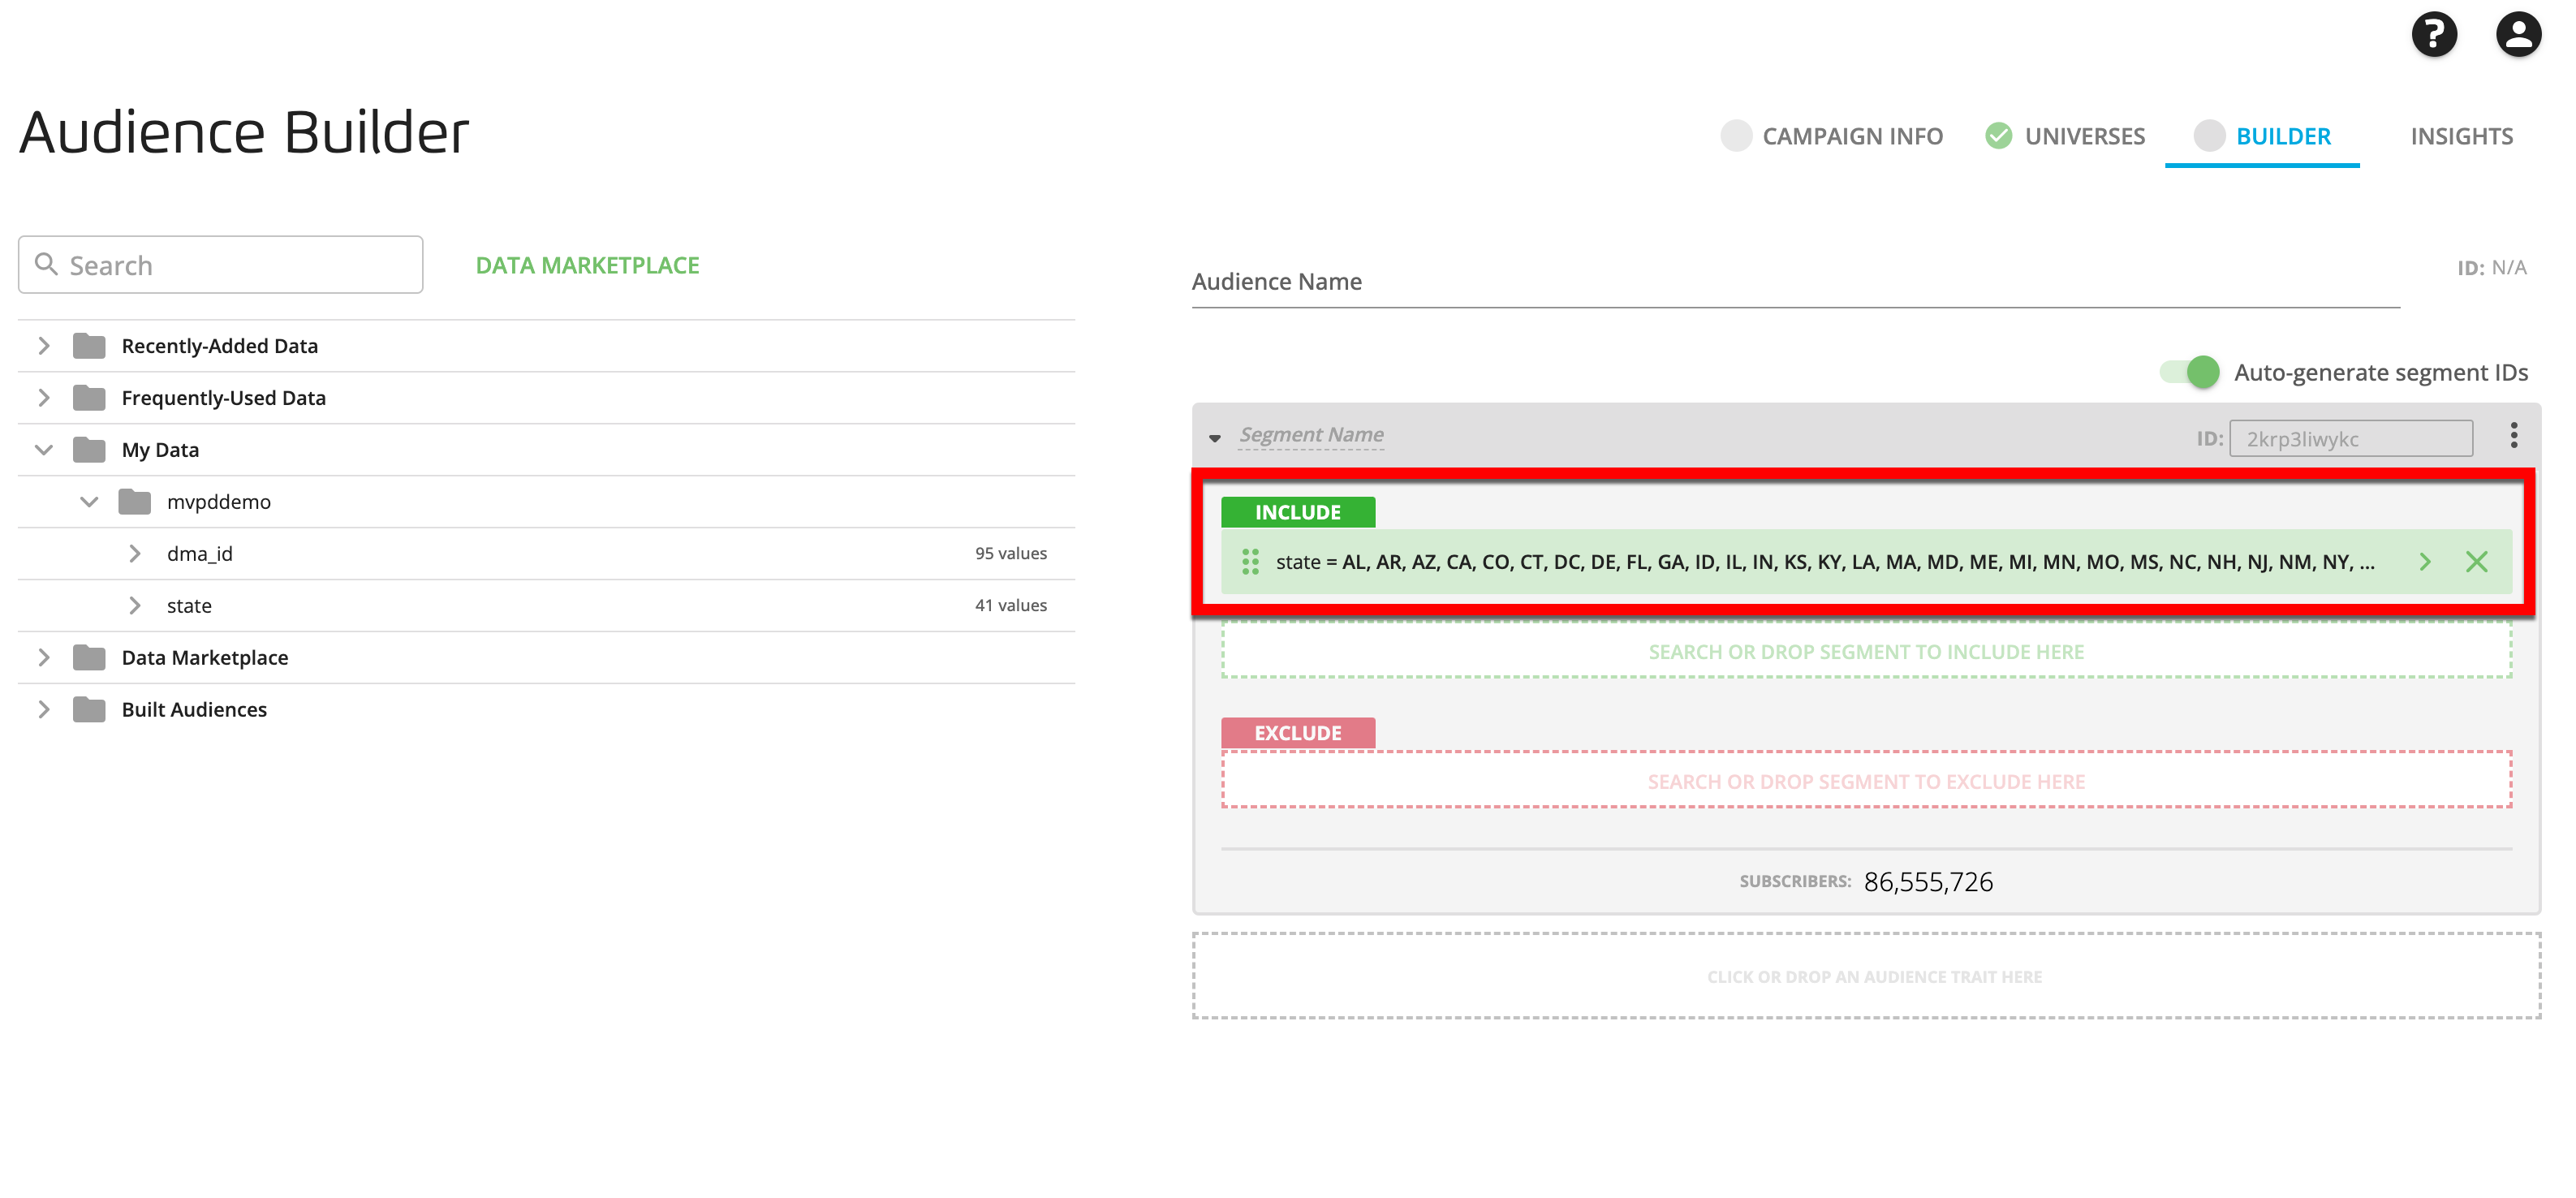
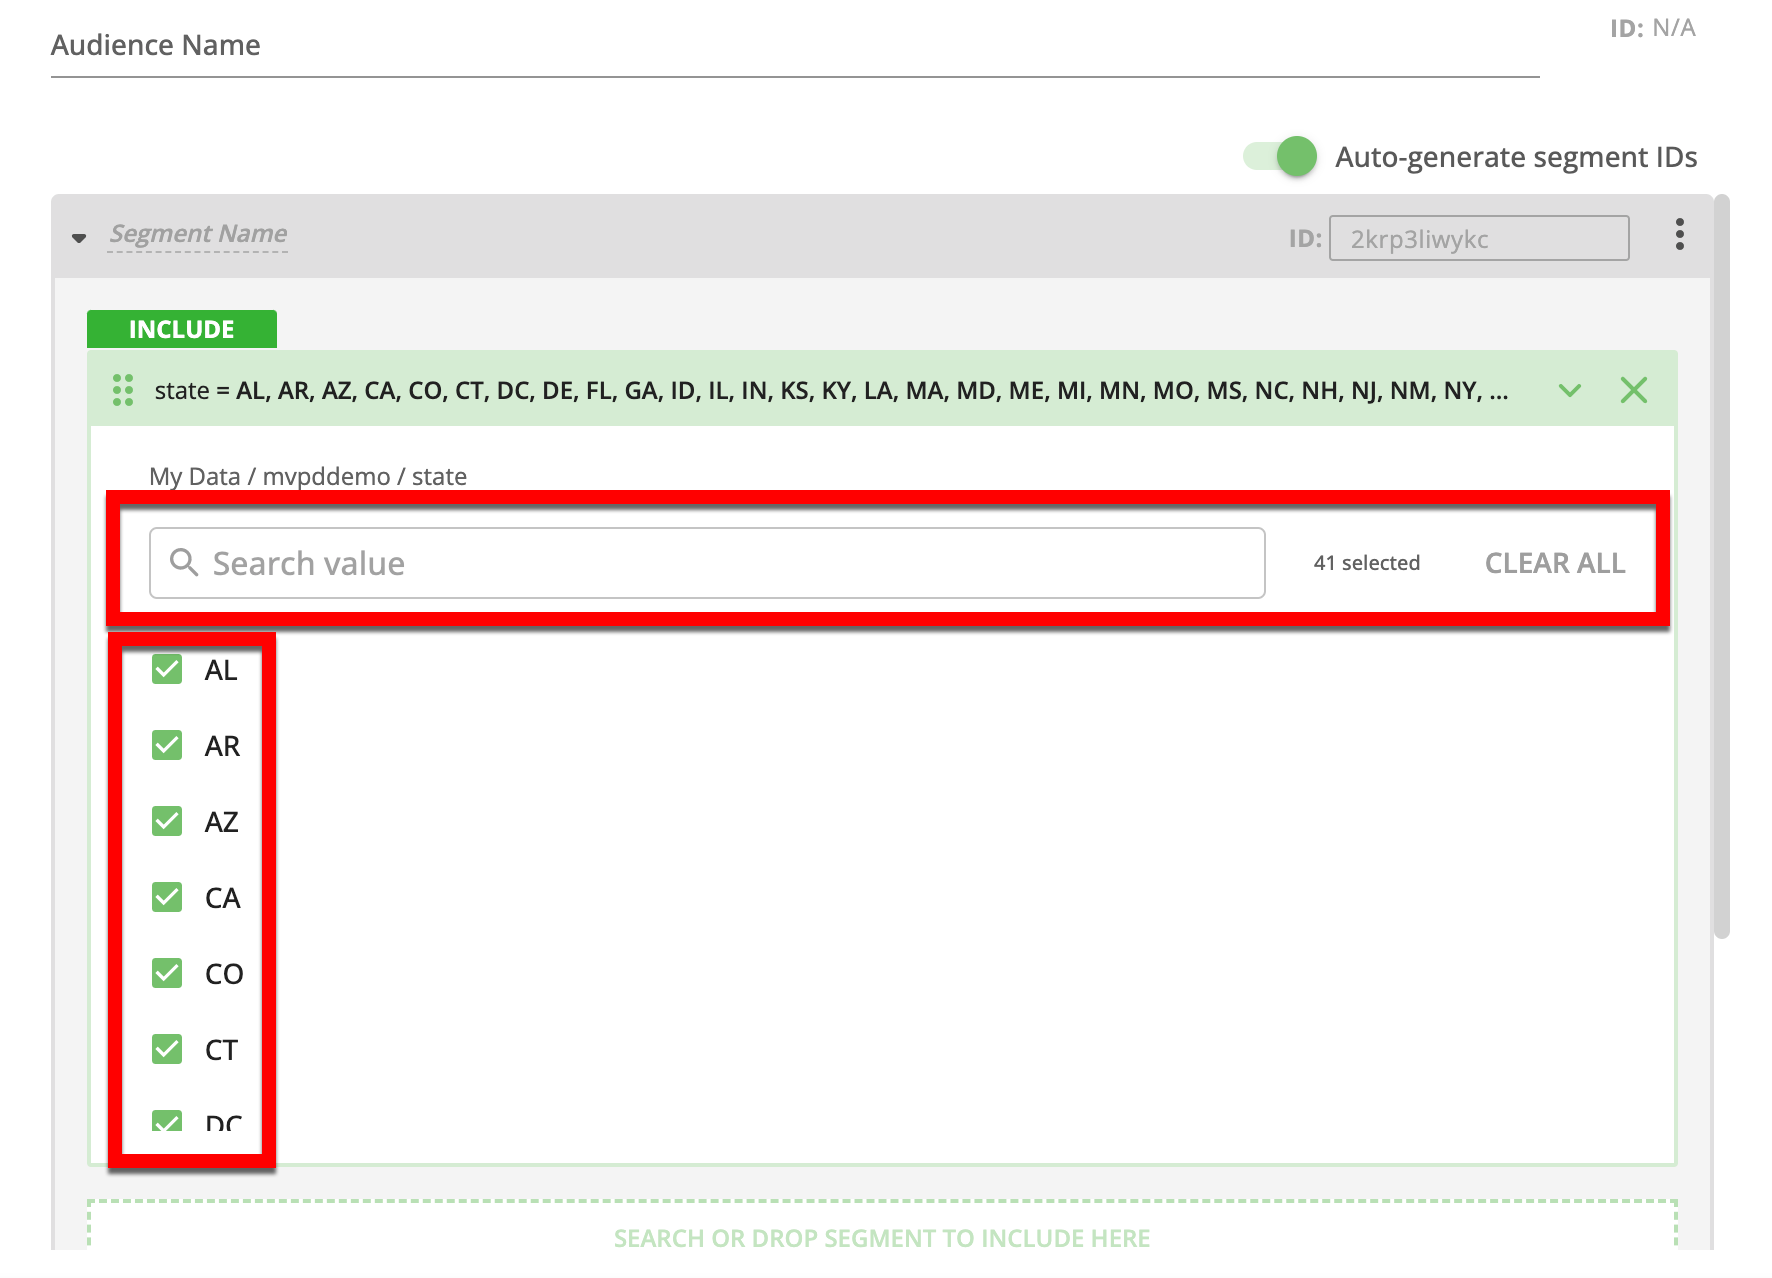
When you drag a segment category, all of the values for that category are included by default. You can click the caret in the row for the segment you just created to display the list of all values for that category and then select or deselect any desired values. If the category contains seven or more values, you can also use the search bar or the select all/clear all functionality.
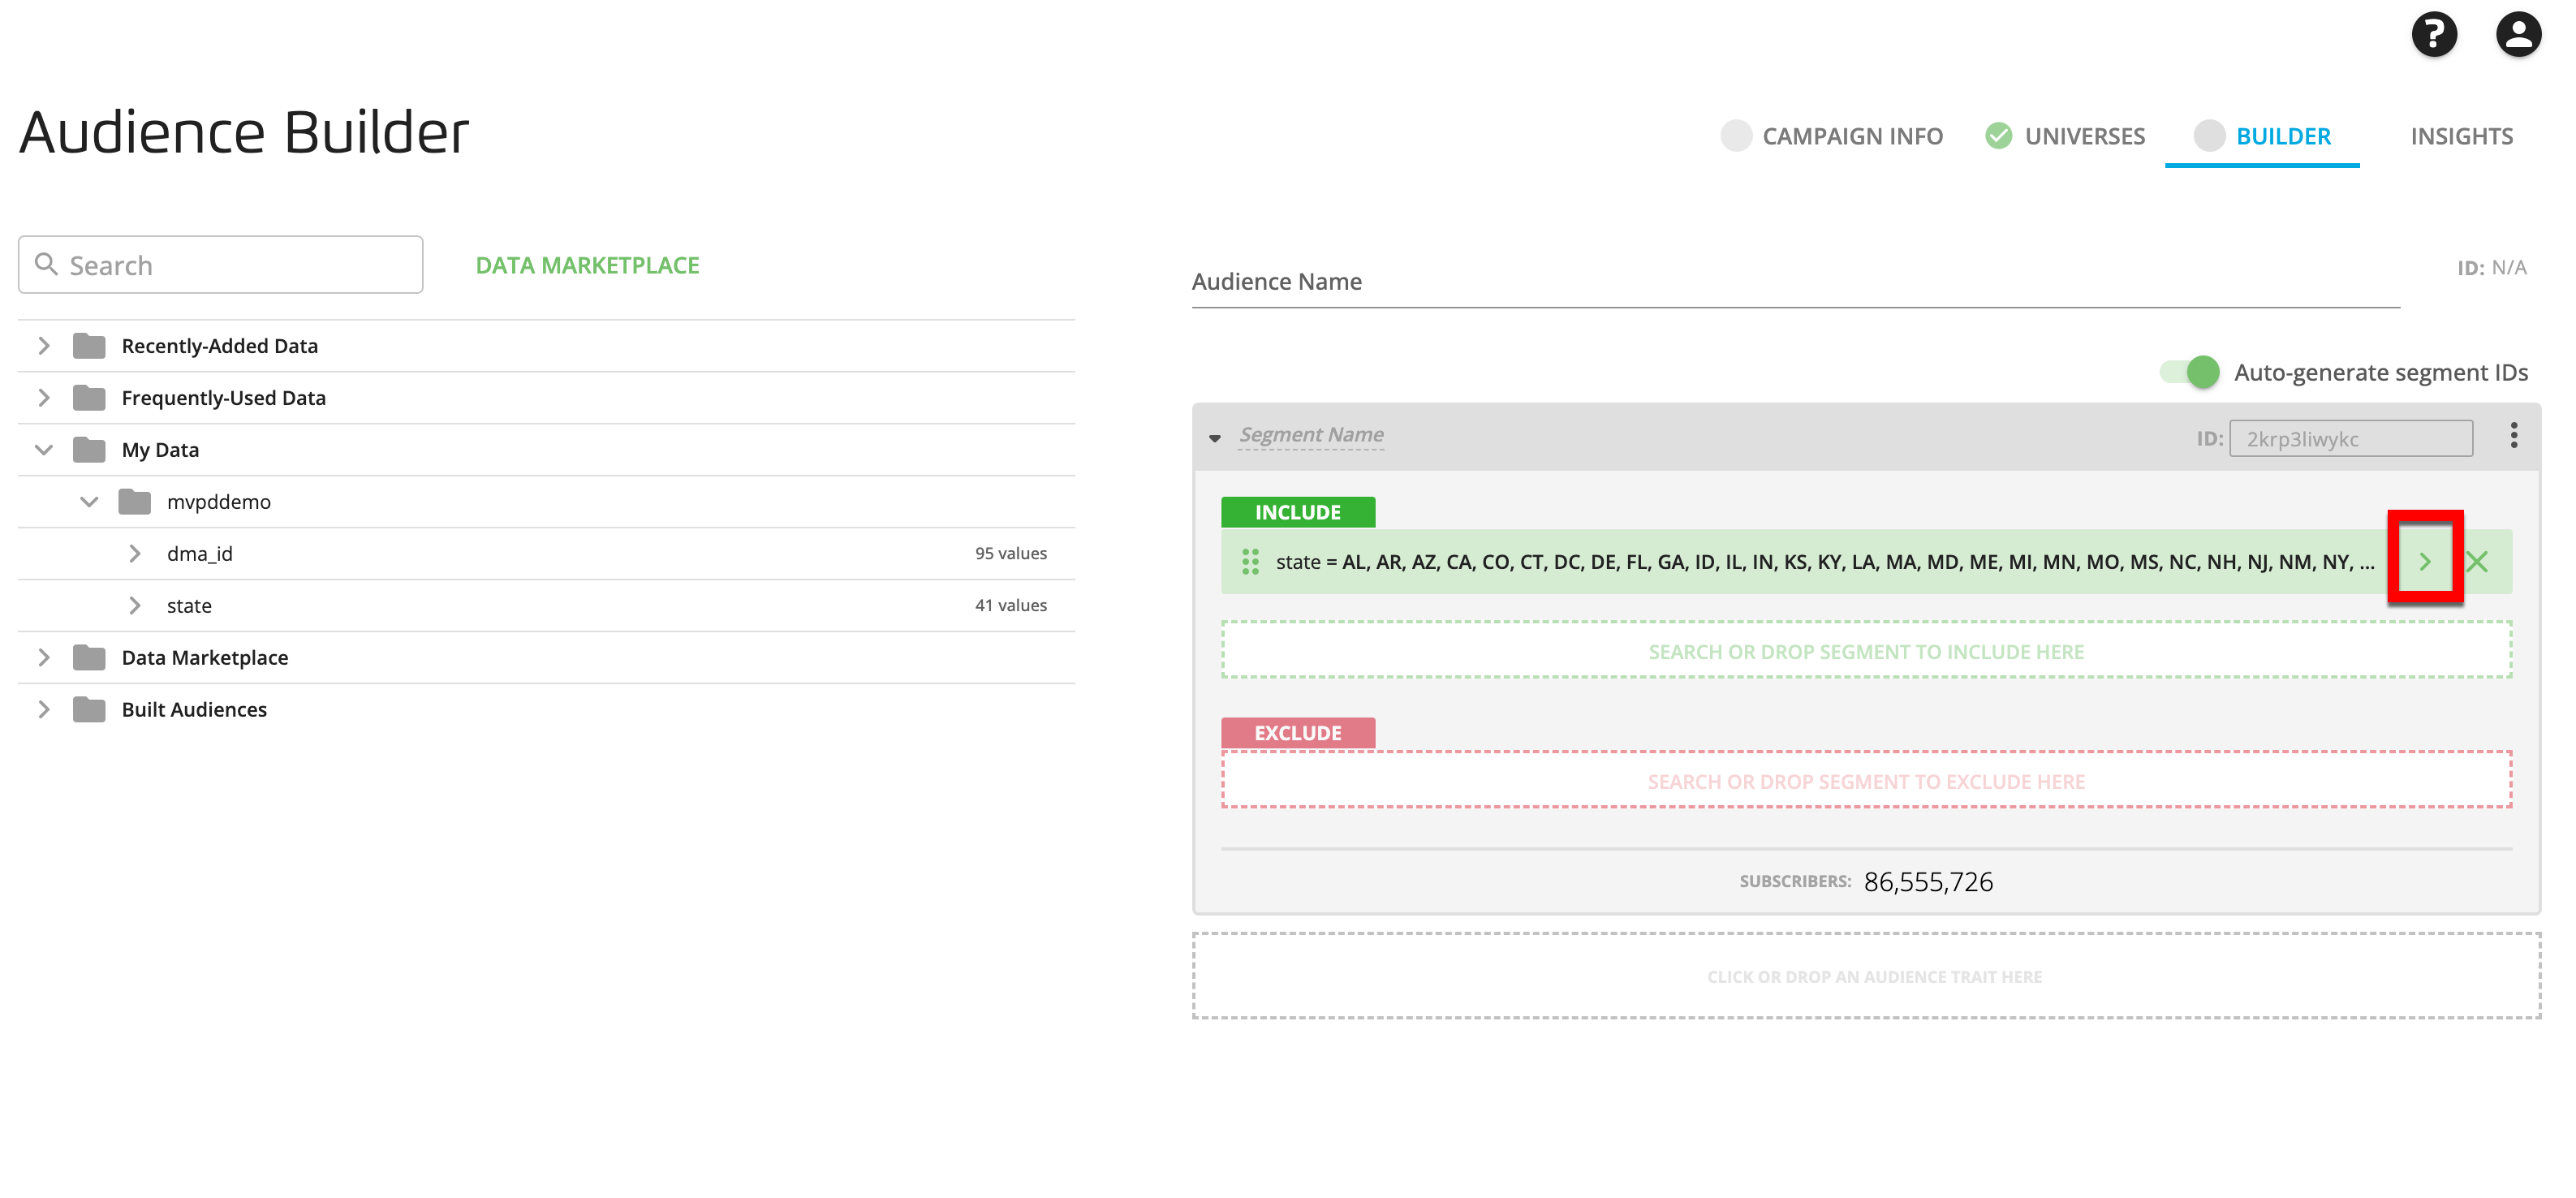
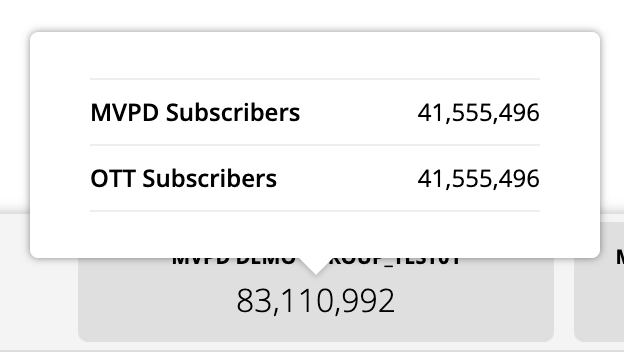
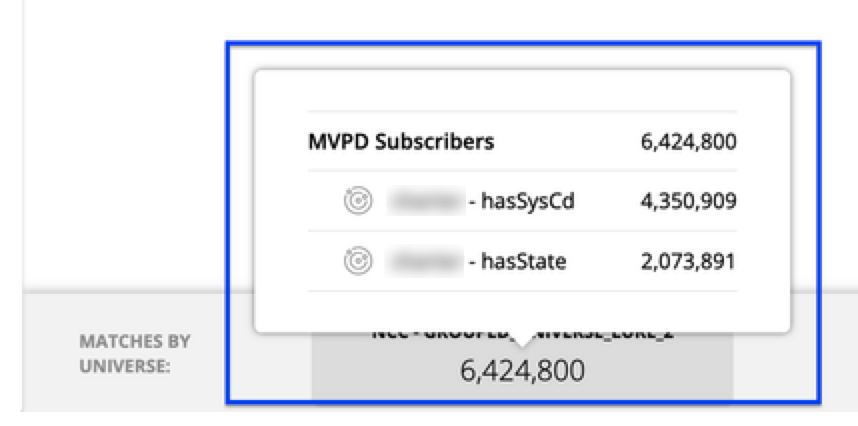
The metrics in the footer area populate: matches by universe, CPM, subscribers, and devices. Hover over any number to see a breakdown for that number.

Note
For any grouped universes you own that are included, you can also see a breakdown by each component universe.
If desired, drag an additional segment category or value into one of the following boxes:
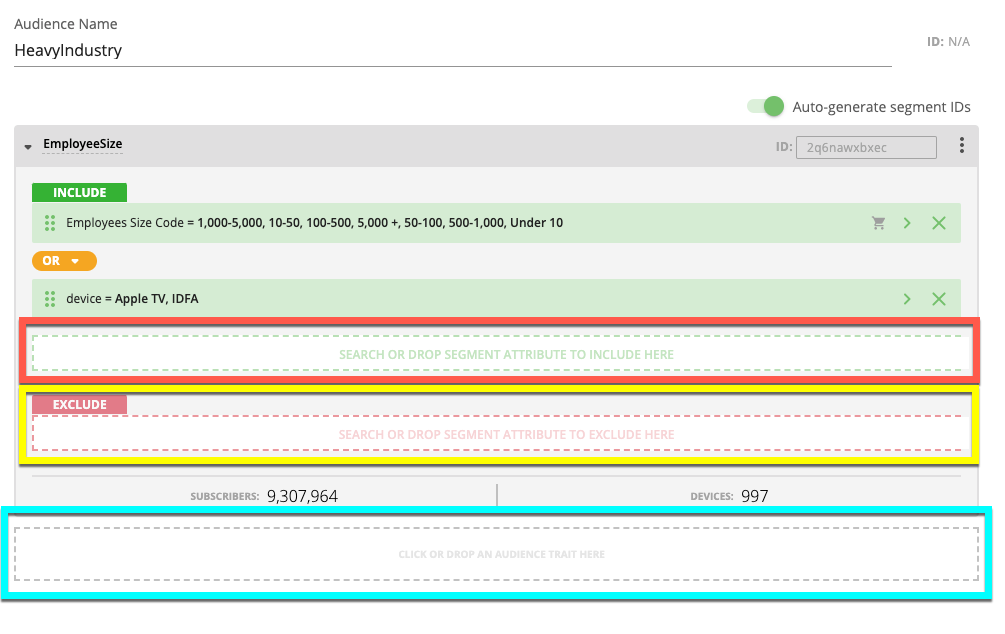
The box within an existing segment (shown in red)
Note
The individual segment components in the same segment box can be joined either by “And” (to include only subscribers or devices who are in both categories) or “Or” (to include all subscribers or devices who are in at least one of the included categories). Click the AND/OR selector to change the join method.

The EXCLUDE box (shown in yellow)
The box for a new segment (shown in blue)
Note
The segments within an audience are joined with an "Or" relationship (meaning any subscriber or device that is in one of the segments will be included).
Note
As you add additional segment categories or values, the metrics in the footer update.
Note
Make sure you meet any thresholds: If a threshold for the minimum number of households that need to be part of any segment or audience has been specified for one or more of the universes you’re building the audience from, or one or more of the segments you're using, you will see a red error icon for the affected universe until you include enough subscribers or viewers to meet the thresholds. All thresholds must be met before saving the audience.
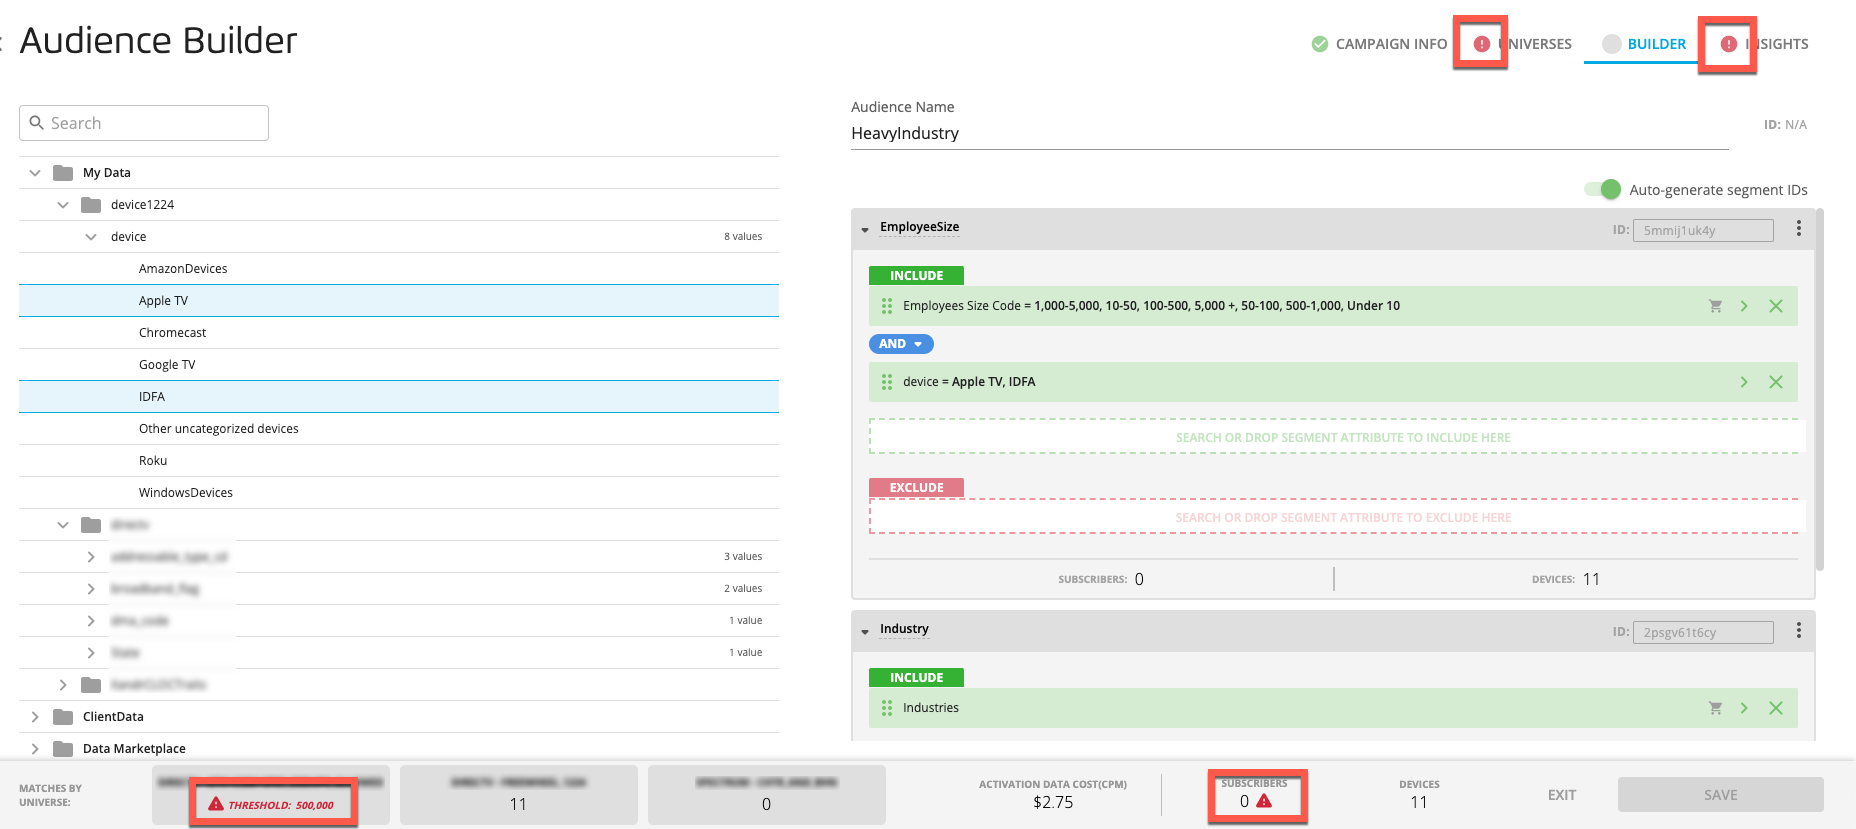
Select the Universes tab to see which universe or segment thresholds are not being met. The counts information for a particular segment and the counts information for the audience will not be displayed until the audience meets those thresholds.
When you've finished adding all the desired components, enter a name for each segment in the "Segment Name" field.
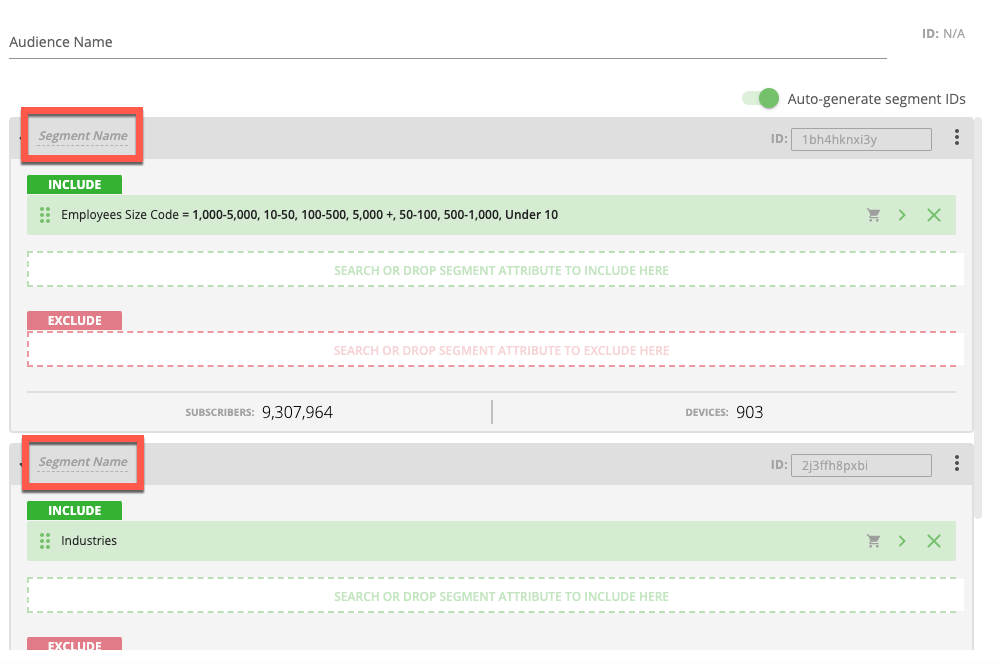
Note
If you need segment IDs for the segments but haven't enabled the "auto-generate segment IDs" toggle, enter segment IDs. See the "Automatically Generate Unique Segment IDs" section for more information.
Caution
Segment names can only contain characters, numbers, hyphens, or underscores. They cannot contain spaces.
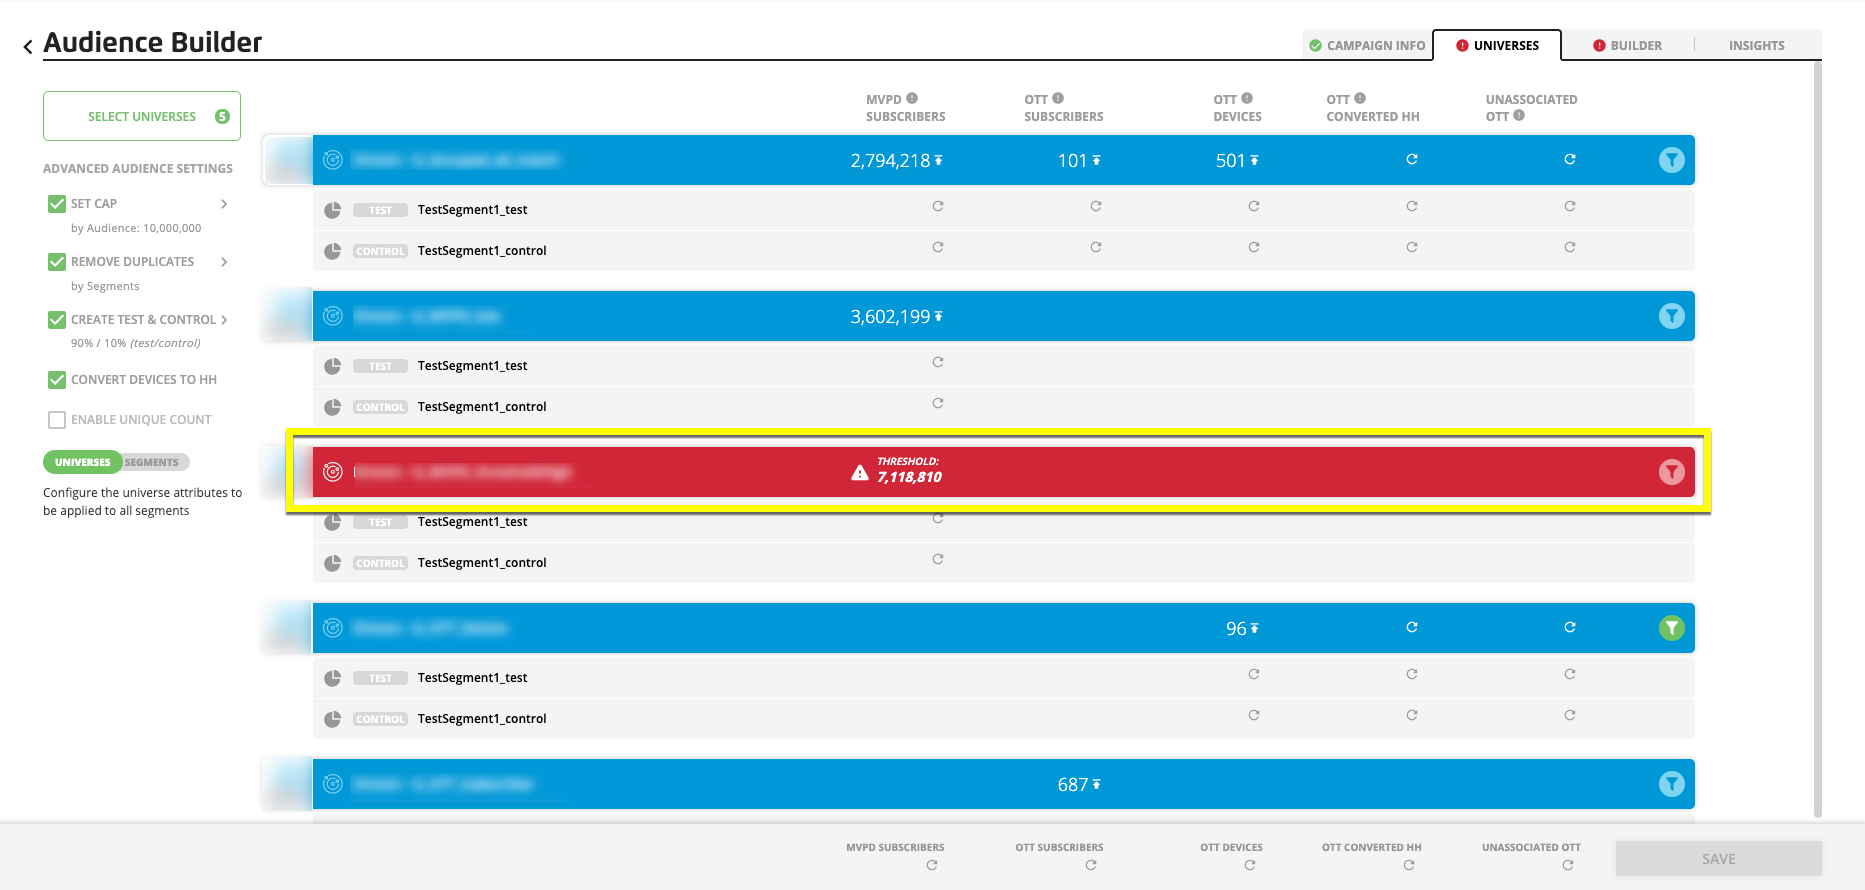
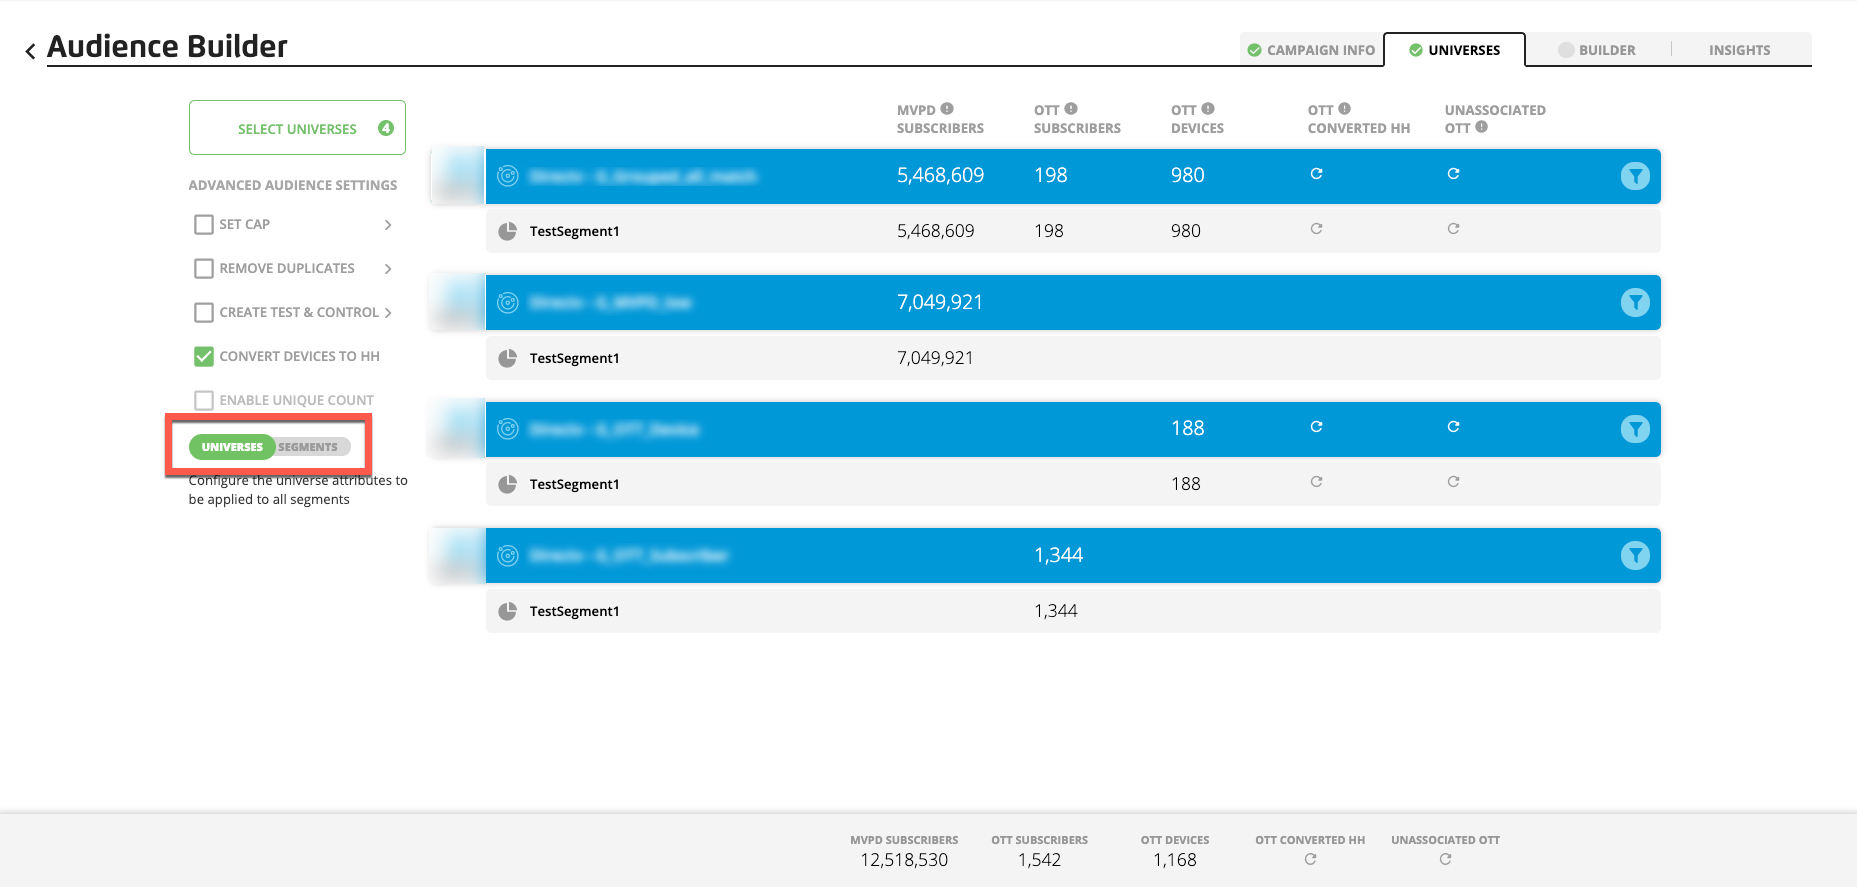
To apply any enabled universe attributes, select the Universes tab:
Use the Universes/Segments toggle to set the desired configuration mode.
Caution
You can only apply universe attributes on either the segment level or the universe level. If you change the configuration mode after applying attributes, those attribute settings in the current mode will be lost.
Click the appropriate filter (funnel) icon and then click the appropriate filter set dropdown arrow to display the available universe attributes for that filter set.
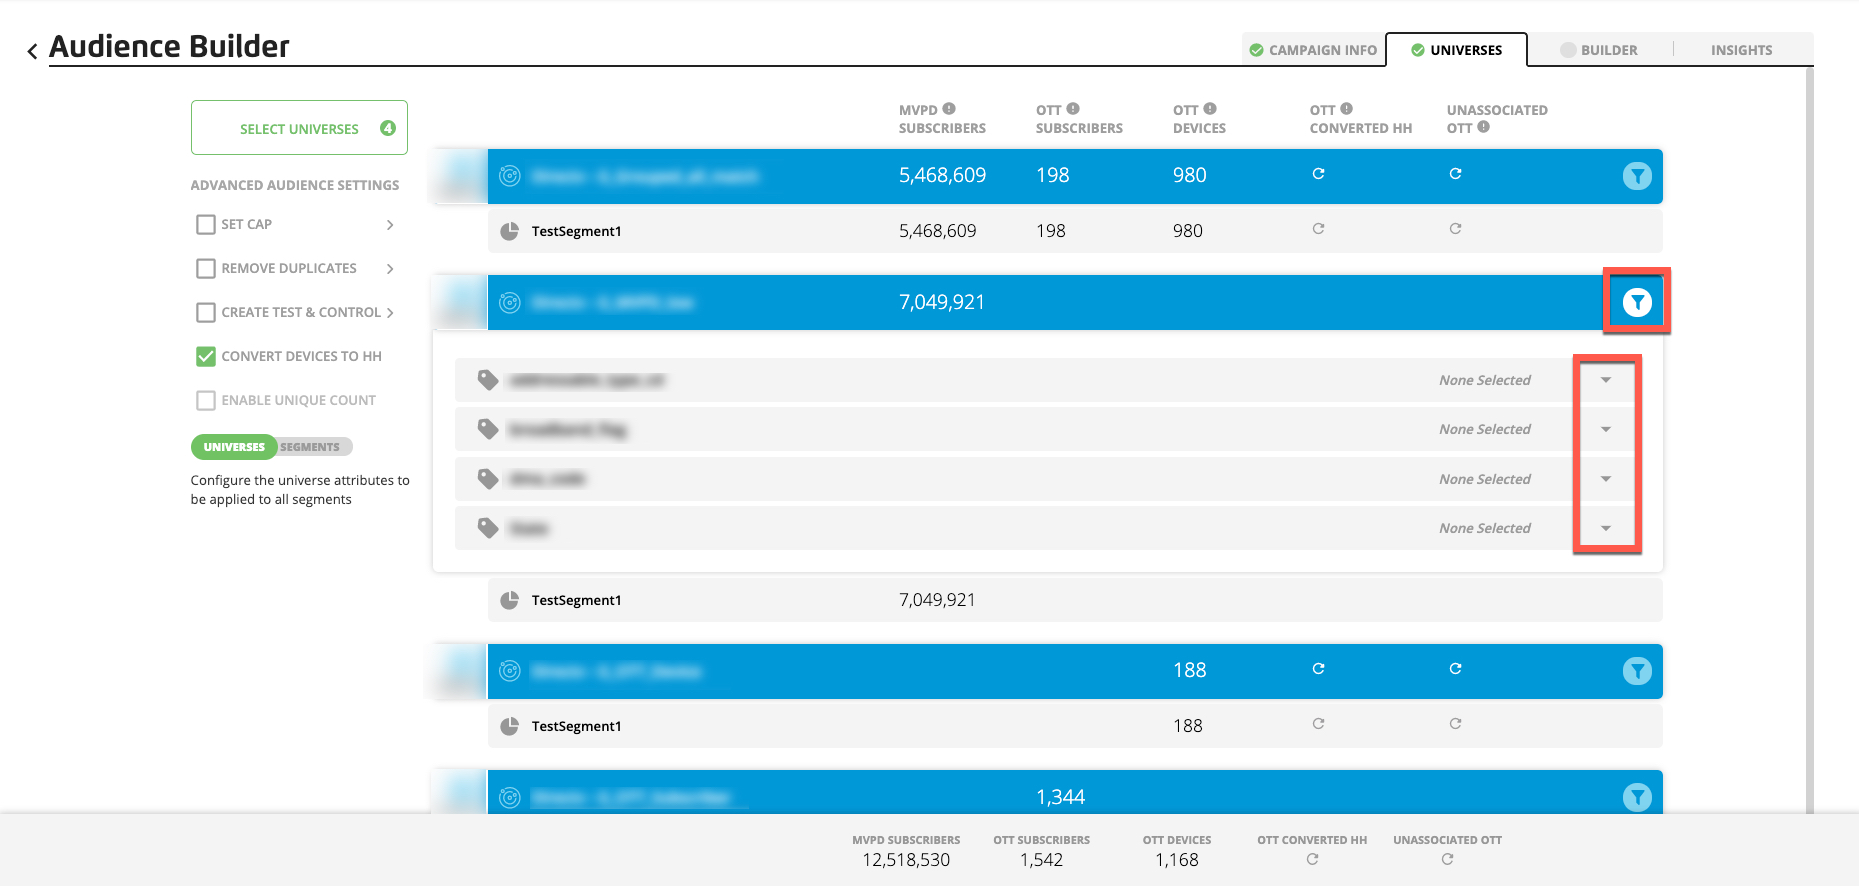
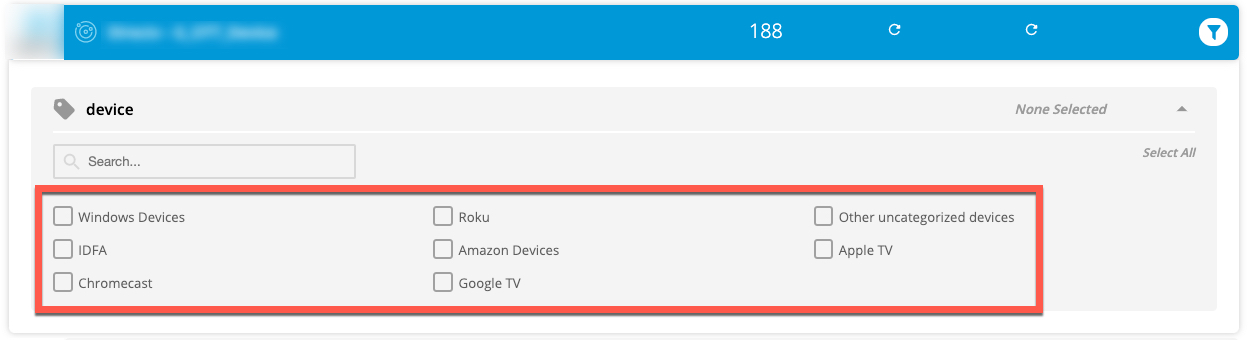
Choose the desired filters using one of the following methods:
For attributes that have check boxes: Click the desired universe attributes and then click the filter icon again to close the filter window.
For ZIP Code attributes: Either click the Select All text to select all available ZIP codes in the universe or type or paste the desired ZIP code values into the text box, separated by commas.

Note
If this is your own universe, you have access to all of the provided attributes. If any attributes are missing, contact your LiveRamp account team.
When you’ve applied all the desired universe attributes, select the Builder tab.
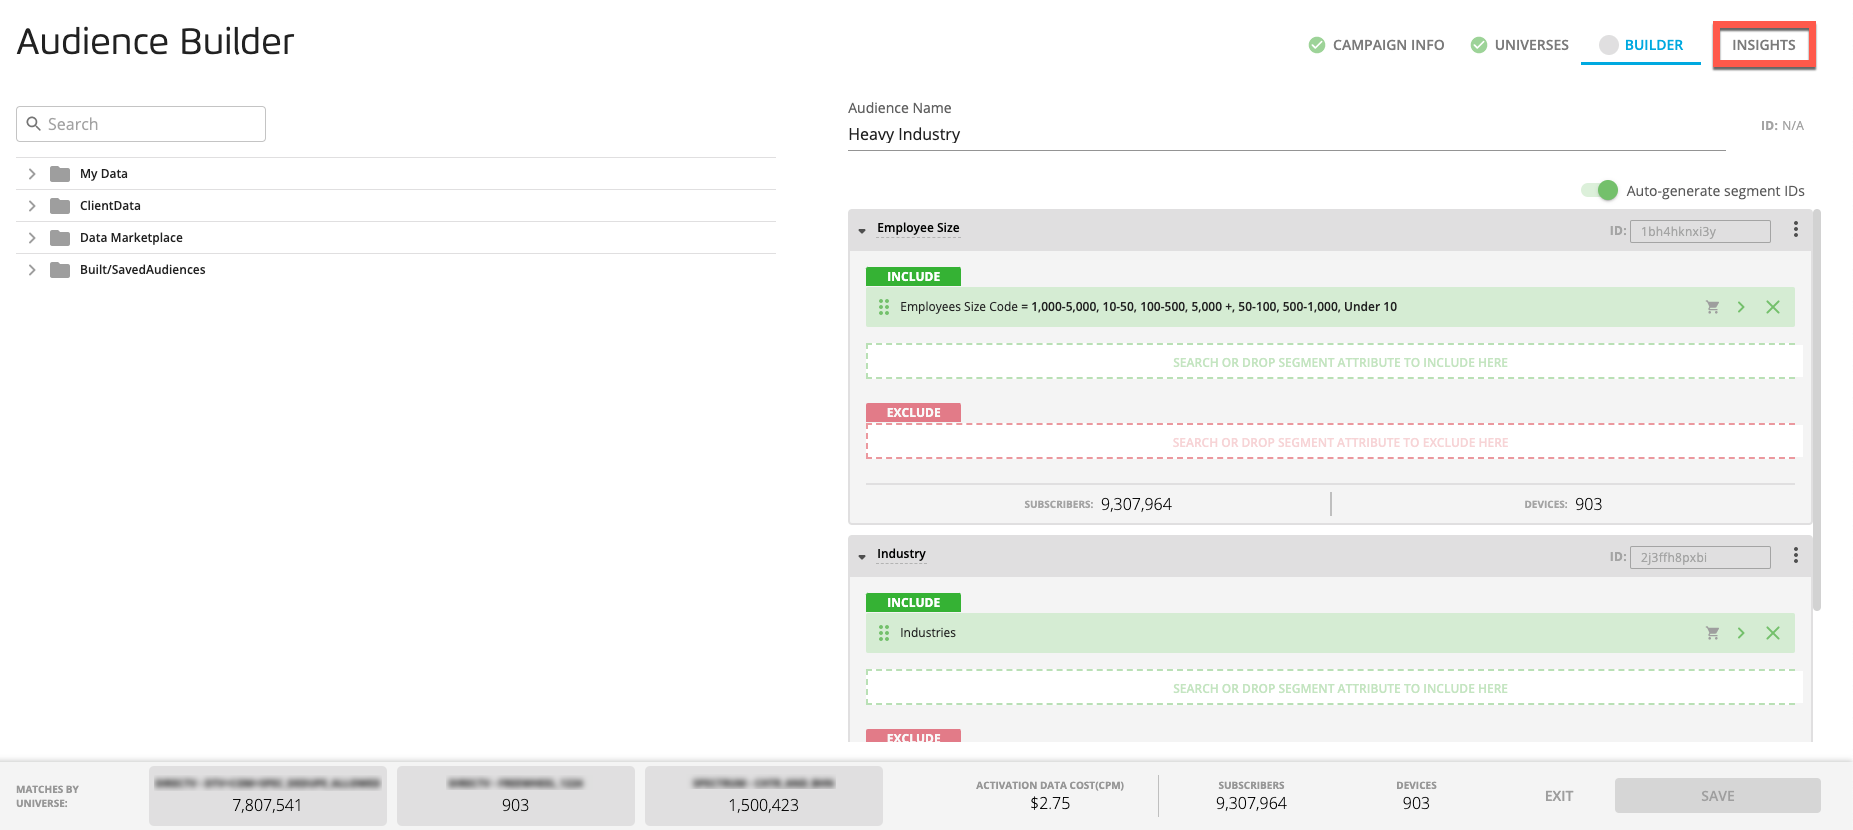
Enter a name for the audience in the "Audience Name" field.
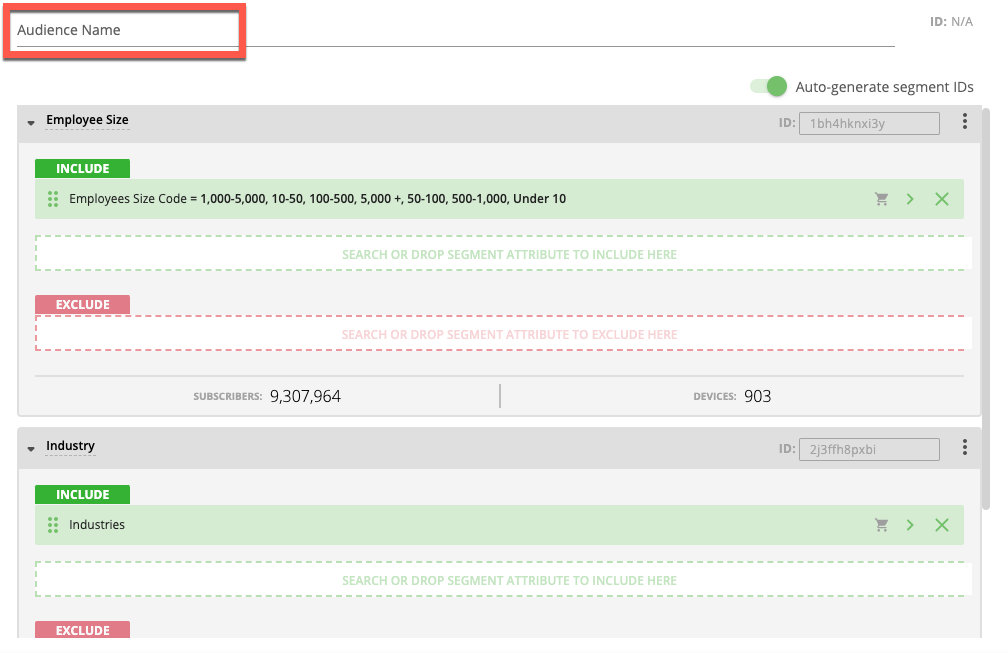
Caution
The audience name can only contain characters, numbers, hyphens, or underscores. The name cannot contain spaces.
You can select the Insights tab to see data visualizations and additional details about the audience (if you’ve opted-in for the Audience Ranker). See “View Audience Insights” for more information.
Note
Want the Audience Ranker? Contact your LiveRamp representative to opt in for the Audience Ranker.
If desired, choose one or more additional options.
Click Save to save the audience.
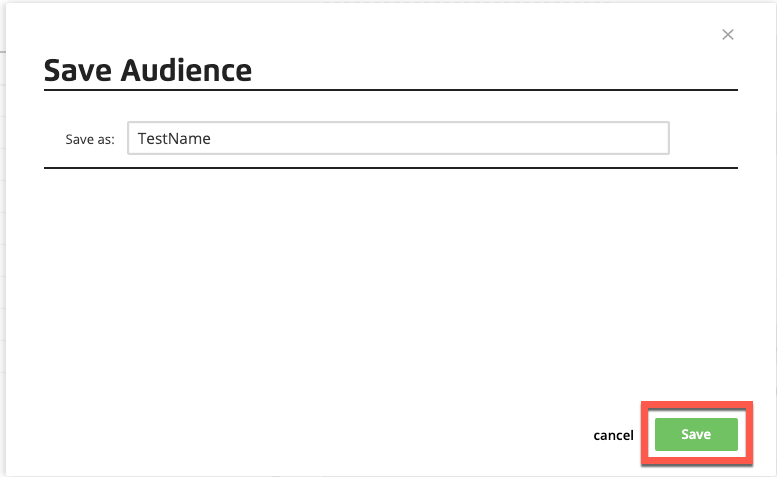
From the Save Audience dialog, confirm your audience name and then click Save.
Once the audience has been created, you can:
Download a file that contains information on the audience and how it was constructed
By default, the audience builder is set to automatically generate a unique segment ID for each audience segment. This setting is enabled by means of an "Auto-generate segment IDs" toggle in the upper-right of the Builder tab of the audience builder.
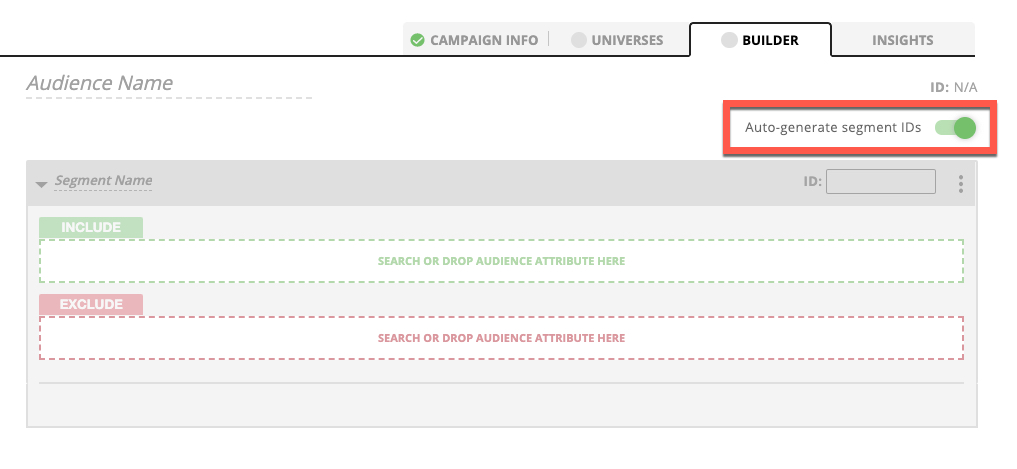
This is to help ensure that segment IDs for your LiveRamp-built audiences are always present and always unique with respect to each other. This ensures that your segments won't collide with each other in the activation platform.
Note
Before distribution, we always validate whether segment IDs should be included so that segment IDs are never sent to platforms that do not accept them. So even if segment IDs are created for the segments in an audience (either by a user or automatically), segment IDs won't be sent to those platforms. This also applies to distributions that include multiple universes and/or grouped universes.
If you’re a platform user who wants to input your own segment IDs, you can always do so. You can either turn off the feature (by sliding the "Auto-generate segment IDs" toggle on the Builder tab to the left) or by leaving the feature on and manually editing the auto-generated IDs.
Note
As soon as you manually edit an automatically-generated segment ID, the toggle moves to the "off" position indicating that the IDs are no longer guaranteed to be unique.
Caution
If you enter your own segment IDs, our systems do not perform any checks for uniqueness.
Note
If you move the toggle from the "off" position to the "on" position, all segment IDs entered will be overwritten with system-generated unique IDs.
Note
If you edit an audience that was built without the "Auto-generate segment IDs" setting on, you can turn the setting on to generate unique segment IDs. Before turning the "Auto-generate segment IDs" setting on, delete any manually entered segment IDs.
If you duplicate an audience, the "Auto-generate segment IDs" setting is copied along with the audience. Change the setting for the new audience if you want a different setting from the one used by the original audience.
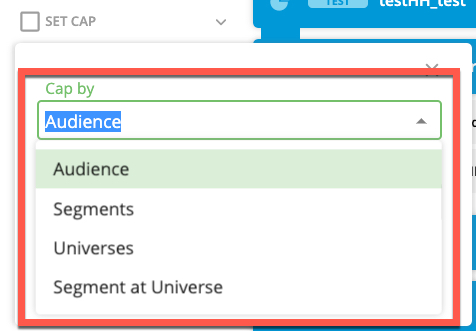
You can set an audience cap in one of several ways:
Cap by audience: This caps the total number of members in the audience (you can cap the universes proportionally or by priority order).
Cap by segment: This caps the total number of audience members in the selected segment (you can set caps for multiple segments).
Cap by universe: This caps the total number of audience members in the selected universe (you can set caps for multiple universes).
Cap by segment at universe: This caps the total number of audience members in the selected segment/universe pairing (you can set caps for multiple segment/universe pairings).
Caution
The segment or universe priority you set affects both the removal of duplicates and audience capping. An audience can only have one segment or universe priority order that will be used for both functions.
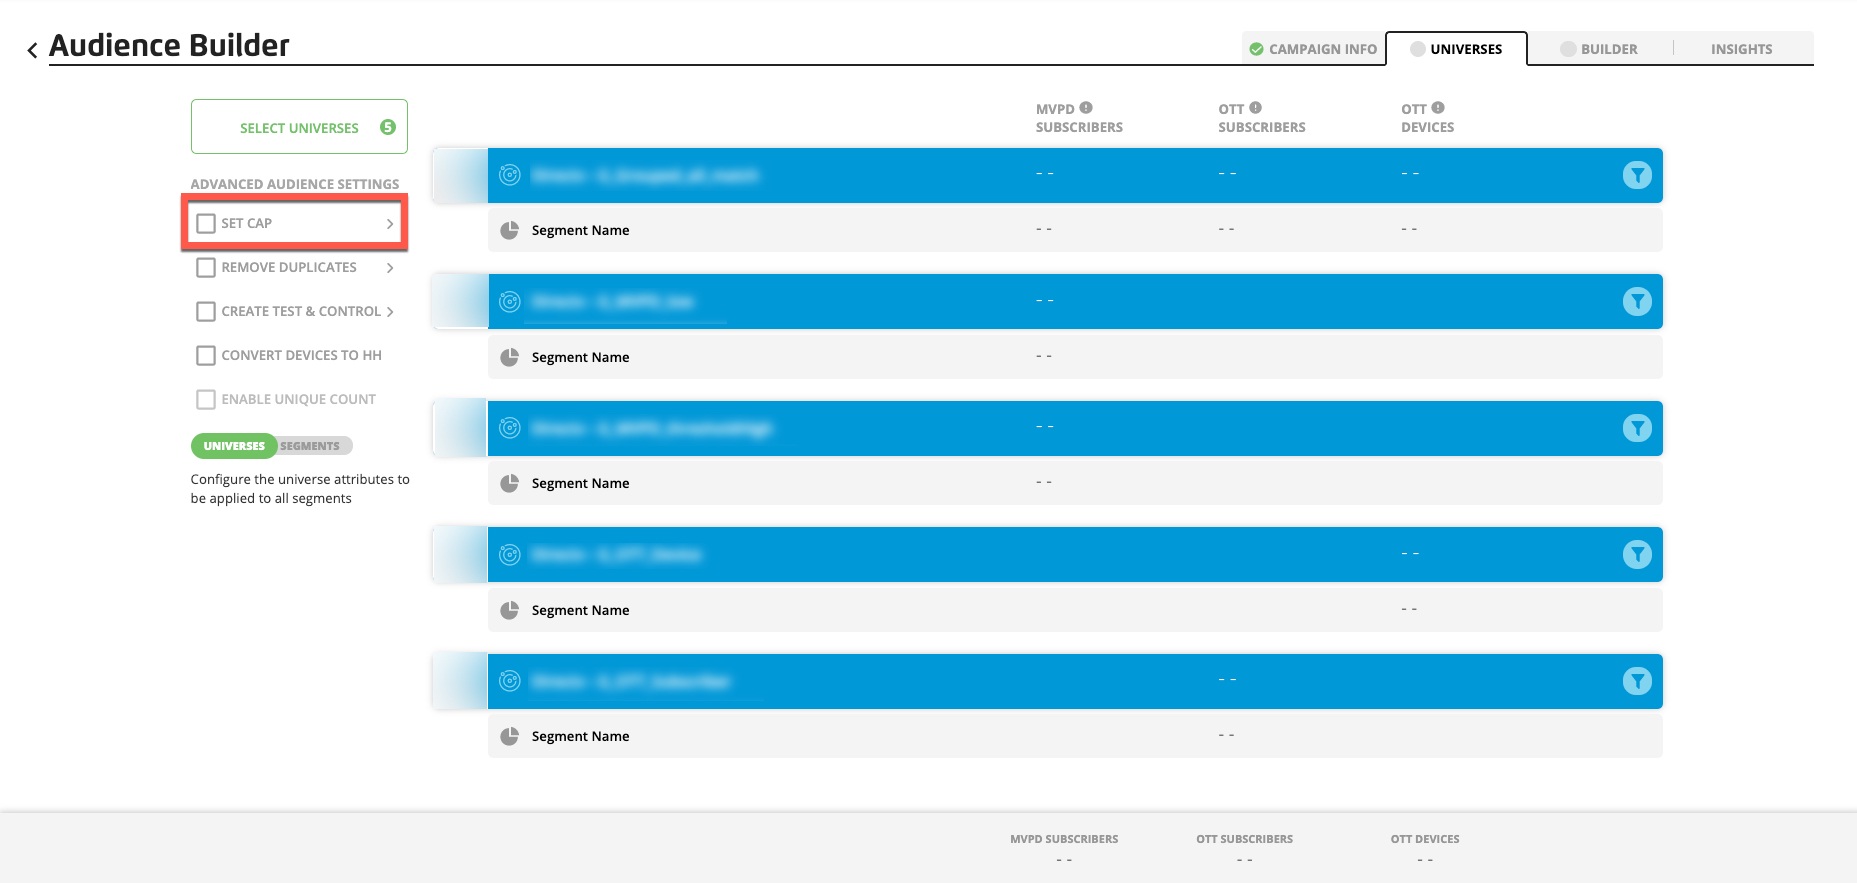
To set an audience cap (either during the process of building the audience or by editing an audience after you've built it):
From the Universes tab on the Audience Builder page, click anywhere on the SET CAP button (the button appears when you hover over the area).
In the Set Cap dialog, select the capping method you want to use from the "Cap by" list.
Configure the settings, depending on the capping method you've chosen:
To cap by audience:
Select the desired audience capping method (cap universes proportionally or cap universes by priority).
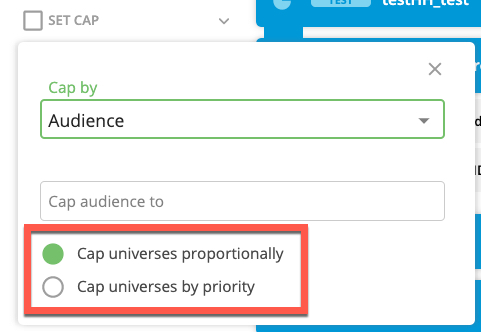
When you cap the universes proportionally, the number of audience members in each universe is randomly reduced in proportion to the universe size. For example, say you have an audience that is built from 4 universes with a total size of 1,200,000 audience members and you want to cap the total size at 1,000,000 (so reducing the total audience size by 200,000). Say the universe proportions look like this:
Universe 1 is 50% of the total audience (600,000 audience members)
Universe 2 is 20% of the total audience (240,000 audience members)
Universe 3 is 15% of the total audience (180,000 audience members)
Universe 4 is 15% of the total audience (180,000 audience members)
The number of audience members removed for each universe will be in proportion to that universe's percentage of the total audience size:
100,000 audience members (50% of 200,000) would be removed from Universe 1
40,000 audience members (20% of 200,000) would be removed from Universe 2
30,000 audience members (15% of 200,000) would be removed from Universe 3
30,000 audience members (15% of 200,000) would be removed from Universe 4
Example 1. Proportional Capping ExampleEnter the cap number.
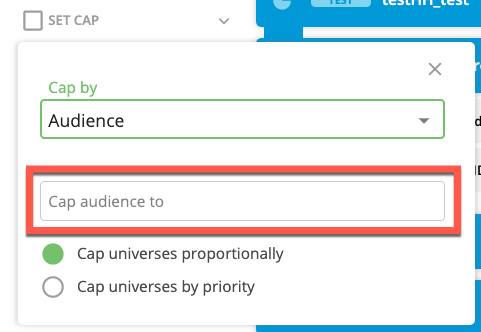
Close the Set Cap dialog.
To cap by segment:
Enter the cap number for each segment you want to cap.
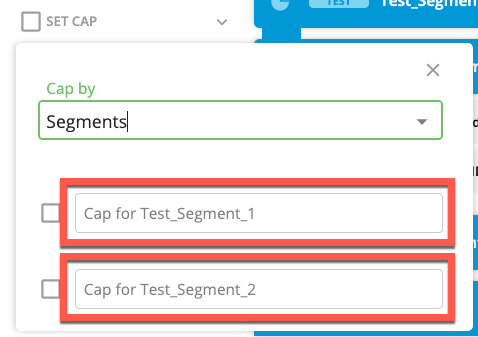
Close the Set Cap dialog.
To cap by universe:
Enter the cap number for each universe you want to cap.
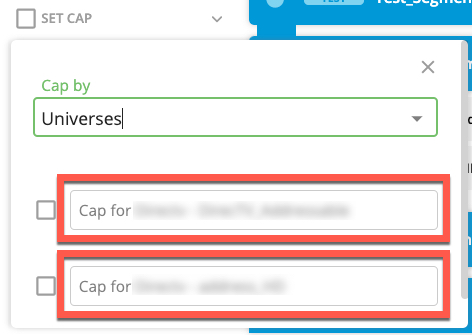
Close the Set Cap dialog.
To cap by segment at universe:
Enter the cap number for each segment/universe pairing you want to cap.
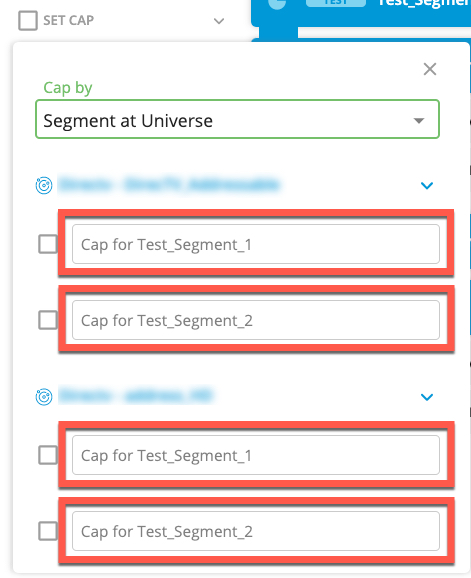
Close the Set Cap dialog.
Once you've finished all other actions to edit or build that audience, select the Builder tab and click .
You can make sure that your audience does not contain the same audience member more than once by removing any duplicates from the segments or universes where that audience member is present. You can set the priority criteria and order, so that any duplicates are first removed from lower-priority segments or universes until the audience member is only present once in the audience.
You can use the following criteria to remove duplicates from an audience:
By segment priority
By universe priority
By segment priority and universe priority
Caution
To remove duplicates from an audience based on universe priority, any permissioned universes in the audience must be permissioned for allowing deduplication at the universe priority. See Permission a Universe to a Partner for more information.
Caution
The segment or universe priority you set affects both the removal of duplicates and audience capping. An audience can only have one segment or universe priority order that will be used for both functions.
Note
For information on how deduplication works when the audience uses grouped universes, see"How Deduplication Works for Audiences that Utilize Grouped Universes."
To remove duplicates from an audience (either during the process of building the audience or by editing the audience after you've built it):
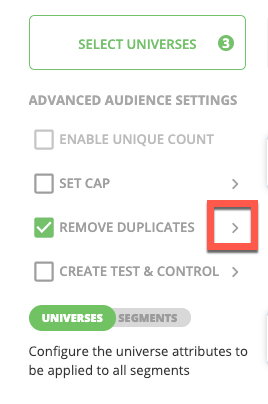
From the Universes tab on the Audience Builder page, check the REMOVE DUPLICATES check box.
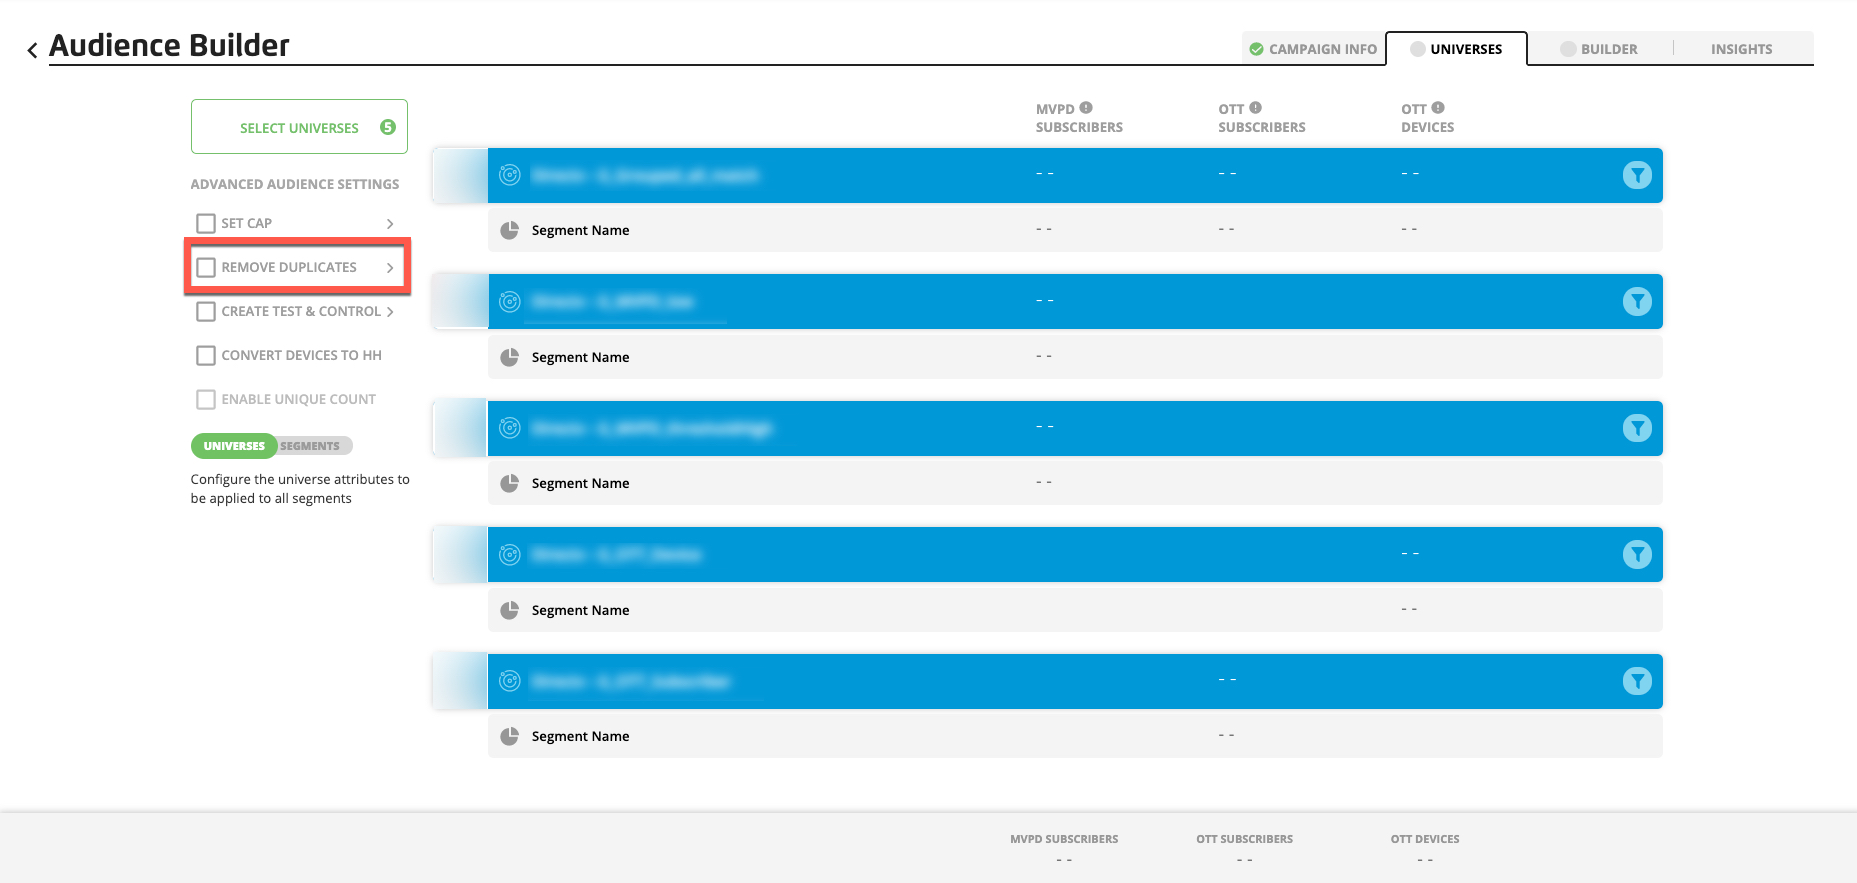
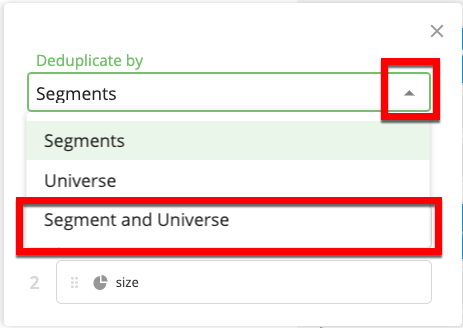
Click the caret to open the deduplication dialog.
To remove duplicates based on segment priority, set the segment priority for the removal of duplicates by dragging the segments into the desired position (if necessary).
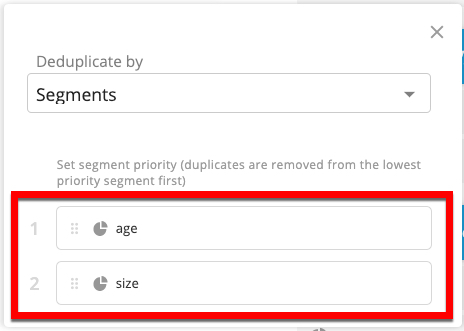
Note
Duplicates will be removed from the lowest-priority segment first (the segment in the bottom position) and then from each segment up the priority list until the audience member is only present in one segment.
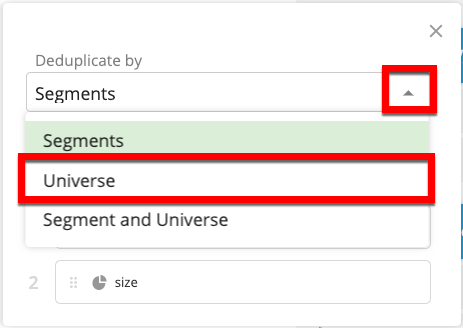
To remove duplicates based on universe priority:
From the "Deduplicate by" dropdown, select "Universe."
Set the universe priority for the removal of duplicates by dragging the segments into the desired position (if necessary).
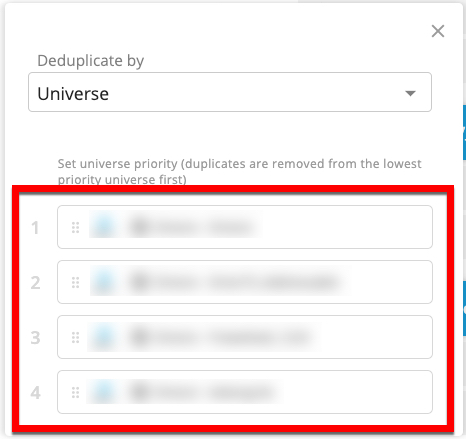
Note
Duplicates will be removed from the lowest-priority universe first (the universe in the bottom position) and then from each universe up the priority list until the audience member is only present in one universe.
To remove duplicates based on segment priority and universe priority:
Note
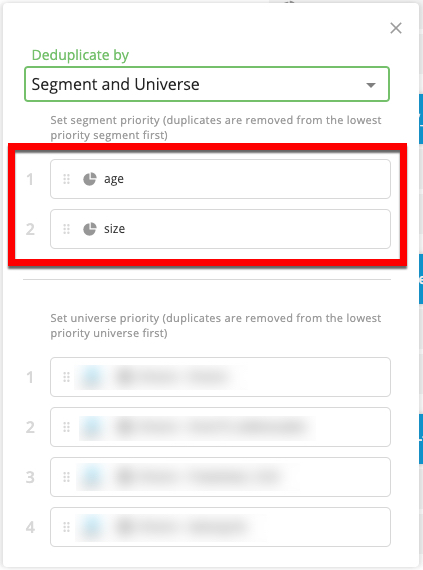
When you select "Segment and Universe", we first use the segment priority to remove duplicates from the lowest-priority segment first (the segment in the bottom position) and then from each segment up the priority list until each audience member is present in only one segment, We then use the universe priority to remove duplicates (if necessary) from the lowest priority universe first (the universe in the bottom position) and then from each universe up the priority list until each audience member is present in only one universe.
From the "Deduplicate by" dropdown, select "Segment and Universe."
Set the segment priority for the removal of duplicates by dragging the segments into the desired position (if necessary).
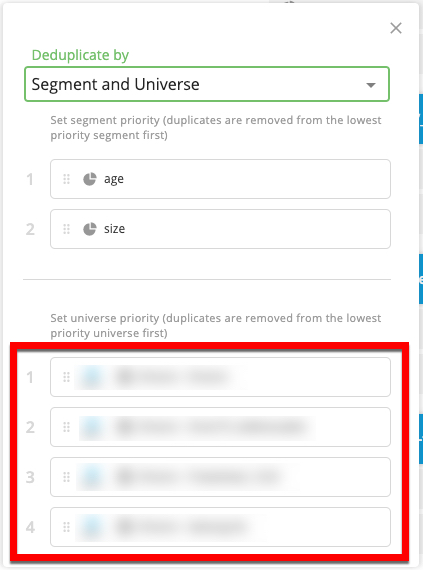
Set the universe priority for the removal of duplicates by dragging the segments into the desired position (if necessary).
Once you've finished all other actions to edit or build that audience, select the Builder tab and click .

Match counts begin processing and should display within 10 minutes.
When you want to be able to measure the effectiveness of your TV campaign by comparing the effects on consumers who were exposed to the campaign versus consumers who weren’t exposed, create test and control groups for your audience.
To avoid putting one household into both a test and control group, test and control groups are split based on the household RampIDs for the audience members. Generating the counts required to perform this split may take up to 10-15 minutes after the audience is saved, but the audience can be sent for distribution (or distribution approval) immediately after it has been built.
To create test and control groups (either during the process of building the audience or by editing the audience after you've built it):
From the Universes tab on the Audience Builder page, click anywhere on the CREATE TEST & CONTROL area.

From the dialog, adjust the slider to the desired test and control percentage split, and close the dialog when completed.
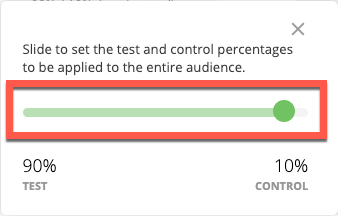
Note
By default, 90% of the deduplicated audience will be put in the test group and 10% in the control group.
Once you've finished all other actions to edit or build that audience, click the Save icon.
Once you save the edits, it will appear on the Audiences page with a blue hourglass in the Status column. It may take up to 10-15 minutes to process the audience and produce counts once test and control groups have been created. However, you can distribute the audience, or request distribution approval from an MVPD, for a permissioned universe used in the audience, as soon as the audience has been built and saved.
Upon completion of the count, the request or distribution will proceed without any additional action needed on your part. See “Distribute an Audience” for instructions.