Publish an Audience to the Audience Gallery (OTT Hub)
Caution
This article is intended for users of the OTT Hub.
The Audience Gallery is a buy-side tool that allows an advertiser or agency to browse readily available inventory from premium TV publishers.
You can publish up to 25 audiences to the Audience Gallery to display them to buyers. These would typically be audience targets that you would make available to any prospective buyer.
Note
Publishing an audience simply makes it available to buyers in the Audience Gallery. It does not distribute the audience to an ad server. To distribute an to an ad server, follow the instructions in "Activate an Audience or RFP." There is no limit on the number of audiences that can be distributed.
Audiences can only be published to the Audience Gallery once you've entered the required audience settings (which will be displayed on the Audience Gallery page). These settings include:
Published Audience Name: The name of the audience that will appear on the Audience Gallery page.
Description: A description of the audience.
Floor Price (CPM): The minimum ad price that can be executed (configured at the ad server).
Contact Info: The email address of the person to contact to obtain a Deal ID for the audience.
Information on at least one deal ID (the deal ID will not be visible to buyers in the Audience Gallery)
These settings can be entered when you build the audience or afterwards, by editing the audience. They can also be entered, or edited, when you publish the audience.
You can also remove an audience from the Audience Gallery (either because you no longer want that audience to be available to buyer or because you've reached your 25 audience limit), by "unpublishing" the audience.
If you've already built an audience and are ready to publish it, perform the following steps:
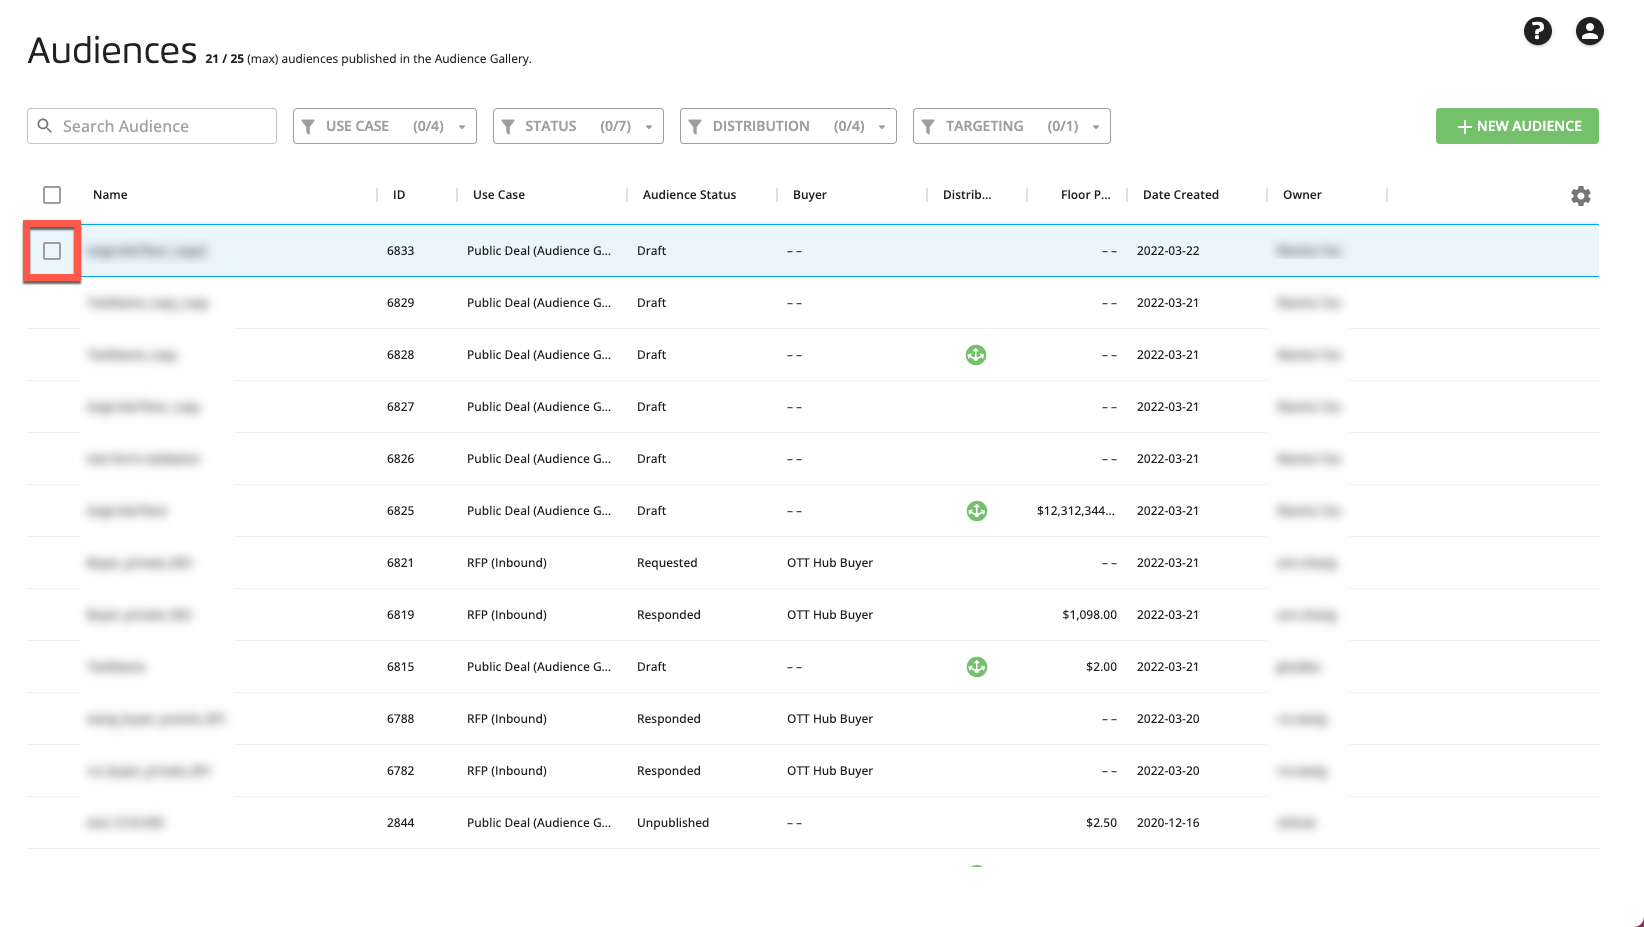
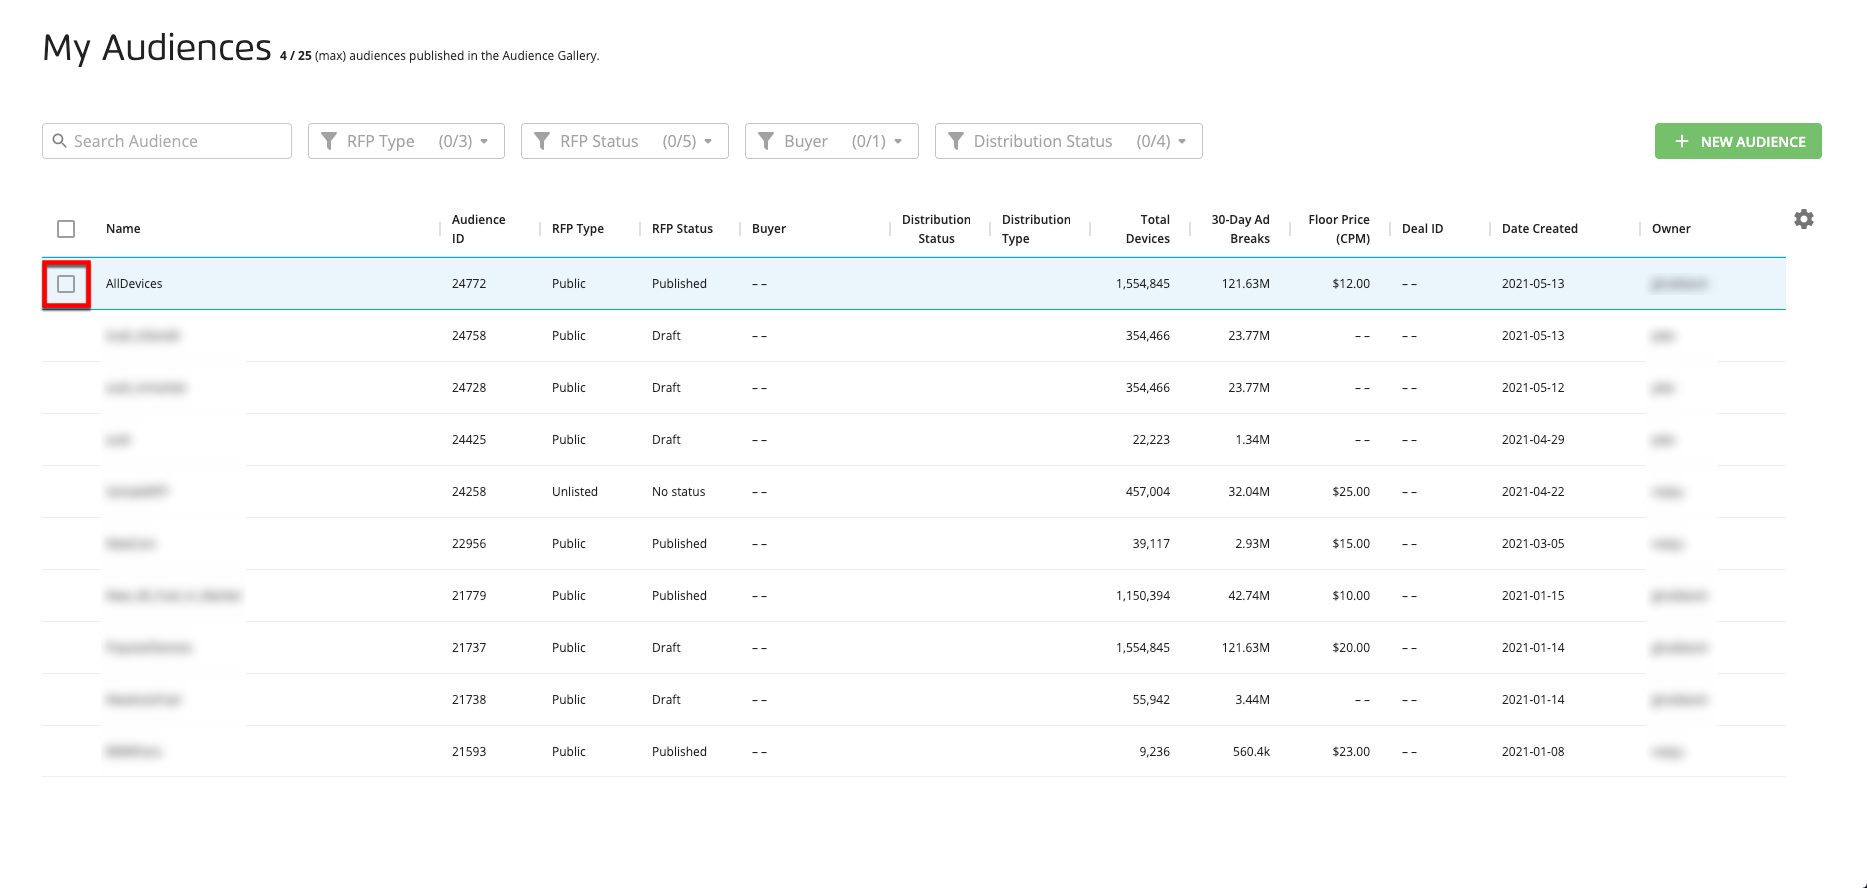
From the Advanced TV navigation menu, click Audiences in the OTT Hub section to navigate to the Audiences page for OTT Hub.

Check the check box for the audience you want to publish.
Note
You can only publish one audience at a time.
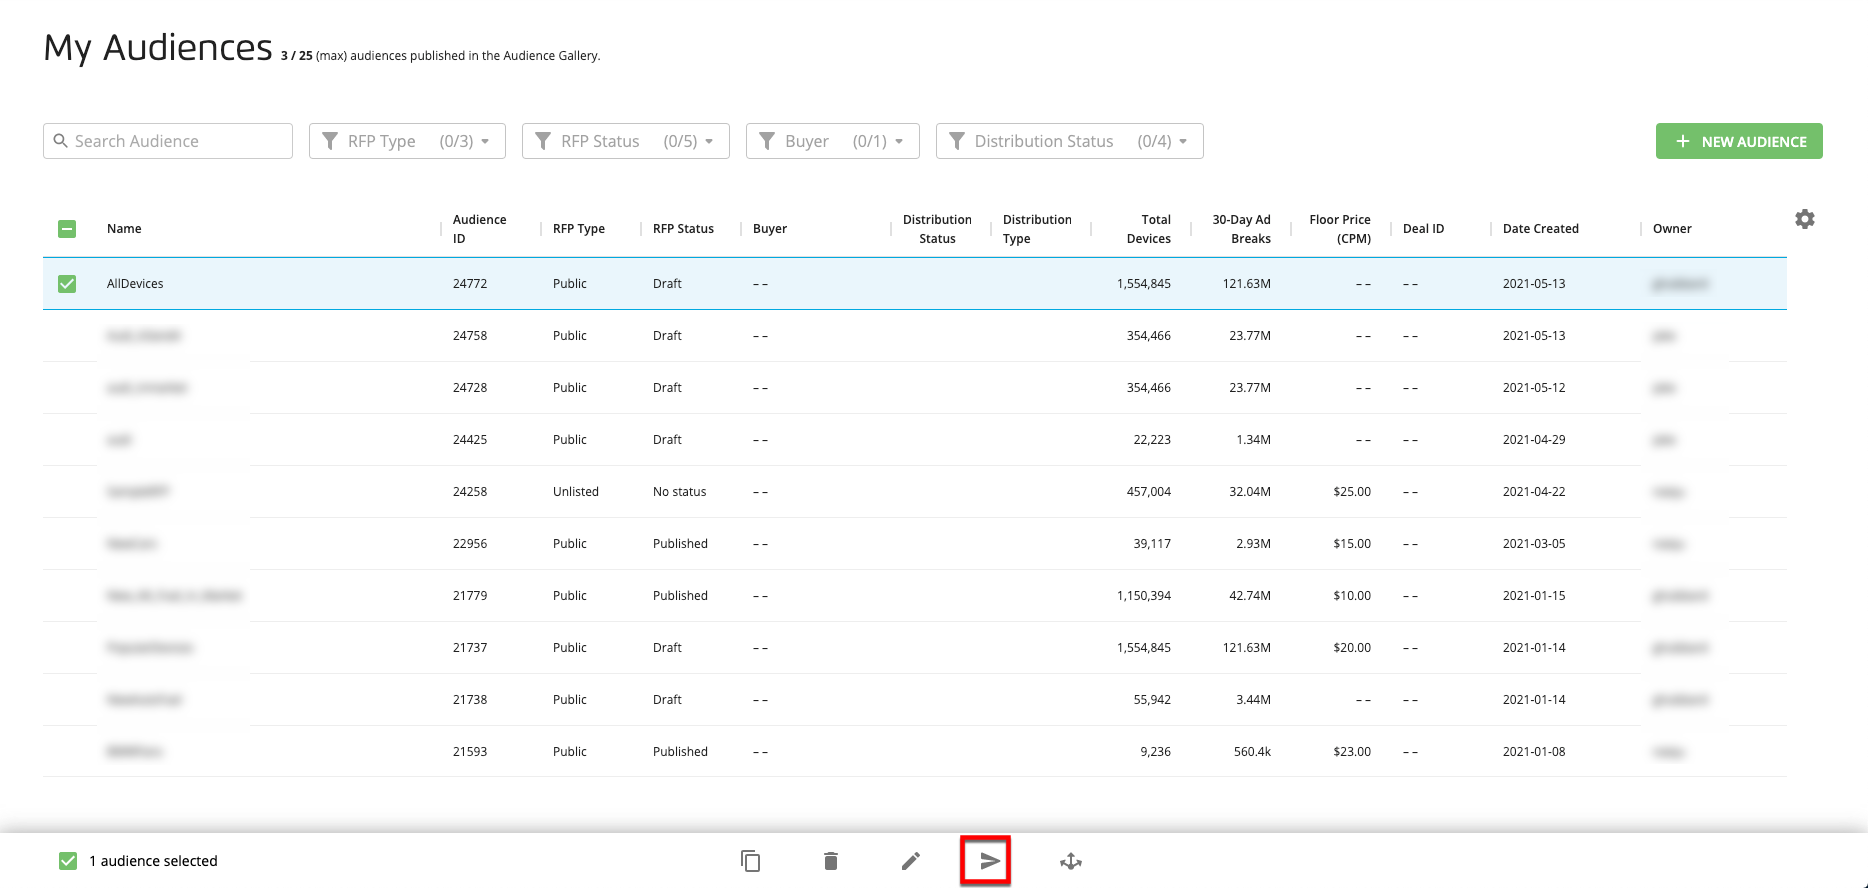
Click the Publish Audience icon (
 ) that appears at the bottom of the page.
From the Audience Settings popup, enter or edit the contact info and default floor price.
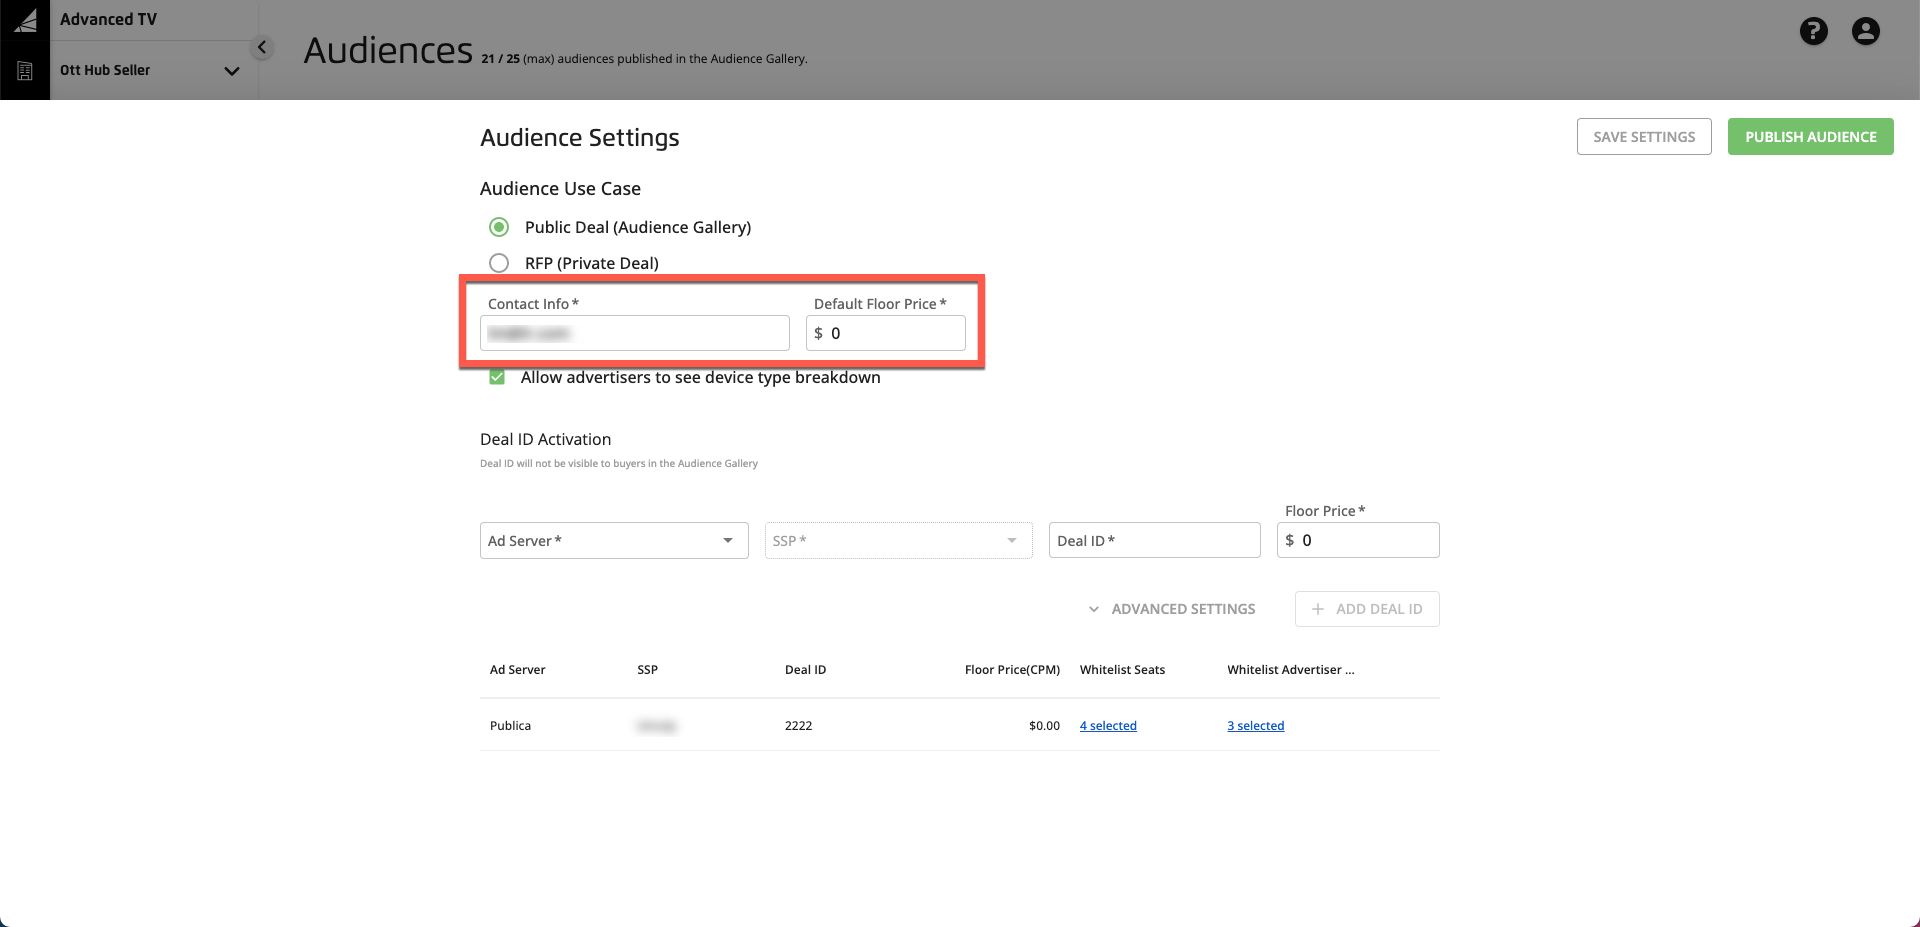
If you want to modify whether buyers will be able to see a breakdown of device types, modify the check box for "Allow advertisers to see device type breakdown".
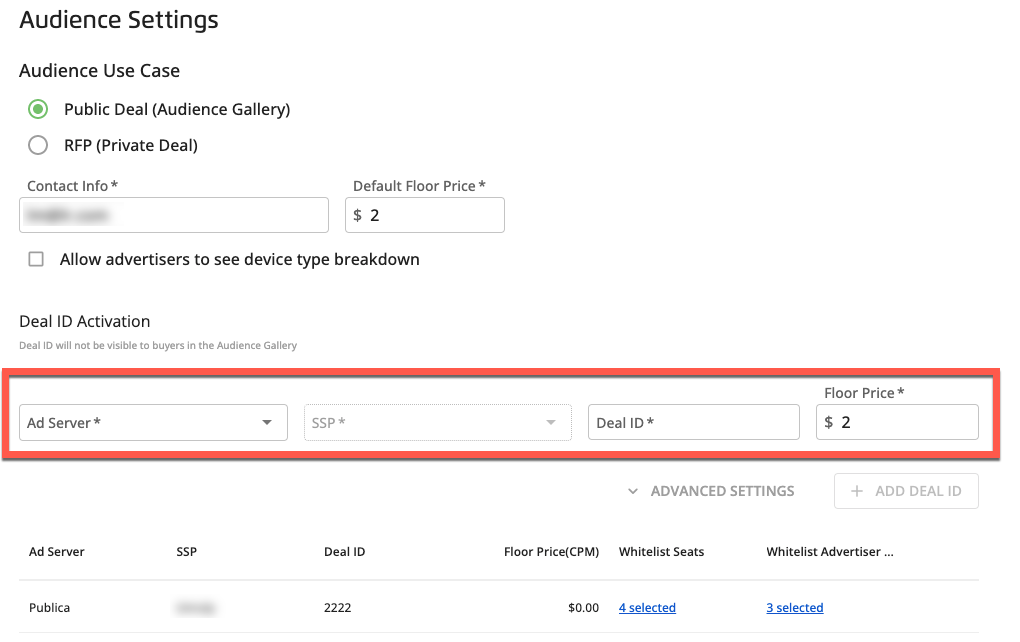
To add deal ID info:
Select the ad server and SSP from the drop-down lists, and enter the deal ID and floor price (if different from the default).
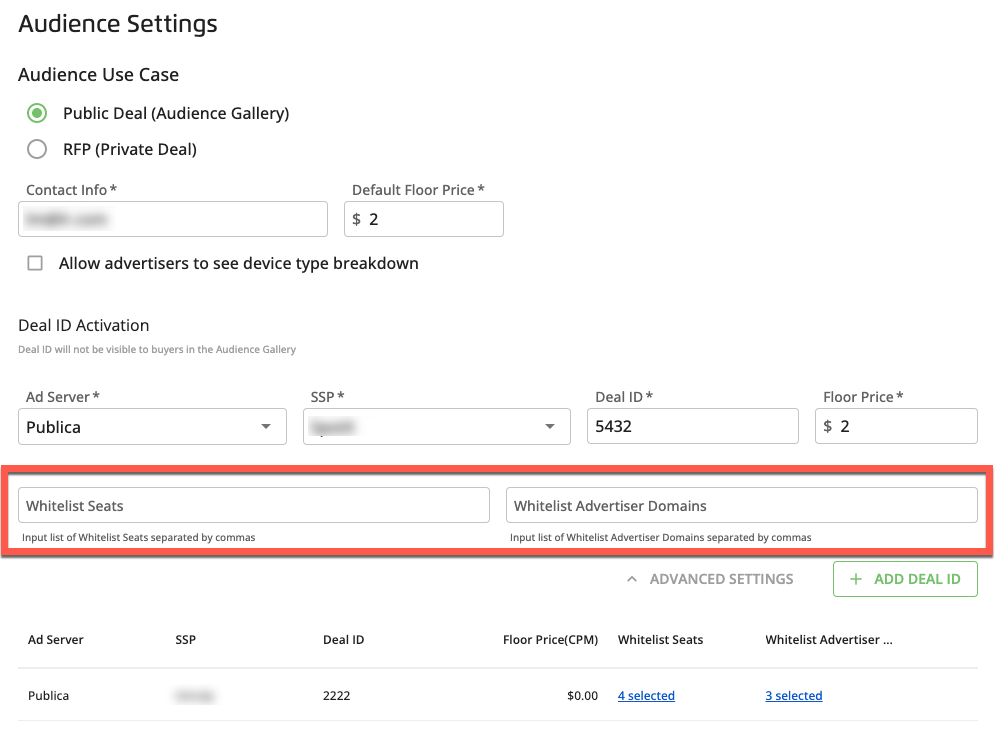
To enter whitelist seats and whitelist advertiser domains, click the ADVANCED SETTINGS text and then enter the desired values, separated by commas.
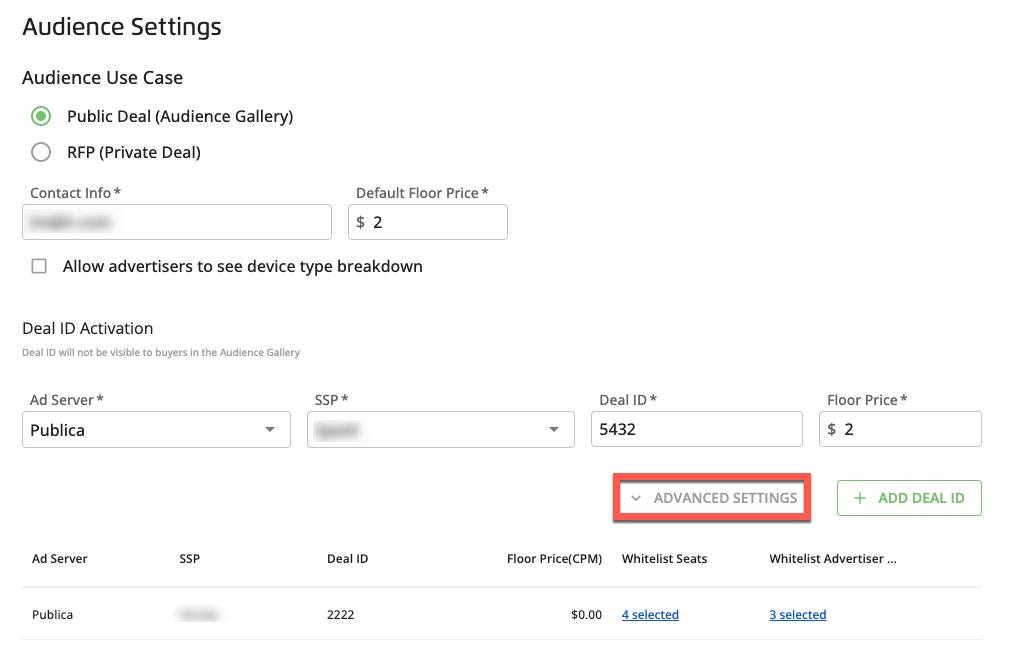
Click .
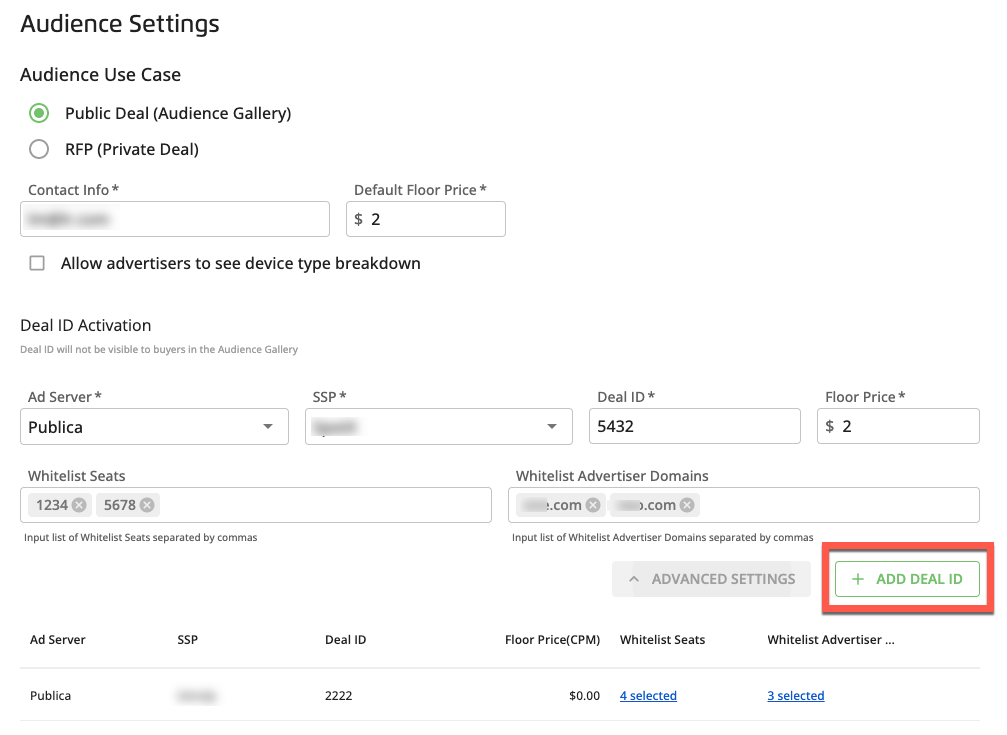
Repeat step 6 for any additional deal IDs you want to add.
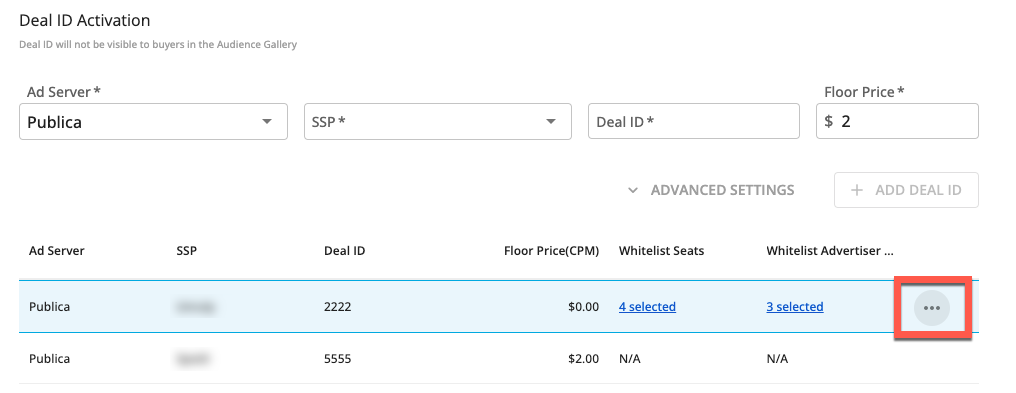
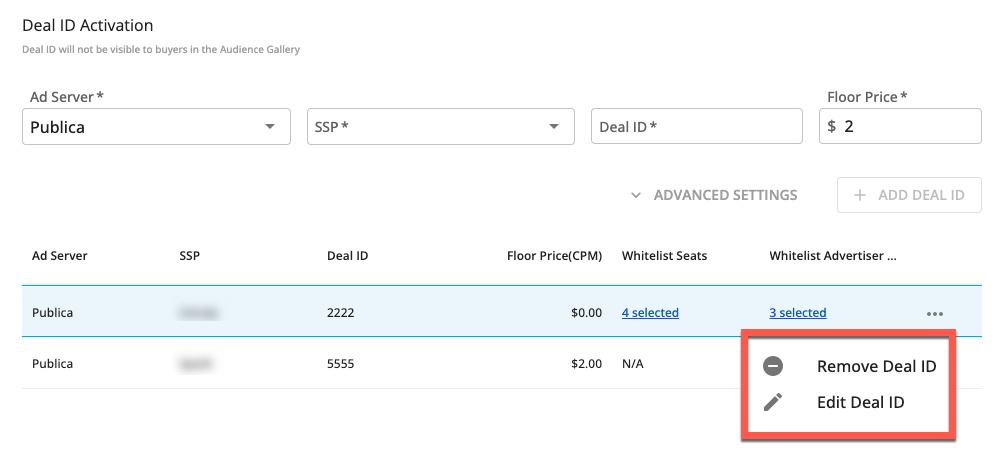
To edit or remove previously-entered deal ID info, click on the ellipsis (three dots) that appears when you hover over the row for that deal ID and select the desired option ("Remove Deal ID" or "Edit Deal ID"). If editing a deal ID, click once you've made you're desired edits.
Once all of the info is correct, click .
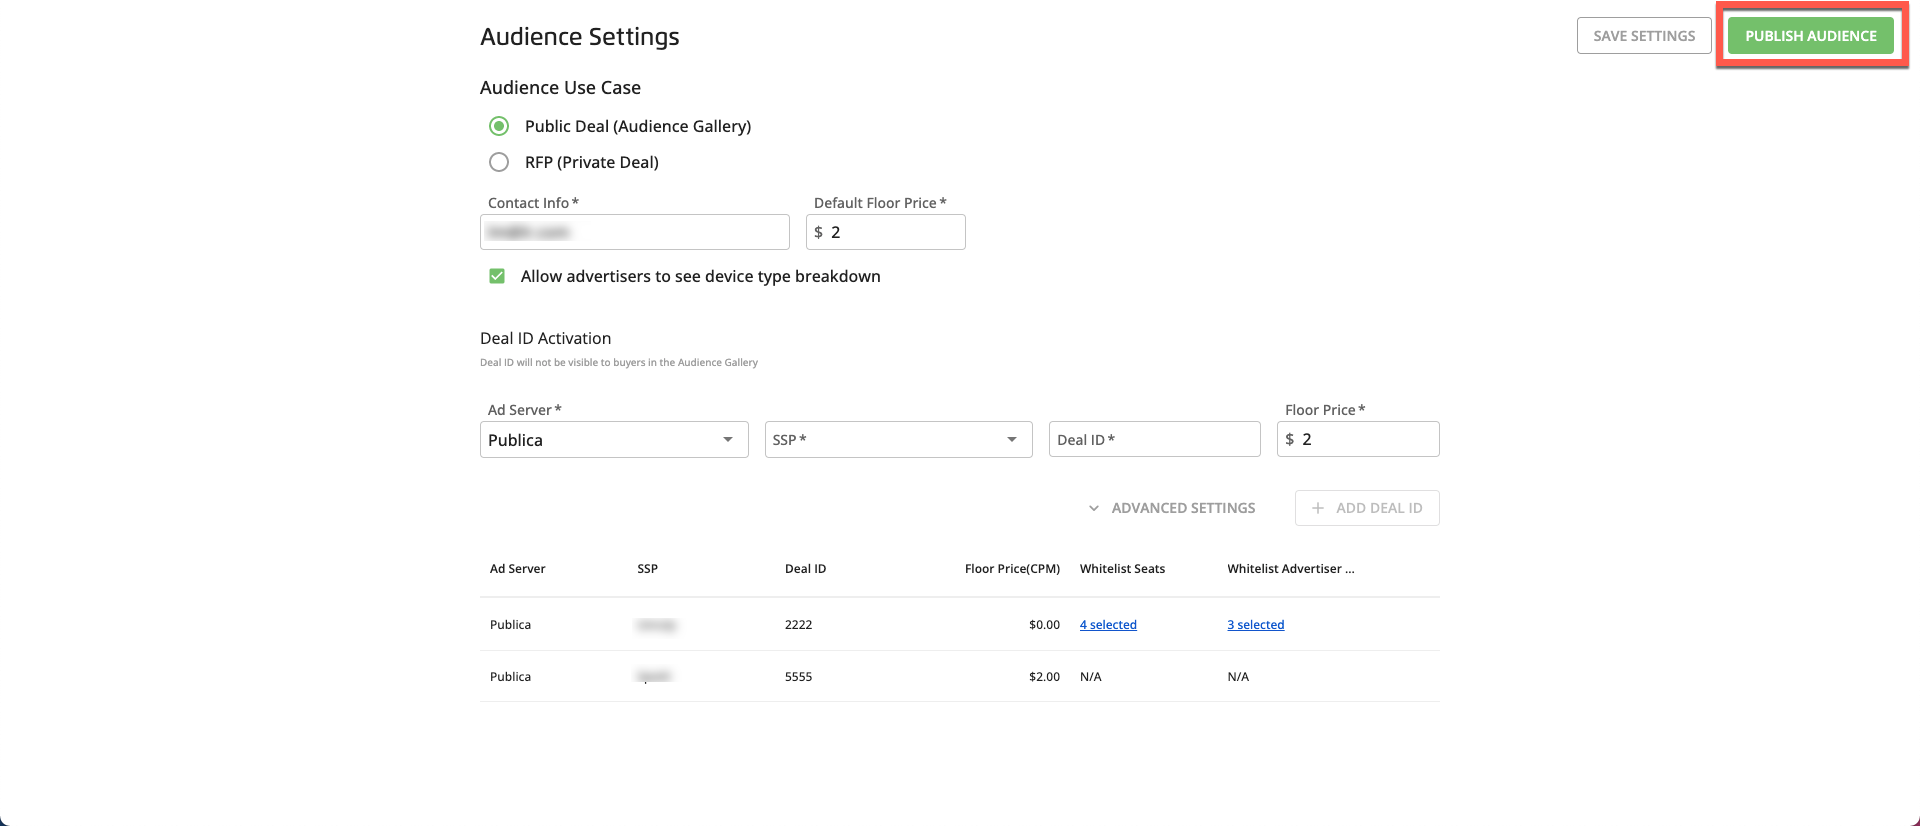
Note
The Publish Audience button is only enabled for public audiences once all required publishing settings have been entered.
A success banner appears, with information on the number of additional audiences that can be published:

To remove an audience from the Audience Gallery (either because you no longer want that audience to be available to buyer or because you've reached your 25 audience limit), "unpublish" the audience:
From the Advanced TV navigation menu, click Audiences in the OTT Hub section to navigate to the Audiences page for OTT Hub.
Check the check box for the audience you want to unpublish.
Note
You can only unpublish one audience at a time.
Click the Edit Audience Settings icon that appears at the bottom of the page.
From the Audience Settings popup, click .
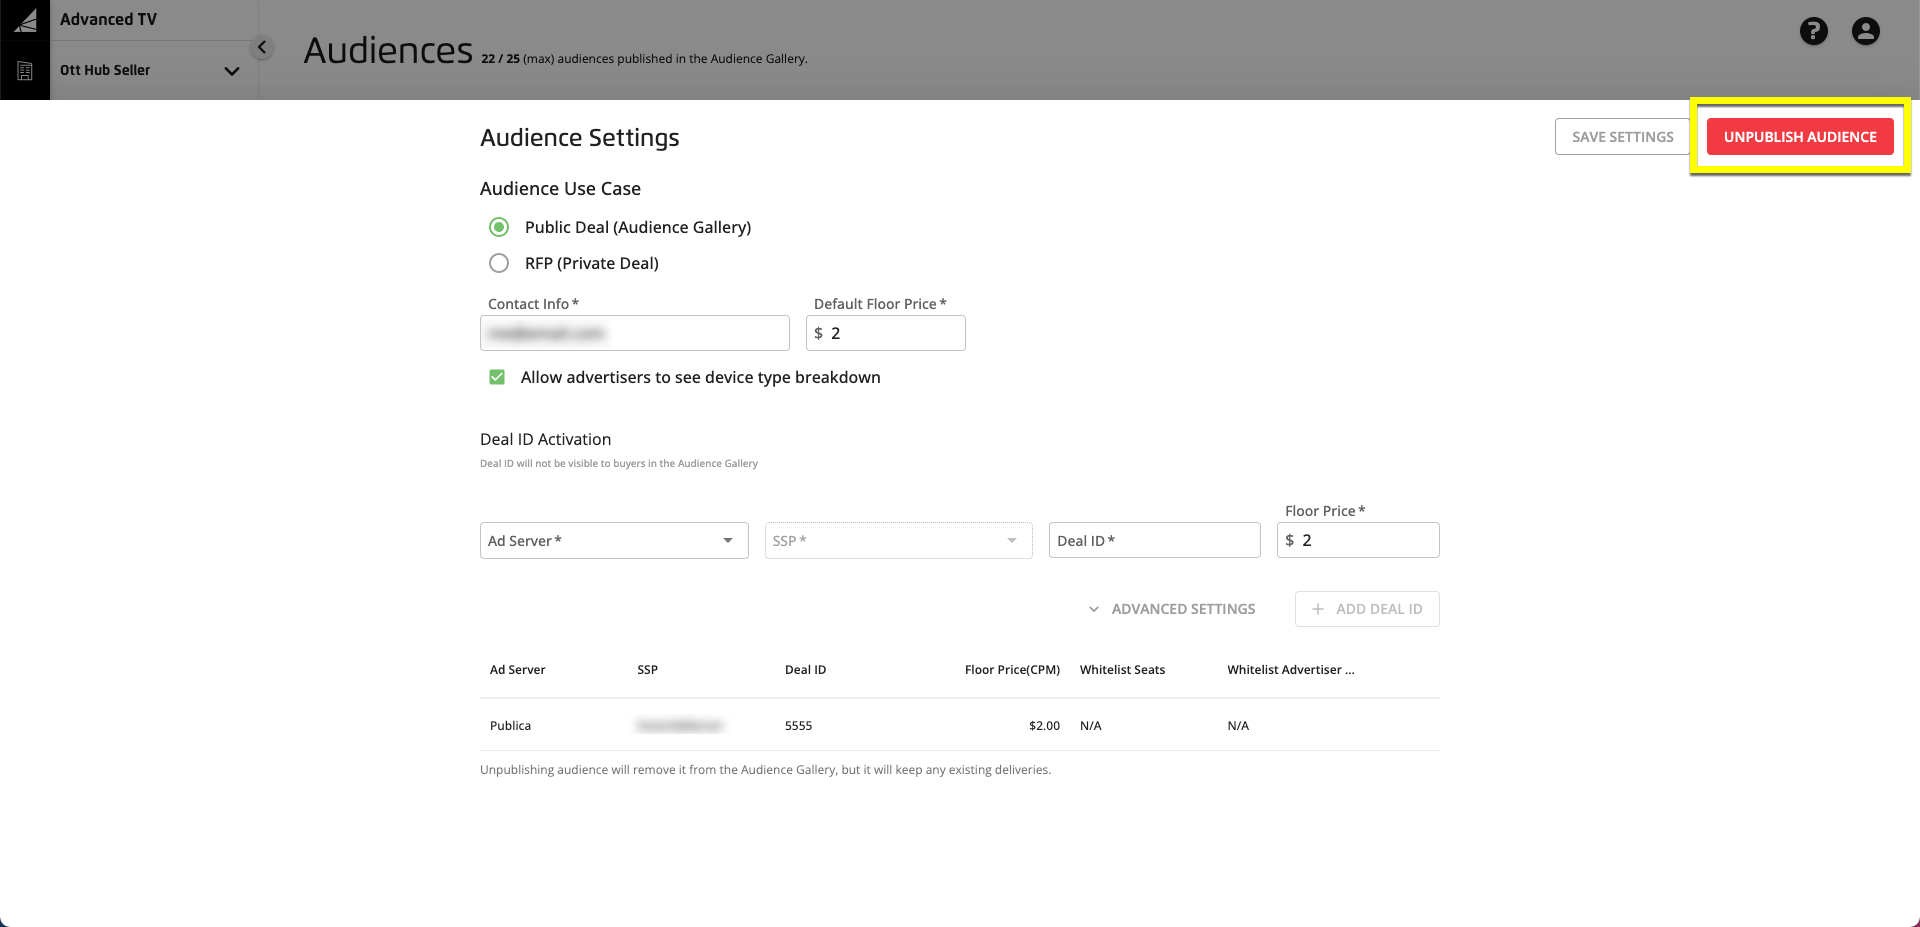
A confirmation banner appears:
