Build an Audience (OTT Hub)
Caution
This article is intended for users of the OTT Hub. If you are not an OTT Hub user, see the article "Build an Audience" in our main Advanced TV section.
Within Advanced TV, an audience is a grouping of IDs that match a specific set of user-defined data attributes.
Once an audience has been built, you can publish the audience to the Audience Gallery or activate it on one or more pre-implemented ad serving platforms.
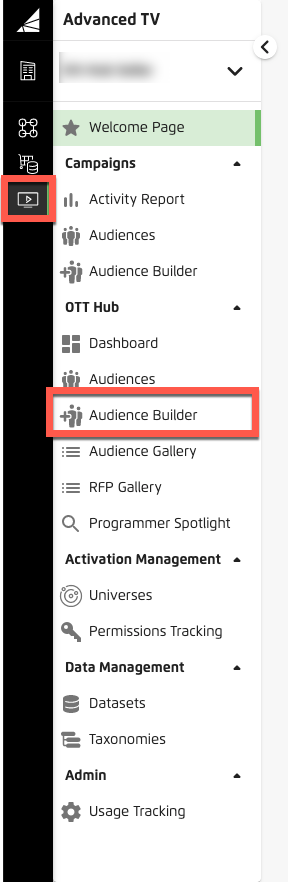
From the Advanced TV navigation menu, click Audience Builder in the OTT Hub section to navigate to the Audience Builder page for OTT Hub.
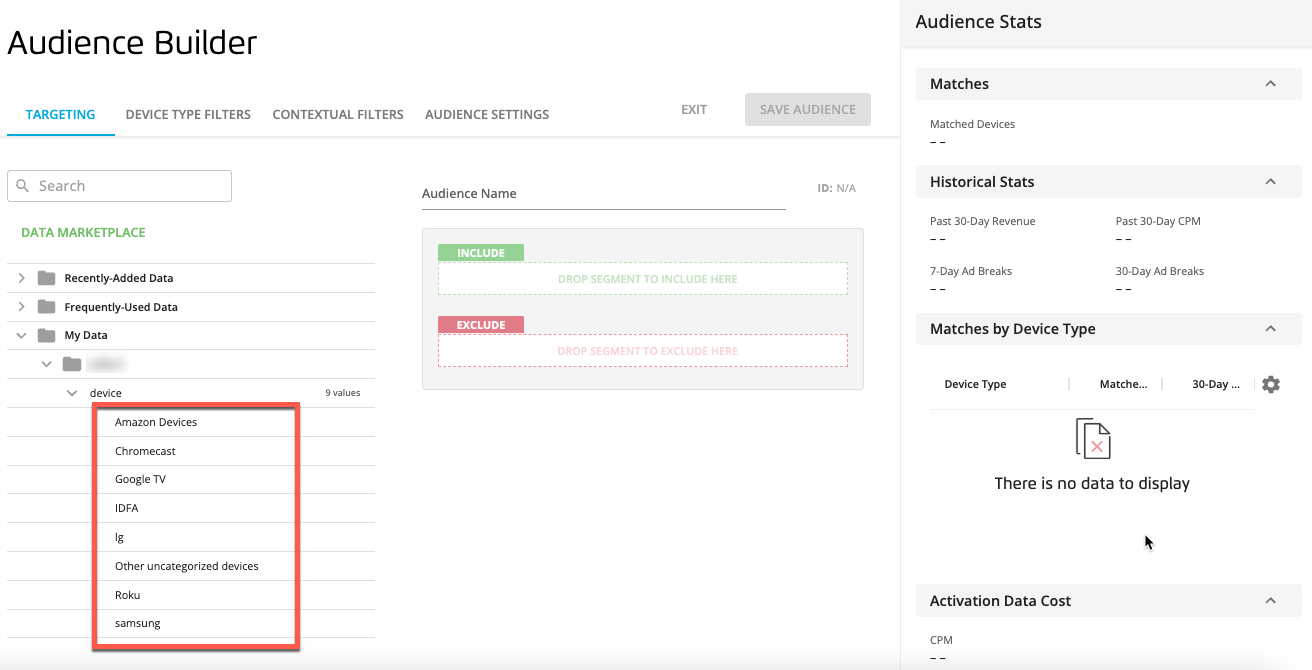
From the TARGETING TAB, click the caret next to the dataset folder that contains one of the segment categories you want to use to build the new audience and continue expanding the folders until you see the segment category you want.
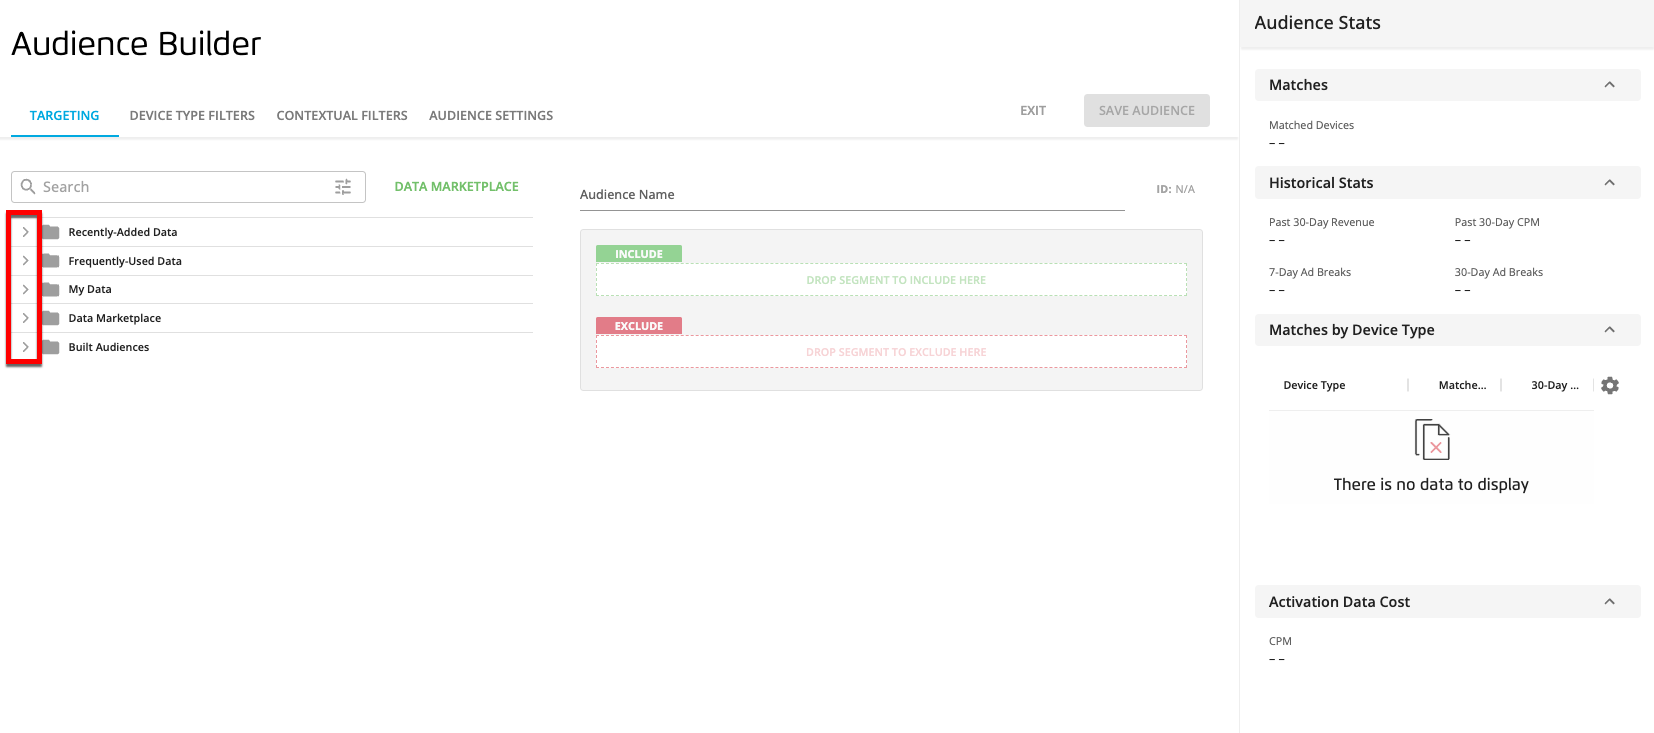
If you already know the name of the segment category or the value, you can enter the segment category name or value name in the search bar or in one of the Audience Builder boxes. You can also perform an advanced search that includes one or more search filters by clicking the advanced search icon in the search bar (see "Perform an Advanced Search in a Builder" for more information).
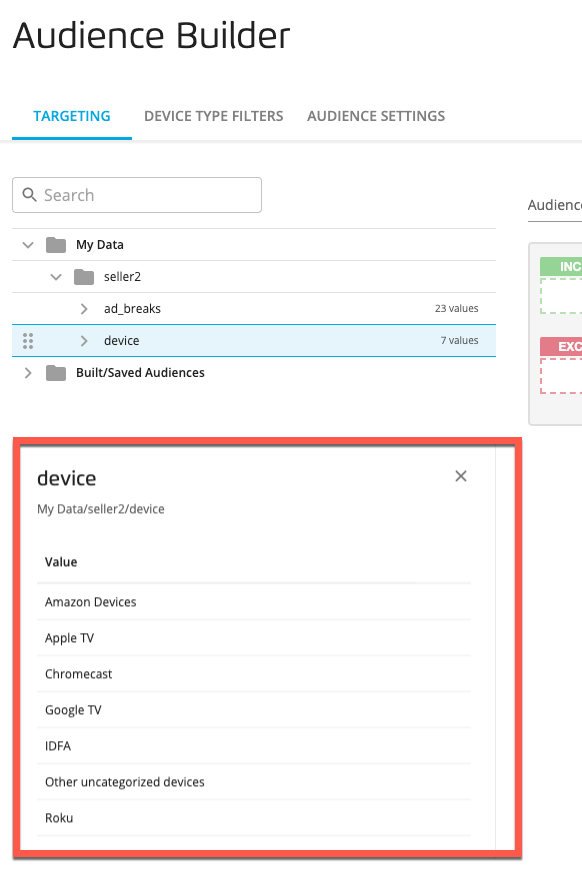
To see a list of the the segment values for a particular segment category, click the caret to expand the segment category or click anywhere in the segment row to open a panel below the folder tree. For Data Marketplace segments, the panel will also display a segment description and the CPM for each segment value.
You can find copies of your most recently-added segment categories (and their segment values) in the "Recently-Added Data" folder (up to 30 segment categories are displayed).
You can find copies of your 30 most frequently-used segment categories (and their segment values) in the "Frequently-Used Data" folder (this is based on the usage in the last 3 months).
You can also use a segment from a previously-created audience as a component of your new audience by opening the "Built Audiences" folder and then expanding the audience to display the individual segments (but no segment values will appear when you drag the segment into one of the boxes).
Note
If you already know the name of the segment category or the value, you can enter that name in the search bar.
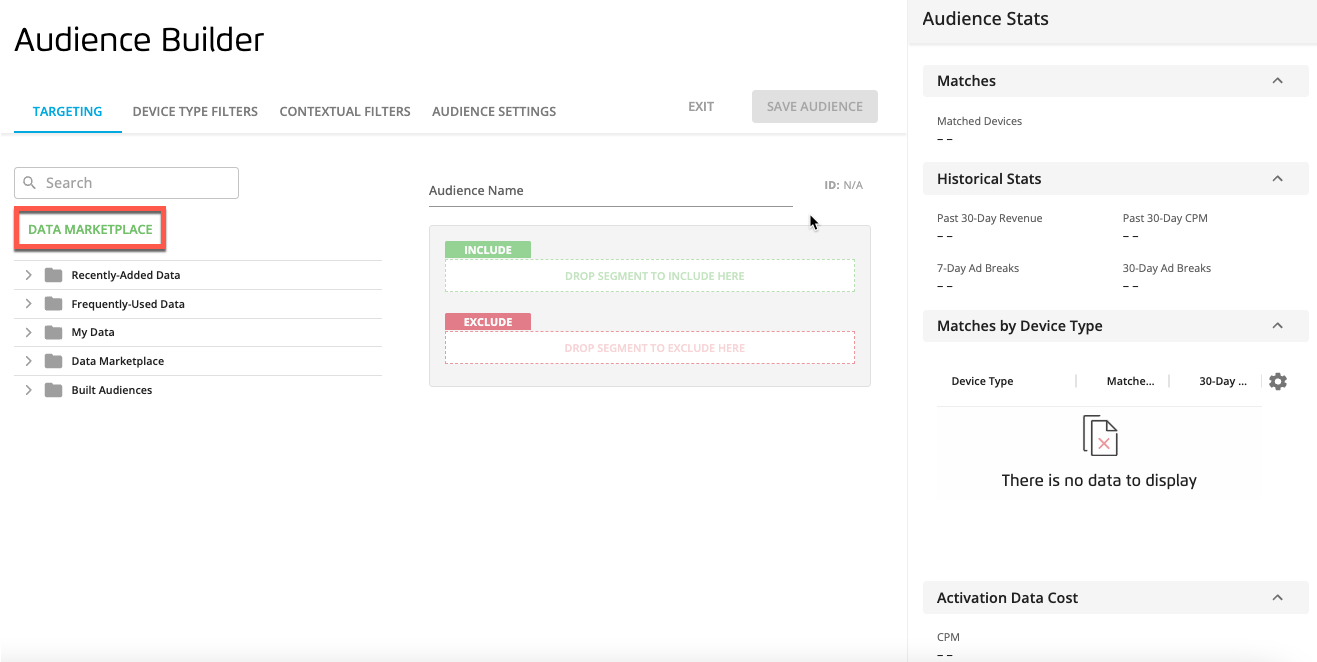
Don't see the type of Data Marketplace data that you need? Click DATA MARKETPLACE to navigate to the Data Marketplace in your Connect account.
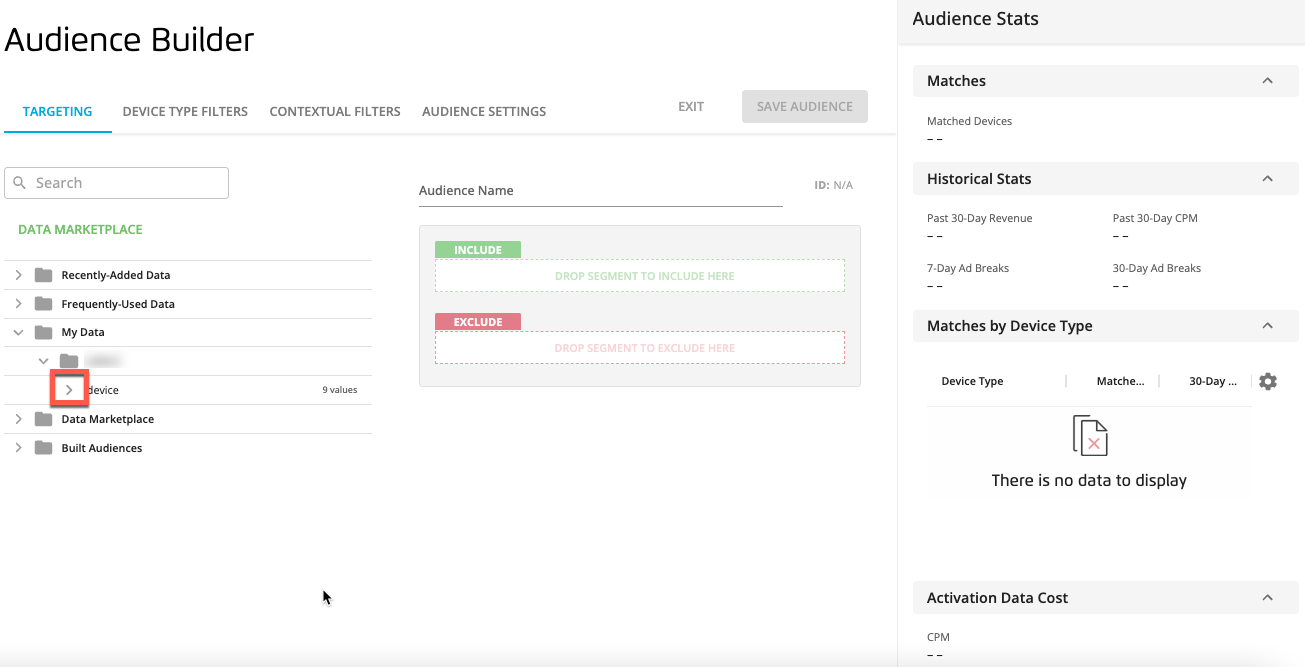
To display all of the available values within a given segment category, click the caret to the left of the segment category name.
Note
You can also click anywhere in the segment row to open a panel below the folder tree. For Data Marketplace segments, the panel will also display a segment description and the CPM for each segment value.
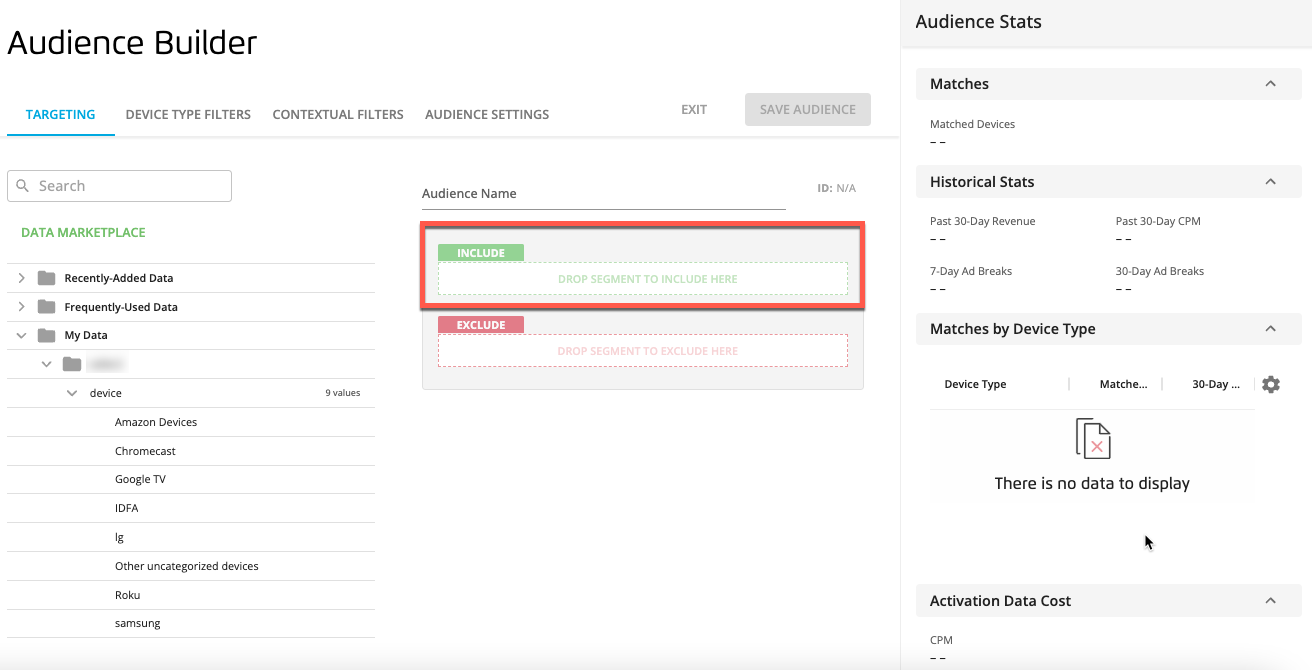
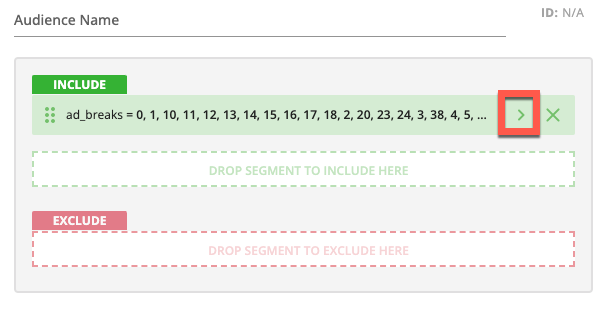
Drag a segment category or value into the INCLUDE box. Click the caret to the right of the segment name and then select or deselect any segment value check box(es) to adjust the values included in the segment.
Note
When you drag a segment category, all of the values for that category are included by default. You can click the caret in the row for the segment you just created to display the list of all values for that category and then select or deselect any desired values. If the category contains seven or more values, you can also use the search bar or the select all/clear all functionality.
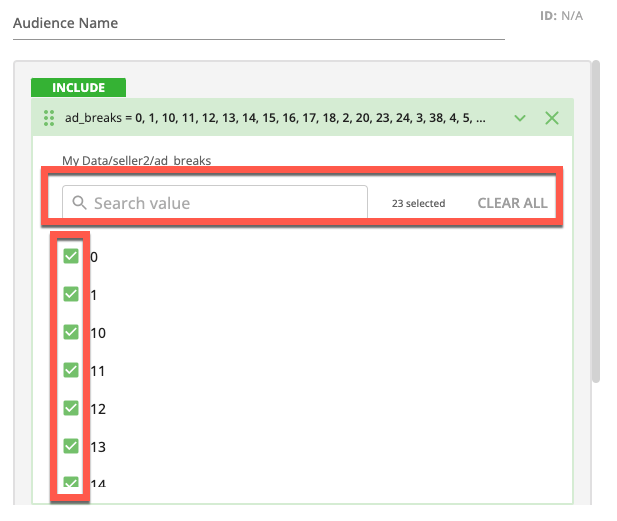
You can select multiple segment categories and/or segment values and then drag them into the box as a group.
You can also use a previously-created audience as a component of your new audience by opening the "Built/Saved Audiences" folder. However, no segment values will appear.
The metrics in the Audience Stats panel populate:
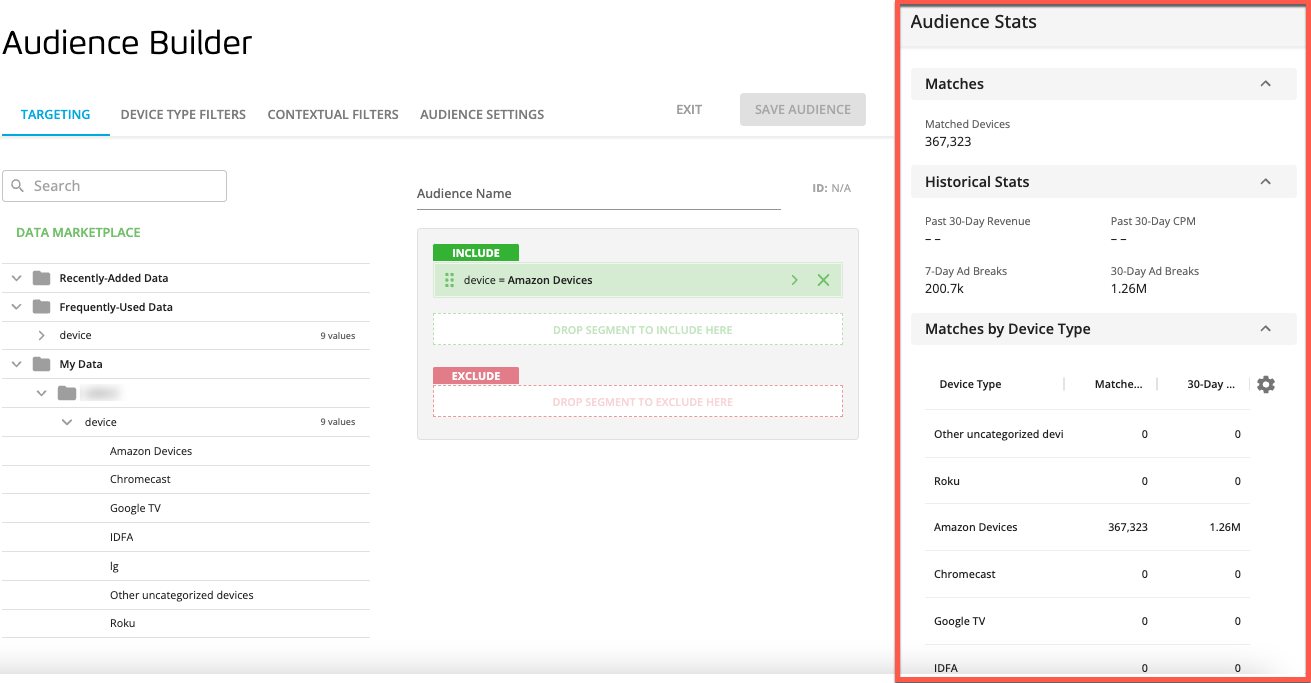
Matched Devices: The number of devices matched to this audience.
Past 30-Day Revenue: The total revenue generated by all devices matched to this audience in the past 30 days.
Past 30-Day CPM: The average CPM paid in the past 30 days in bidding on the devices matched to this audience.
7-Day Ad Breaks: Our forecast of the number of potential ad impressions that might be shown for the devices in this audience over 7 days. See "Forecasting" for more information.
30-Day Ad Breaks: Our forecast of the number of potential ad impressions that might be shown for the devices in this audience over 30 days. See "Forecasting" for more information.
Matches by Device Type: A table showing the number of matched devices and ad breaks for each device.
Note
Click the gear icon to select whether the table shows 7-day ad breaks or 30-day ad breaks.
Activation Data Cost (CPM): The cost of activating this audience via LiveRamp, which includes the LiveRamp Matching Fee (CPM) and the Data Marketplace CPM (the highest CPM of all including Data Marketplace segments. Hover over the number to see a breakdown of this cost.
Note
As you adjust the audience, the metrics adjust.
Make any additional adjustments to the targeting logic:
To add additional members (or devices) to the audience, drag another segment category or value into the INCLUDE box.
If you want to exclude certain members (or devices) from the audience, drag an additional segment category or value into the EXCLUDE box.
Note
The individual segment components in the same segment box can be joined either by “And” (to include only subscribers or devices who are in both categories) or “Or” (to include all subscribers or devices who are in at least one of the included categories). Click the AND/OR selector to change the join method.

Enter a name for the audience in the "Audience Name" field.
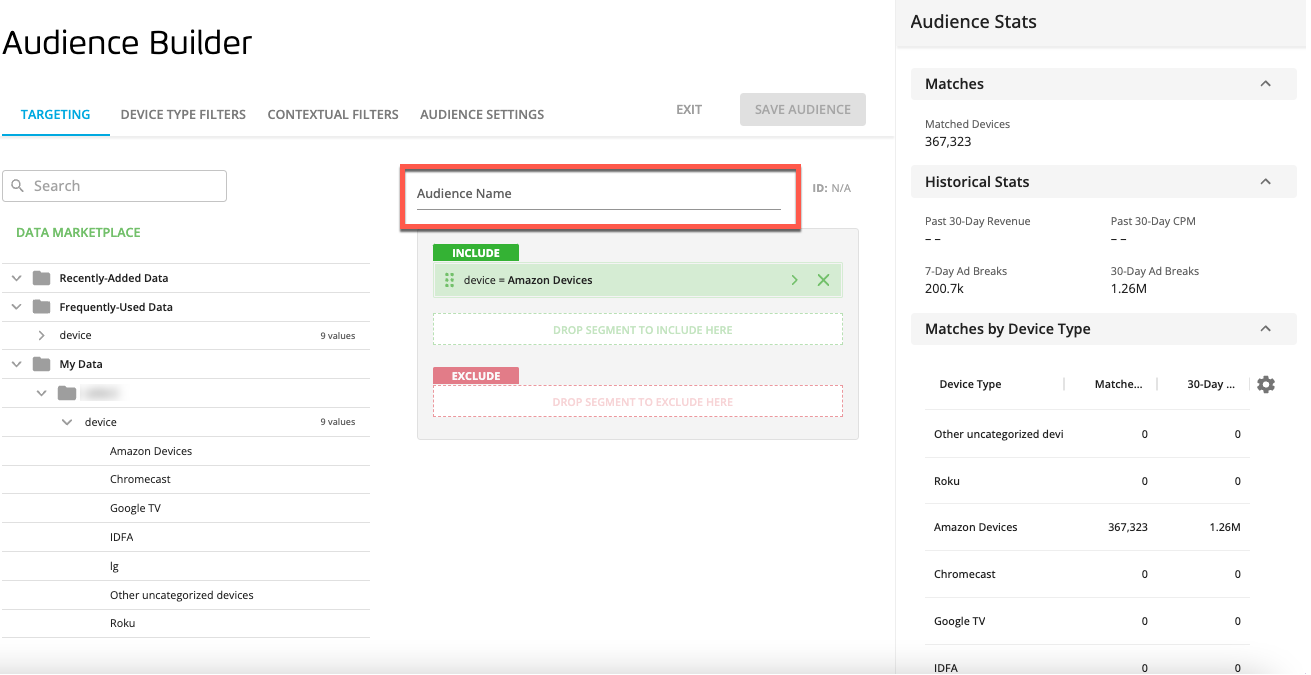
Caution
The audience name can only contain letters, numbers, hyphens, underscores, or spaces, and cannot be longer than 240 characters.
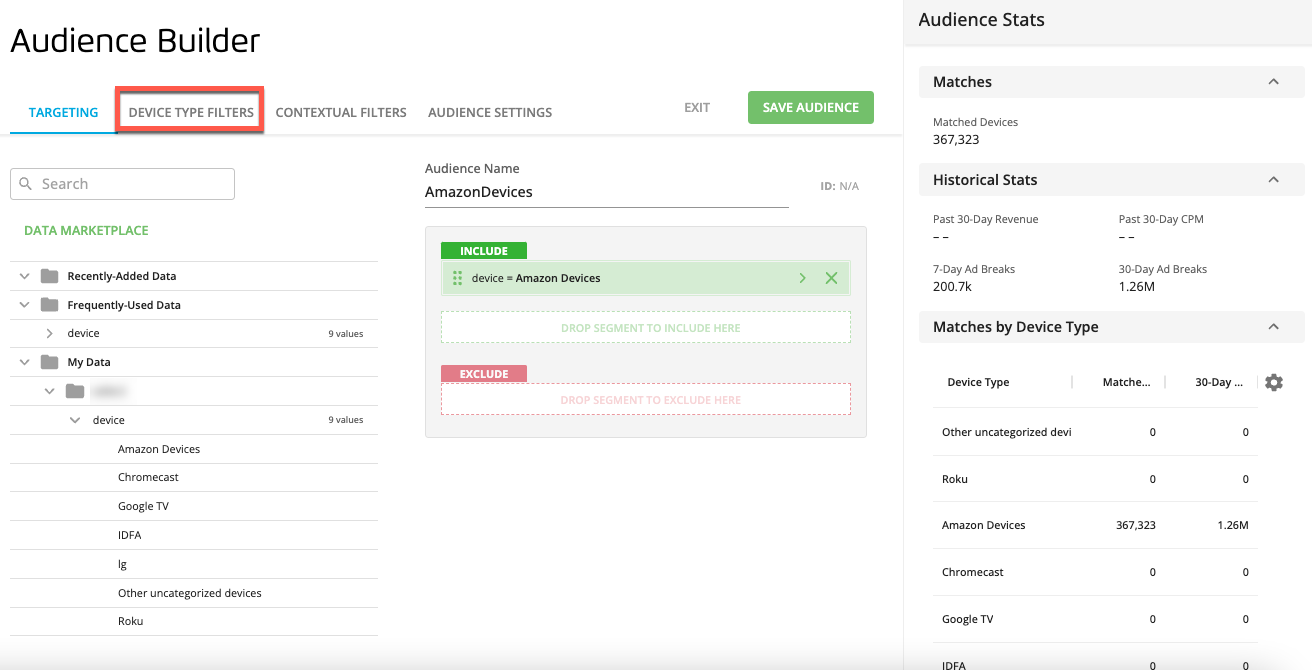
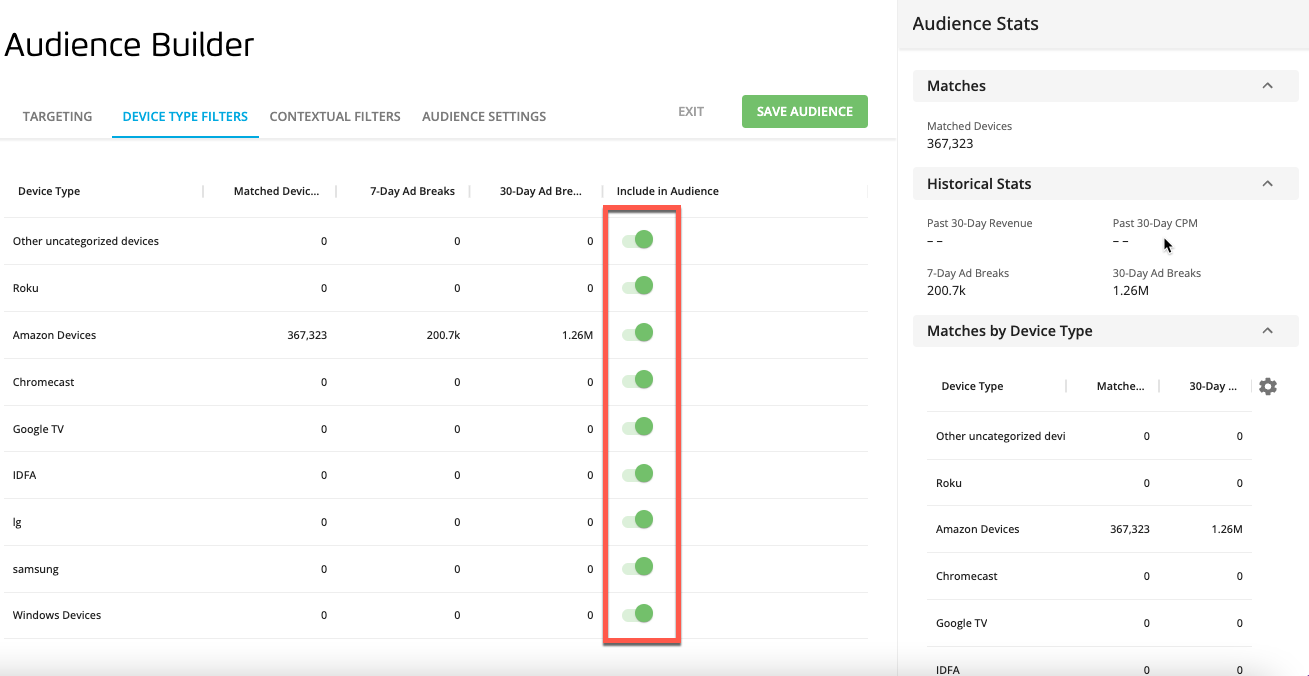
To change the device types that will be included in the audience, select the DEVICE TYPE FILTERS tab and adjust the "Include in Audience" toggles for the device types you want to adjust (all device types are included by default).
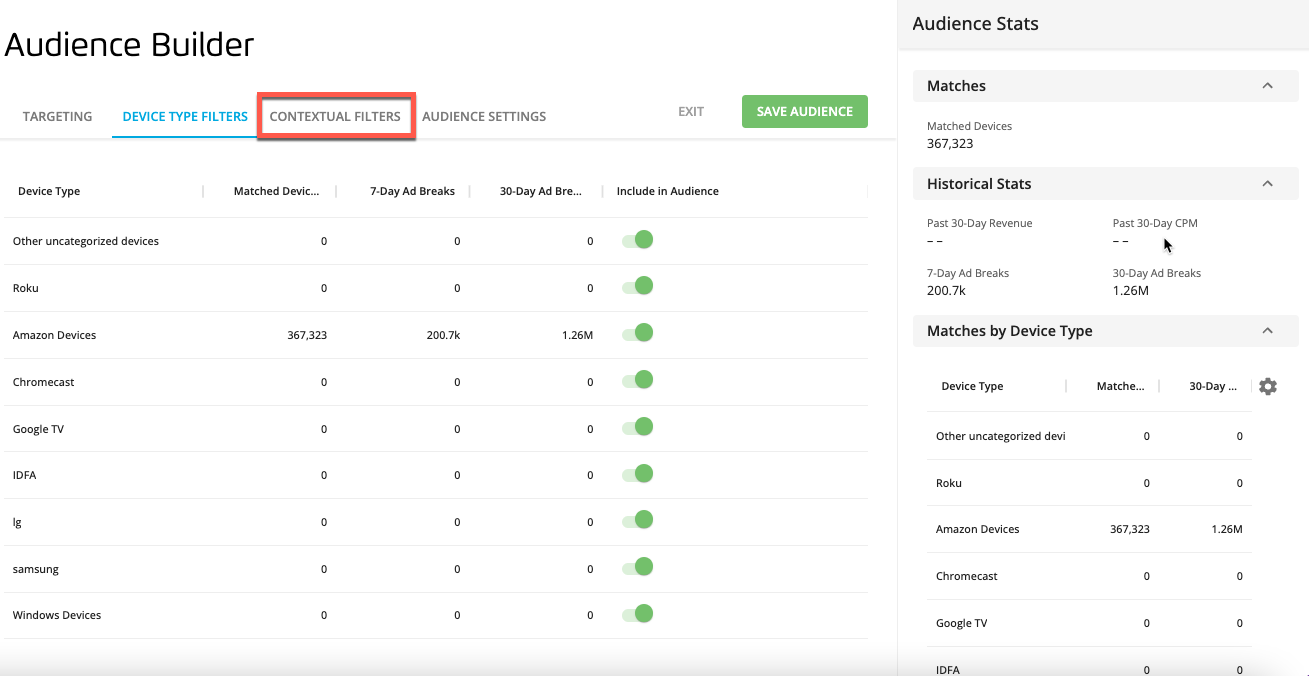
To apply contextual filters, select the CONTEXTUAL FILTERS tab and apply the desired filters (see "Applying Contextual Filters" below for more information).
To add audience settings, select the AUDIENCE SETTINGS tab and enter the desired information:
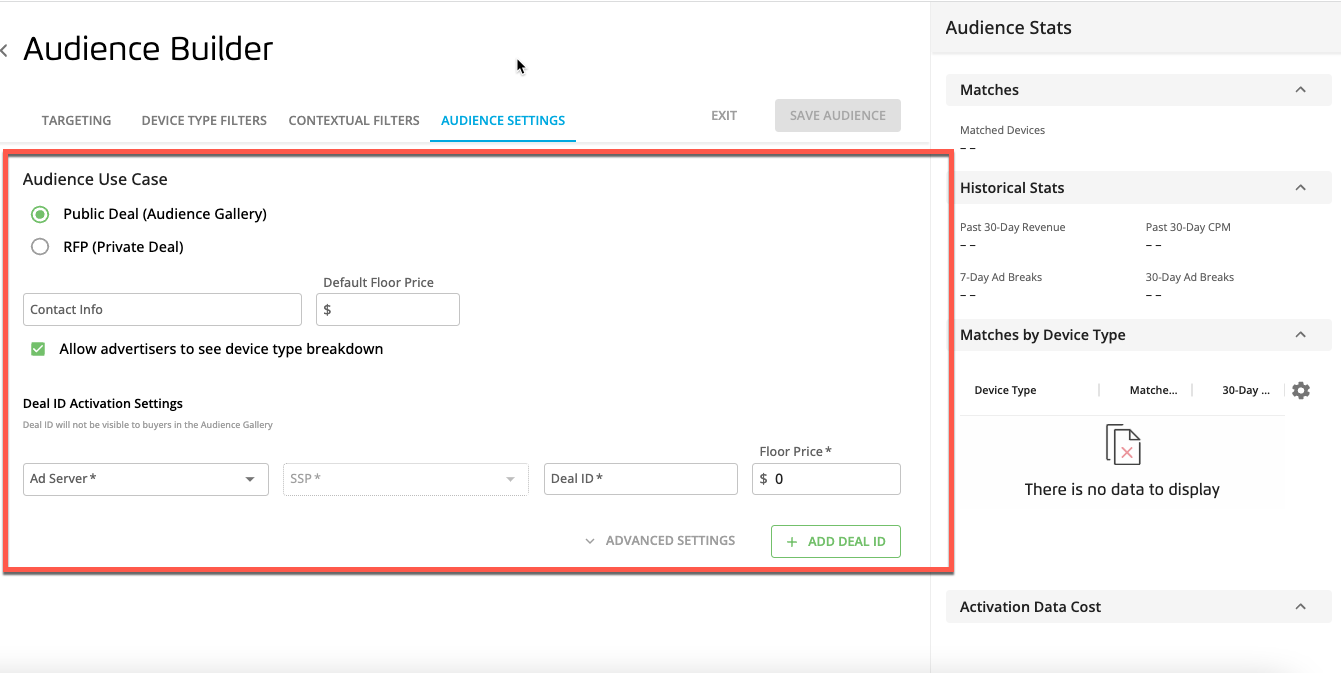
Audience Use Case: "Public Deal (Audience Gallery)" or "RFP "
Advertiser: For RFP use cases, enter the advertiser this audience is being built for.
Contact Info: The email address of the person to contact to obtain a Deal ID for the audience.
Default Floor Price: The default minimum ad price that can be executed (configured at the ad server).
To allow the advertiser to see a breakdown of device types and choose which device types (for pubic deals), check the "Allow advertisers to see device type breakdown" check box.
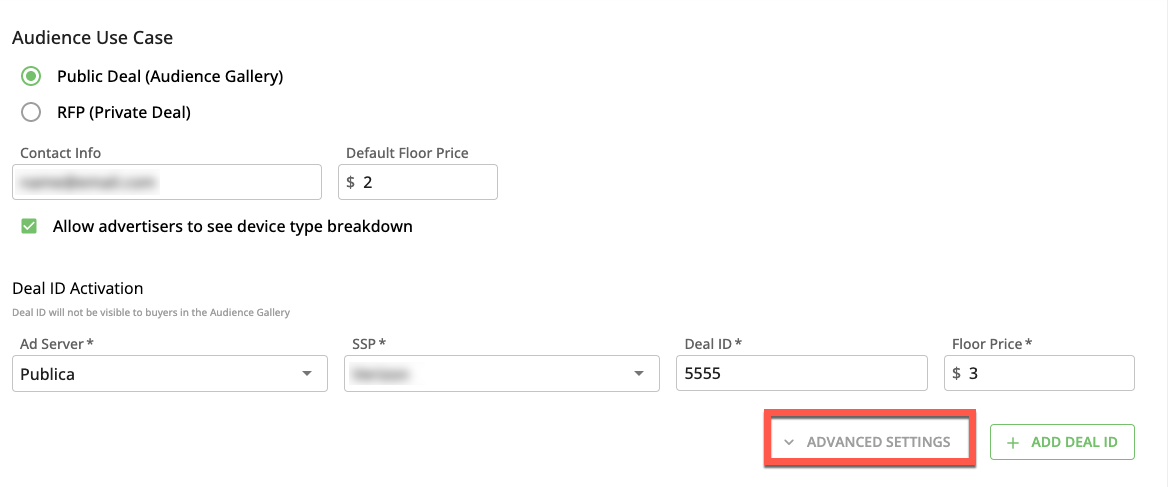
To add deal ID activation information, select the ad server and SSP from the drop-down lists, and enter the deal ID and floor price (if different from the default).
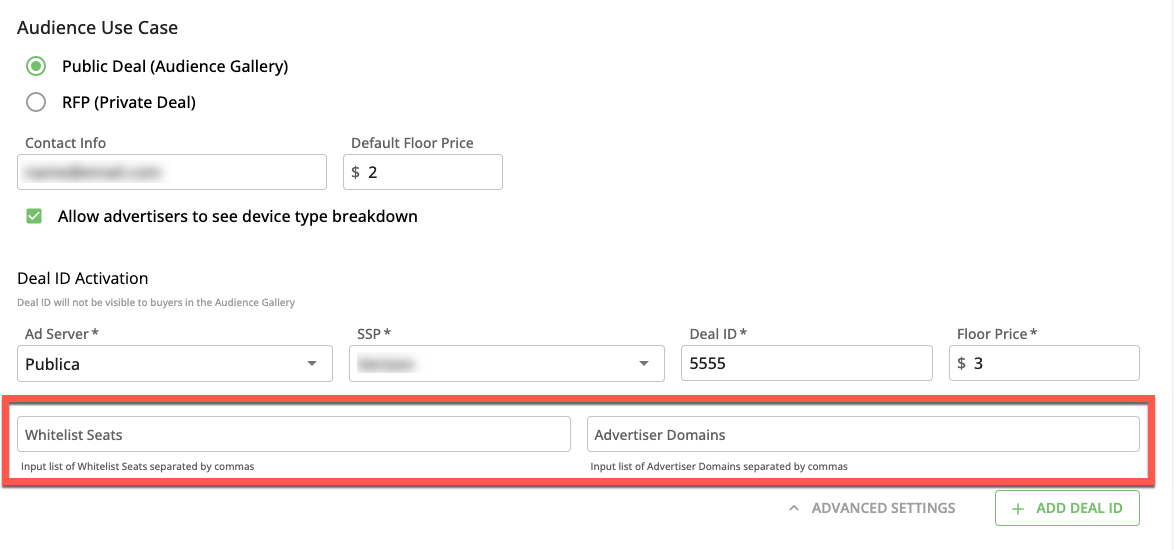
To enter whitelist seats and whitelist advertiser domains, click the ADVANCED SETTINGS text and then enter the desired values, separated by commas.
Click .
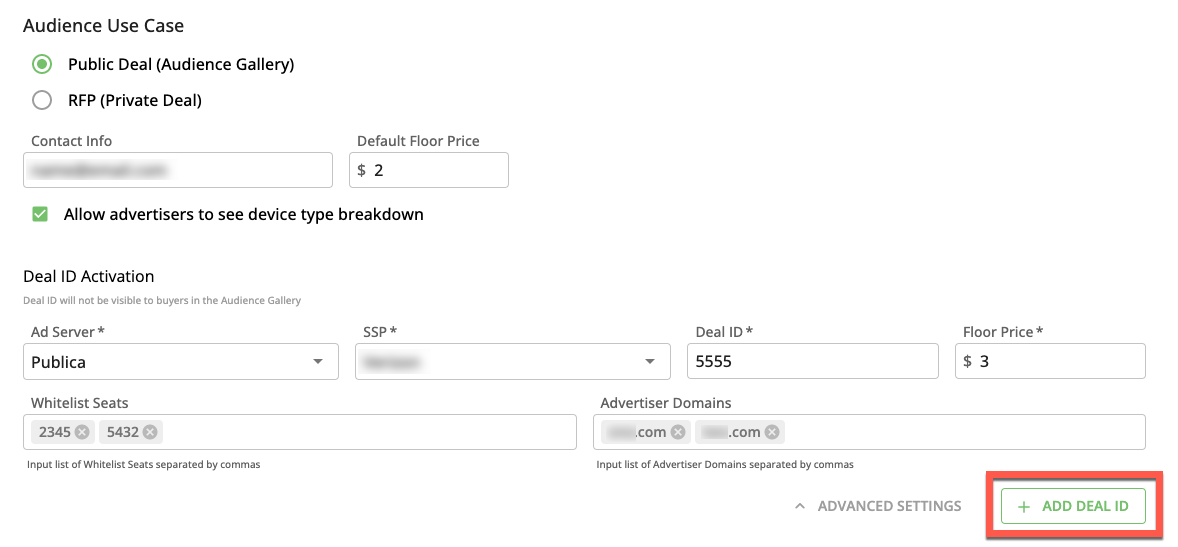
Repeat steps 9-11 for any additional deal ID information you want to add.
When you've finished, click from any tab.
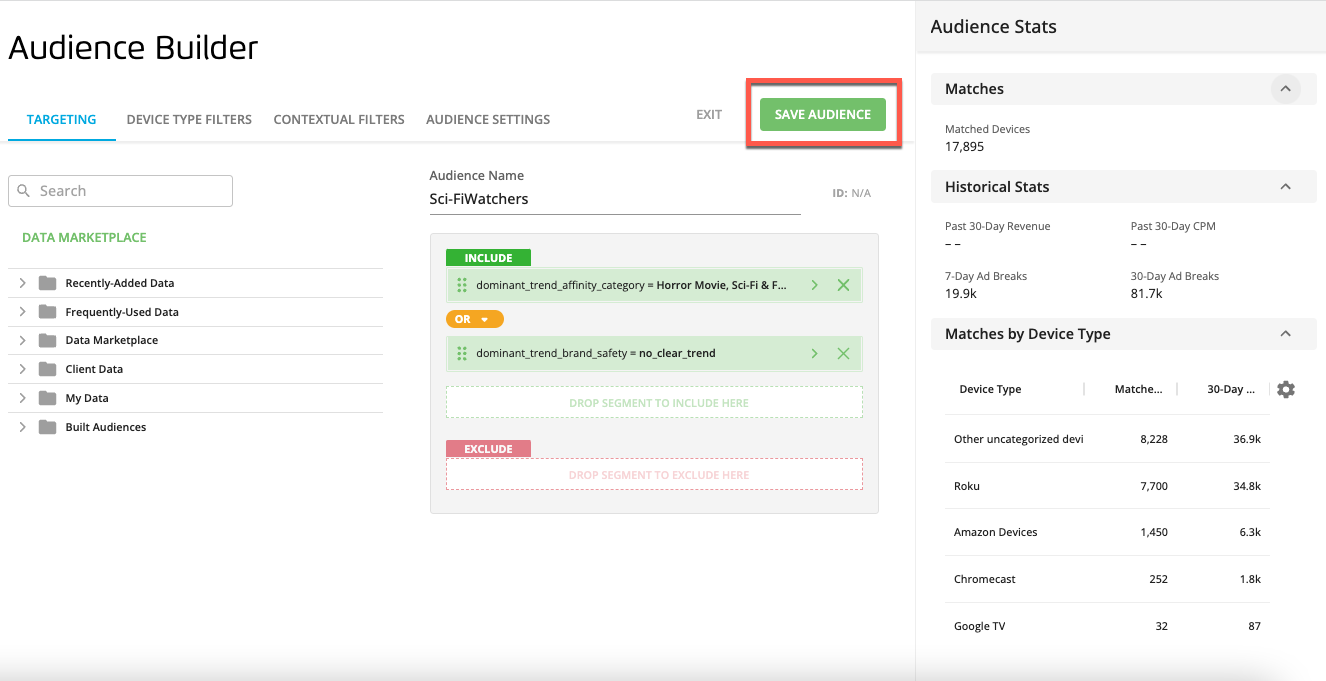
A success banner appears:

The audience now appears on the Audiences page, where you can publish it to the Audience Gallery or activate it on your desired pre-implemented ad-serving platform(s).
Applying Contextual Filters
If the subscriber universe that you're building audiences from has been enabled for contextual filters, you can choose to apply contextual filters to the audience.
Some of the filters you might apply (such as dominant affinity or dominant IAB taxonomy) affect the number of devices in the audience directly, regardless of when or where the ad is shown. When you apply this type of filter, the matched devices stats will change to reflect those filters.
Other filters (such as geo location and daypart) are based on historical information (such as where a consumer watched previously or what daypart they watched in). The filters do not affect the number of matched devices delivered in the audience but can be used to get an idea of how many devices the ad might be served to (based on the 7-day and 30-day ad breaks) if it's shown in a given location or during a given daypart.
Apply a Contextual Filter
Once you've defined your audience, you can apply contextual filters.
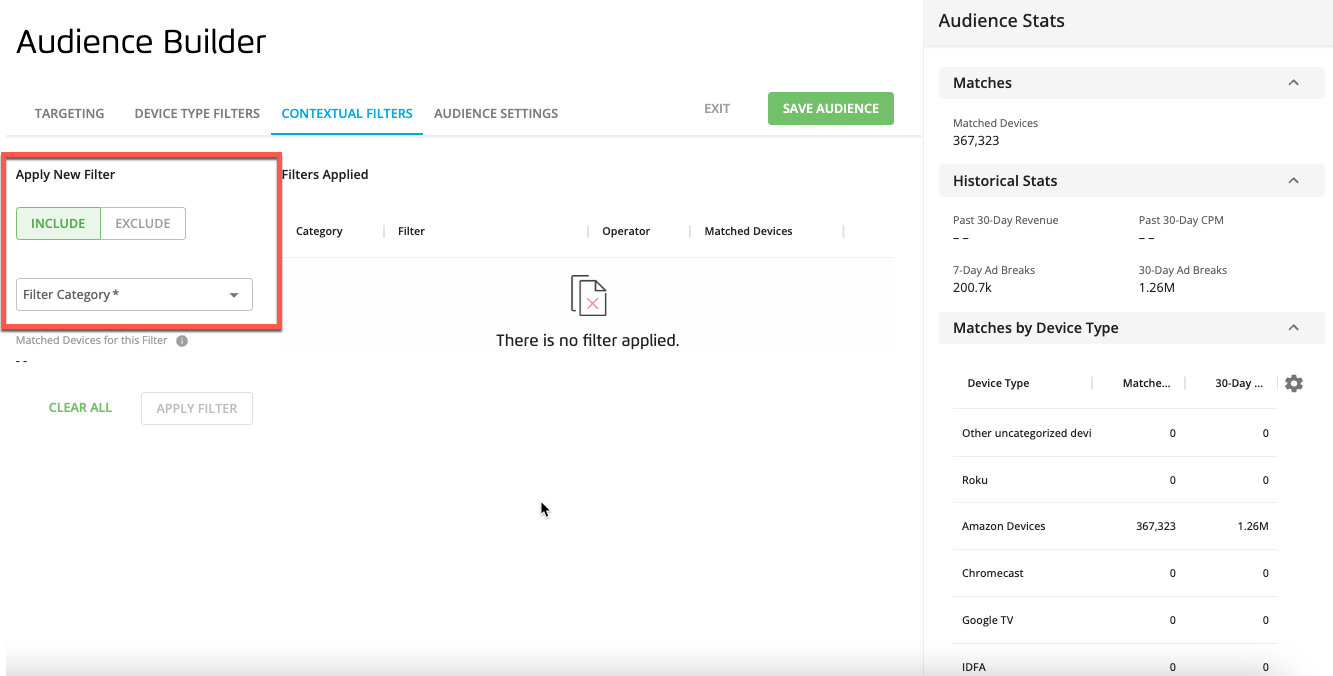
To apply a contextual filter:
If desired, change the INCLUDE/EXCLUDE toggle, depending on whether you want to apply a filter to include the selected filter category members or exclude them.
From the Filter Category dropdown, select the filter category.
From the Filter By dropdown that displays, select the option you want to use to filter (which varies depending on the filter category you select).
From the additional dropdown that displays, select the desired option(s).
Click .
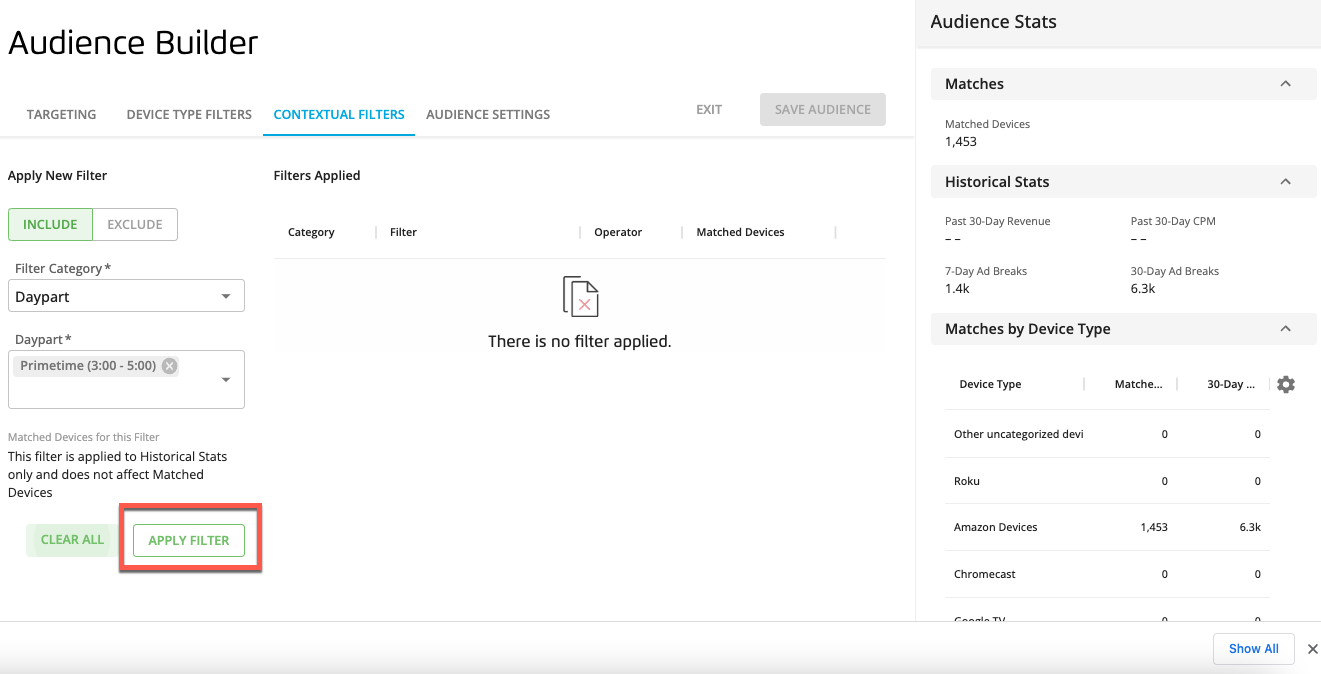
Note
This button will not be enabled if the audience has not been defined. Define the audience before adding any contextual filters.
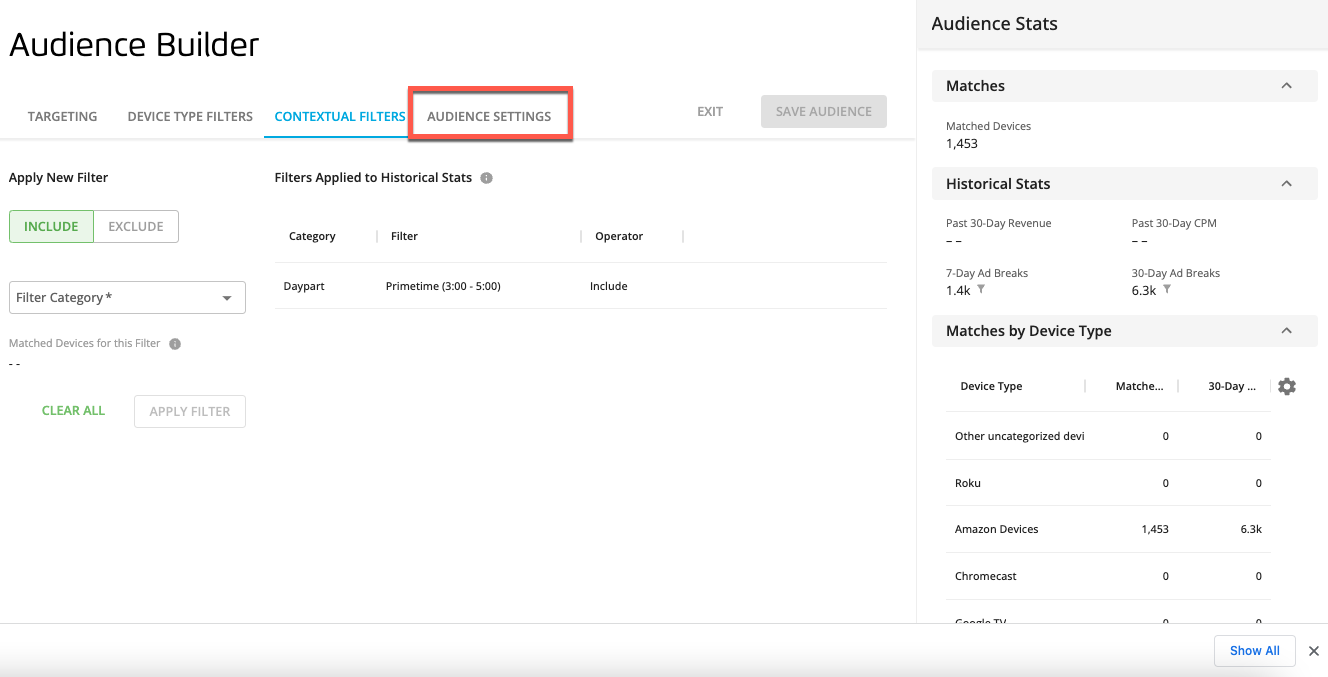
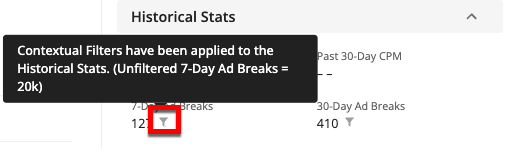
If you've applied a filter that is applied directly to the audience, you'll see the number of matched devices and the historical stats adjust. If you've applied a filter that's based on historical information, the number of matched devices will not adjust but the historical stats will adjust.
Any stats that have been affected by a filter are displayed with a funnel icon, along with a tooltip that shows what the stat would be if filters were not applied:
Turn Off a Contextual Filter
At times you might want to turn a contextual filter off temporarily to see how it affects the number of matched devices or the historical stats (such as the number of ad breaks).
To turn off a contextual filter:
Hover over the row for that filter and then click the ellipsis (three dots) that appears on the right side of the row.
Select .
The filter is displayed in the filter table, but with the filter information striked out.
Follow the same steps to turn the filter back on, except select .
Edit a Contextual Filter
To edit a contextual filter:
Hover over the row for that filter and then click the ellipsis (three dots) that appears on the right side of the row.
Select .
Make your desired edits and then click .
Delete a Contextual Filter
To delete a contextual filter:
Hover over the row for that filter and then click the ellipsis (three dots) that appears on the right side of the row.
Select .