Universe Permissioning
Universe owners (such as MVPDs and networks) can permission their universes to their partners (such as MVPD consortiums or agencies) so that they can build audiences from those universes and distribute them back to the universe owner.
They can also see aggregate counts across multiple universes and unique household counts (if the MVPDs have enabled household counts) for audiences built from universes that have significant overlap.
Several permissioning options are available:
Allow audiences to be built: You can choose to allow the partner to build audiences using this universe.
Allow the universe to be added to grouped universes: You can choose to allow the partner to add this universe to grouped universes.
Caution
If you are permissioning a grouped universe, this option is not available.
Enable automatic distributions: You can choose to allow the partner to distribute audiences built using this universe without getting your explicit approval.
Caution
Automatic distributions are not available for grouped universes.
Allow deduplication at universe priority: You can choose to allow the partner to deduplicate any audiences built using this universe on a universe (or segment and universe) priority. This is available for either the "build" or "group" permission options.
Custom thresholds: You can either use the default audience and segment threshold for that universe, or you can set custom thresholds that will apply for that partner’s use of the universe. See "Thresholds" for more information.
Filter attributes: You can choose to enable the partner to filter on some or all of the attributes present in that universe’s dataset, such as location or ZIP codes. This allows the partner to create audiences and apply those filters, either at the segment level or at the universe level.
Note
To include filter attribute options in a universe, make sure that the relevant data is in your dataset and have your LiveRamp team enable that data as filter attributes.
How Deduplication Works for Audiences that Utilize Grouped Universes
When Component Universes Are Enabled for Deduplication
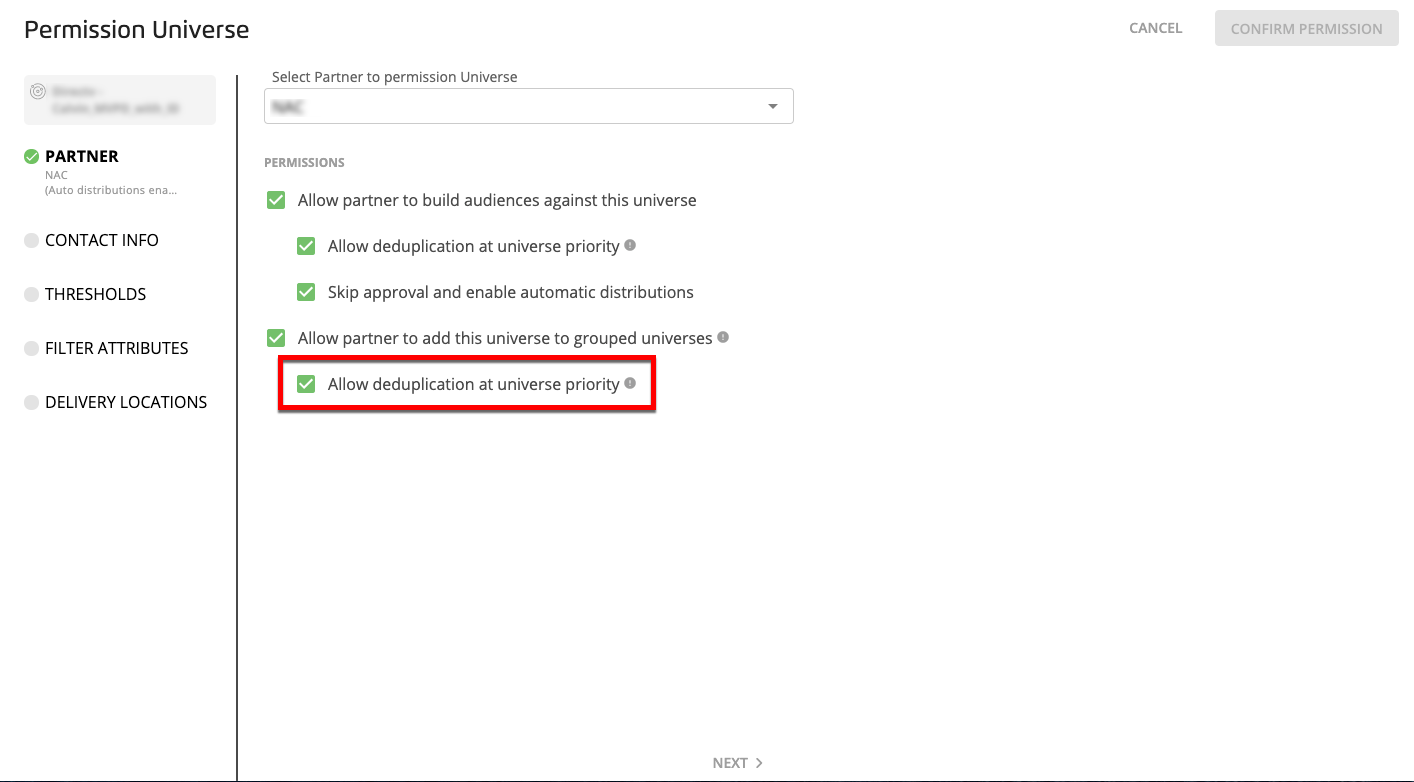
If all of the component universes in a grouped universe have been permissioned for deduplication at the universe priority (as shown in the image below), audiences built using that grouped universe can be deduplicated.
Note
That grouped universe can also be permissioned to another partner with deduplication enabled for audience building.
MVPD 1 permissions universe A to Consortium 1 for universe grouping with deduplication enabled.
MVPD 2 permissions universe B to Consortium 1 for universe grouping with deduplication enabled.
Consortium 1 creates grouped universe C using universe A and universe B.
Consortium 1 can deduplicate any audiences built using grouped universe C.
Consortium 1 can permission grouped universe C to Agency 1 for audience building and can enable deduplication.
When a Component Universe is not Enabled for Deduplication
When a grouped universe contains an individual universe that has not been permissioned for grouped universe deduplication, audiences built using that permissioned grouped universe cannot be deduplicated.
Caution
That grouped universe cannot be permissioned to another partner with deduplication enabled (for either audience building or adding to a grouped universe).
MVPD 1 permissions universe A to Consortium 1 for universe grouping with deduplication enabled.
MVPD 2 permissions universe B to a Consortium 1 for universe grouping without deduplication enabled.
Consortium 1 creates grouped universe C using universe A and universe B.
Consortium 1 cannot deduplicate any audiences built using grouped universe C.
Consortium 1 can permission grouped universe C to Agency 1 for audience building, but cannot enable deduplication.
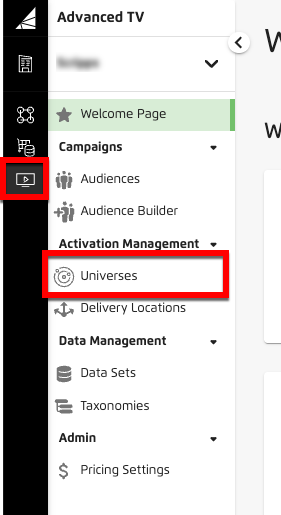
From the Advanced TV navigation menu, click Universes to navigate to the Universes page.
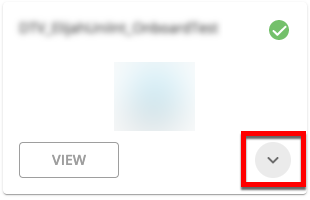
From the Universes page, click the caret that appears when you hover over the tile for the universe you want to permission, and then click the Permission icon (key icon) that appears at the bottom of the tile.

From the Partner dropdown on the Permission Universe dialog, select the partner you want to permission the universe to.
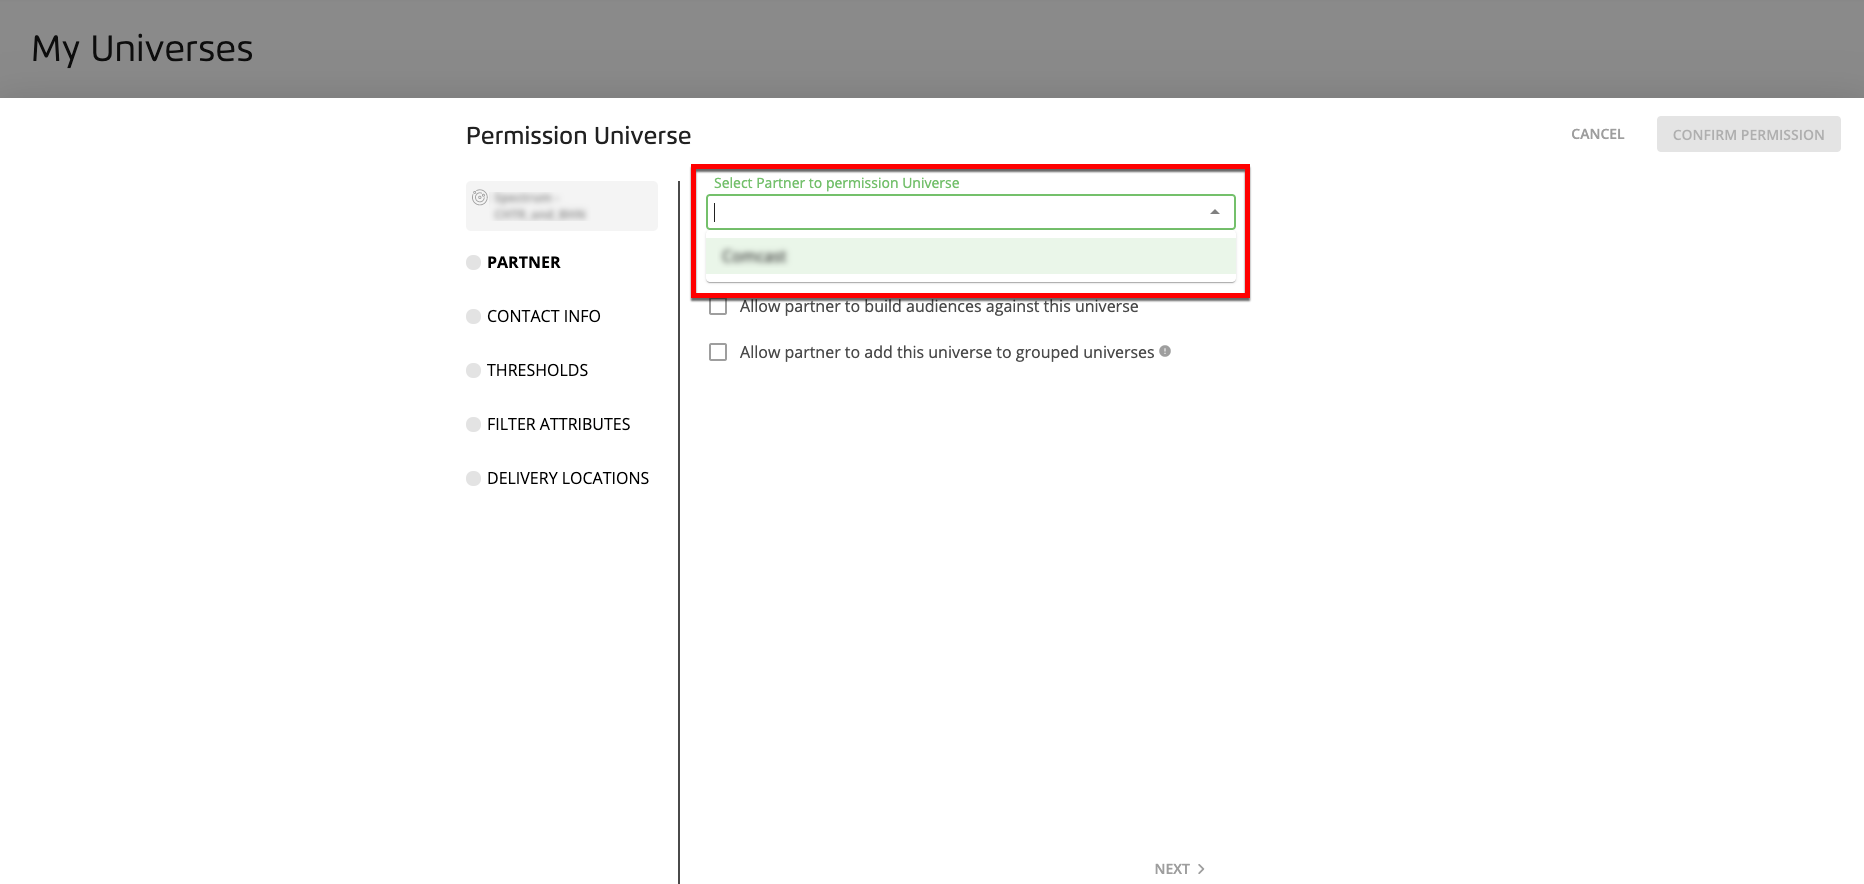
Note
If you don't see the partner you want on the drop-down list, contact your LiveRamp representative.
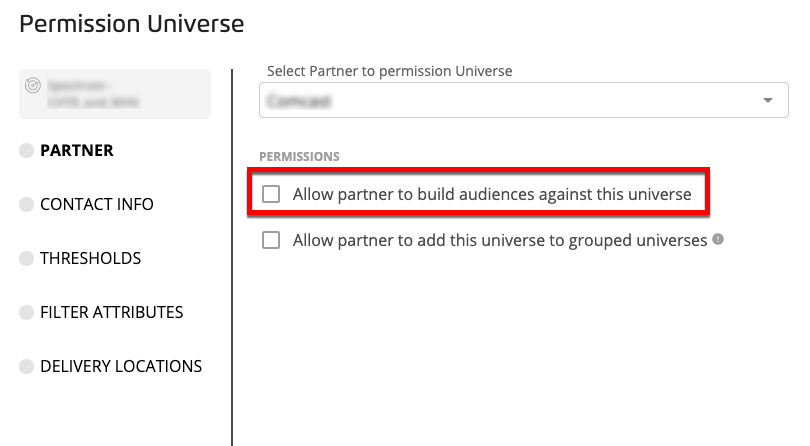
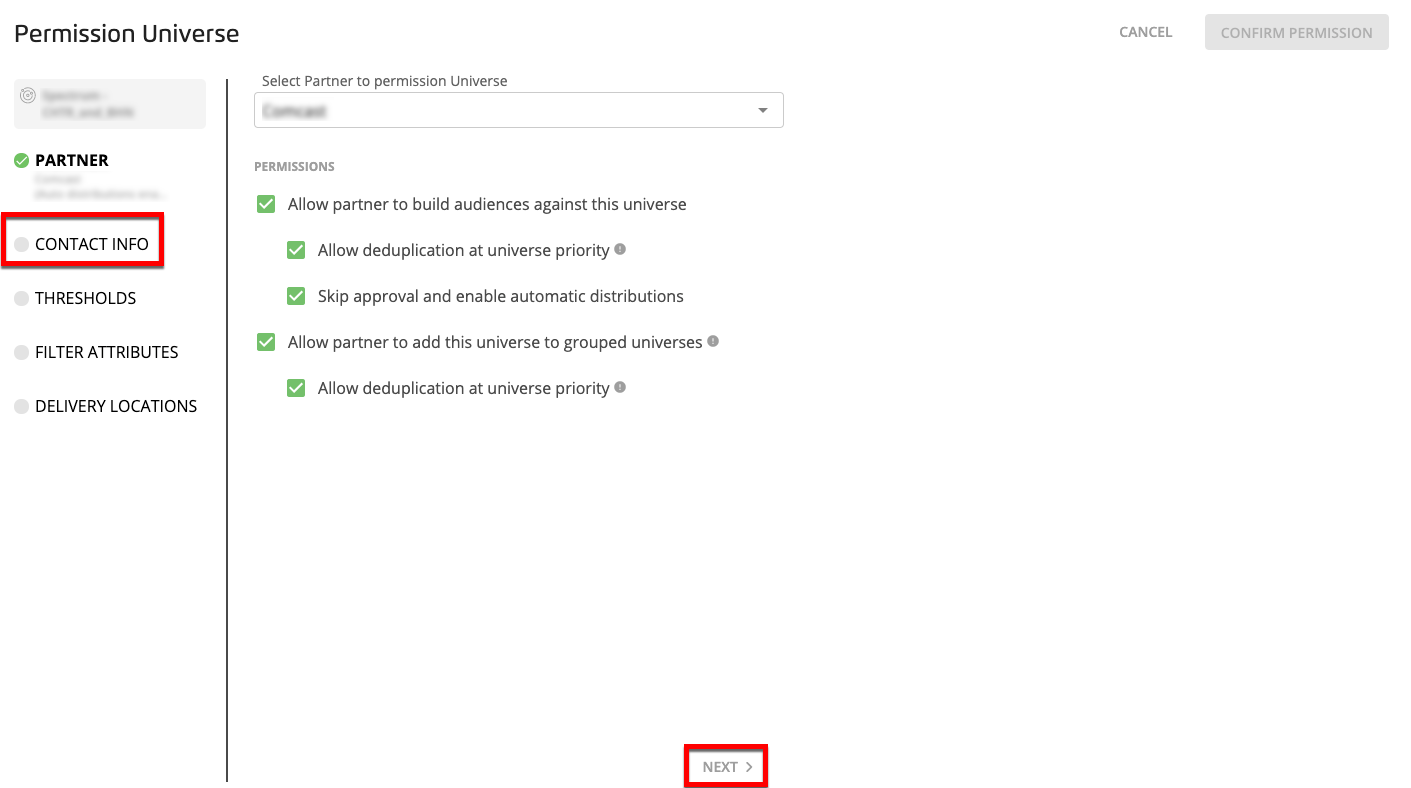
To allow the partner to build audiences using this universe, check the "Allow partner to build audiences against this universe" check box.
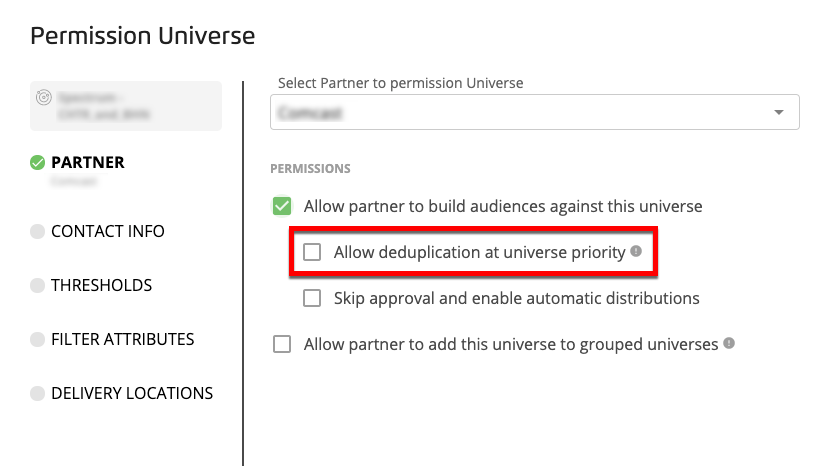
Once enabled, you can select from the additional options:
If you want to allow the partner to be able to remove duplicates by universe priority from any audiences built using this universe, check the "Allow deduplication at universe priority" check box.
Note
This check box will be disabled if you are permissioning a grouped universe that contains one or more universes that were permissioned to you without allowing deduplication.
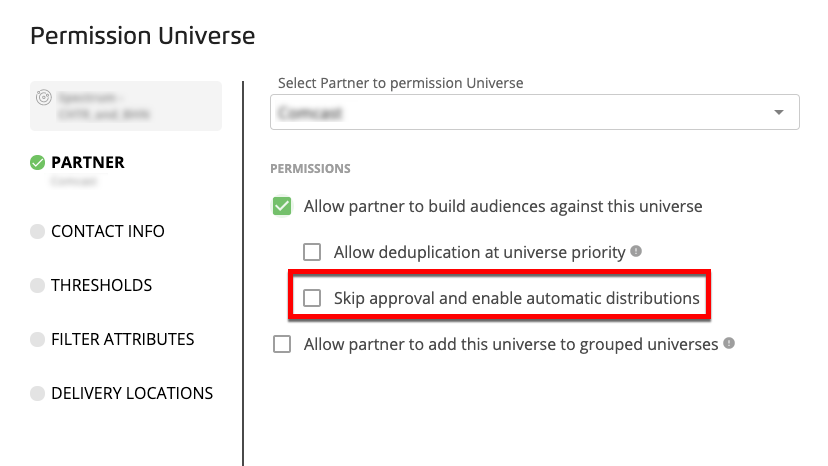
To allow the partner to distribute audiences built from this universe without getting your approval first, check the "Skip approval and enable automatic distributions" check box.
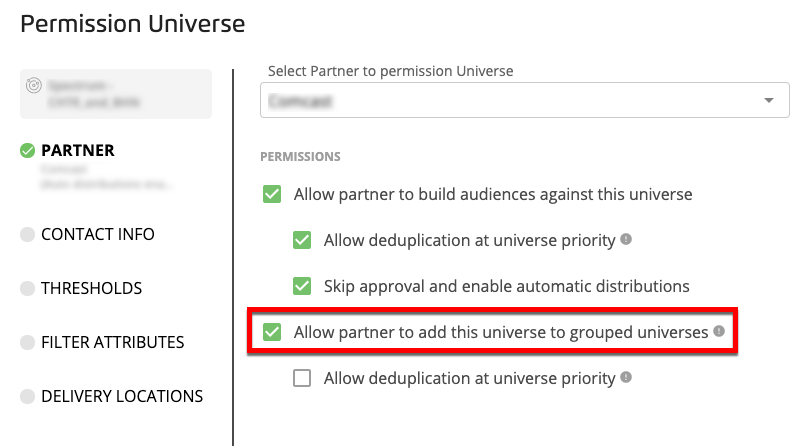
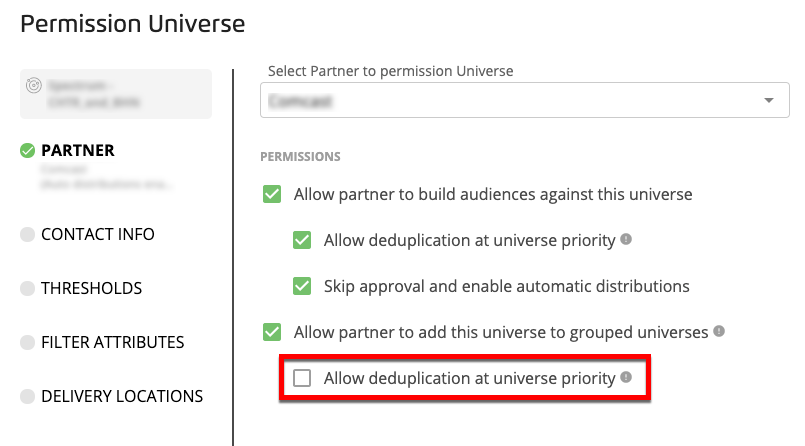
To allow the partner to add this universe to a grouped universe, check the "Allow partner to add this universe to grouped universes" check box.
Note
This also allows the partner to permission a grouped universe they create using this universe to another partner. If you enable this option, you must select at least one delivery location when you permission the universe to the partner.
If you are permissioning a grouped universe that contains any component universes that you do not own, this option is not available.
Once enabled, you can also choose to allow the partner to be able to remove duplicates by universe priority from any audiences built using any grouped universes this universe has been added to by checking the "Allow deduplication at universe priority" check box.
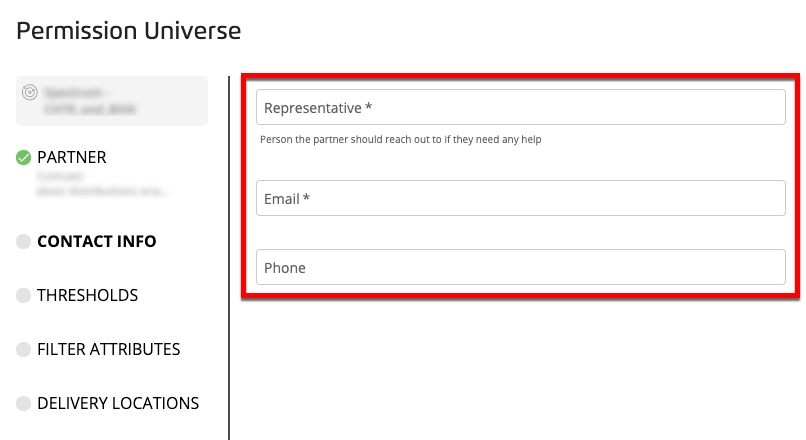
Click or select the CONTACT INFO tab.
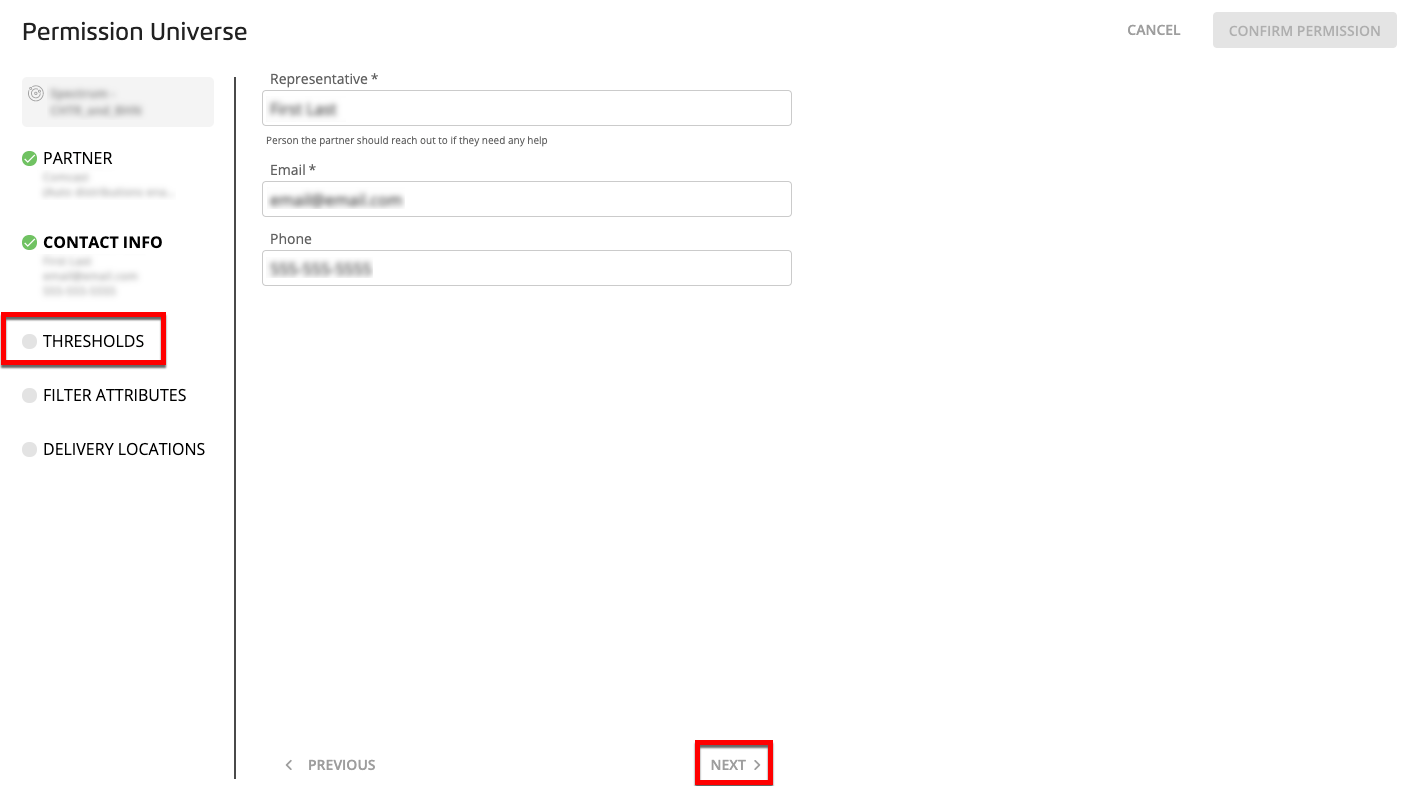
Enter the contact information for the person at your organization that the partner should contact if they need any help (name and email are required fields).
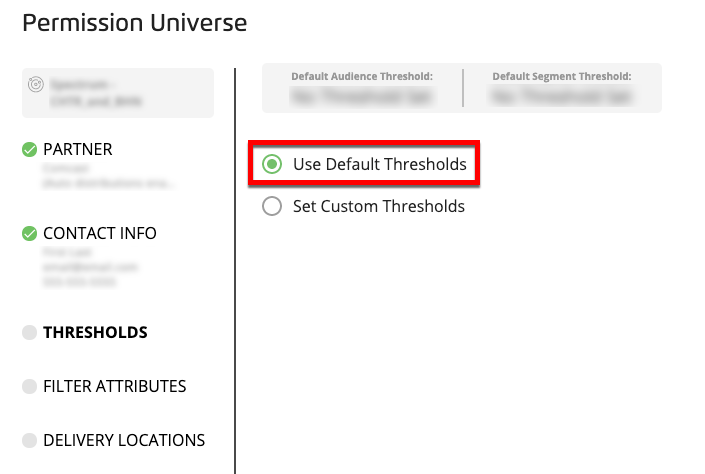
Click or select the THRESHOLDS tab.
Set the thresholds that will apply to audiences the partner builds with the universe:
To use the default thresholds, select "Use Default Thresholds."
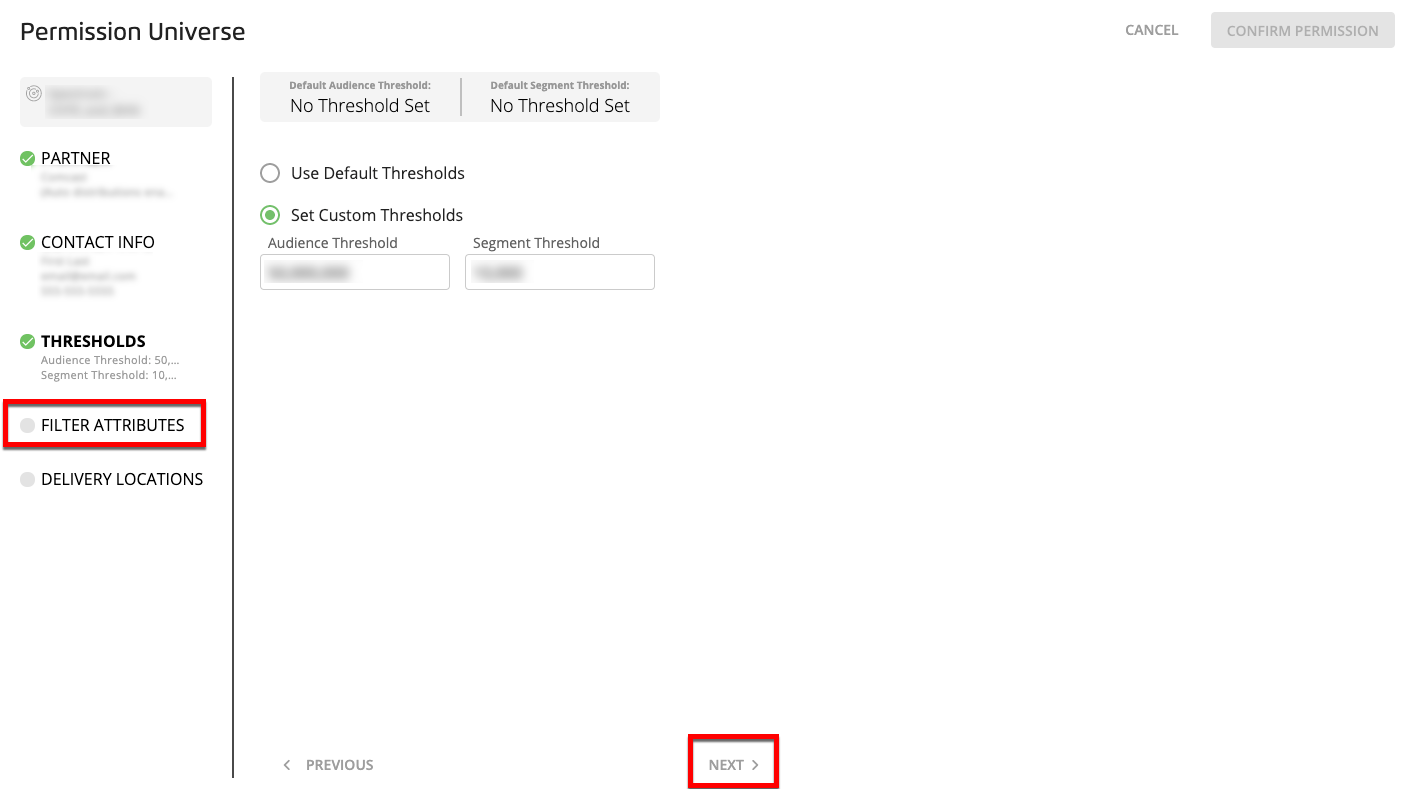
To use custom thresholds different than the default thresholds, select "Use Custom Thresholds" and then enter the threshold values for the audience threshold and segment threshold.
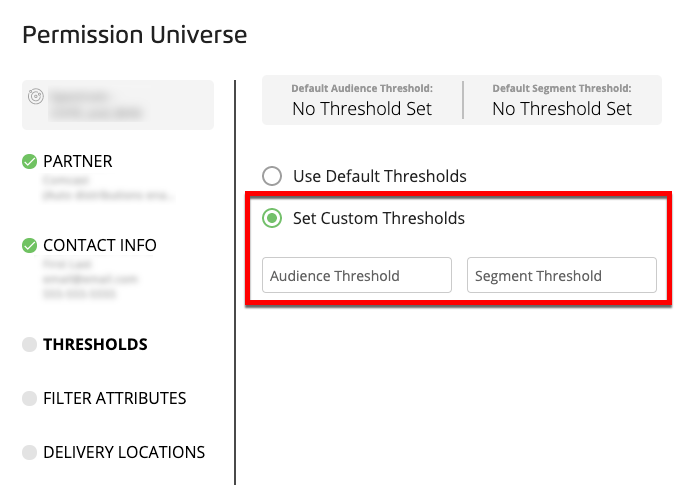
Note
Any custom thresholds must be higher than the default thresholds, and at least one of the custom thresholds must contain a different value than the corresponding default threshold.
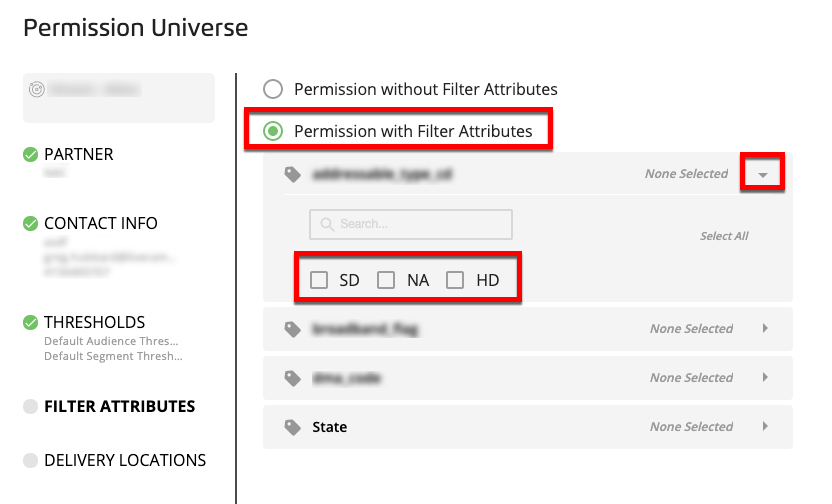
Click or select the FILTER ATTRIBUTES tab.
Select the desired filter attributes permission:
To permission the universe without filter attributes, select "Permission without Filter Attributes."
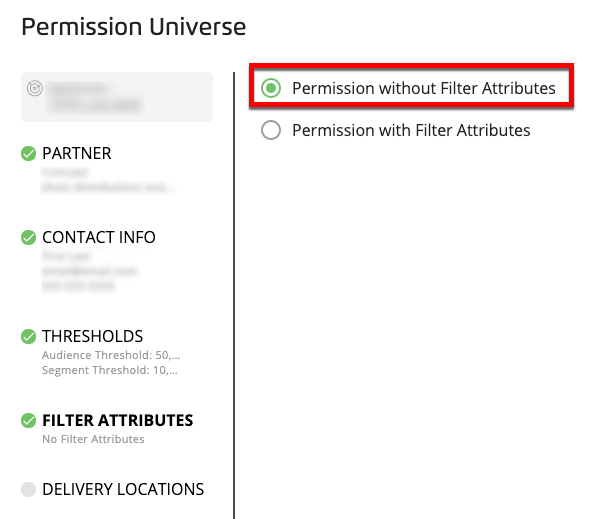
To permission the universe with any enabled filter attributes, select "Permission with Filter Attributes." From the attributes that appear, use one of the following methods to enable the desired attributes:
For attributes that have check boxes: Click on the caret for a desired attribute to expand the row and then check the check boxes for the desired attribute values.
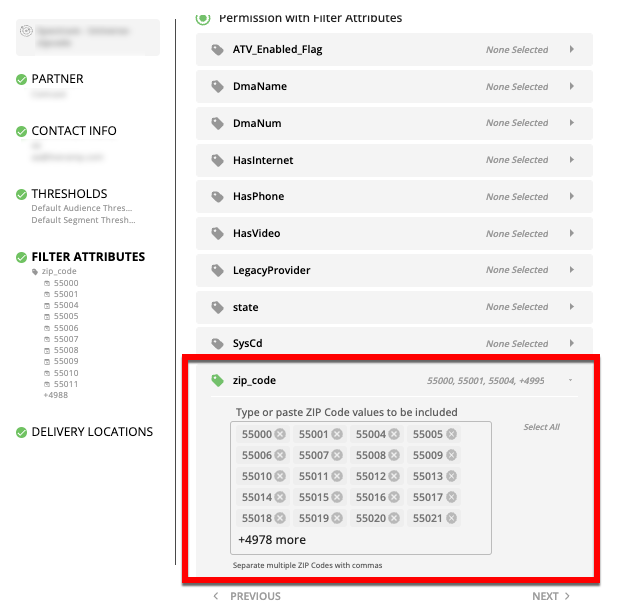
For ZIP Code attributes: Click on the caret for ZIP codes to expand the row and then either click the Select All text to select all available ZIP codes in the universe or type or paste the desired ZIP code values into the text box, separated by commas.
Note
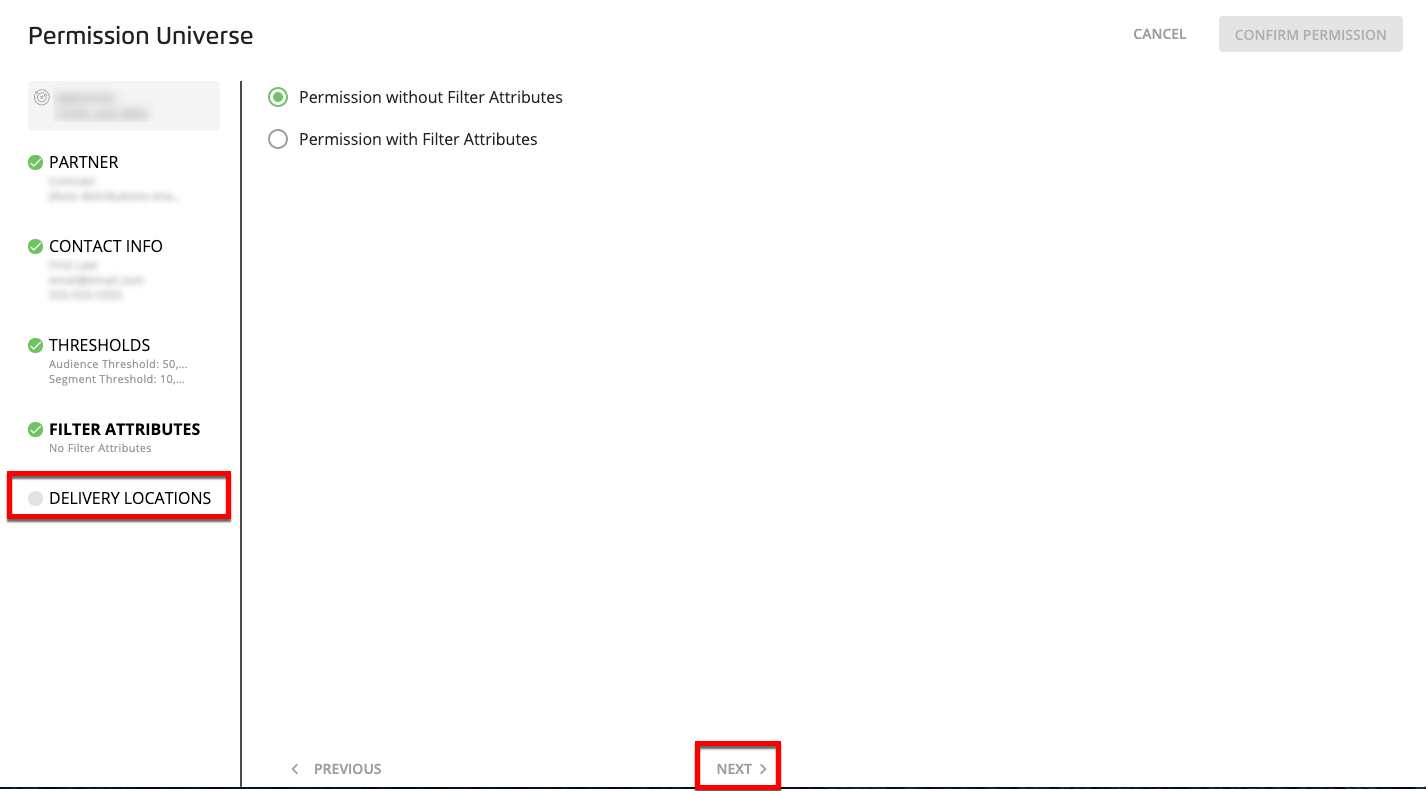
If no filter attributes have been enabled for the universe, no attributes will appear and you will not be able to confirm the permission with this setting. Select "Permission Without Filter Attributes."
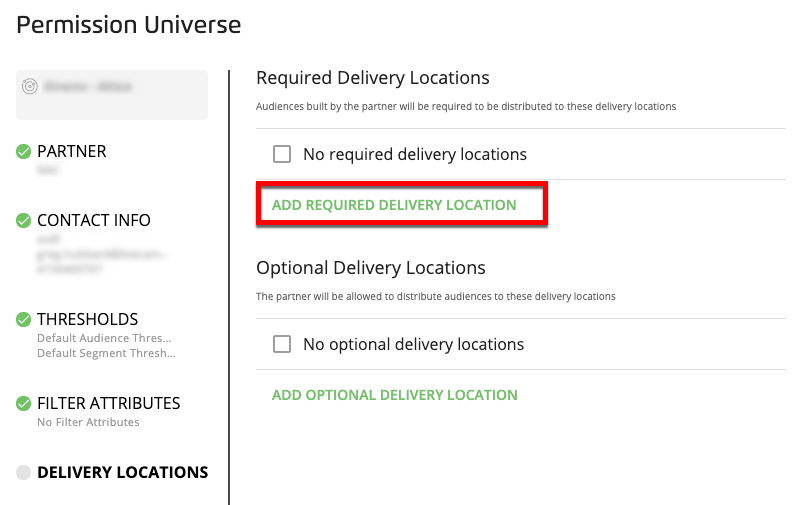
Click or select the DELIVERY LOCATIONS tab.
Set the option for required delivery locations:
To permission the universe without any required delivery locations, check the "No required delivery locations" check box.
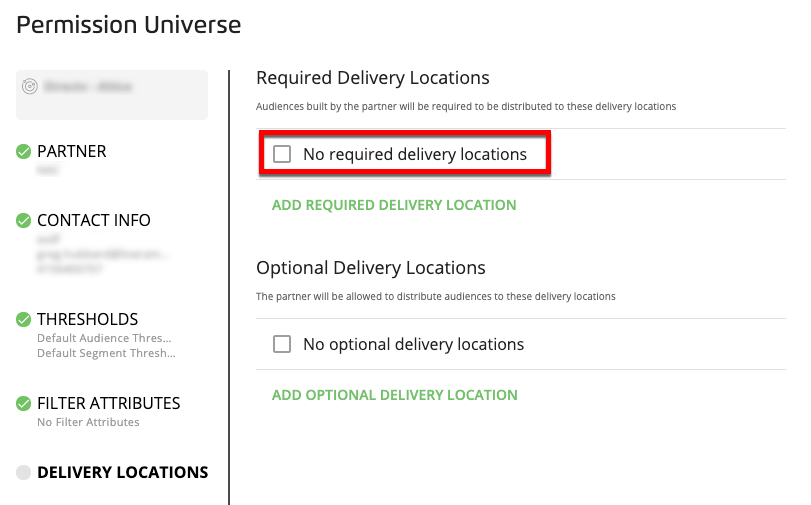
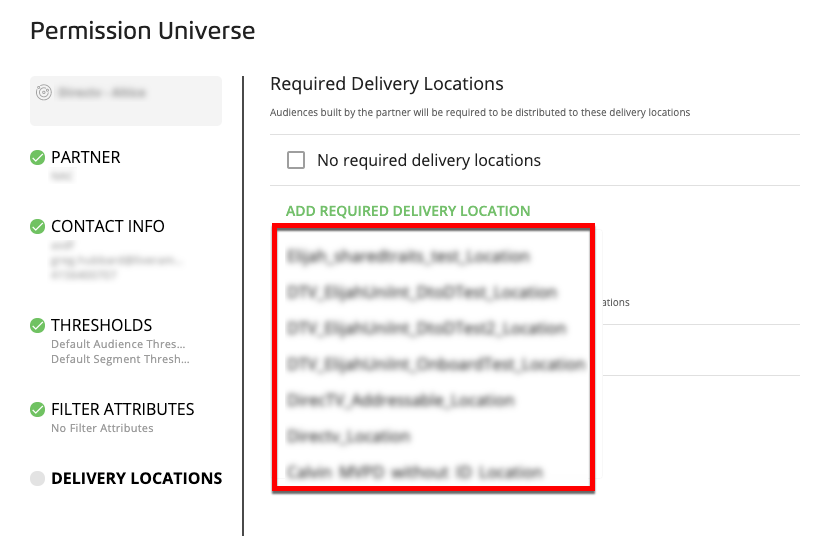
To add required delivery locations, click ADD REQUIRED DELIVERY LOCATION and then select the locations from the drop-down list.
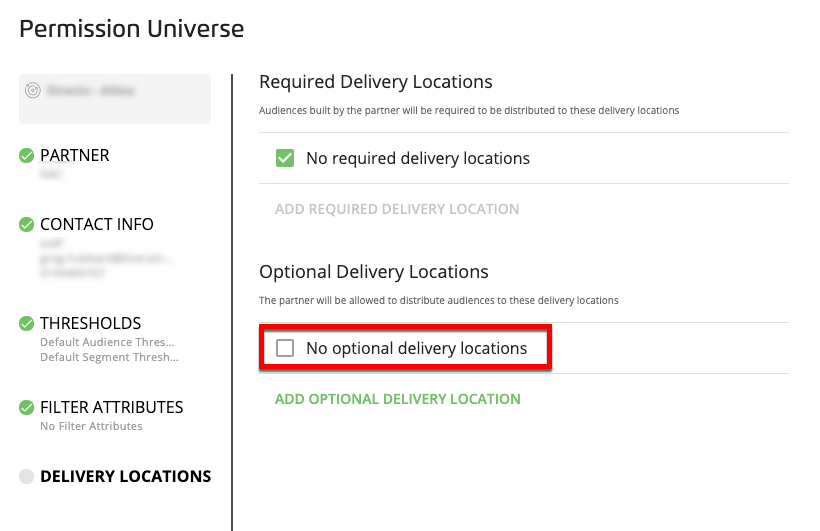
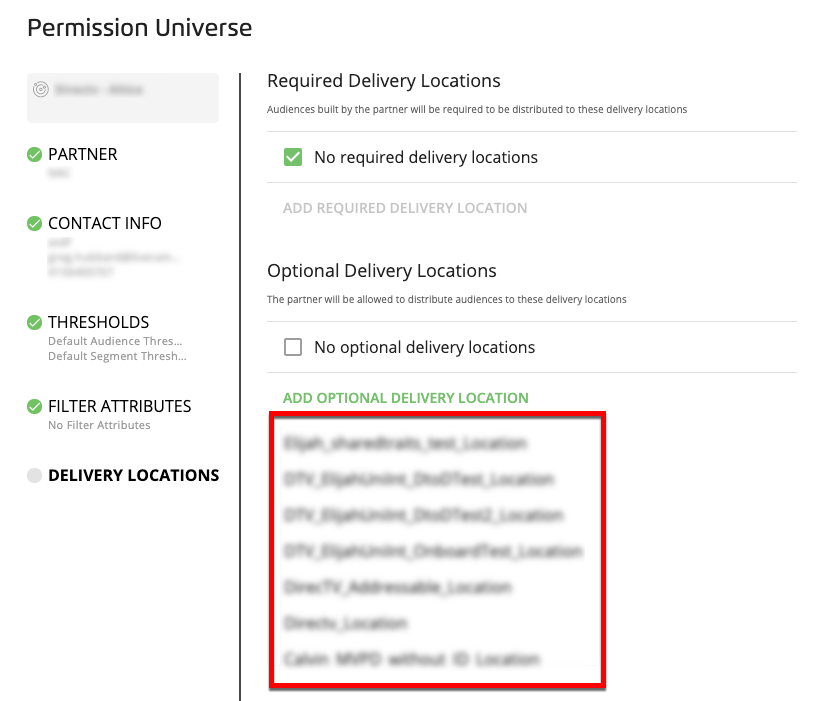
Set the option for optional delivery locations:
To permission the universe without any optional delivery locations, check the "No optional delivery locations" check box.
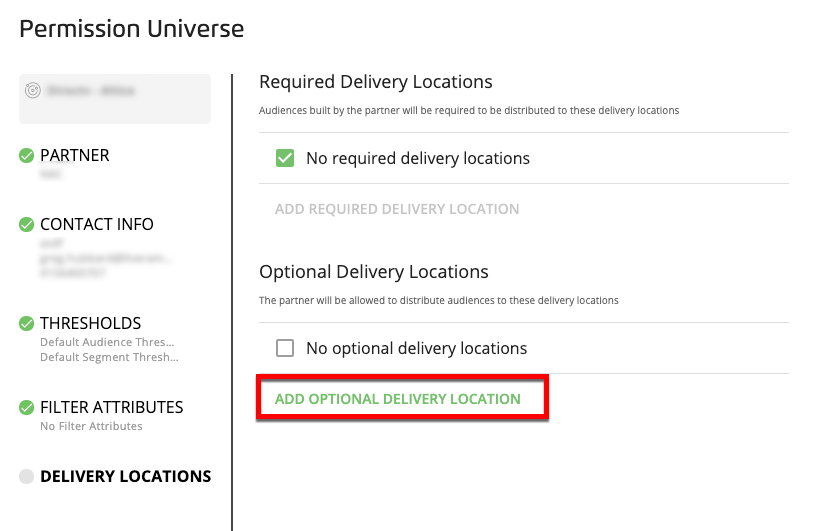
To add optional delivery locations, click ADD OPTIONAL DELIVERY LOCATION and then select the locations from the drop-down list.
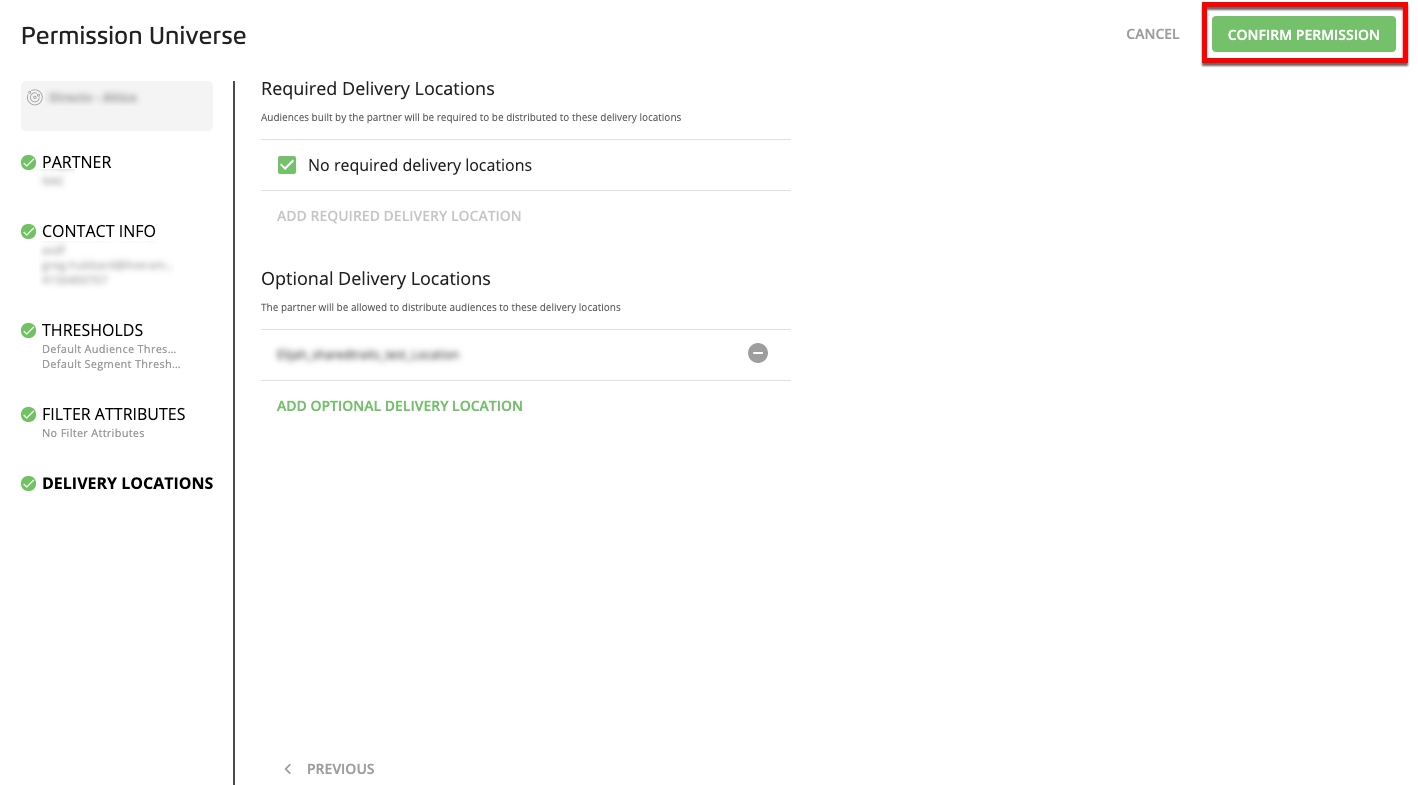
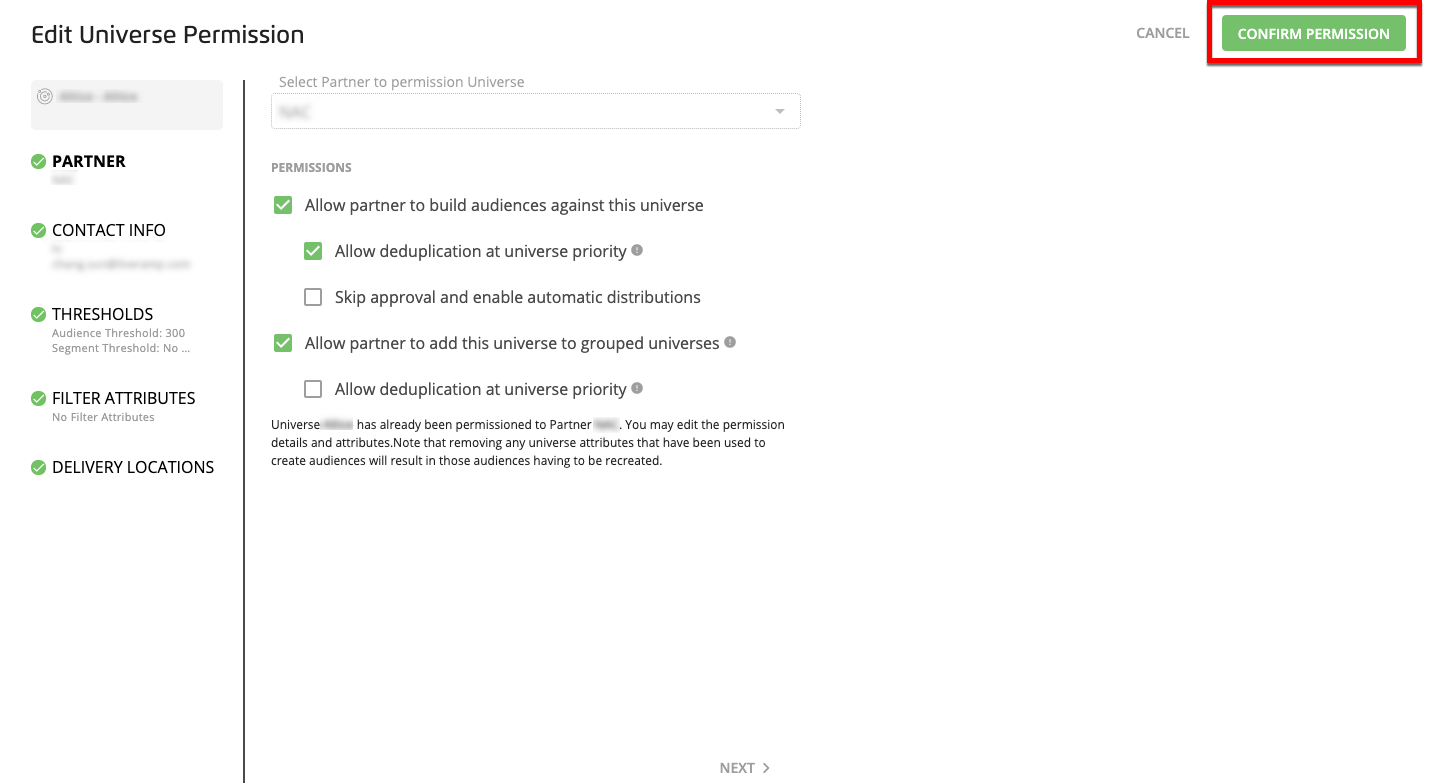
Once you've set all the permission properties, click .
Note
To review or revise any information before confirming, click or the appropriate tab.
Note
If you enabled the option "Allow partner to add this universe to grouped universes" in an earlier step, you must select at least one delivery location when you permission the universe to the partner. If you have not selected any delivery locations, the button will be disabled.
A green success banner appears.

Note
To change or revoke any active permissions, see “Revoke a Permission”. To modify an active permission (such as changing contact info, thresholds, whether to allow universe deduplication, or permissioned filter attributes), see “Edit a Permission”.
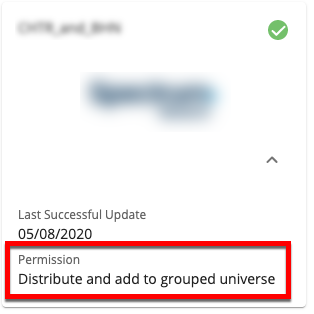
The partner can then view the universe on their Universes page, and can see the permission use cases enabled when they hover over the universe tile:
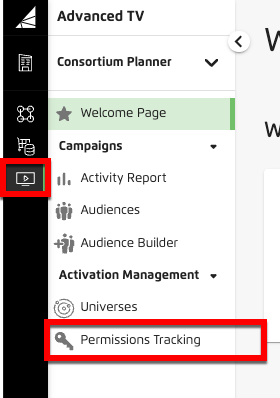
You can view your universe permissions on the Permissions Tracking page.
You have visibility into the audiences your partners build from your permissioned universes, and can approve audience distribution (unless you've allowed a partner to distribute automatically), on the Activity Report page.
From the Permissions Tracking page, you can edit several elements of a particular universe permission to a partner:
The audience building and universe grouping options
Whether the partner is required to request distribution approval before distributing for audiences built using this universe (not grouped universes that include this universe)
Whether the partner can remove duplicates by universe priority from audiences built using this universe or grouped universes that include this universe
Contact info for the person the partner should reach out to
Thresholds for the universe and any segments created from that universe
Filter Attributes
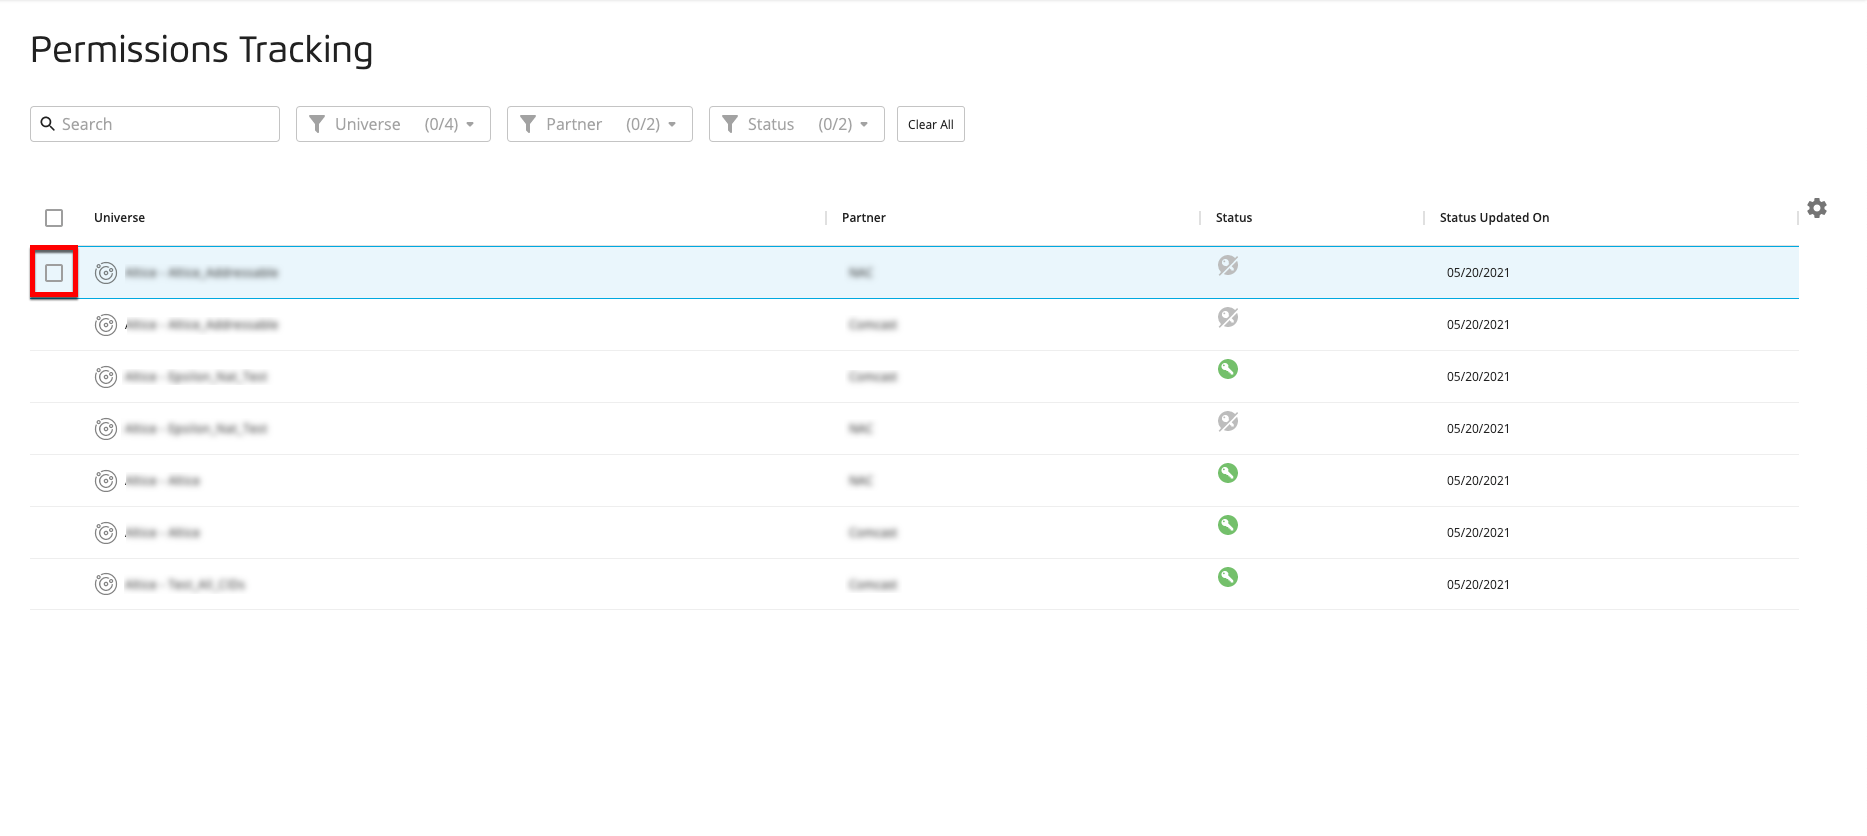
From the Advanced TV navigation menu, click Permissions Tracking to navigate to the Permissions Tracking page.
Hoer over the row for the permission you want to edit and select the check box for that permission.
Click the Edit icon (
 ) that appears in the footer area.
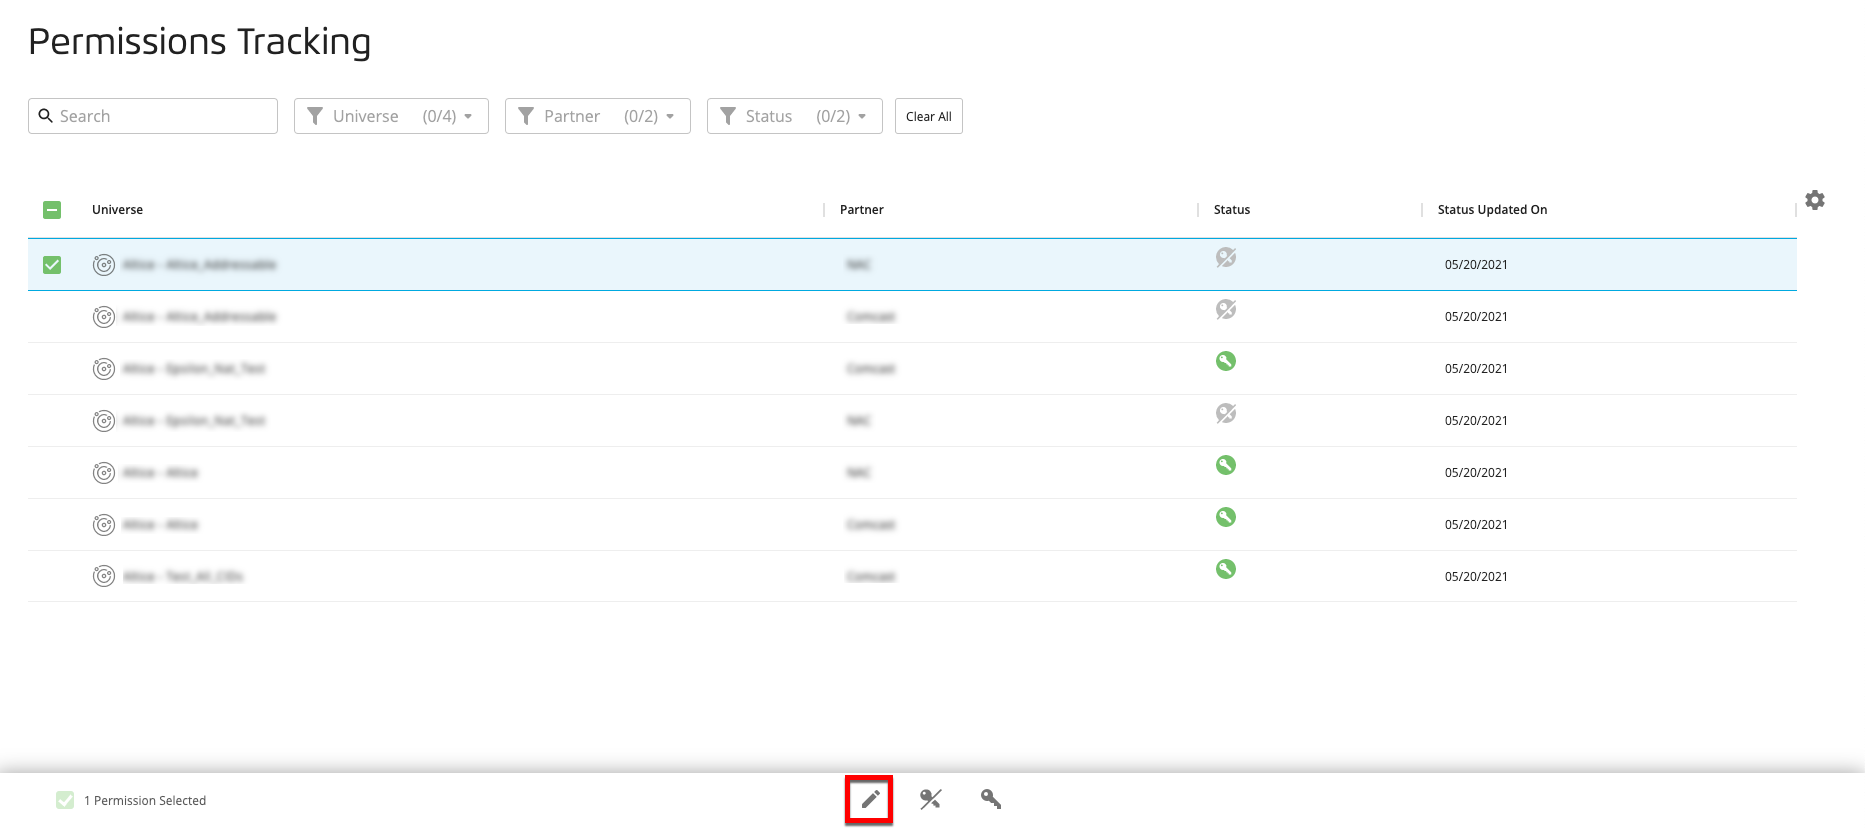
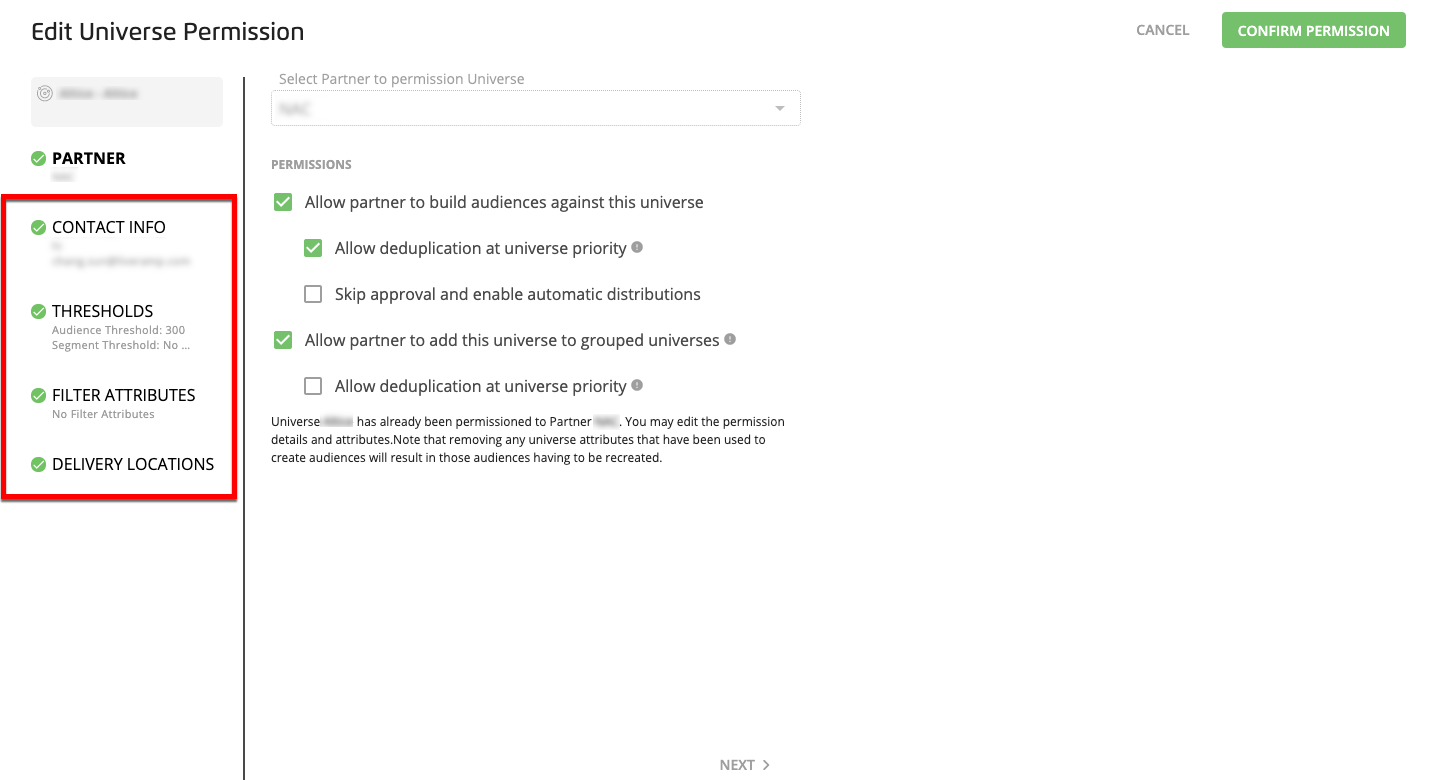
From the Partner tab of the Permission Universe dialog, you can edit the partner permission options:

Whether the partner is allowed to build audiences using this universe
Whether the partner is allowed to add this universe to a grouped universe
Whether the partner can remove duplicates by universe priority from audiences built using this universe or grouped universes that include this universe
Whether the partner is required to request distribution approval before distributing for audiences built using this universe (not grouped universes that include this universe)
Select the appropriate tab for any additional information you want to edit.
Make your desired edits. For the Filter Attributes tab, click the caret to expand the filter attribute rows and see the available filter attributes.
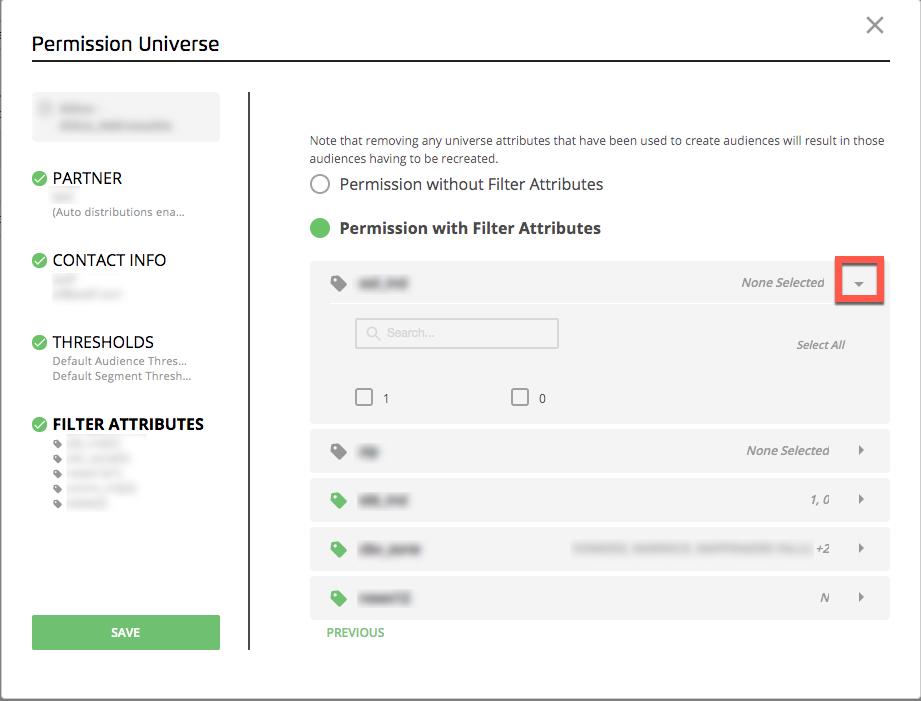
Repeat for additional tabs, if necessary.
Click when you're done making edits.
You can revoke a currently-active permission. However, any audiences that your partner has built using that universe will no longer be able to be distributed unless they remove the universe. Also, that universe will be removed from their list of available universes when building an audience.
If you revoke the permission for a universe that has been made part of a grouped universe, that grouped universe becomes invalid. Any audiences using that universe that have not been distributed, or that are set to "recurring" distributions, will have to be rebuilt (see "Distribution Options" for more information on recurring distributions).
Note
If your partner has built and distributed an audience that uses the universe you’re revoking permission for, any previous distributions will not be affected.
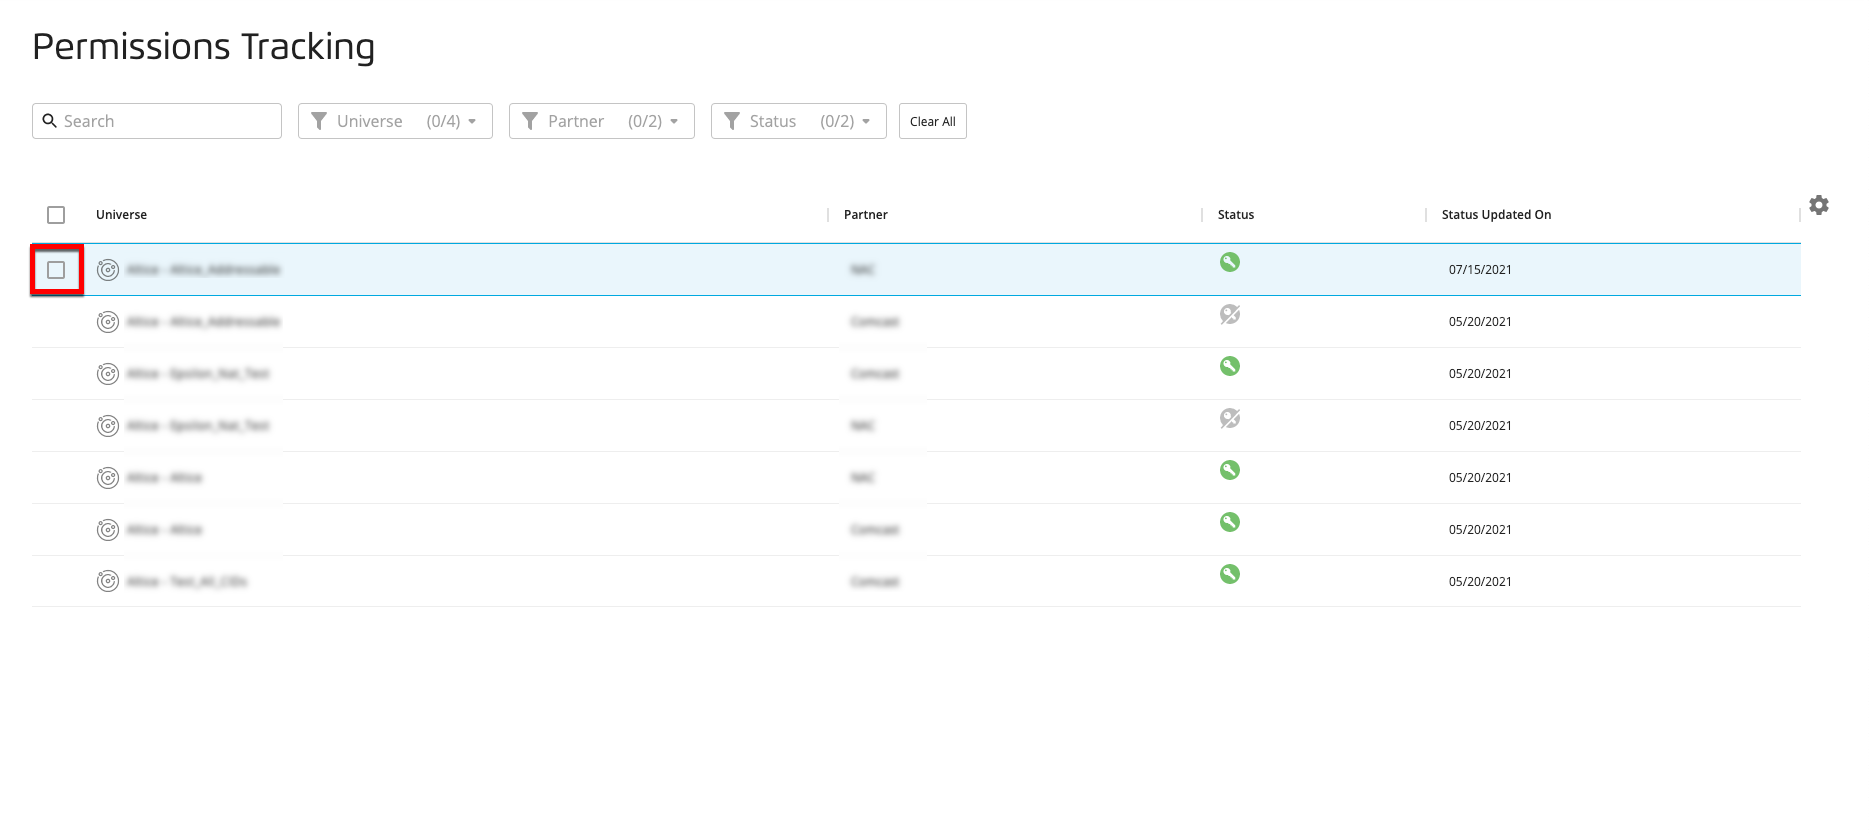
From the Advanced TV navigation menu, click Permissions Tracking to navigate to the Permissions Tracking page.
Hover over the row for the permission you want to revoke and select the check box to the left of the permission name.
Note
You can revoke multiple permissions by checking additional check boxes or by checking the check box in the table header to select all permissions.
Click the Revoke Permission icon (
 ) that appears in the footer area.
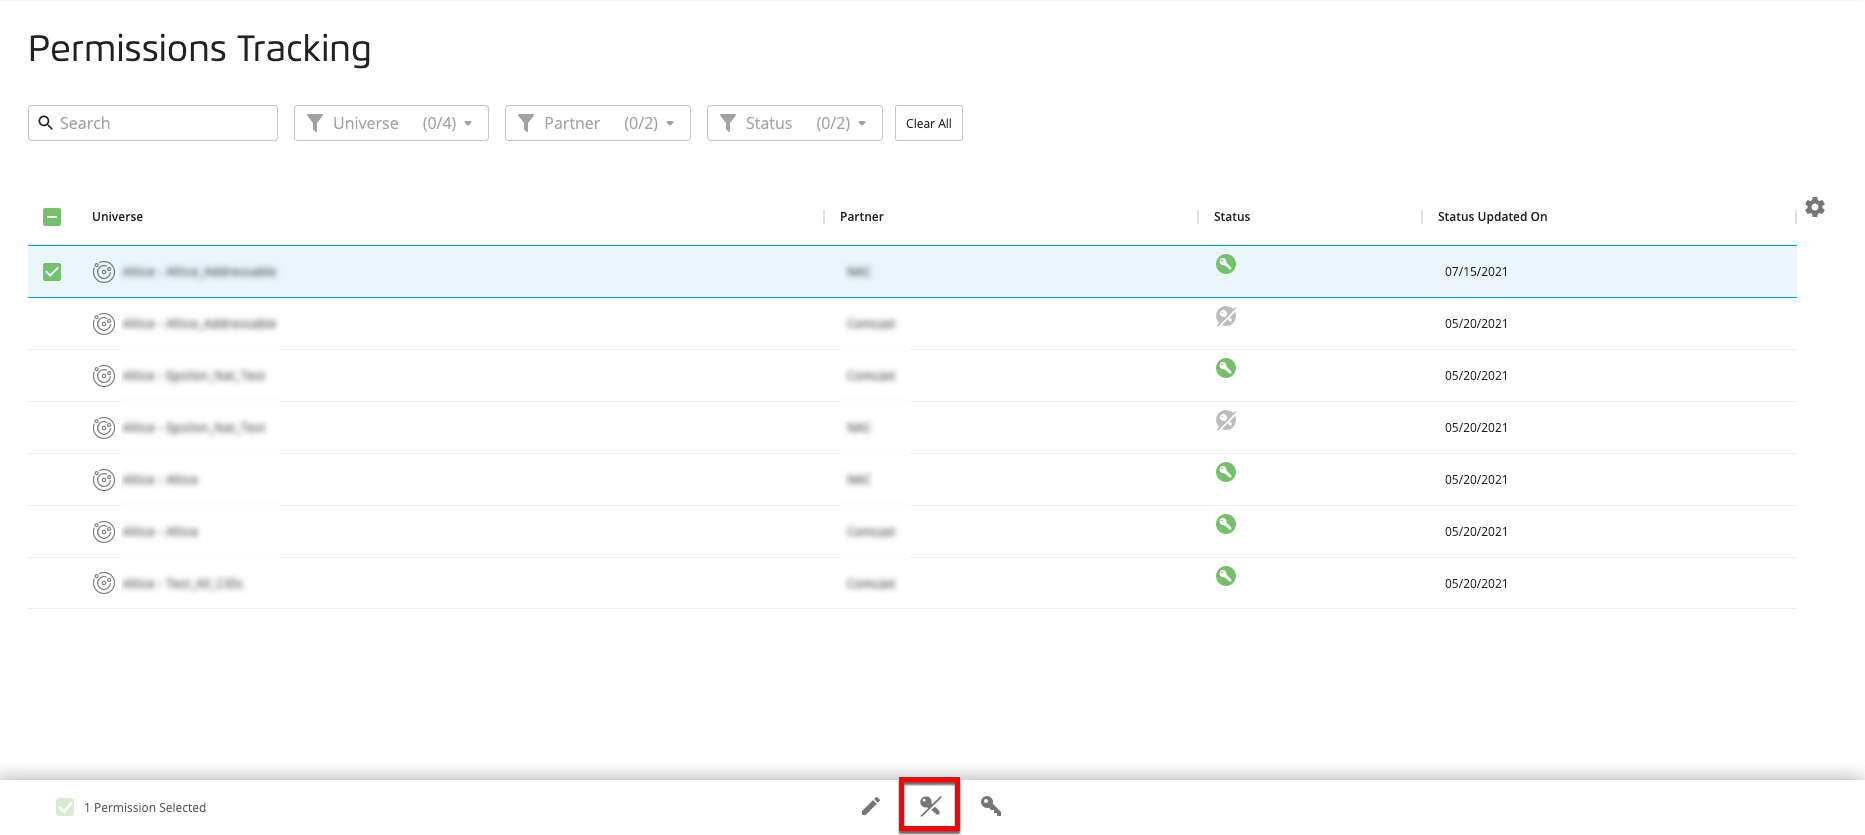
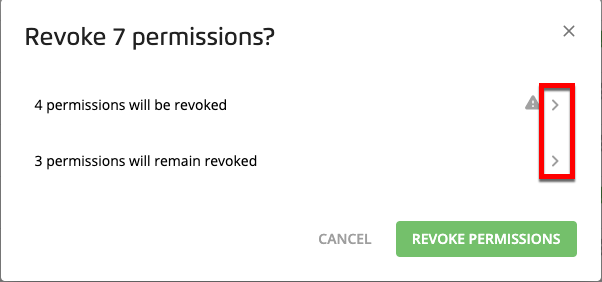
Review the confirmation dialog message that appears, including any warnings (if the partner has built one or more audiences that use a universe that is being revoked, a gray warning triangle appears).
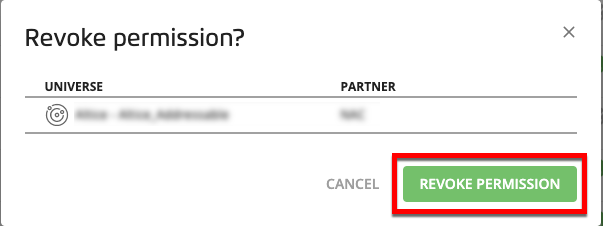
If you’ve selected one or more permissions that are all currently active, the dialog shows the affected universes and partners:

If you’ve selected multiple permissions and one or more of those are currently inactive, the dialog shows the breakdown of the number of permissions that will be revoked and the number that will remain revoked. You can click the caret for a particular row to expand and see the list of permissions:
To revoke the permissions that are currently active, click .
A green success banner appears at the top of the page.

You can re-activate a permission that has previously been revoked.
From the Advanced TV navigation menu, click Permissions Tracking to navigate to the Permissions Tracking page.
Hover over the row for the permission you want to re-activate and select the check box to the left of the permission name.
Note
You can re-activate multiple permissions by checking additional check boxes or by checking the check box in the table header to select all permissions.
Click the Activate Permission icon (
 ) that appears in the footer area.
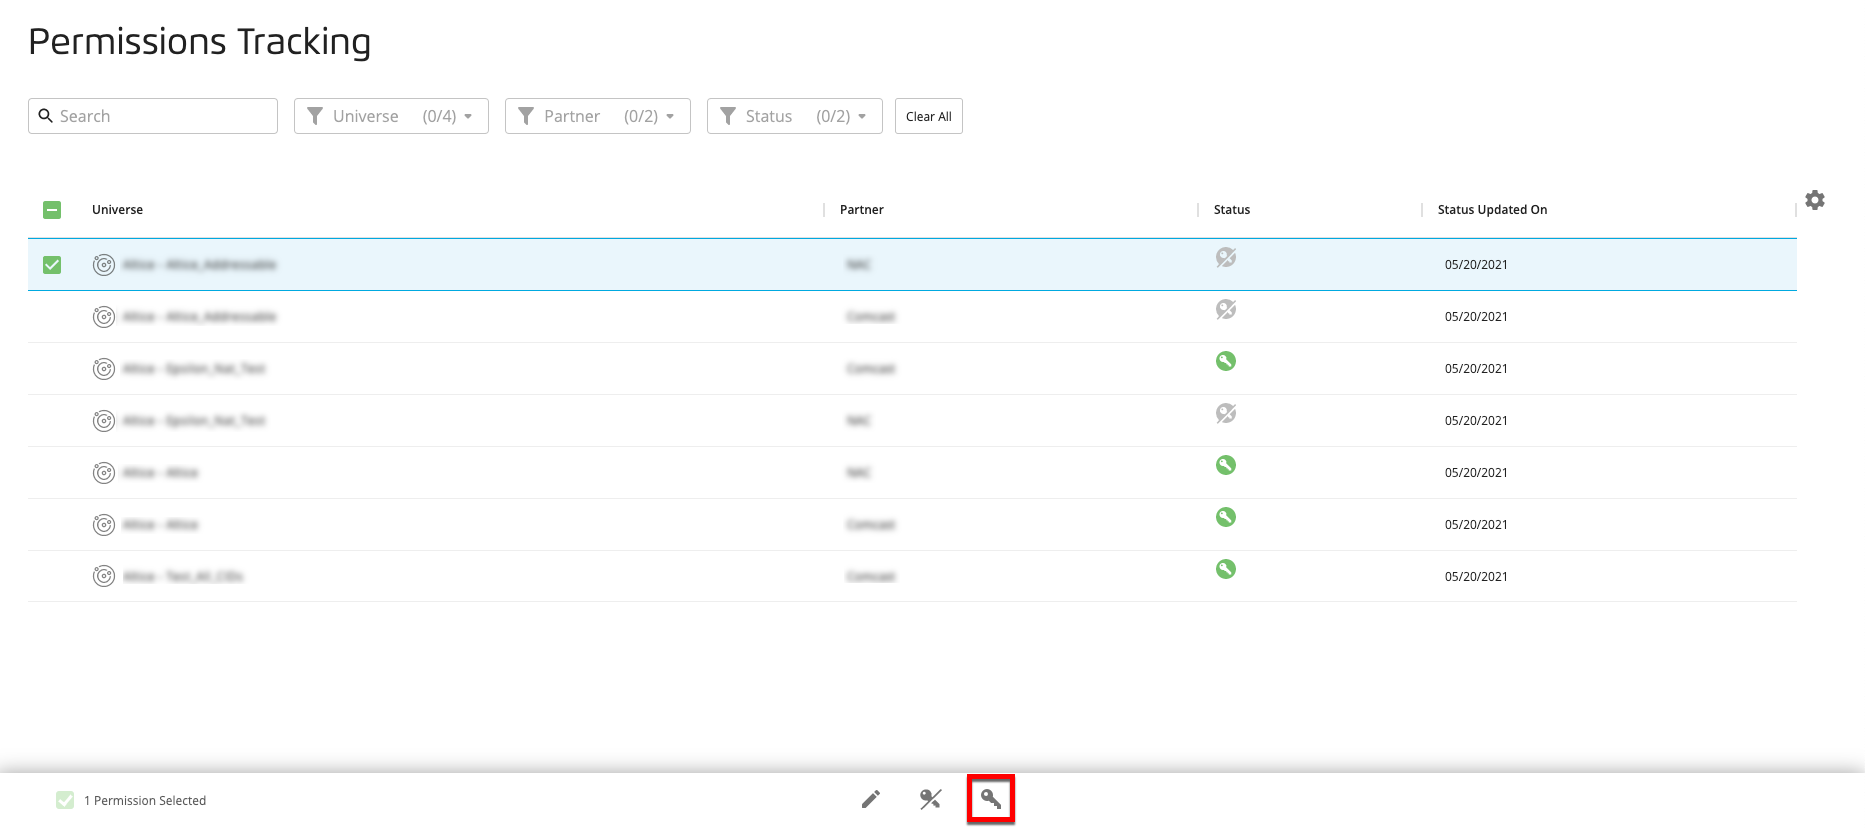
Review the confirmation dialog message that appears, including any warnings (If the partner has built one or more audiences that use a universe that is being revoked, a gray warning triangle appears).
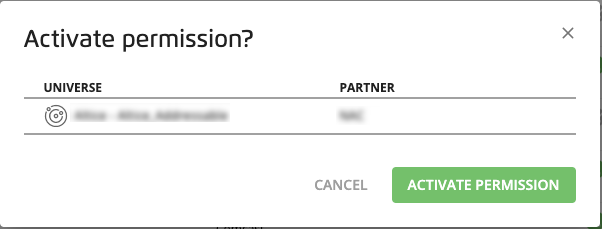
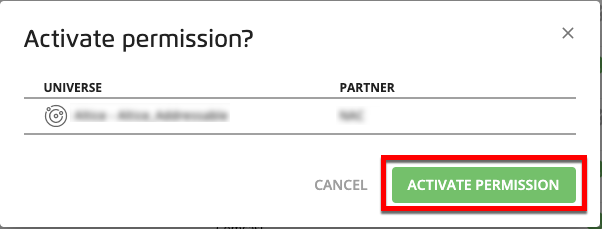
If you’ve selected one or more permissions that are all currently inactive, the dialog shows the affected universes and partners:
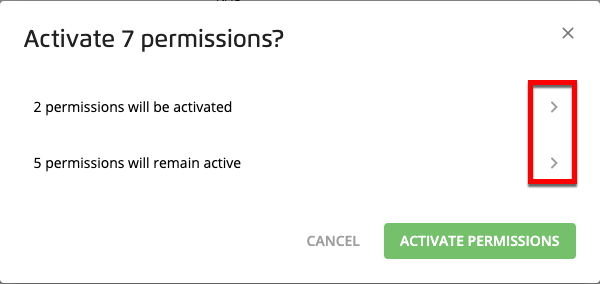
If you’ve selected multiple permissions and one or more of those are currently active, the dialog shows the breakdown of the number of permissions that will be activated and the number that will remain active. To expand and see the list of permissions for a particular row, click the caret on the right side of the row.
To re-activate the permissions that are currently inactive, click .
A green success banner appears at the top of the page.

If you've opted in for Advanced TV notifications, you will receive an email notification about your permissioned universes under certain conditions.
Note
For information on enabling notifcations, see "Advanced TV Notifications."
Notification When a Permissioned Universe is Added to a Grouped Universe
When a universe you've permissioned to a partner is added to a grouped universe, you'll receive the following notification:
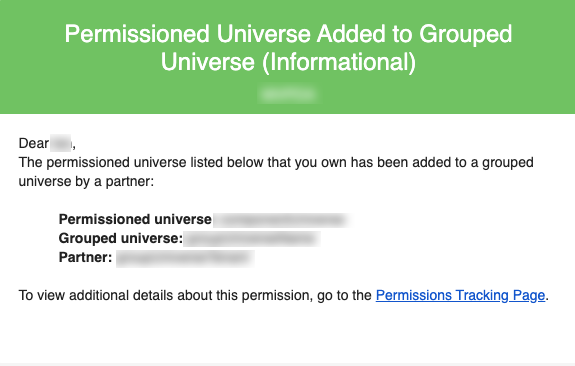
To view additional details about this permission, go to the Permissions Tracking page.
Notification When an Audience is Built Using a Universe You Own
When a universe you've permissioned to a partner is used to build an audience (but the audience is not saved), you'll receive the following notification:
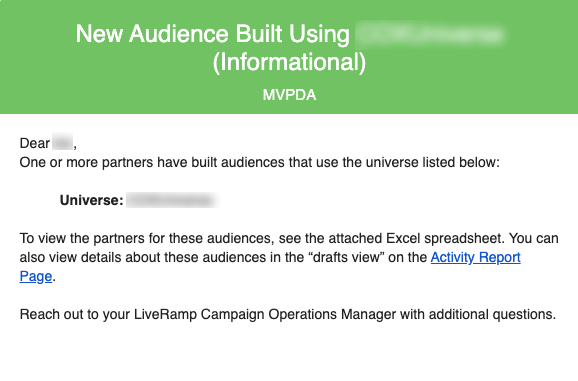
An Excel file is included with the email that contains the names of the partners who've built audiences from the listed universe.
You can also view details about these audiences in the "drafts view" on the Activity Report page.
Notification When an Audience is Saved Using a Universe You Own
When a universe you've permissioned to a partner is used to build an audience and that audience has been saved, you'll receive the following notification:
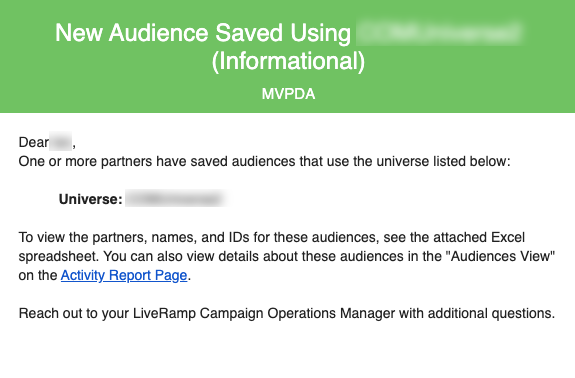
An Excel file is included with the email that contains the names of the partners who've built audiences from the listed universe, as well as the audience names and IDs.
You can also view details about these audiences in the "audiences view" on the Activity Report page.