Create a Destination Connection
You can create destination connections during the process of creating a data delivery group or outside of that process. The steps are essentially the same, no matter which method you choose.
To create a destination connection:
Start the process by opening the Destination Connection Builder in one of the following ways:
From the Quick Actions dropdown list in the navigation pane, click Add Destination Connection.

During the process of creating a data delivery group and selecting the integrations to send your data to, click .
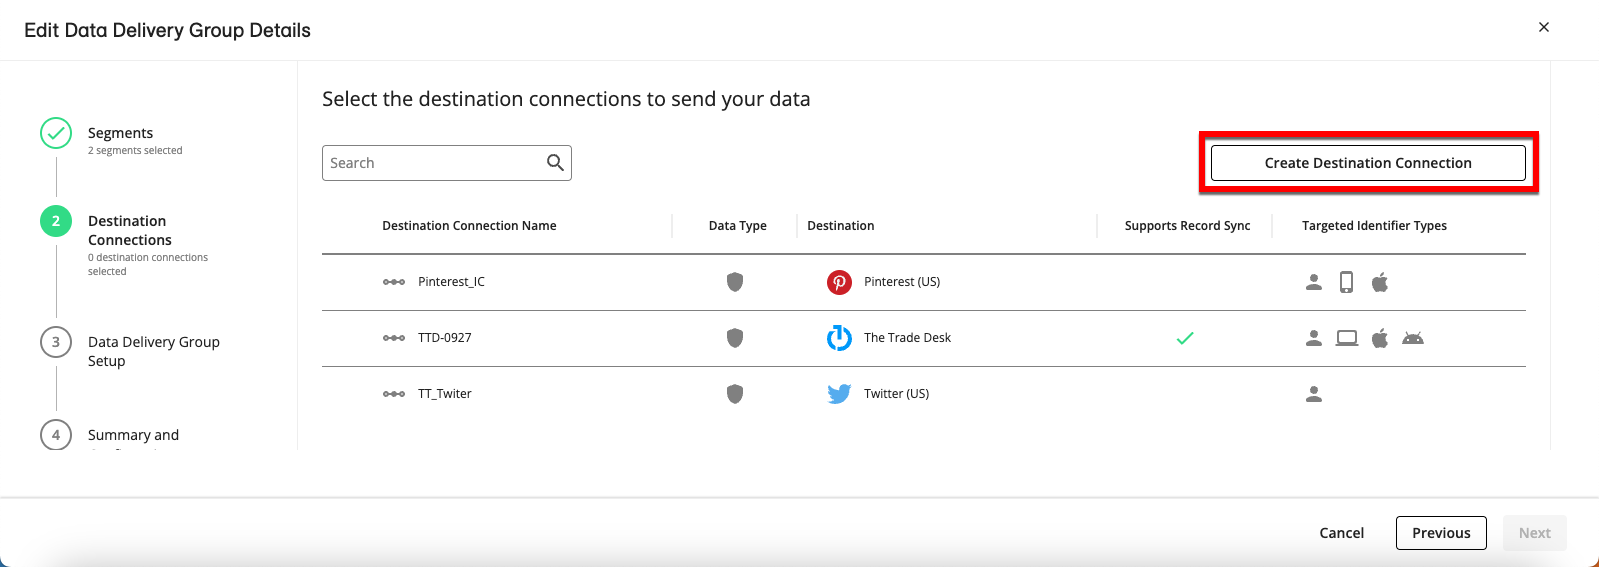
A new browser tab opens and displays the Destination Connection Builder.
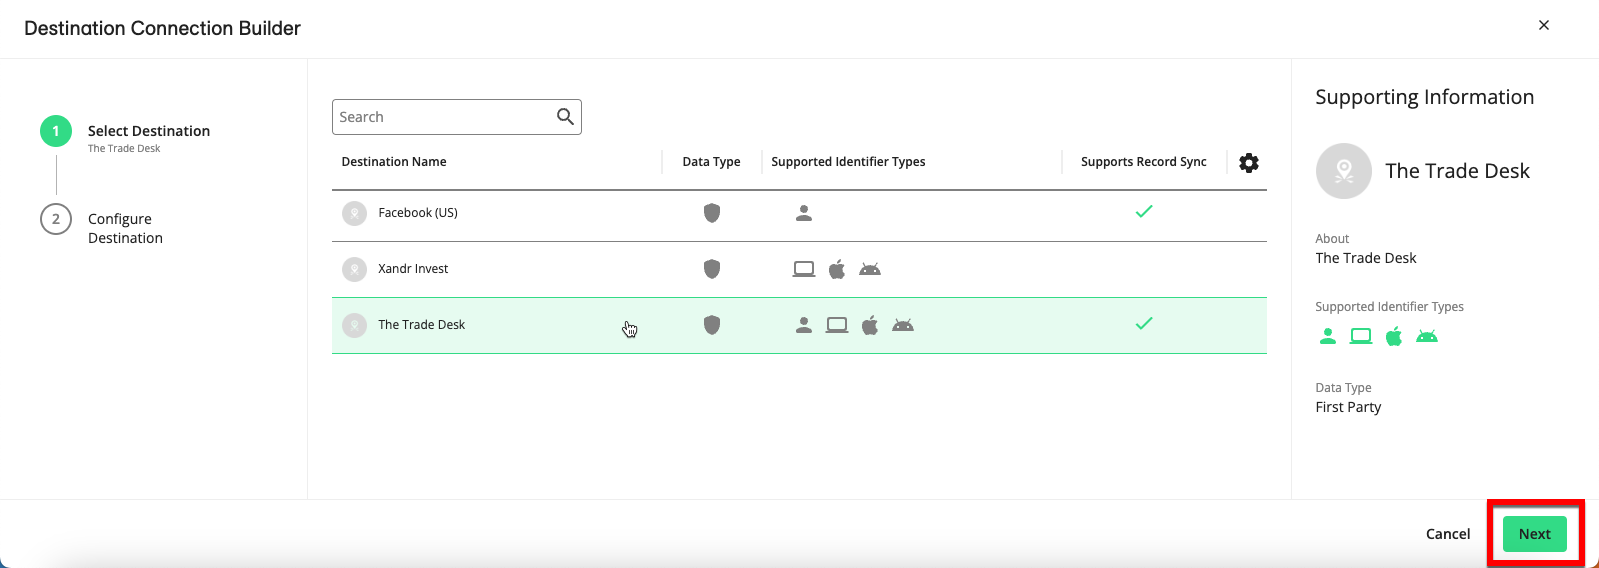
Select the desired integration (such as “Facebook (US)”) and then click .
Note
The integration list table and the side panel display the data type (for example, first-party data) and identifier types that can be sent through the integration, as well as whether that destination supports Record Sync (which sends record deletions to the destination platform). For more information on Record Sync, see "Keep Destination Data Fresh with Record Sync".
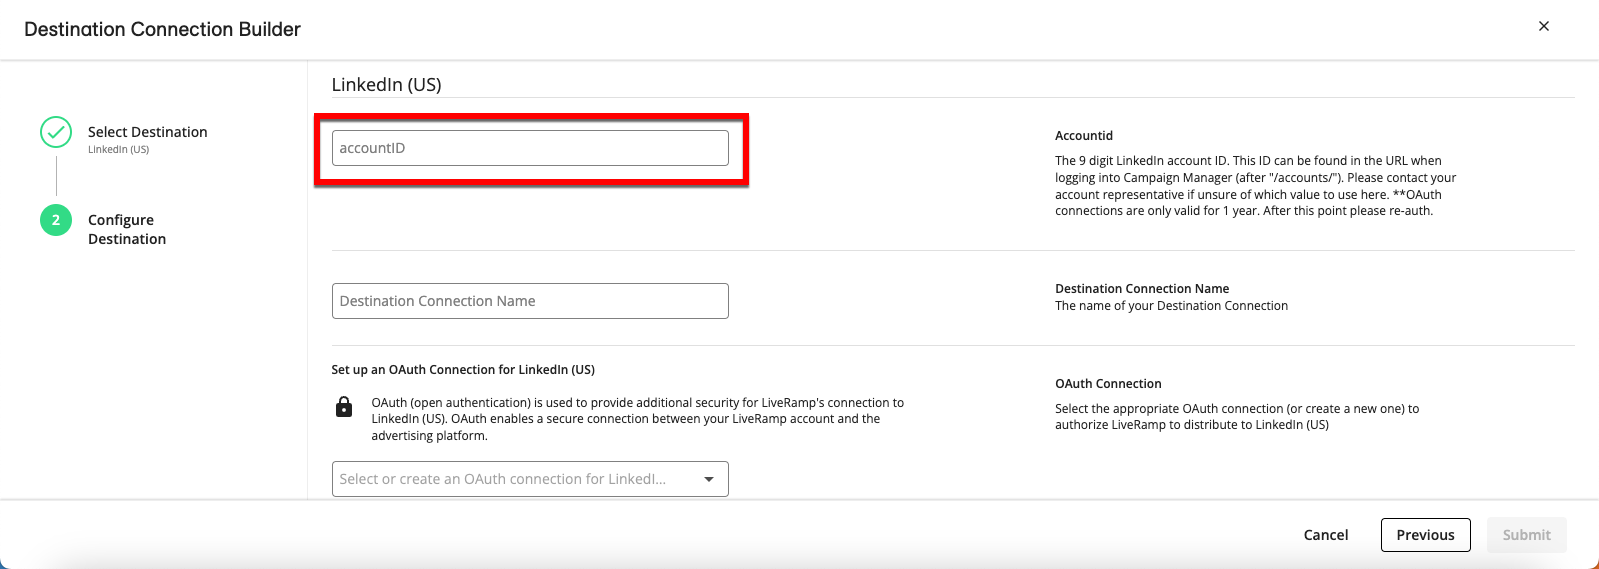
Configure the properties required for the integration, such as your account ID (LinkedIn example shown - other integrations might require different properties).
Note
Helper text appears on the right side of the screen with information on filling out these fields.
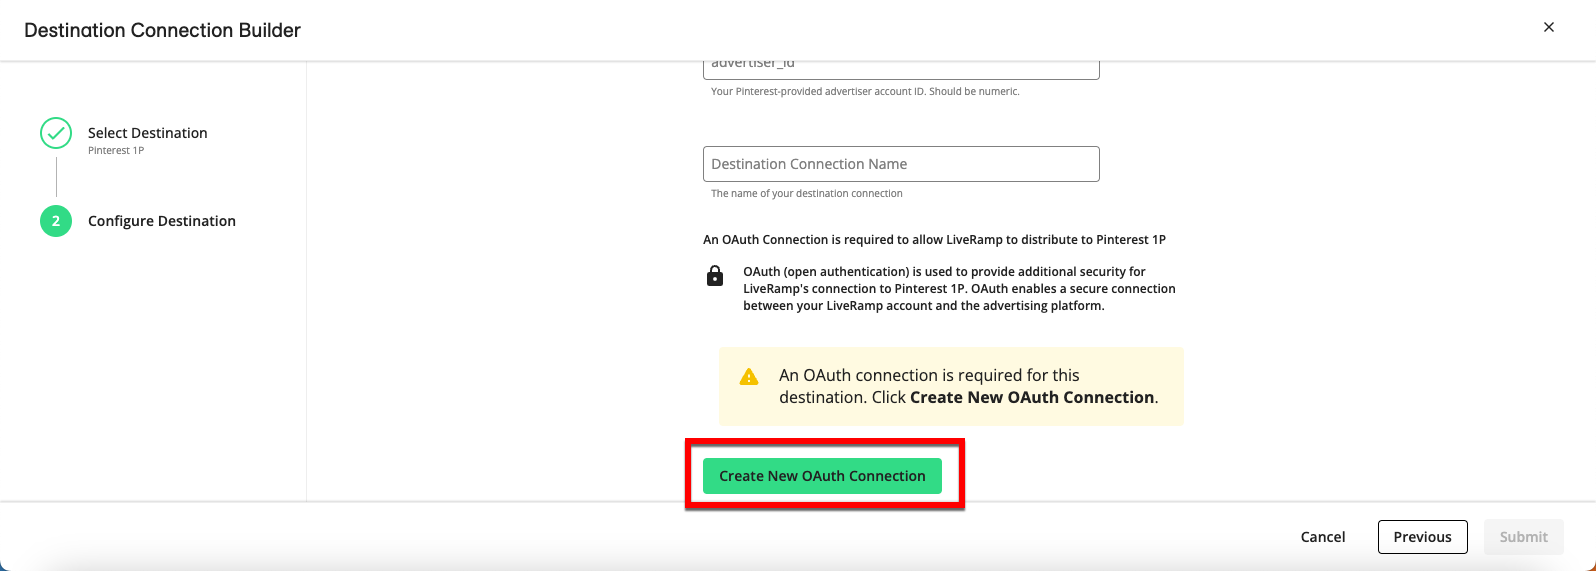
Enter a name for the destination connection.
If OAuth authorization is required for the destination, click and then follow the authorization process at the destination's website (for platform-specific instructions, see the sections below) (Pinterest example shown):
Note
A success message appears when a new OAuth connection is successfully created. If you have trouble creating the new OAuth connection, check the OAuth instructions for the destination to make sure you have the appropriate permission level to perform authorization.
Click .
If you were in the process of creating an data delivery group, you can return to that tab and continue the destination connection selection process.
If you created the destination connection from the Destination Connections page, you will be returned to that page and the new connection appears in your list of connections.
Perform OAuth Authorization for LinkedIn
Account type required: The LinkedIn account needs to be a campaign manager account and must correspond to the account ID entered on the destination account.
OAuth expiration: OAuth credentials at LinkedIn expire 1 year after authorization. After 1 year (or if you notice your distributions are not going through), perform OAuth authorization at LinkedIn again.
Required fields:
Accountid: The 9 digit LinkedIn account ID. This ID can be found in the URL when logging into Campaign Manager (after "/accounts/"). Contact your LinkedIn account representative if unsure of which value to use here.
Steps to perform OAuth for LinkedIn:
Once the LinkedIn login dialog appears, enter your credentials and then click Sign in.

Perform OAuth Authorization for Pinterest
Permission level required: Admin or Audience level
OAuth expiration: OAuth credentials at Pinterest never expire (Pinterest automatically refreshes the credentials, but if you have an issue try re-authenticating first).
Required fields:
Advertiser ID: Your Pinterest-provided advertiser account ID. Should be numeric.
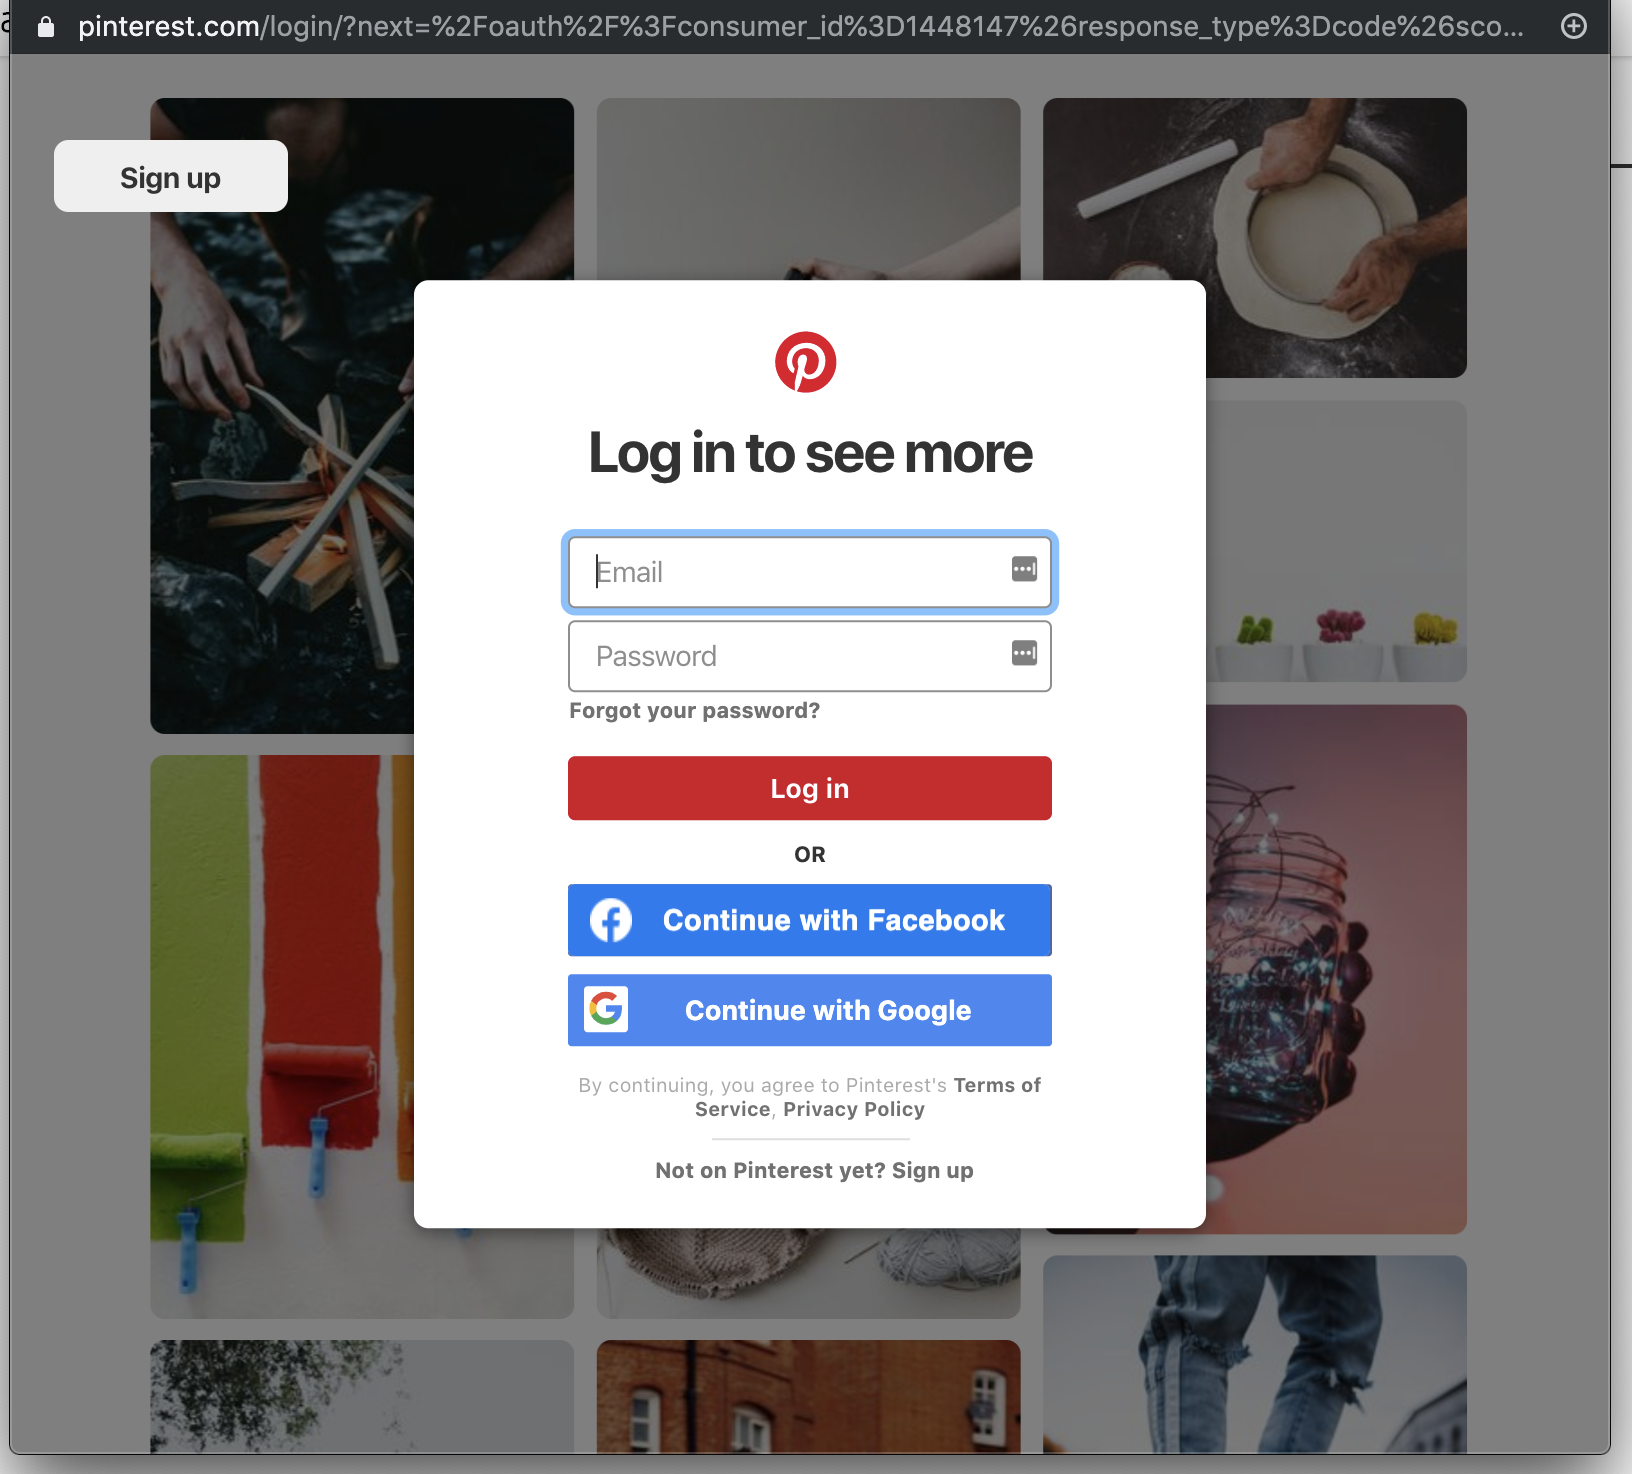
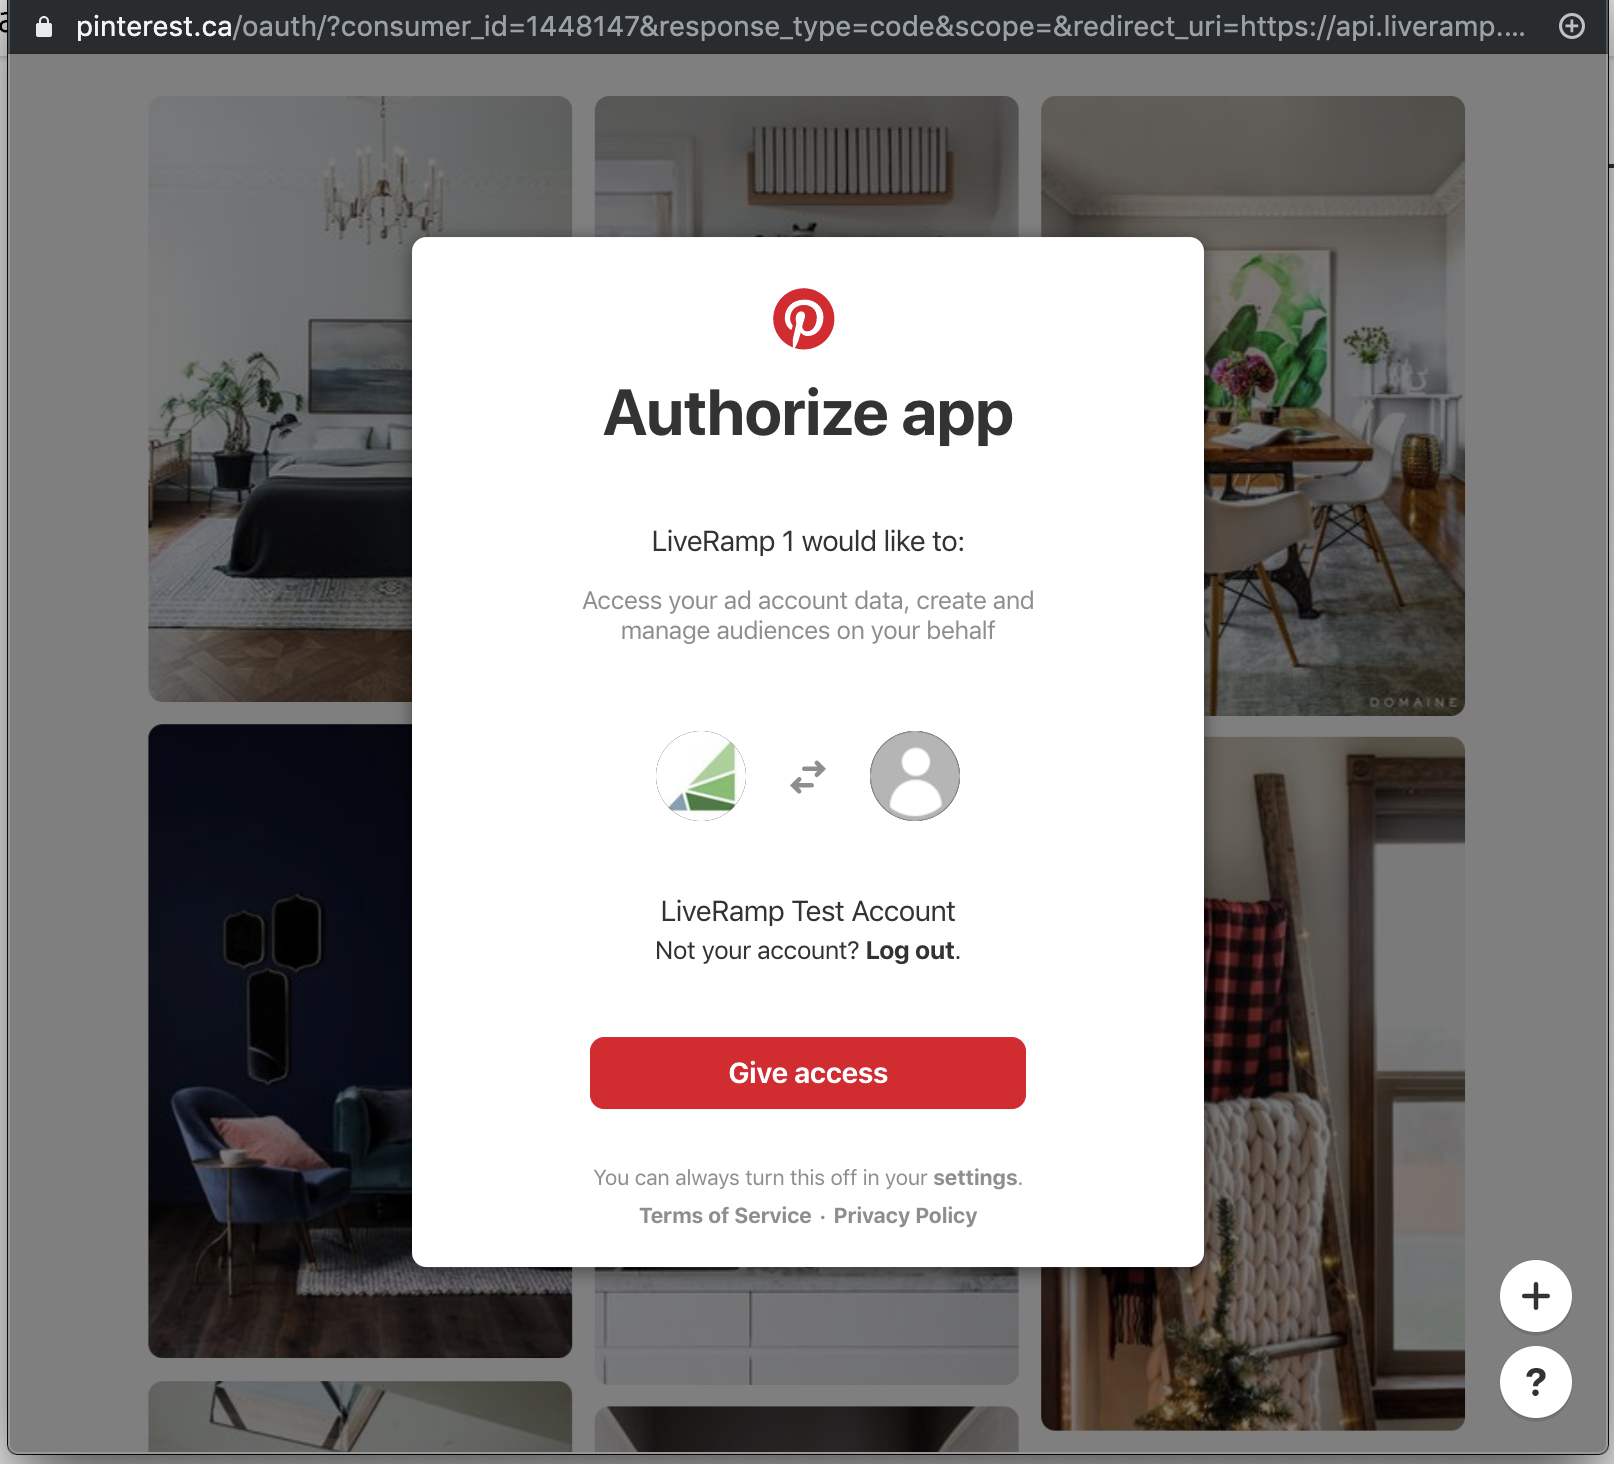
Steps to perform OAuth for Pinterest:
After the Pinterest login dialog appears, enter your credentials and then click .
From the Authorize app dialog, click .
Perform OAuth Authorization for Snapchat
Snapchat account requirements: The account must be a Business Ad Account with Snapchat.
Permission level required: The Snapchat user must either be an Organizational Admin, or a user with Campaign Manager or Data Manager permissions.
Required fields:
Client: The name of your company or account at Snapchat. Contact your Snapchat account representative if unsure of which value to use here. Do not include whitespace or other special characters (e.g., use "CompanyName" or "Account_Name").
Snapchat Ad Acct ID: The Ad Account ID issued to you by Snapchat. Contact your Snapchat representative for more information.
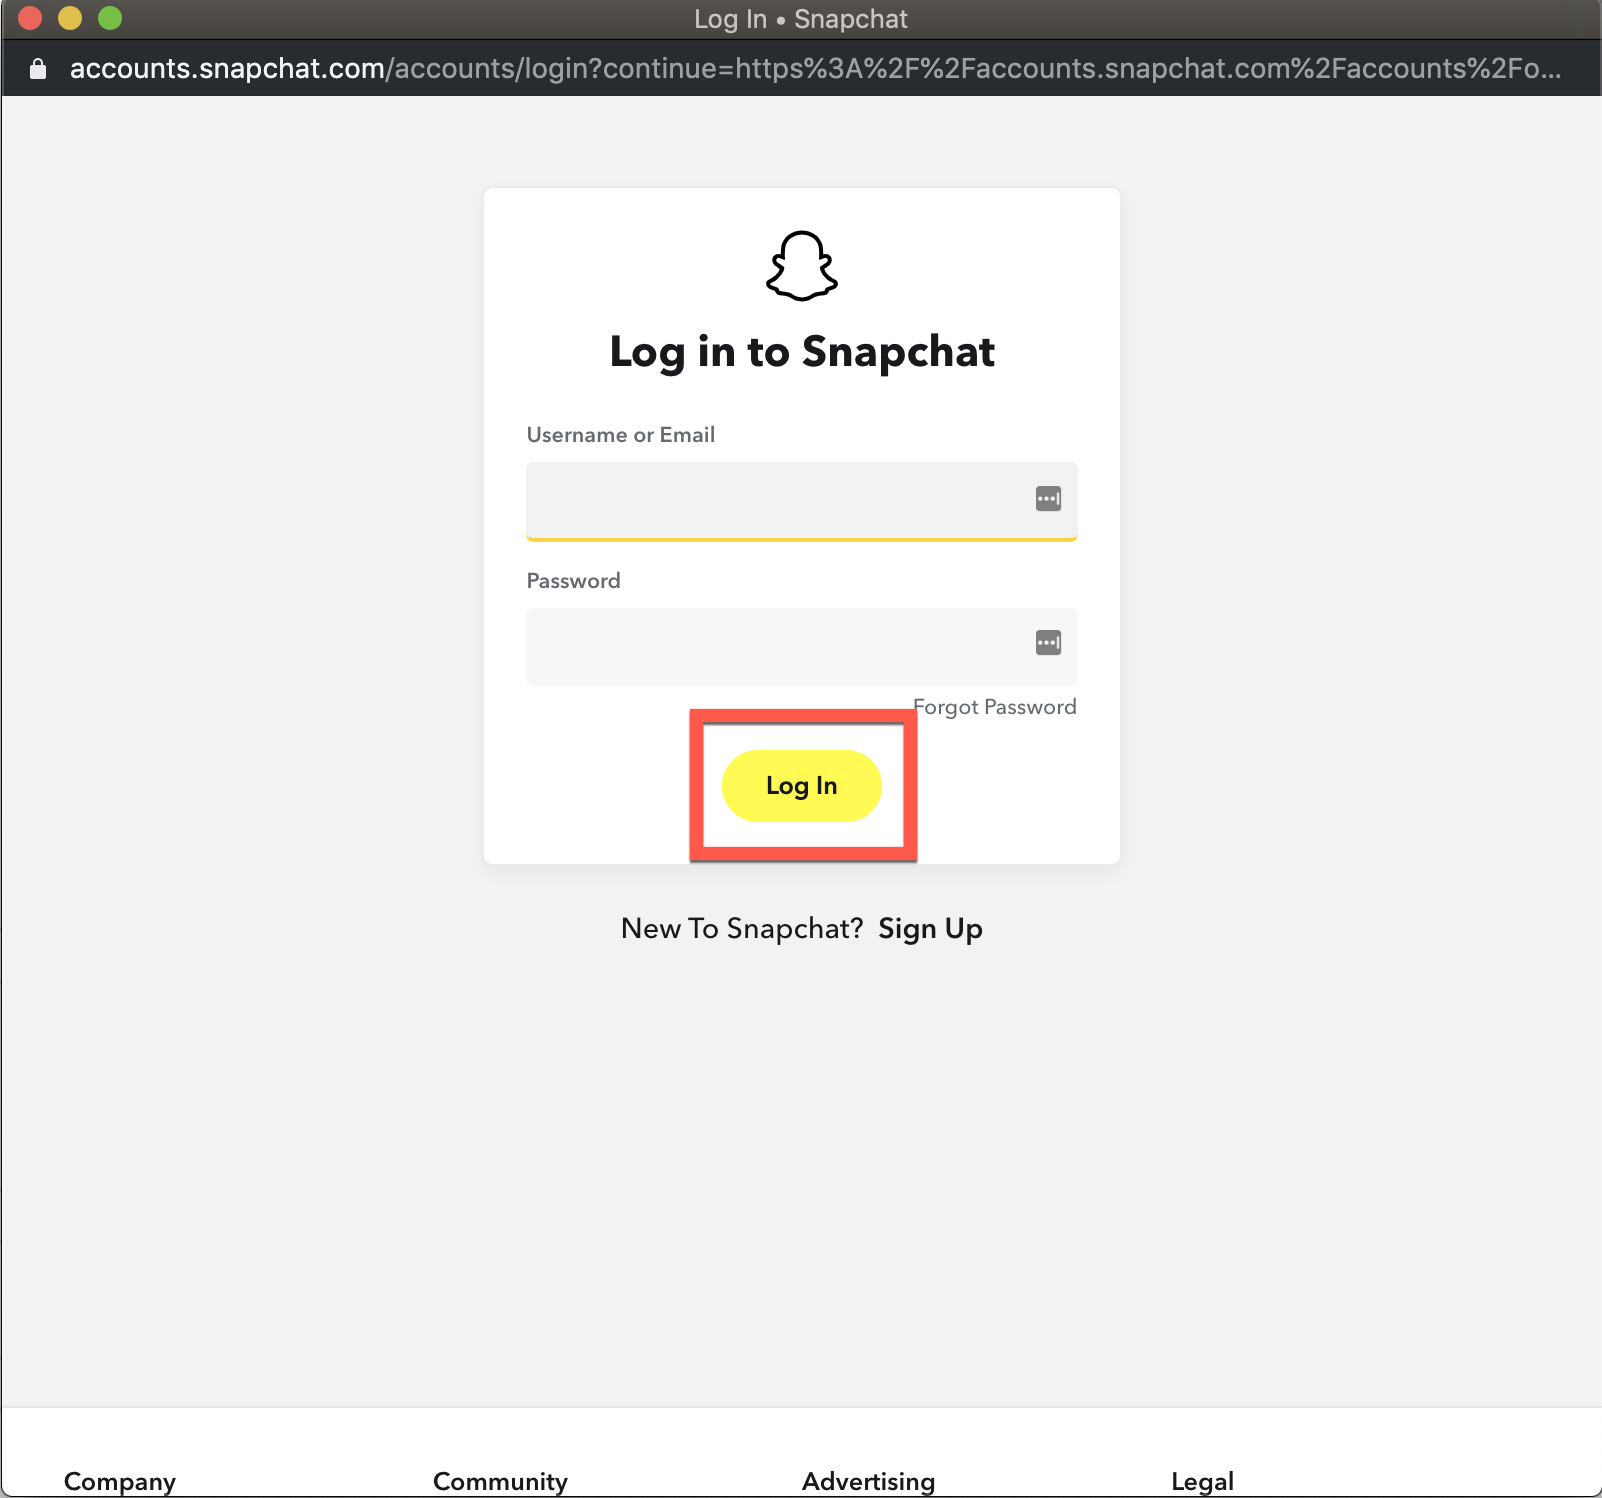
Steps to perform OAuth for Snapchat:
After the Snapchat login dialog appears, enter your credentials and then click Log in.
From the dialog that appears, click Continue to grant access.
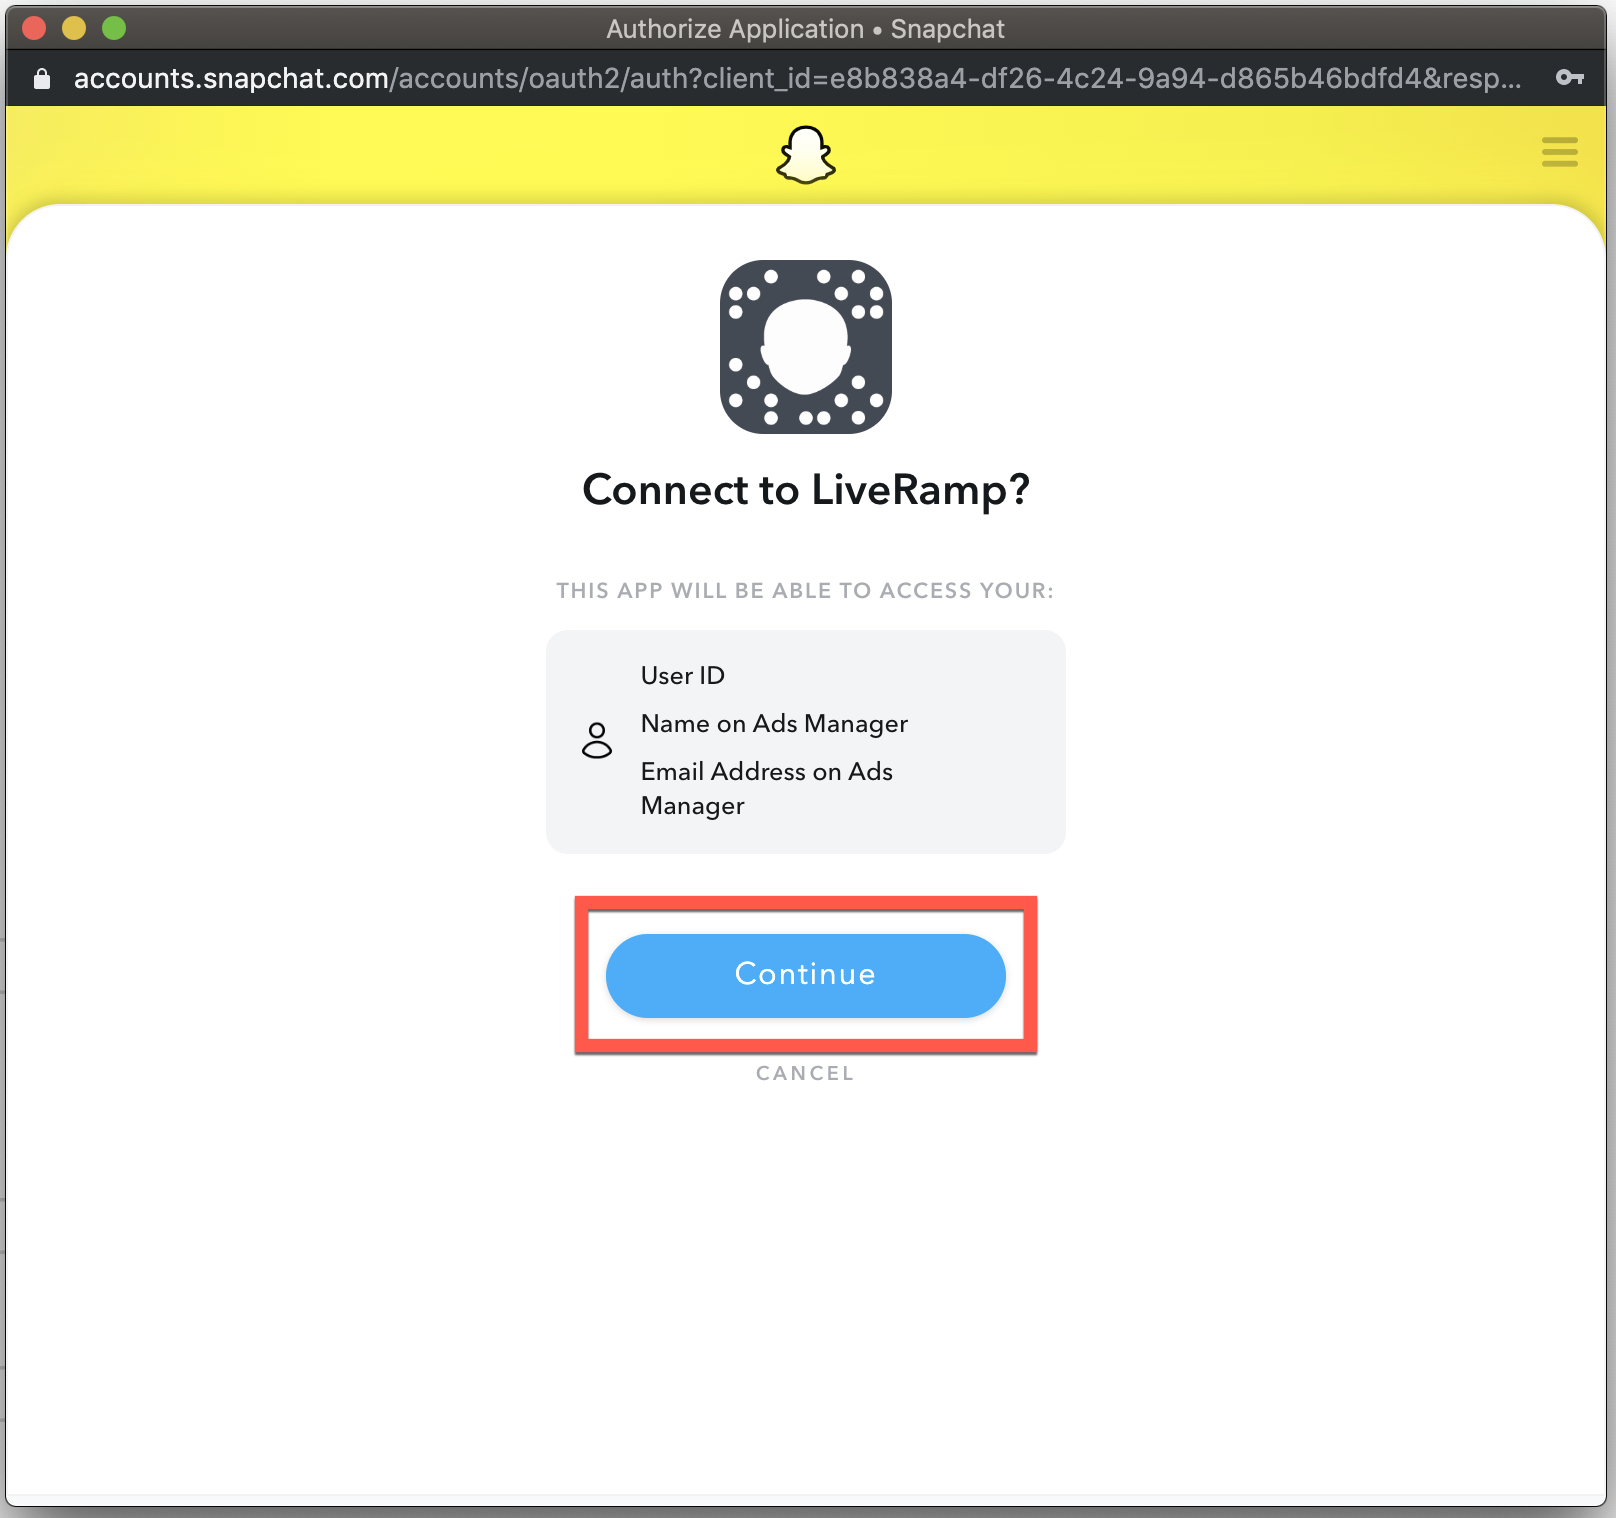
From the dialog that appears, click Continue to return to the destination account screen, where you should see the blue success banner at the top of the screen.
If you receive an authorization error, confirm that the account is a Business Ad Account and that the user performing the authorization has the appropriate permission level.
More info on Snapchat User Roles and Permissions can be found here.
Perform OAuth Authorization for TikTok
Permission level required: The TikTok account needs to have either the "Ad Account Operator" or "Ad Account Admin" permission level.
Steps to perform OAuth for TikTok
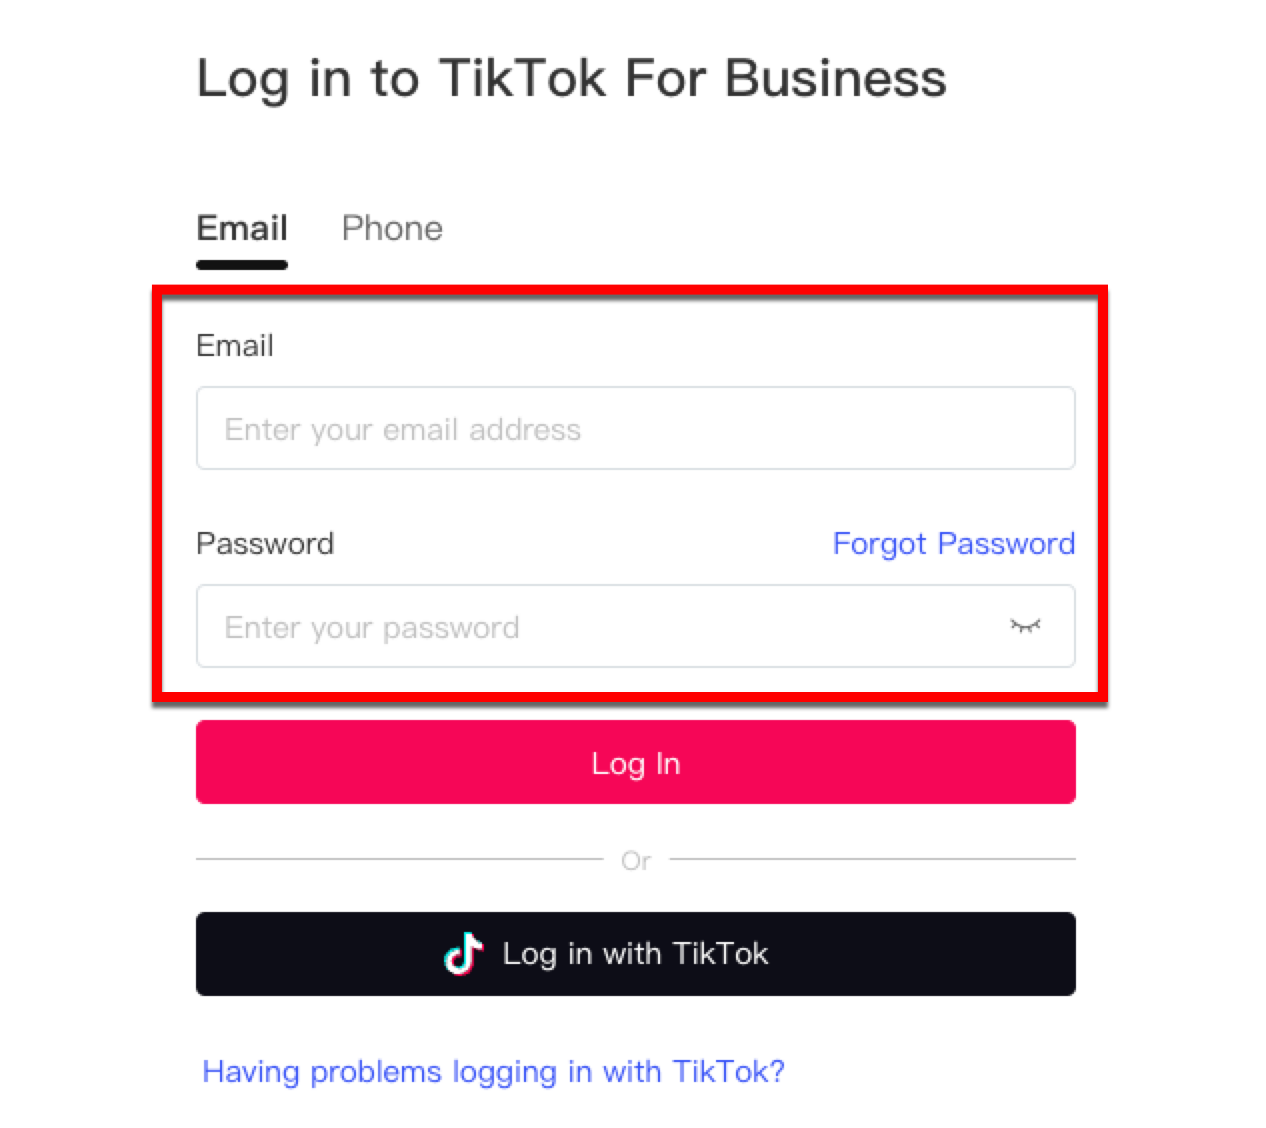
After the TikTok for Business login dialog appears, enter your credentials and then click Log in.
From the dialog that appears, click Confirm.
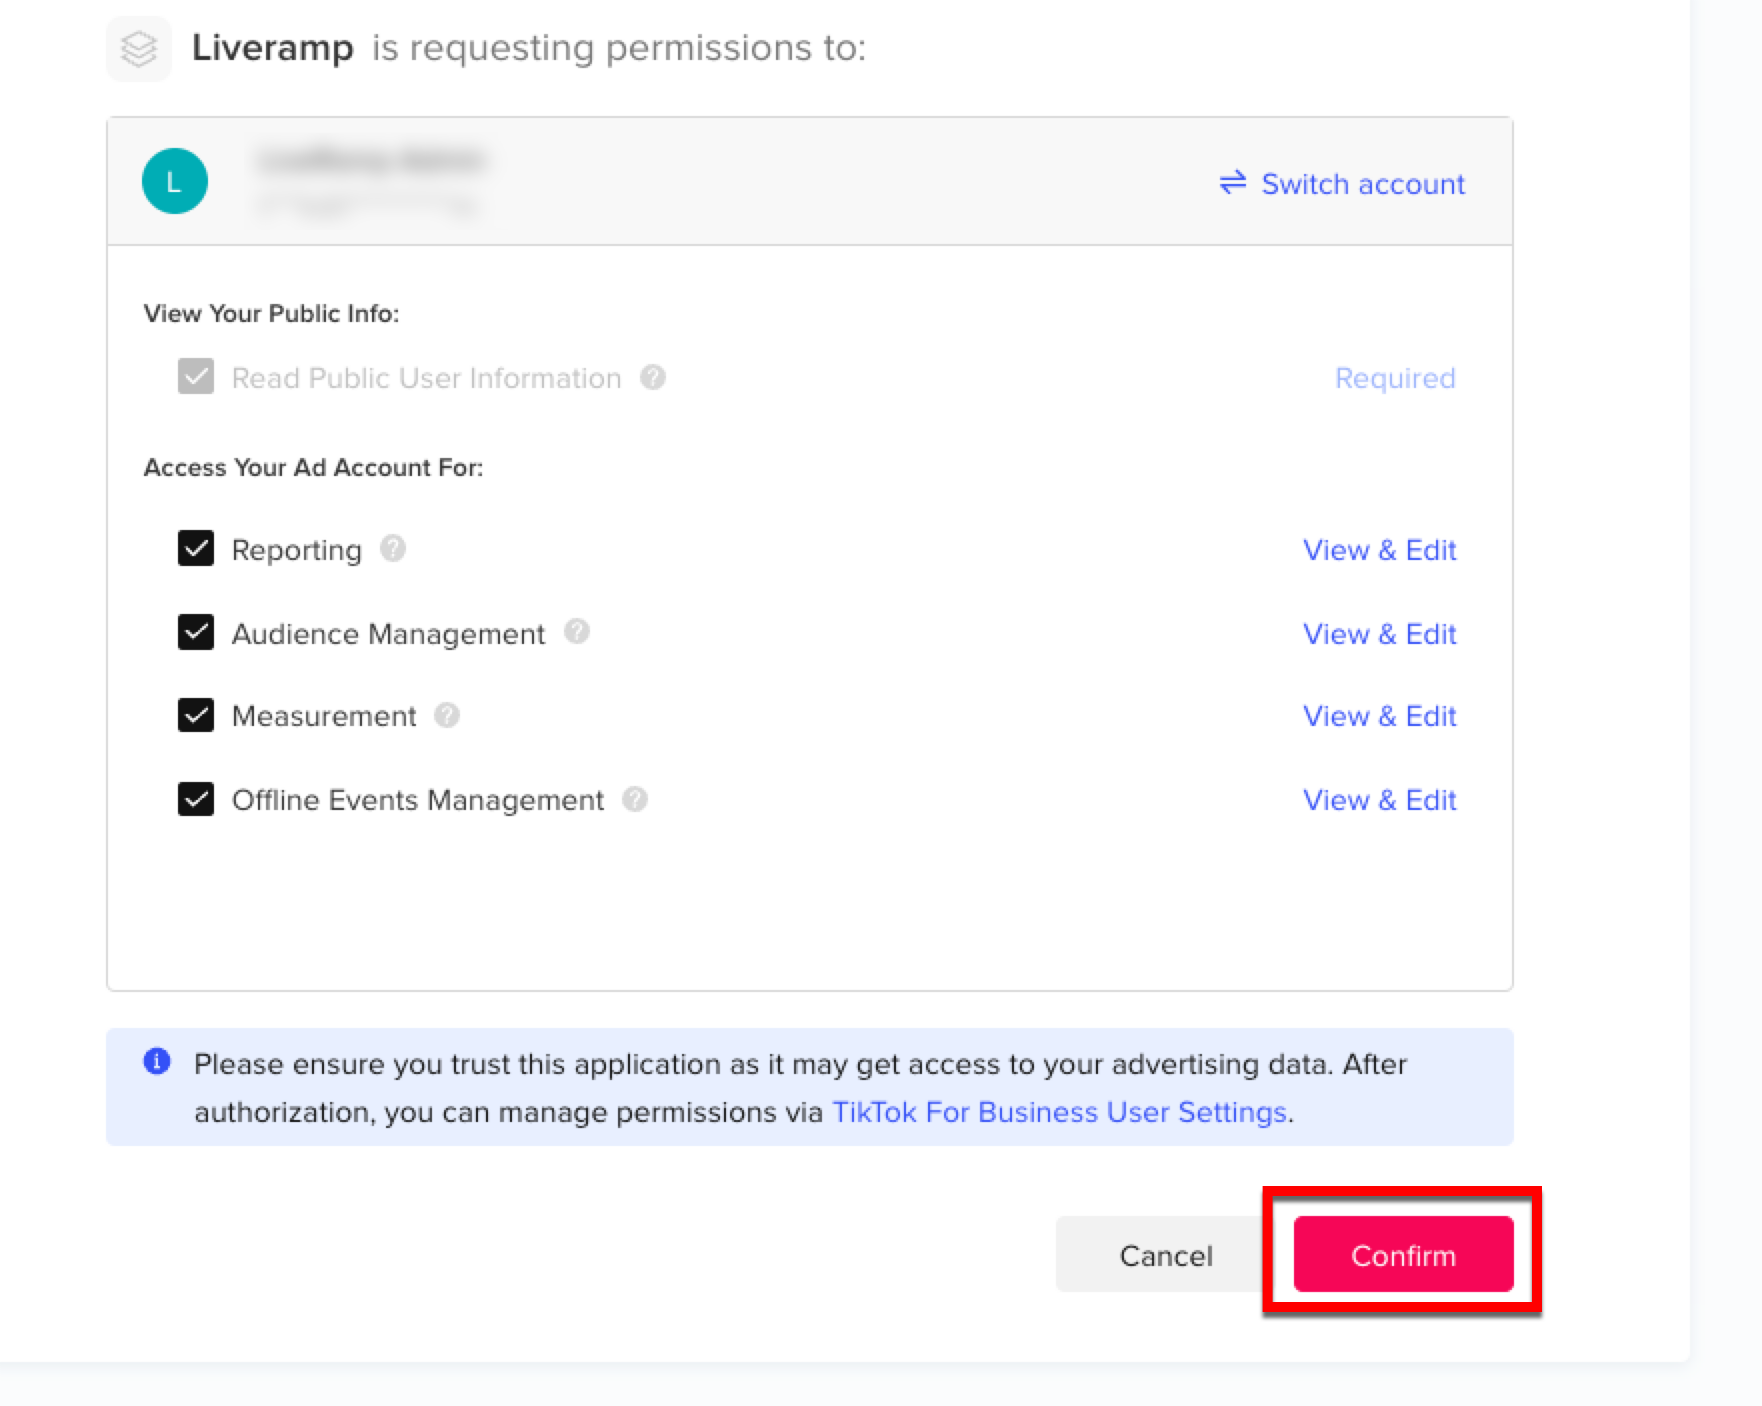
Note
Do not uncheck any of the check boxes.
Perform OAuth Authorization for X (FKA Twitter)
OAuth expiration: None
Required fields:
Account ID: Alphanumeric string of characters that indicate the ads account ID that the segments will be sent to.
Ttl In Days: Number of days that users added to a segment will be active in the segment. The default value is 180 days. This can be changed after the DA is created.
Steps to perform OAuth for X:
After the X authorization dialog appears, enter your X credentials and then click Sign In.

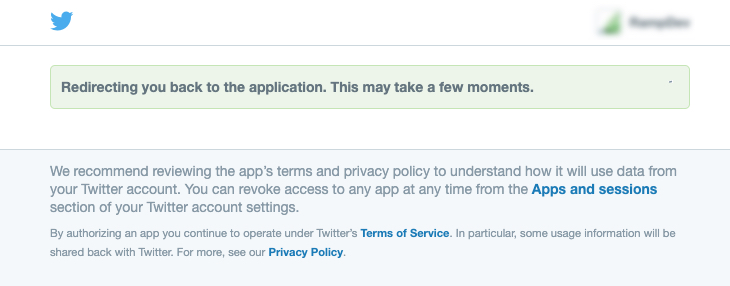
You’ll briefly see a redirect dialog.