Implement ATS Direct
Once you create an ATS Direct configuration, you must integrate an existing ATS for Web configuration that is tied to the same placement with ATS Direct.
To create a new ATS for Web configuration, see Create an ATS Configuration.
Integrate ATS Direct with ATS for Web
When ATS Direct is implemented through ATS for Web, ATS Direct will send the ATS Envelope to LiveRamp and cache the matching segments in local storage to minimize latency on your website.
Go to ATS → Web and select an ATS configuration.
Select Integrations and then click .
Select ATS Direct.
Click .
You are now ready to start working with deals in Console. Optionally, you can use the existing ATS.js functions to retrieve matching segments.
Configuring Google Publisher Tag
If you're working with Google Ad Manager (GAM), you must add the ATS Direct key that is passed from the ATS Direct module to the Google Publisher Tag. The key will ensure that the segment IDs (values) are registered correctly in GAM. If you haven't yet, make sure you've created the ATS Direct key value in GAM.
You can also customize and generate ad tags from the GAM interface without having to edit code manually.
Sign in to Google Ad Manager.
Go to Inventory → Ad units.
Find the ad unit to which you want to add the ATS Direct key and click its name to see details.
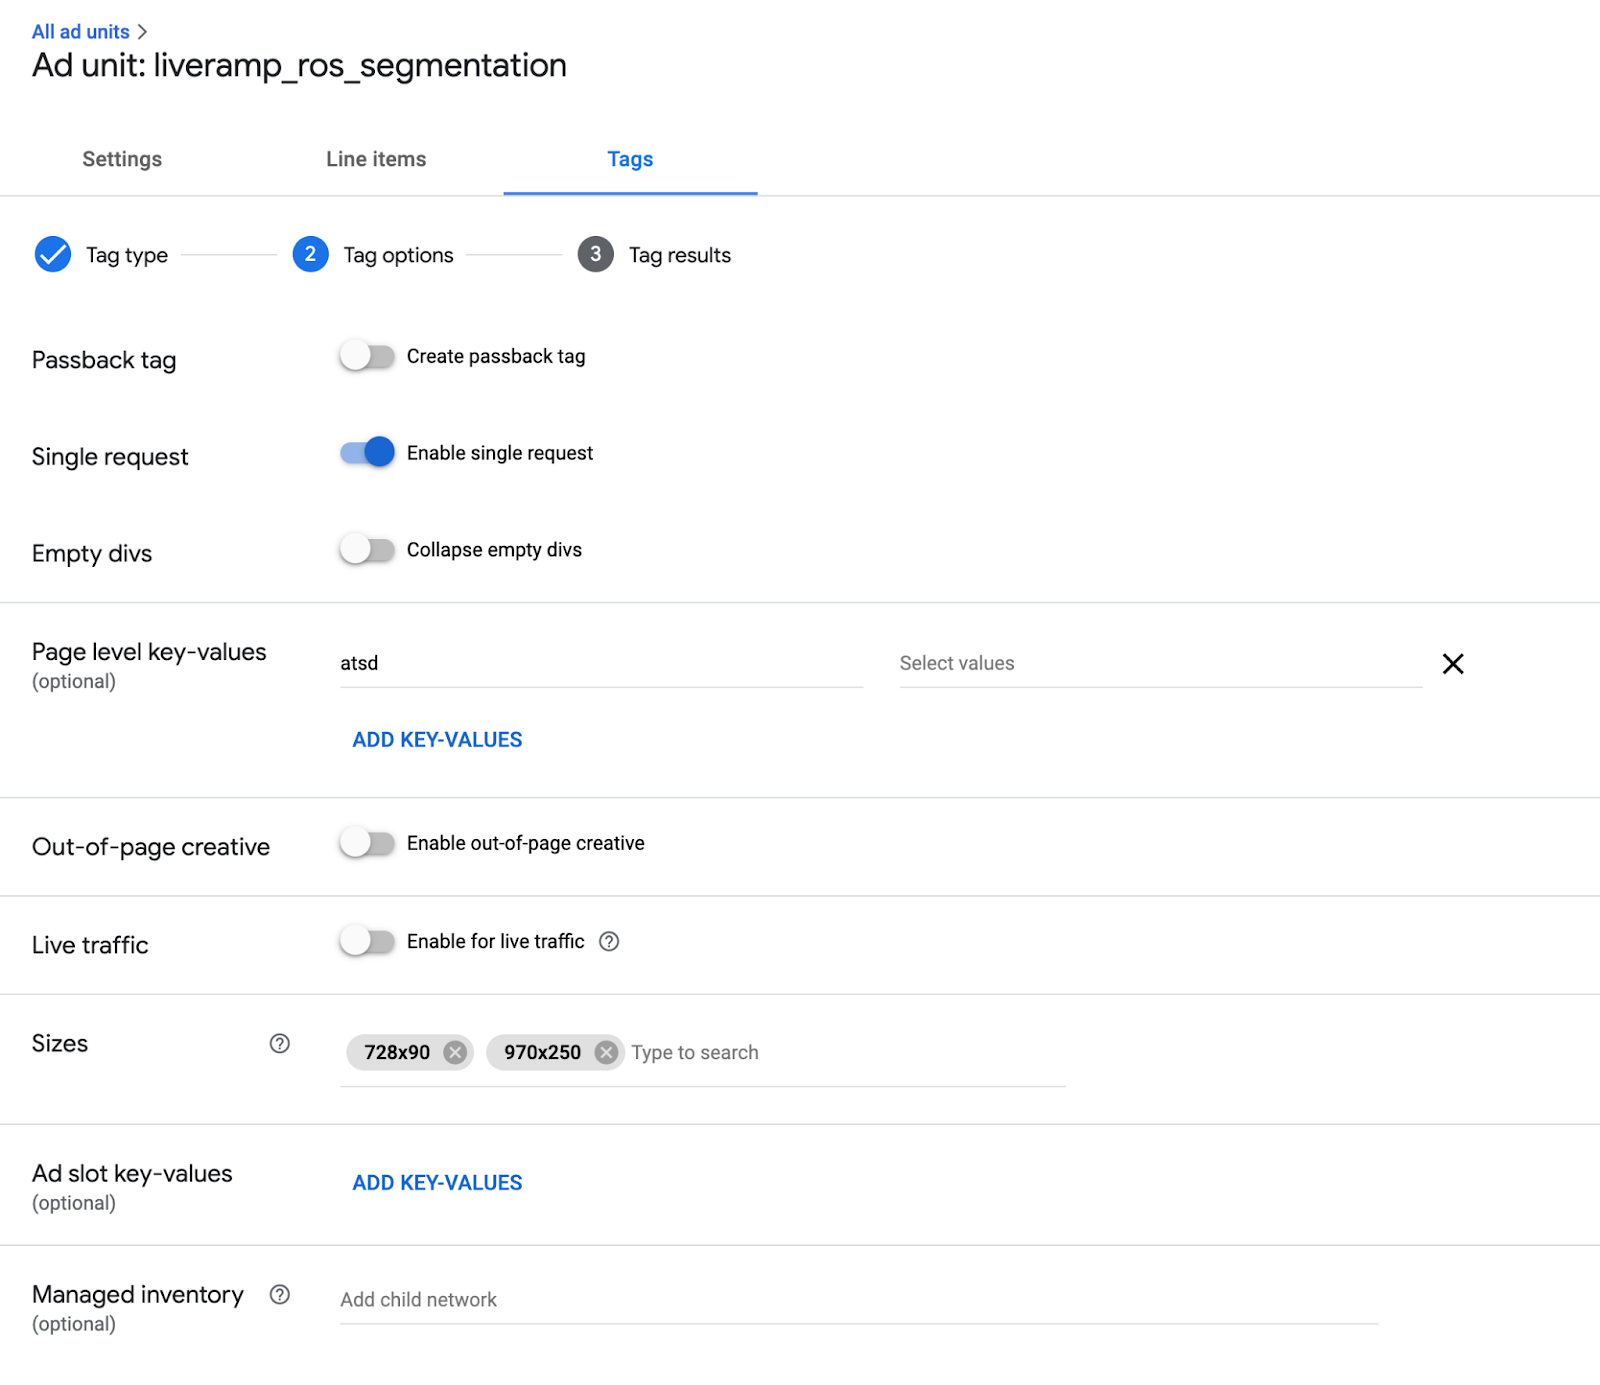
Select the Tags tab on the ad unit details page.
Enter "atsd" as a key value in the Page level key-values field.

To learn more about key-value targeting with GPT, see Google's article "Use key-value targeting with GPT".
Code example:
<script async src="https://securepubads.g.doubleclick.net/tag/js/gpt.js"></script>
<script>
  window.googletag = window.googletag || {cmd: []};
  googletag.cmd.push(function() {
    googletag.defineSlot('/1234/liveramp_ros_segmentation', [[728, 90], [970, 250]], 'div-gpt-ad-1655556672-0').addService(googletag.pubads());
    googletag.pubads().enableSingleRequest();
    googletag.pubads().setTargeting('atsd', []);
    googletag.enableServices();
  });
</script>