Build a Query with the Advanced Audience Builder
With the Advanced Audience Builder, you can build a query to get user counts for selected products sold in selected locations under selected criteria. You can also create an audience from that query (by adding it to the taxonomy) to activate that audience at your desired destinations (or use that audience as a component of a new custom audience).
LiveRamp will assist you with the ingestion of the underlying transaction data into a schema called the "Retail Data Model" so that the mapping maintains the necessary key fields and valid field data that Advanced Audience Builder requires.
Note
Users who have the LSH Admin, LSH Data Scientist, or LSH Campaign Planner personas can access the Advanced Audience Builder if it has been enabled for your account.
The query-building process consists of the following steps:
Enter a unique name for the query.
Select the desired criteria:
Note
A minimum of one criterion from the options below must be selected to run the query.
Select any desired brands, products, or product categories: You can scroll or search through the list of products or product categories, or you can upload a single-column CSV file of product barcodes. If you do not make any selections, data on all products will be returned.
Select any desired location type: You can choose from "E-Commerce" or "In-Store." If you select "In-Store", you can select from several store types or you can upload a single-column CSV file with the site IDs of the desired locations. If you do not make any selections, data on all locations will be returned.
Select any desired date and time range: You can choose either a fixed or dynamic date range. You can also set a beginning time (the "from" time) and/or an ending time (the "to" time). If you do not make any selections, data will be returned for the entire time range available.
Select any desired days of the week.
Select any desired metric to target and the values to use for that metric: You can choose from "Amount Spent", "Units Bought", or "Visits." For the selected metric, you can set minimum and maximum values, a percentage range, or the "per year", "per month", "per week", or "per day" level. If you do not make any selections, all available data that meets the other selected criteria will be returned.
Choose whether you want to create a custom audience from this query (by adding it to the taxonomy) and, if so, whether you want the query to be updated (for queries with dynamic date ranges only).
If you selected the "Keep this query updated" option, then LSH periodically updates your data according to the selected schedule. Updates of the query data are based on the time period you selected. Updates are made to products, categories, and brands.
The updates occur as follows:
For a period of 0-30 days, the query is updated daily. Only the last six months of daily data are retained.
For a period of 31-90 days, the query is updated weekly. Only the last two years of data are retained.
For a period of 91-360 days, the query is updated every 15 days.
For a period of 361 days or greater, the query is updated every 30 days.
Run the query.
See Steps to Build a Query for complete information.
In the left navigation bar, click Welcome and then click Advanced Audiences.
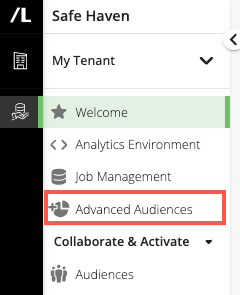
Click .
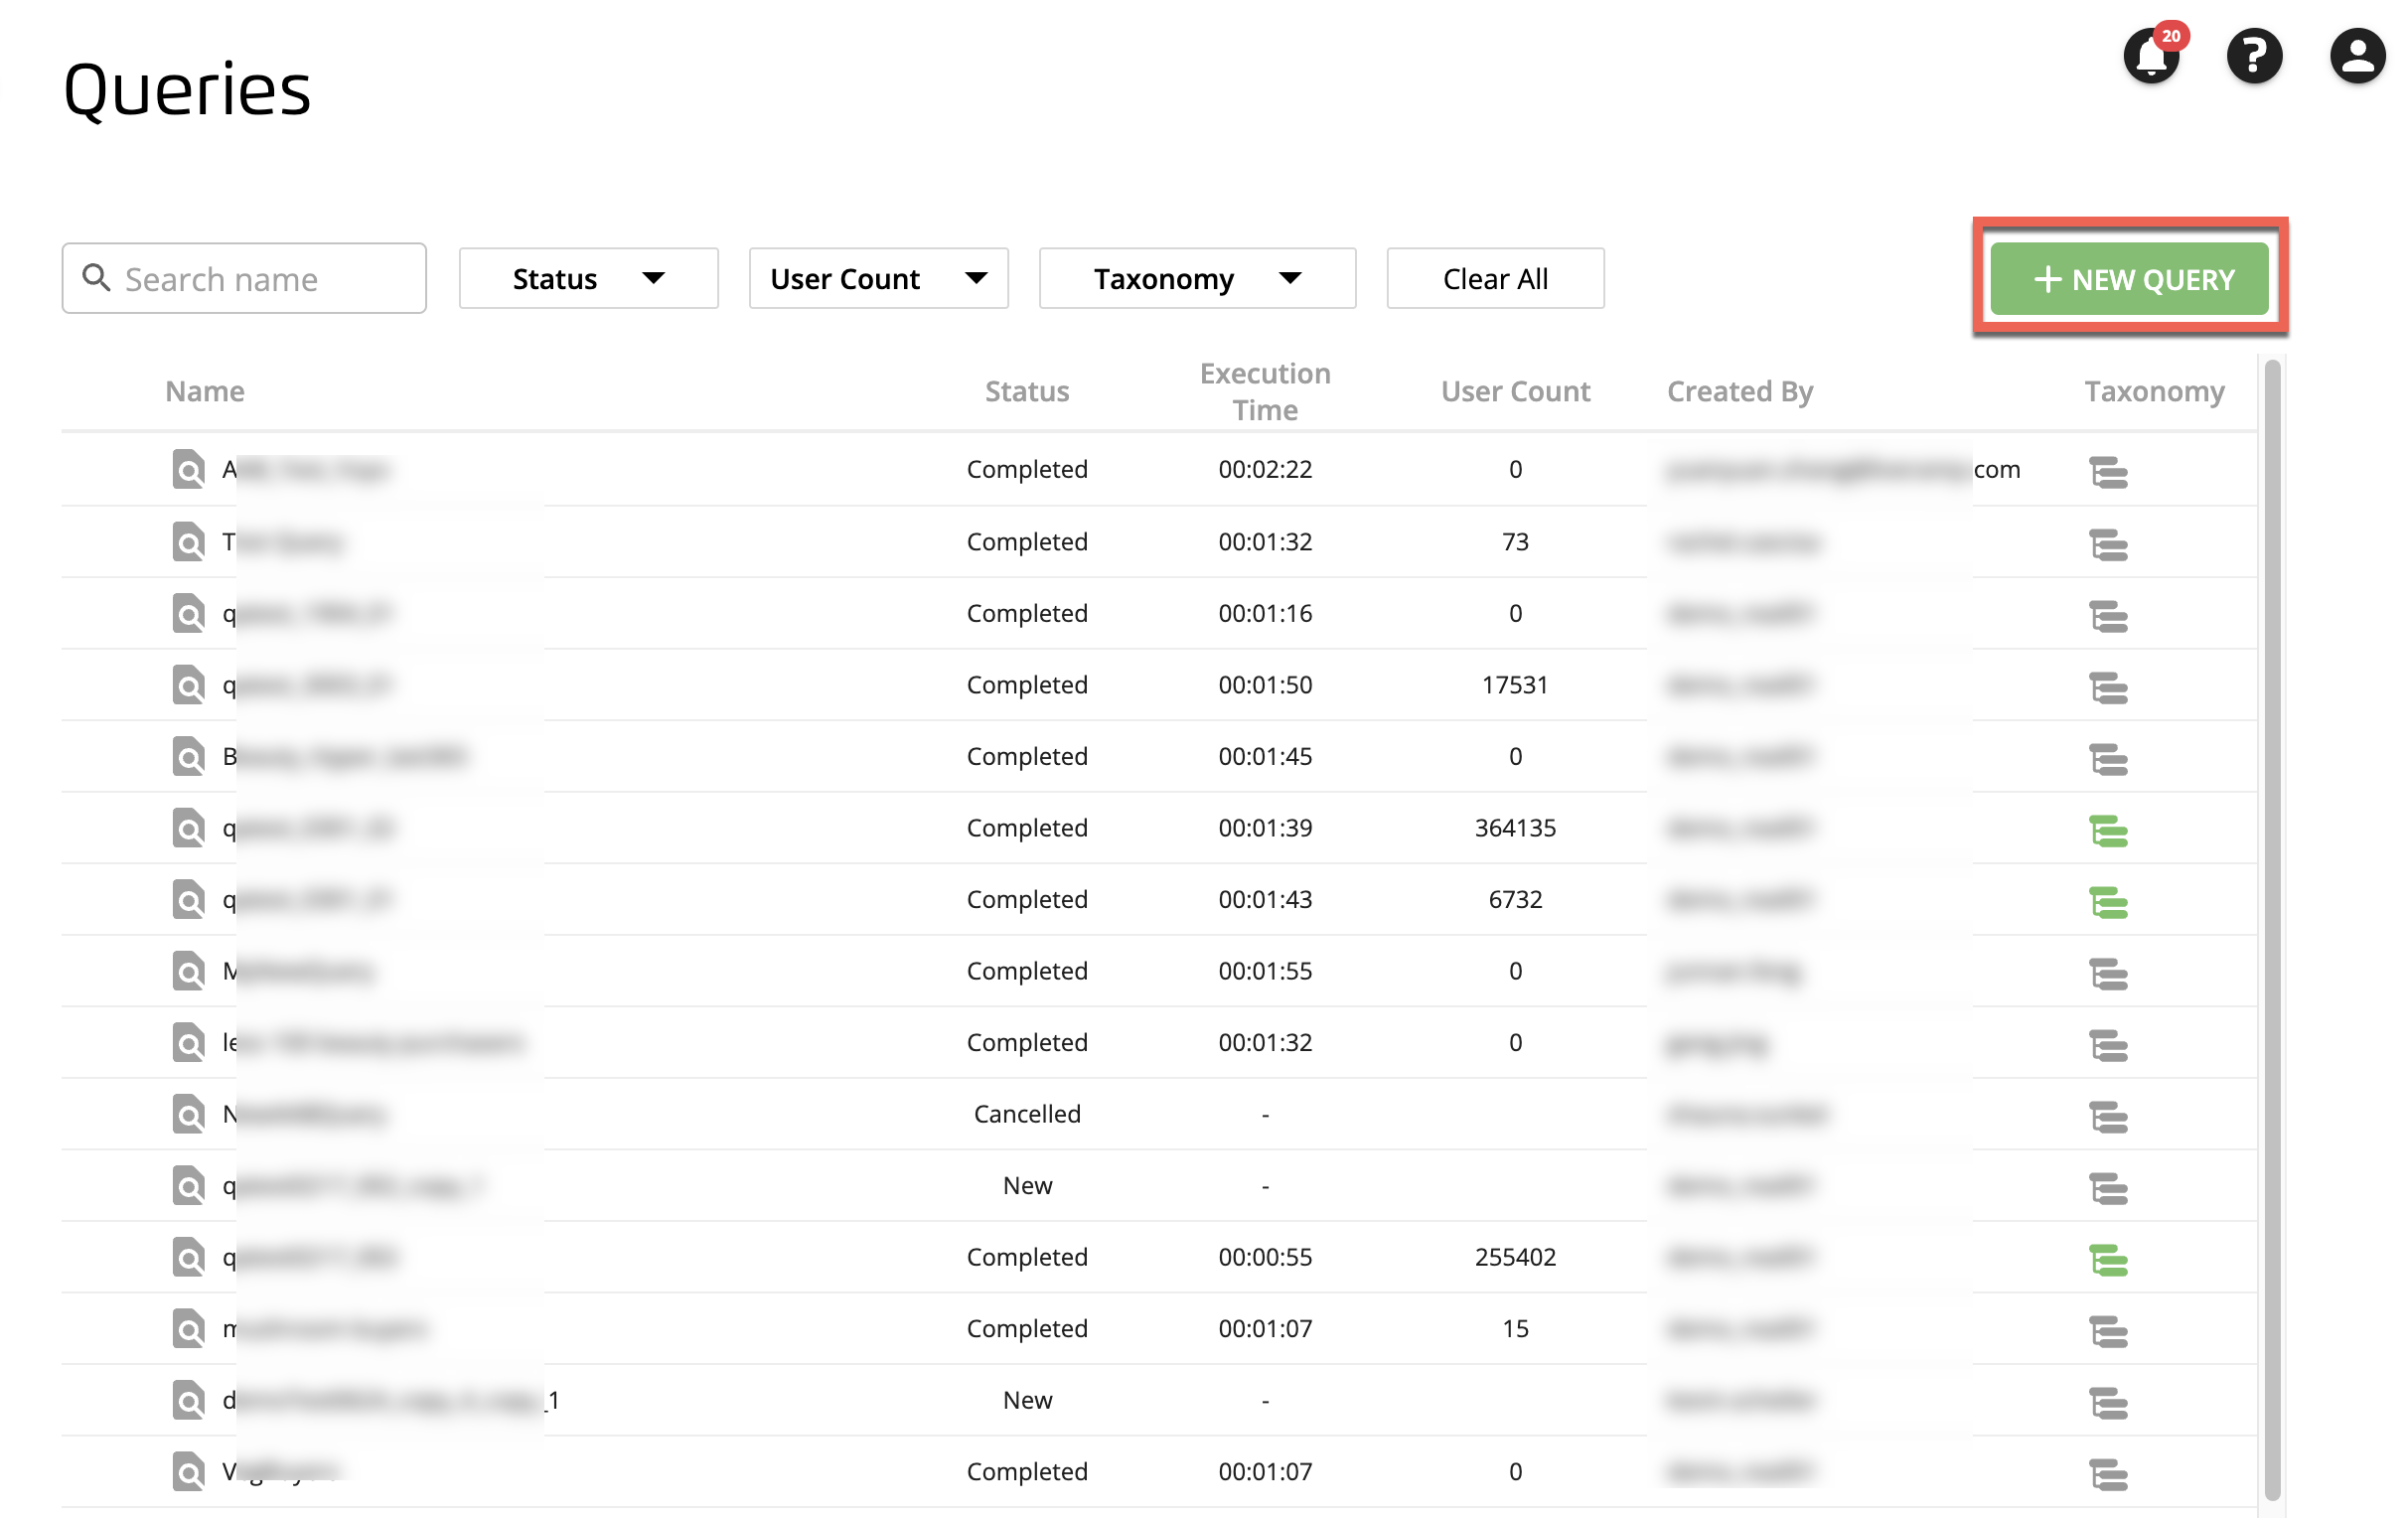
The Product tab of the New Query page opens.

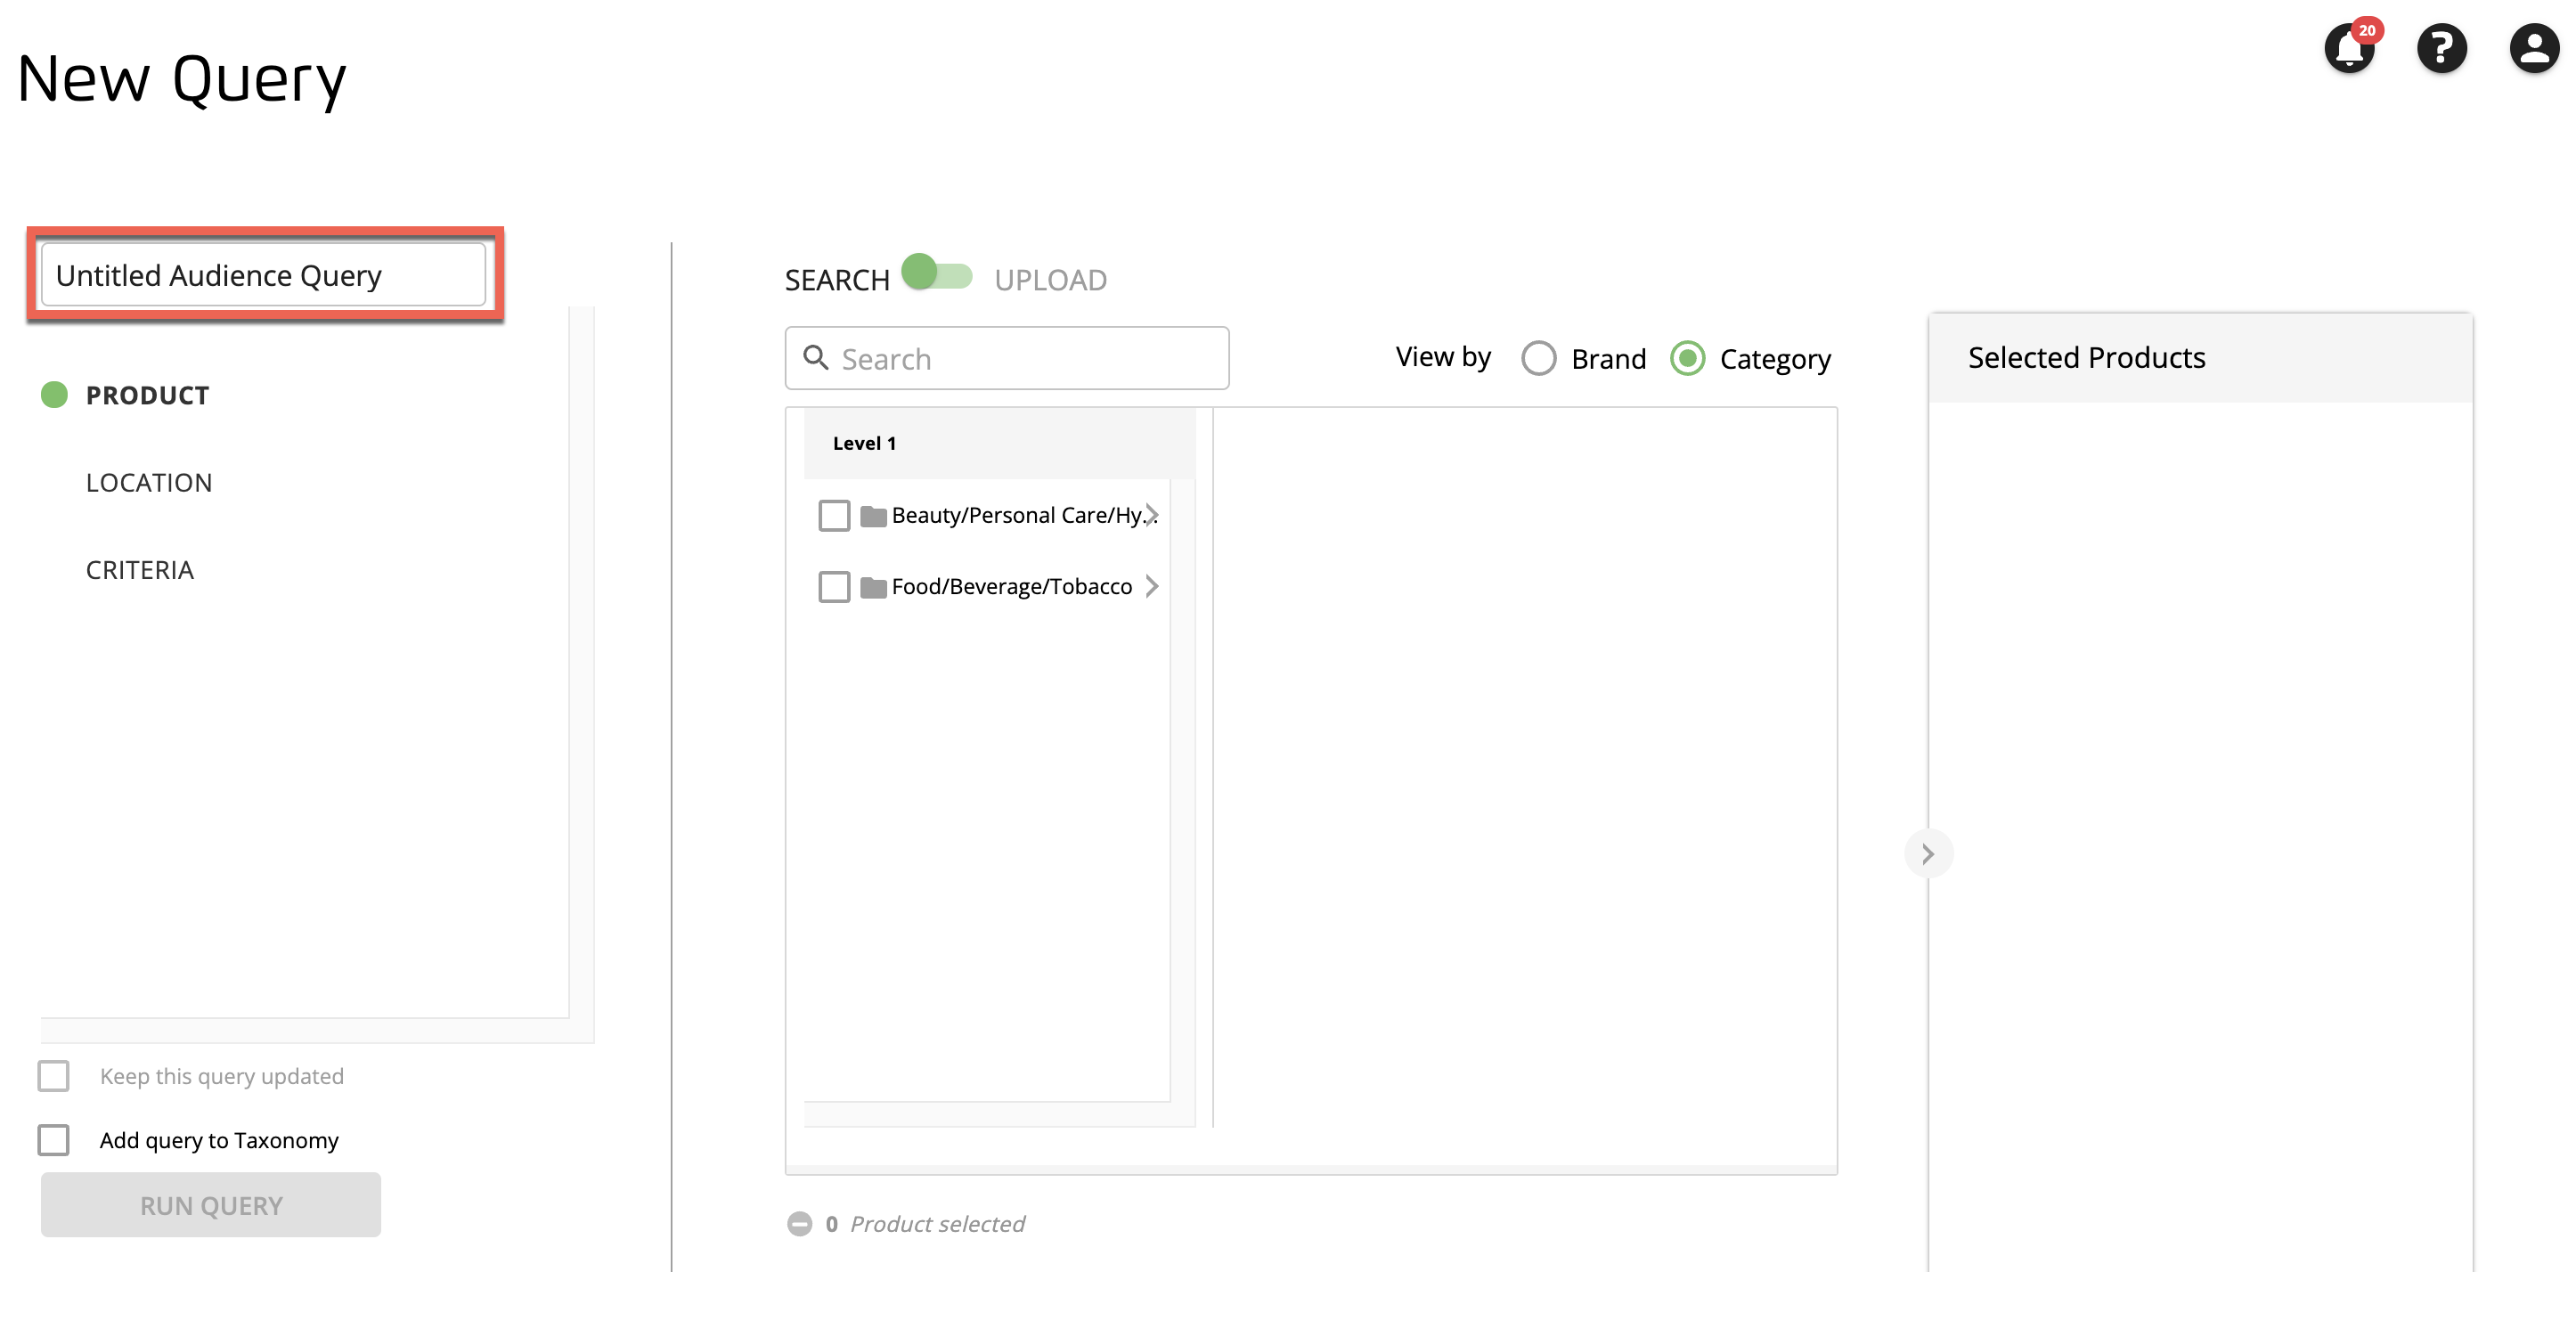
Enter a unique name for your query in the name field.
Note
You cannot run the query until a query name has been entered. Query names can contain letters, numbers, underscores, and spaces. Query names cannot contain special characters. The maximum length of a query name is 240 characters.
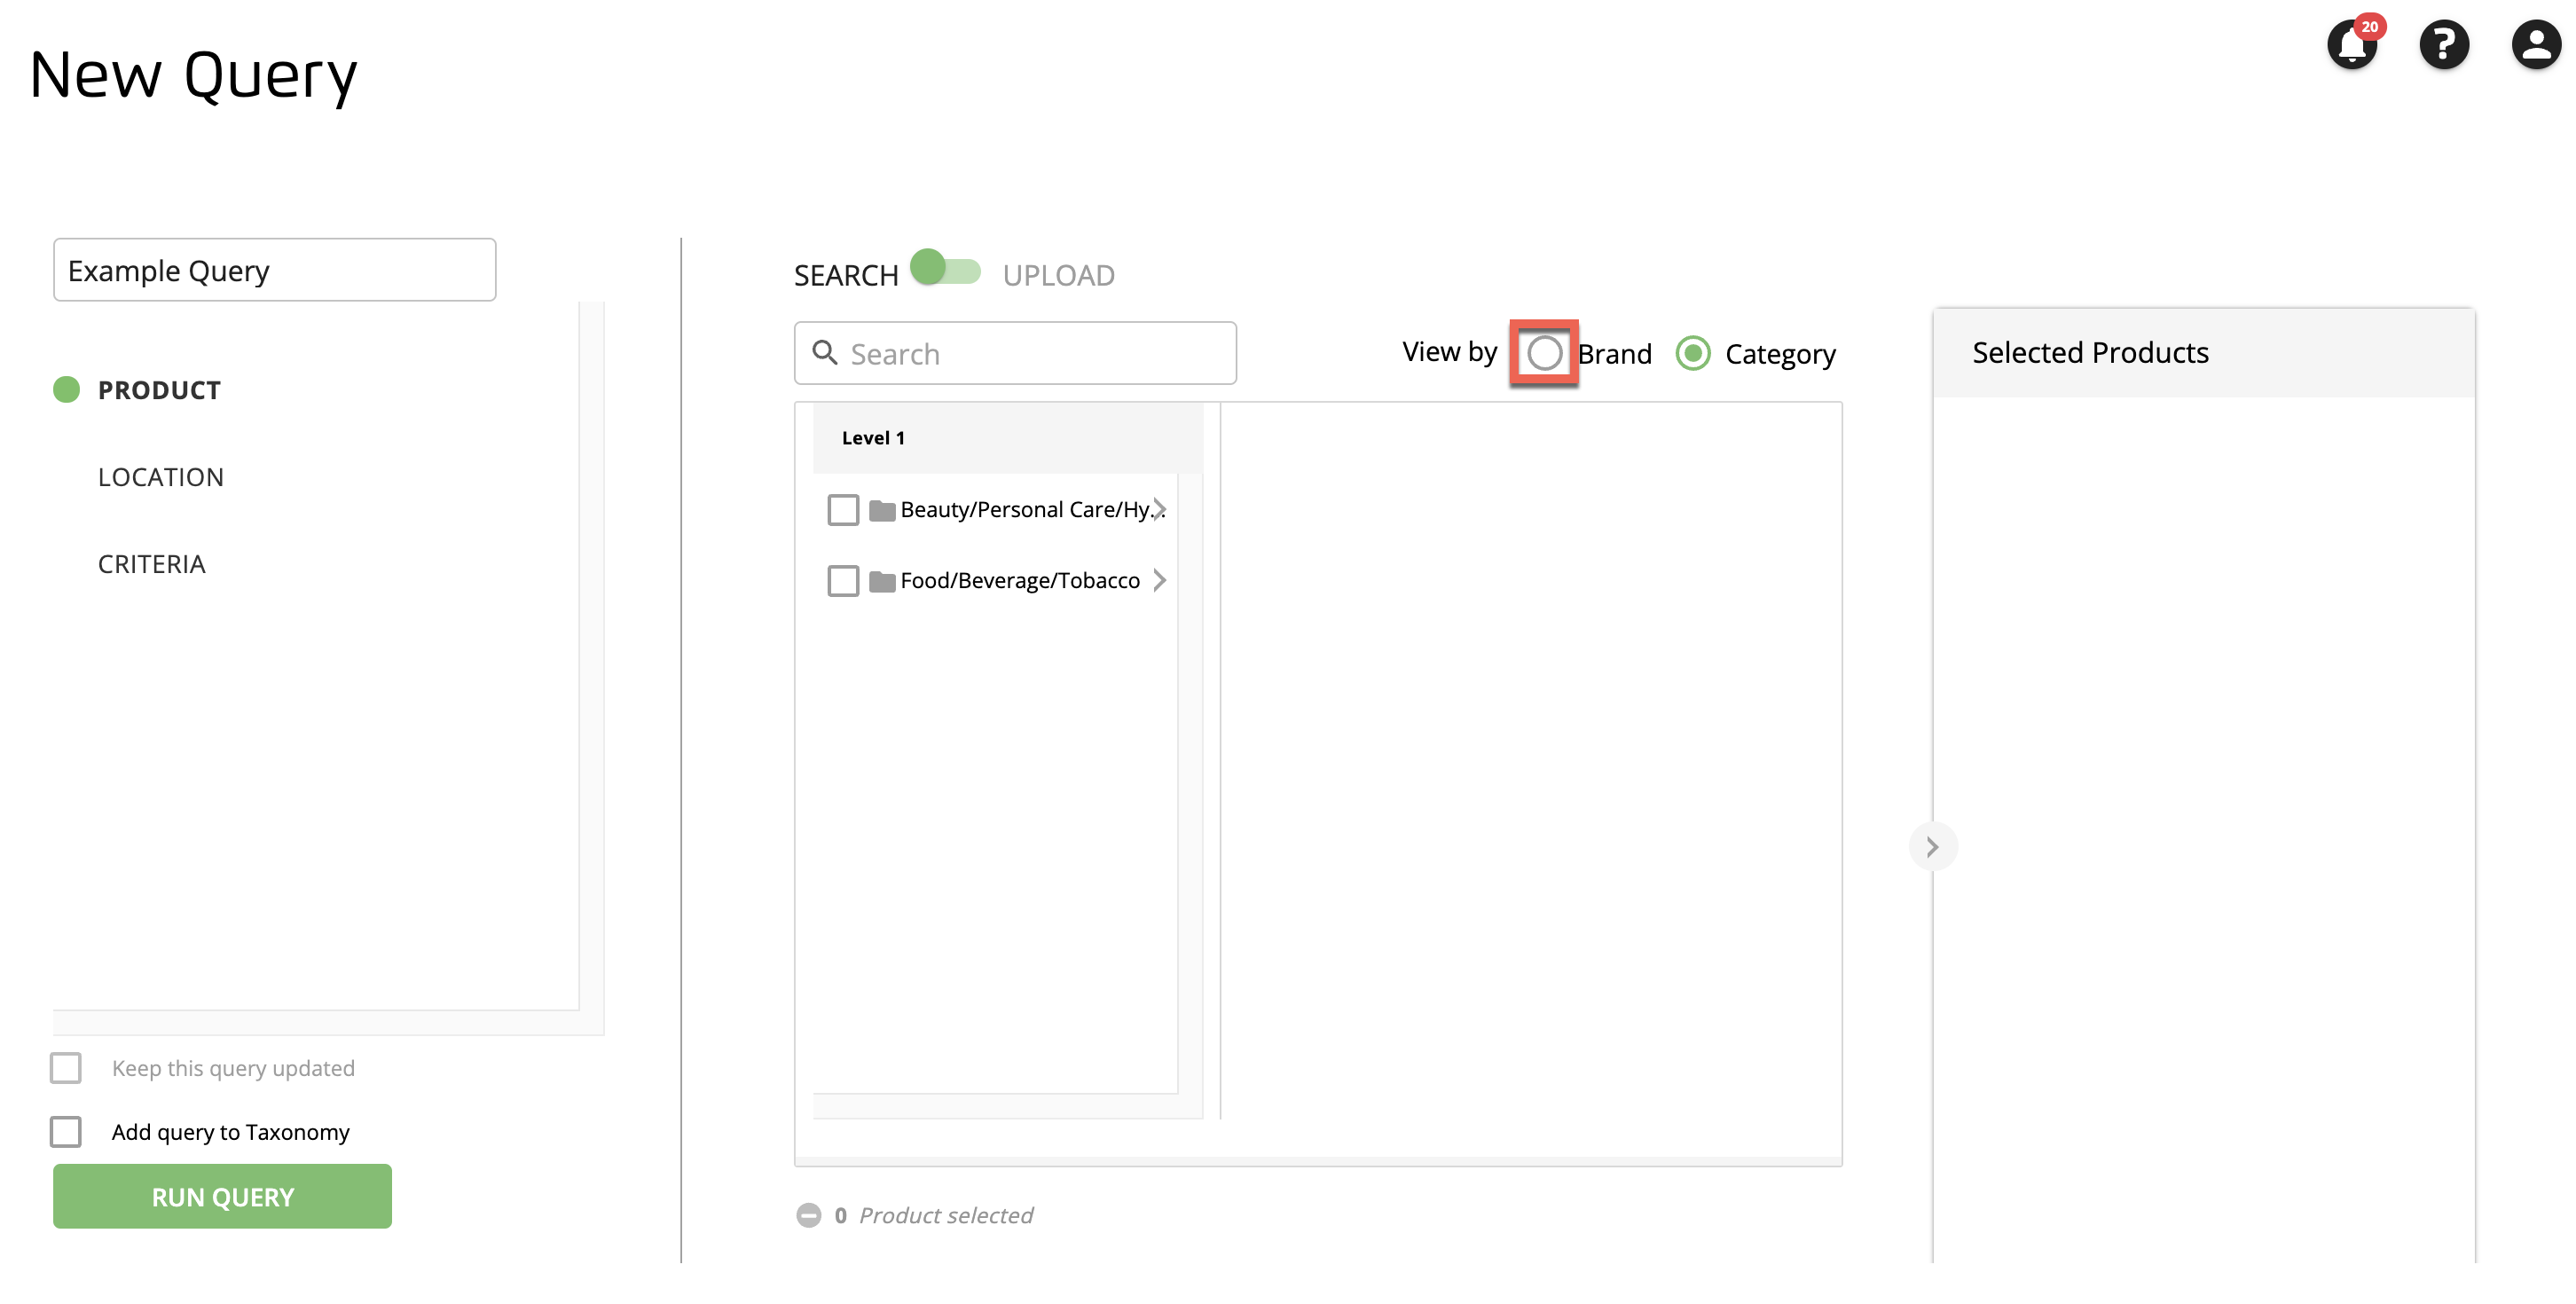
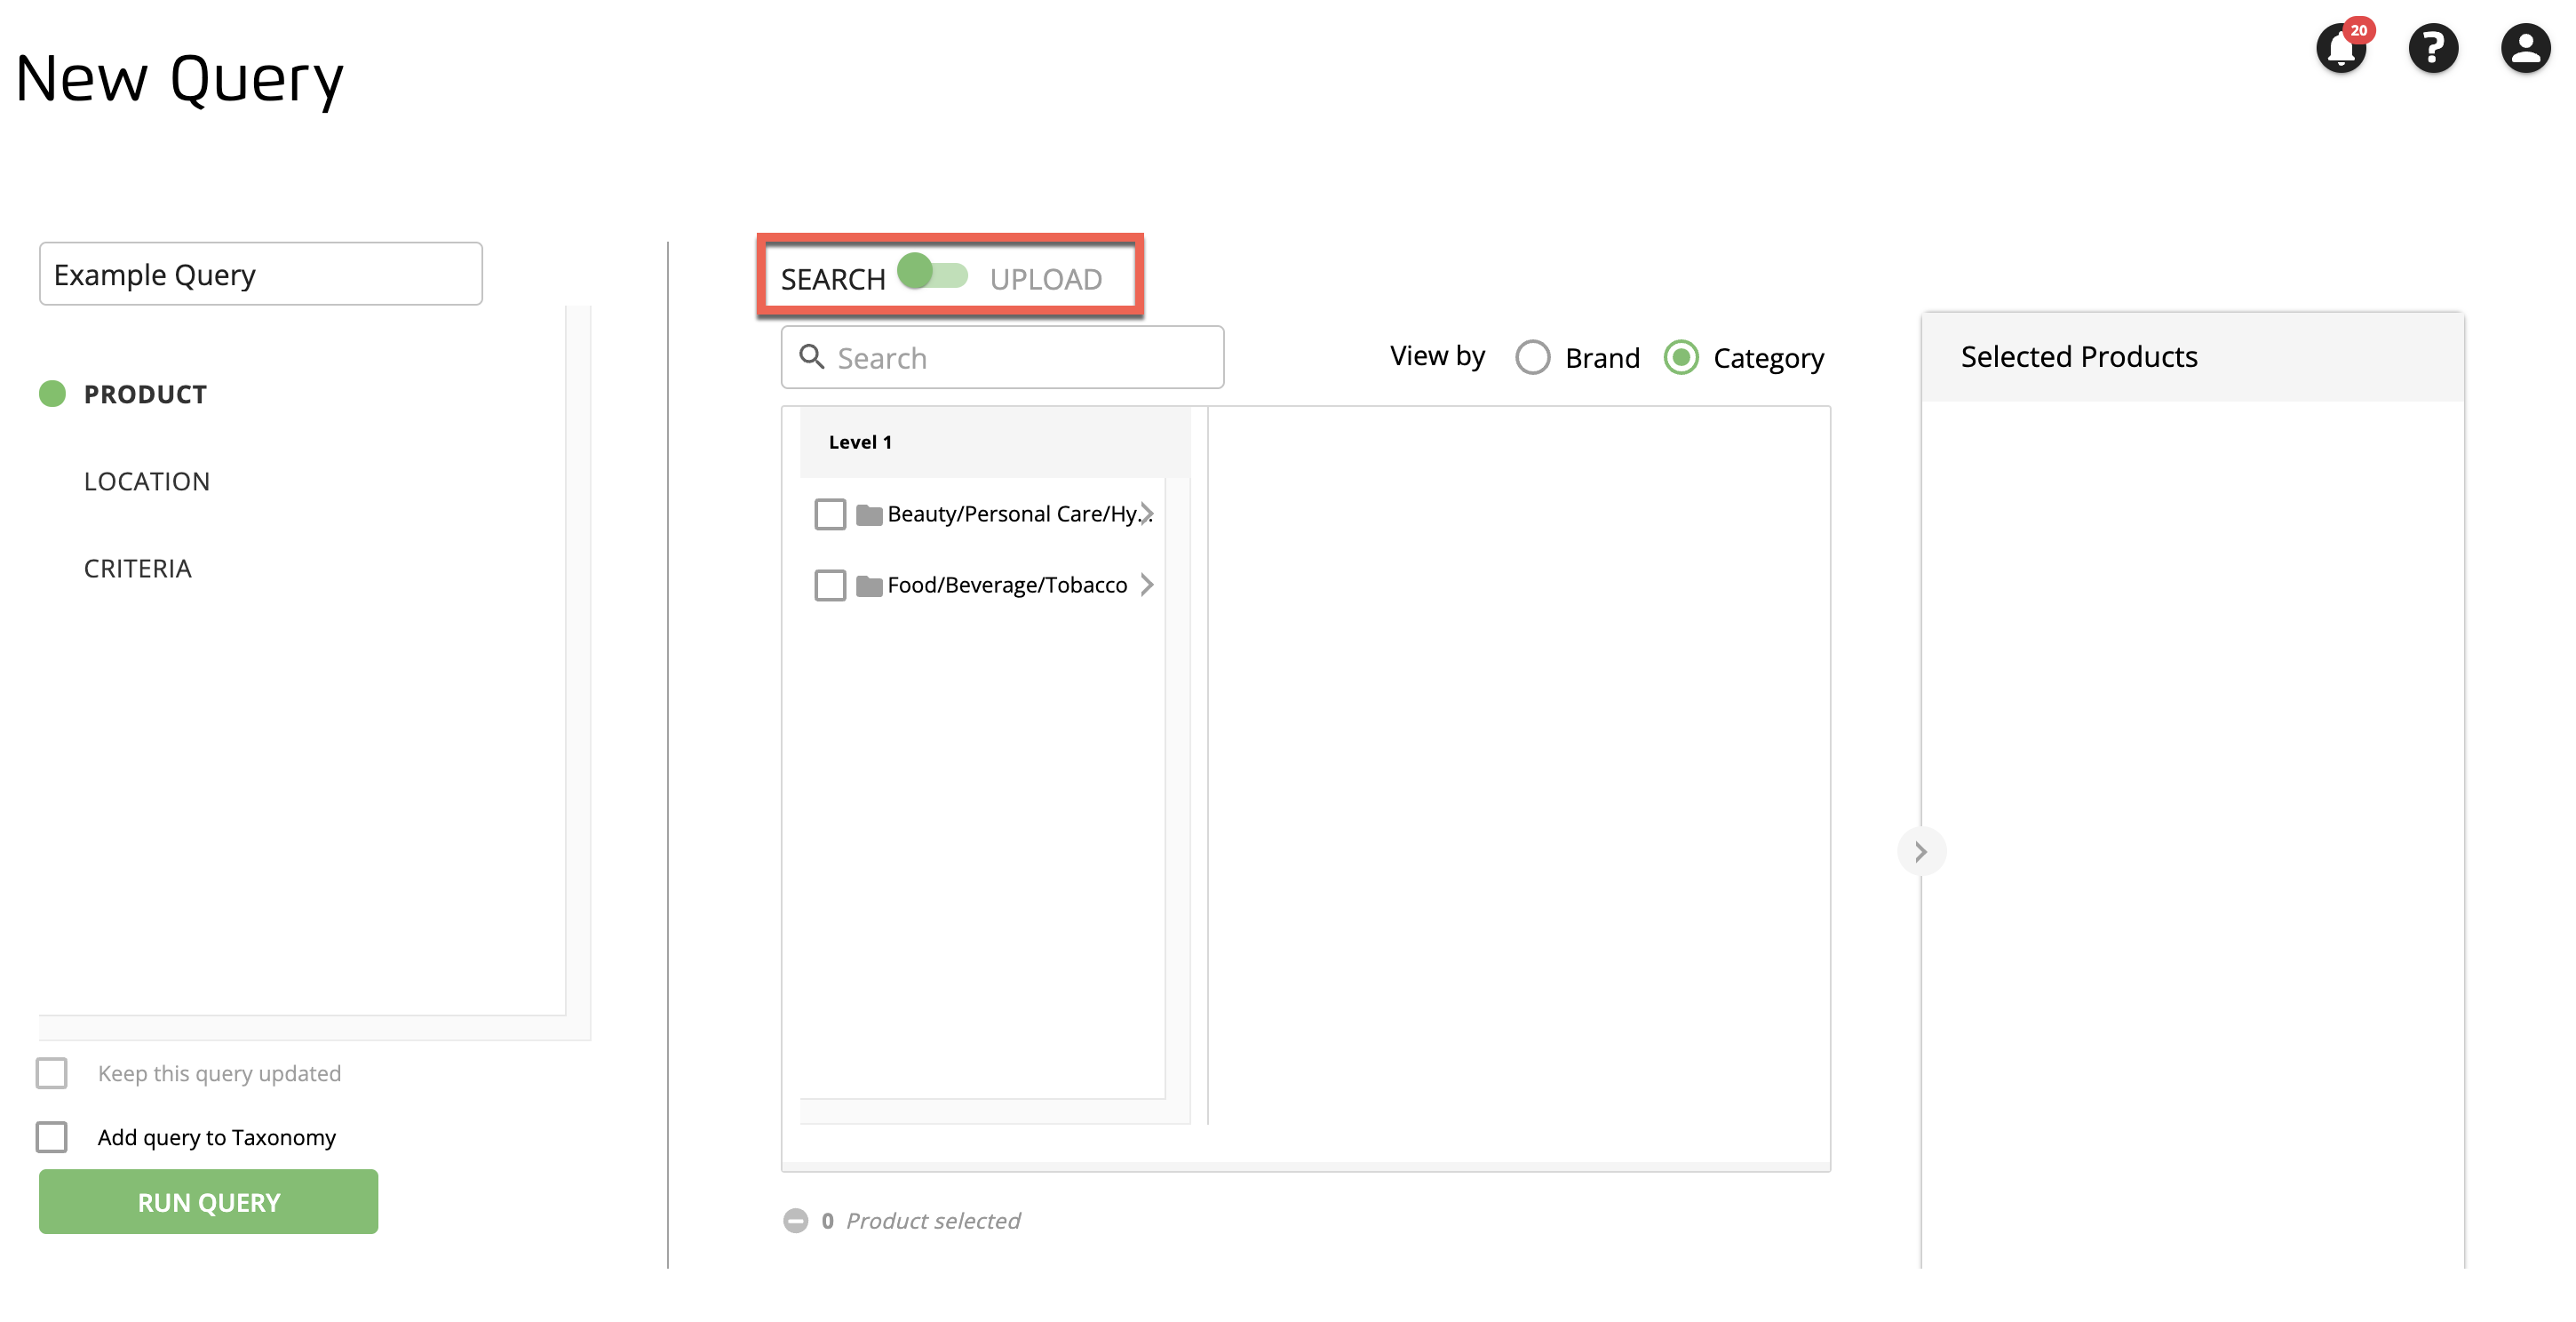
If you want to select specific brands or products, rather than product categories, click the Explorer dropdown list and select "Brand Explorer."
Note
To select product categories, you do not need to change the default setting for the Explorer selector.
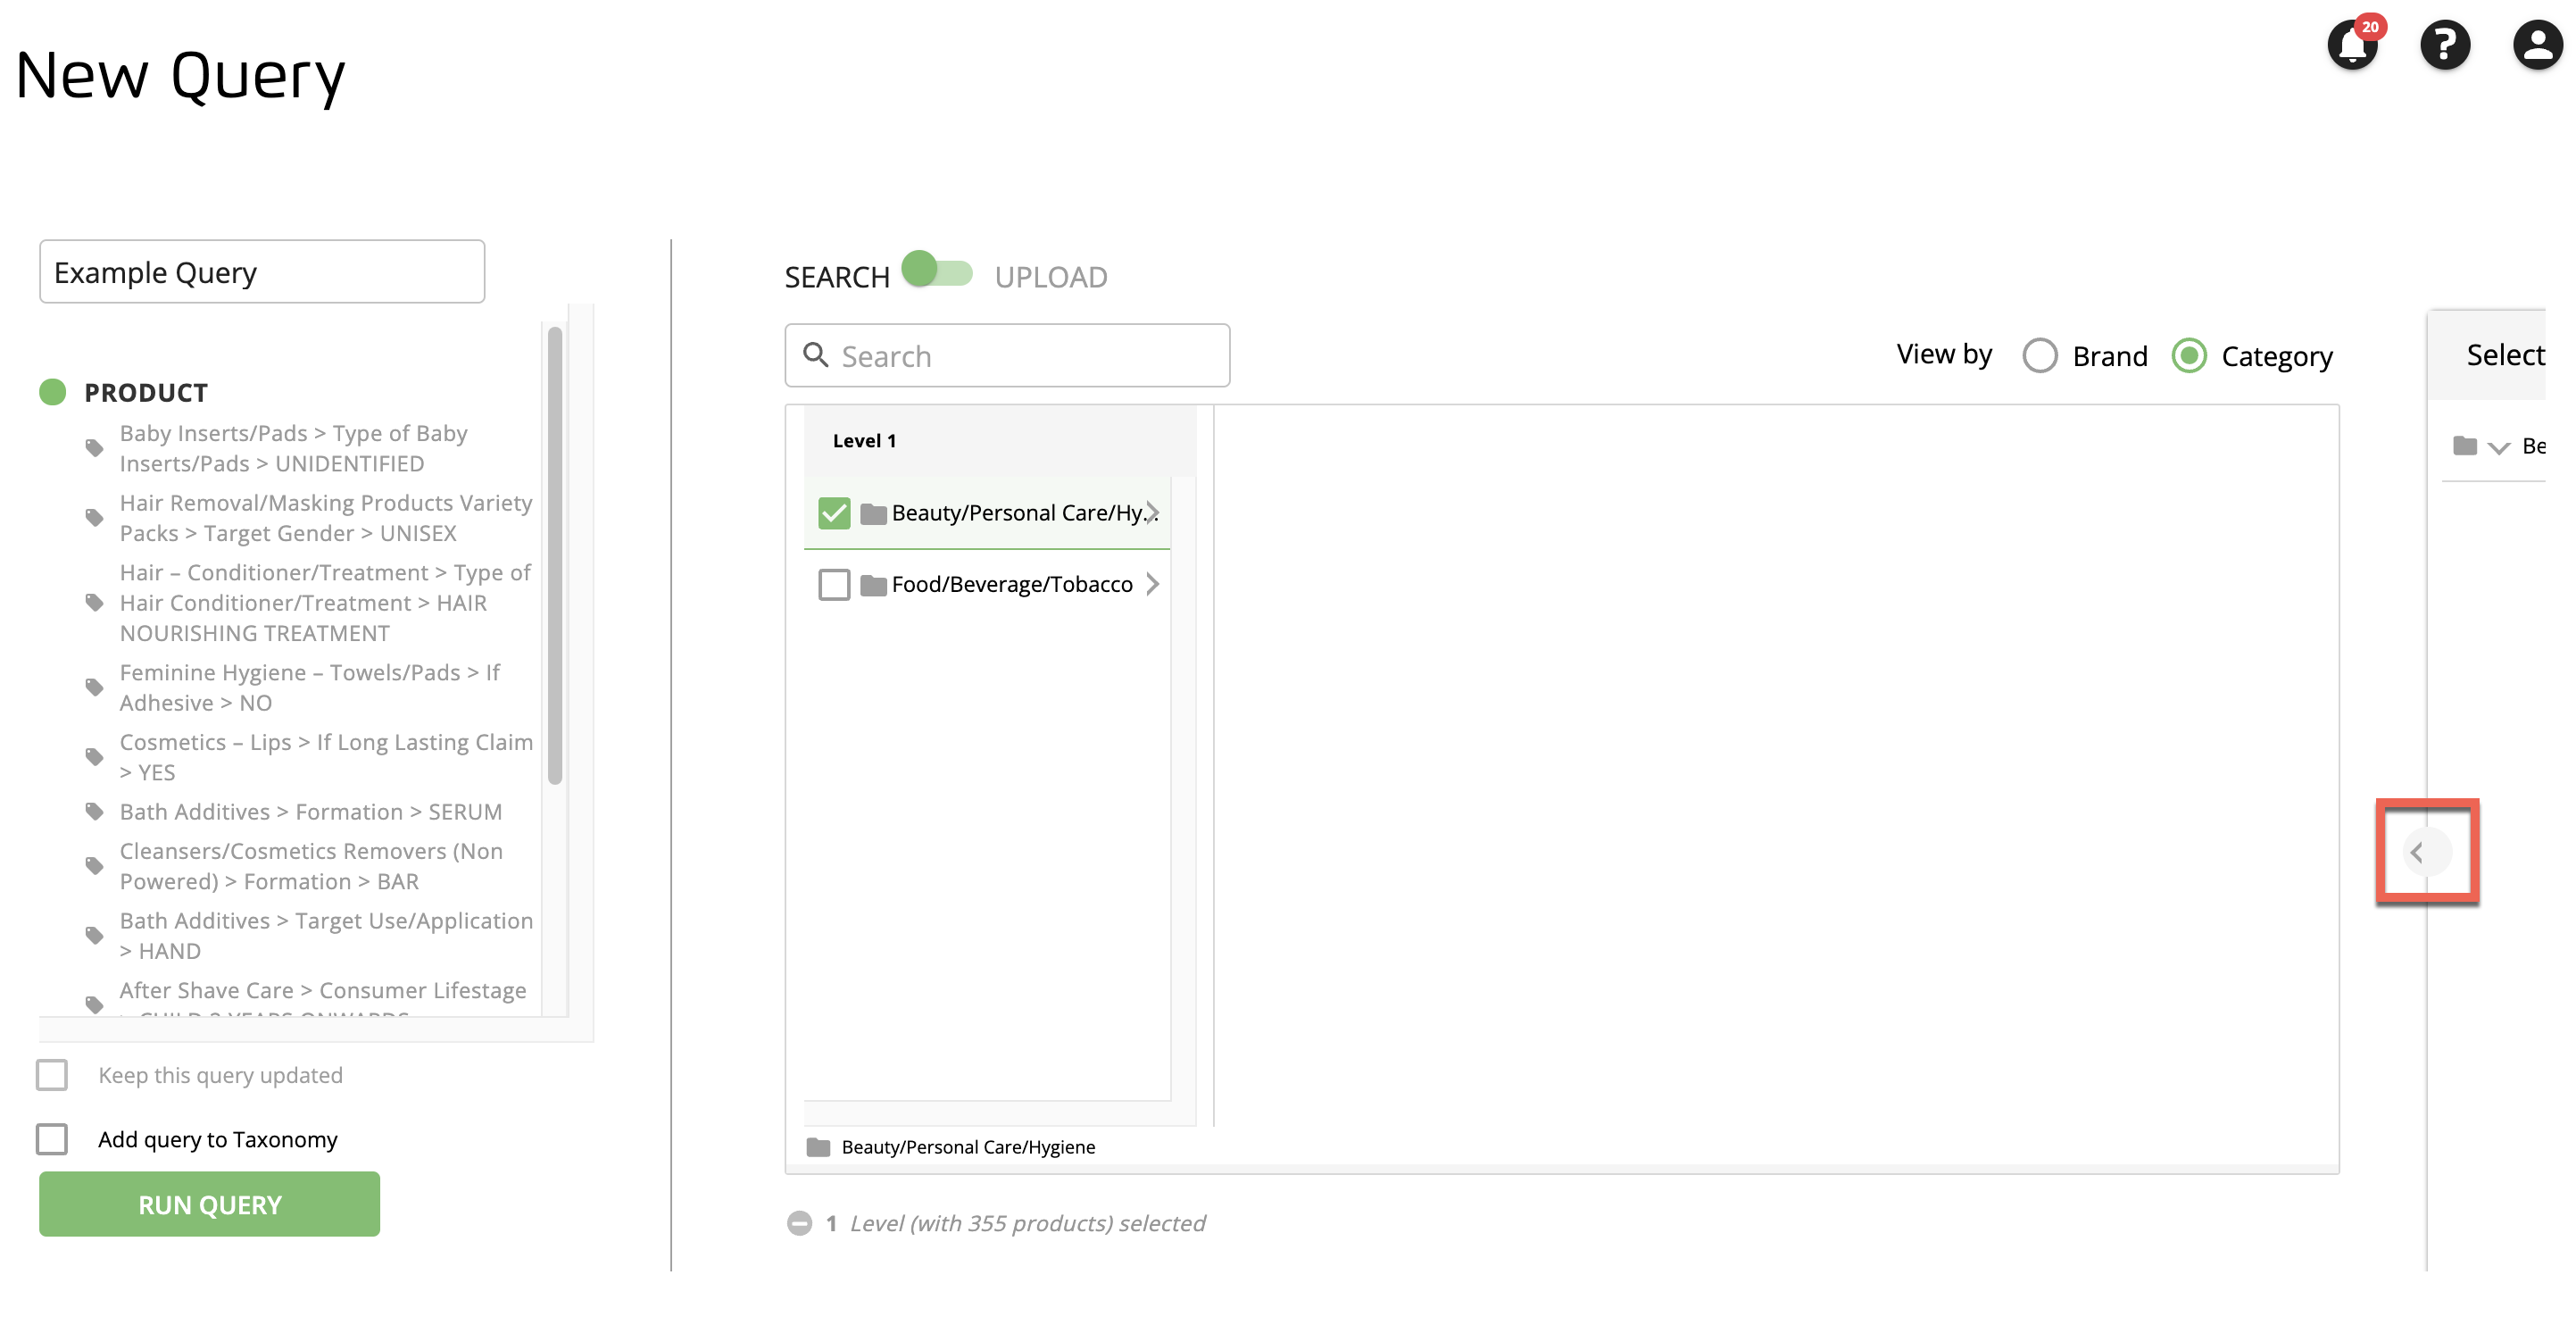
Select any desired product category or categories (or brand/product), using any of the following methods:
Browse through the catalog and select the check boxes for the desired catalog items.
Note
Hover over the "folder" or "tag" icon to the left of the item name to make the check box appear.
Use the search bar to search for a category, brand, or product name, and then select the check boxes for the desired catalog items.
Upload a file of product or product category barcodes:
Prepare a single-column CSV file of the product codes you want to measure.
You can browse your entire catalog and select the items you wish to measure. Or, upload a portion of your product codes (EANs and UPCs) for better performance on large datasets.
From the Search/Upload toggle on the Product tab, select Upload.
Drag and drop your file into the upload area, or click to choose the file from the file's location.

View a List of Selected Products or Product Categories
You can view a list of the product or product categories you've selected (or uploaded) by clicking the caret on the right side of the screen:
The Selected Products panel displays a list of all selected catalog items:
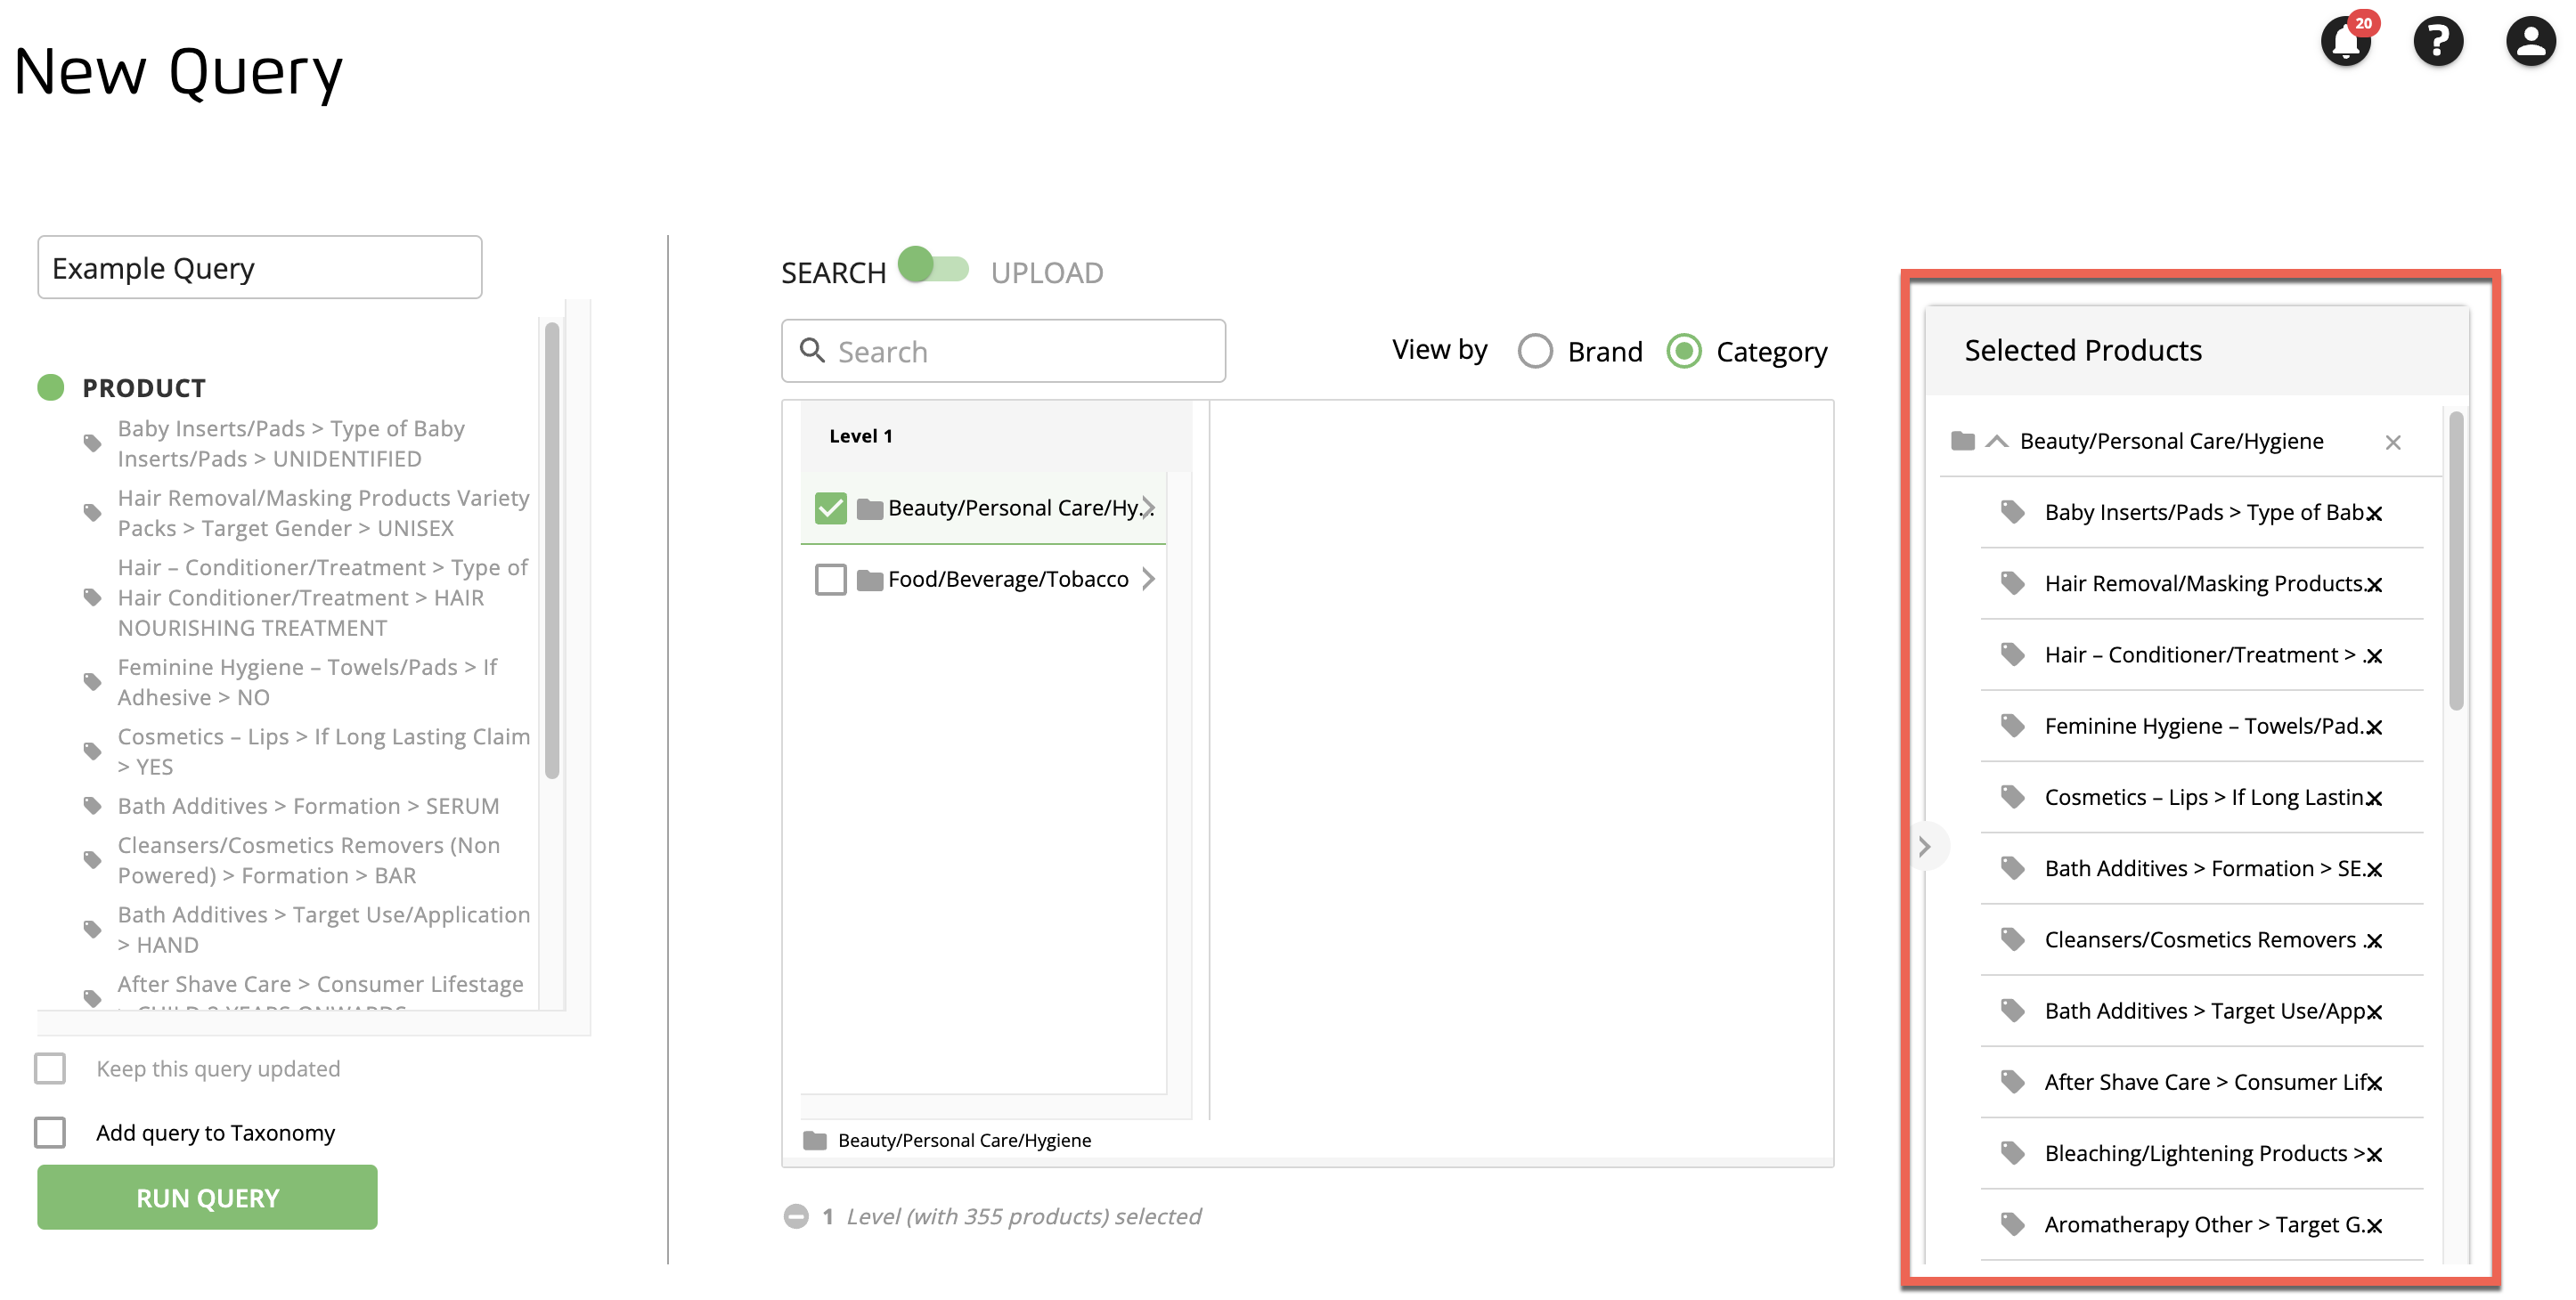
Click the "x" for any catalog item you want to remove.
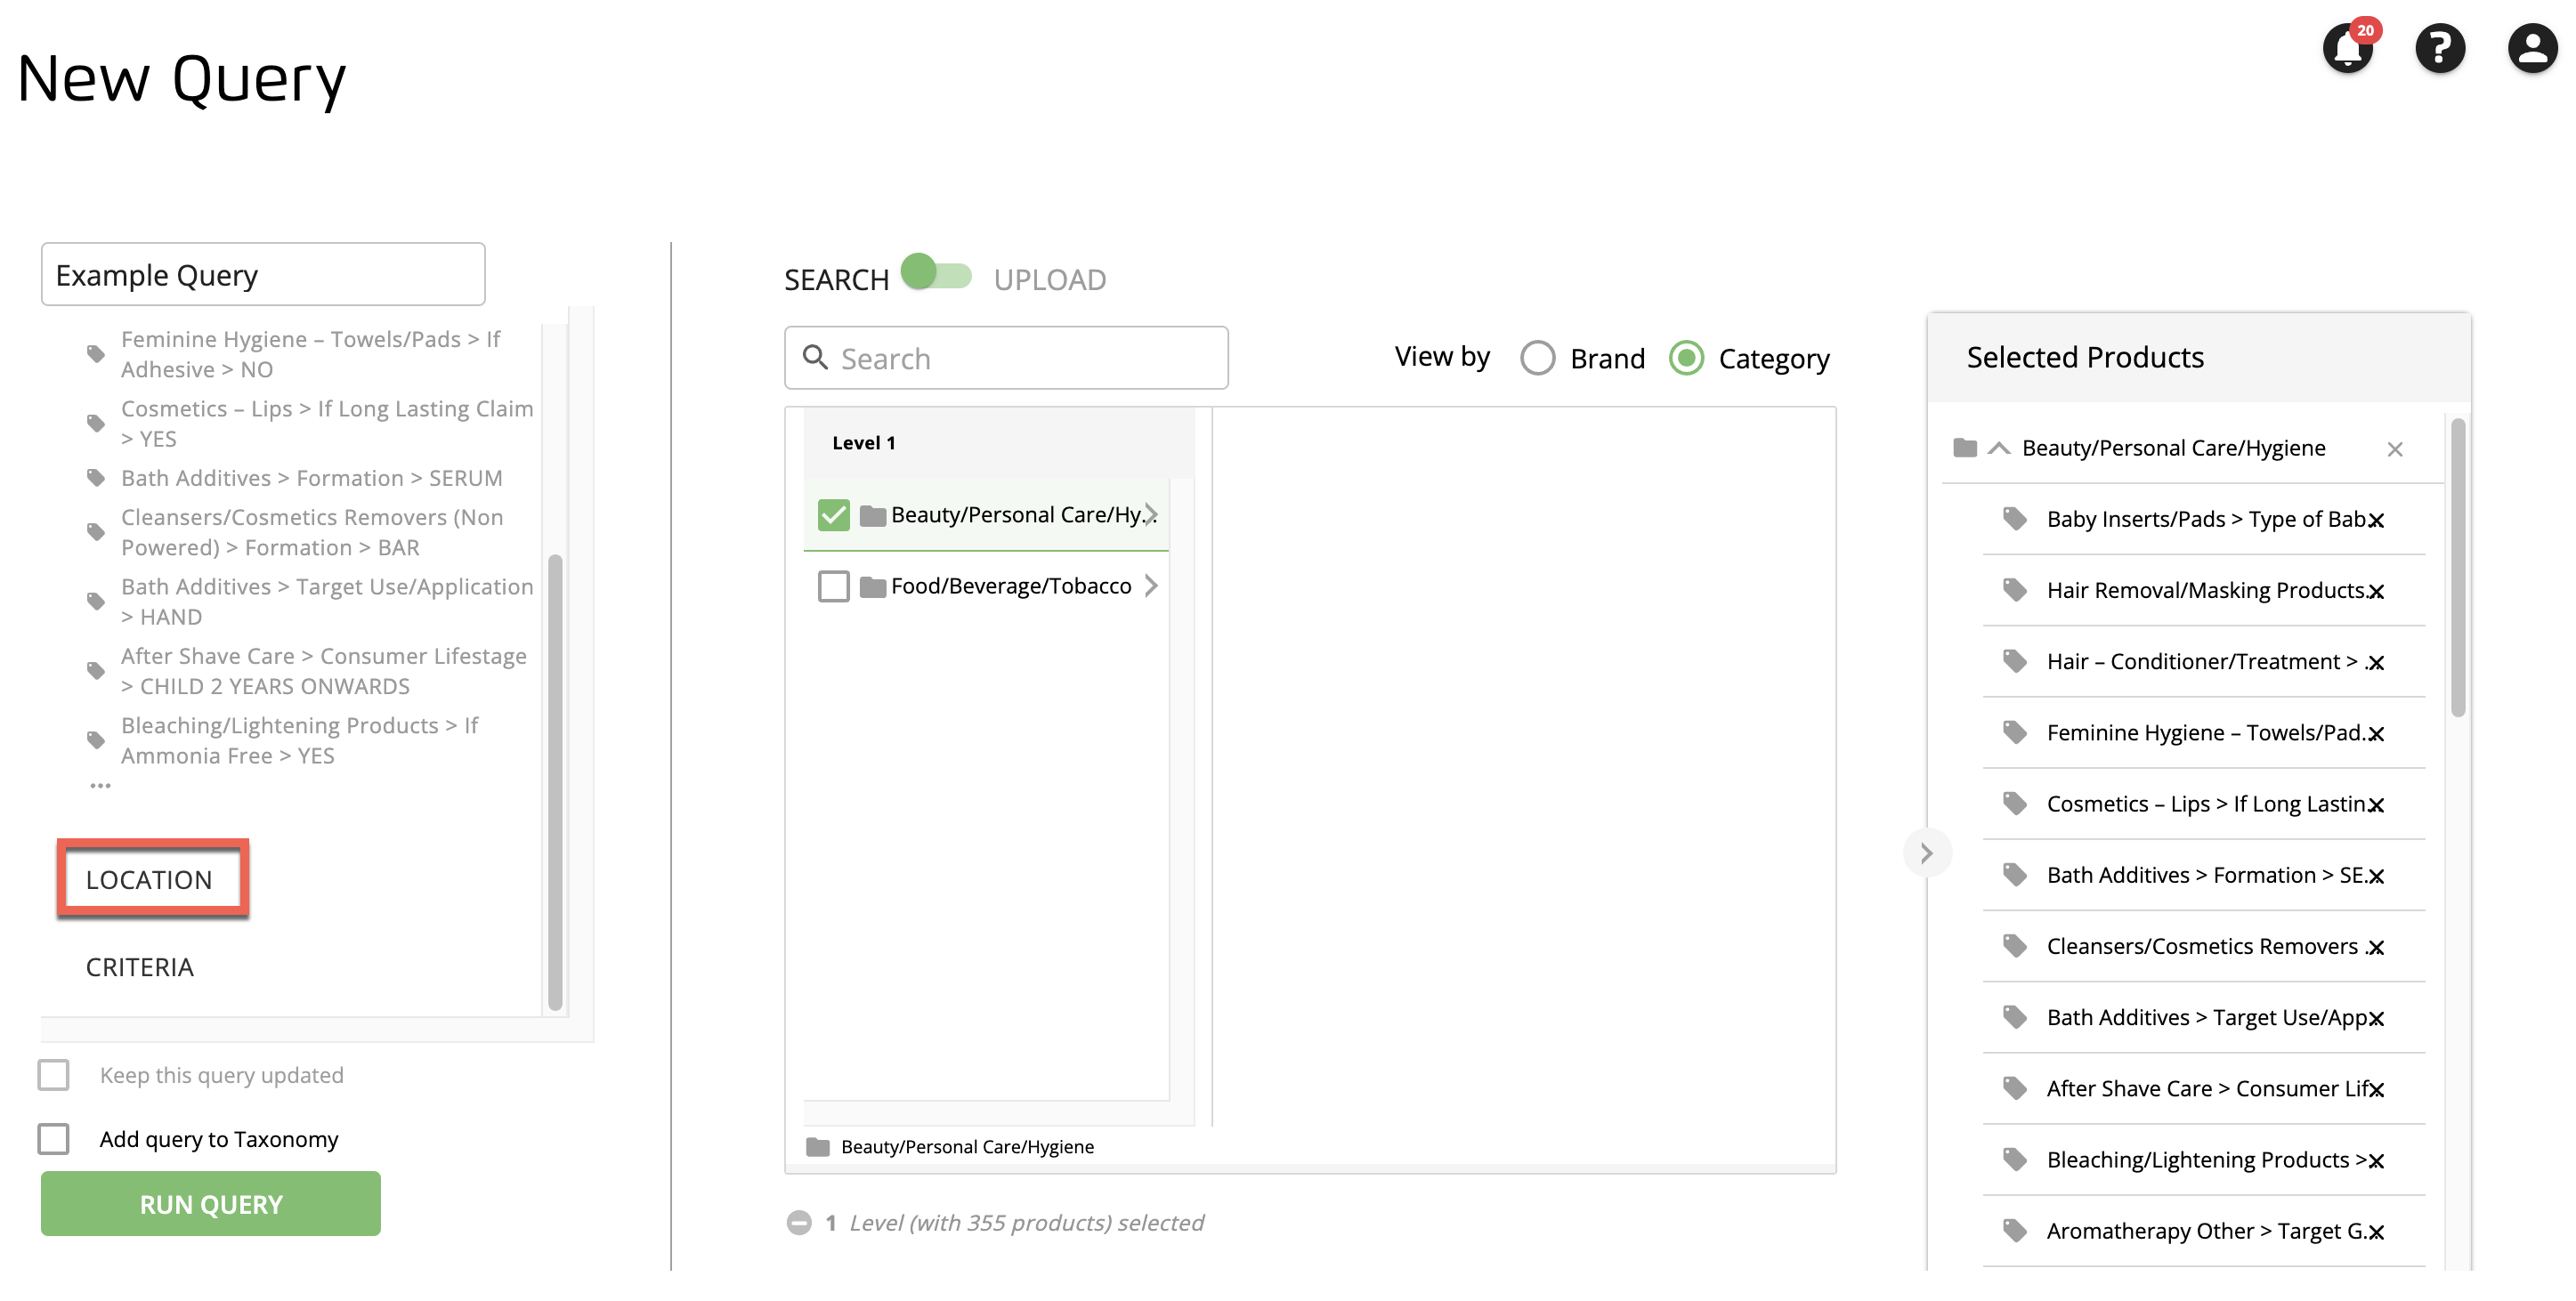
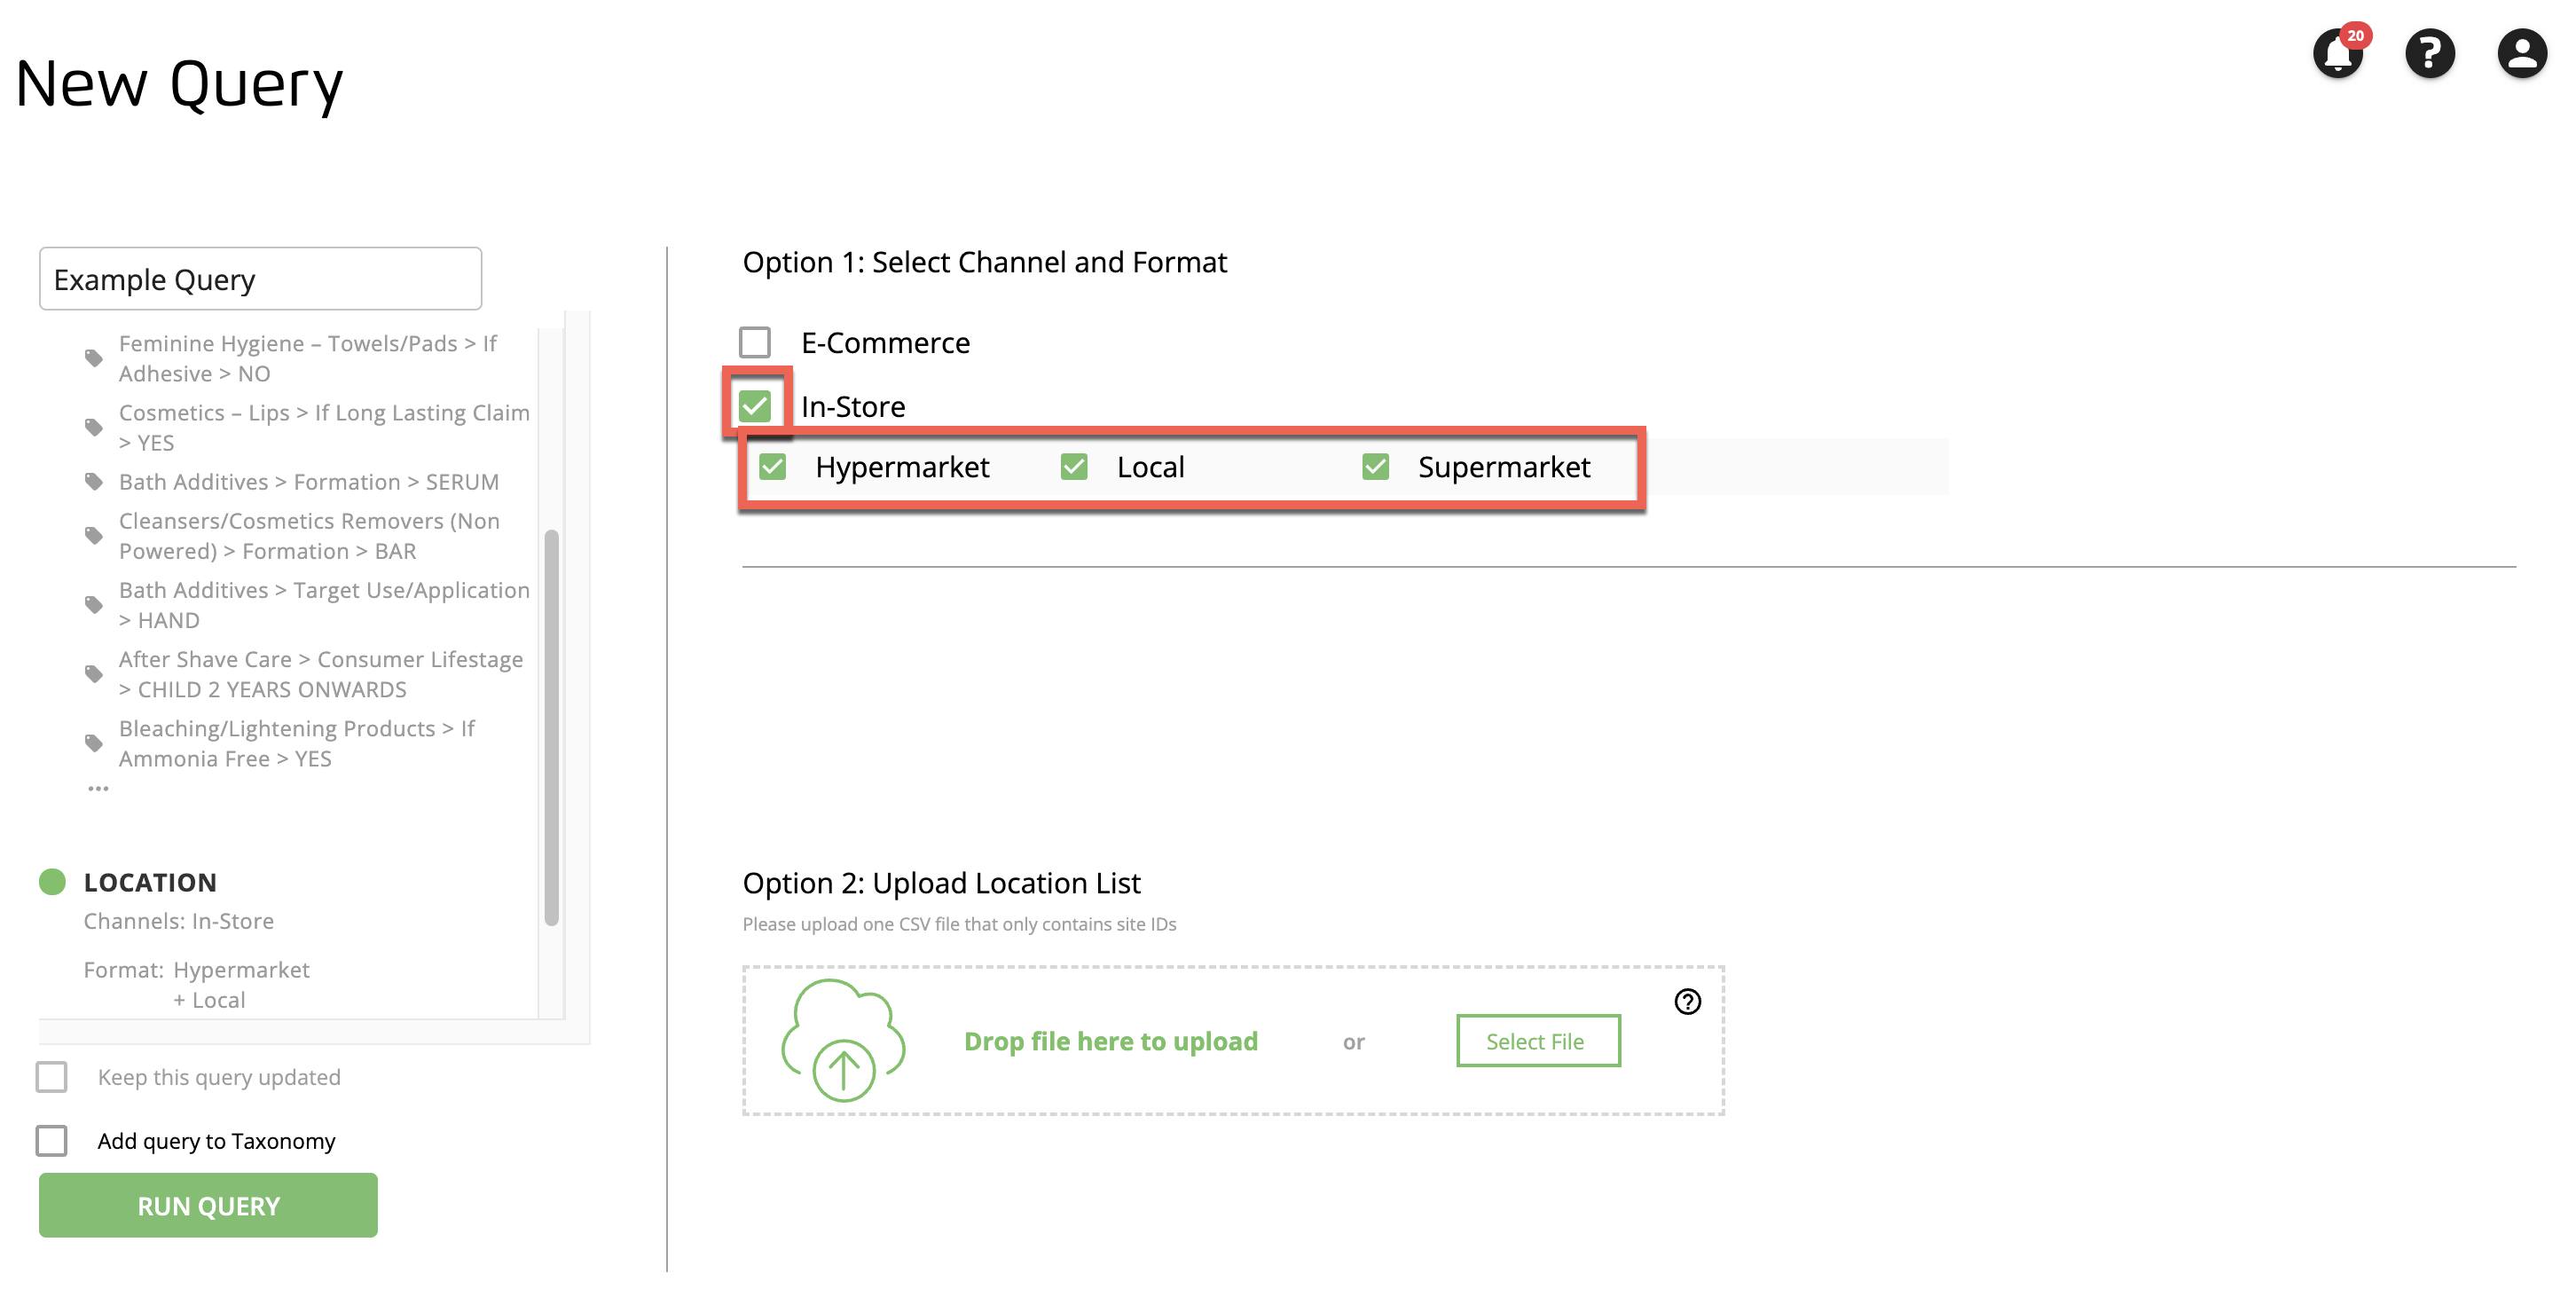
Click to open the Location tab.
Select any desired locations using one of the following methods:
Note
If no location selections are made, the query will return data for all possible locations.
Select by channel: "E-Commerce" or "In-Store." If you select "In-Store", you can choose from "Hypermarket", "Local", and "Supermarket."
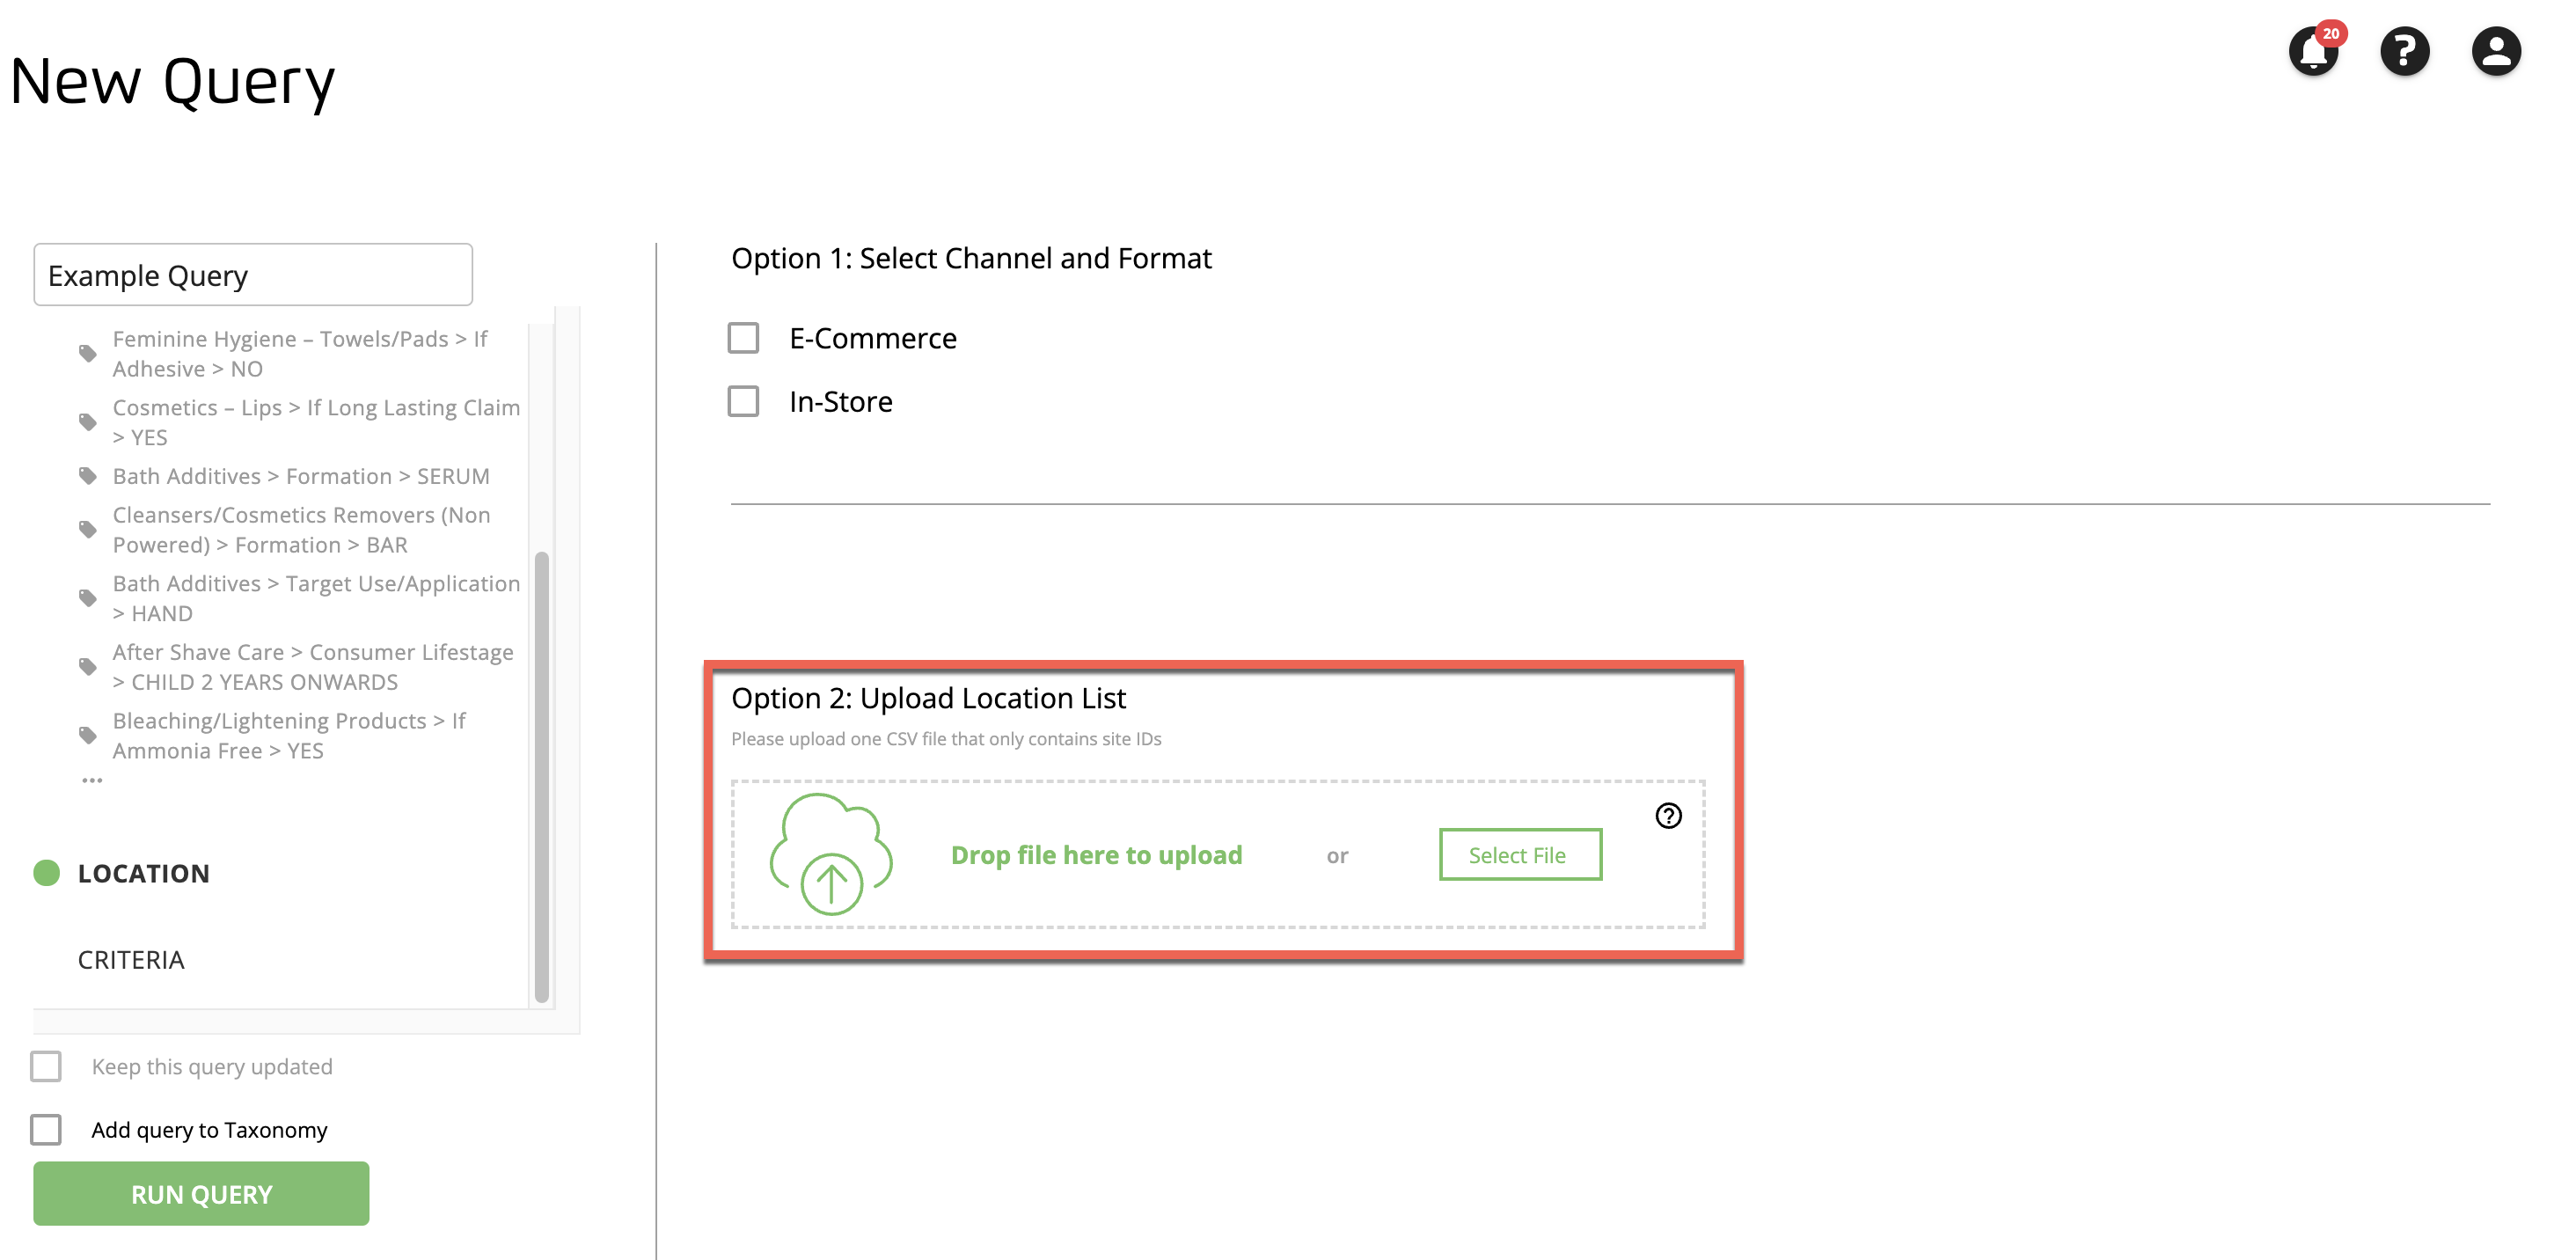
Upload a location list:
Prepare a single-column CSV file of site IDs.
Drag and drop your file into the upload area, or click to choose the file from the file's location.
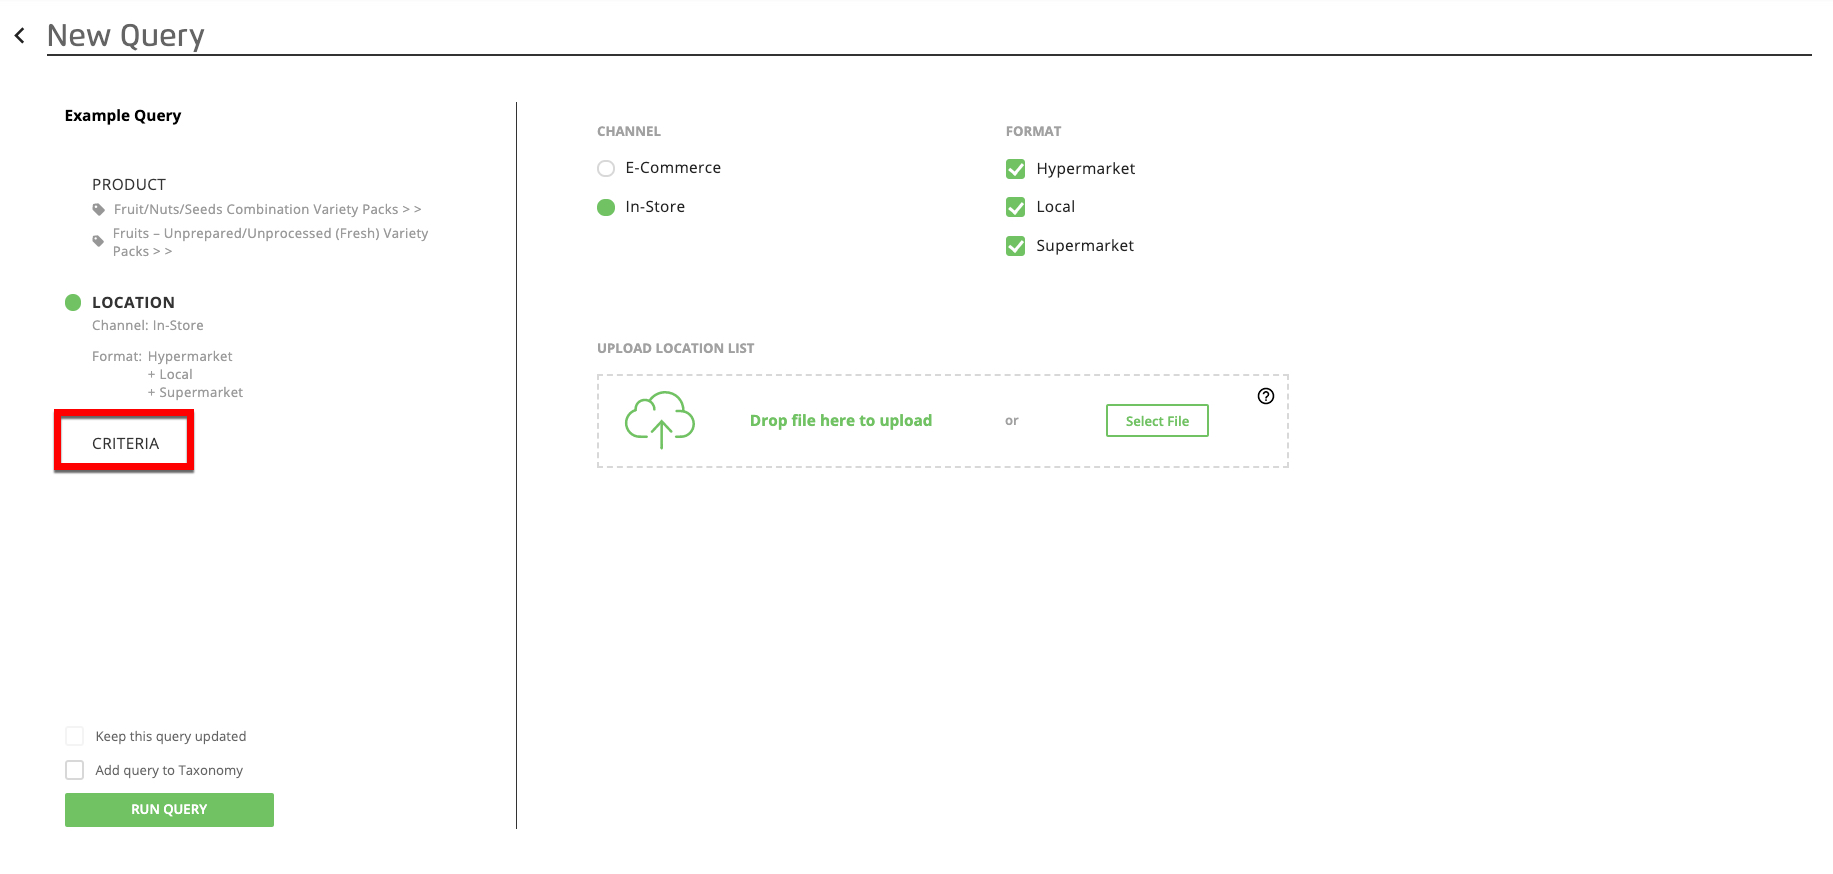
Click to open the Criteria tab.
Select any desired date range:
Note
If no date range selections are made, the query will return data for all possible dates.
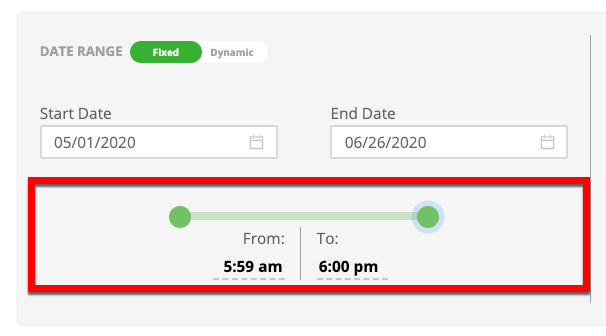
For a fixed date range (that doesn't change), make sure the Date Range toggle is set to "Fixed" and then enter the desired start and end dates (or select them from the date picker).
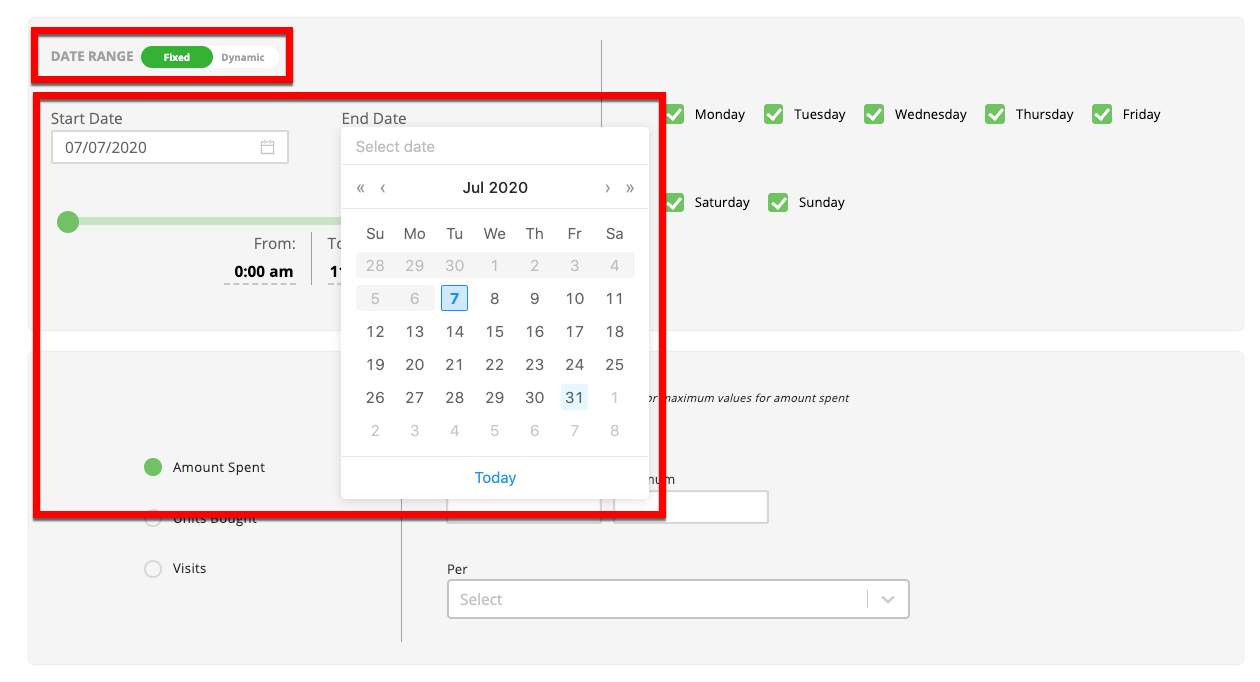
For a dynamic date range (that is based on the last X number of days), set the Date Range toggle to "Dynamic" and then enter the number of days you want to look back for in the Last Days field.
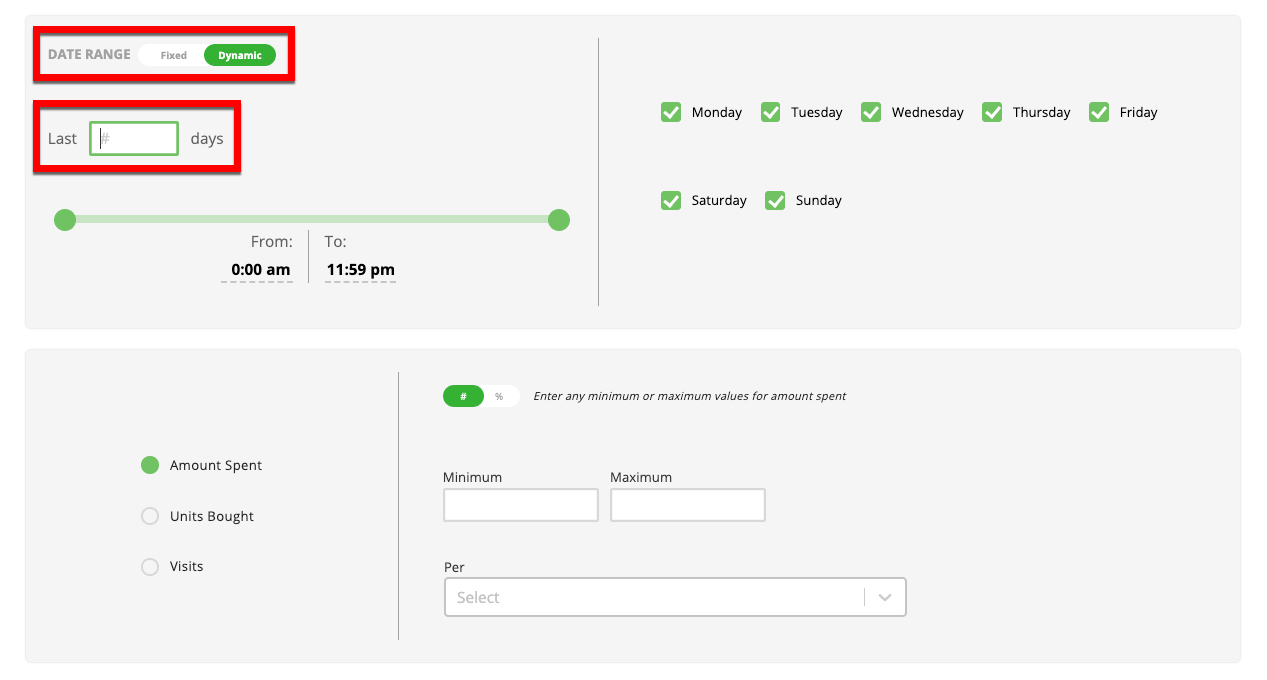
To adjust the time of day that you want to use, slide one or both of the time of day sliders to the desired position.
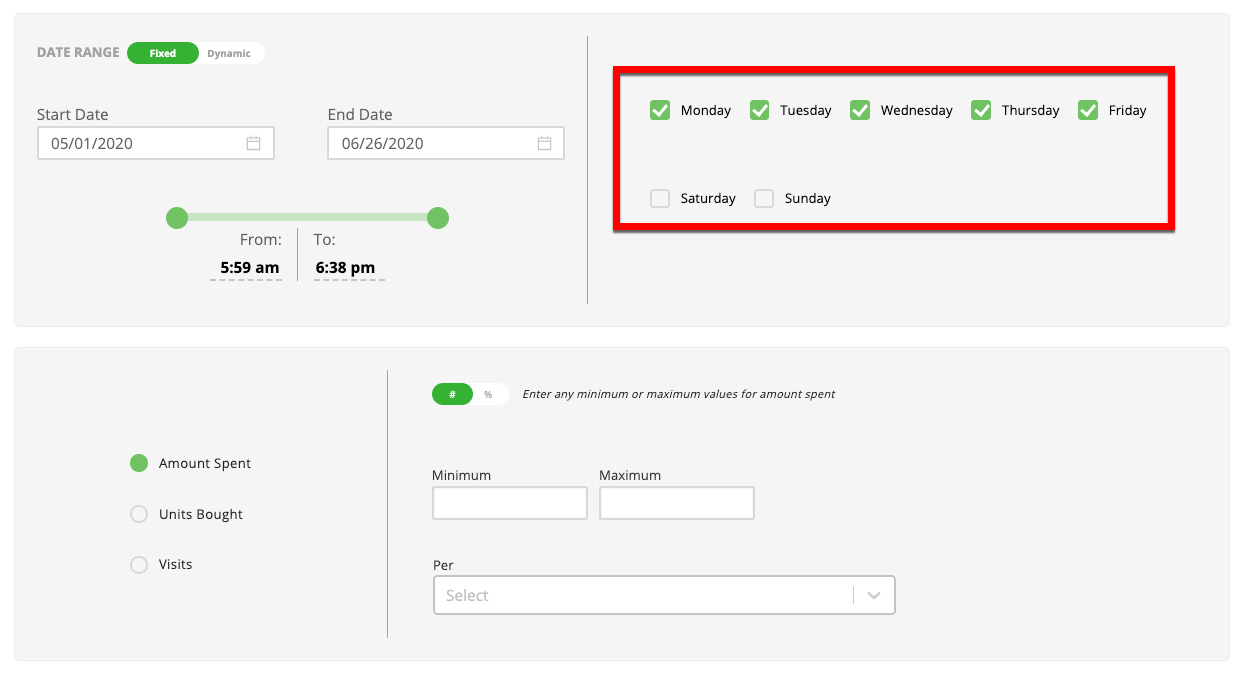
To adjust the days of the week you want to use, select or clear the corresponding check boxes.
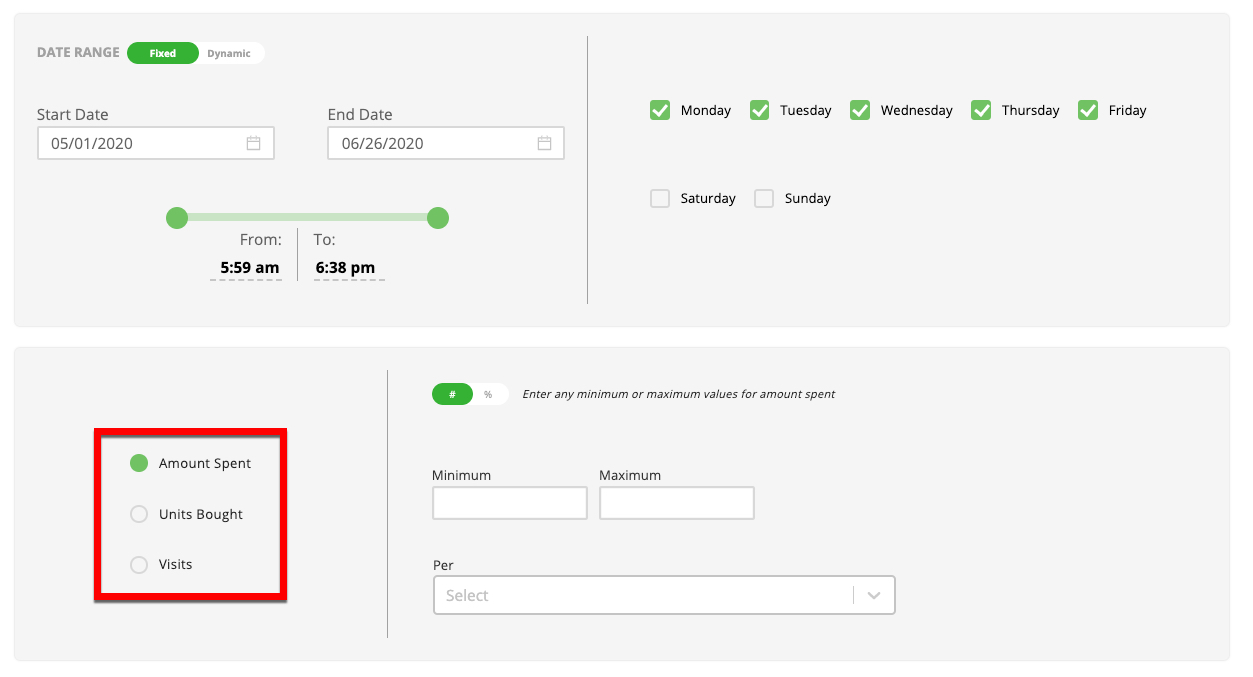
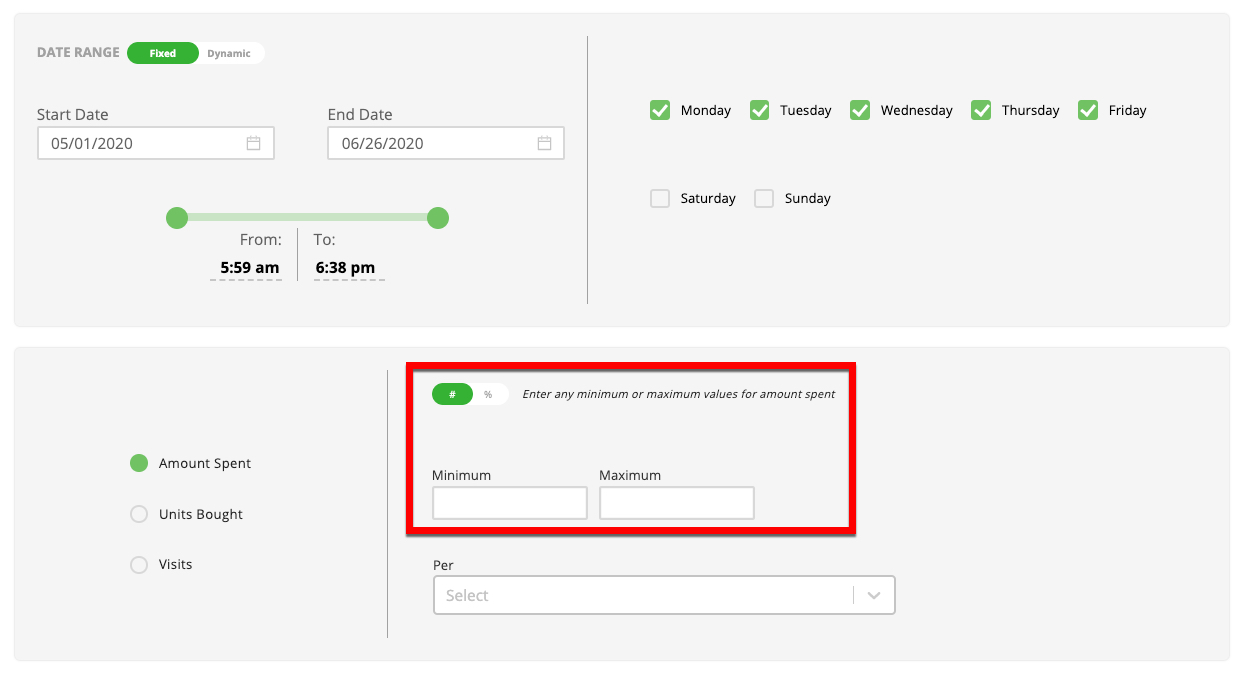
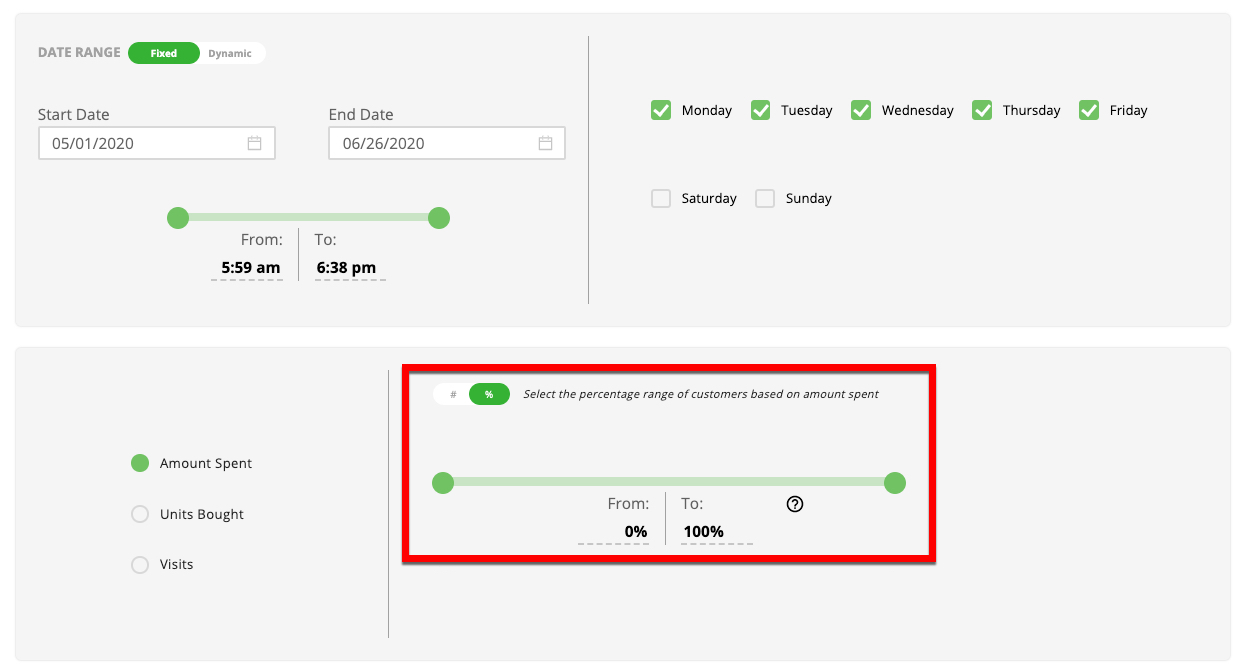
Choose any metric you want to base the query on ("Amount Spent", "Units Bought", or "Visits").
Note
If no metric selection is made, the query will return data without using metric criteria.
Enter the criteria for that metric:
For criteria based on the minimum and maximum values for the metric, make sure the toggle is in the "#" position and then enter the desired minimum and/or maximum values.
For criteria based on a percentage range of customers, make sure the toggle is in the "%" position and then drag the ends of the slider to the desired percentage range. When you select %, the "Per" options disappear because specifying criteria based on a percentage range of customers is mutually exclusive of specifying a time interval, such as per month.
Note
The percentage slider has the highest values all the way to the left and the lowest values all the way to the right. For example, if you adjust the slider to give from 0% to 10%, the query will include the top 10% of customers for the specified criteria.
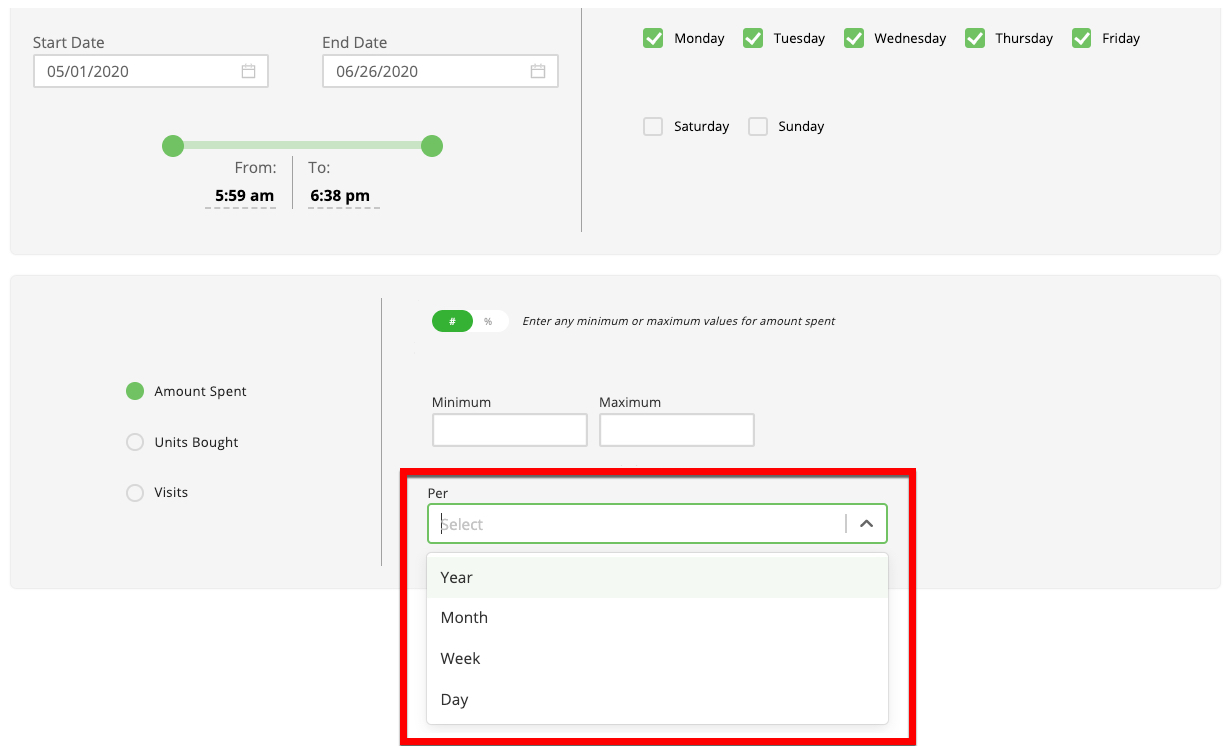
Select the basis for the metric criteria (per year, month, week, or day).
The Amount Spent refers to the money spent by a customer on products. The Units Bought are the quantities of each product you purchase. Visits refer to the number of times that the user shopped for products. A visit must be accompanied by a purchase. The number of visits is derived from the transaction ID count.
Note
The query returns only customers who have met the metric criteria for the entire date range of the query. For example, if you create a query with a 6-month data range and set the metric criteria to "Amount Spent=minimum $30 per month" the query only returns customers who have spent $30 or more for every one of the 6 months in the date range. A customer who spent $30 or more in only some (but not all) of the months in the data range would not be included.
If you want to create a custom audience from the query or to have the query automatically updated, select the appropriate check boxes.
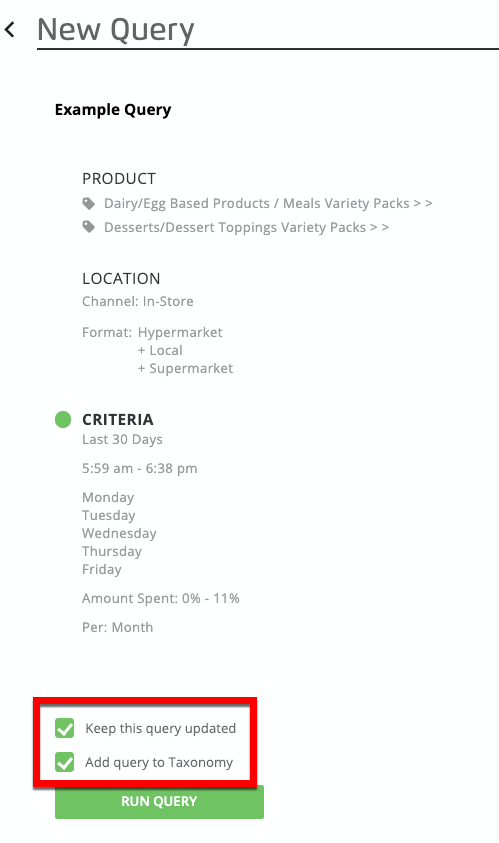
Note
Queries based on a fixed date range in the past cannot be automatically updated.
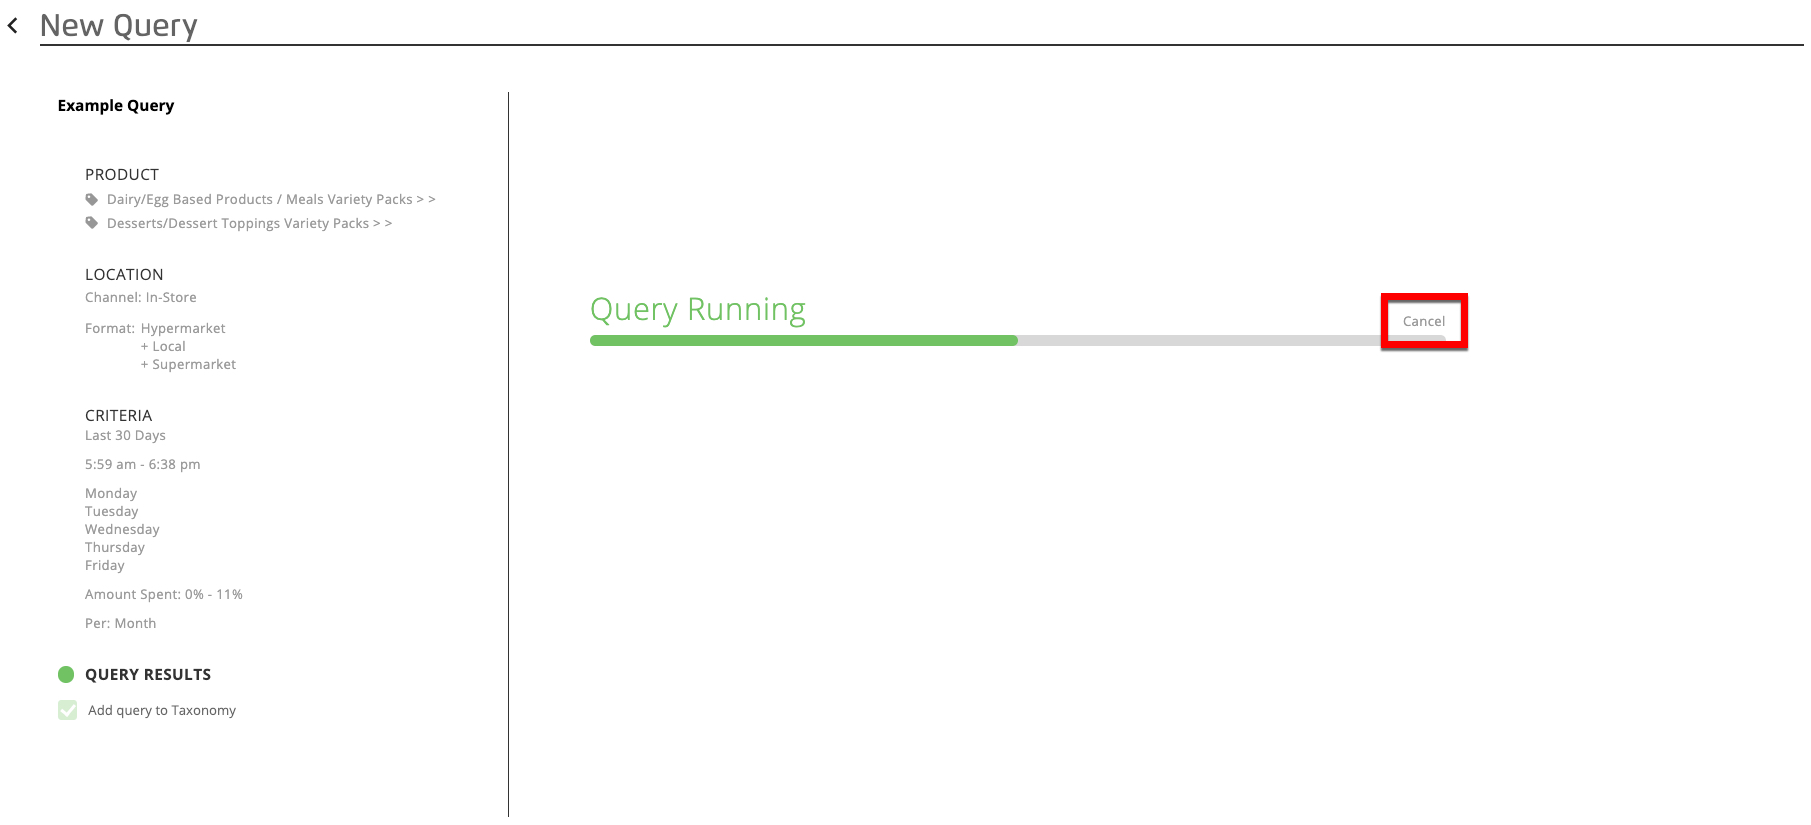
Click to start the processing of the query.
A progress bar displays to indicate that the query is running and show approximately where it is in the processing step.

Note
If you decide to cancel the query before it finishes processing, click the "Cancel" link text.
In the left navigation bar, click Welcome and then click Advanced Audiences.
Select the query you want to view details for.
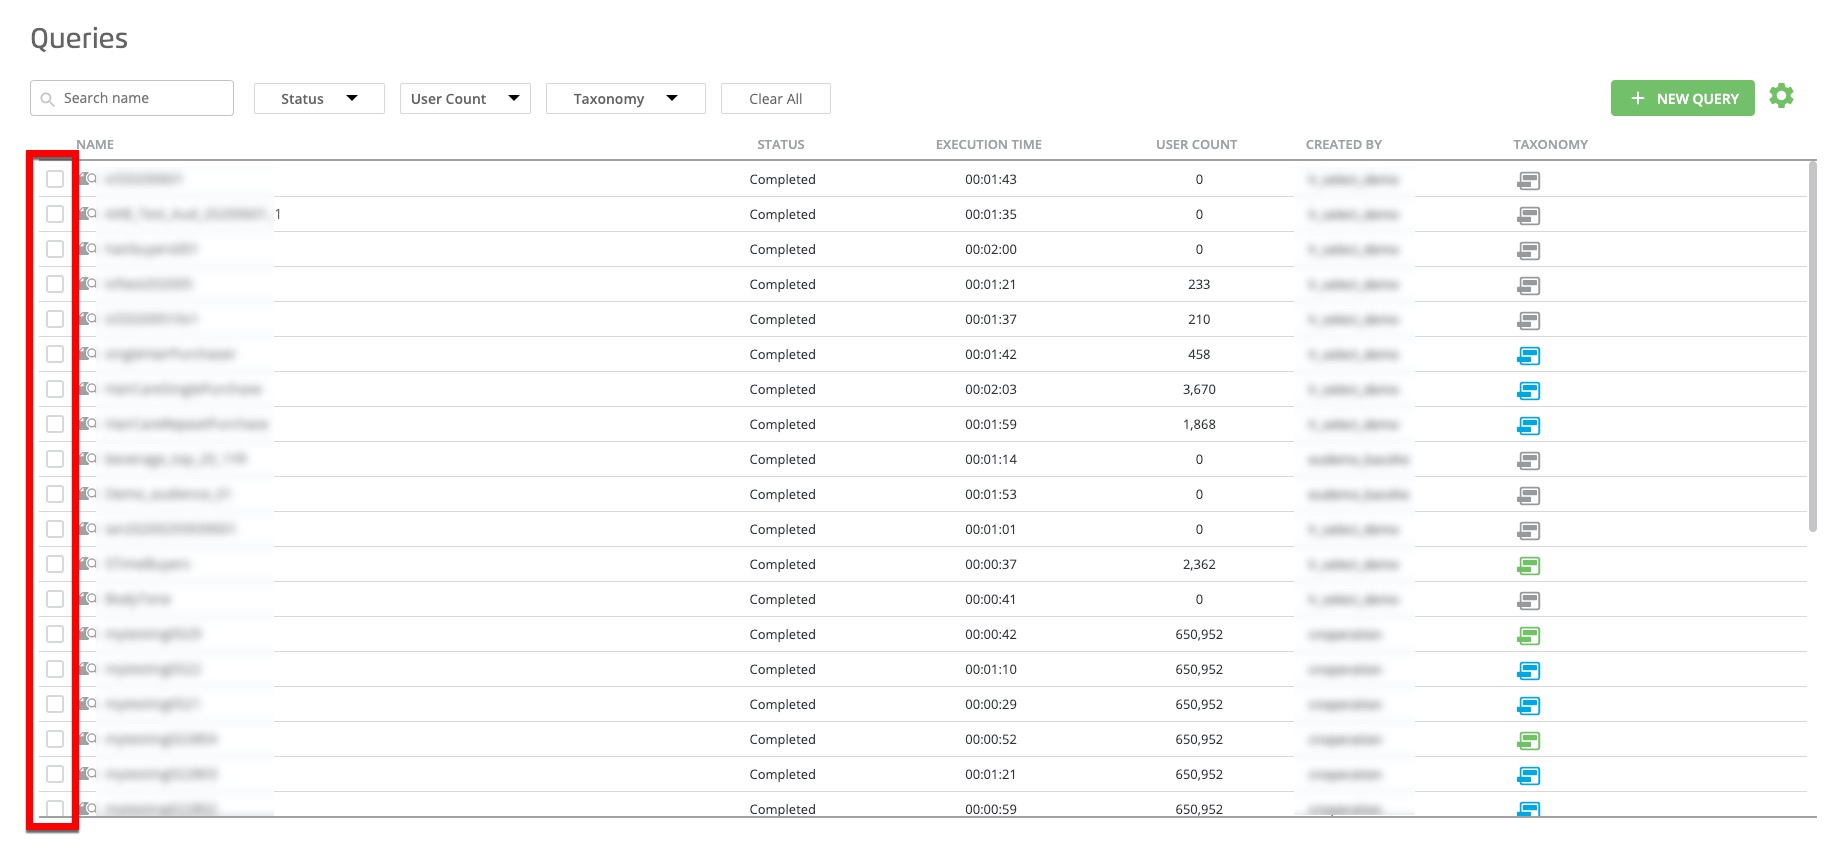
From the icons in the footer area, click the View Query Details (
 ) icon.
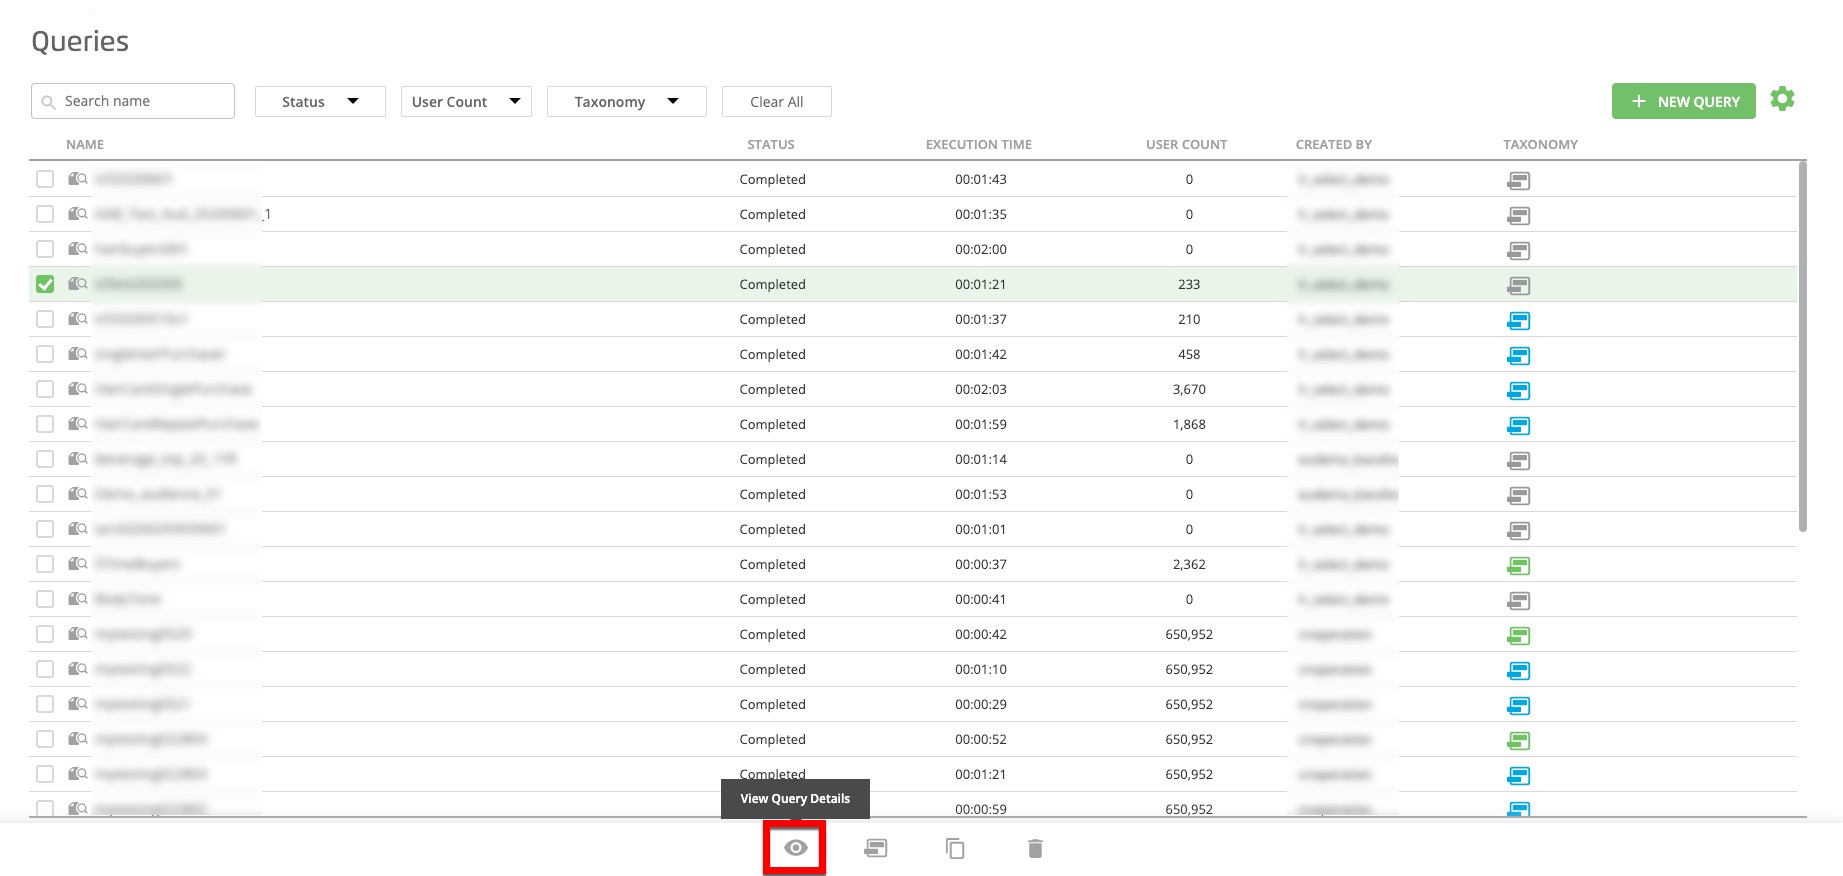
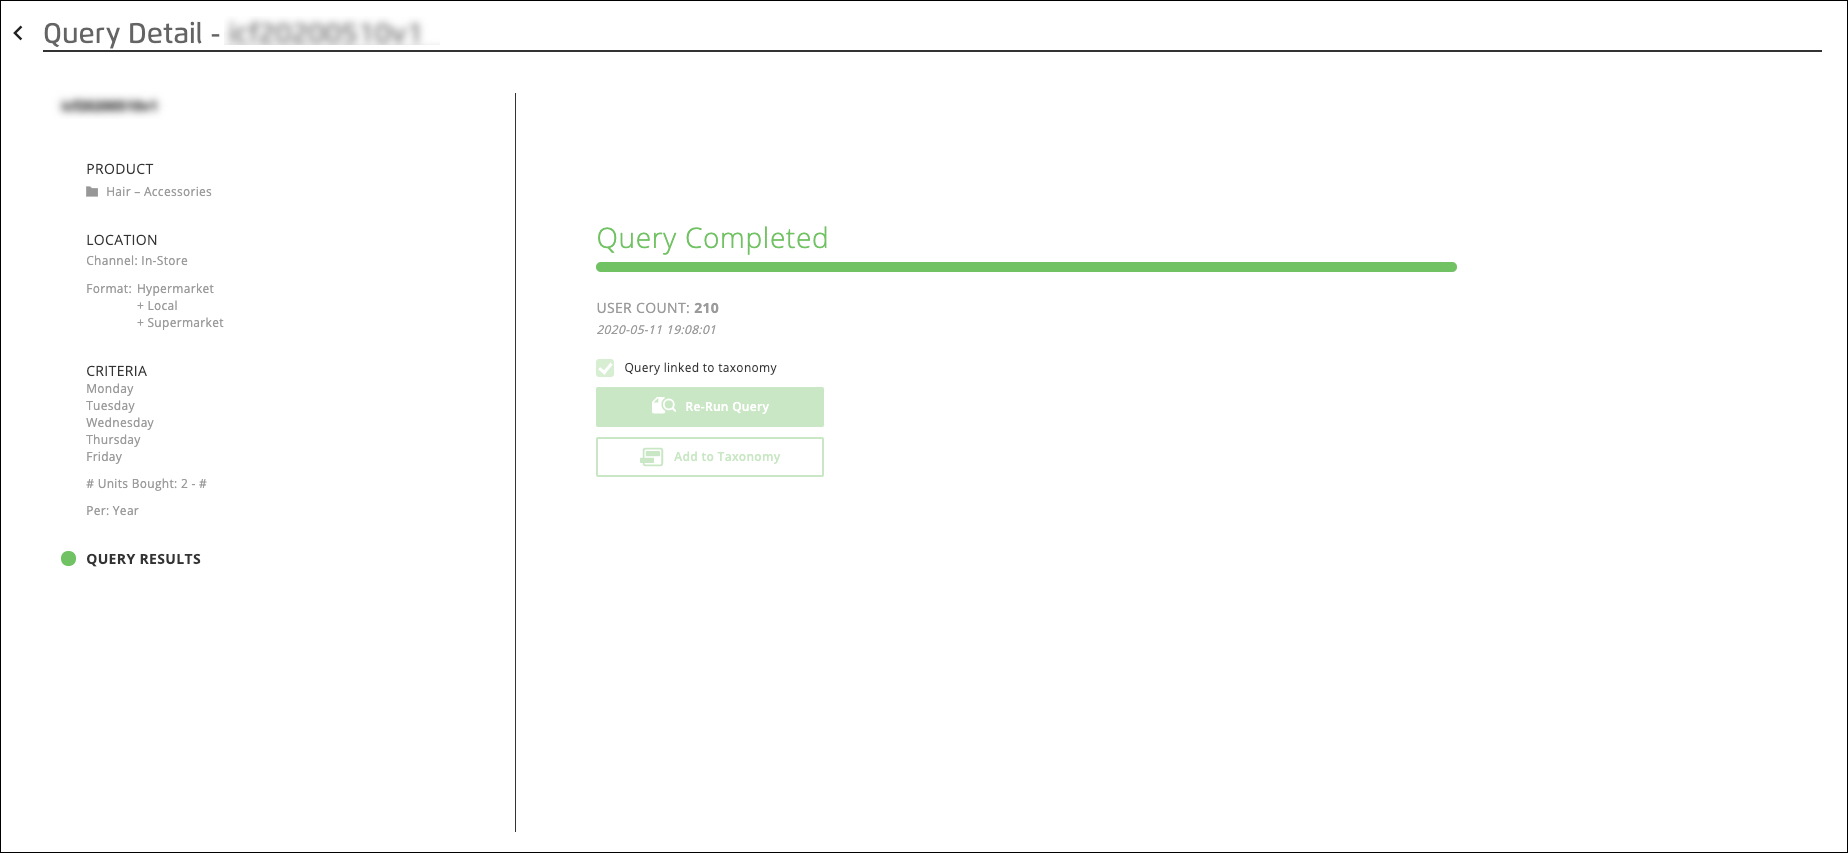
The Query Detail page opens and displays query information, such as products, locations, criteria, user counts, and whether the query is linked to a taxonomy. If the query hasn't been added to the taxonomy, you can rerun the query or add the query to the taxonomy.
If you didn't add a query to the taxonomy during the query building process, you can add it later:
In the left navigation bar, click Welcome and then click Advanced Audiences.
Select the check box for the query you want to add to the taxonomy.
From the icons that appear in the footer area, click the Add to Taxonomy (
 ) icon.
The query is added to the taxonomy and the audience created from that query appears in the "Analytics Environment Data > AAB Segments" folder on the Audiences page and on the Audience Builder page.
In the left navigation bar, click Welcome and then click Advanced Audiences.
Select the check box for the query you want to duplicate.
From the icons that appear in the footer area, click the Duplicate Query (
 ) icon.
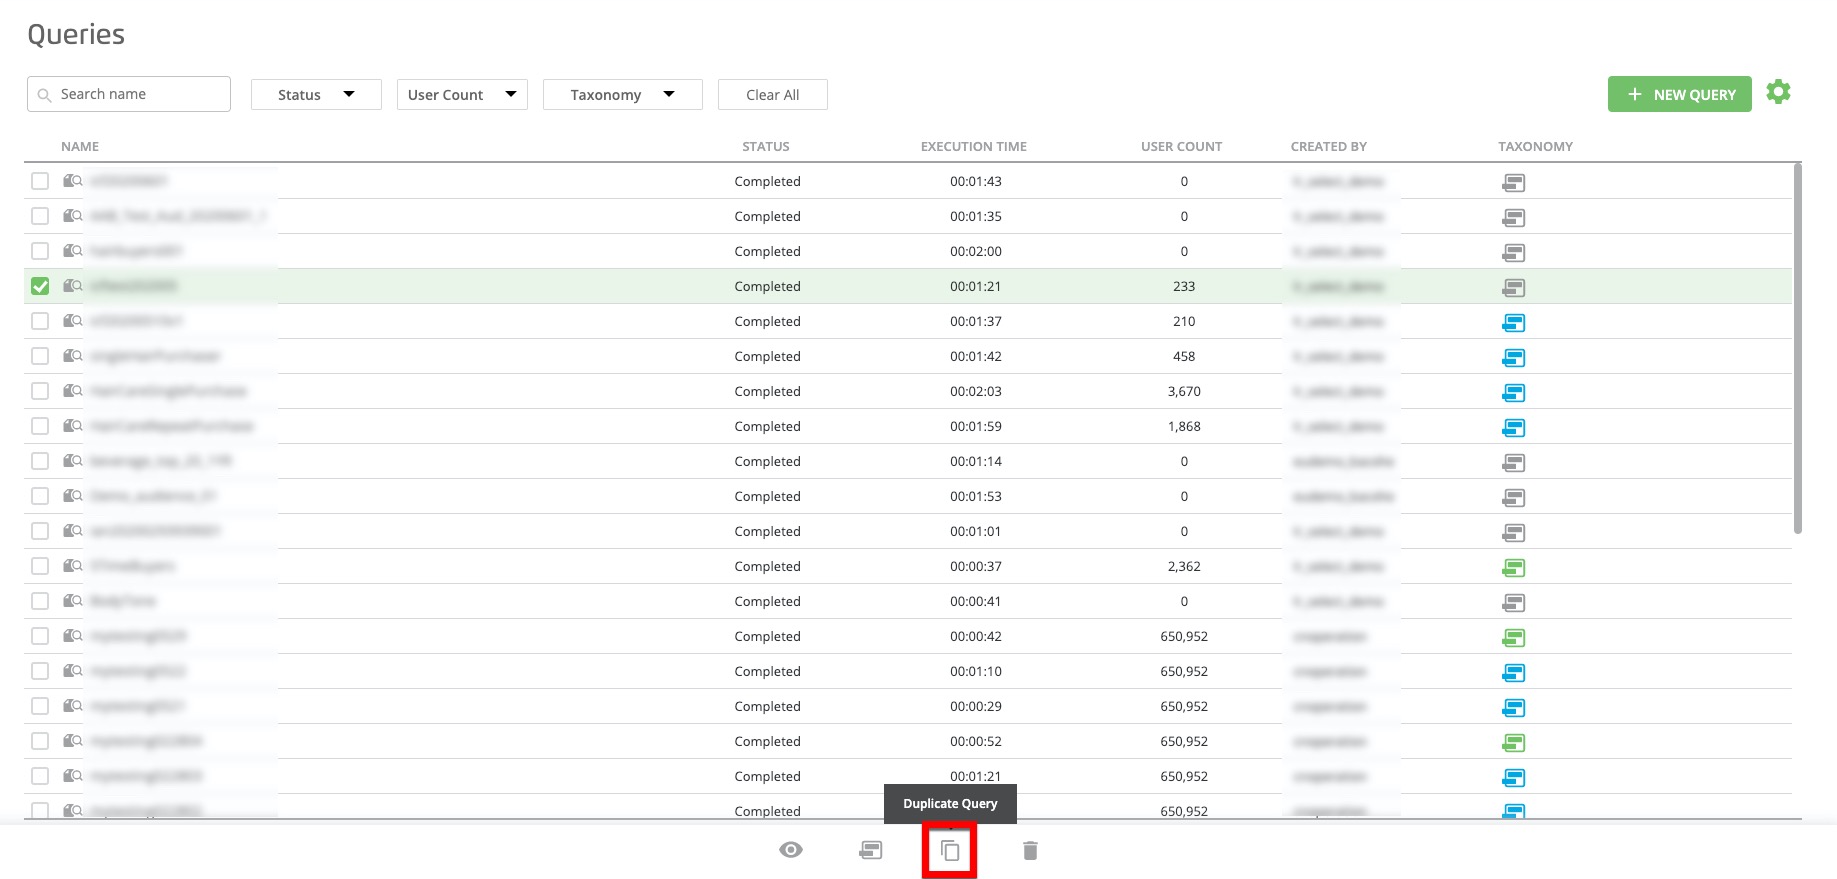
From the confirmation dialog that appears, click .
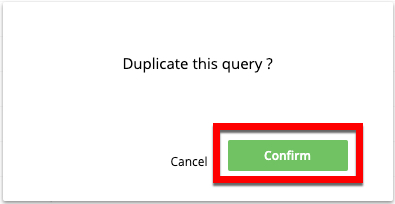
The query is duplicated and appears in the Queries table with "_copy_1" at the end of the query name. To edit the query, check the check box for that query and then click the View Query Details icon (the eyeball icon).
Once you've built a query, you can edit the query if you need to make changes to it.
Note
You cannot edit a query if the query is running.
To edit a query:
In the left navigation bar, click Welcome and then click Advanced Audiences.
Select the check box for the query you want to edit.
From the icons that appear in the footer area, click the Edit Query (
 ) icon.
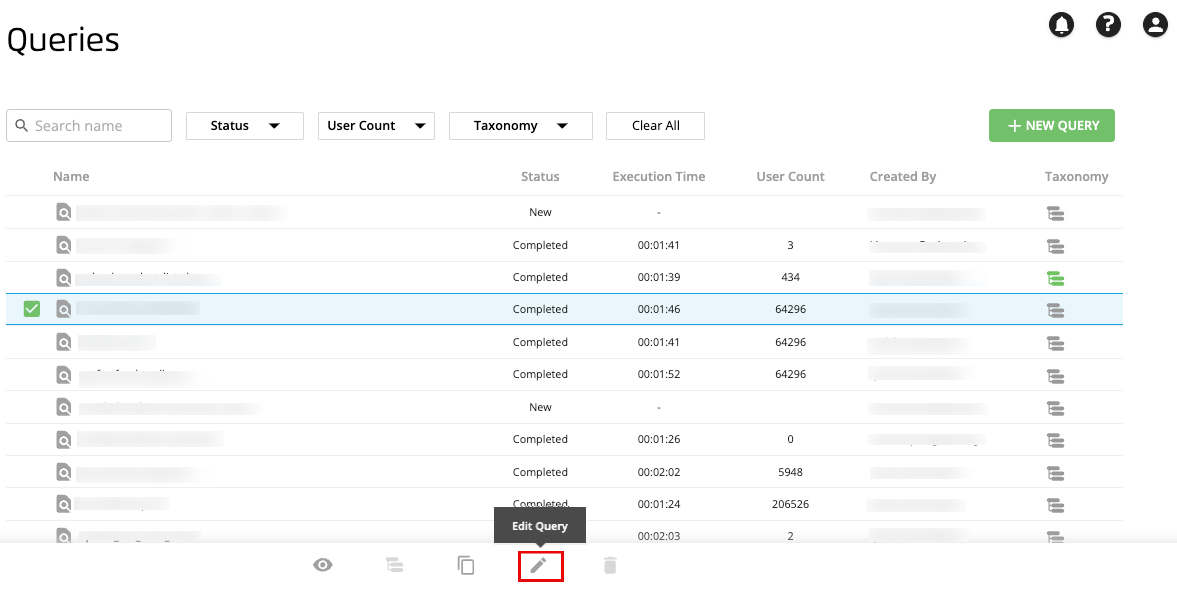
The Query Detail page opens and displays query information, such as products, locations, criteria, user counts, and whether the query is linked to a taxonomy.
See “Steps to Build a Query” for guidance when editing the segment name and segment build logic, and rerunning the query.
Note
If a query has not been added to the taxonomy, you can edit the segment name and segment build logic, and rerun the query.
If a query has already been added to the taxonomy, you cannot edit the segment name, but you can edit the segment build logic and rerun the query.
In the left navigation bar, click Welcome and then click Advanced Audiences.
Select the check box for the query you want to delete.
From the icons that appear in the footer area, click the Delete Query (
 ) icon.
From the confirmation dialog that appears, click .

The query is deleted and no longer appears in the Queries table. If the query was added to the taxonomy, the audience created from that query no longer appears in the table on the My Audiences page.