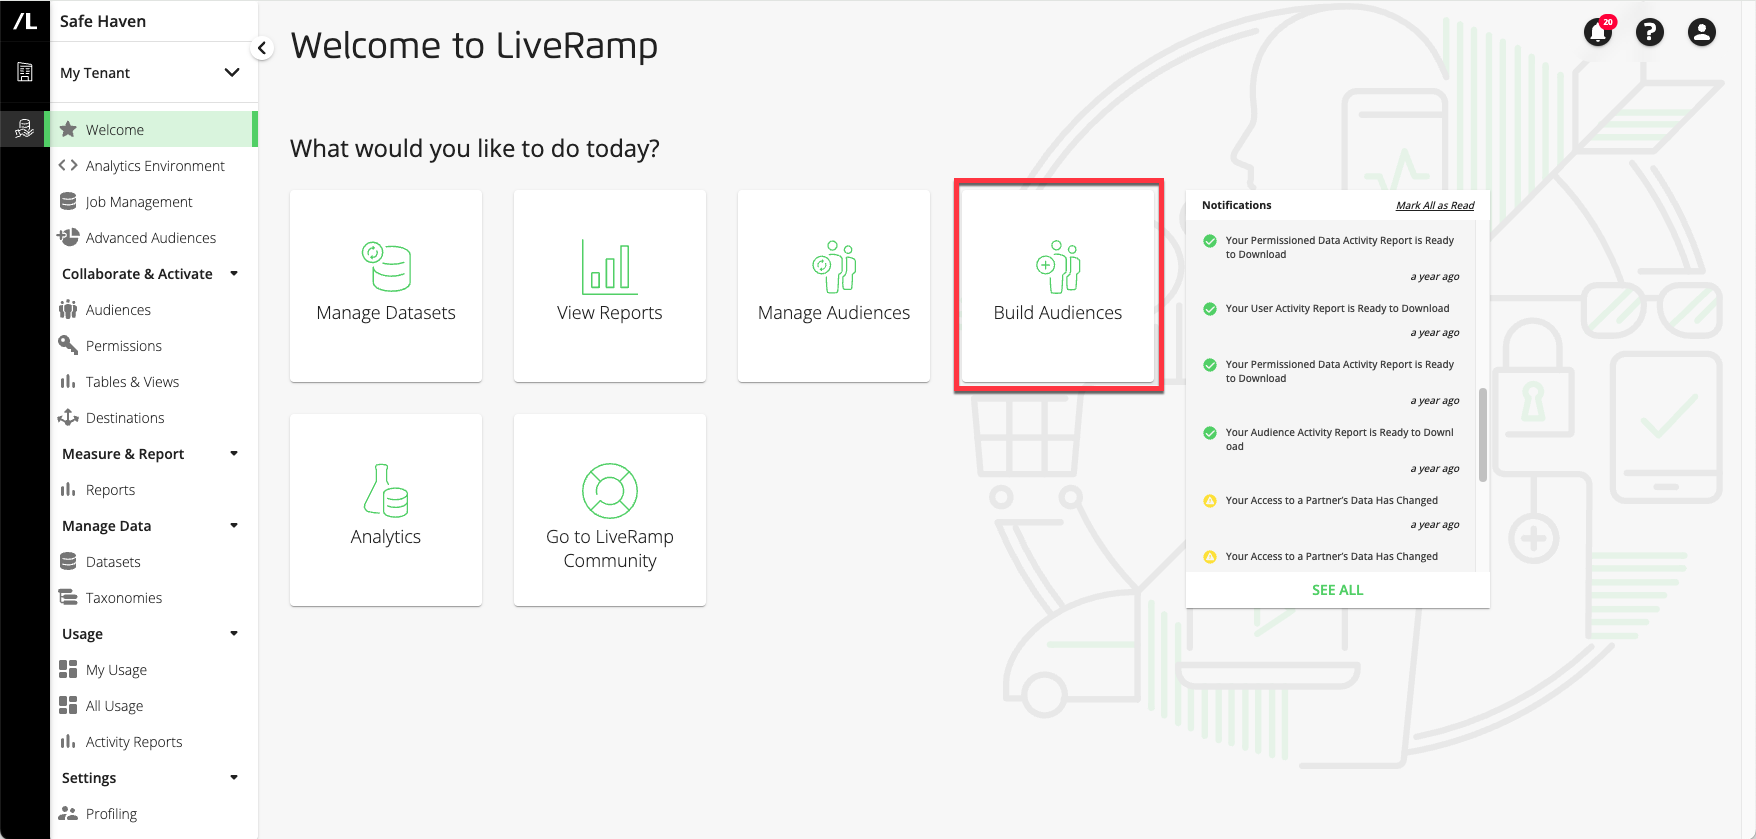
Build an Audience
From the Welcome page, click the "Build Audiences" tile.
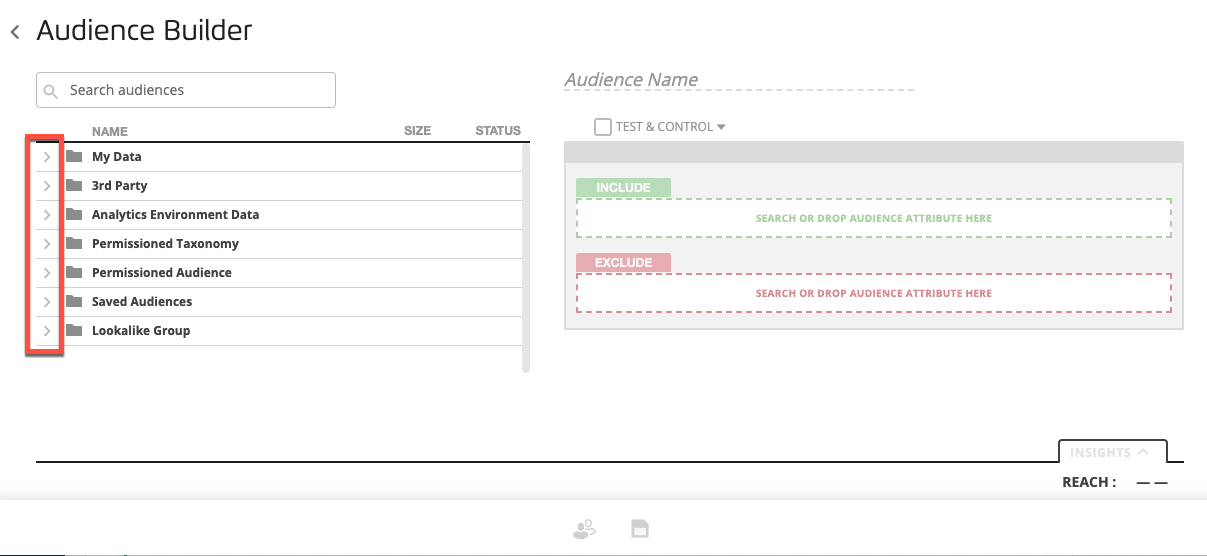
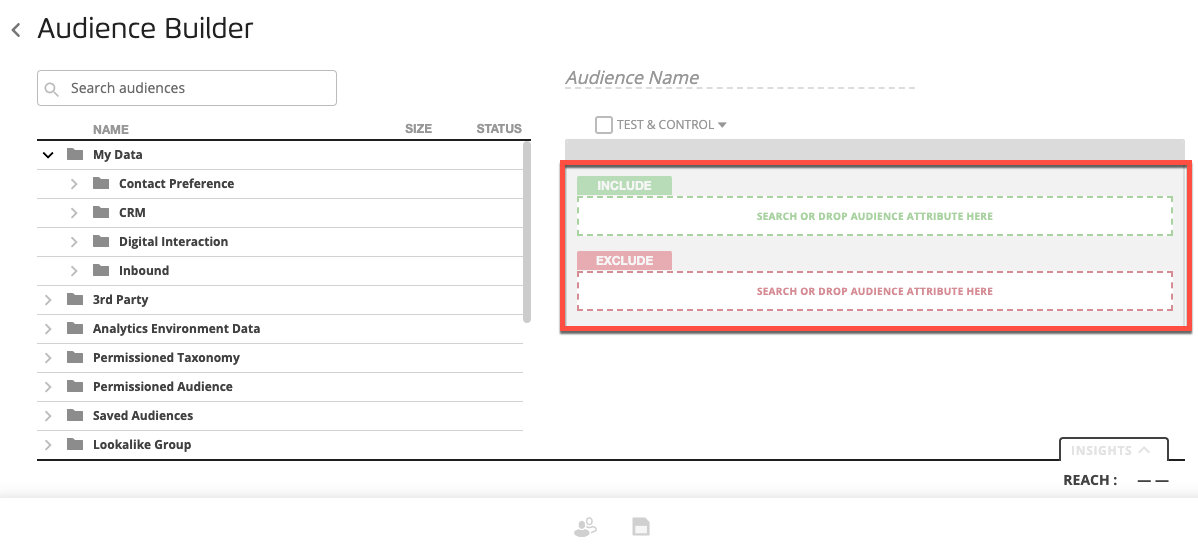
Click the caret next to the dataset folder that contains one of the segment categories you want to use to build the new audience. Depending on the location of the desired segment category, continue opening folders until the segment category is visible.
Note
The data that appears in the My Data folder is determined by the active taxonomy. See Make a Taxonomy the Active Taxonomy.
The Permissioned Audience and Permissioned Taxonomy folders are displayed if a partner has granted you data permissions for an audience or taxonomy.
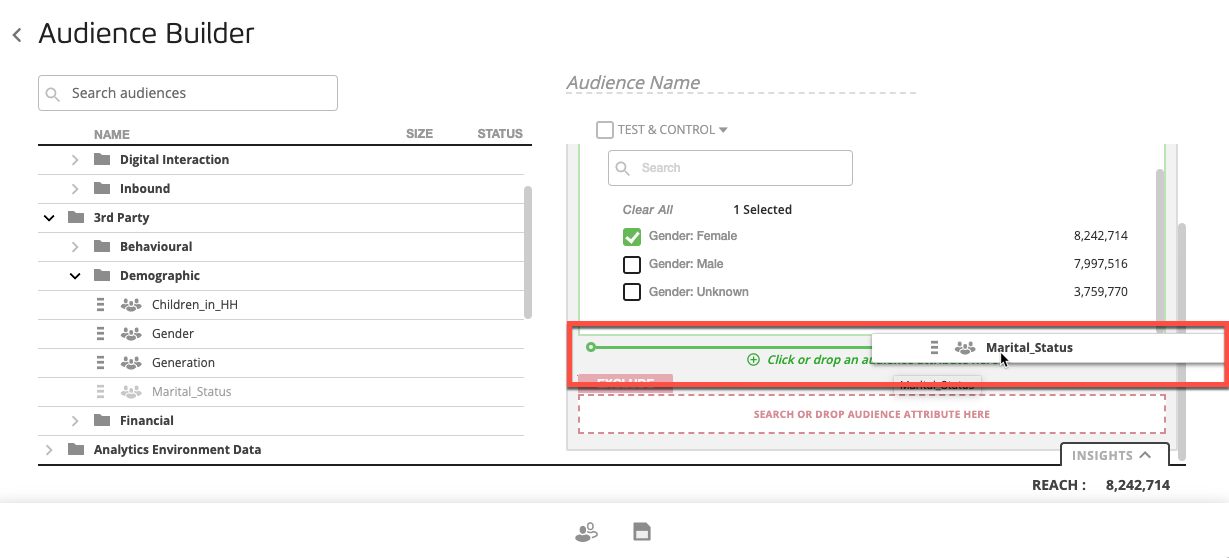
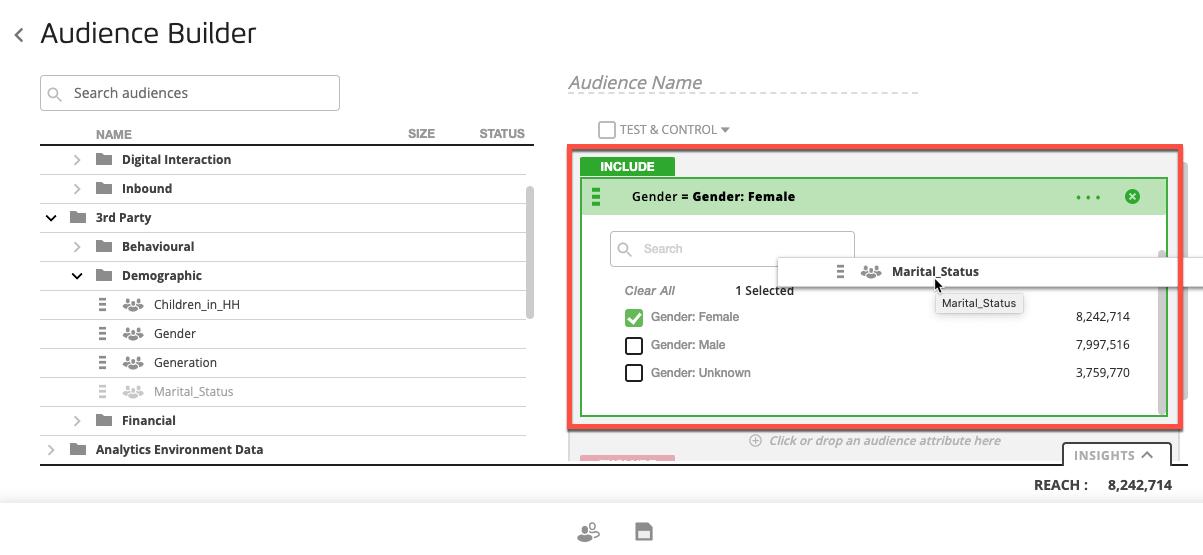
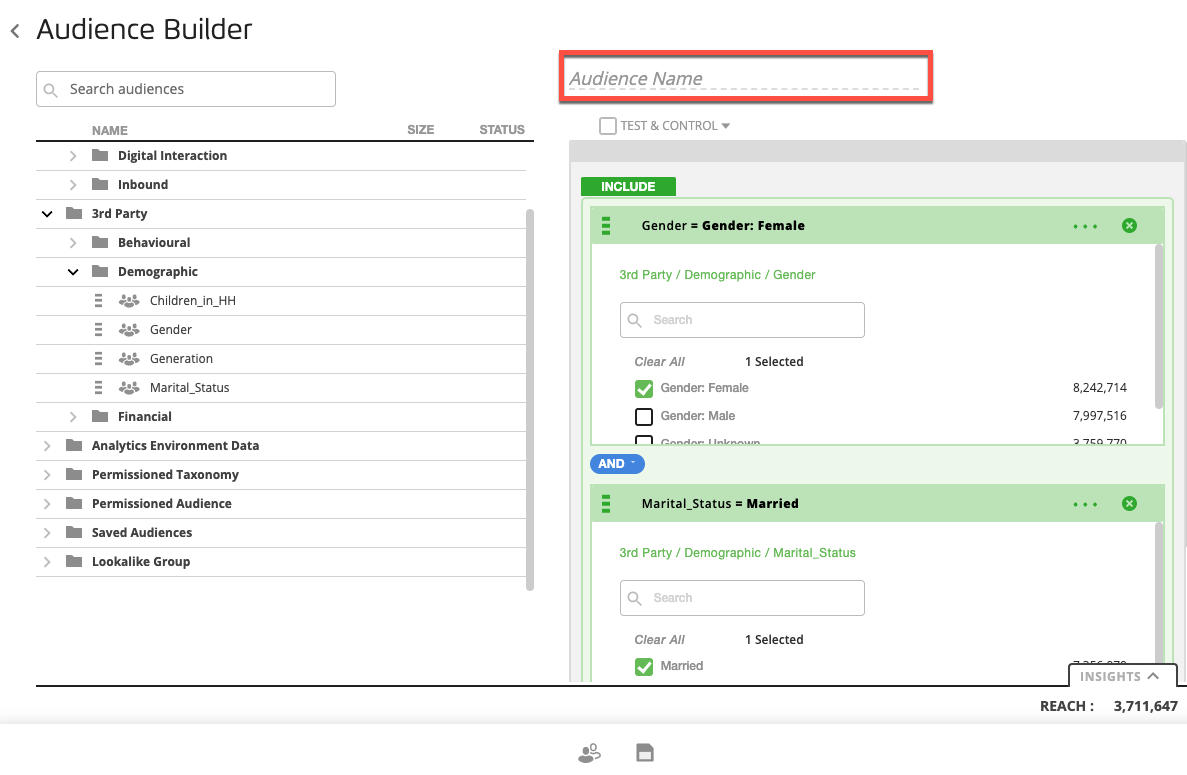
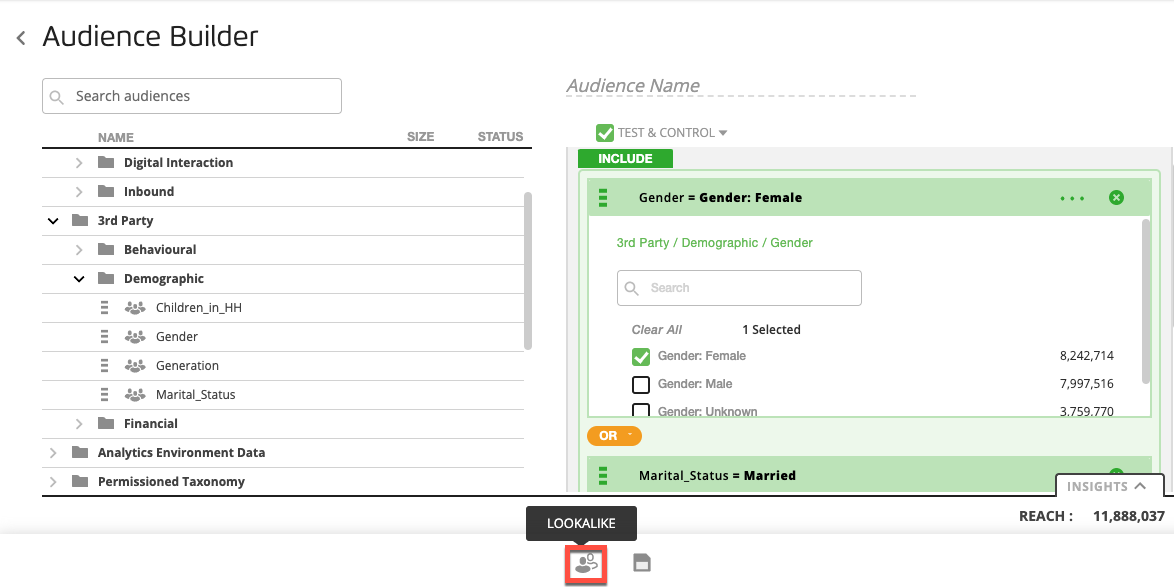
Drag a segment category into either the INCLUDE box or the EXCLUDE box, and then select the check boxes for the desired values (if appropriate).
You can also use a previously created audience as a component of your new audience by opening the "Saved Segments" folder.
Tip
You can also find segments by entering text directly into one of the boxes and then selecting the desired segment from the search results.
If desired, continue building the segment by dragging additional segment categories into the segment and toggling between the AND and the OR selections between the individual segment components:
To create a segment with simple segment rules (with no segment nesting), drag an additional segment category into the area between the INCLUDE box and the EXCLUDE box until a bright green line appears under the INCLUDE box.
To create a segment with nested segment rules (similar to the way parentheses are used in mathematical equations), drag an additional segment category into the INCLUDE box (the border of the box will turn bright green when the segment is correctly positioned).
When you've finished adding all the desired components, enter a name for the audience in the "Audience Name" field.
Note
The audience name can only contain letters, numbers, hyphens, or underscores, cannot contain more than 240 characters, and must be unique.
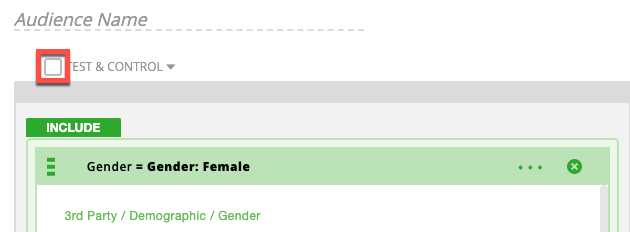
To create a test and control group:
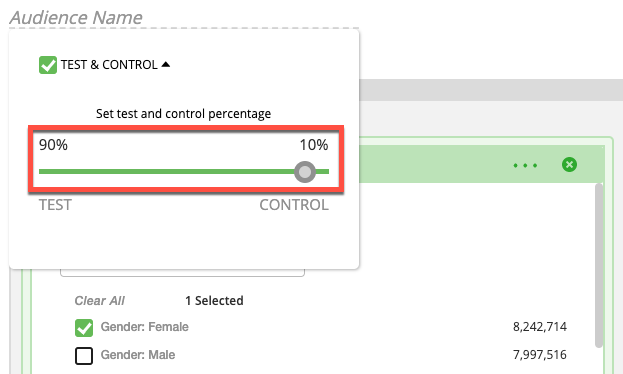
Click the TEST & CONTROL check box.
By default, 90% of the deduplicated audiences will be put in the test group, and 10% in the control group. If you want to adjust this split, click the caret symbol to the right of TEST & CONTROL to open the percentage slider dialog.
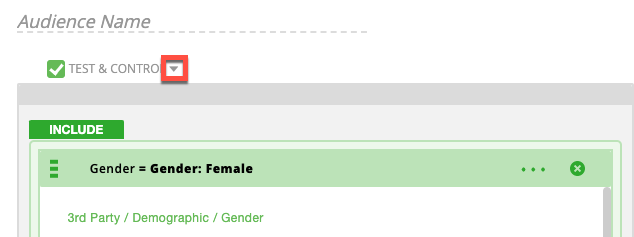
Adjust the slider to the desired split, and then click the caret symbol again to exit the dialog.
You can select the Insights tab to see the data visualizations contained in the active profile for your account. See "Create a Profile."
If you only need this audience as a seed audience to use for creating a lookalike-modeled audience, click at the bottom of the screen and then follow the instructions in "Creating a Lookalike-Modeled Audience."
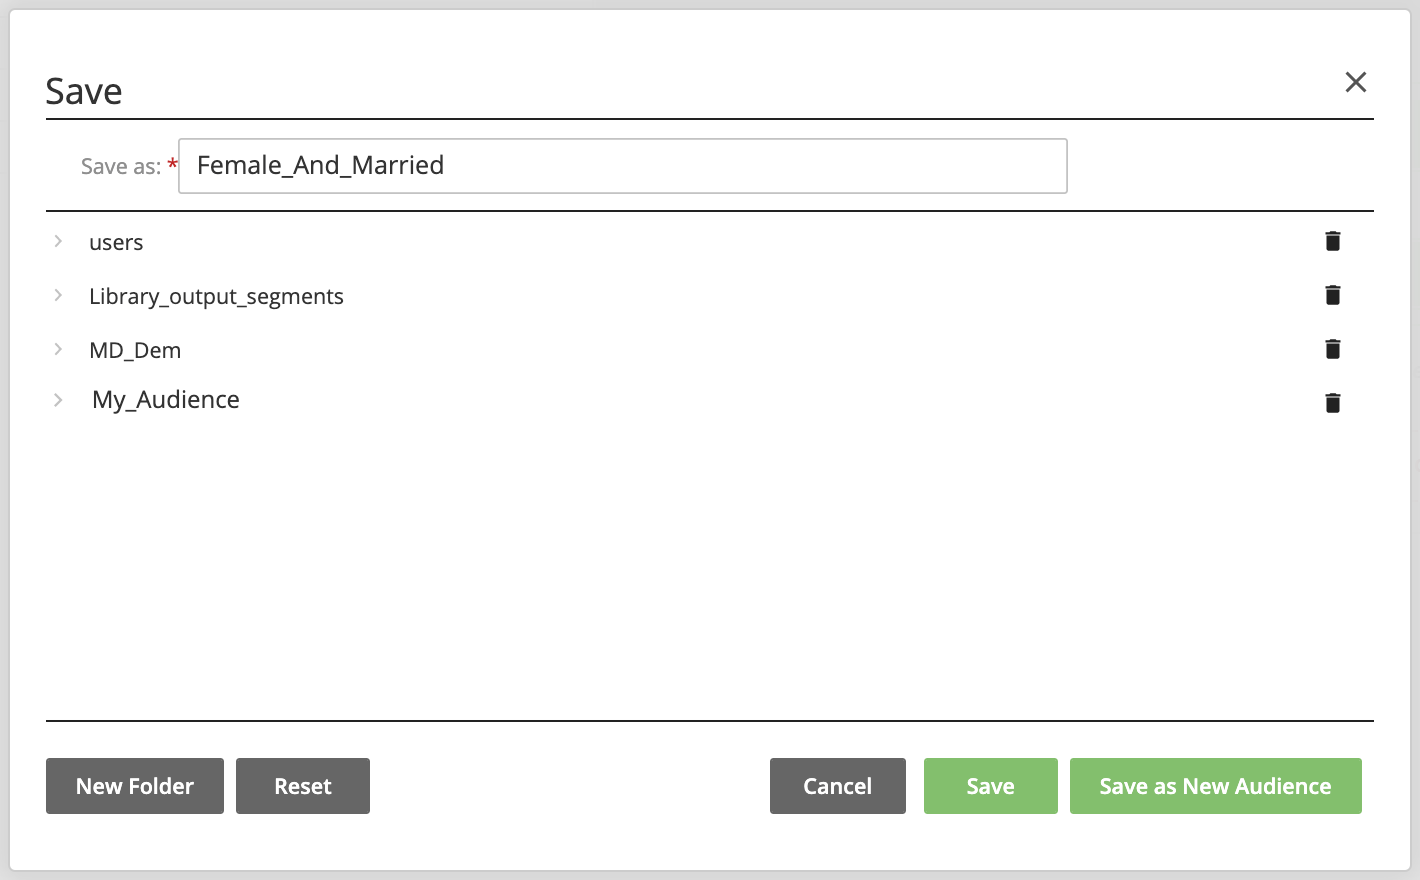
Click .
Confirm your audience name.
(Optional) Select the folder or subfolder to save the audience into (if they've been created). If you don't select a folder, the audience will be saved in the root folder.
Note
To create a new folder, click New Folder, enter a folder name, and then click New Folder again.
Click Save.
To view your audience, go to the Audiences page.