Manage Users
If you are assigned the Tenant Admin persona, you can manage users for your tenant.
Note
If you and your partners agree that you should manage your partner's users, create a case in the LiveRamp Community portal to request a Primary Tenant persona.
You can view users in your tenant account.
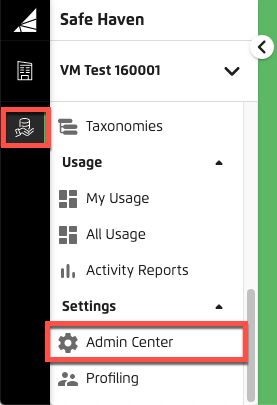
In the left navigation bar, click Admin Center.
The Tenants tab appears.
Click the Tenant Users tab.
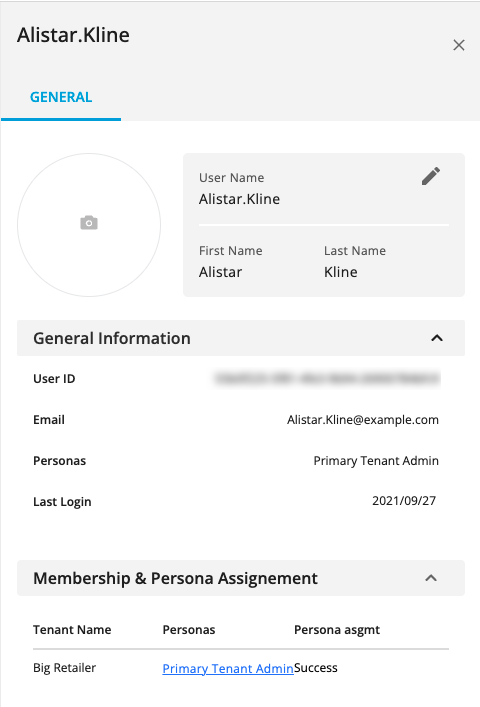
Click anywhere in the row of the user you want to view. The side pane displays more details for the user, including their contact information, user ID, assigned personas, last login, and so on.
In the Admin Center, click the Users tab, where you can view the user names and email addresses of theusers.
If you want to view more details than are available on the Users tab, click the side panel's General tab and then click Manage Partner Tenant. The partner's view of the Admin Center is displayed.
Click the Users tab and then click anywhere in the row of the user you want to view. The side pane displays more details for the user, including their contact information, user ID, assigned personas, last login, and so on.
Before you can create a user, you need the appropriate email address to use for Safe Haven. You cannot modify the email address after creating the user account.
To create a user for your tenant, the account must first be created and the personas must be configured. See Manage Partner Tenants.
In the left navigation bar, click Admin Center.
The Tenants tab appears.
Click the Tenant Users tab.
Click .
The Create New User dialog appears.
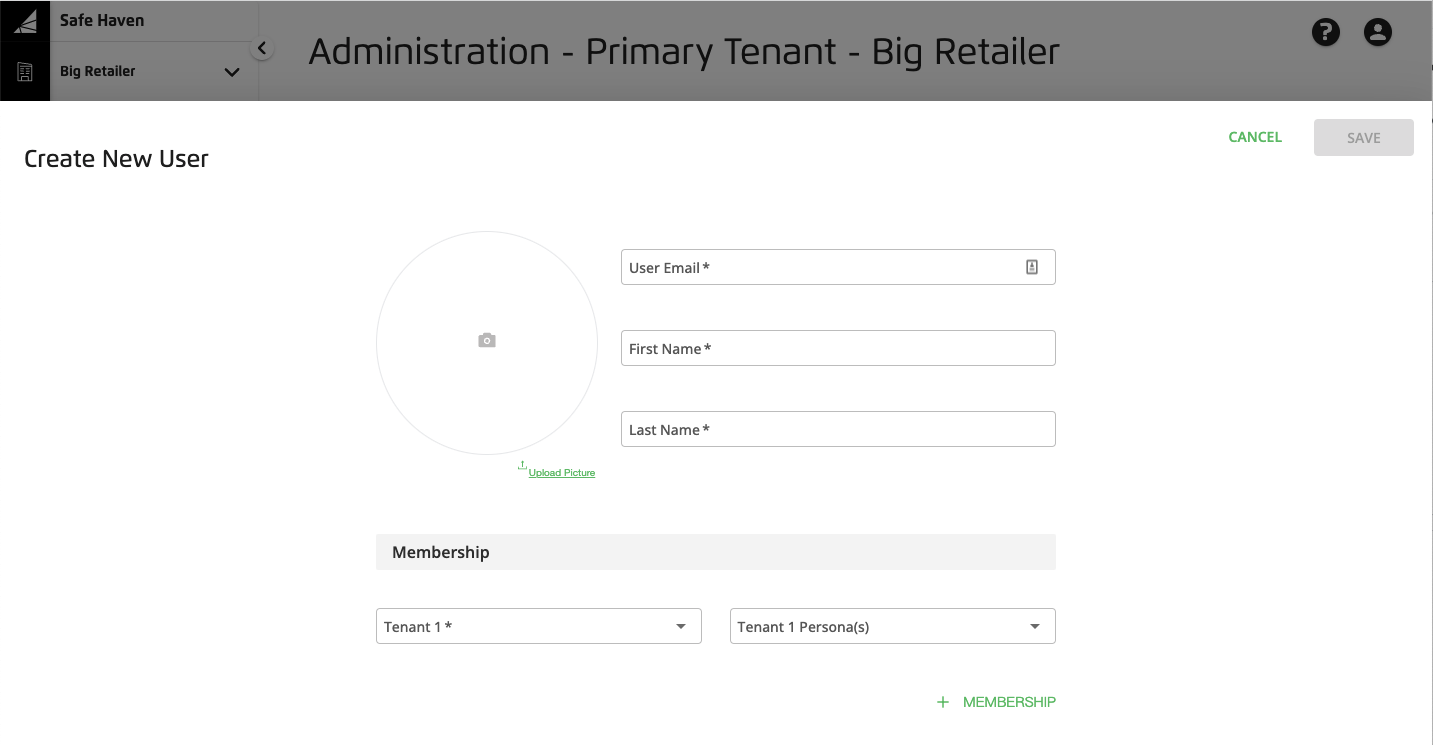
Enter the user's email, first and last name, and optionally upload a photo of the user.
In the Membership section, select your tenant's name from the Tenant dropdown list.
From the Tenant Persona list, select the persona that you want to assign to the user.
Caution
You can select multiple personas if you need to give a user access to more applications than are granted by a specific user persona but this is not recommended. If you believe having users with multiple personas is required for your activities, create a Customer Profiles case in the LiveRamp Community portal.
Due to Analytics Environment data access restrictions, a user cannot be granted an LSH Data Scientist persona and either an LSH Data Analyst persona or an LSH Admin persona for the same tenant.
Click .
The user's record is saved and their persona status is displayed as In Progress. The account will be ready to use once the persona is successful.

Once user persona changes are successful, it can take up to 24 hours for the changes to propagate.
Note
If you have enabled SSO for LiveRamp applications and the user already exists in your SSO implementation, they can log in with their existing credentials.
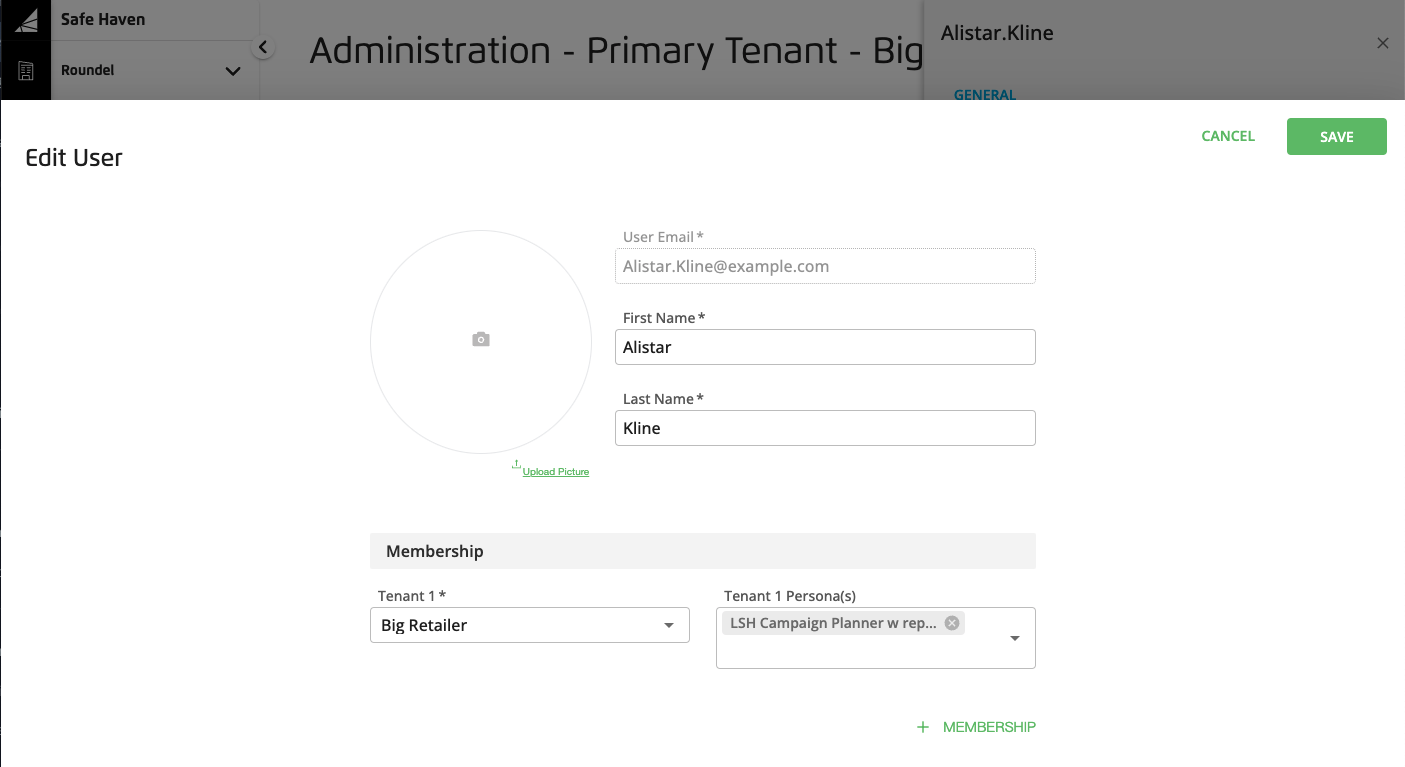
When you edit a user's record, you can modify their first and last name, upload a photo, and assign or remove persona assignments. You cannot edit their email address once the account is first created. If you must change the user's email address, remove the user's record and create a new user record with the correct email address.
In the Admin Center, do one of the following:
Tenant user: Click the Primary Tenant Users tab.
Click anywhere in the row of the user you want to view. The side pane displays more details for the user, including their contact information, user ID, assigned personas, last login, and so on.
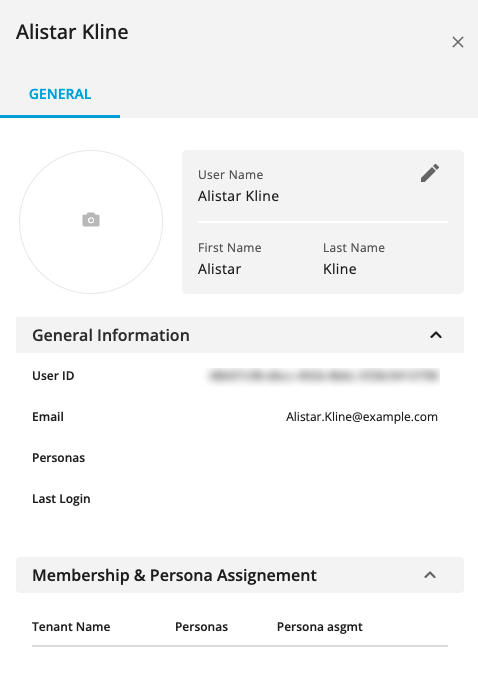
In the User Name section at the top of the user's side panel, click the Edit icon
 .
.The Edit User dialog is displayed.
Note
If the user previously had been assigned a persona that is still in progress or resulted in a problem, the Edit icon will be grayed out and you must wait until the processing completes before editing the user.

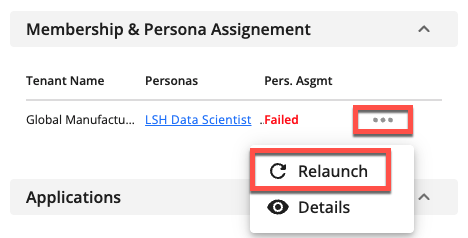
If the persona status is Failed (such as when assigning the LSH Data Scientist persona and your account lacks sufficient Tableau licenses), you can try the option from the More Options menu (
 ). If the assignment fails again, create a case in the LiveRamp Community portal.
Edit the user's picture, name, tenant, and persona as needed.
Click .
Once changes are made to user personas, it can take up to 24 hours for the changes to propagate.
At times, you might need to remove a user from your account to free up a license for a new user (depending on the number of licenses allowed in your contract), or because that user should no longer have access to Safe Haven.
Note
The user will only be removed from the tenant you're currently managing. If the user has access to other Safe Haven tenants, removing the user will not affect their access to those tenants.
In the Admin Center, do one of the following:
Tenant user: Click the Primary Tenant Users tab.
Tenant user: Click the Tenants tab, click the tenant's row, click Manage Tenant, and click the Users tab.
Tenant user: From the More Options menu (
 ), select .
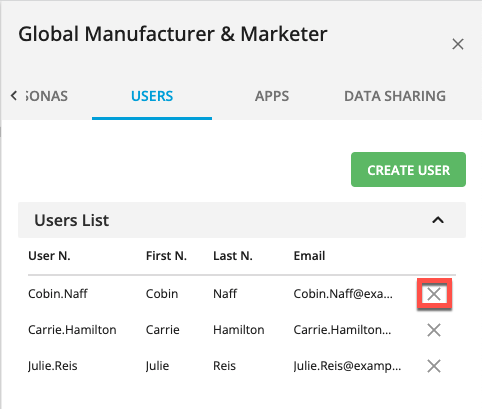
Tenant user: Click the Tenants tab, click the tenant's row, click the Users tab, and click the user's X icon.
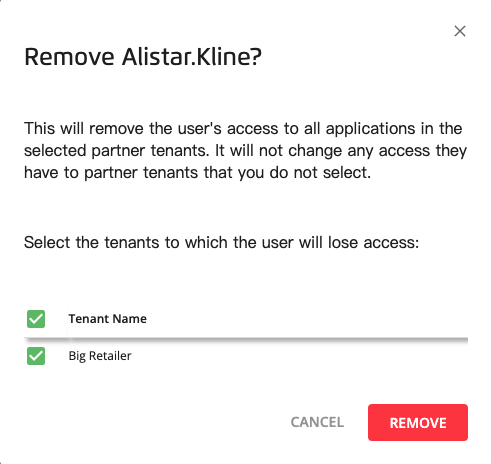
In the Remove username dialog, select the check boxes for all tenants from which you want to remove the user.
Click .