Activate a New Destination Account
A destination account at LiveRamp is a set of configurations that allow you to distribute data to a particular seat at a destination.
To activate a destination account, you first select the destination and then select the appropriate destination integration (based on the type of data you're sending, the region, or the delivery configuration):
To distribute first-party data segments (data you collected or purchased outside of LiveRamp), you need to activate a first-party data destination integration.
To distribute Data Marketplace data segments, you need to activate a Data Marketplace destination account integration.
To distribute segments built from data from LiveRamp Clean Room In a brand self-service workflow, you need to activate a Data Marketplace data destination integration (because any segments you build from that data are considered "monetized clean room segments").
To distribute segments built from data from LiveRamp Clean Room In a retailer-managed workflow, you need to activate a Data Marketplace data destination integration (because any segments you build from that data are considered "non-monetized clean room segments").
Note
You cannot distribute both first-party data and Data Marketplace data through the same destination account.
For certain first-party destinations, you'll have an option to choose a Record Sync-enabled destination account if you want to be able to have the user deletions within segment updates sent to the destination during data refreshes. See "Keep Destination Data Fresh with Record Sync" for more information.
Tip
LiveRamp is integrated with hundreds of destinations, and we're adding new ones all the time. You can find the full list—which includes display, mobile, search, video, site personalization, and attribution platforms—at www.liveramp.com/partners.
Caution
To activate a destination account at a destination that requires OAuth authorization, you must have the appropriate permission level to create an OAuth connection for that destination. See "Managing OAuth Connections" for more information.
To distribute first-party data to Google, you must first provide LiveRamp with access to your Google account by mapping the appropriate LiveRamp account ID to your Google account. This must be done before you activate the Google destination account. For more information, see "Providing Access to LiveRamp".
To distribute data to Facebook through either the Direct Integration or the Data Marketplace integration, you must add LiveRamp as a partner in Facebook for the associated ad account ID(s) before you activate the destination account. For more information, see "Add LiveRamp as a Partner in Facebook".
Some destination accounts (such as LinkedIn, and Adobe Audience Manager) require additional manual configuration by LiveRamp after the destination account has been activated (for a list of these platforms, see the "Destination Platforms that Require LiveRamp Action" section below). Create a support case to complete the activation (see "Using the LiveRamp Community Portal" for instructions).
Once you've activated the destination account, you can go to the Segment Distribution page for that destination account to distribute data to your seat at that destination.
For instructions on activating a destination account, see the section below.
Tip
To view an interactive walkthrough demo of this process, click here.
Steps to Activate a Destination Account
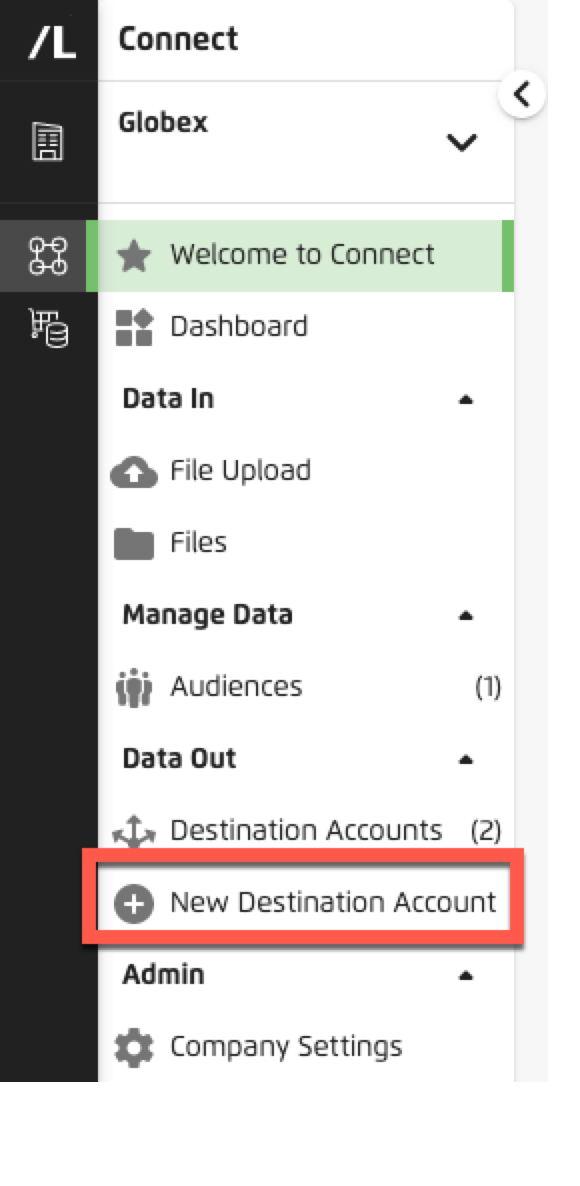
To activate a new destination account in Connect:
From the Quick Actions menu, select New Destination Account.
Use the following methods to locate your desired destination:
Search by the destination name
Scroll through the list of destinations
Use the "Destination Type" filter to filter on any desired capabilities:
AI: Displays destinations with integrations to activate data to AI partners
Audio: Displays destinations with integrations to activate data to Audio partners
CTV/Video/TV: Displays destinations that have a destination integration that supports sending CTV IDs
Commerce Media Networks: Displays destinations with integrations to activate data to Commerce Media Network partners
DSP: Displays destinations with integrations to activate data to DSP partners
Data Marketplace: Displays destinations that have a Data Marketplace data destination integration
Direct to Publisher: Displays destinations that participate in our Direct to Publisher program
Gaming: Displays destinations with integrations to activate data to Gaming partners
MarTech: Displays destinations with integrations to activate data to MarTech partners
Onboarding: Displays destinations that have a first-party data destination integration
Other: Destinations that do not fit into other categories
SSP & Curation: Displays destinations with integrations to activate data to SSP and Curation partners
Search: Displays destinations with integrations to activate data to Search partners
Social: Displays destinations with integrations to activate data to Social partners
Note
To keep a particular destination at the top of the list, you can make that destination a "favorite" by clicking the star in the upper right of the tile.
Destinations that are unavailable to you (often because they were not included in your contract) will be “grayed out” and can’t be activated. You can contact your LiveRamp Customer Success Manager if you wish to have one of those tiles enabled.
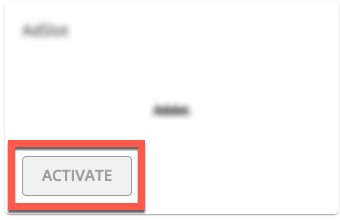
Once you've located your desired destination, hover over that destination tile and then click Activate.
From the Choose an Integration screen, locate your desired destination integration (you can use the same methods you used to locate your desired destination).
Note
Be sure to use the appropriate integration for first-party data or a Data Marketplace integration for Data Marketplace data. Create a support case (see "Using the LiveRamp Community Portal" for instructions) or contact your Customer Success Manager if you’re unsure which integration to activate.
For certain first-party destinations, you'll have an additional option to choose a Record Sync-enabled integration if you want to be able to have user deletions sent to the destination during data refreshes. See "Keep Destination Data Fresh with Record Sync" for more information.
Integrations that are unavailable to you (often because they were not included in your contract) will be “grayed out” and can’t be activated. You can contact your LiveRamp Customer Success Manager if you wish to have one of those tiles enabled.
To keep a particular destination integration at the top of the list, you can make that destination integration a "favorite" by clicking the star in the upper right of the tile.
Once you've located your desired destination integration, hover over that destination integration tile and then click Activate.integration.
The configuration screen for that destination integration opens.
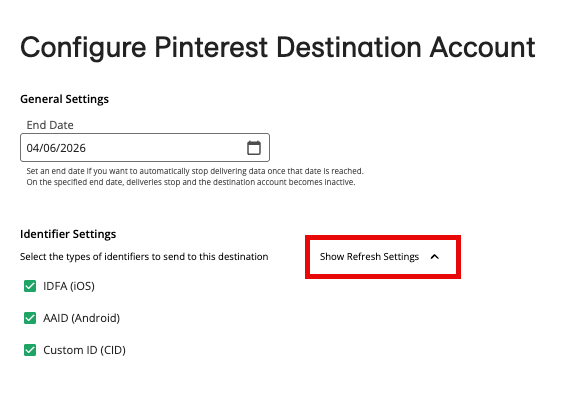
If desired, use one of the methods below to change the default end date:
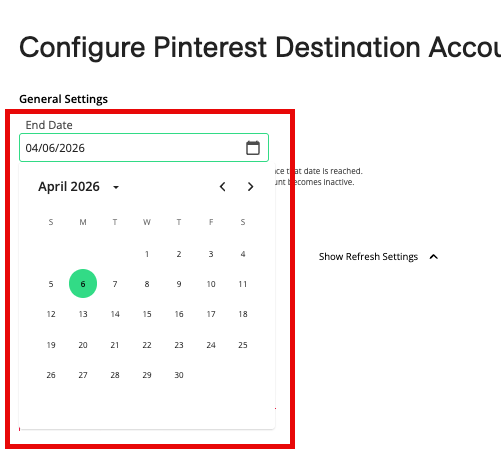
Click into the End Date field and select the desired end date from the dropdown calendar that appears.
Click the blue "X" in the End Date field to activate the destination account with no end date.
Note
By default, the end date is set to six months after the activation of the destination account, and the Account Status is set to “Active”.
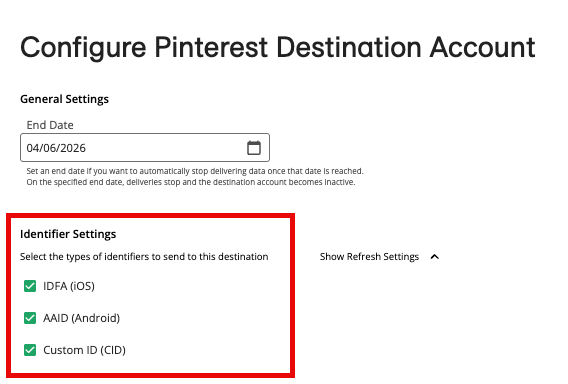
Confirm or change the identifier settings. If a destination supports multiple identifier types (for example, a mobile ad platform that supports both Android and iOS devices), you can choose which identifiers you'd like to send data to. The default identifiers for that destination will be used unless you change the selections.
Tip
For those destinations that accept RampID as an identifier, we recommend that you keep RampID selected in order to maximize your reach and match rates.
Note
For destinations that support the delivery of IP addresses (Acast, MNTN, and Nexxen), select "Platform IDs" to deliver those identifiers.
If necessary, view or edit the refresh options. The default refresh options that are suitable for the majority of the workflows for that destination are enabled (see “How LiveRamp Refreshes Distributed Data” for more information). To view or change the default refresh options for the selected identifier types, click the “Show Refresh Settings” link text.
To change the options (for admin-level users only), select or deselect the appropriate check boxes.
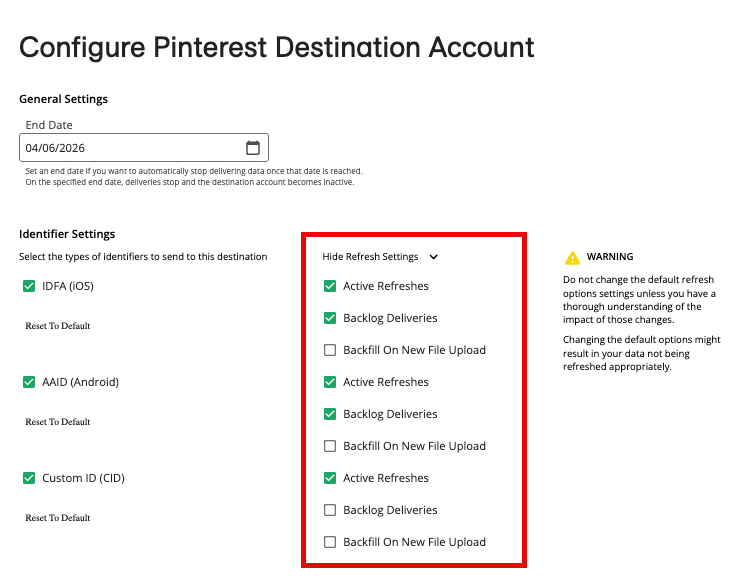
Caution
The default options for each destination account should only be changed for custom or unique workflows, and only if you have a thorough knowledge of the impact of these settings. Changing the default options might result in your data not being refreshed appropriately.
If you’re activating a Google DV360 PAIR destination account, select the DV360 publishers you want to activate the data to:
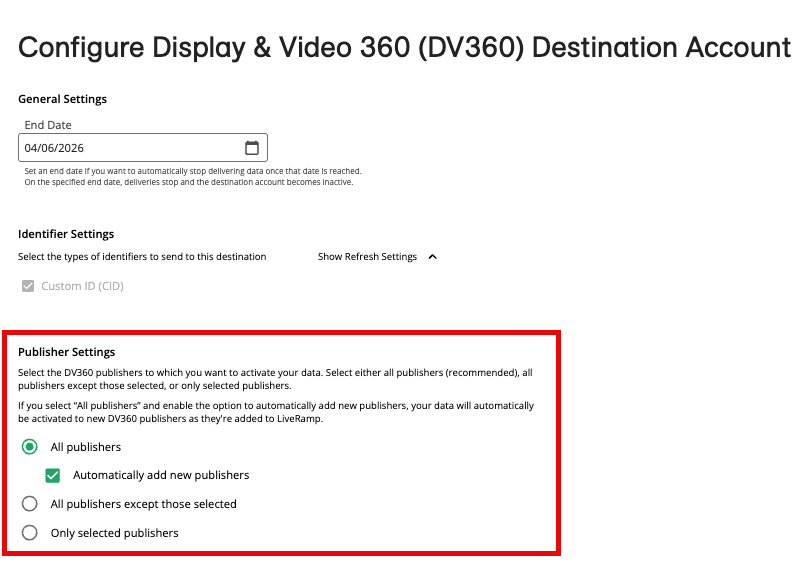
All publishers
Note
If you select “All publishers”, you can then choose to enable the option to automatically add new publishers so that your data will automatically be activated to new DV360 publishers as they're added to LiveRamp.
All publishers except those selected: Click the radio button and then check the check boxes for the publishers you want to exclude (scroll or use search to find the desired publishers)
Only selected publishers: Click the radio button and then check the check boxes for the publishers you want to include (scroll or use search to find the desired publishers)
Note
We recommend selecting “All publishers” to utilize our full publisher network and optimize reach at DV360.
For more information on distributing via Google PAIR, see "Distribute Data to Google DV360 Publishers via PAIR".
If the destination requires a valid OAuth connection:
Tip
See "Destinations That Require Authorization Using OAuth" for a list of OAuth destinations.
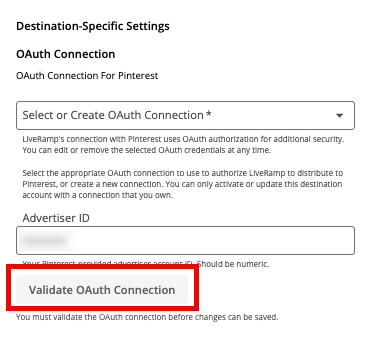
Select one of your existing OAuth connections for that destination from the OAuth Connection dropdown list, or select Create New OAuth Connection to create a new connection for that destination and follow the authorization process at the destination's website.
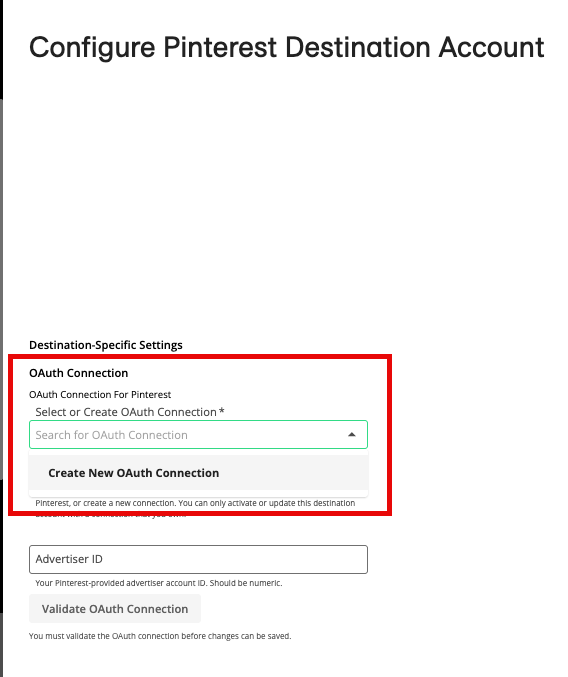
Enter the appropriate information in the other OAuth-related fields (Pinterest example shown - required fields vary by destination).

Click .
Note
See "Activate a Destination Account for OAuth Destinations" for a list of OAuth destinations and information on creating an OAuth connection for those destinations.
Enter the remaining requested destination account settings, following the guidelines given next to that field in the UI. Many destinations will also require you to enter your Account ID with that platform.
Accept or adjust the default destination account name (this will appear as the name of the destination account in Connect).
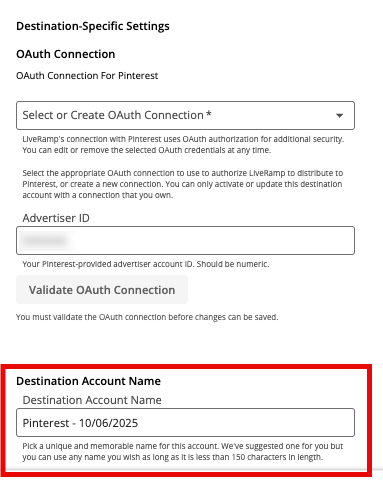
Note
Destination account names must be less than 150 characters in length.
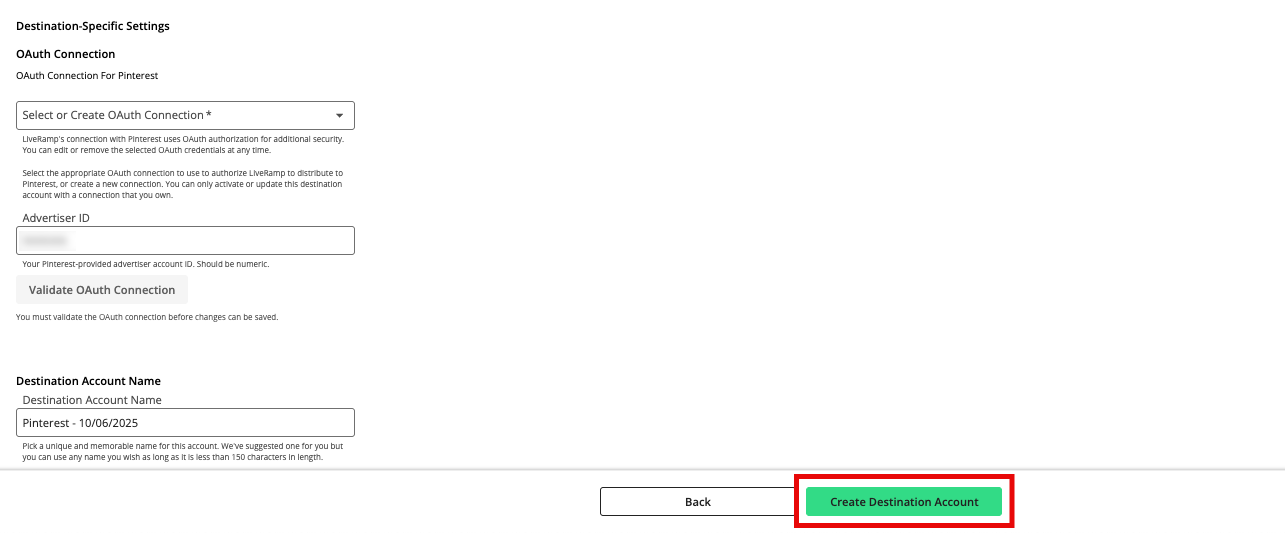
Once you fill out all the required fields (and after fixing any validation errors highlighted in red), click Create Destination Account.
If you're activating a Google first-party integration destination account and you haven't previously provided LiveRamp with access to your Google account by mapping the appropriate LiveRamp account ID to your Google account, follow the appropriate instructions in "Providing Access to LiveRamp".
Note
If this access is not provided to LiveRamp, the distributions will get stuck in the "Failed" status.
If you're activating a destination account for a platform that requires LiveRamp action to complete the configuration, you can either wait for 24 hours to see if LiveRamp is able to finalize the activation or create a support case to ask that the activation be finalized. For a list of these platforms, see the "Destination Platforms that Require LiveRamp Action" section below.
After you've activated the desired destination account, you're ready to distribute data to the destinations.
Note
Make sure to keep within the limits of the number of destination accounts your contract allows, if applicable.
By default, the precision level used by the destination account for distributing segments is the precision level used by the audience those segments are contained within. If you wish to change the precision level for a particular destination account only, create a support case (see "Using the LiveRamp Community Portal" for instructions).
Need to make property changes or want to deactivate a destination account you no longer need? You can edit the destination account properties at any time.
Destination Platforms that Require LiveRamp Action
For certain destination platforms, LiveRamp needs to perform a manual review and configuration to finalize the activation. In most cases, LiveRamp automatically performs this review and finalizes the activation within 24 hours after you activate the destination account.
Until the activation has been finalized, any segments added to distribution will remain in a "Queued" status.
If the activation hasn't been finalized within 24 hours, create a support case to ask that the activation be finalized.
The destination platforms listed below require LiveRamp action:
Adobe Audience Manager
Jivox - First-Party Data
LiveIntent
Permutive
Prodege
Simulmedia
Teads
Trusignal - Modeling
Viant
Note
For Viant destination accounts, you do not need to wait 24 hours after activation to create a support case. As soon as you finish activating the destination account, create a support case to have LiveRamp finalize it.
Videology - Data Marketplace