Edit a Taxonomy
You can edit the taxonomy directly in the UI or download the taxonomy, edit it in a spreadsheet application, and then upload the file.
Users with the LSH Admin, LSH CP Admin, or LSH Data Scientist personas can edit a taxonomy using the following methods:
Editing the taxonomy directly in the UI
Downloading taxonomy details in an XLSX file, editing it in a spreadsheet application, and then uploading the file
Note
Only the taxonomy owner can edit a taxonomy directly in the UI. If you want to edit a taxonomy that you do not own, duplicate the taxonomy and then edit the duplicated taxonomy.
You cannot edit the active taxonomy. If you want to edit the active taxonomy, first make another taxonomy the active taxonomy. After editing, make the original taxonomy the active taxonomy again. See Make a Taxonomy the Active Taxonomy.
If you need to edit the taxonomy name or the datasets used in the taxonomy, you must edit the taxonomy in the UI. Taxonomy names and the included datasets cannot be edited via Excel file.
Caution
If you have data in the Analytics Environment, we recommend you do not change the segment and value names (i.e., the last "Level_Desc" folder or column and the "Value_Desc" column) because any changes you make to those columns will not be reflected in the Analytics Environment. Keeping the segment names and values the same will make it easy to decipher how Customer Profiles for Data Collaboration segments relate to Analytics Environment segments.
When editing field values, it is possible to duplicate an existing value. For example, if you have a field with a value of X and you change it to Y, you can end up with two Y values if another Y value exists. To prevent duplicates, review existing values before editing a field.
In the left navigation pane, click Taxonomies.
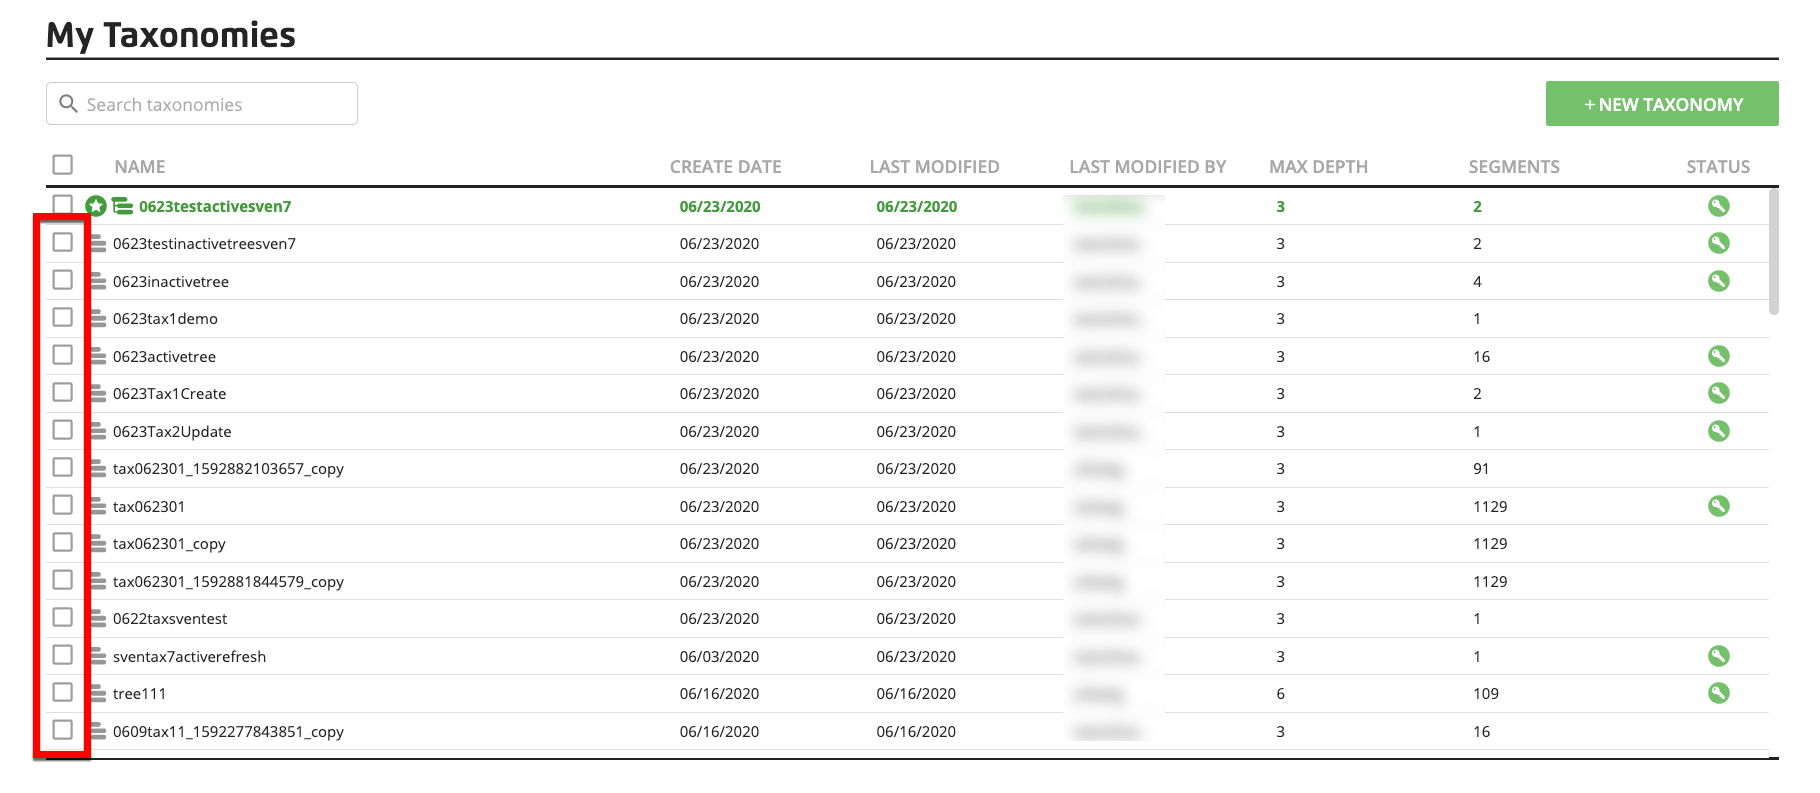
On the Taxonomies page, select the check box for the taxonomy you want to edit.
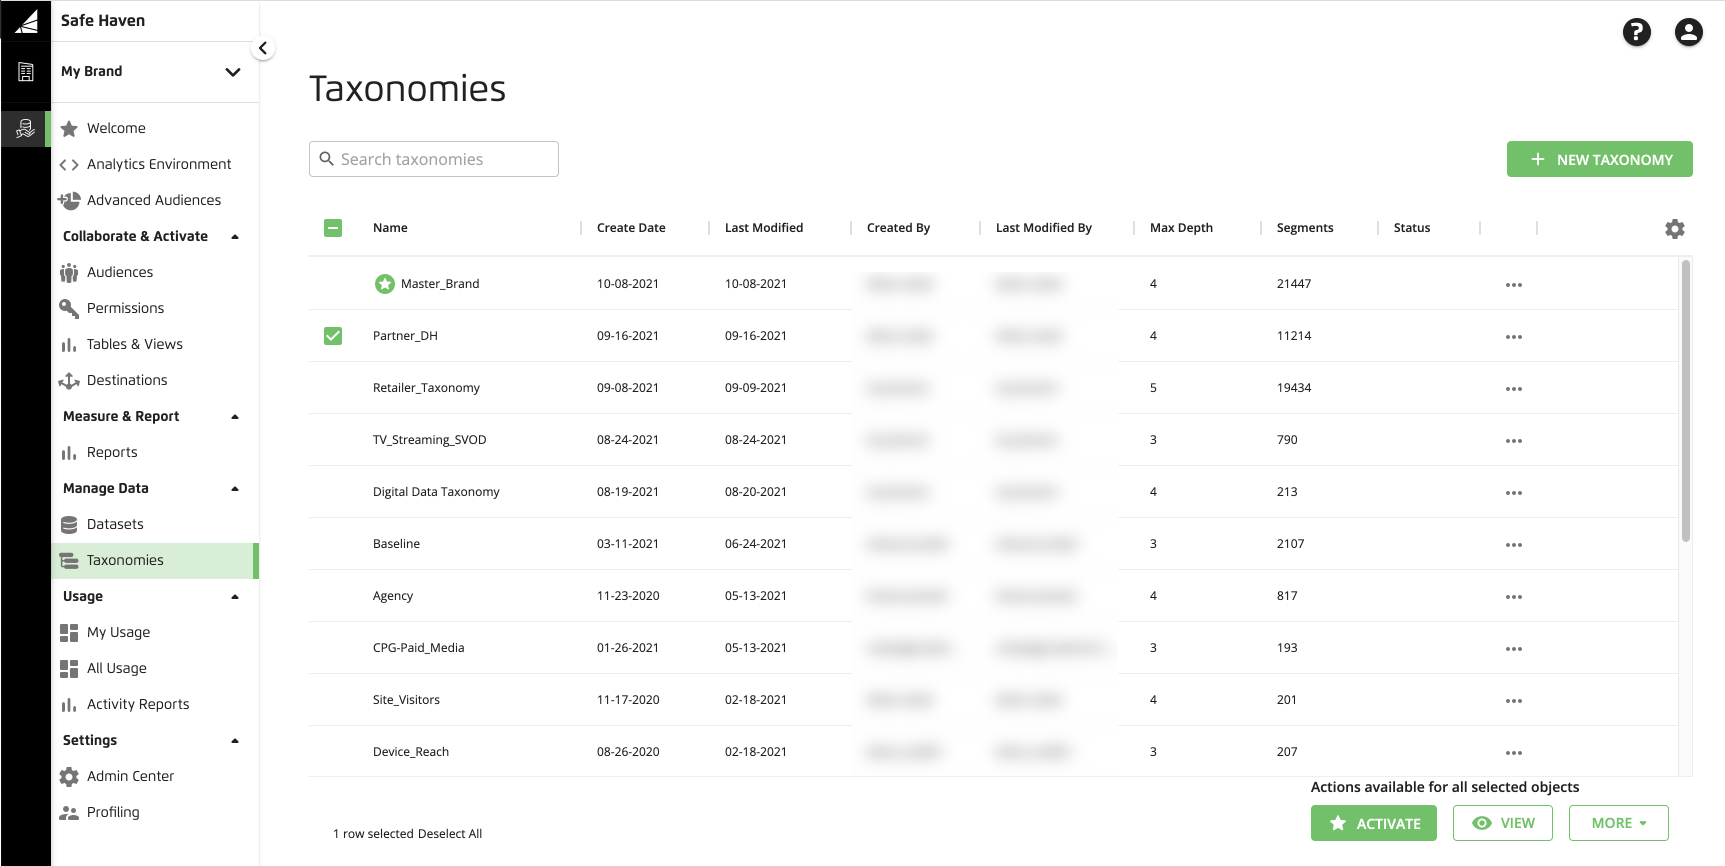
In the footer, click and then click (
 ).
).The Edit Taxonomy page displays.
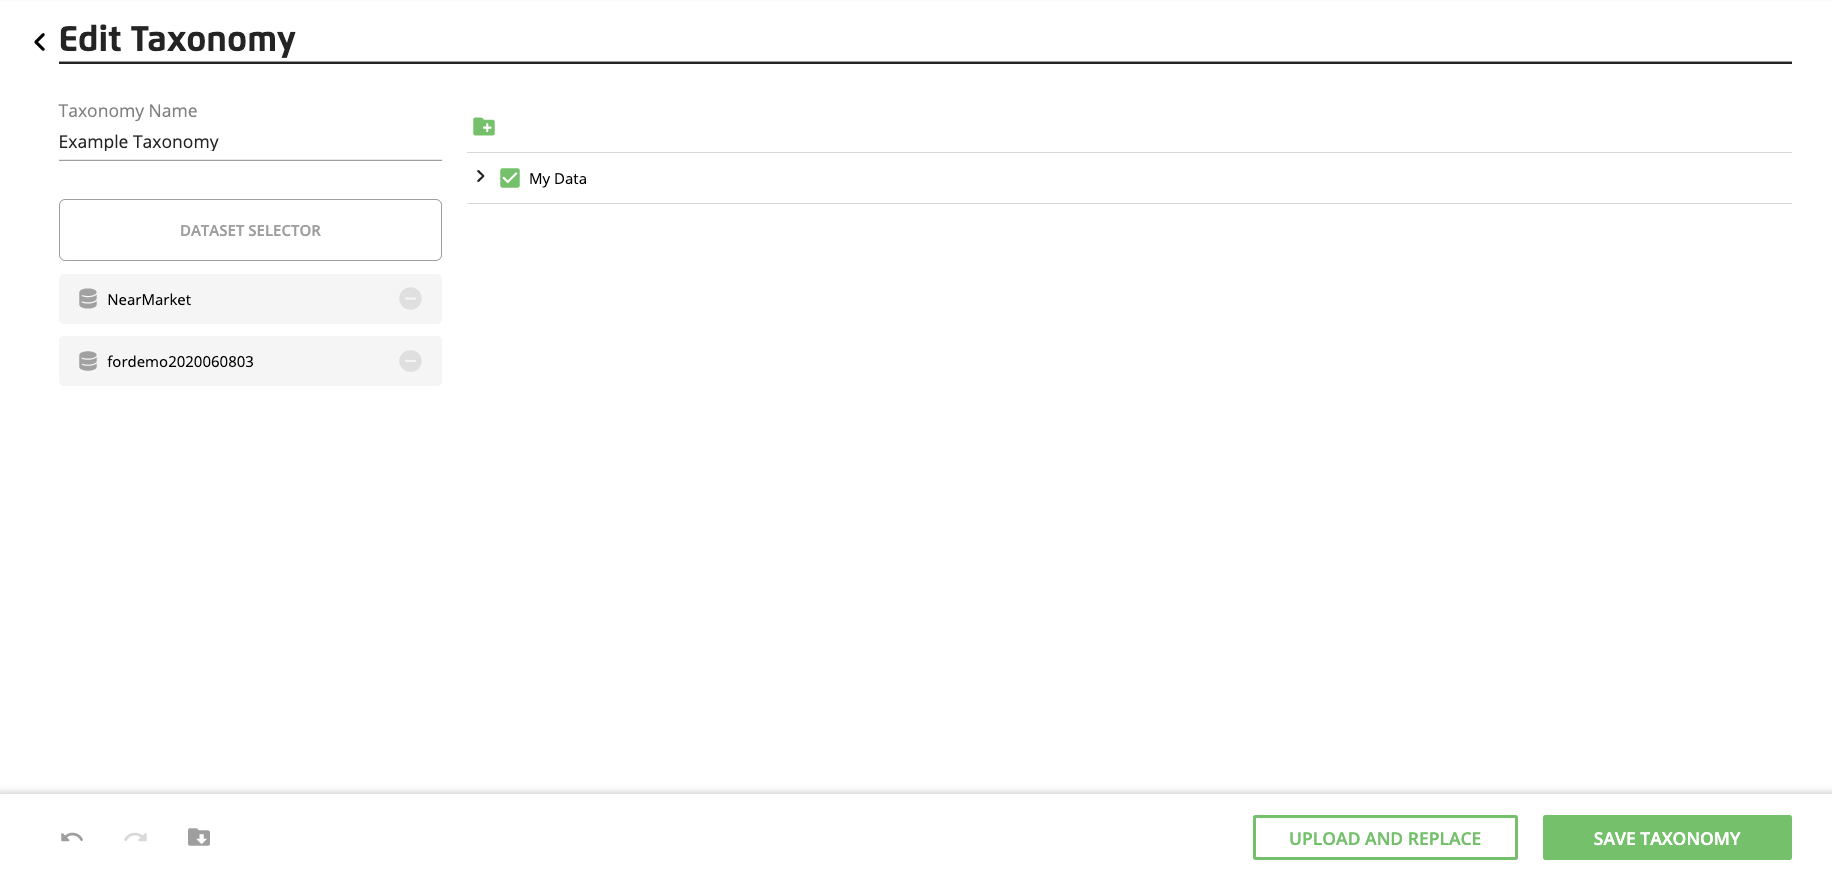
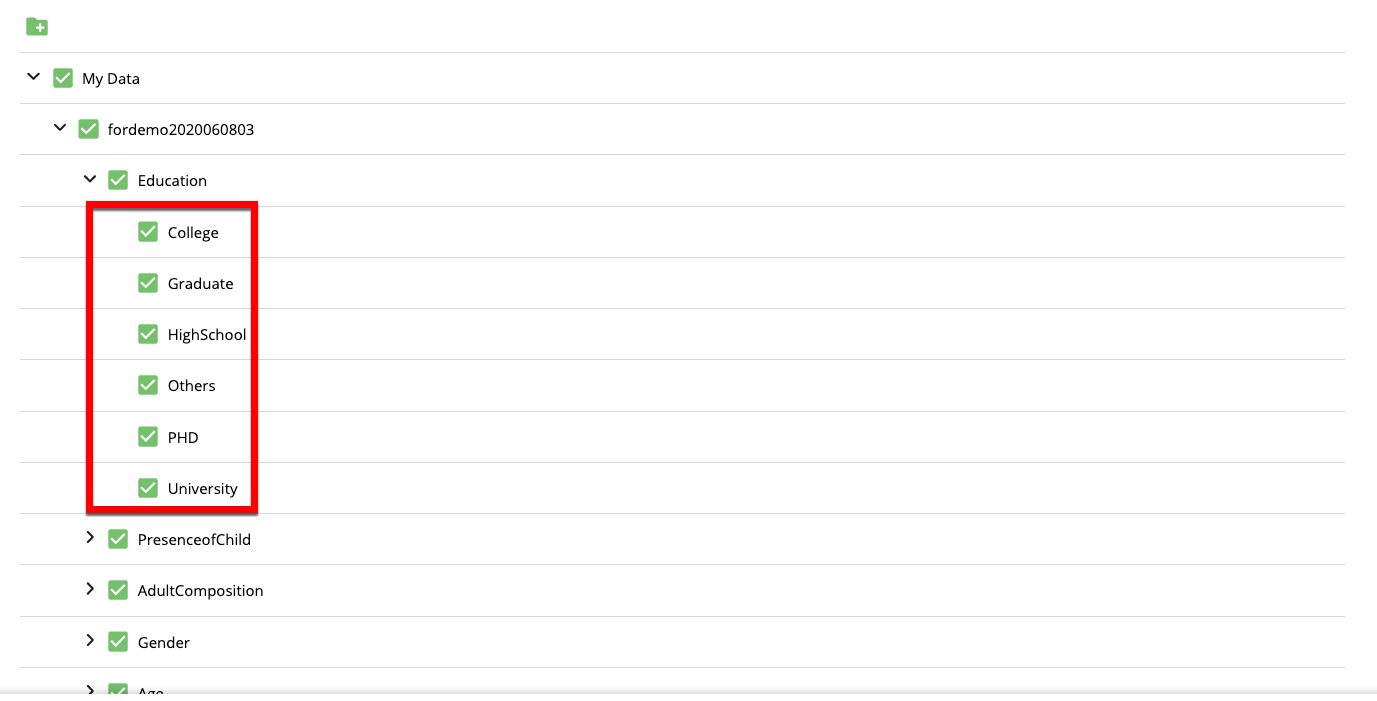
To expand a taxonomy folder: Click the caret to the left of the folder name.
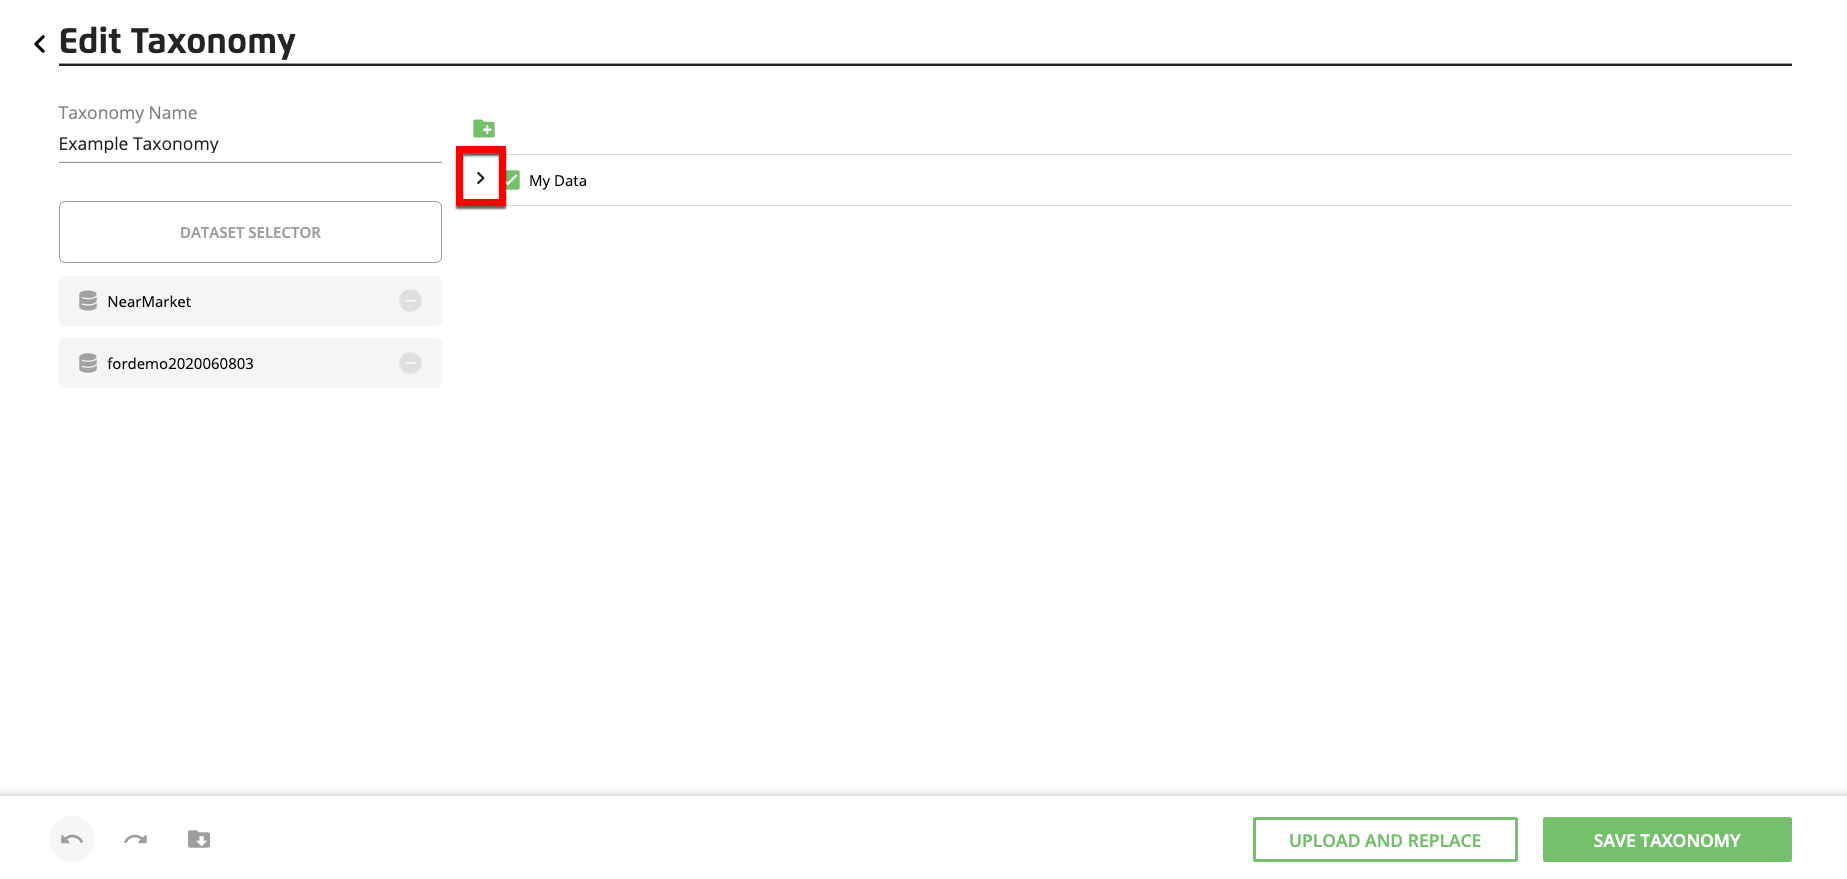
Once you reach the field value level, no caret appears to the left of the field value name.
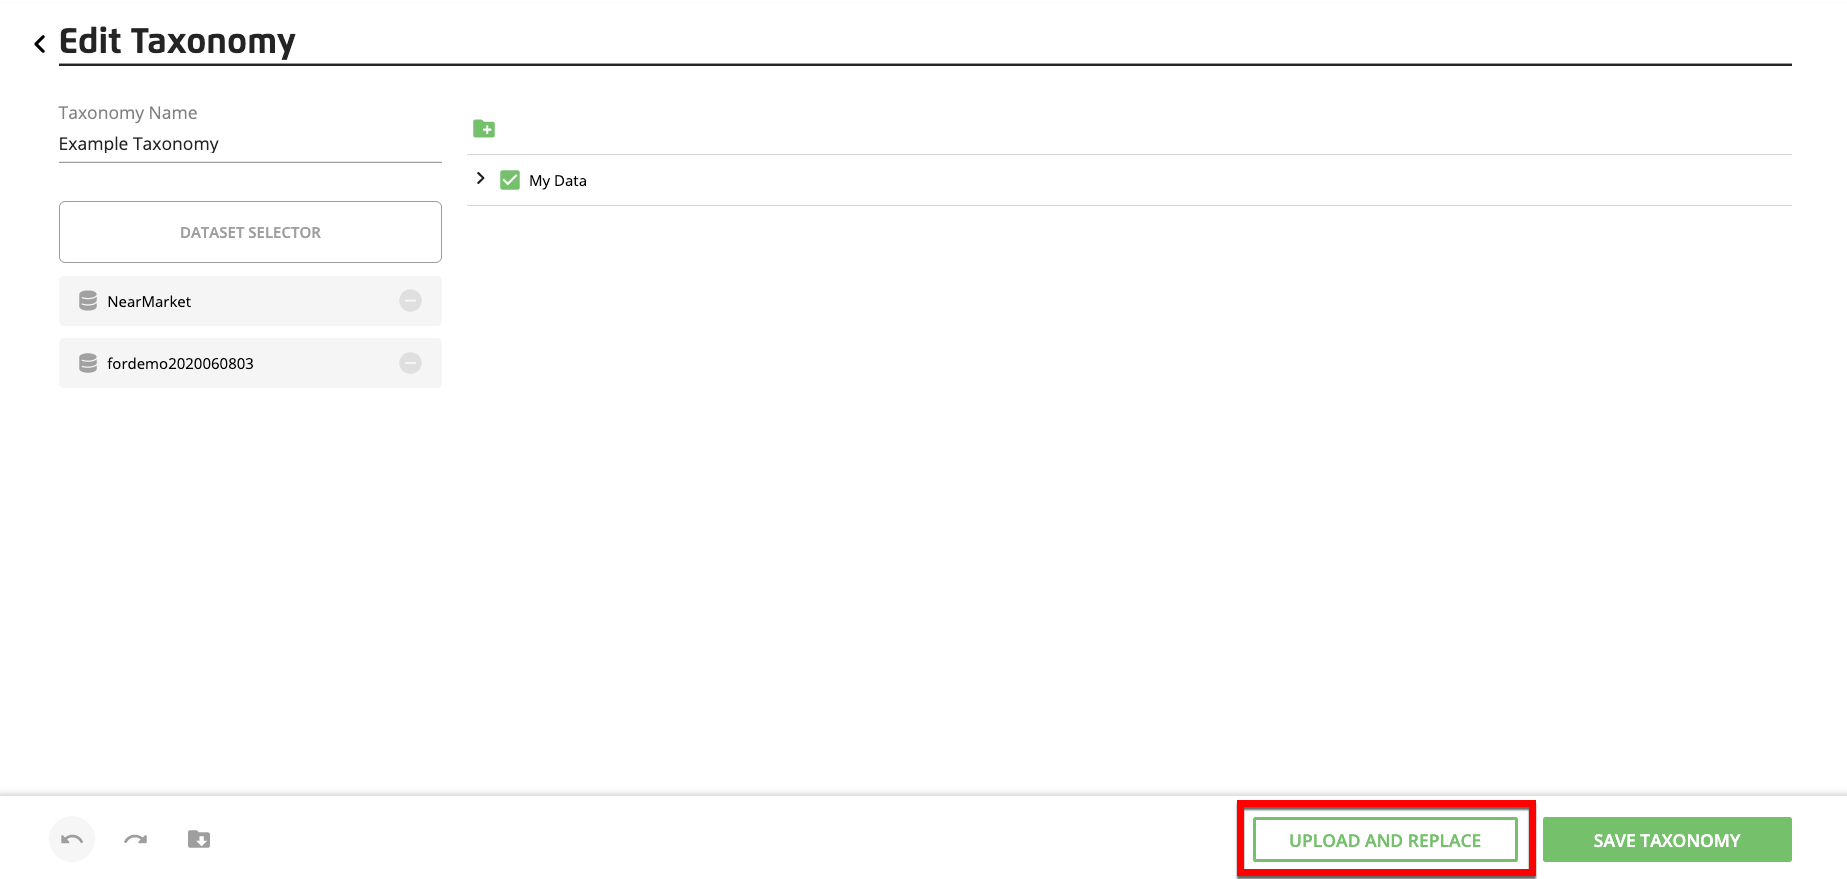
Several editing controls are available in the footer area:
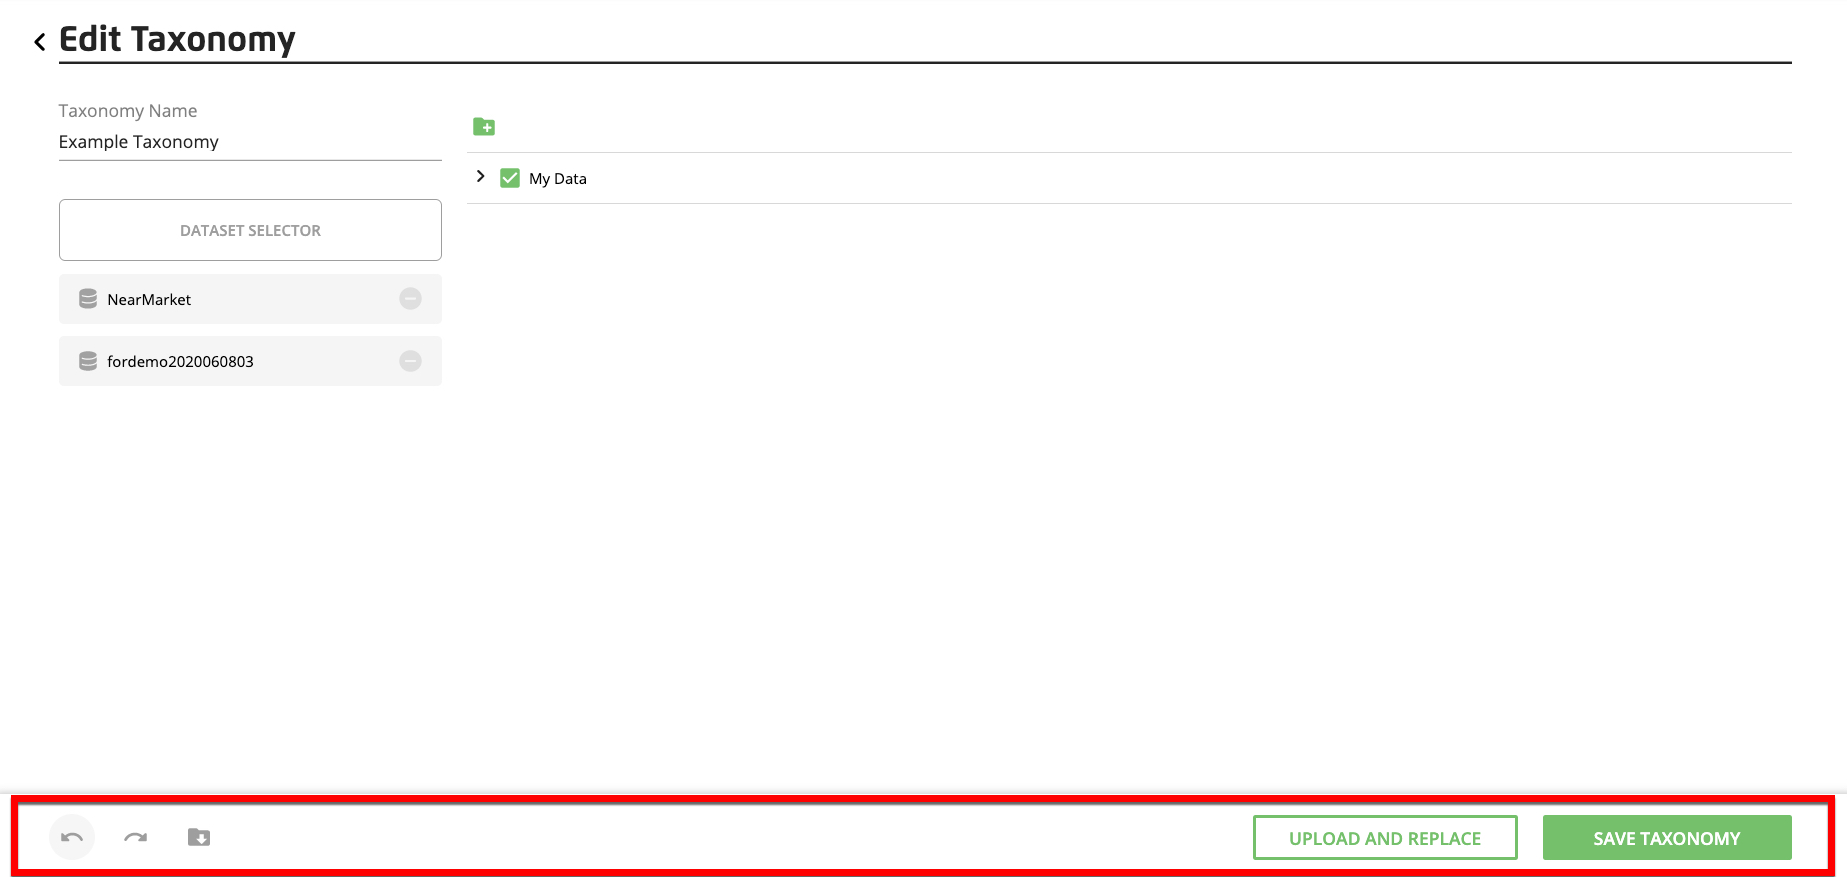
"Undo" and "Redo" buttons (
 )
)A "Download" button (
 ) to download taxonomy details if you want to edit the taxonomy via an Excel file
An "Upload and Replace" button (to upload an edited Excel taxonomy file)
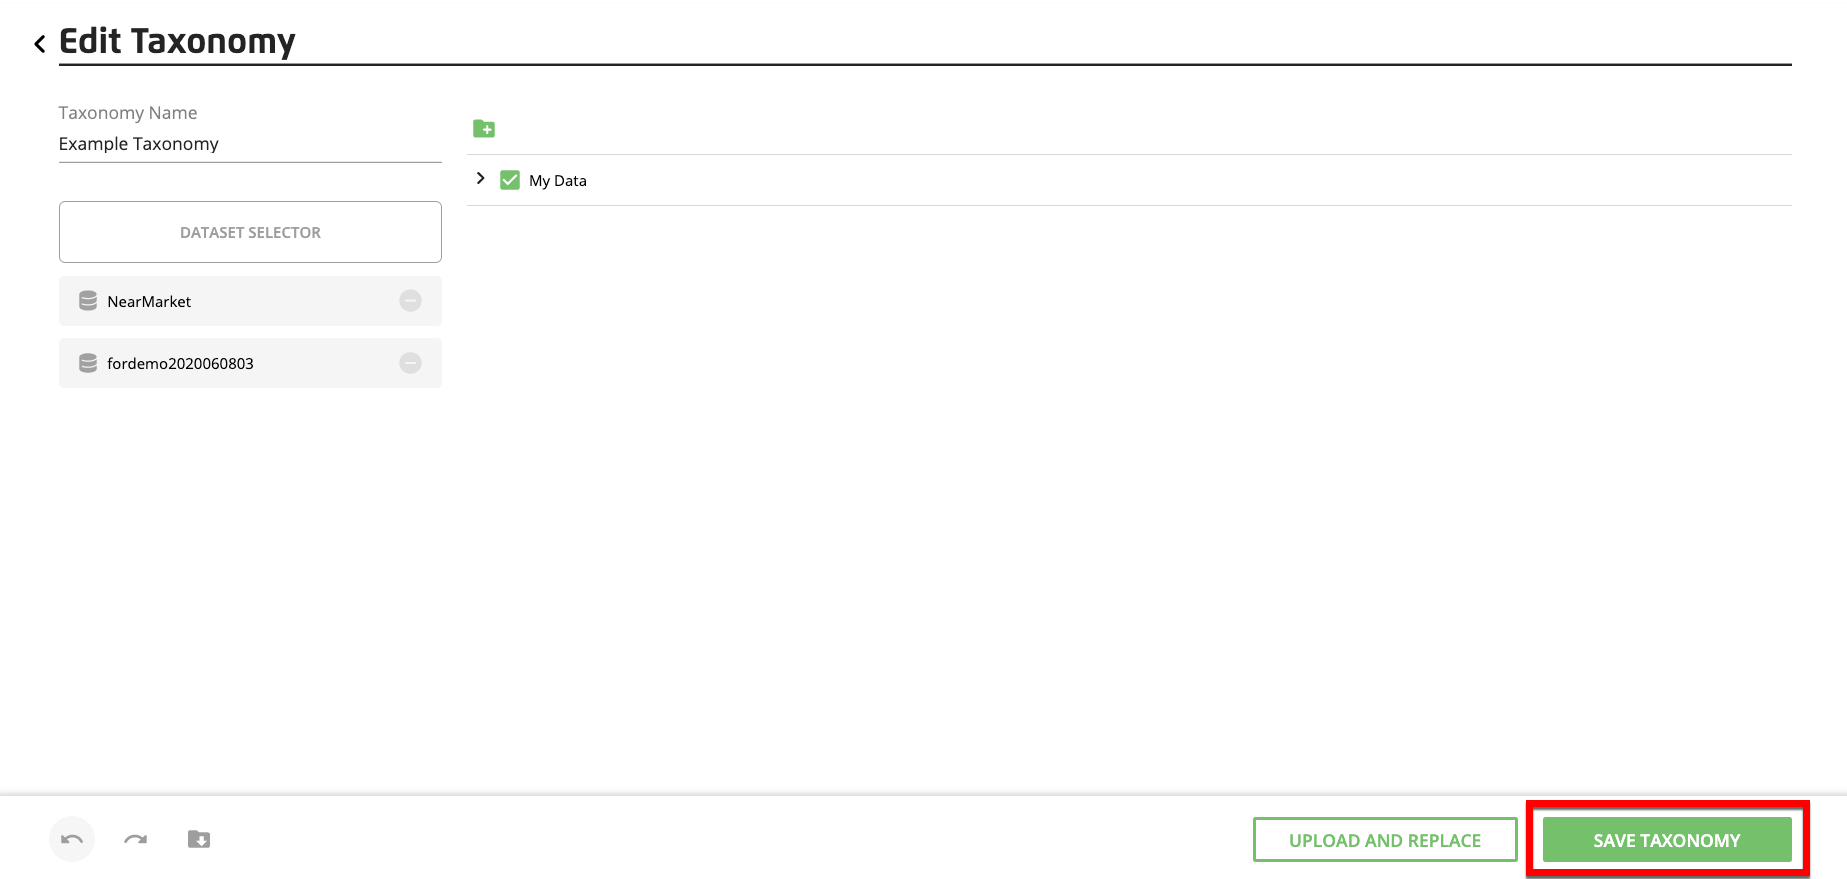
A "Save Taxonomy" button
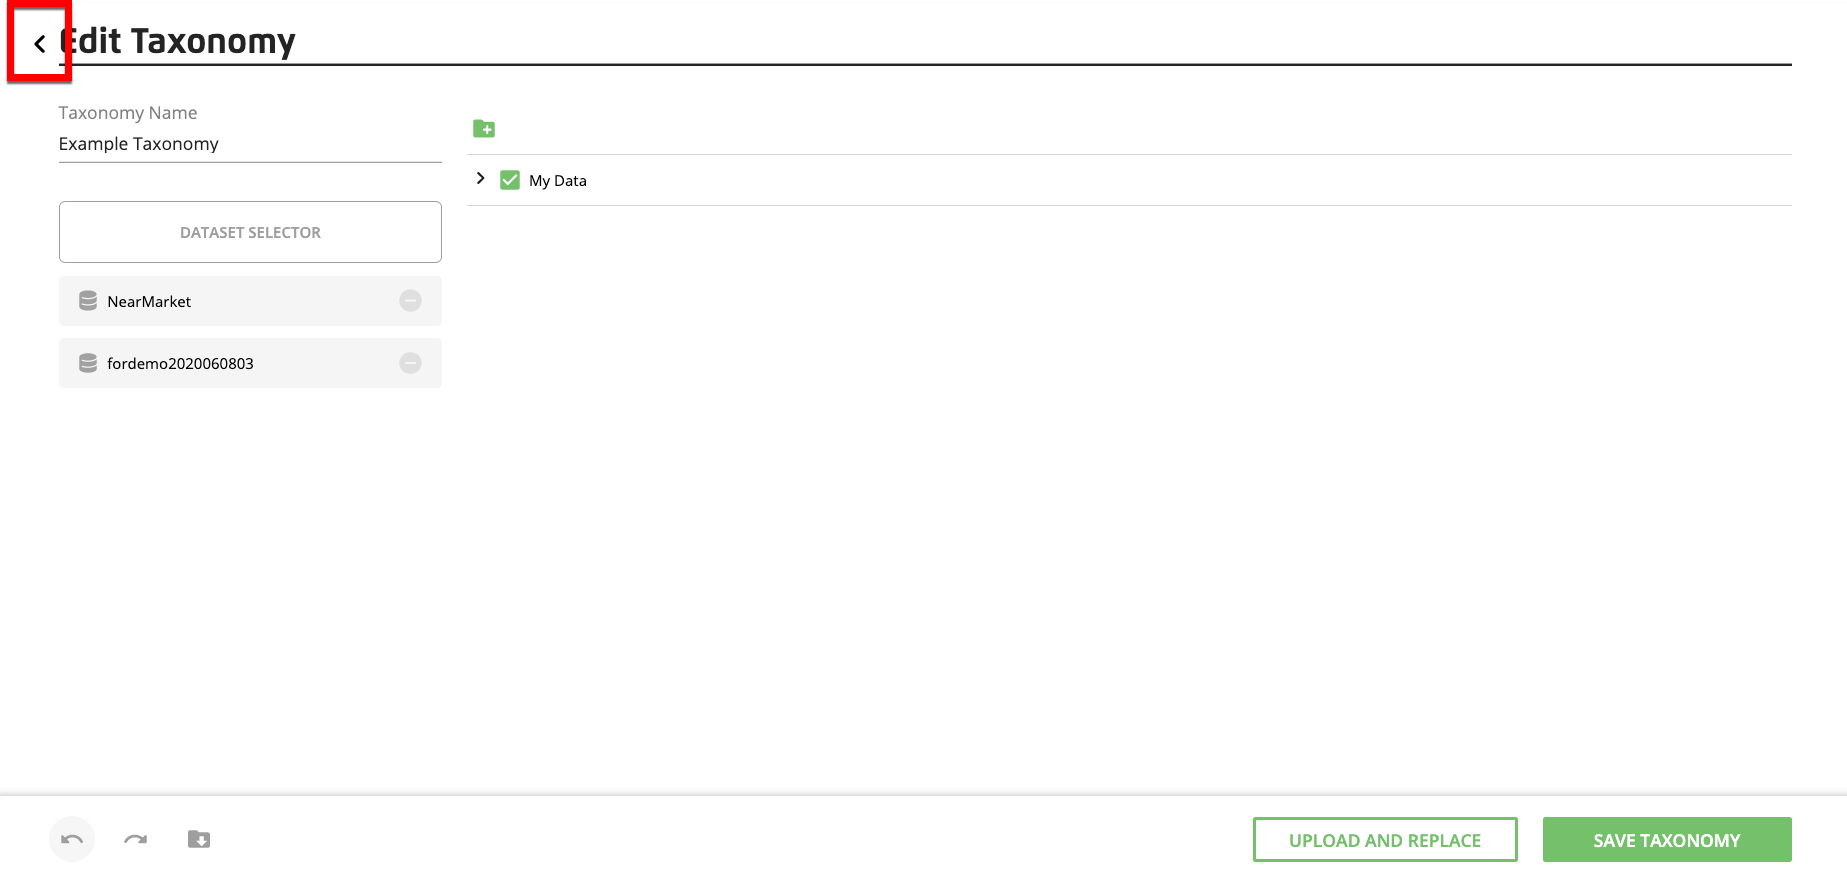
To discard your changes and return to the Taxonomies page, click the back arrow (caret) in the upper left.
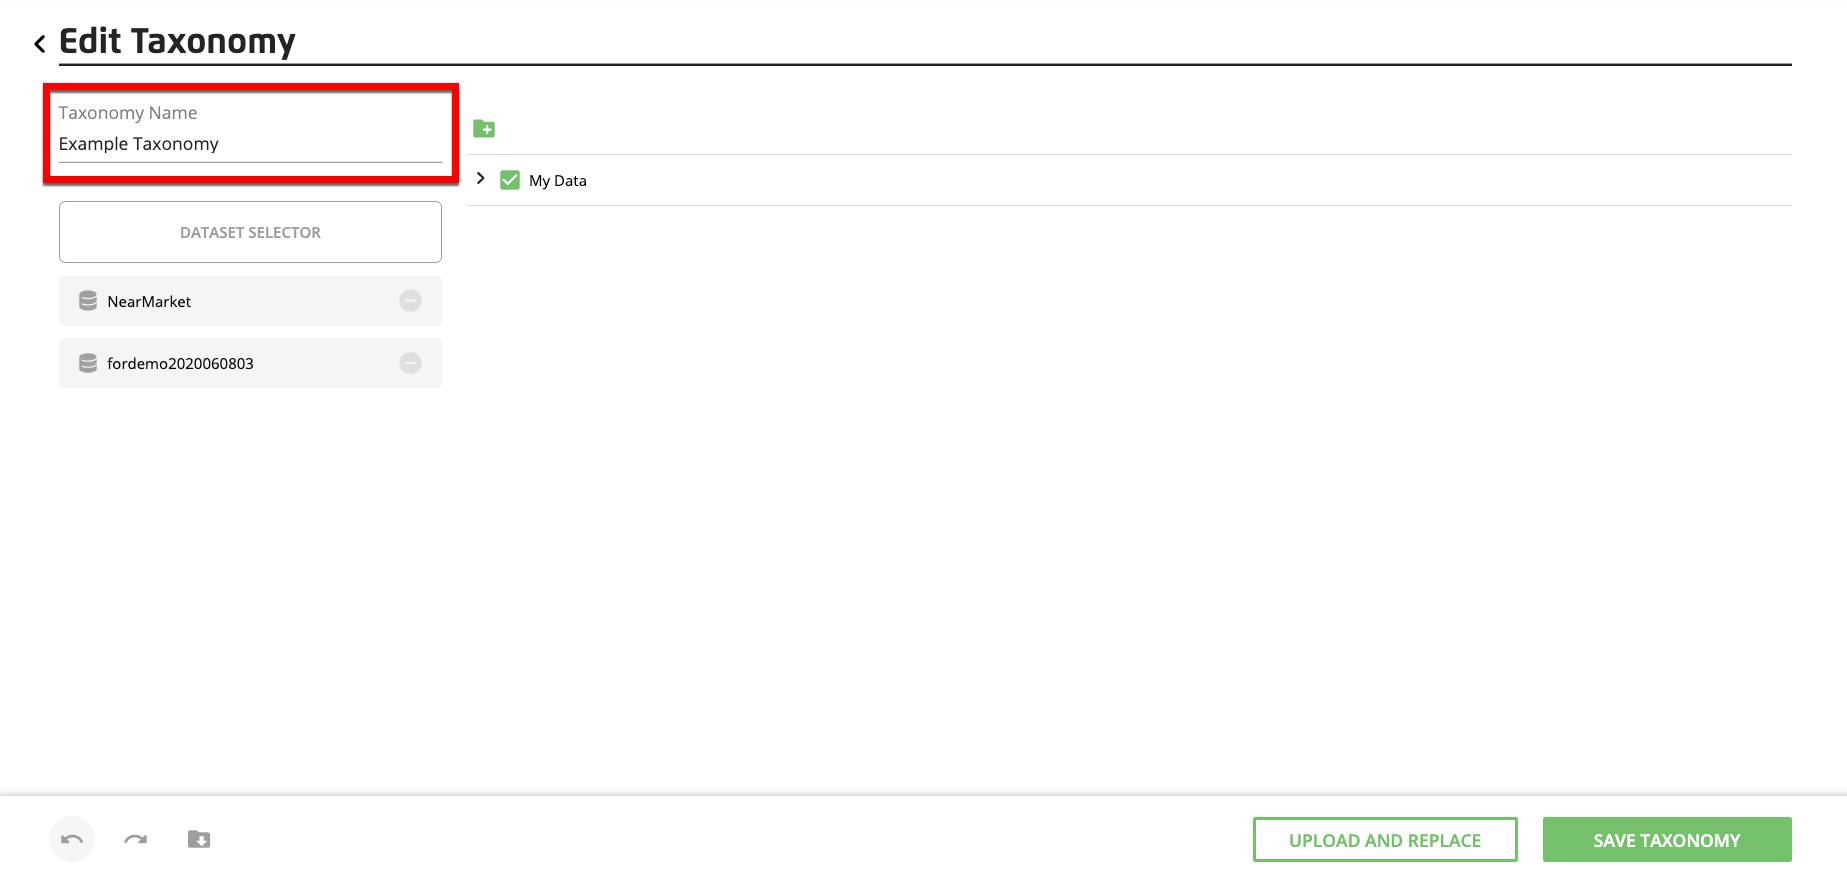
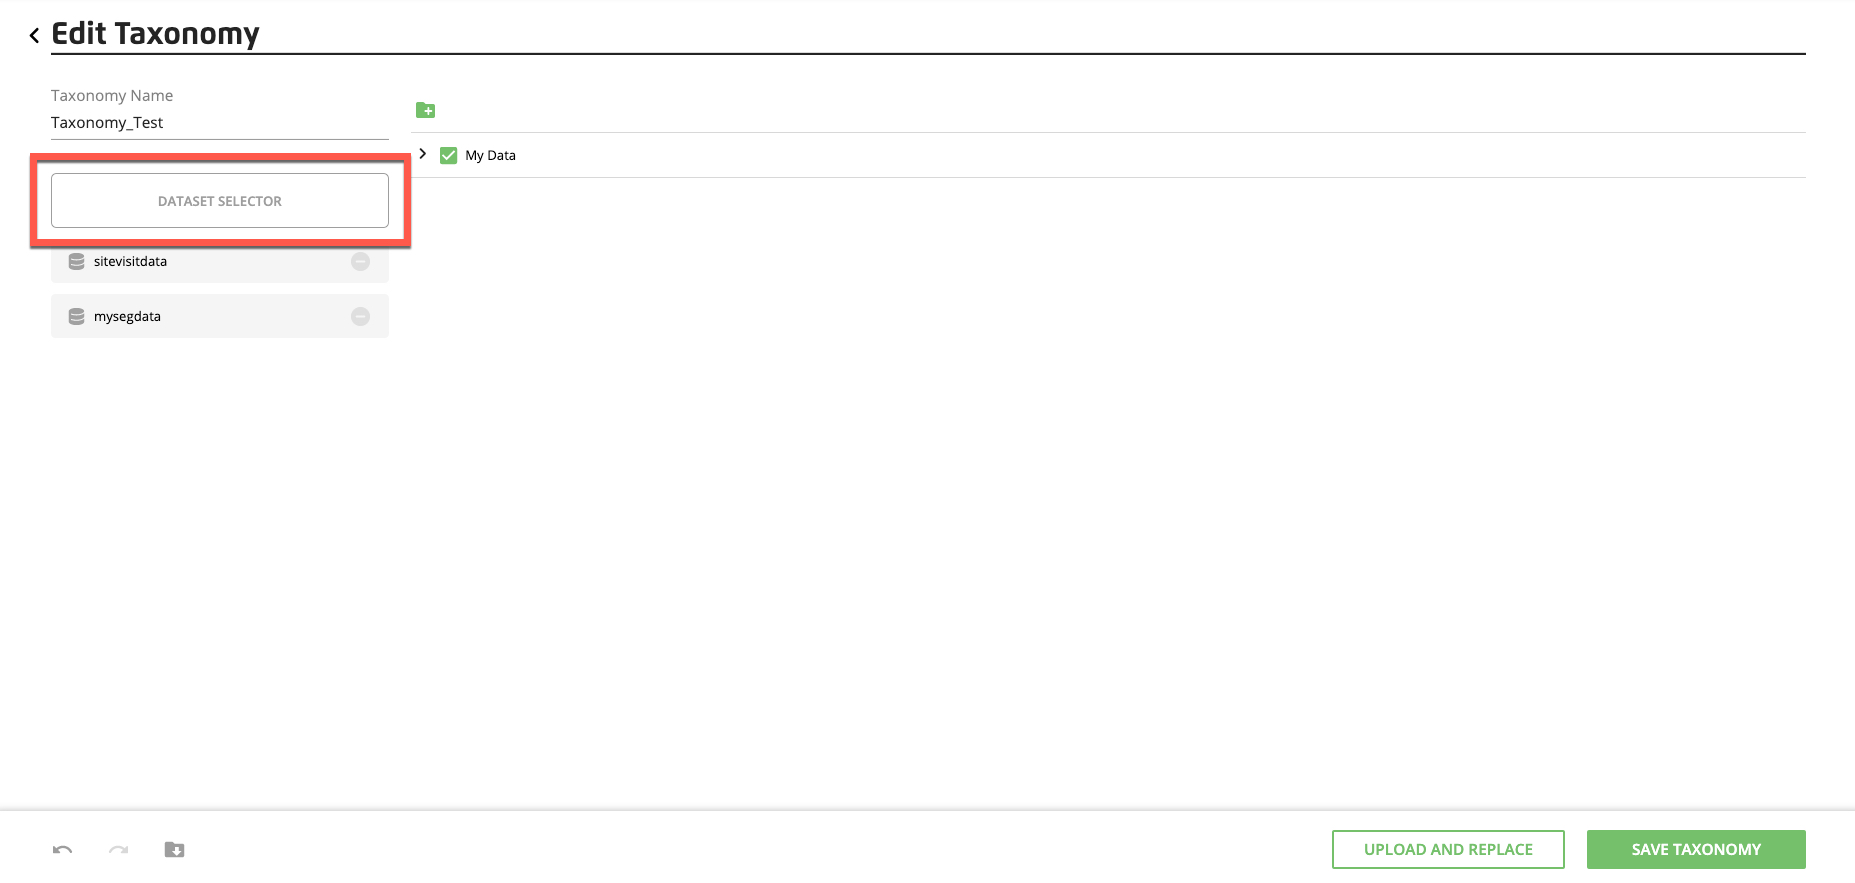
To change the taxonomy name, use the Taxonomy Name field to edit the name.
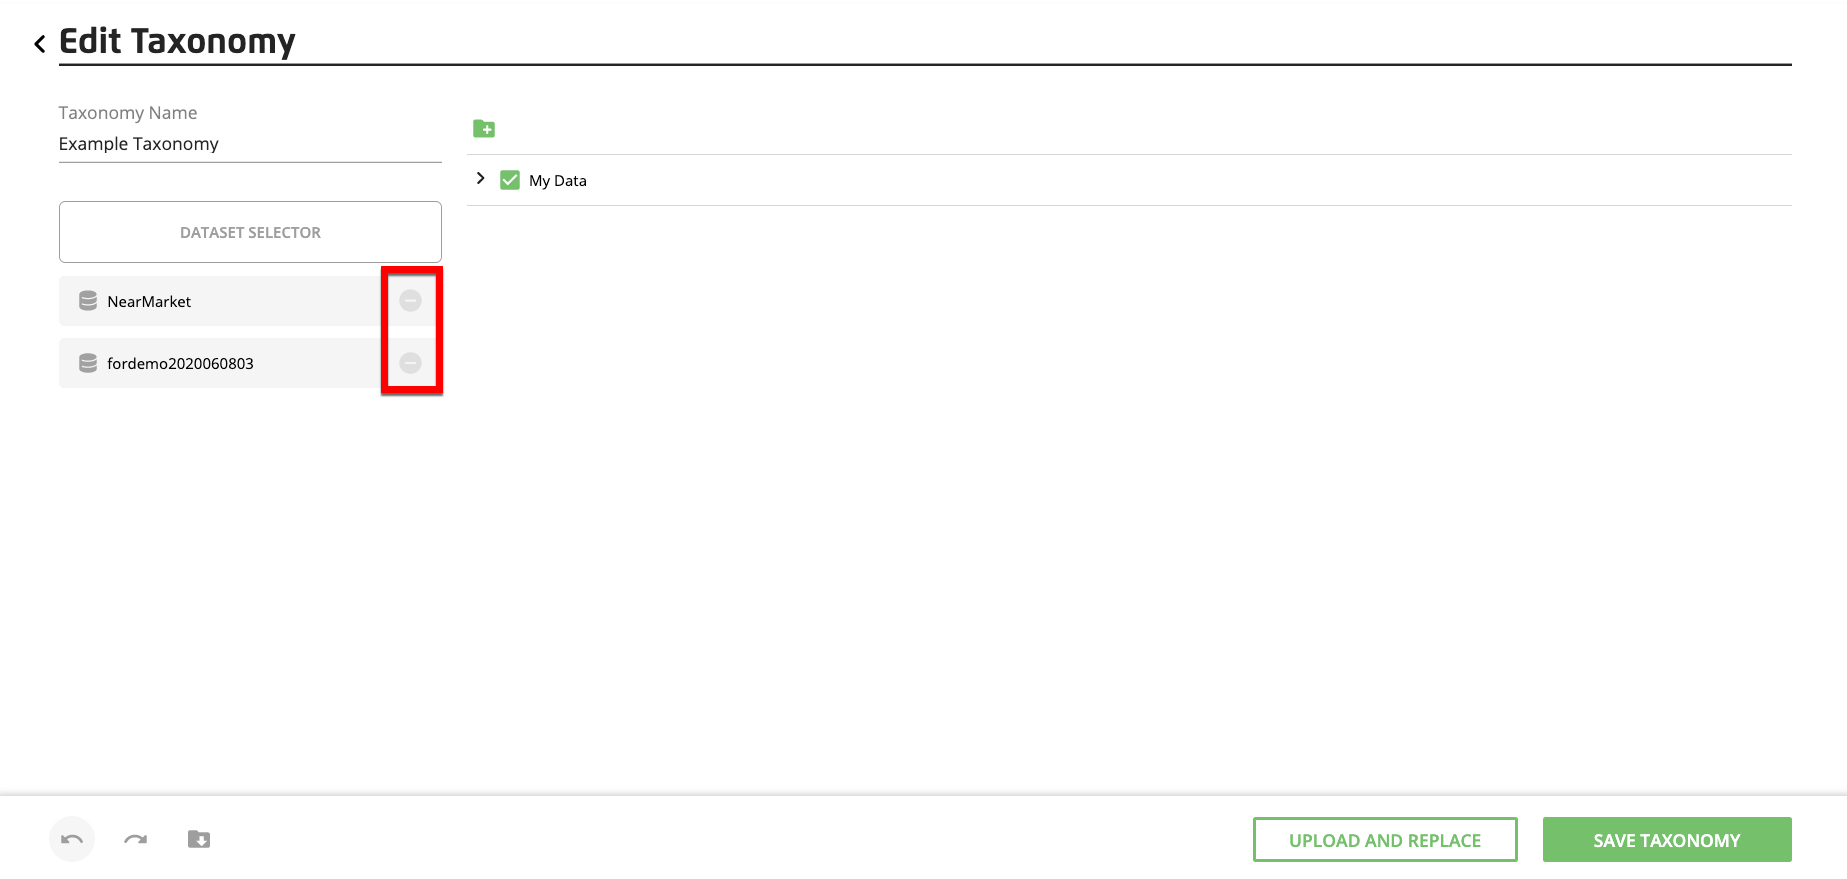
To remove a dataset, click the "remove" button (the minus sign) on the row for that dataset.
To add a dataset:
Click Dataset Selector.
From the dialog that appears, expand the appropriate folder until you see the desired dataset.
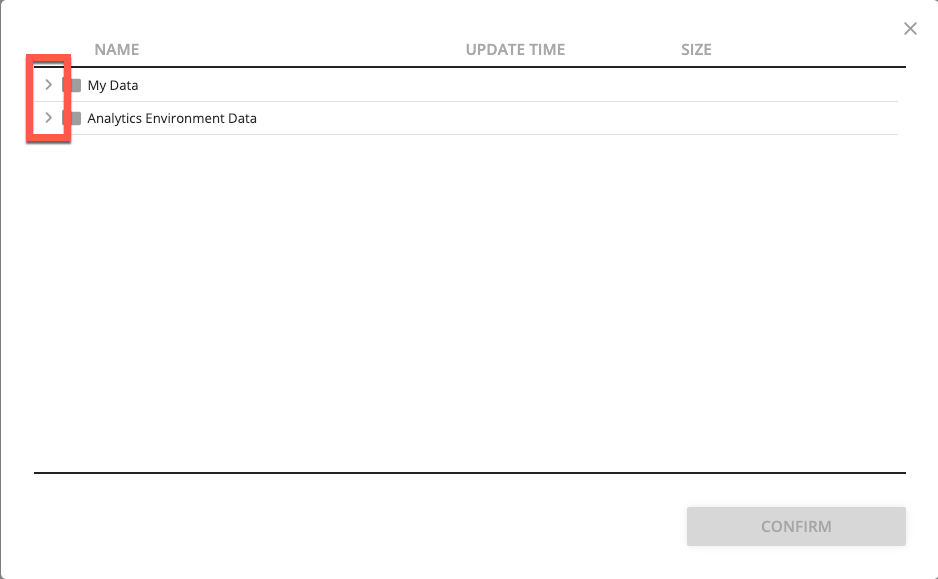
Select the check box for the desired dataset and then click .

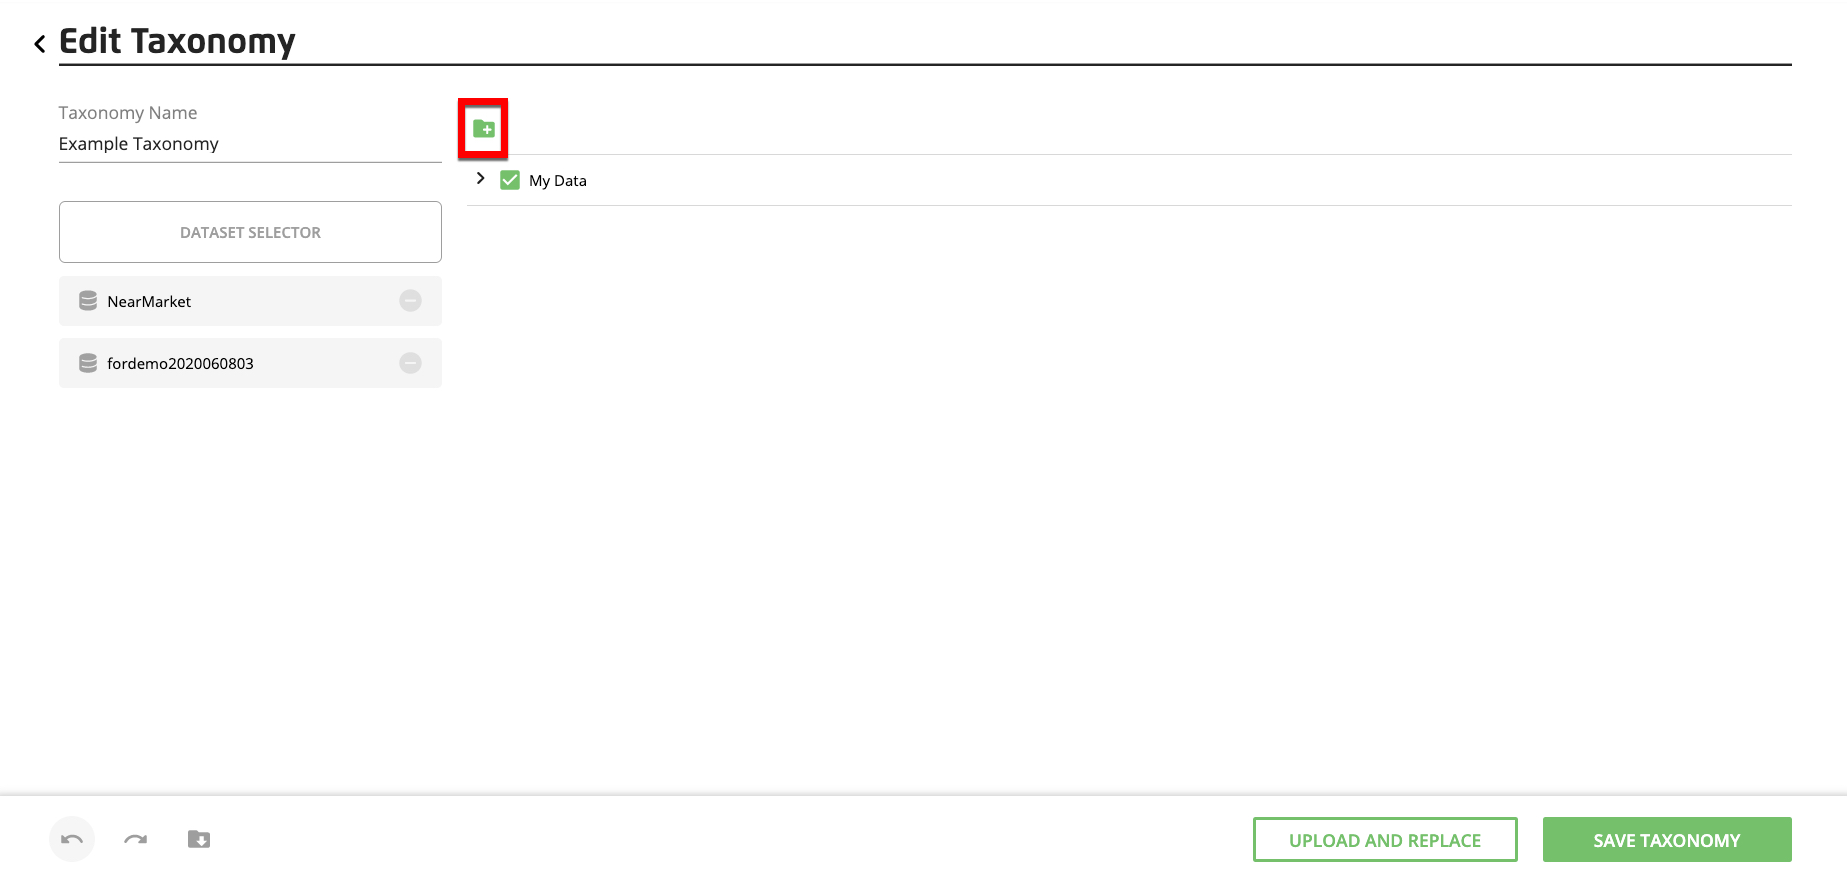
To add a "Level 1" folder (the equivalent of the "Level1Desc" column in a downloaded taxonomy Excel file), click at the top of the folder tree.
Caution
Adding a Level 1 folder is not recommended because it makes it more difficult for users to understand where your data comes from. The Level 1 folder is at the same level as the "My Data" folder on the Audiences page and the Audience Builder page.
To add a subfolder within another folder in the taxonomy tree, hover over the row for the folder you want to add the new folder to and click the "Add Folder" icon.

You cannot add a subfolder within a folder that only contains values.
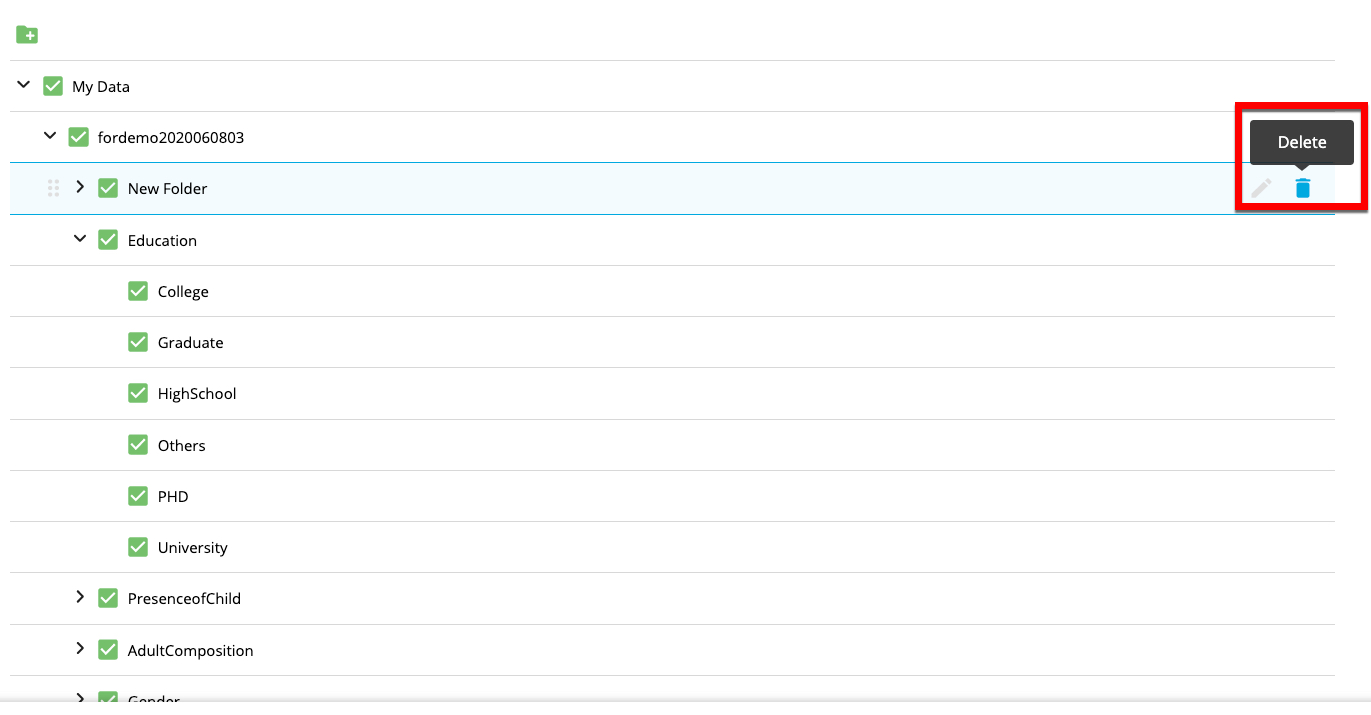
To delete a folder, hover over the row for that folder and click the Delete icon.
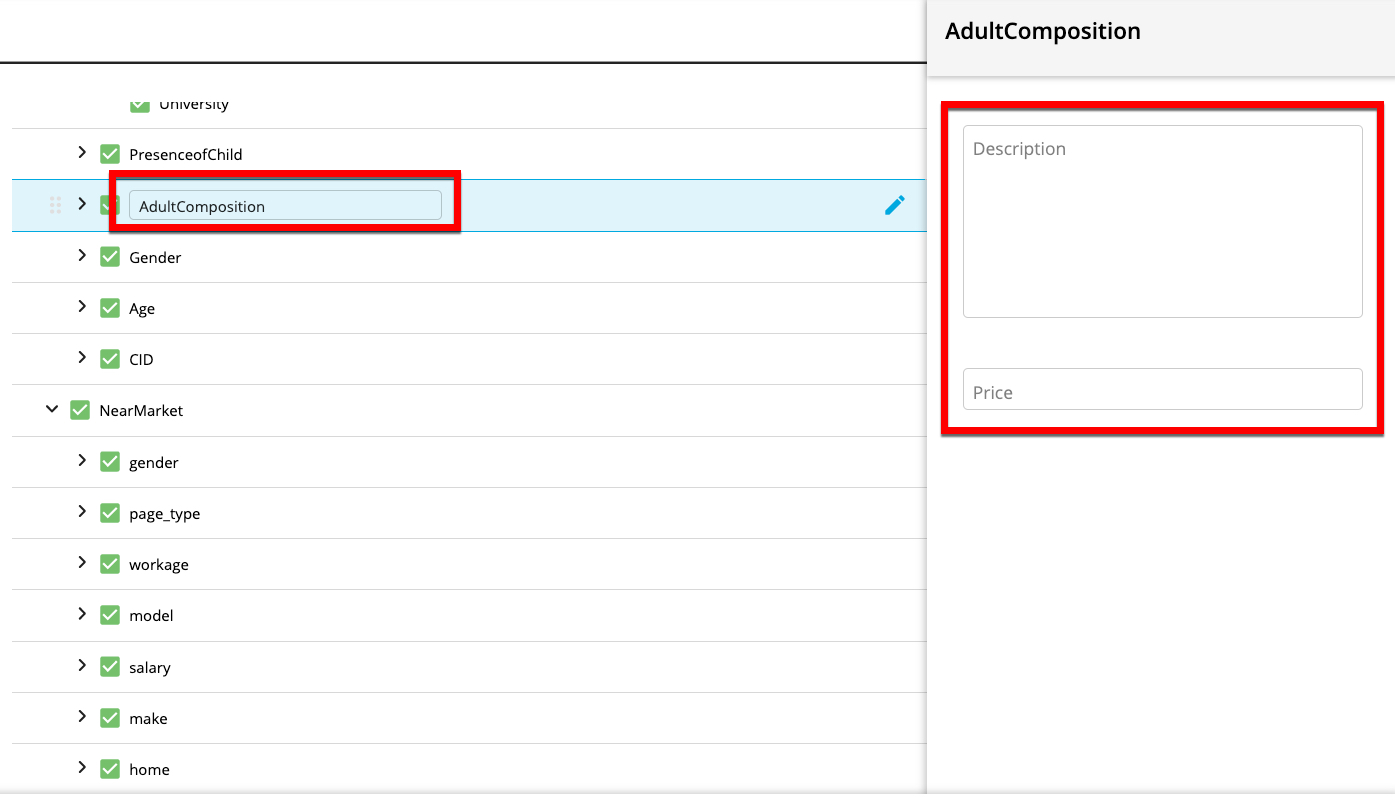
To edit the name, description, or price for a folder, hover over its row and click the Edit icon.
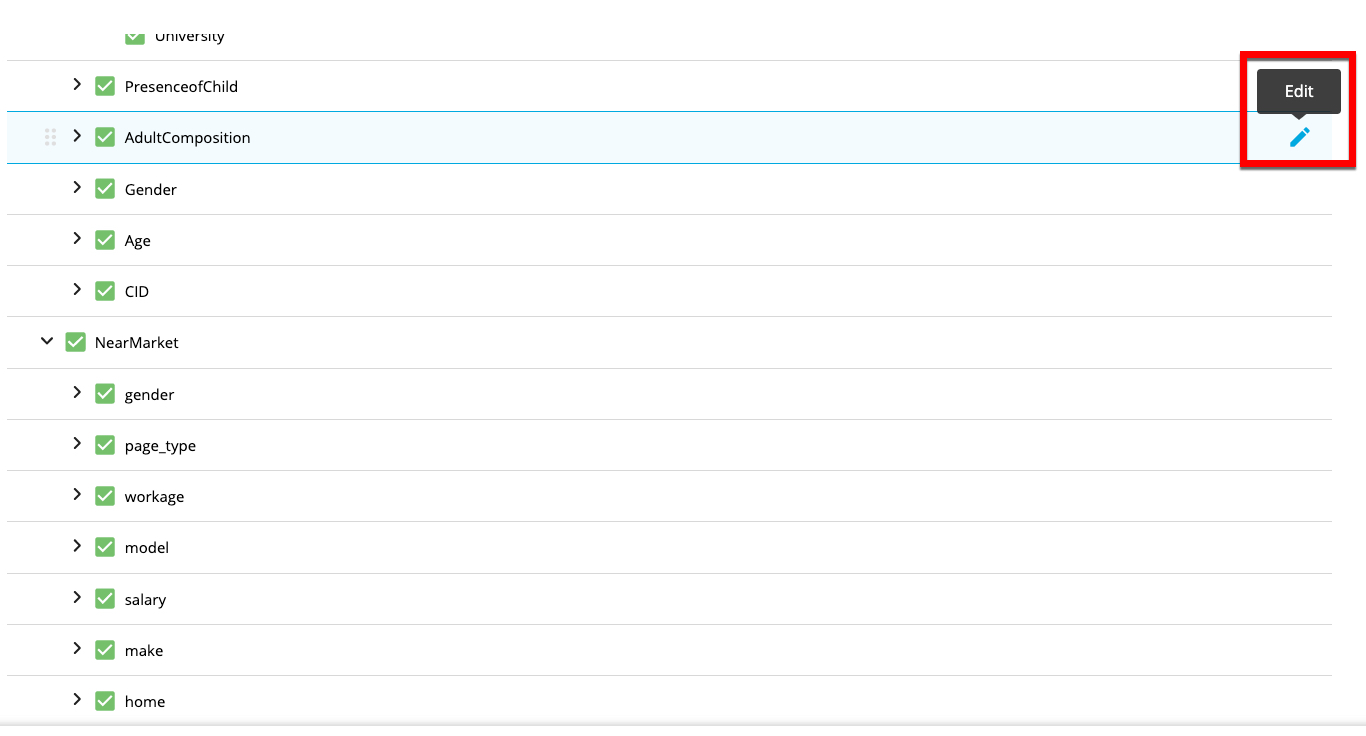
This makes the name field editable and opens a side panel where you can edit the description or price.
To exit the folder editing options, click outside the folder row and side panel.
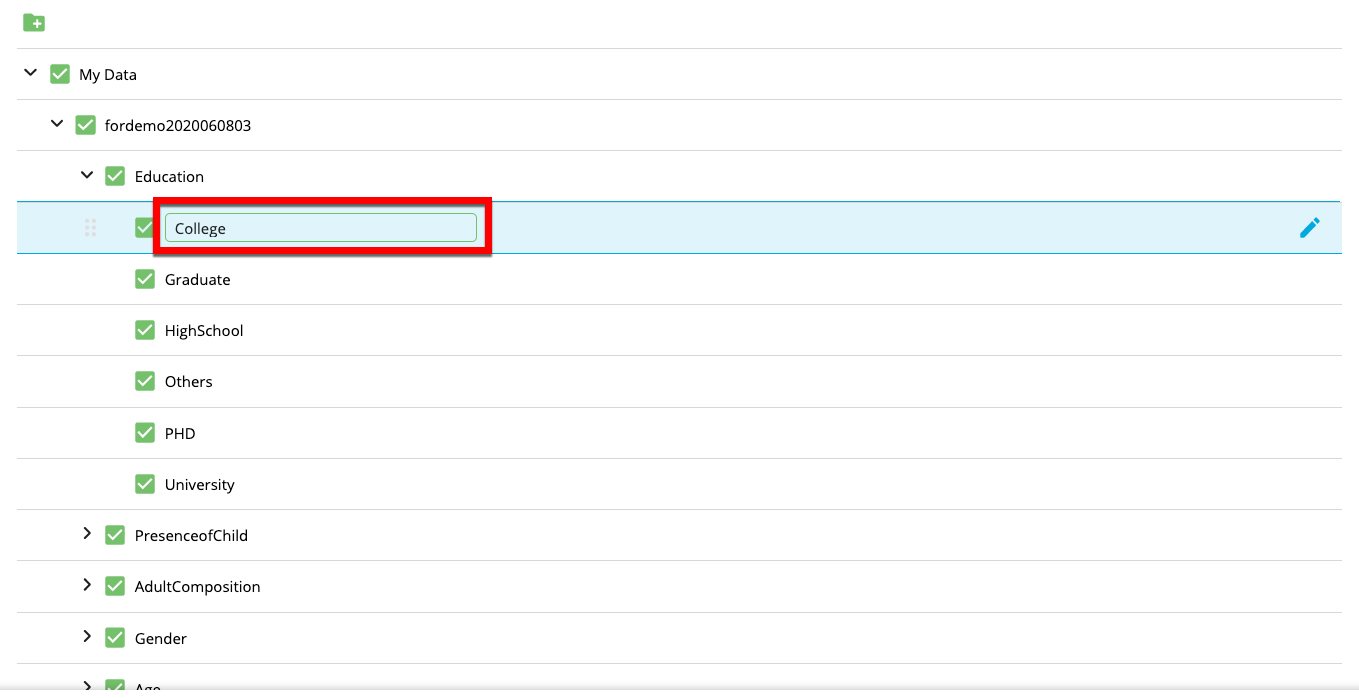
To edit the name for a field value, hover over the row for that field value and click the Edit icon.
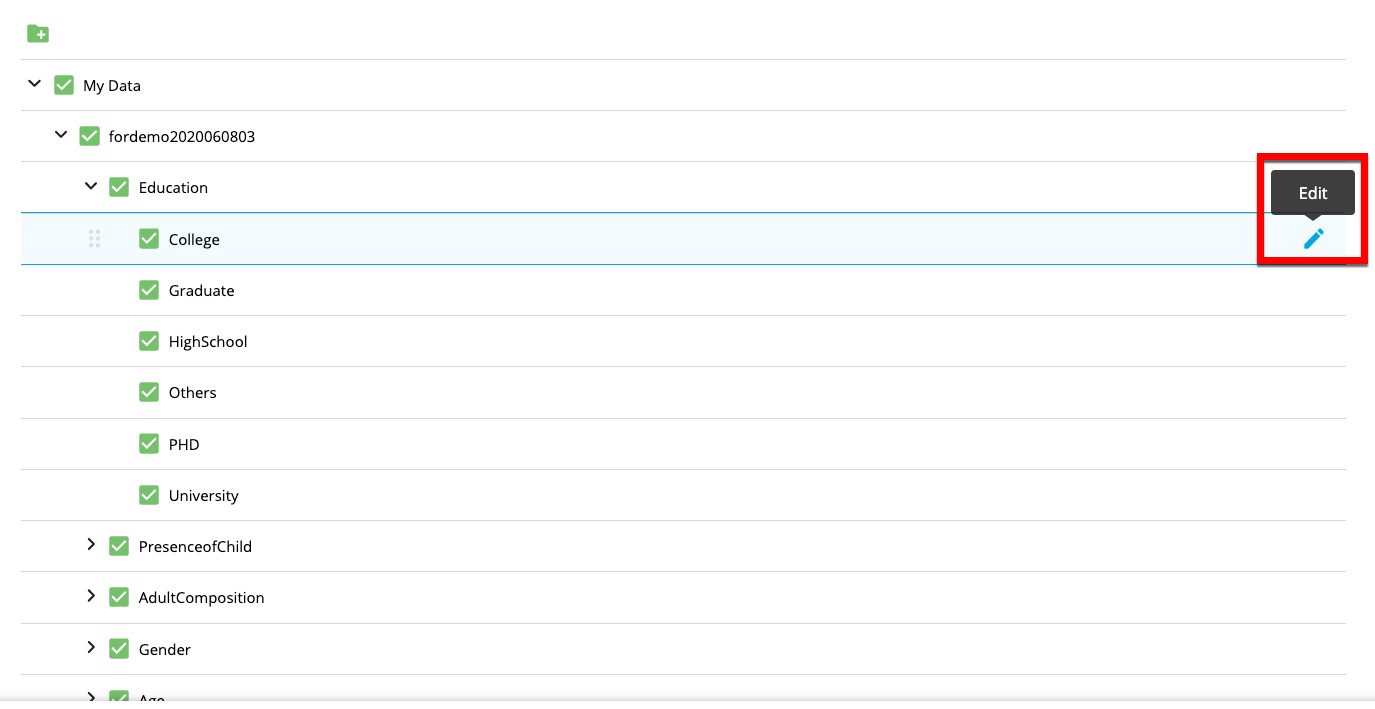
This makes the name field editable.
To exit the field value editing options, click outside of the field value row.
To move a folder or value, hover over the appropriate row and then use the Grabber icon (the six dots) to drag the folder or value into the desired folder.
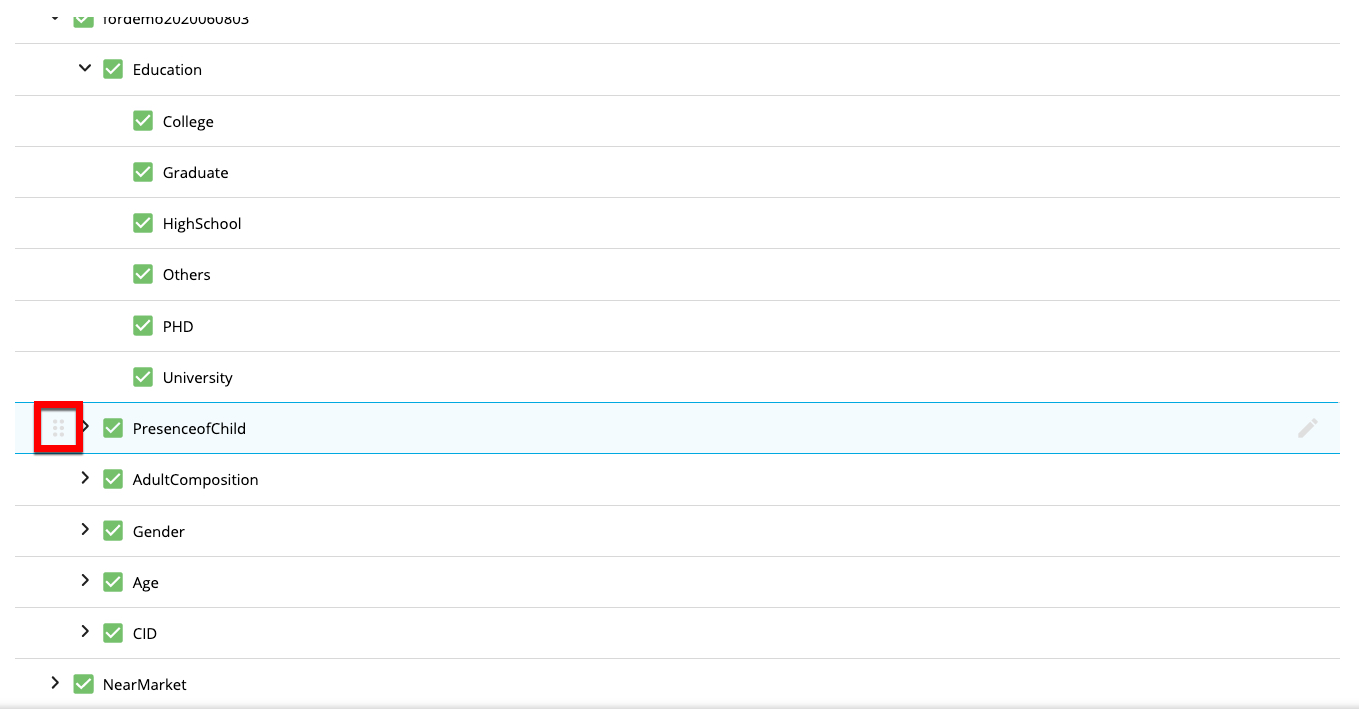
The folder row that you try to drag the value or folder into will turn blue if the folder is allowed to be moved inside of that folder row.
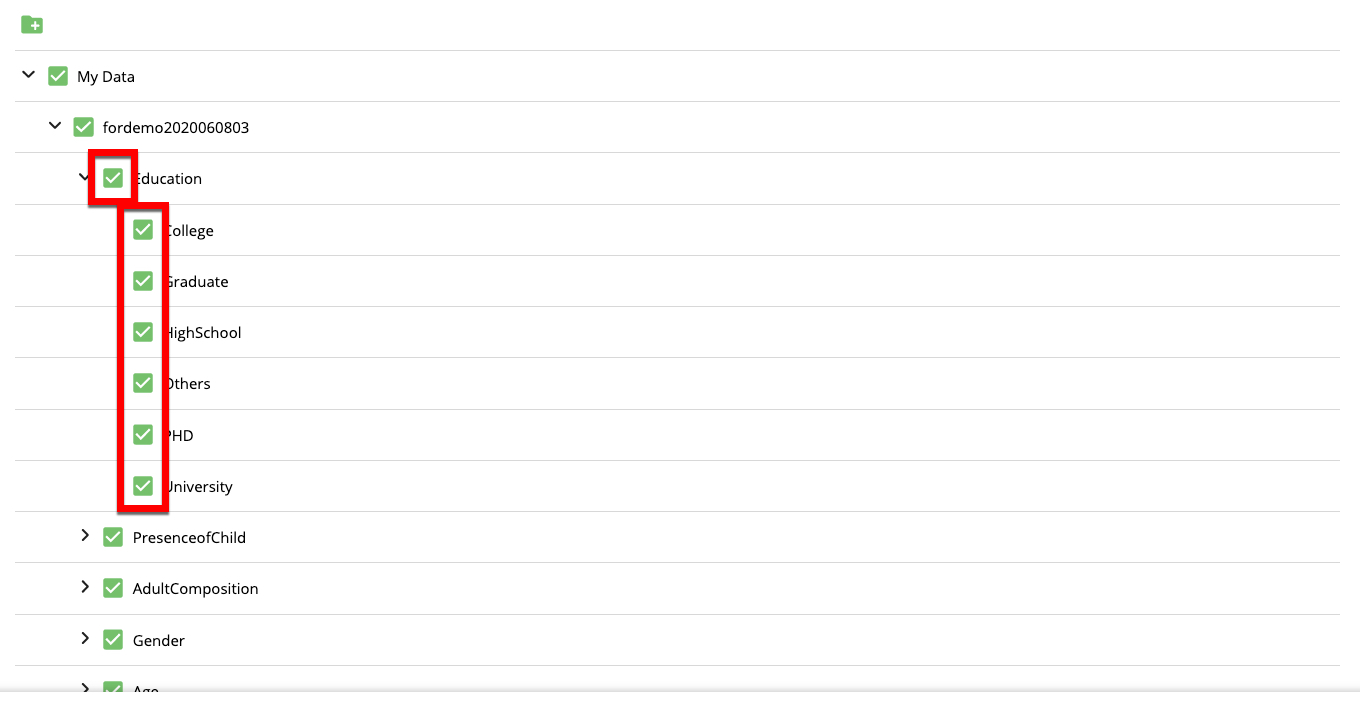
To remove a value or a folder (and all subfolders and values within that folder), clear the check box for that value or folder.
Once you're done editing the taxonomy, click .
From the Taxonomies page, select the check box for the taxonomy you want to download details for.
In the footer, click and then click (
).Open the downloaded Excel file.

Modify the structure, following these guidelines:
Do not modify columns A to C ("Taxonomy_ID", "Node_ID", and "Level1_Desc"). If you change the "Taxonomy ID" or "Node ID" column info, the upload will fail. If you change the "Level1_Desc", the parent folder name in the UI will change, which might be confusing to your users.
You can modify column D (“Level2_Desc”) but use caution as this is the data set name that Safe Haven uses and it might be confusing if you change this.
For the level description columns, make sure not to leave any blank columns in between columns that you have filled out. For example, if you have filled out level 3 ("Level3_Desc") and level 5 ("Level5_Desc"), "Level4_Desc" must have a value.
Do not give the same name for a value description (“Value_Desc”) and a folder at the same level.
The folder names and segment value names will be automatically sorted alphabetically on your Audiences page and Audience Builder page. Sorting the file will not affect how the folder names and segment names appear.
Save the modified file in .xlsx format.
From the Taxonomies page, select the check box for the taxonomy you want to edit and then click the Edit icon (
 ) in the footer area.
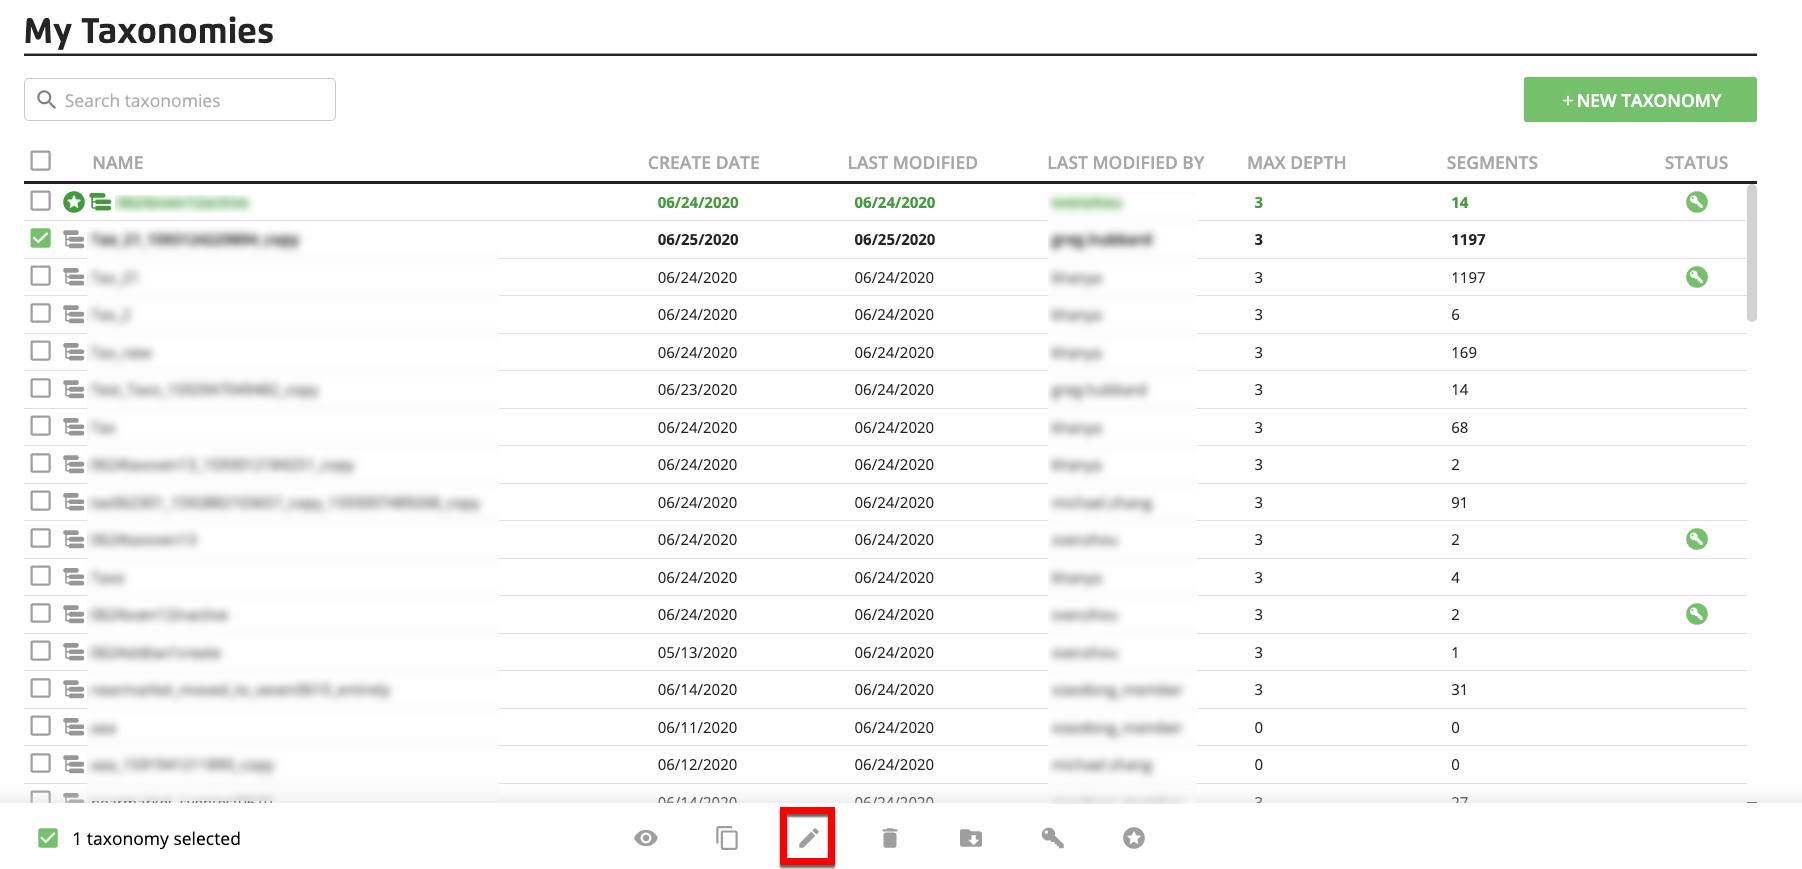
From the Edit Taxonomy page, click .
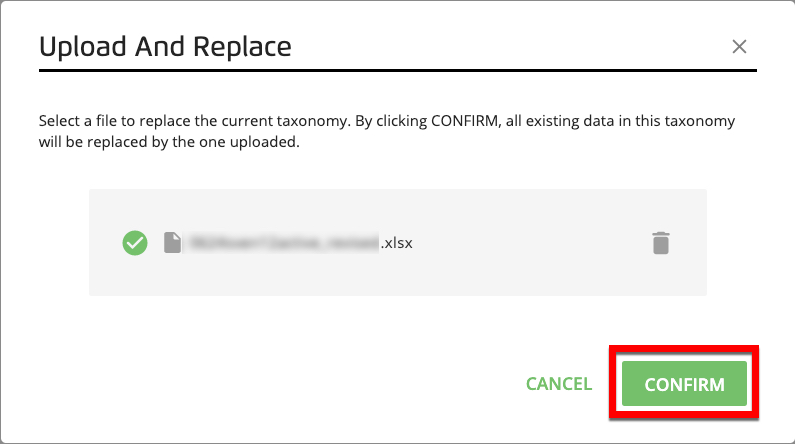
From the Upload and Replace dialog that appears, upload your file using one of the following methods:

Drag and drop your file into the upload area
Click , navigate to the location where you saved the modified taxonomy, and select the file.
Click .
Click .
Your taxonomy appears directly below the active taxonomy (unless it is the active taxonomy, in which case it appears at the top of the table).