Reseller Onboarding
Data onboarding with LiveRamp activates offline first-, second-, and third-party data, as well as contextual data, in and across any marketing channel. Simply put, LiveRamp enables marketers to activate their offline CRM and transaction data in the online ecosystem. This allows for people-based marketing across all digital applications.
LiveRamp resellers offer their reseller clients premier LiveRamp services, enabling their reseller clients to make offline data actionable online. One implementation of this service is provided through our Connect UI; these instructions will help you get started with this option.
Understanding LiveRamp’s Customer Account Hierarchy
Customer accounts are structured in a hierarchy:
The reseller’s customer account (the “parent account’): users of this account have access to the reseller’s customer account, as well as all reseller client customer accounts
Reseller client customer accounts (“child accounts”): users of these accounts only have access to their specific customer account
This hierarchical structure enables resellers to manage all their clients’ customer accounts in Connect, while making sure clients only have access to their own customer account and data.
Note
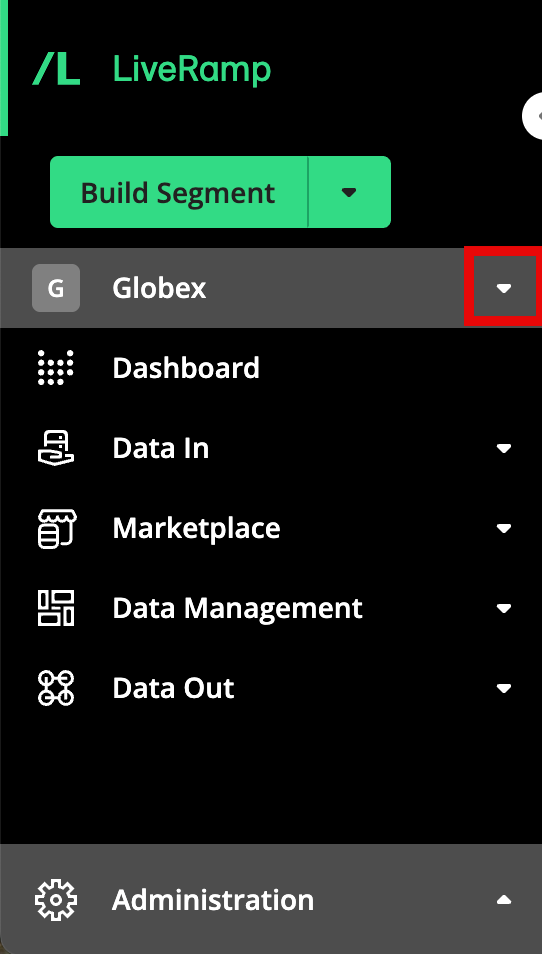
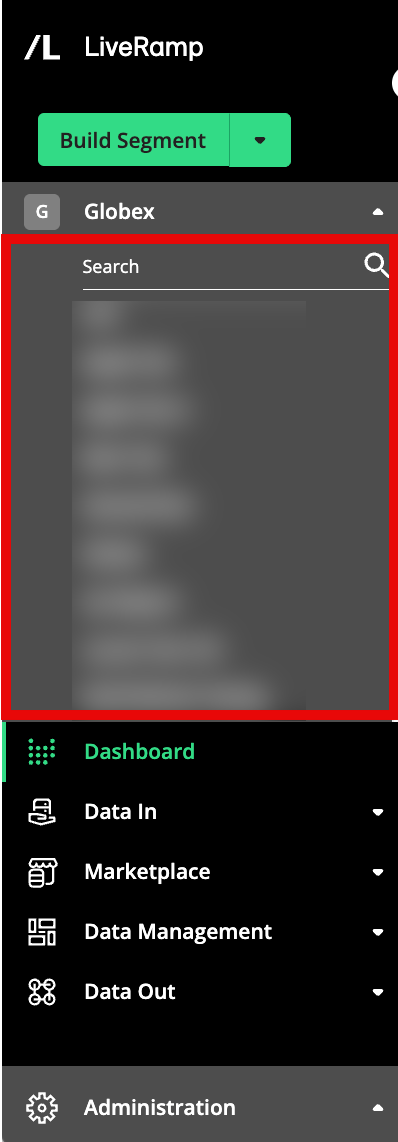
To switch between your reseller accounts, click anywhere in the account switcher area and then use the account drop-down list to change from one account to another. If you have a large number of accounts, you can also use the search bar to locate the desired account.
Overview of Steps
Before your clients’ data can be onboarded, you must set up the necessary reseller client customer accounts in Connect.
Once the account has been created, create an audience for your client.
Once you have set up the necessary customer account, you have the option of having your reseller client manage the rest of the onboarding process or you can do that for them.
See the sections below for information on performing these steps.
Set Up Reseller Client Customer Accounts
In Connect, resellers and reseller clients both have “customer accounts.” Via customer accounts, users can upload their offline data and distribute to the end destination.
Note
Only users with “Admin” level permissions can add reseller client customer accounts: Contact your LiveRamp representative if you need your permission level changed.
When your clients access their own instance of Connect, they will not have access to your other client accounts or your account.
For agencies whose advertisers will be distributing Data Marketplace data to Facebook: If you will be distributing all data to your own Facebook account, you will need your own LiveRamp agreement and Facebook audience sharing relationship with LiveRamp. Since you will be distributing data through your own account, you do not need to create a new client in Connect.
To set up a customer account for a reseller client:
Log in to your parent reseller customer account in Connect.
Note
If you haven’t received login credentials: Contact your LiveRamp Account Manager.
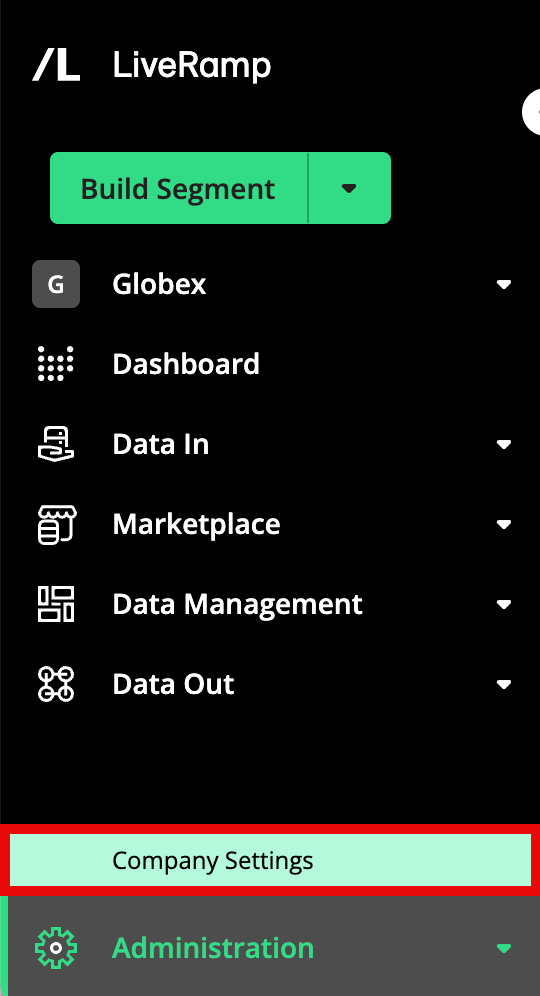
From the Connect navigation menu, click Company Settings to navigate to the Company Settings page.
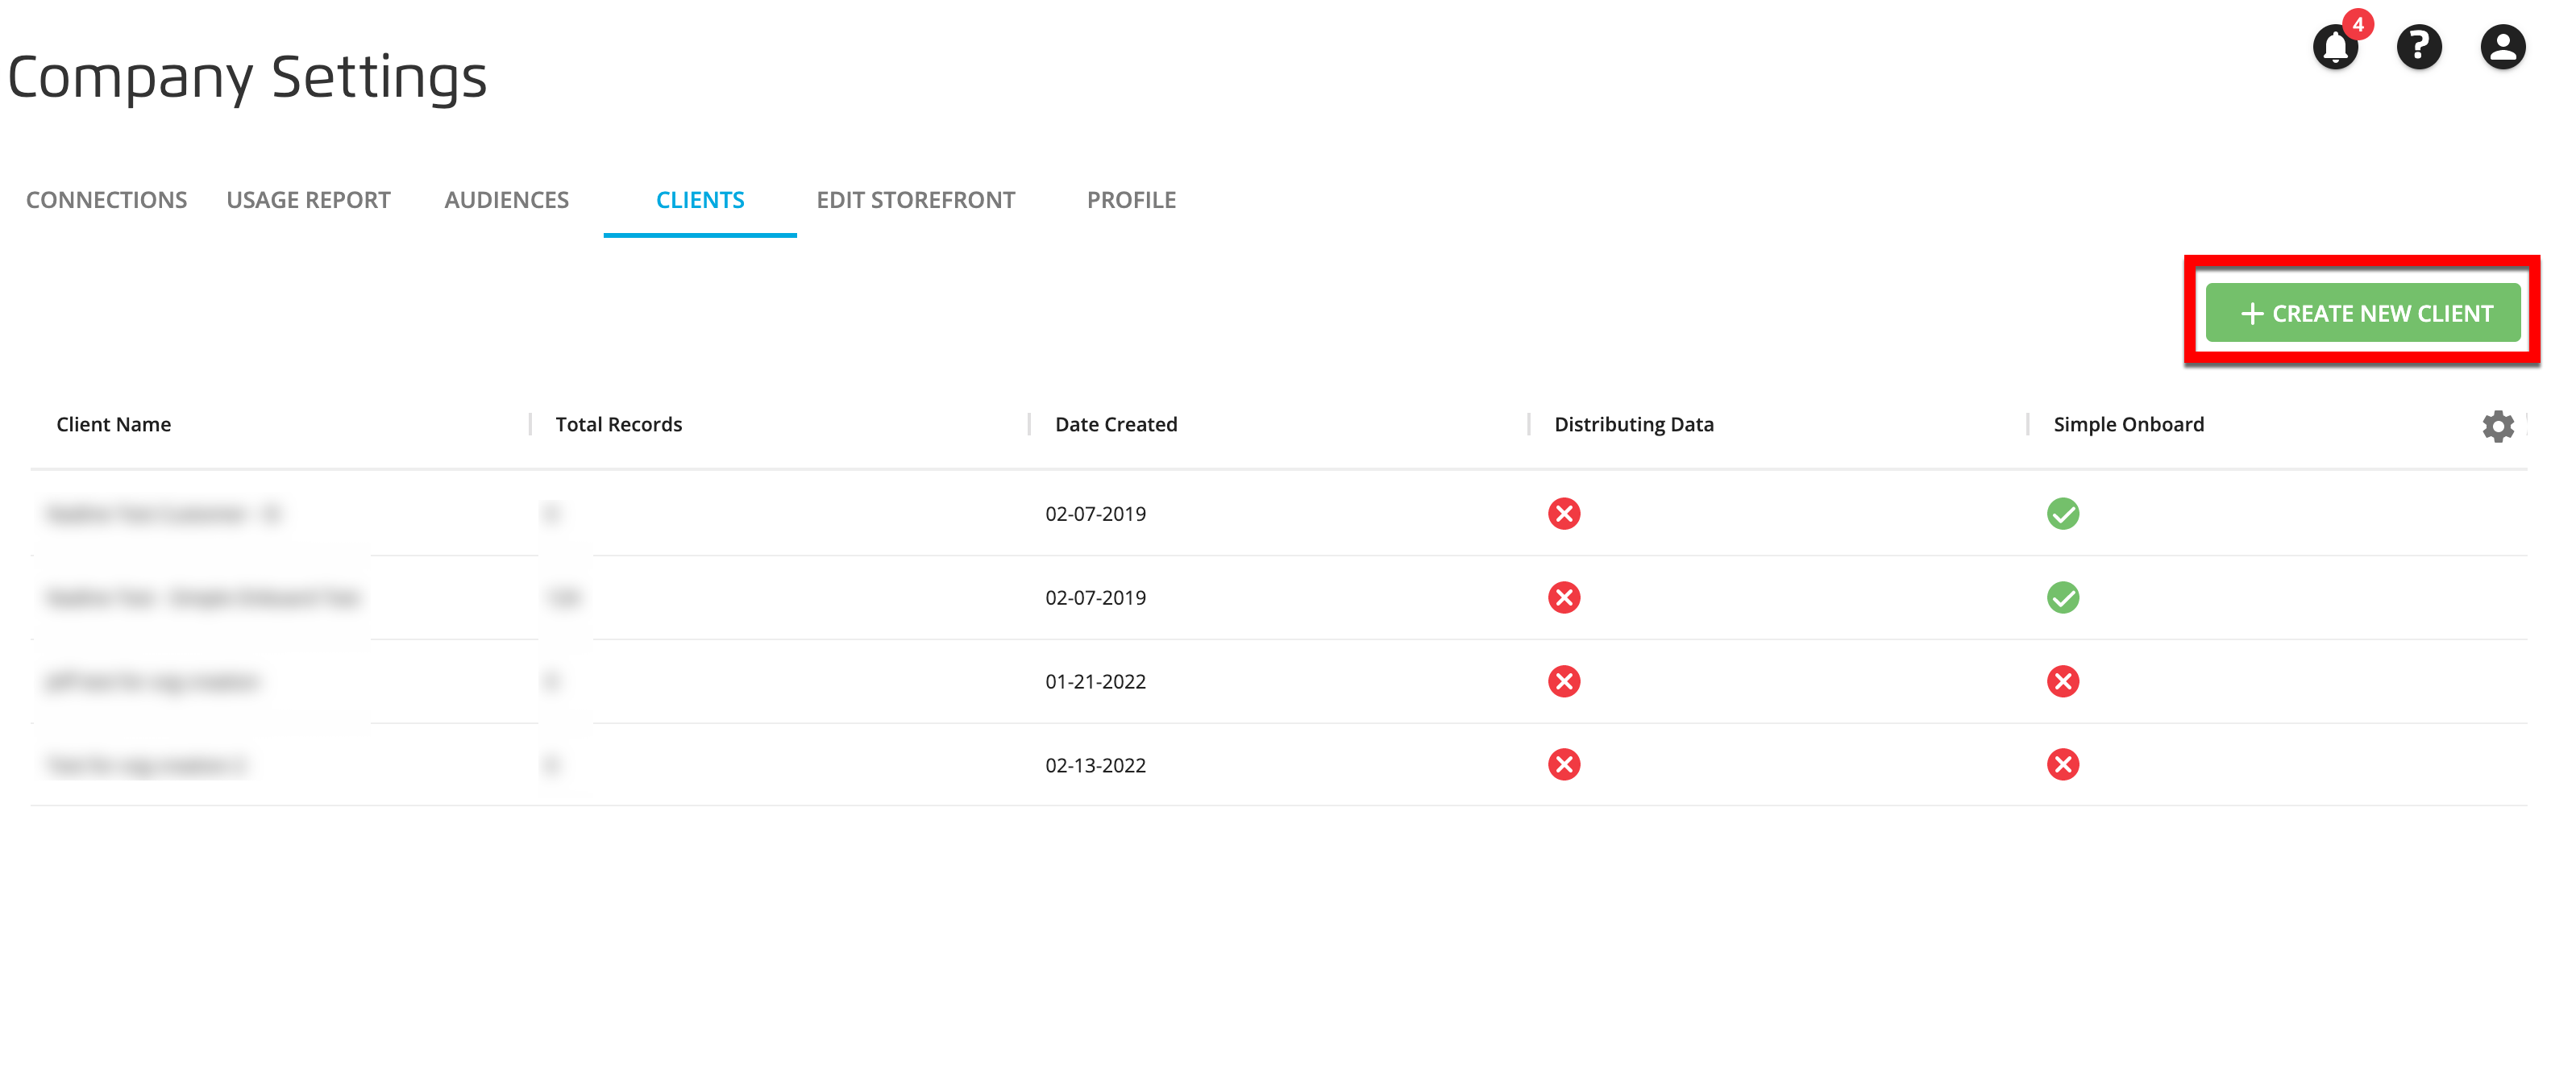
Select the Clients tab. This displays a summary of your current clients and their data.

Note
If the Clients tab is not available, contact your LiveRamp representative.
Click .
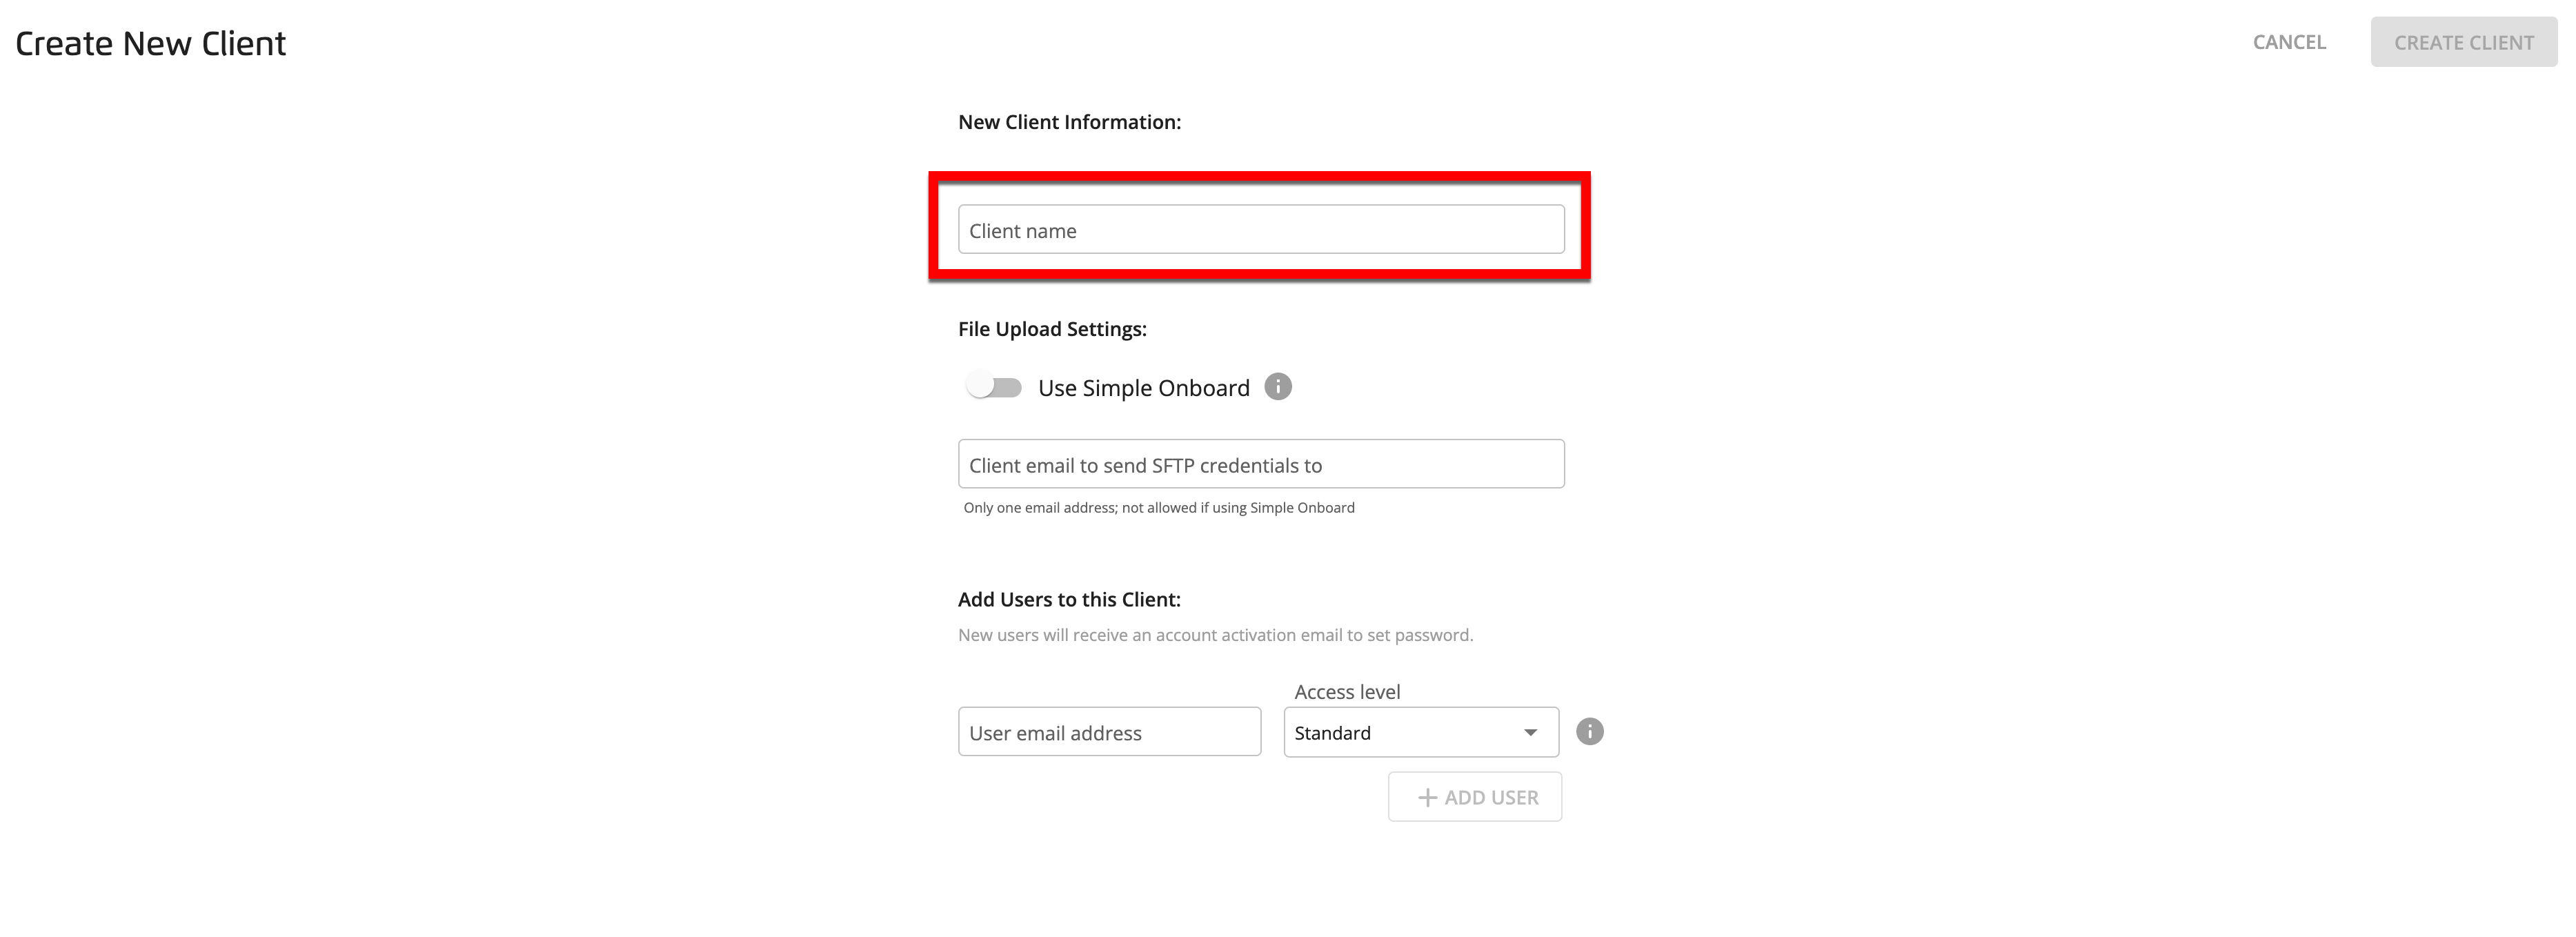
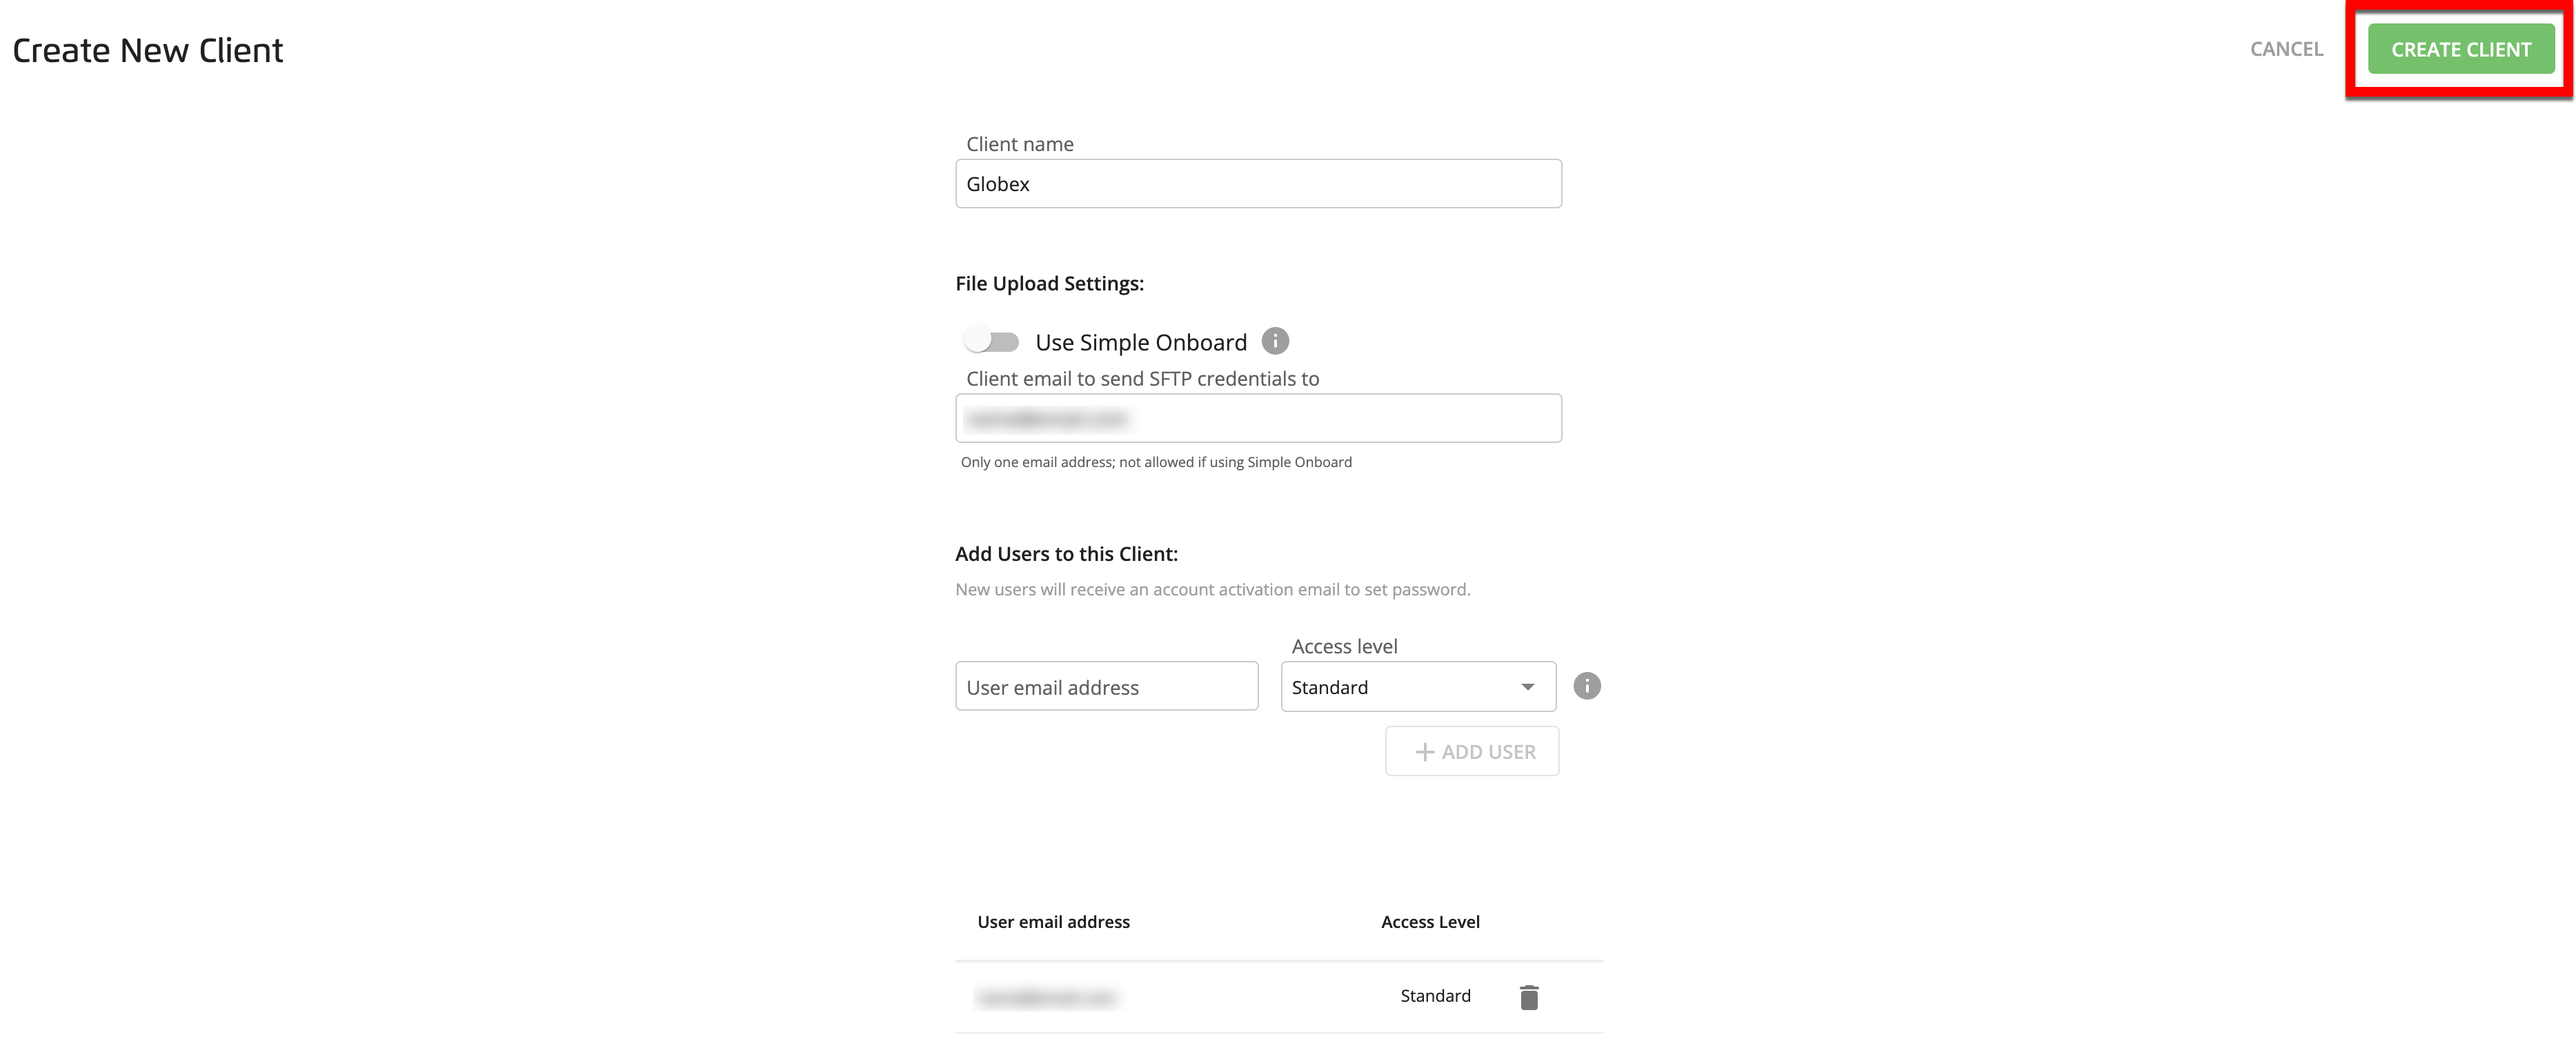
From the Create New Client window, enter the name for the new client in the "Client name" field in the following format: [Agency name] - [Customer name].
To enable the new client to use Simple Onboard (where they upload PII-based files through Connect, where every record in each file is a member of a specific segment), slide the Use Simple Onboard toggle to the right (see "Enable Simple Onboard for Your Reseller Clients" for more information).

To give a specific client user the ability to upload files via SFTP, enter that user's email address in the "Client email to send SFTP credentials to" field.
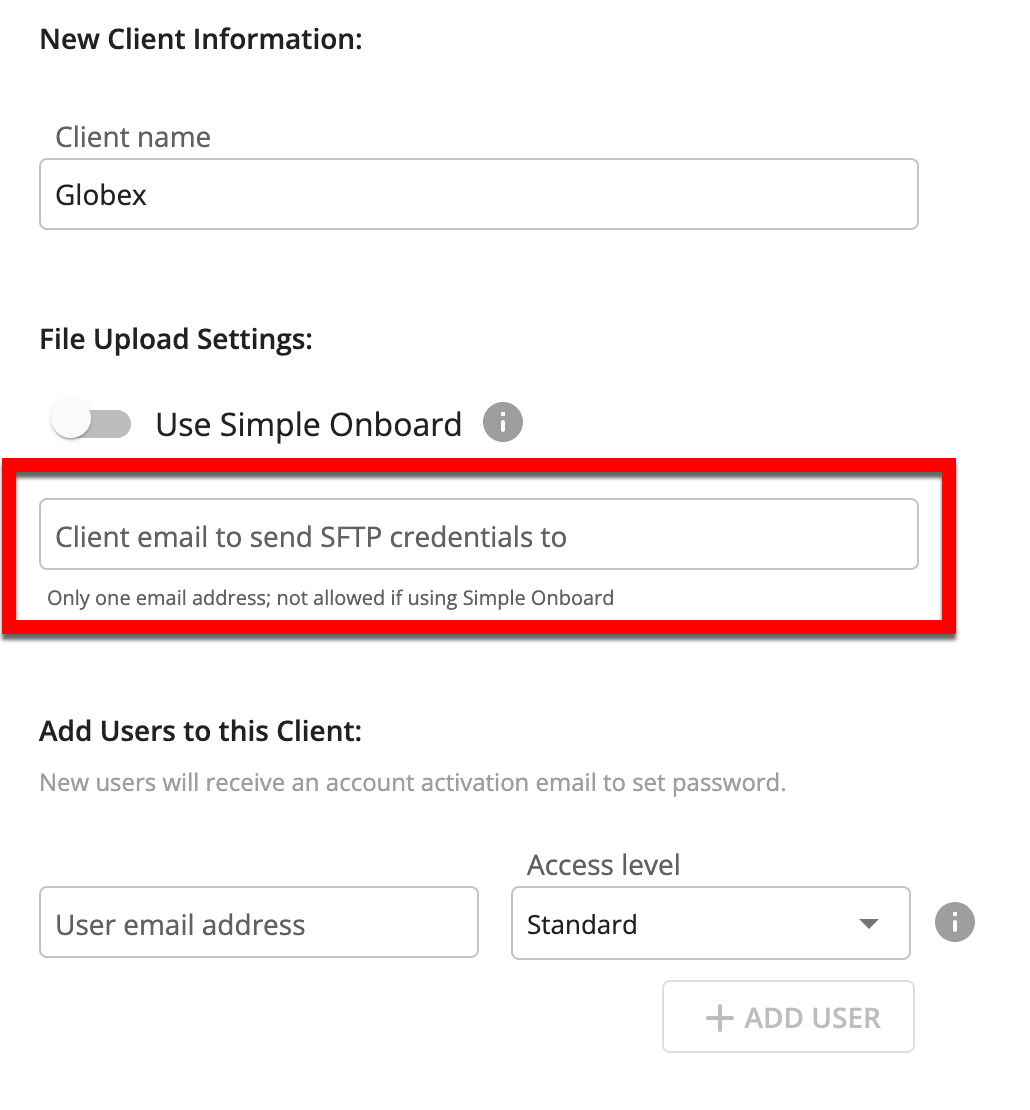
Caution
If you've enabled Simple Onboard for this client in the previous step, do not enable SFTP access by entering an email address. All Simple Onboard files must be uploaded via Connect.
Note
Files 500MB and smaller can be uploaded via Connect but files larger than 500 MB need to be uploaded via the LiveRamp SFTP.
Add a user to this client by entering a user email address and then selecting the appropriate access permission level for the user:
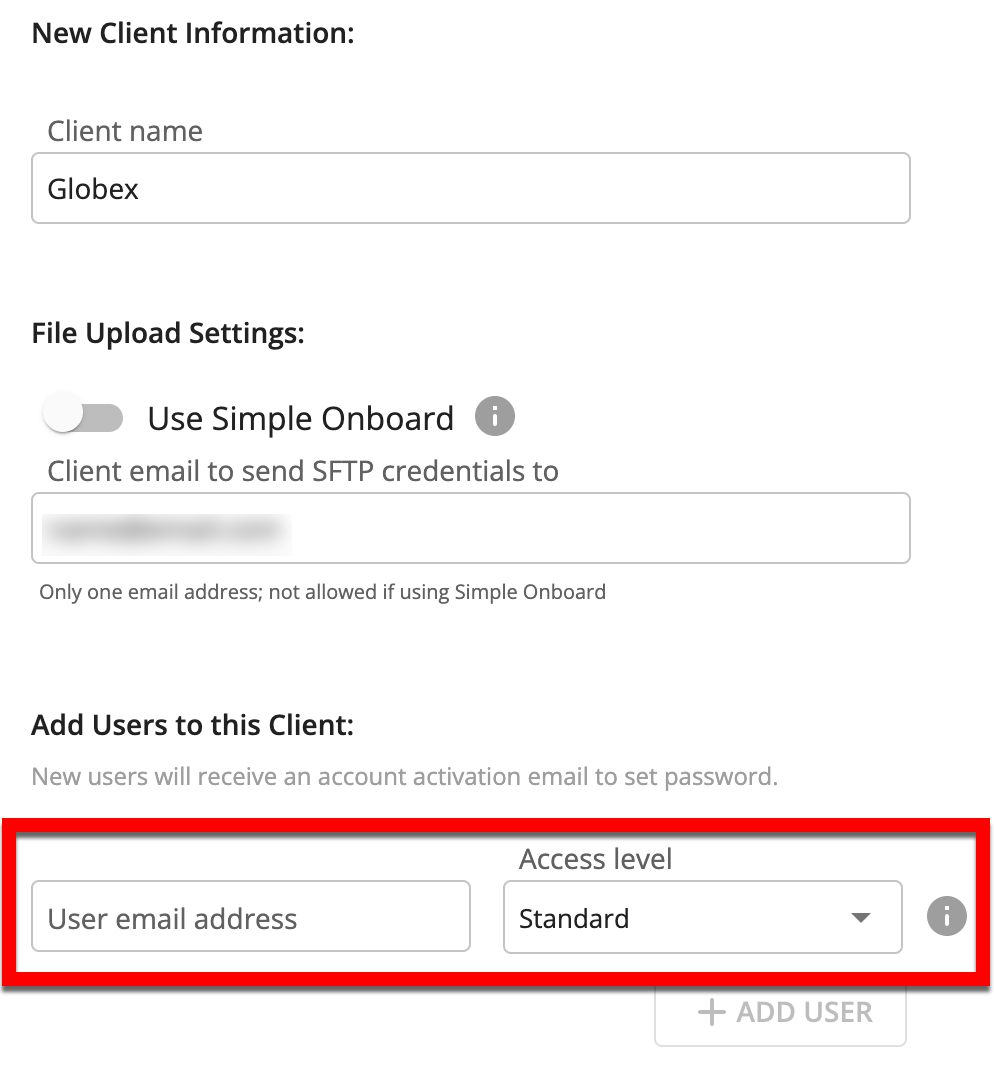
Select "Admin" for users who need to perform account management tasks, such as creating additional audiences, deleting audiences, and managing users.
Select "Standard" for users who do not need to perform account management tasks.
For more information on the capabilities available for each access permission level, see "Access Levels and Restrictions for Connect Users".
Click to finish the process of adding the user.
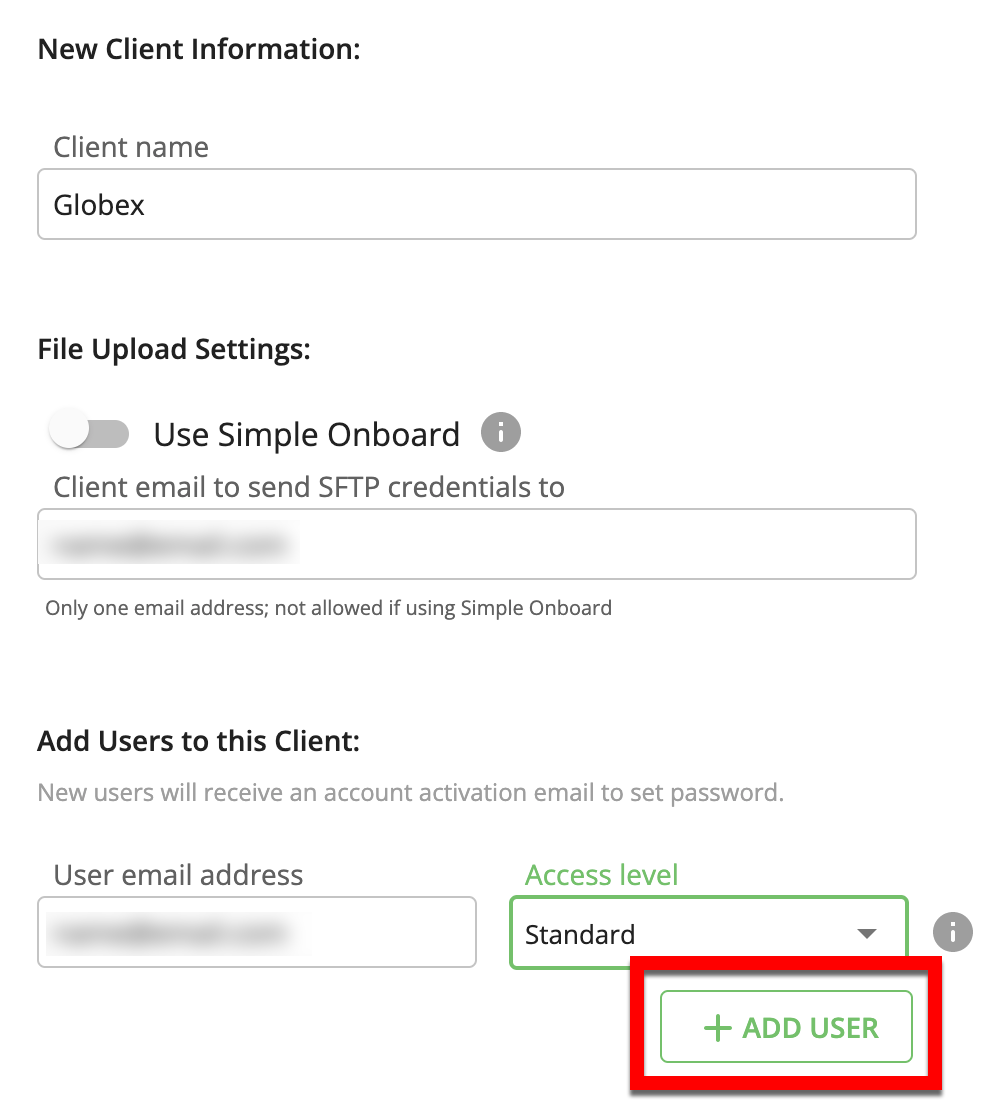
To add additional users, repeat the previous two steps.
Note
You don't need to add yourself as a user: You automatically have access to your client accounts, so you don’t have to add yourself as a user.
Click CREATE CLIENT.
A success banner appears:

Users you add will receive an email with directions for how to access Connect. These credentials will expire in 24 hours.
Switch to the new account you just created by clicking anywhere in the account switcher area and then using the account drop-down list to change from one account to another.
Create an audience for the reseller client by following the instructions in "Create a New Audience".
Caution
To delete a reseller client account: Contact your LiveRamp representative. Resellers cannot delete reseller client accounts in Connect.
Onboard Data
After the necessary reseller client customer account and audience have been created, the account is ready to have data onboarded, which involves uploading data into LiveRamp and distributing data to the end destination.
The onboarding process can be handled in either of two ways:
You handle the onboarding process. See "Getting Started with Onboarding" for instructions.
Your reseller client handles the onboarding process. See “Onboarding Guide for Reseller Clients” for instructions for your reseller client.
Tip
Note sure which option to use? Consult your LiveRamp Account Manager to help understand which onboarding option is best for you.
After you've determined how your client's data files will be uploaded, see the "Create Files" section below for details on how these files should be formatted.
Note
LiveRamp’s match rates for offline to online onboarding are typically 30-60%, depending on the type and quality of uploaded information.
The onboarding process takes 2-7 days depending on data volumes and workflows.
Create Files
Files for reseller clients must follow a specific format to ensure successful file uploads.
All files must be single-segment files, meaning they only contain the identifiers for all the consumers you want in a particular segment (and no segment data fields). These types of files are sometimes also referred to as "file-wide fields" because they create a field that contains all of the members in the file.
For example, if you want to have a segment of all the dog lovers in your CRM, you would create a file containing only the PII identifiers of those consumers and name the file with the desired name of the segment to be created. Do not include a "dog lovers" column.
Once the file is ingested and processed, a “dog lovers” segment is created in Connect with all the consumers in your uploaded file.
Guidelines Overview
In addition to our standard file formatting guidelines, reseller client files must meet the following guidelines:
Column-based files only
PII-based data only (no online data files)
No segment data fields (only identifier data fields)
Allowed file formats are CSV, TSV, or TXT (do not upload Excel files)
Name the file with the name of the segment you want to create (in addition to our file naming guidelines)
Files can be compressed and/or encrypted (see “Finalizing Files for Uploading” for more information)
Must contain the following PII identifier fields only (no segment data fields), with these exact headers in this exact order:
FIRSTNAME
LASTNAME
ADDRESS1
ADDRESS2
CITY
STATE
ZIP
EMAIL1
EMAIL2
EMAIL3
EMAIL4
PHONE1
PHONE2
If you don't have data for a particular column, include the column and leave the cells empty
To download a .csv file template with these columns and column headers, click here.
Caution
Hashing identifiers: To send hashed emails (SHA-256, MD5, and/or SHA-1 hashes) or hashed phone numbers (SHA-1 hashes only), use the existing email or phone columns and headers (no other identifiers can be hashed - see "Hashing Identifiers" for more information). Do not add additional columns or change the column headers.
The first time you send hashed identifiers, make sure the Implementation team is aware so they can import the data correctly.