Create a Data Permission
You can create data permissions for tables, views, segments, and user-defined functions (UDFs) that are owned by your organization as indicated in the Owned By column on the All Assets page. You can also create a data permission from the All Assets pane of SQL Editor.
For example, a publisher might want to create data permission for a table for their advertiser partner. Based on how the data permission was configured by the publisher, the advertiser can then combine the permissioned data with their second-party data for segment building and activation.
Note
Depending on your organization's contract, you may not have access to these features.
Tip
What you can do in the Data Collaboration Platform depends on your roles. Before you begin, check if you have the correct roles to perform the tasks in this article. To learn more, see "Roles and Permissions".
Before creating a permission:
Your data partner must first be configured for your account so that they are available to select from the Collaboration Partner list.
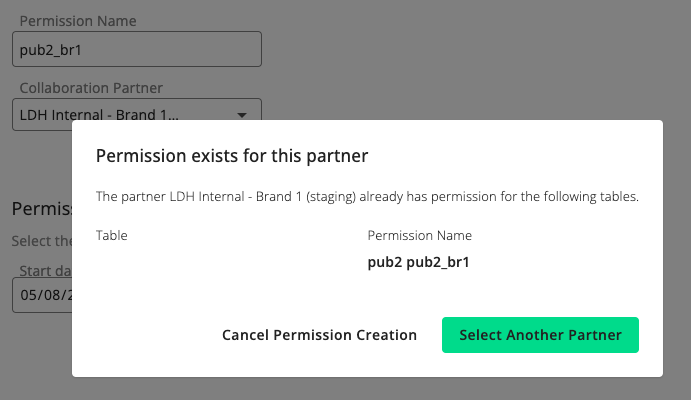
Go to the Data Permissions page to verify that permission to use the table, view, or function has not already been granted to the partner. An error message is displayed if you try to grant a second permission for the same asset and partner:
If you want to apply a query threshold (minimum aggregated results), verify that your selected asset has a valid ID column, because query results are aggregated at the ID column level.
You cannot grant permission to an asset owned by another organization, which is indicated in the Data Type column by either the
 icon (My Data) or the
  icon (Partner Data). You can also see who owns the asset in the Owned By column. Alternatively, click the asset's row to display its side panel. If the asset's More Options menu (
 ) includes the option, your organization owns it.
To see common questions about data permissions, see Data Permission FAQs.
Follow the instructions below to create a data permission for a table or a view. You can select which columns in your data your partner can aggregate against, specify the minimum aggregated result, and configure the allowed platforms for activation.
From the navigation pane, select Data Assets → Tables and Views. The Tables & Views page is displayed.
Alternatively, you can select Data Assets → All Assets to create a data permission from the All Assets page.
Hover on the row for the table or view for which you want to grant permission. Its More Options icon (
) is displayed:
Tip
To create data permissions in bulk, you can select the check boxes next to the assets you want to create permissions for and click . This method is suitable for you if:
You want to create multiple data permissions for one partner
You want to apply the same configurations for all data permissions
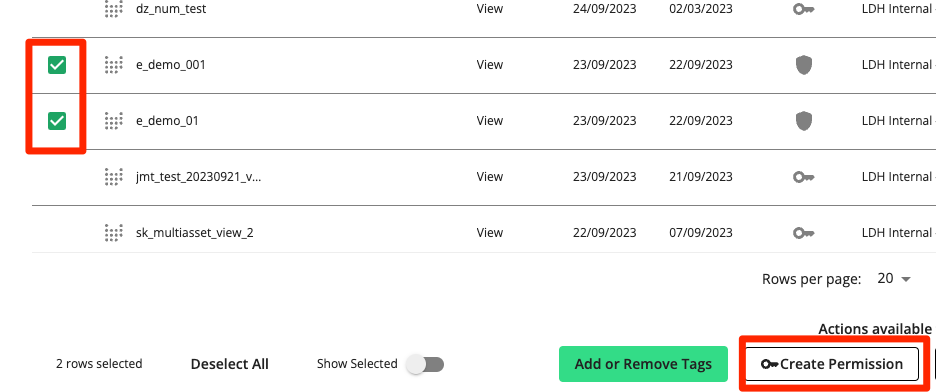
To learn more, see the "Create Multiple Data Permissions" section below.
From the More Options menu (
), select .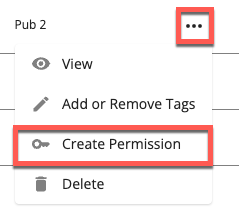
The Create Permissions dialog displays the Assets step.
Verify that the displayed asset is the correct asset for which you want to create a permission and then click . The Details step is displayed.
Enter a name for the permission, select the partner to whom you want to grant permission, and specify start and end dates. The data permission will be active at the beginning of the start date and ends at the end of the end date (if an end date is configured).
Tip
You can create one-day permission by selecting the same date as both the start and end date.
Click .
In the Data Combinations Rules step, configure the allowed data combination for your partner. By default, your partner can always combine this data with other data you have permissioned to them.
Combine with their first-party data: Select this option to allow your partner to combine your data asset with the data that your partner has collected themselves or purchased outside of LiveRamp.
Combine with their second-party data permissioned from other LiveRamp partners: Select this option to allow your partner to combine your data asset with data that other LiveRamp partners shared with them. Select one of the following options:
Only the following LiveRamp partners: Select this option if you want to specify certain LiveRamp partners' data with which your partner can combine your data asset. This option will be disabled if you haven't set up an allowed partner list. Contact your LiveRamp representative if you want to set this up.
Any LiveRamp partners: Allow your partner to combine your data asset with data from any other LiveRamp partners that were shared with them.
Click .
The Analytics Rules step displays options to set up query restrictions for the permissioned asset.
To allow your partner to run queries on the asset, enable Allow your partner to query this data. You can then configure the following options:
Set the query limit to determine which column your partner can aggregate against. To enable this, click the Set minimum for aggregated query results check box.
Minimum # of Aggregated Records: Select the granularity of the query results. If the results of a query do not meet the specified minimum, those rows will not be displayed.
Column for Aggregation: Select which column your data partner can aggregate against. The minimum number of aggregated records will be applied to the column you select here. For example, if you specify 50 as the minimum and select RampID as the column, your partner will not see results of any query they perform if it results in fewer than 50 unique household RampIDs.
Household RampID: Aggregate based on the household ID column (typically called "hhid"). If this option is grayed out, you cannot select it because the underlying data model does not include household-level data.
RampID: Aggregate based on the RampID column.
Other: Aggregate based on one of the columns found in the asset.
Under Query Statement Visibility, you can select one of the following options:
Query statements will not be tracked in Data Activity
Track query statements only
Track query statements and results in Data Activity
If this option is enabled, your partner's SQL queries (and their results, if selected) will be displayed on the Data Activity page. Your partner will be notified that you can view their queries when they select this asset in SQL Editor.
Click .
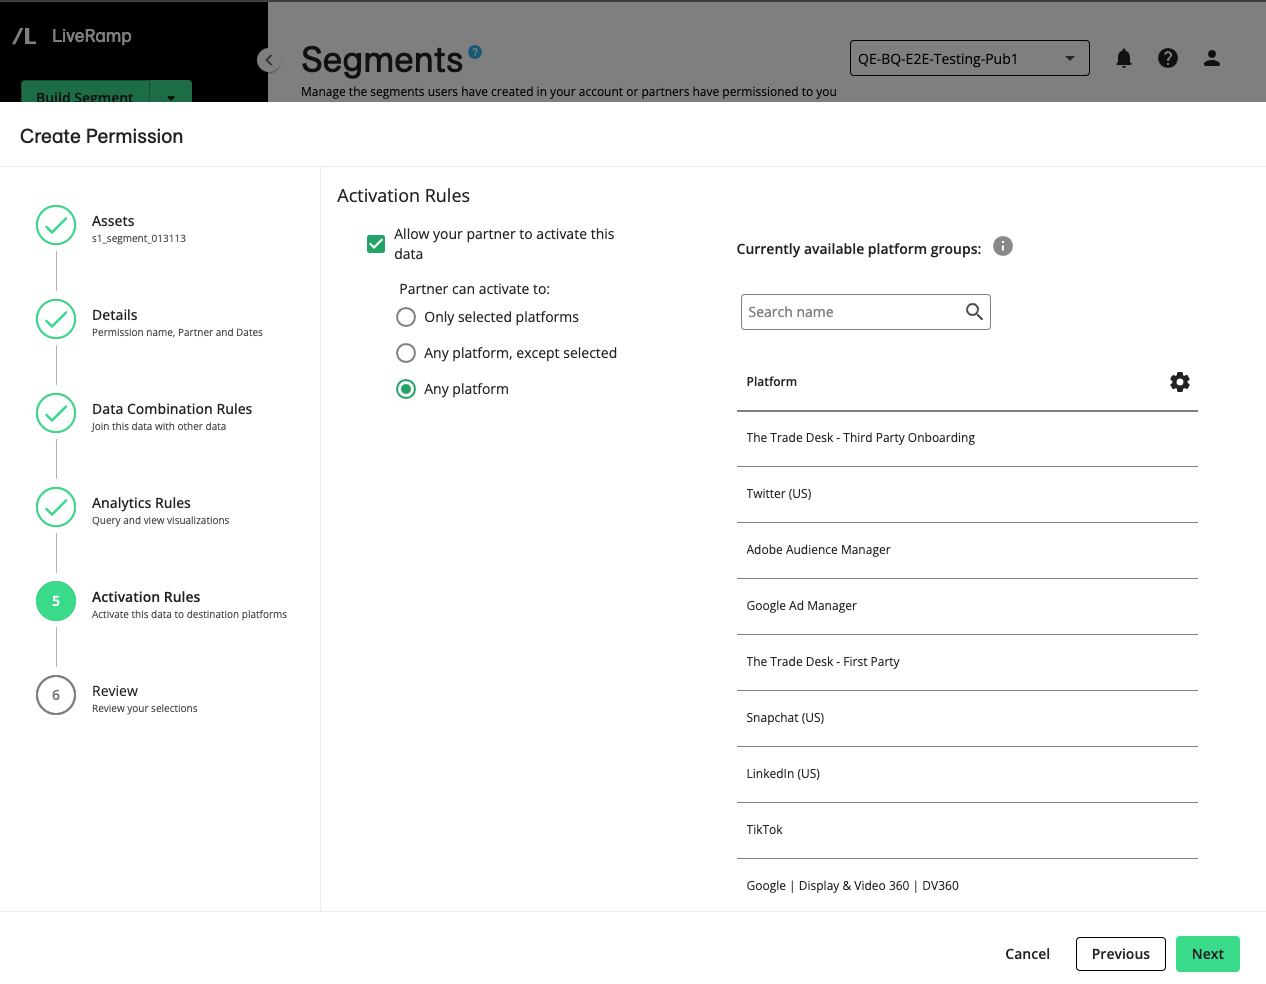
Configure the Activation Rules step to allow your partner to perform activation on the permissioned assets. For tables and views, this means your partner can use the data as attributes to build segments and activate them to your preferred destination platforms.
Enable Allow this partner to activate this data and select one of the following options:
Selected platforms: Allow your partner to activate the segments only on specific platforms of your choice. If this option is enabled, a standard list of destination platforms will be displayed for you to select from.
Tip
Use the search bar to quickly look for a specific destination platform.
Any platform, except selected: Allow your partner to activate the segments on any platform, except the selected platforms from the standard destination list.
Any platform: Allow your partner to activate the segments on any platform of their choosing. This includes current and future platform groups configured to use on LiveRamp. Your partner may only have a subset of the platform groups that are displayed configured.
Click .
Review the summary of your permission and click . To adjust the permission, click until you land on the desired step.
When creating a data permission for a UDF, you can enable query visibility to allow your partner's query statements (and their results) to be visible to you. You can also optionally allow your partner to view the underlying SQL statements that make up the UDF.
From the navigation pane, select Data Assets → User-Defined Functions. The User-Defined Functions page is displayed.
Alternatively, you can select Data Assets → All Assets to create a data permission from the All Assets page.
Hover on the row for the UDF for which you want to grant permission. Its More Options icon (
) is displayed:
Tip
To create data permissions in bulk, you can select the check boxes next to the assets you want to create permissions for and click . This method is suitable for you if:
You want to create multiple data permissions for one partner
You want to apply the same configurations for all data permissions
To learn more, see the "Create Multiple Data Permissions" section below.
From the More Options menu (
), select .The Create Permissions dialog displays the Assets step.
Verify that the displayed asset is the correct asset for which you want to create a permission and then click . The Details step is displayed.
Enter a name for the permission, select the partner to whom you want to grant permission, and specify start and end dates. The data permission will be active at the beginning of the start date and ends at the end of the end date (if an end date is configured).
Tip
You can create one-day permission by selecting the same date as both the start and end date.
You can enable query tracking to track one of the following:
Your partner's query statements
Your partner's query statements and the results
If this option is enabled, your partner's SQL queries (and their results, if selected) will be displayed on the Data Activity page. Your partner will be notified that you can view their queries when they select this asset in SQL Editor.
You can optionally enable UDF visibility so your partner can view the underlying SQL statement that you used to create this user-defined function. They can see it on the UDF's side panel on their All Assets page or their UDFs page.
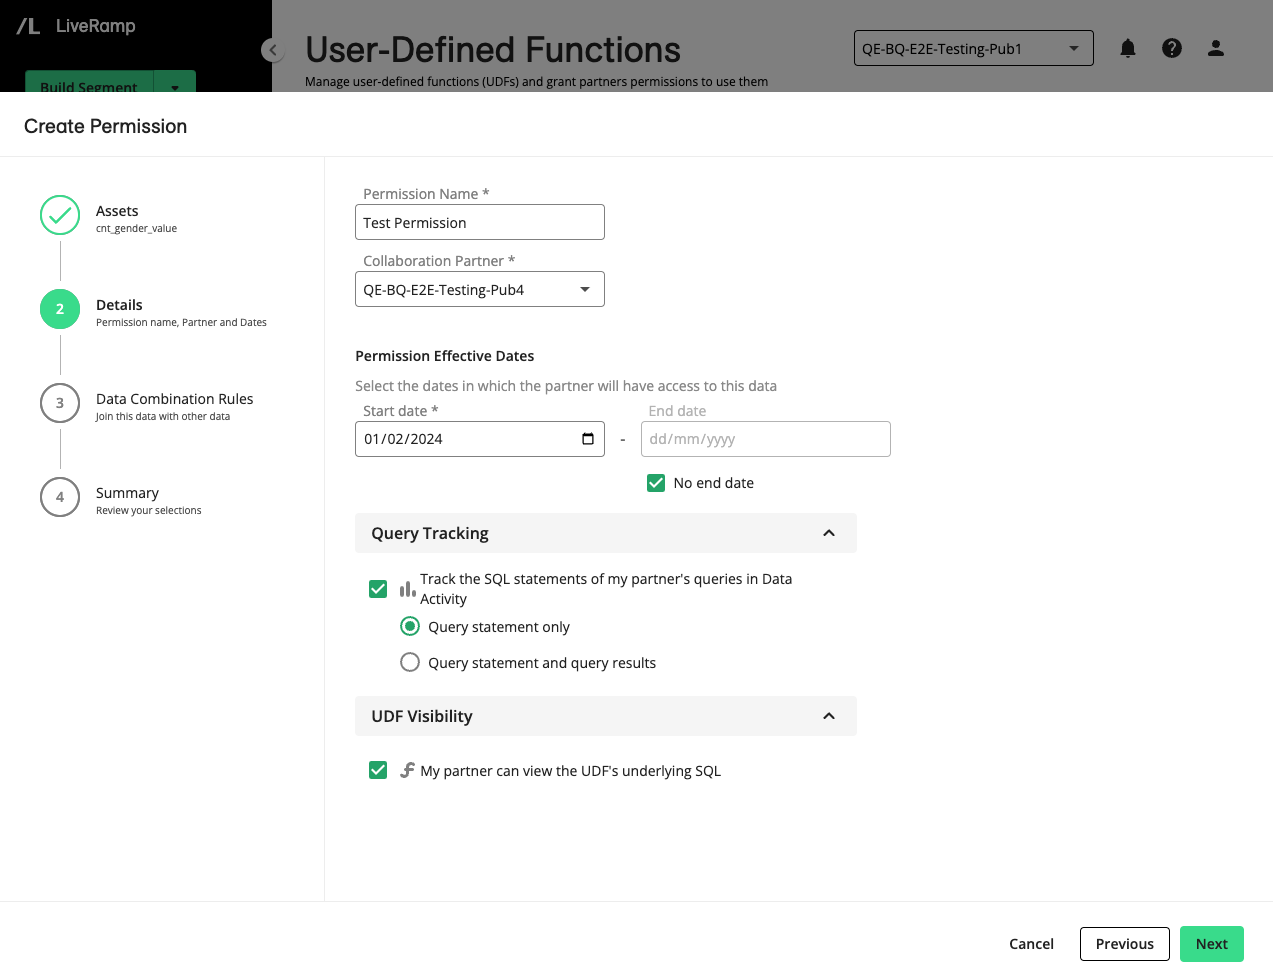
Click .
In the Data Combinations Rules step, configure the allowed data combination for your partner. By default, your partner can always combine the data with other data you have permissioned to them:
Combine with their first-party data: Select this option to allow your partner to combine your data asset with the data that your partner has collected themselves or purchased outside of LiveRamp.
Combine with their second-party data permissioned from other LiveRamp partners: Select this option to allow your partner to combine your data asset with data that other LiveRamp partners shared with them. Select one of the following options:
Only the following LiveRamp partners: Select this option if you want to specify certain LiveRamp partners' data with which your partner can combine your data asset. This option will be disabled if you haven't set up an allowed partner list. Contact your LiveRamp representative if you want to set this up.
Any LiveRamp partners: Allow your partner to combine your data asset with data from any other LiveRamp partners that were shared with them.
Click .
Review the summary of your permission and click . To adjust the permission, click until you land on the desired step.
When you create a data permission for a segment, you can choose to allow your partner to perform activation using the segment and which platforms your partner is allowed to perform activations on.
From the navigation pane, select Data Assets → Segments The Segments page is displayed.
Alternatively, you can select Data Assets → All Assets to create a data permission from the All Assets page.
Hover on the row for the segment for which you want to grant permission. Its More Options icon (
) is displayed:
Tip
To create data permissions in bulk, you can select the check boxes next to the assets you want to create permissions for and click . This method is suitable for you if:
You want to create multiple data permissions for one partner
You want to apply the same configurations for all data permissions
To learn more, see the "Create Multiple Data Permissions" section below.
From the More Options menu (
), select .The Create Permissions dialog displays the Assets step.
Verify that the displayed asset is the correct asset for which you want to create a permission and then click . The Details step is displayed.
Enter a name for the permission, select the partner to whom you want to grant permission, and specify start and end dates. The data permission will be active at the beginning of the start date and ends at the end of the end date (if an end date is configured).
Tip
You can create one-day permission by selecting the same date as both the start and end date.
Click .
In the Data Combinations Rules step, configure the allowed data combination for your partner. By default, your partner can always combine the data with other data you have permissioned to them:
Combine with their first-party data: Select this option to allow your partner to combine your data asset with the data that your partner has collected themselves or purchased outside of LiveRamp.
Combine with their second-party data permissioned from other LiveRamp partners: Select this option to allow your partner to combine your data asset with data that other LiveRamp partners shared with them. Select one of the following options:
Only the following LiveRamp partners: Select this option if you want to specify certain LiveRamp partners' data with which your partner can combine your data asset. This option will be disabled if you haven't set up an allowed partner list. Contact your LiveRamp representative if you want to set this up.
Any LiveRamp partners: Allow your partner to combine your data asset with data from any other LiveRamp partners that were shared with them.
Click .
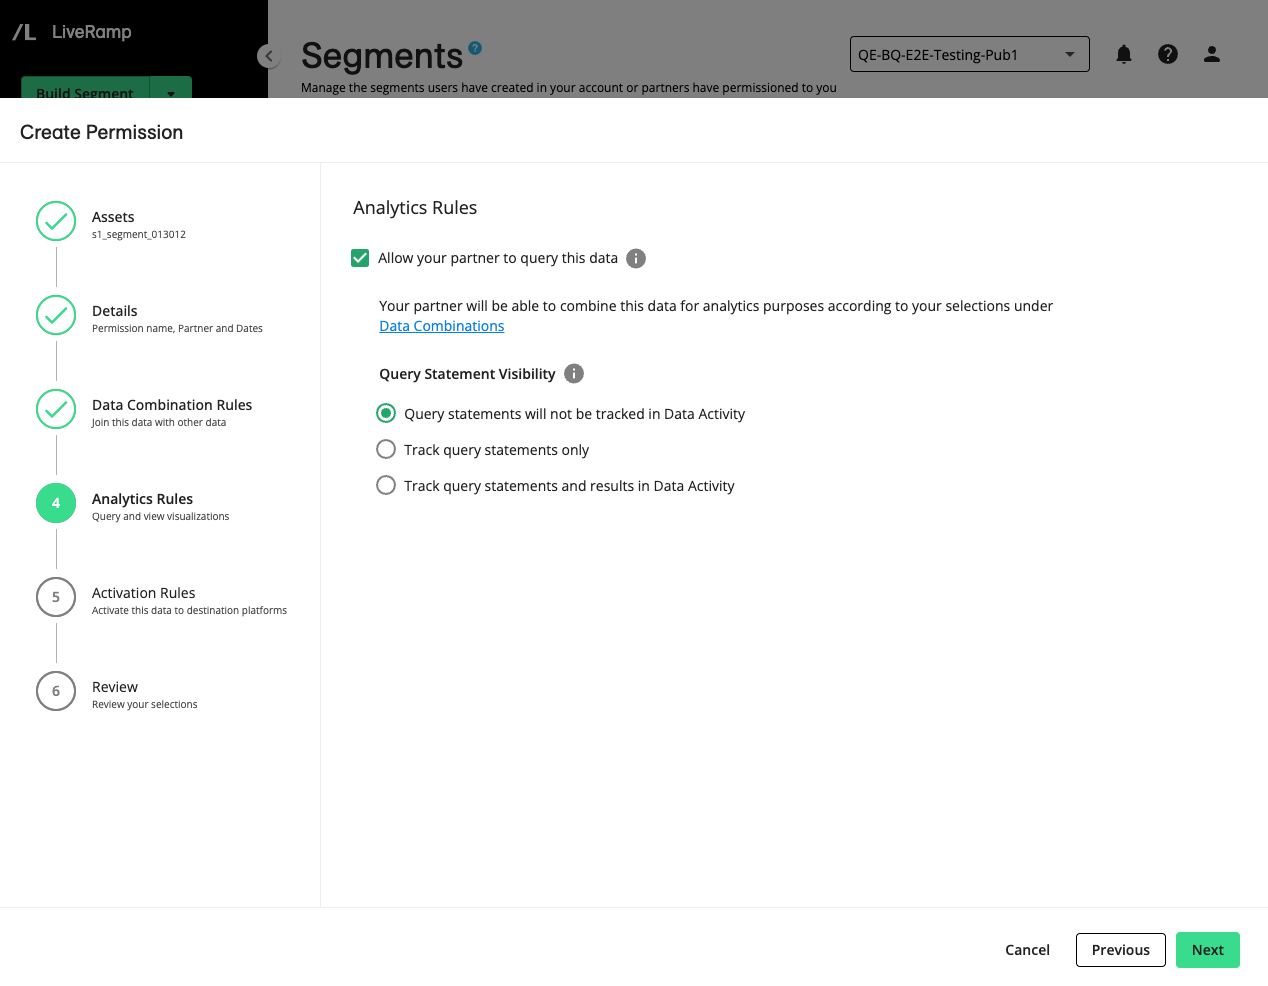
The Analytics Rules step displays options to set up query restrictions for the permissioned asset.
To allow your partner to run queries on the asset, enable Allow your partner to query this data. You can then configure the Query Statement Visibility option by selecting one of the following:
Query statements will not be tracked in Data Activity
Track query statements only
Track query statements and results in Data Activity
If this option is enabled, your partner's SQL queries (and their results, if selected) will be displayed on the Data Activity page. Your partner will be notified that you can view their queries when they select this asset in SQL Editor.
Click .
Configure the Activation Rules step to allow your partner to perform activation on the permissioned segments.
Enable Allow this partner to activate this data and select one of the following options:
Selected platforms: Allow your partner to activate the segments only on specific platforms of your choice. If this option is enabled, a standard list of destination platforms will be displayed for you to select from.
Tip
Use the search bar to quickly look for a specific destination platform.
Any platform, except selected: Allow your partner to activate the segments on any platform, except the selected platforms from the standard destination list.
Any platform: Allow your partner to activate the segments on any platform of their choosing. This includes current and future platform groups configured to use on LiveRamp. Your partner may only have a subset of the platform groups that are displayed configured.
Review the summary of your permission and click . To adjust the permission, click until you land on the desired step.
You can create multiple data permissions for the same data partner at the same time. This only works if you intend to apply the same configuration for all data permissions you want to create.
For example, you want to grant data partner A access to three different User-Defined Functions. You want all the data permissions to expire on 25 September 2024 with the query visibility settings disabled and UDF visibility enabled. In this case, you can create multiple data permissions at once, rather than creating three separate data permissions.
Multiple data permissions can be created at the same time for:
Multiple tables
Multiple views
Multiple UDFs
Multiple segments
Multiple tables and views
Go to Data assets → All Assets.
Select the check boxes of the assets you want to create data permissions for. Note that you cannot create multiple data permissions for different asset types, except for tables and views together.

Click .

You can then proceed to set your data permissions as instructed in the previous sections based on which type of asset you are working with.
Once the permission has been successfully created, your partner will be notified through email or in-app messaging (depending on their notification settings) that they now have access to the permissioned data.
The permission will also become available for you to view on the Data Permissions page where you can view its status, details, modification history, and expiration date. To go to the Permissions page, select Data Assets → Data Permissions. To learn more, see "The Data Permissions Page".
You can edit and revoke the permission at any time as long as it has not passed its expiration date. To learn more, see "Edit a Permission" and "Revoke a Permission".