- Safe Haven Documentation
- Customer Profiles for Data Collaboration
- Audiences
- Distribute an Audience
Distribute an Audience
You can distribute the segments and audiences in your account to one or more destinations you have had LiveRamp enable for you. Distributions are made via destination accounts.
You can distribute a single audience, multiple audiences, or a subfolder and all the audiences contained in that subfolder.
You can distribute the audience once ("One-Time" is the default setting), set it to "Always-On" to redistribute when the underlying data are updated, or select "Scheduled" to specify a start and end date.
Caution
You cannot distribute to Google Customer Match (GCM) or other offline data-based destinations.
You cannot distribute an audience with fewer than 25 members.
The destination accounts you can use depend on the type of data in the segment or audience:
If Data Marketplace data was used, you can only distribute the segment to Data Marketplace destinations.
If no Data Marketplace data was used (for segments containing only first-party data), you can only distribute to onboarding destinations.
Distribute to Analytics Environment
If the ability to distribute to Analytics Environment is configured for your account, audience data will also be automatically sent to your "<account_name>_wh" dataset and in BigQuery's Systems Area, which includes the following tables:
customer_profiles_segments: Contains the segment data (members) that were sent to Analytics Environment from Customer Profiles for Data Collaboration. Use this table to perform campaign measurements and develop insights.
customer_profiles_segment_reference: Contains metadata from distributed segments that are automatically sent to Analytics Environment, including name, counts, destinations distributed, and timestamps.
For information about these tables, see "Analytics Environment Resources."
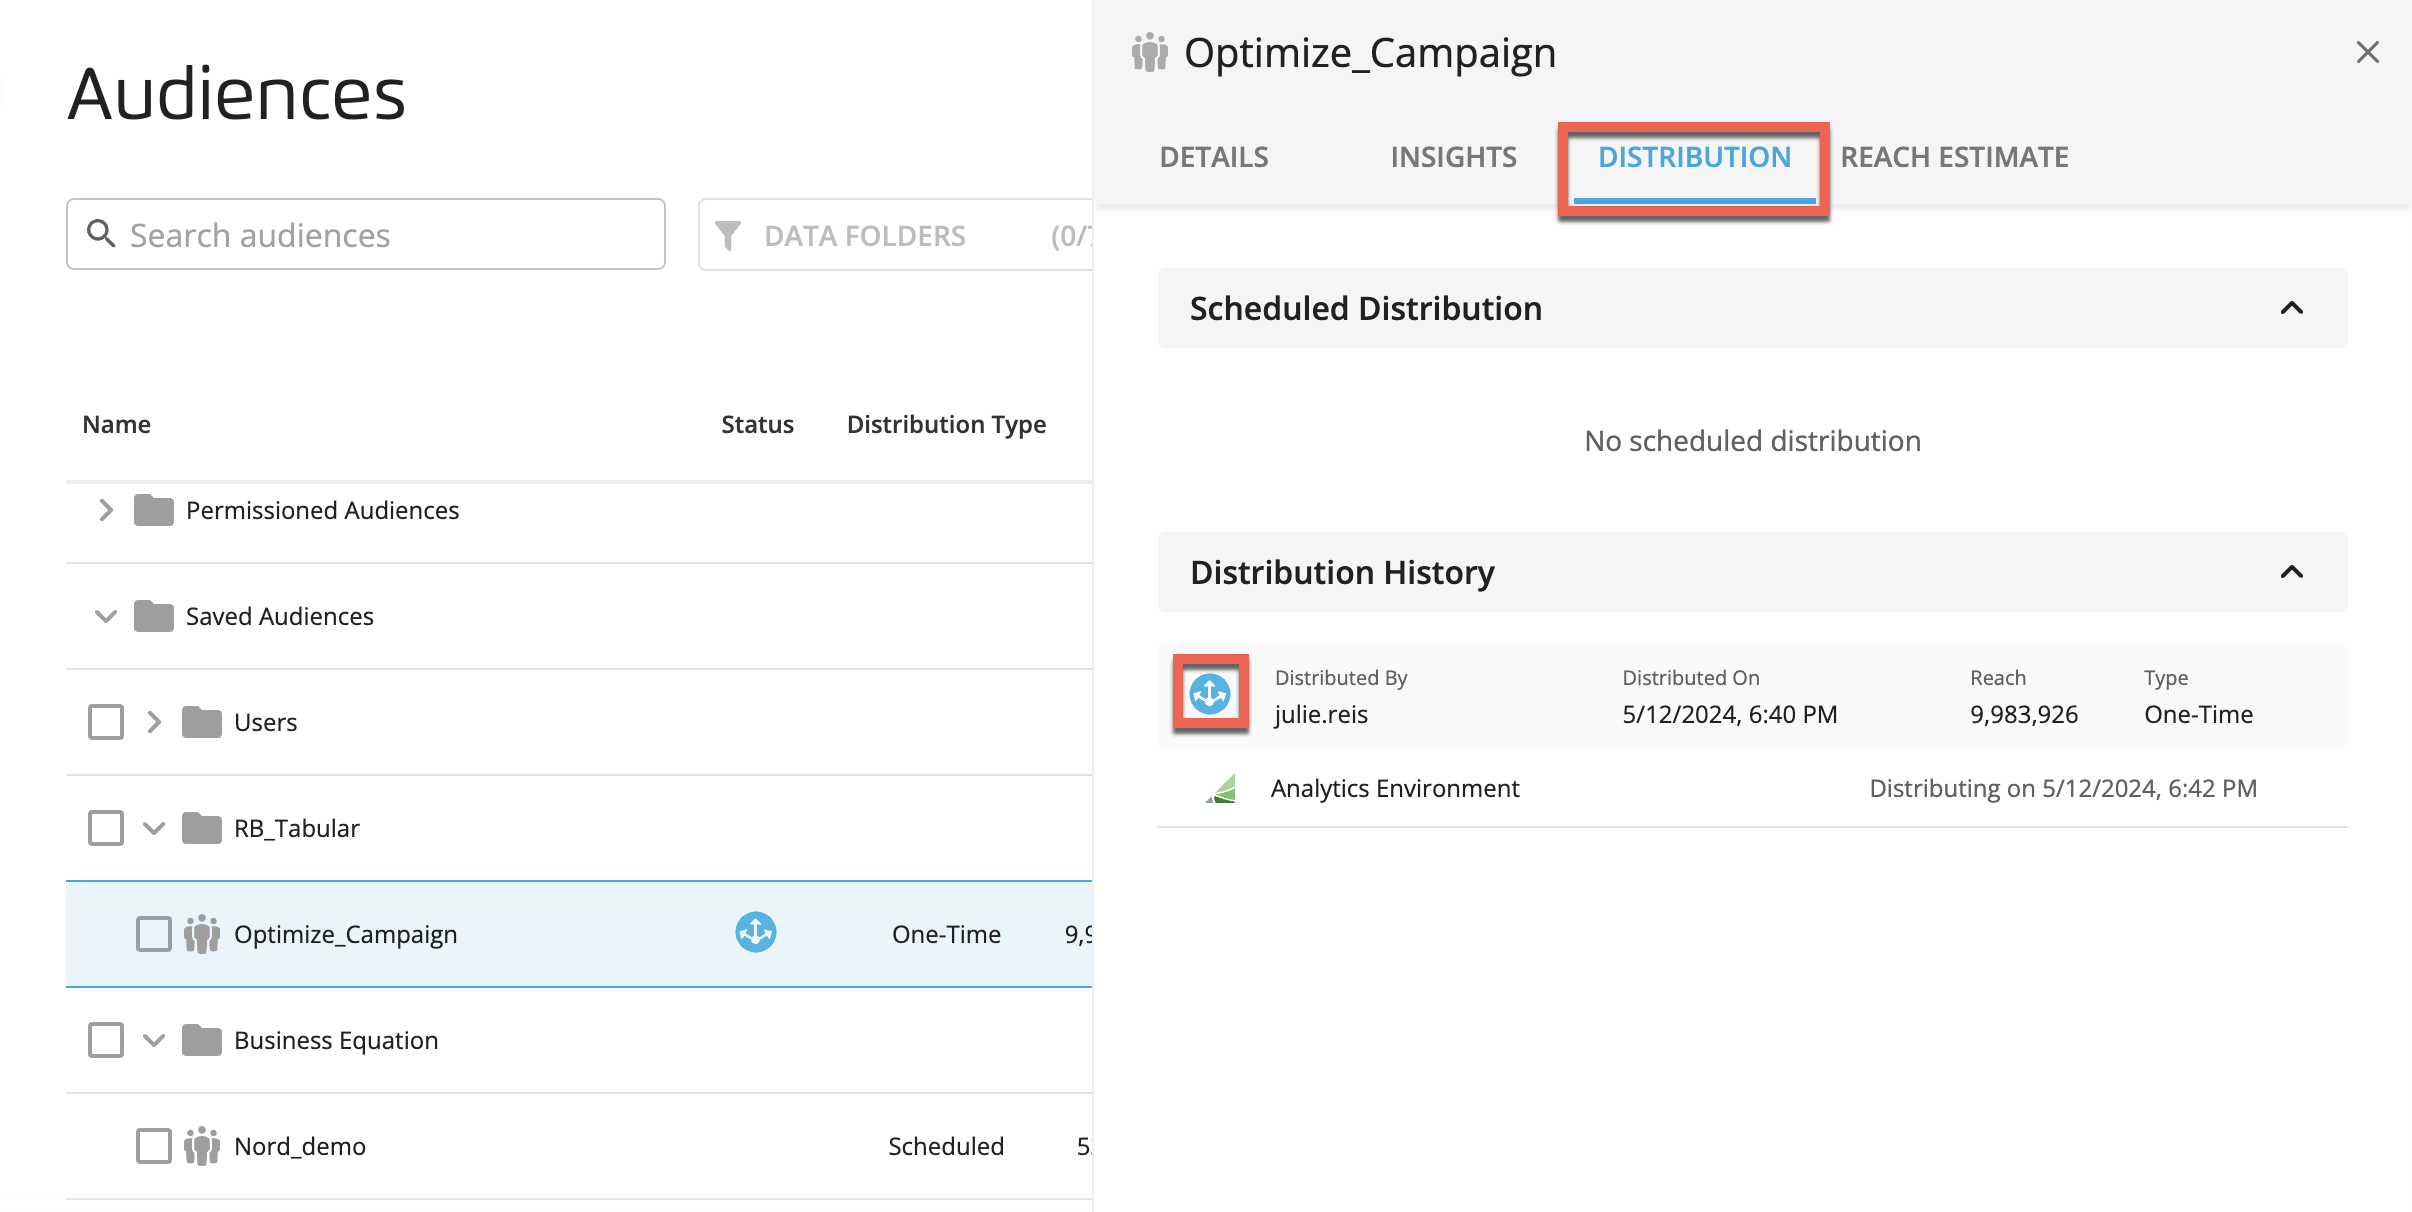
If you only want to send the data to Analytics Environment and don't want to send it to any destinations, select only the "Analytics Environment" tile during distribution. Processing distributions to Analytics Environment can take up to a day but is often completed in a few hours. You will receive an email notification of the distribution and you can also check the Distribution tab of the audience's side panel to see its distribution status.

You can select the following distribution modes:
Incremental Append mode: Each distribution will only add incremental users to the customer_profiles_segments table. Use this mode if you only need to know when a user was first distributed for the segment. By default, audiences use this mode if they are set to Always-On.
Full Append mode: Each distribution will add a snapshot of the whole segment to the customer_profiles_segments table. Use this mode if you need to know every time that a user was distributed for the segment. By default, audiences use this mode if they are not set to Always-On.
Permissioned data can only be sent to Analytics Environment if the partner selected the "Utilize in Analytics Environment" use case when creating the permission. If the data has not been permissioned for this use case, the audience data will not be automatically sent and the Analytics Environment tile will be grayed out during distribution.
Note
Test and Control audiences are not supported for Always-On and Scheduled distributions.
In the left navigation bar, click Audiences.
The Audiences Page is displayed.
Select the check boxes for the audiences or subfolders that you want to distribute.
Note
You can distribute up to 200 audiences at the same time by selecting multiple check boxes. However, selecting more than 20 audiences can negatively impact performance.
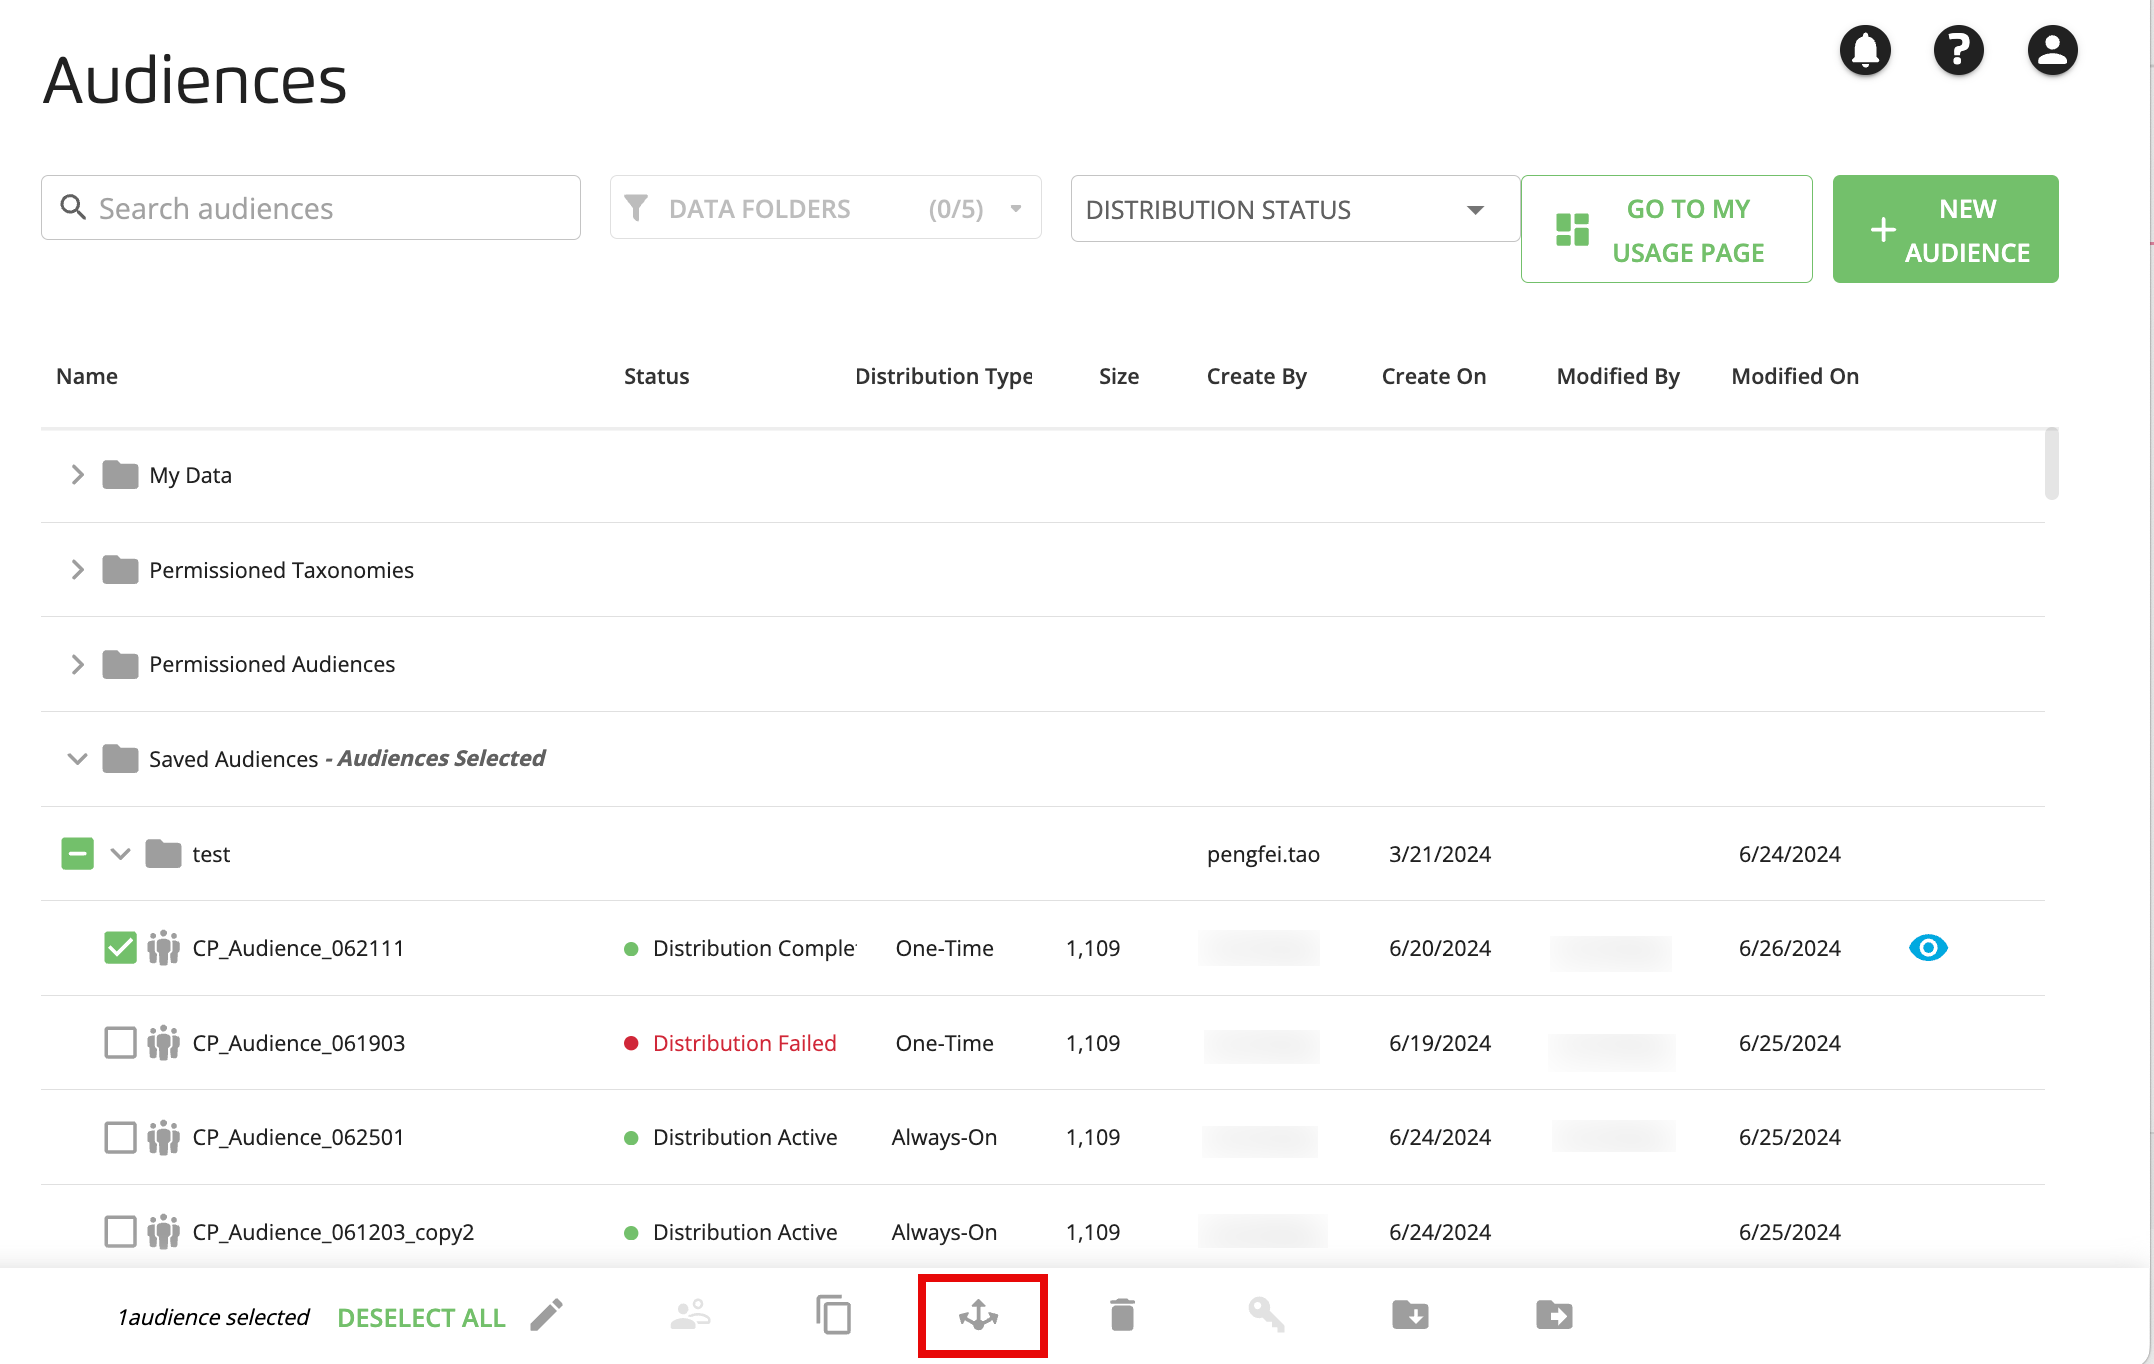
Click the Distribute icon
 that is displayed at the bottom of the page.
The Distribute Audience dialog displays your destination accounts.
If your selected audiences contain third-party data, only third-party destinations are displayed. If a destination's row is grayed out, hovering your cursor over it will display the reason why you cannot distribute the audiences to the destination.
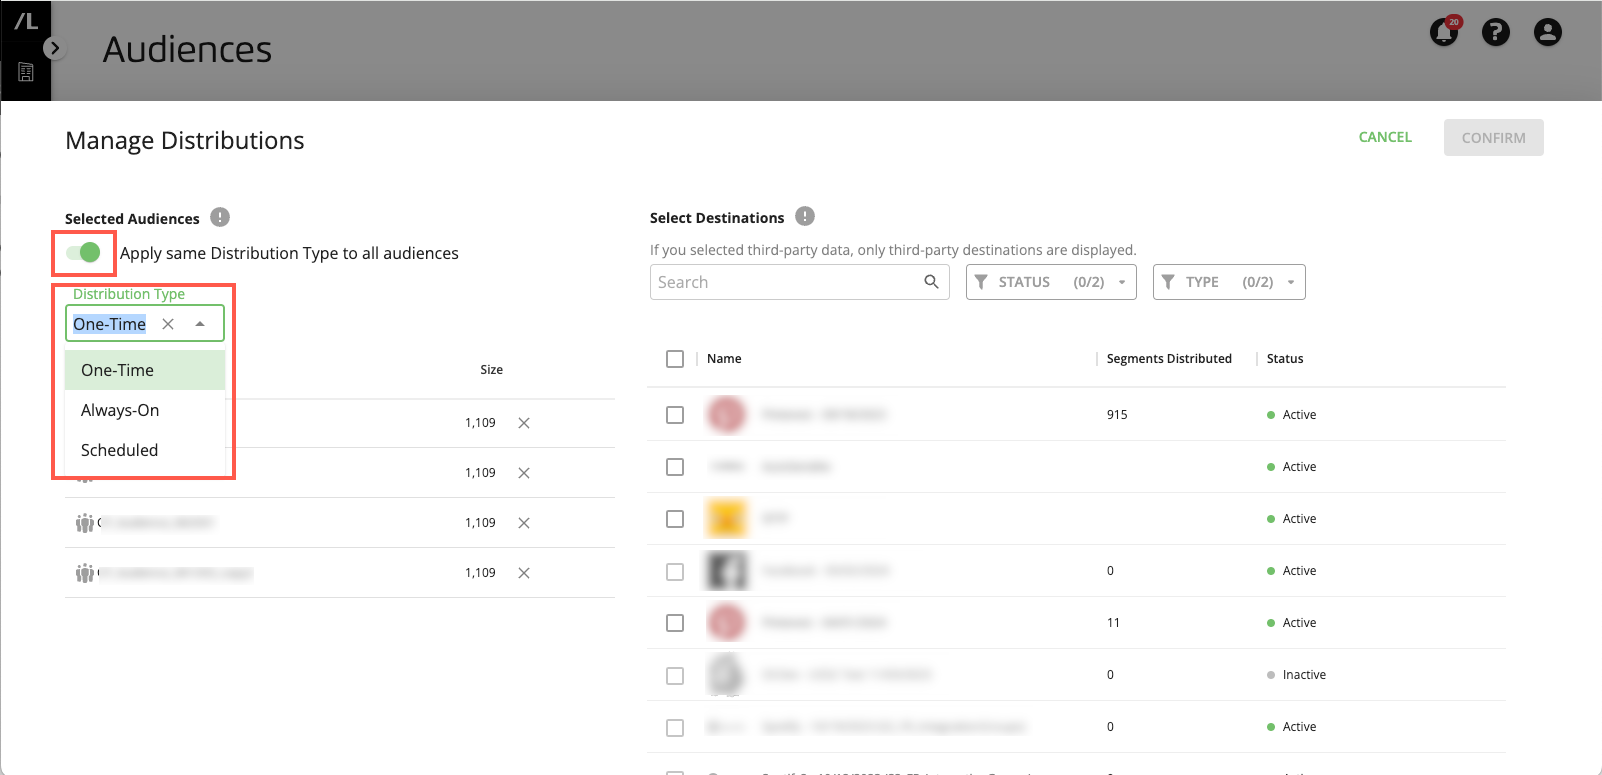
In the Distribution dialog, set the Apply same Distribution Type to all audiences toggle on (default) or off. If set to on, select one of the distribution types in the Distribution Type list that you want applied to all the selected audiences. If set to off, select one of the distribution types in the Distribution Type list for each of the selected audiences:
Note
When the Apply same Distribution Type to all audiences toggle is on, if you select the "Always-On" or "Scheduled" distribution type, the distribution type for any test and control groups or lookalike-modeled audiences (with "Always-On" disabled) in the Selected Audiences list will remain "One-Time".
One-Time (the default): Distribute the audience only once.
Always-On: The audience is automatically redistributed whenever the underlying data are updated. See "Setting a Distribution to Always-On".
Scheduled: Specify a start and end date for the audience distribution. If you leave the end date empty, you are effectively specifying a "no end date" distribution.

Select the check box for the destinations that you want to deliver to (select the check box by Name to select all eligible destinations listed), and then click CONFIRM.
Note
If previously selected destination accounts are inactive, expired, or invalid, they will not be included in this audience distribution.
If a destination you want to distribute to is grayed out and cannot be selected, you can hover over its row to display an explanation of why it cannot be selected. For example, the destination accounts you can use depend on the type of data in the segment or audience. If Data Marketplace data was used, you can distribute the segment to Data Marketplace destinations only. If no Data Marketplace data was used (for segments containing only first-party data), you can distribute to activation destinations only.
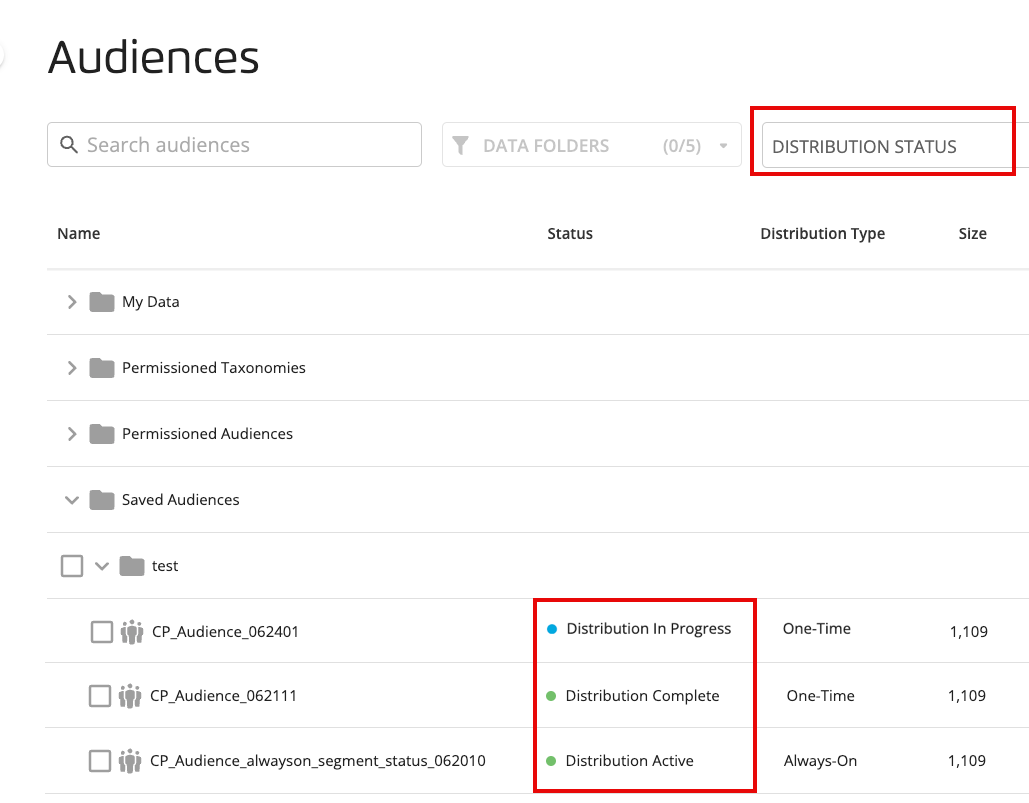
A distribution status appears in the Status column for the audiences you distributed and your audiences should be available at the destinations within 2-7 days. You can also filter all audiences based on the distribution status by selecting the filter at the top of the Audiences page. See "View Distribution Status Details" for information on viewing the distribution status.

Note
If the distribution of an audience is complete, you can edit the audience by selecting it and clicking the Edit icon. Test and control groups, lookalike-modeled audiences, and audiences with a distribution status of "Distribution in Progress" cannot be edited.
If an audience is currently distributing, you can select it, click the Distribute icon, and adjust its destinations. However, you cannot select a distributing audience in combination with other audiences.
Distributions can take up to several days to complete depending on the destination platform's policies and performance.
Note
Test and Control audiences are not supported for Always-On distributions.
By default, distributions are set to One-Time to send it only once. You can optionally set an audience distribution to Always-On so that it is automatically redistributed whenever the underlying data are updated. For example, an update might be needed due to new data you upload to your account, permissioned data that is updated in a partner's account, or updates to the records for the members of that audience in the LiveRamp Identity Graph.
The Always-On option will send new identifiers as part of the redistribution of the entire audience (new audience members' IDs + the prior set of IDs).
Note
The redistribution of an Always-On distribution will not delete identifiers from the destination platform that LiveRamp sent in a previous distribution unless the destination has been implemented as a Record Sync destination. See "Keep Destination Data Fresh with Record Sync" for more information.
Always-On is only available for audiences that you have built using Customer Profiles for Data Collaboration (the audiences that appear in the "Saved Audiences" folder on the Audiences page).
Note
If the Always-On slider appears grayed out and cannot be enabled, the audience has stopped distributing because it contains one or more unavailable segments, due to permissioned data included in that audience being no longer available. To continue distributing that audience, edit the audience to remove or replace the unavailable segments. Then distribute the new audience. See "Invalid Audiences."
In the left navigation bar, click Audiences.
Select the audience that you want to set to Always-On and then click the Distribute icon
 that is displayed at the bottom of the page.
The Distribute Audience dialog displays your destination accounts.
In the Distribute Audience dialog, select Always-On from the Distribution Type list.
Click Confirm.
A confirmation dialog summarizes your distribution changes.
Click Confirm.