Distribute Data to a Destination
Once you've created a destination account, you can distribute (activate) segments through that destination account.
Once you've added your segments to distribution, you should see your data in the destination platform within 1-3 days after distribution.
Note
For certain destination platforms that are rate limited, distribution might take longer. For more information, see "Rate-Limited Destination Platforms".
It typically takes another 1-3 days after the data appears in the destination platform for stats to calculate and populate within Connect.
If you want to be able to resend all active segments for a particular destination account on your own, LiveRamp can enable this ability for you. Create a support case in the LiveRamp Community portal to have this enabled. See "Resend Active Segments" for more information.
If your segments are not showing up at the platform after 3 days, see "Troubleshoot Distributions to Destination Accounts" or resend the active segments.
If you want to have all the fields and segments from one or more audiences added to distribution automatically, see "Automatically Add Segments to a Distribution".
Caution
Keep our recommended destination account limits in mind:
Maximum of 1,000 segments distributing in one destination account
Maximum of 500 segments added for distribution to a destination account per hour
See "How LiveRamp Refreshes Distributed Data" for more information on how your distributed data can be refreshed.
Note
If you want to be able to resend all active segments for a particular destination account on your own, LiveRamp can enable this ability for you. Create a support case in the LiveRamp Community portal to have this enabled. See "Resend Active Segments" for more information.
Distribute Segments from the Segment Distribution Page
Follow the steps below to distribute data to a destination from the Segment Distribution page for a specific destination account:
Tip
To view an interactive walkthrough demo of this process, click here.
From the navigation menu, click Search to open the global search pane, and then select or search for the desired destination account to navigate to the Segment Distribution page for that destination account.
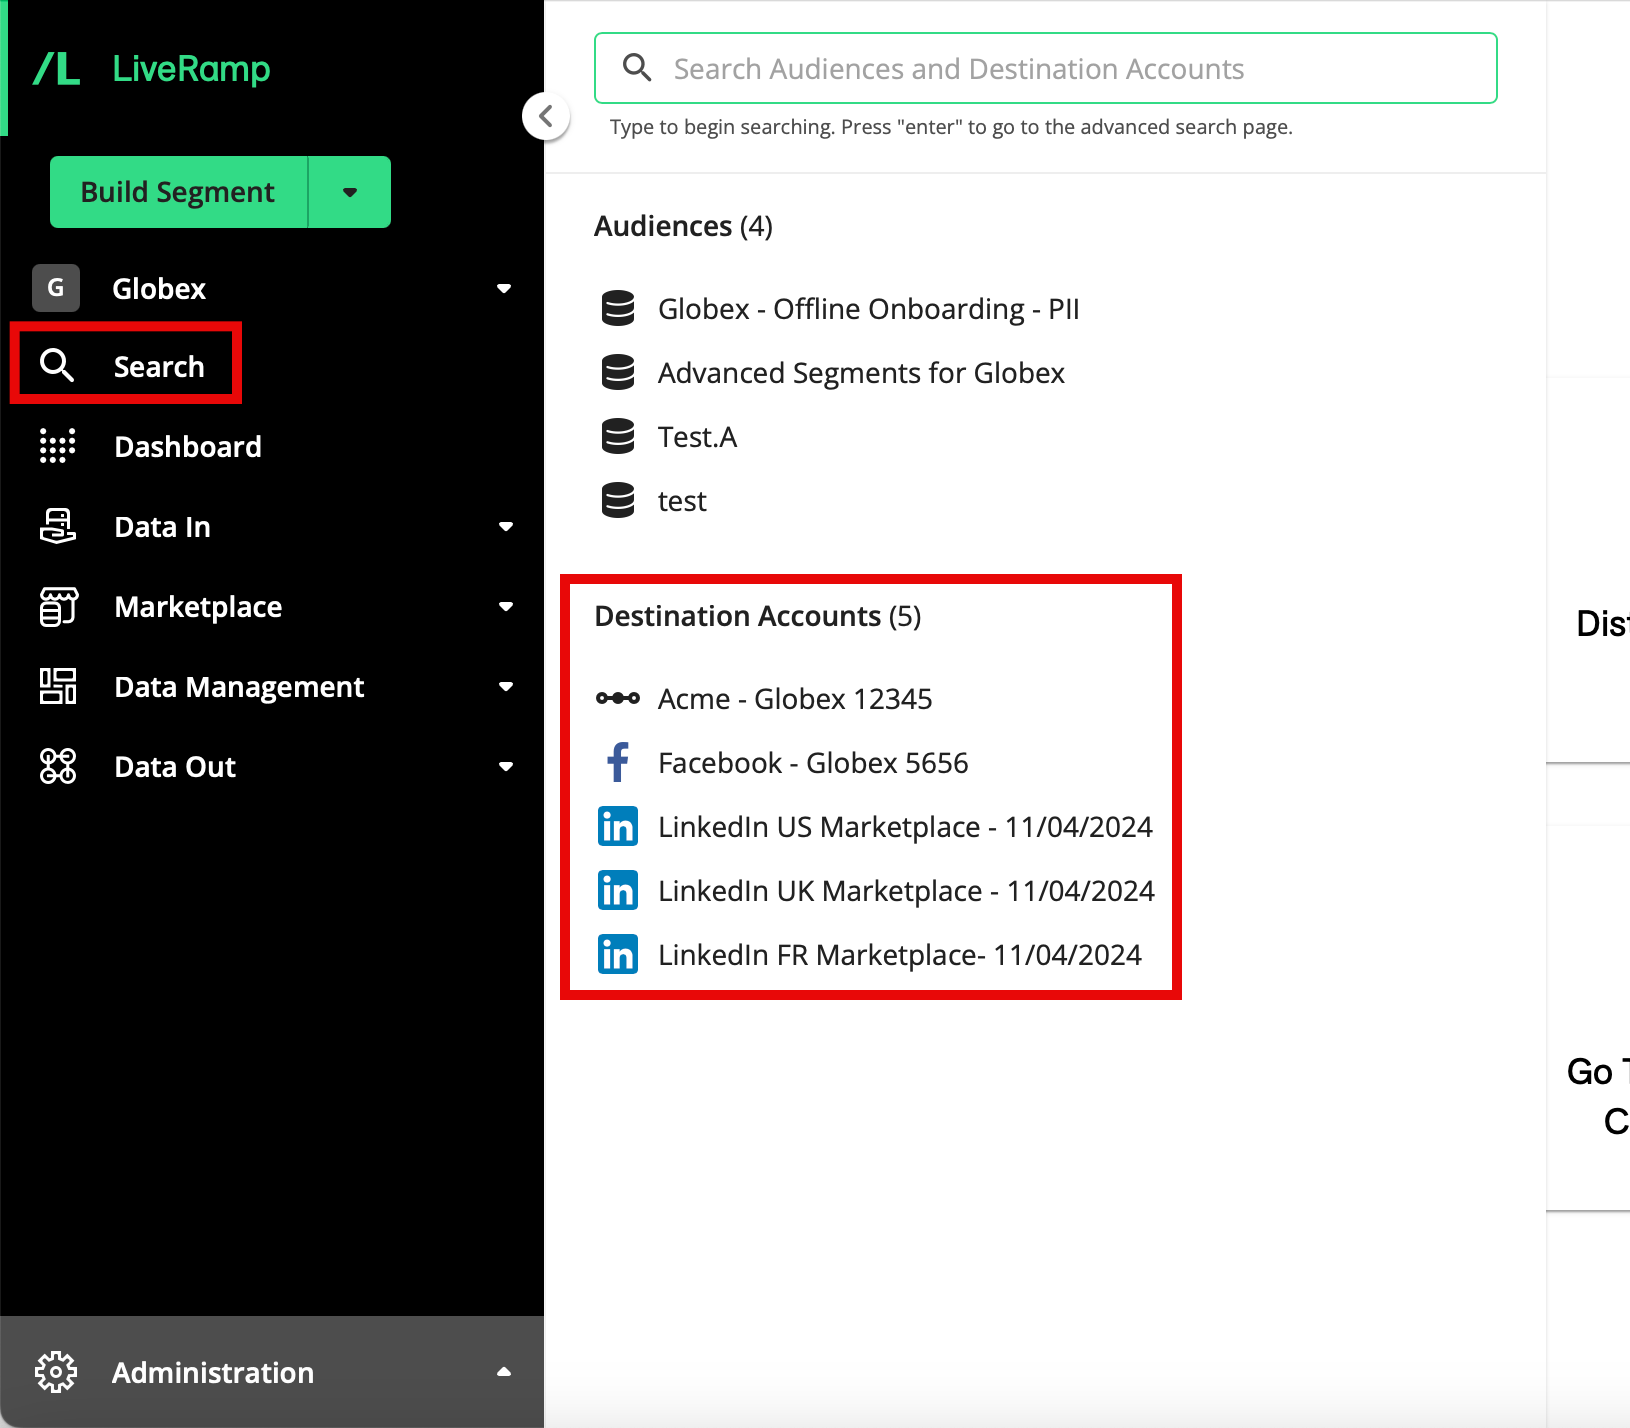
Note
For other methods to navigate to the Segment Distribution page, see "The Segment Distribution Page".
From the Segment Distribution page for that account, select the segments to distribute to this destination by checking the check boxes to the left of the segment name.
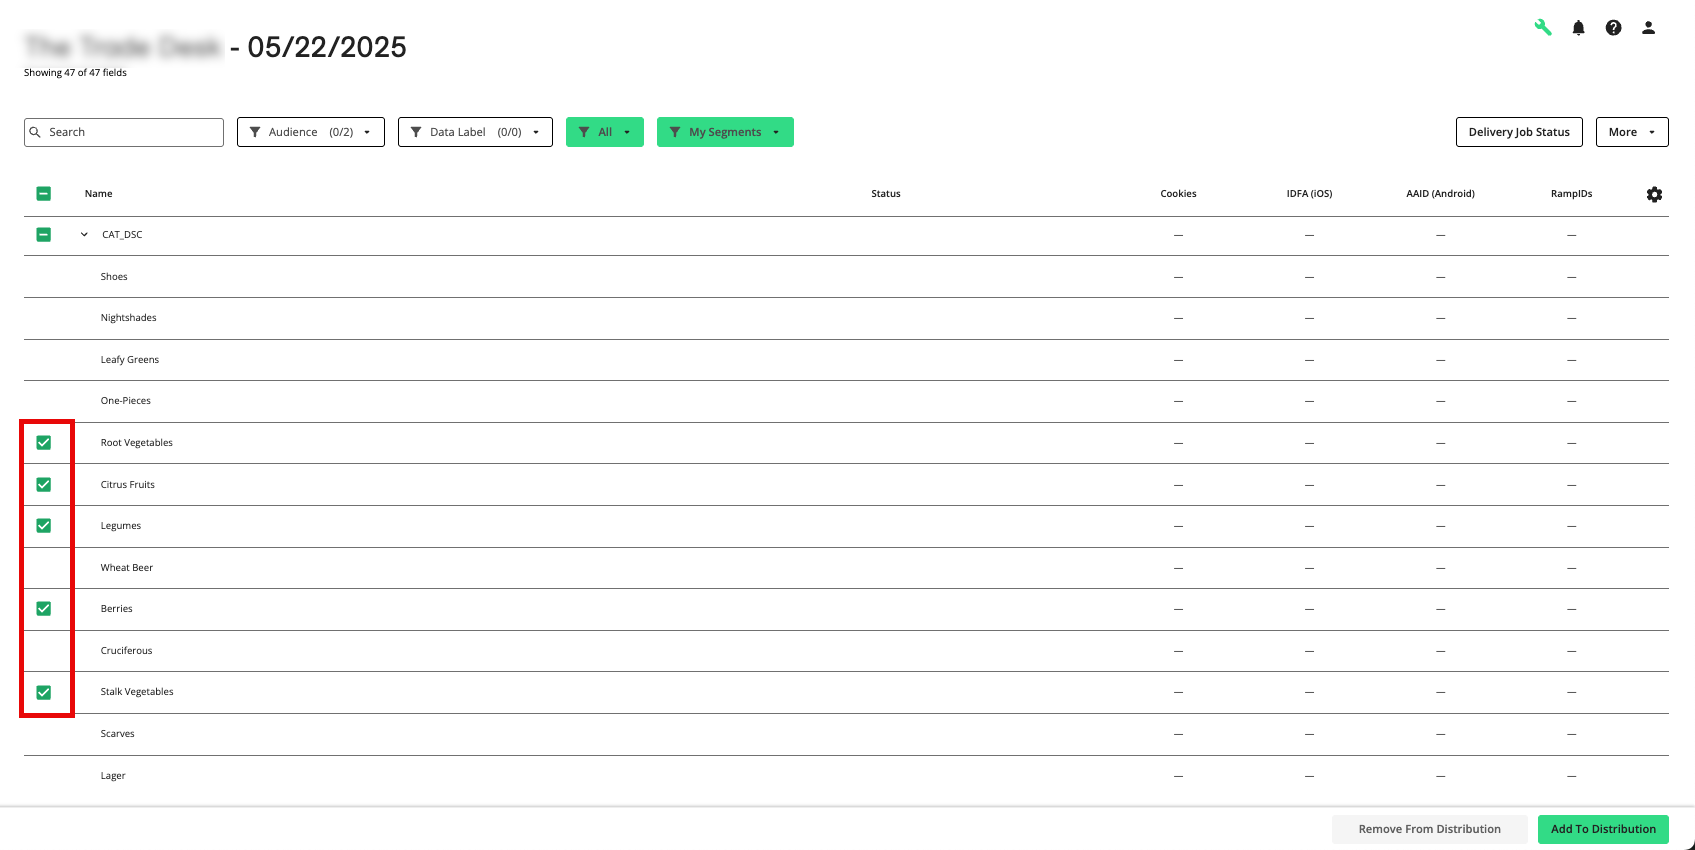
Note
For Data Marketplace destination accounts, any segments that do not have the required pricing field(s) for that destination will not appear. To request to have those pricing fields added, or to find alternate segments that meet the pricing requirements, email the Audience Solutions team at
DataMarketplace@liveramp.com.For Google DV360 PAIR destination accounts, the list of audiences displayed is limited to PII-based audiences. The only input records that can be matched are those records that originally contained plaintext email addresses or SHA-256 hashed email addresses (for more information, see "Distribute Data to Google DV360 Publishers via PAIR").
Several options can be used:
Distribute segments or fields: You can select an entire field to distribute—for example, if you want to distribute the AGE field for all different available ages. You can also choose to distribute an individual segment (field/value pair), such as AGE:42 by clicking the caret to the left of the field name and then checking the check box for the desired value.
Caution
Many destination platforms cannot accept raw fields, so if you distribute a raw field to one of those platforms the delivery will fail. For more information, see "Raw Field".
Use the Search bar to narrow the list of segments by searching on keywords or phrases.
Filter by audience: You can use the Audience dropdown list to filter the segment list by audience.
Filter with labels: For non-Data Marketplace destination accounts, you can use the Label dropdown list to filter the segments based on any labels that have been applied to them. Labels can be useful when you have a large number of segments that you want to distribute to multiple destinations.
Filter by inactive status: You can use the Active/Inactive dropdown list to view only segments that are not currently being distributed to this destination account ("inactive" segments).
Note
To add segments that have been uploaded to a particular audience, and all the segments that will be uploaded later to that audience, create a case in the LiveRamp Community portal to make that request.
Click Add To Distribution to start the distribution of your selected segments.
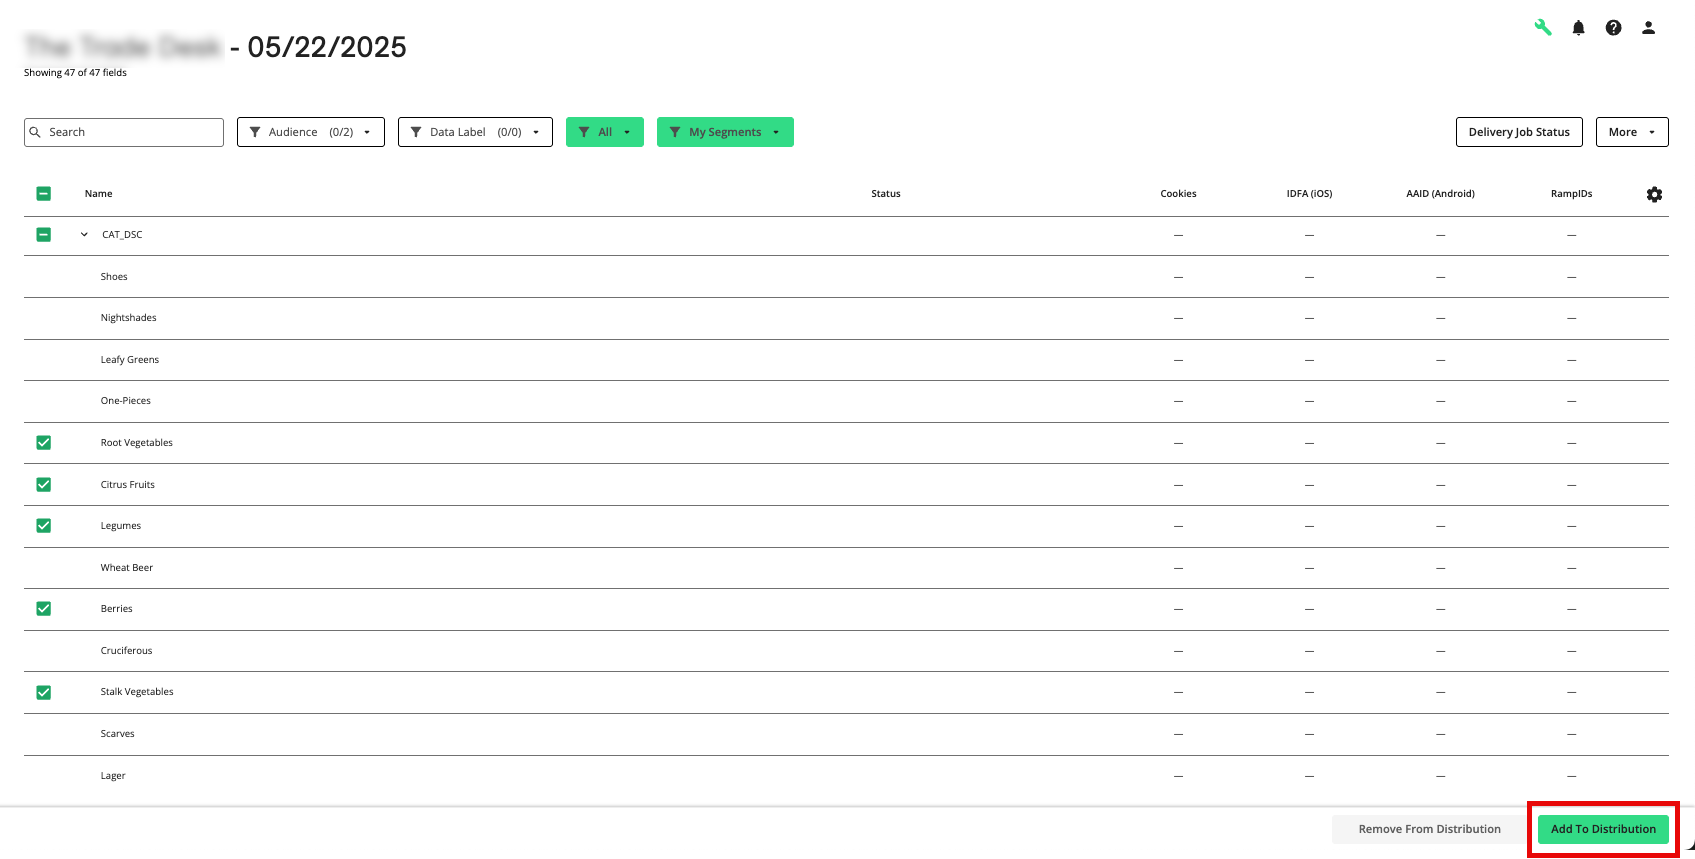
Note
For campaigns with a predetermined duration: Utilize an end date for the destination account to help reduce the chance that distributions run after a campaign has ended and reduce the possibility of being charged for more data than you actually used. See "Announcing End Dates for Destination Accounts (7/2/19)" for more information.
See "How LiveRamp Refreshes Distributed Data" for more information on how your distributed data can be refreshed.
Use the Search Bar
In addition to using the filters to filter the list of segments, you can also use the search bar to search using the following methods:
Search by keyword or phrase (including the ability to search on multiple words or phrases - see "Search on Multiple Words or Phrases" below for more information)
Search by segment ID (including searching on multiple segment IDs - see "Search on Multiple Segment IDs" below for more information)
When searching, keep the following guidelines in mind:
Search terms must be an exact match to return results. The search does not support the use of wildcards (such as "*" or "?") or perform fuzzy matching. If your search does not return the desired results, try alternate words.
Your search results will be scoped by any filters you've set.
Although the search bar does return searches on data seller names, when searching on the Data Marketplace Segments page we recommend using the SELLERS filter to filter your search by data seller(s).
Search on Multiple Words or Phrases
You can search on multiple words or phrases by including the percentage symbol ("%") in between each word or phrase. This type of search uses "AND" logic to return segments that contain both of the words or phrases in the order you entered them in. This is helpful when searching by a particular audience vertical or category.
For example, searching “in market%credit card” returns segments where “in market” is included in the segment name and “credit card” follows somewhere else after in the segment name.
Searching “owner%BMW” returns segments such as “Automotive > Existing Auto Owners > Make > BMW”, whereas “BMW%owner” only returns segments such as “Automotive > In Garage > Vehicle Make > BMW Owners”.
To find all segments targeting users “interested" in electronics, you might search “interest%electronic”. However, to find purchased based segments, search “purchase%electronic.”
Search on Multiple Segment IDs
If you have segment IDs for the Data Marketplace segments you're interested in, you can search for those segments by entering their segment IDs. You can include up to 145 segment IDs in each search string.
To search on multiple segment IDs, use the following format:
Start the search string with an open bracket ("["), followed by the first segment ID
Separate each segment ID with a comma (",")
End the search string with a close bracket ("]")
The example below shows the properly formatting to use for searching on multiple segment IDs:
[1000023144,1000023394,1000023404,1000023414,1000023424,1000023434,1000023444,1000023454,1000023464]
You can use whatever method works for you to create this search string.
One approach you can use to create a search string of segment IDs from a downloaded CSV file (either one you've downloaded from Connect or one that the Data Marketplace Audience Solutions team has given you) consists of these steps:
Open the file in Excel or Google Sheets.
Make sure the segments you want to search for are grouped together.
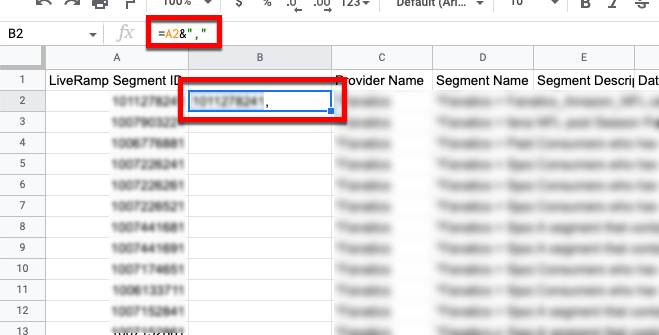
Insert an additional column to the right of the "LiveRamp Segment ID" column (column A).
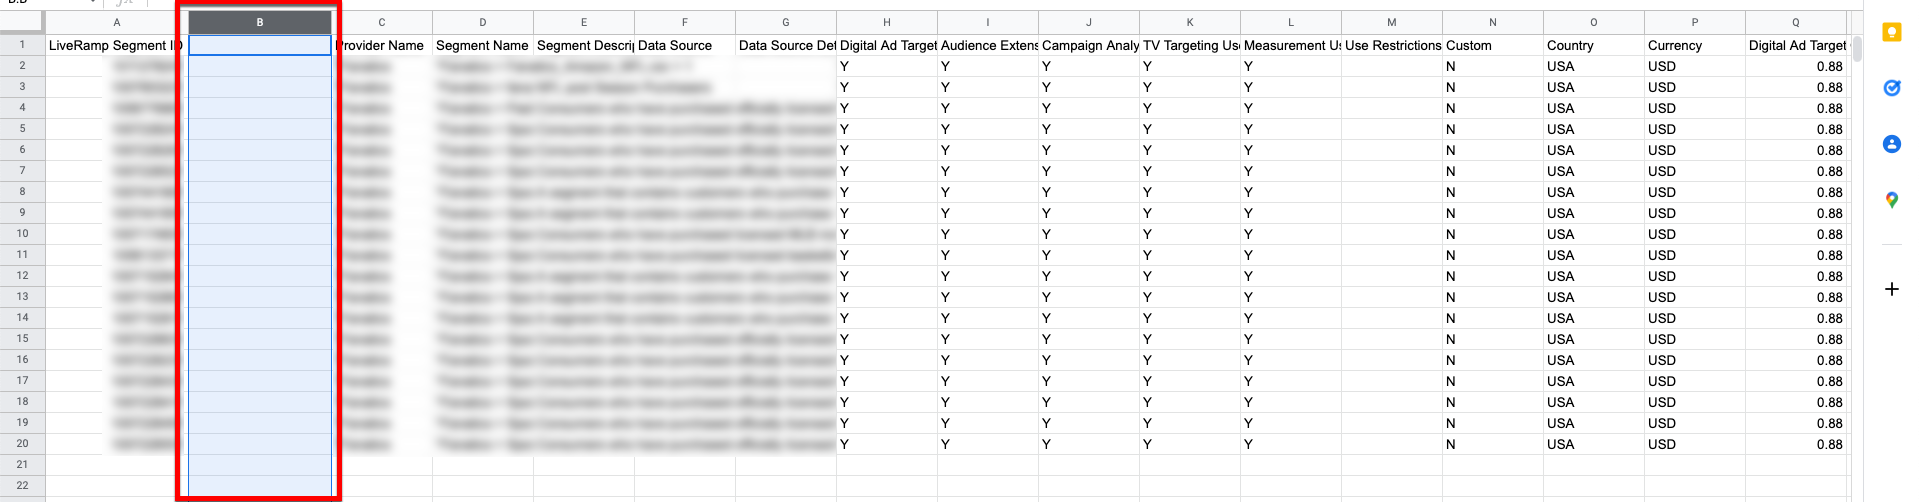
In the cell to the right of the first segment ID, enter the macro "=A2&“,”" (without the first set of quotation marks).
Column B for that row should populate with the segment ID with a comma at the end.
Note
This assumes your first segment row is row 2. If your first segment role is not row 2, adjust the macro. For example, if your first segment row is row 5, enter the macro "=A5&","".
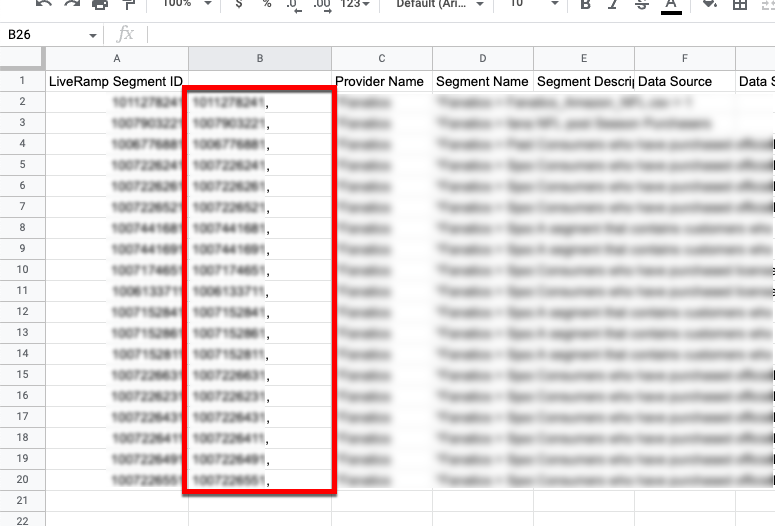
Copy the cell in column B and paste it into the cells in column B for all of the additional segments you want to include.
Each column B cell for those rows should populate with the segment ID with a comma at the end.
In one operations, starting with the first segment and ending with the last segment, copy the cells in column B.
In the search bar in Connect, enter an open bracket character ("[") and then paste the copied segment ID string.
Delete the comma after the last segment ID and then enter a close bracket character ("]") at the end of the string.
The table should display only the segments for the segment IDs you entered in the search bar. If the results do not display correctly, check that the formatting of the string is correct (open bracket, segment IDs separated with commas, and ending with a close bracket).