Providing Data Marketplace Segment Information
Once your segments are available in Connect, you need to provide information on the segments you'd like to sell (such as segment name, permitted use cases, and price) to enable them as Data Marketplace segments. You can do this in either of the following ways:
Once your segments are available in Connect, you need to provide information on the segments you'd like to sell (such as segment name, permitted use cases, and price) to enable them as Data Marketplace segments. You can do this in either of the following ways:
Via a Data Marketplace segment metadata file that you download via Connect, update, and then re-upload to Connect
By enabling segments individually in the Connect UI
For a full list of the metadata that can be included, see "List of All Segment Metadata File Columns".
Guidelines for Providing Segment Information
When providing segment information, keep the following guidelines in mind:
Make sure that any recently-uploaded segments have been completely ingested by checking their ingestion status on the Files page (for more info, see "View File Ingestion Info for Activation Audience Files").
Include clear segment descriptions: Make sure to include descriptions with enough clarity that a reasonable consumer can understand the segments, especially when distributing to platforms with additional restrictions (such as Google and Amazon).
Make sure to include appropriate segment descriptions for all standard segments. Standard segments that do not have segment descriptions will fail the segment review and approval process. For more information, see "Data Marketplace Segment Review and Approval".
We also highly encourage descriptions for custom segments as well. While this is not required, a custom segment with an unclear name and no description is more likely to impact the segment review process.
Make sure to include valid Programmatic Standard pricing information for any use cases you've enabled, as well as valid Advertister Direct pricing for all segments. For more information, see "Data Marketplace Pricing Options".
After segment information has been provided: LiveRamp performs a privacy review and approval, which usually takes 1-2 business days.
To block certain advertisers from accessing your segments: See "Blocking Advertisers from Data Marketplace Segments" for instructions.
For distributions to social media platforms: For distributions to social media platforms (such as Facebook, Snapchat, X, LinkedIn, Pinterest, and TikTok), make sure you are opted in by having the "Direct to Buyer" media channel enabled in your contract settings (see "View Data Marketplace Contract Information" for instructions). If that channel is not enabled, contact your LiveRamp representative.
Once one of your Data Marketplace segments has been distributed to another destination platform (either by you or by a data buyer), you cannot edit segment information (including pricing information) directly. See "Edit Existing Data Marketplace Segment Information" for more information on how to edit segment information for segments that have been distributed.
If you want to disable your enabled Data Marketplace segments so that buyers no longer see them in the list of available Data Marketplace segments, see "Disable Data Marketplace Segments".
Provide Segment Information via a Segment Metadata File
A Data Marketplace segment metadata file is a comma-separated value (CSV) spreadsheet file containing information about a list of segments. The steps to provide information via a segment metadata file are:
Download a Data Marketplace segment metadata file via Connect.
Update the file with the appropriate information, typically including these columns in the file (for complete instructions and a list of all columns in the file, see "Update a Data Marketplace Segment Metadata File"):
Segment Name (column I)
Segment Description (column J)
Use Cases (columns M-Q)
Price (columns S-Y)
Custom (column Z): Use “Y” for custom segments and “N” for standard segments.
Seller Approval (column AD): Enter “Y” to enable the segment.
Tip
To increase demand for your Data Marketplace segments: Ask your LiveRamp rep to opt in your PII-based segments for Overlap Analysis. Overlap Analysis enables data buyers to perform an overlap of their first-party data with PII-based segment data from the Data Marketplace to make sure the segment fits their use case. Once this has been enabled, enter “Y” in the “Opt-in for Combination Segments” column (column AH) for each segment you want to include.
Upload the segment metadata file back to Connect.
See the information in "Segment Metadata File (Data Marketplace)" for complete instructions.
Note
Distributions to Social Media Platforms: All distributions to social media platforms (such as Facebook, X, Snap, LinkedIn, and Pinterest) are billed at the Advertiser Direct percentage of media spend, as reported by the data buyer.
Provide Segment Information for Individual Segments
To provide information on a small number of Data Marketplace segments, you can provide information for each segment individually.
Caution
Don't use this method if you've already uploaded the information via a segment metadata file.
Steps to Enable an Individual Segment
To enable an individual Data Marketplace segment:
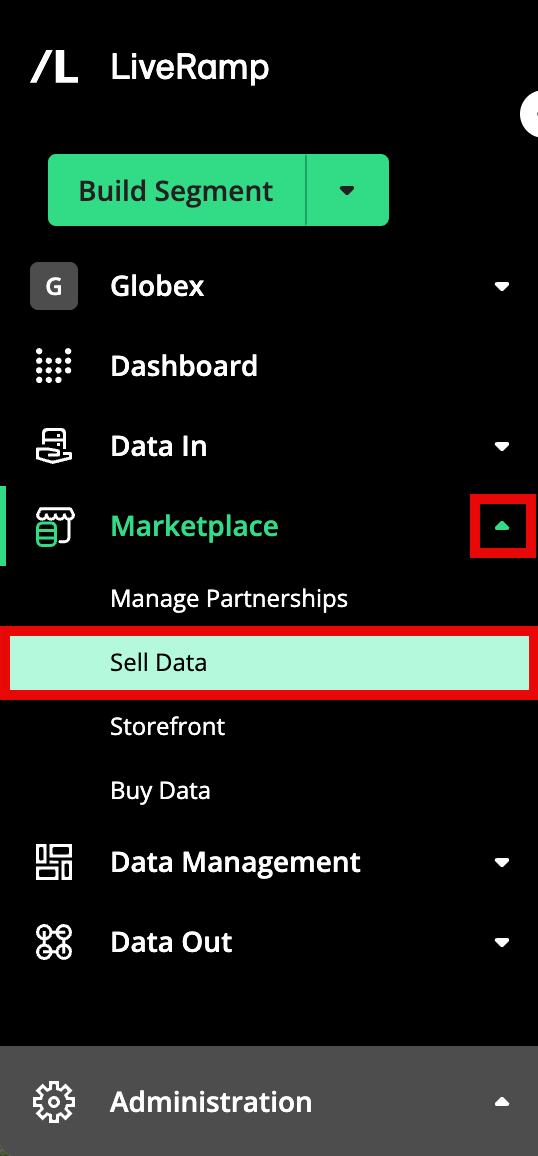
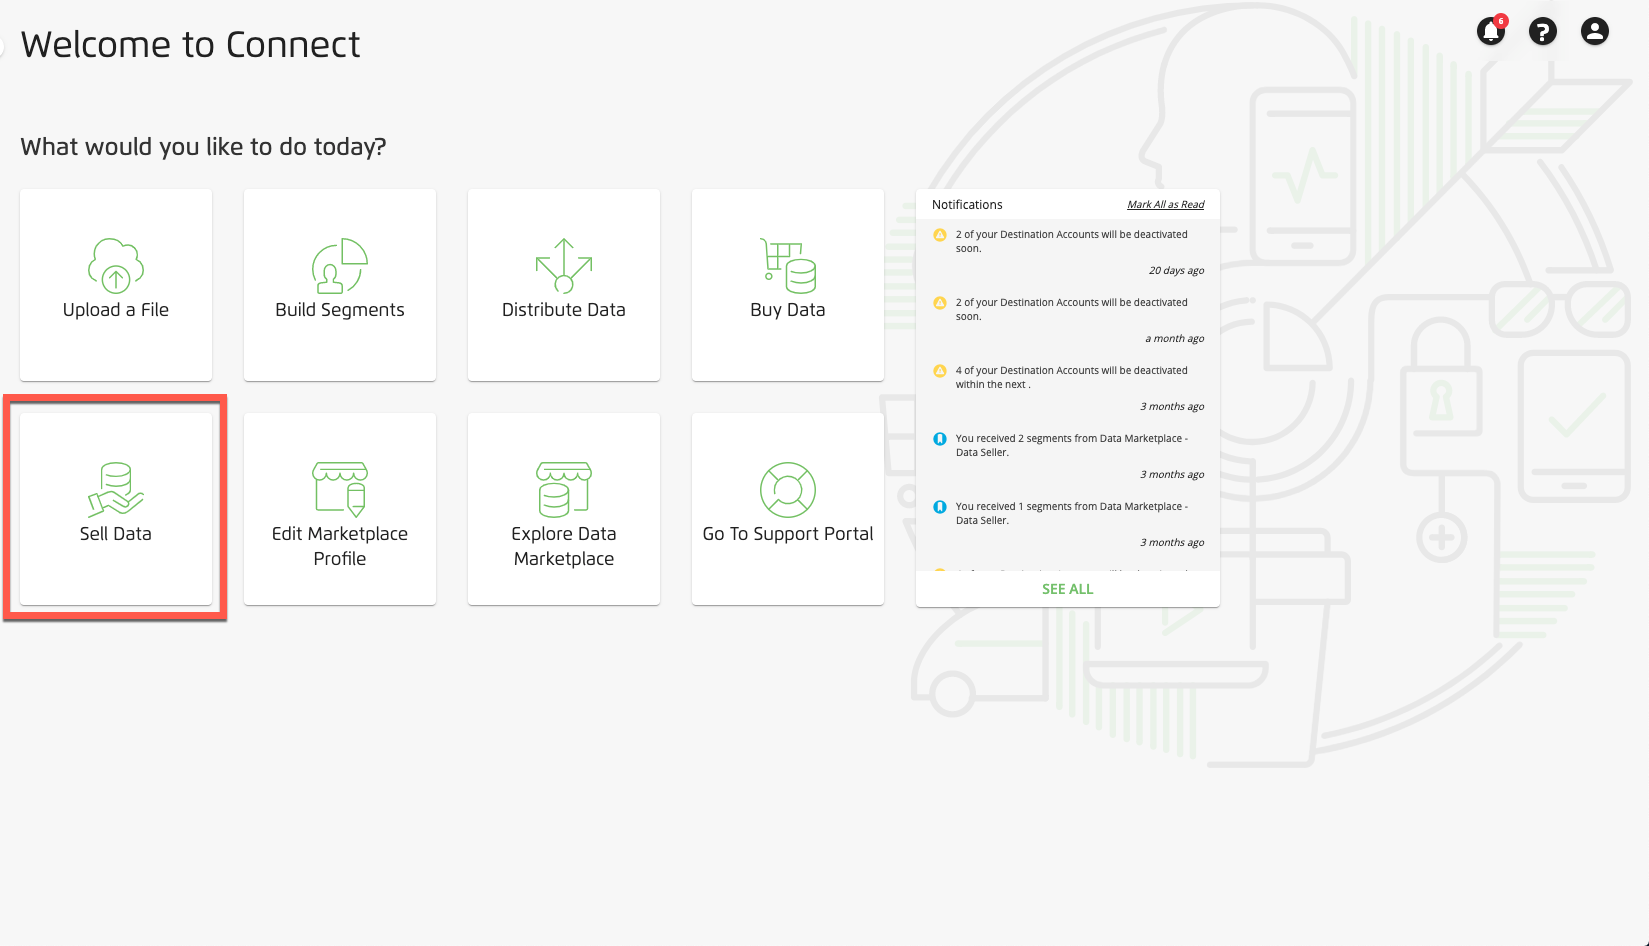
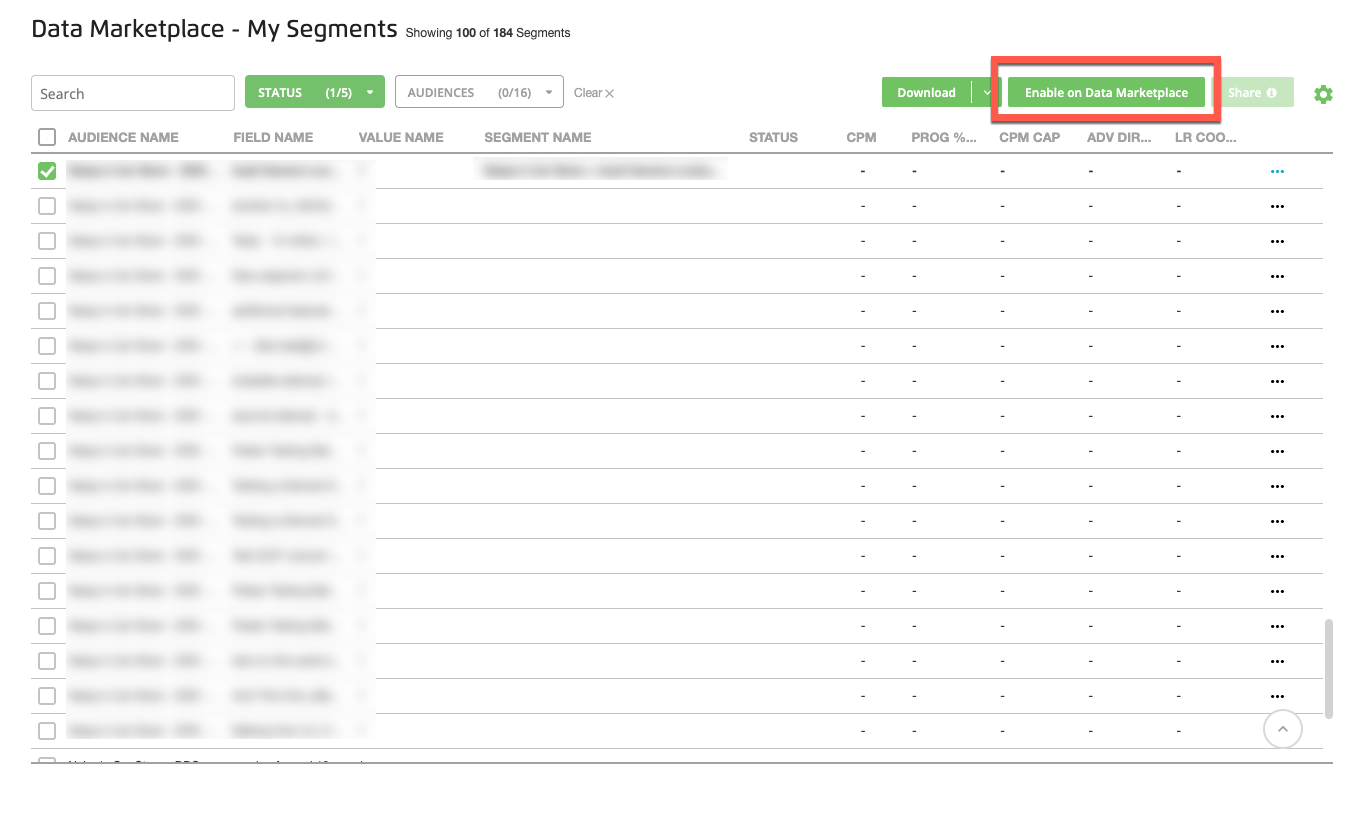
From the navigation menu, select Marketplace → Sell Data to navigate to the Data Marketplace - My Segments page, or click the Sell Data tile from the Welcome page.
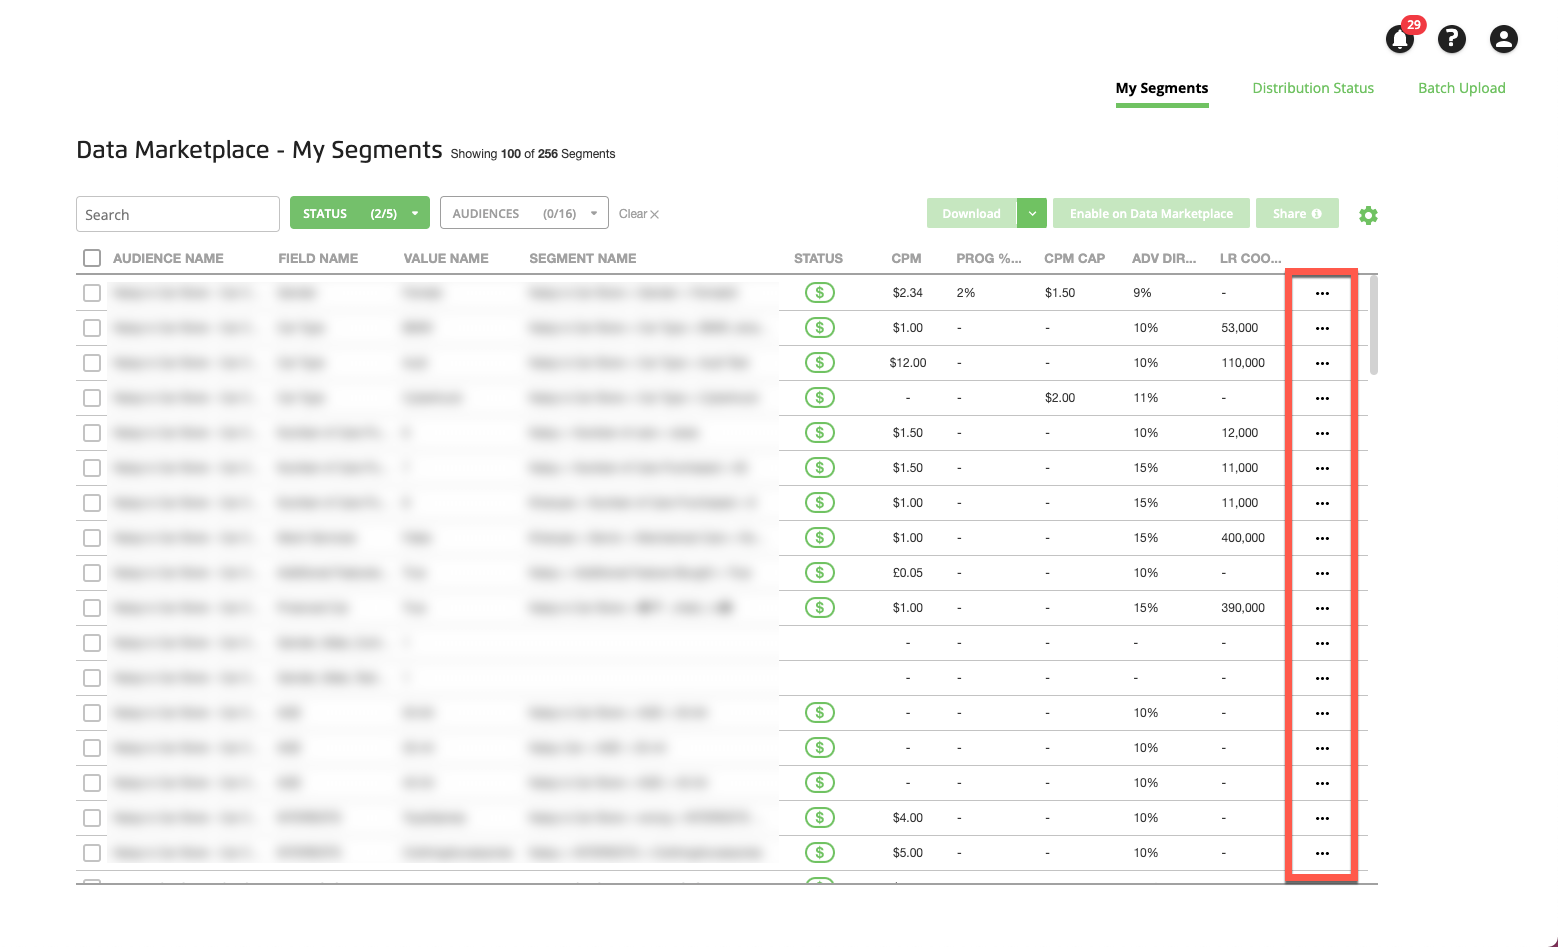
Click the ellipses next to the desired segment.
From the window that opens, edit the following:
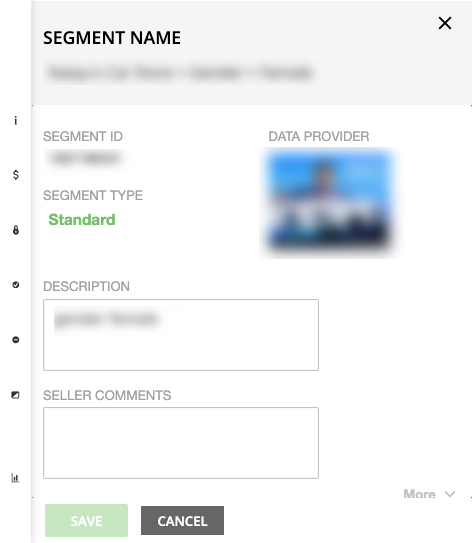
Segment Name
Caution
If the beginning of the segment name doesn't start with your correct data seller name (or an approved alias), your updates cannot be saved. Make sure to enter your correct data seller name (or an approved alias) at the beginning of every segment name. See "Using Aliases in Data Marketplace Segment Names" for more information on aliases and "View Data Marketplace Contract Information" for instructions on viewing any approved aliases for your account.
For segments being distributed to Facebook: Segment names cannot be longer than 108 characters after adding the number of characters in your data seller name.
Description
Caution
Make sure to include appropriate segment descriptions for all standard segments. Standard segments that do not have segment descriptions will fail the segment review and approval process. For more information, see "Data Marketplace Segment Review and Approval".
We also highly encourage descriptions for custom segments as well. While this is not required, a custom segment with an unclear name and no description is more likely to impact the segment review process.
Avoid special characters (aside from "&", which is allowed) and line breaks/carriage returns in segment descriptions.
Keep segment descriptions to 245 characters or less.
Seller Comments
Currency
Pricing
Note
There are three possible pricing models that data sellers can use for their Data Marketplace segments (see "Data Marketplace Pricing Options" for more information):
Programmatic Standard: This is the pricing model used by most programmatic platforms that are not part of our Advertiser Direct program and who do not use hybrid pricing. The fields you need to fill out will depend on the use cases you select. Enter all prices as positive (non-zero) numbers up to two decimal places. See "Data Marketplace Permitted Use Cases" for more information.
Programmatic Hybrid: This pricing model only applies to segments distributed to specific platforms (The Trade Desk and Google RMN) and only if their Programmatic Standard CPM is less than $5.00. Hybrid pricing means that segments are billed at the Programmatic percentage of media entered unless that amount exceeds the CPM cap entered. Enter all prices as positive (non-zero) numbers up to one decimal place.
Advertiser Direct: This pricing model is used for LiveRamp's Advertiser Direct platforms, including Facebook, X, Pinterest, LinkedIn, Snapchat, and TikTok. Segments distributed to these platforms are billed at the Advertiser Direct percentage of media entered. Enter all prices as whole (no decimal places), positive (non-zero) numbers.
Permitted Use Cases (see "Data Marketplace Permitted Use Cases" for more information)
Allowlisted platforms: For custom segments, you must select at least one allowlisted platform that the segment can be distributed to.
Note
The default setting for data seller accounts is that any allowlisted platform that is also a data buyer can view and distribute the custom segments to themselves in Connect. To change this setting so that allowlisted platforms cannot view and distribute the custom segments where they've been allowlisted, create a support case (using "Data Marketplace - Seller" as the product type). You can view the current allowlisting setting on your contract page in Connect (for more information, see "View Data Marketplace Contract Information").
Note
To avoid pricing discrepancies, once you’ve distributed a Data Marketplace segment to another destination platform, you cannot edit the pricing information for that segment. For segments that have been previously distributed, the pricing fields (including the "Currency" field) are not editable.
See "Edit Existing Data Marketplace Segment Information" for more information on how to edit segment information for segments that have been distributed.
Tip
Wondering how to fill out the fields? See "Update a Data Marketplace Segment Metadata File" for more information on filling out segment information.
Click SAVE to save your edits.
Note
If you haven't entered your correct data seller name (or an approved alias), an error message appears:

Enter the correct data seller name or an approved alias, and click again.
Check the check box for the edited segment and then click Enable on Data Marketplace to submit it for LiveRamp Business and Privacy approval. Once the review is complete, your segments will be live in the Data Marketplace and will be available for purchase or distribution to a destination.
Note
Need to disable a segment? Once a segment has been enabled, you can disable it (to remove it from the Data Marketplace ) by checking the check box and then clicking Disable. When using this method, all existing distributions of the segments will stop.
If you want to disable the segment from the Data Marketplace but continue distribution, disable the segment by uploading a new segment metadata file (for more information, see "Disable Data Marketplace Segments").